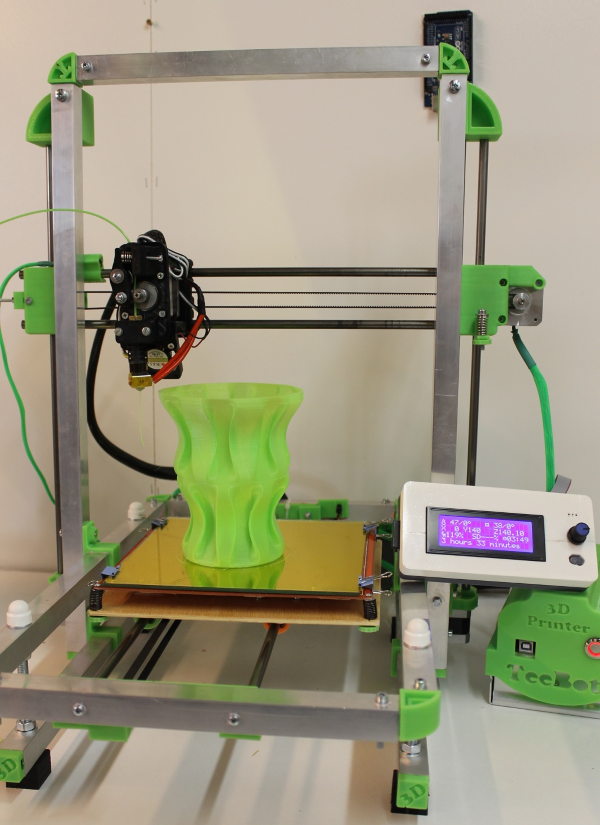
Up 3d printer drivers
Getting started guide - Microsoft Standard Driver for 3D Printers - Windows drivers
- Article
- 6 minutes to read
The Microsoft Standard Driver for 3D Printers allows developers to easily make their printer compatible with Windows 10. Any printer that uses Microsoft OS descriptors can be recognized as a compatible 3D printer. Using a concrete example, this article will show how to create a firmware that allows a device to be recognized as a 3D printer by Windows 10 and communicate its print capabilities.
Introduction
The Microsoft Standard Driver relieves the burden of writing their own driver from independent hardware vendors (IHVs) who want their 3D printers to be compatible with Windows 10. Versions of Windows that are aware of Microsoft OS descriptors use control requests to retrieve the information and use it to install and configure the device without requiring any user interaction.
The general process to get a 3D printer working on Windows 10 includes the following steps:
Compatible ID. The independent hardware vendor (IHV) has to include the "3D Print" compatible ID in the firmware of the printer. This allows the device to be recognized as a 3D printer.
Standard Driver. Once the device is plugged in, Windows Update will download the 3D print standard driver and detect the current device as a 3D printer that uses a default configuration.
Extended properties descriptor. Several base configurations for 3D printers are made available as part of the standard driver. A developer can therefore choose a base configuration that matches their 3D printer. On top of choosing a base configuration, a developer can override some of the properties to better match their 3D printer and include them in the new firmware.

Plug and play. Once the firmware is burned in the flash memory of the 3D printer, whenever a user plugs it into a Windows 10 machine, the standard driver will automatically be downloaded and will use the custom print capabilities that the developer has chosen.
In the following sections, we will illustrate each of these steps using a concrete example.
For more information, see Microsoft OS Descriptors.
Compatible ID
To specify to the Windows operating system that we are currently using a 3D printer, we have to use the right compatible ID. The list of Microsoft Compatible ID are available at Microsoft OS Descriptors.
The compatible ID for a 3D printer is shown in the following table:
| Compatible ID | Sub-compatible ID | Description |
|---|---|---|
| "3DPRINT" (0x33 0x44 0x50 0x52 0x49 0x4E 0x54 0x00) | Varies | MS3DPRINT G-Code Printer |
In the header file that is included in the 3D printer firmware, the IHV must specify the Compatible ID as shown here:
#define MS3DPRINT_CONFIG_SIZE 232 #define MS3DPRINT_OSP_SIZE (4+4+2+0x20+4+MS3DPRINT_CONFIG_SIZE) #define MS3DPRINT_XPROP_SIZE (4+2+2+2+MS3DPRINT_OSP_SIZE) #define SIZE_TO_DW(__size) \ ((uint32_t)__size) & 0xFF, \ (((uint32_t)__size)>>8) & 0xFF, \ (((uint32_t)__size)>>16) & 0xFF, \ (((uint32_t)__size)>>24) & 0xFF // CompatibleID and SubCompatibleID static const uint8_t PROGMEM ms3dprint_descriptor[40] = { 0x28, 0x00, 0x00, 0x00, // dwLength 0x00, 0x01, // bcdVersion 0x04, 0x00, // wIndex 0x01, // bCount 0x00, 0x00, 0x00, 0x00, 0x00, 0x00, 0x00, // RESERVED 0x00, // bFirstInterfaceNumber 0x01, // RESERVED '3', 'D', 'P', 'R', 'I', 'N', 'T', 0x00, // compatibleID ("3DPRINT") // subCompatibleID 0x00, 0x00, 0x00, 0x00, 0x00, 0x00, 0x00, 0x00 /* */ , 0x00, 0x00, 0x00, 0x00, 0x00, 0x00 // RESERVED }; This line in the code above is the compatible ID of a 3D Printer:
'3', 'D', 'P', 'R', 'I', 'N', 'T', 0x00, // compatibleID ("3DPRINT")
With this specific configuration, IHVs can compile their firmware and flash the device.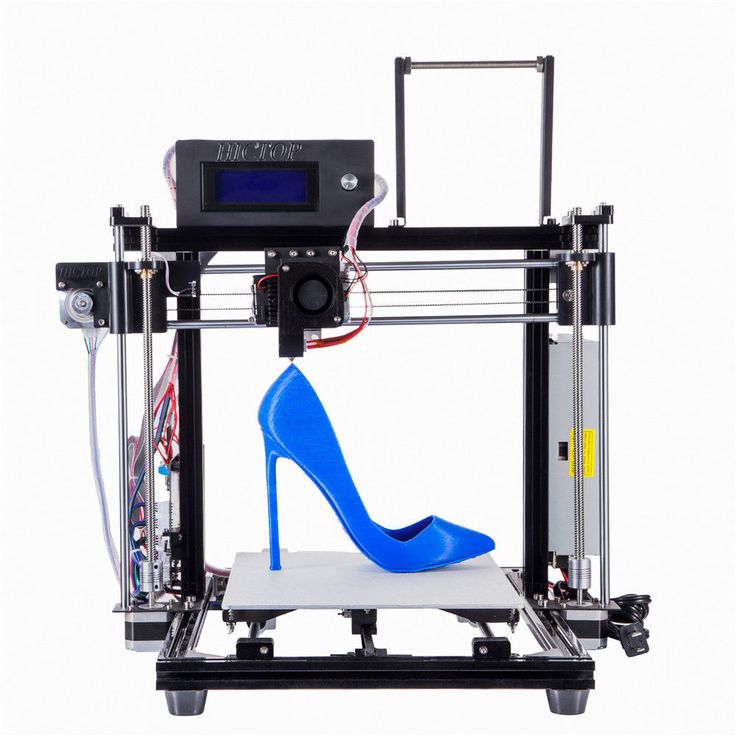 Then when the device is plugged in, the 3D Print Standard Driver will automatically get downloaded from Windows Update.
At this stage the printer is using the standard driver default configuration, the parameters used by the default configuration are accessible in the folder %SYSTEMROOT%\System32\MS3DPrint in the file StandardGCode.xml. Additionally, a developer can chose to use a different base configuration, a list of base configurations are available in the same folder %SYSTEMROOT%\System32\MS3DPrint. This list is regularly populated with new configuration as new 3D printers emerge on the market.
Extended Properties OS Feature Descriptor
As stated in the above section, IHVs have access to several base configurations. This has the advantage of minimizing the amount of information that has to be stored in the printer's flash memory. Developers can inspect the base configurations made available and choose the one that is the closest to their printers. In this example we are going to choose the SD card base configuration and override some of the properties with the parameters below:
| Parameters | Value |
|---|---|
| Job3DOutputAreaWidth | 250000 |
| Job3DOutputAreaDepth | 260000 |
| Job3DOutputAreaHeight | 270000 |
| Filamentdiameter | 2850 |
For more information about these parameters, please refer to the MS3DPrint Standard G-Code Driver. docx document in the 3D Printing SDK (MSI download) documentation.
To specify which base configuration to use and which parameters to override, the developer has to specify it through the Extended Properties OS Feature Descriptor as shown here:
// Modifiers to the base configuration static const uint8_t PROGMEM ms3dprint_properties_descriptor[] = { SIZE_TO_DW(MS3DPRINT_XPROP_SIZE), // dwLength 0x00, 0x01, // bcdVersion 0x05, 0x00, // wIndex 0x01, 0x00, // wCount SIZE_TO_DW(MS3DPRINT_OSP_SIZE), // dwSize 0x07, 0x00, 0x00, 0x00, // dwPropertyDataType (1=REG_SZ, 4=REG_DWORD, 7=REG_MULTI_SZ) 0x20, 0x00, // wPropertyNameLength 'M', 0x0, 'S', 0x0, '3', 0x0, 'D', 0x0, // bPropertyName 'P', 0x0, 'r', 0x0, 'i', 0x0, 'n', 0x0, 't', 0x0, 'C', 0x0, 'o', 0x0, 'n', 0x0, 'f', 0x0, 'i', 0x0, 'g', 0x0, 0x0, 0x0, SIZE_TO_DW(MS3DPRINT_CONFIG_SIZE), // dwPropertyDataLength // Data 0x42, 0x00, 0x61, 0x00, 0x73, 0x00, 0x65, 0x00, 0x3D, 0x00, 0x53, 0x00, 0x44, 0x00, 0x00, 0x00, /* Base=SD */ 0x4A, 0x00, 0x6F, 0x00, 0x62, 0x00, 0x33, 0x00, 0x44, 0x00, 0x4F, 0x00, 0x75, 0x00, 0x74, 0x00, /* Job3DOut */ 0x70, 0x00, 0x75, 0x00, 0x74, 0x00, 0x41, 0x00, 0x72, 0x00, 0x65, 0x00, 0x61, 0x00, 0x57, 0x00, /* putAreaW */ 0x69, 0x00, 0x64, 0x00, 0x74, 0x00, 0x68, 0x00, 0x3D, 0x00, 0x32, 0x00, 0x35, 0x00, 0x30, 0x00, /* idth=250 */ 0x30, 0x00, 0x30, 0x00, 0x30, 0x00, 0x00, 0x00, 0x4A, 0x00, 0x6F, 0x00, 0x62, 0x00, 0x33, 0x00, /* 000 Job3 */ 0x44, 0x00, 0x4F, 0x00, 0x75, 0x00, 0x74, 0x00, 0x70, 0x00, 0x75, 0x00, 0x74, 0x00, 0x41, 0x00, /* DOutputA */ 0x72, 0x00, 0x65, 0x00, 0x61, 0x00, 0x44, 0x00, 0x65, 0x00, 0x70, 0x00, 0x74, 0x00, 0x68, 0x00, /* reaDepth */ 0x3D, 0x00, 0x32, 0x00, 0x36, 0x00, 0x30, 0x00, 0x30, 0x00, 0x30, 0x00, 0x30, 0x00, 0x00, 0x00, /* =260000 */ 0x4A, 0x00, 0x6F, 0x00, 0x62, 0x00, 0x33, 0x00, 0x44, 0x00, 0x4F, 0x00, 0x75, 0x00, 0x74, 0x00, /* Job3DOut */ 0x70, 0x00, 0x75, 0x00, 0x74, 0x00, 0x41, 0x00, 0x72, 0x00, 0x65, 0x00, 0x61, 0x00, 0x48, 0x00, /* putAreaH */ 0x65, 0x00, 0x69, 0x00, 0x67, 0x00, 0x68, 0x00, 0x74, 0x00, 0x3D, 0x00, 0x32, 0x00, 0x37, 0x00, /* eight=27 */ 0x30, 0x00, 0x30, 0x00, 0x30, 0x00, 0x30, 0x00, 0x00, 0x00, 0x66, 0x00, 0x69, 0x00, 0x6C, 0x00, /* 0000 fil */ 0x61, 0x00, 0x6D, 0x00, 0x65, 0x00, 0x6E, 0x00, 0x74, 0x00, 0x64, 0x00, 0x69, 0x00, 0x61, 0x00, /* amentdia */ 0x6D, 0x00, 0x65, 0x00, 0x74, 0x00, 0x65, 0x00, 0x72, 0x00, 0x3D, 0x00, 0x32, 0x00, 0x38, 0x00, /* meter=28 */ 0x35, 0x00, 0x30, 0x00, 0x00, 0x00, 0x00, 0x00 /* 50 */ }; Information regarding the extended properties OS feature descriptor are in the OS_Desc_Ext_Prop. doc file. See Microsoft OS Descriptors for more information.
Verifying the print capabilities
Once the device has the firmware burned in flash memory , the device will automatically be detected by Windows 10 and the print capabilities will be stored in registry.
It is very important that the IHV changes the VID/PID of the device to their own. You should never use the Vendor ID (VID) or Product ID (PID) of another existing device as the operating system will not be able to detect the device properly as the VID and PID take priority over the OS descriptor.
If the device has been properly installed, the device should be listed in Devices and Printers.
In the Device Manager, the matching device id and the compatible id can be verified.
The USB driver properties can be obtained by visiting the registry at HKEY_LOCAL_MACHINE\SYSTEM\CurrentControlSet\Enum\USB.
The 3D Print driver properties can be obtained by visiting the registry at HKEY_LOCAL_MACHINE\SYSTEM\CurrentControlSet\Control\Print\Printers.
Additional resources
For more information, see the following documents and resources:
3D Printing in Windows
3D Printing SDK (MSI download)
Microsoft OS Descriptors
USB 2.0 Specification
You can also contact the Microsoft 3D Printing team at [email protected].
UP Plus 2 3D Printer | UP!
- Redesigned model inside and out, engineered to provide continuous dimensionally accurate 3D printed parts
- Best-in-class desktop 3D Printer and easiest to use
- Innovative auto leveling platform calibration and automatic height sensor
- Improved 3D print spooling speed
UP Plus 2 3D Printer
Using a 3D Printer just got easier, the UP Plus 2 features automatic platform levelling along with automatic platform height detection. The all new UP Plus 2 is the latest version of the award-winning UP Plus 3D printer. It is closely based on its predecessor, but with a host of innovative new refinements. The newest way to print quality 3D models right from your desk for visualisation, collaboration, and functional prototyping testing.
Award Winning 3D Printer
The all-new UP Plus 2 is based on the award winning UP Plus 3D Printer (also known as Afinia in USA) that won the Make Magazine Ultimate Guide to 3D Printing Buyer’s Guide Competition. [tagline_box title=”Make Magazine editors said” description=”A Clear winner and Easy to use, with feature-rich software and impressive print quality.“] The only printer that managed to print the owls nostril was the UP 3D Printer, even 3d printer bureau parts from Shapeways and Ponoko didn’t manage this test correctly. Watch some of the results 20 minutes into the video http://www.youtube.com/watch?v=x4plMvIzlA0.
Smart Support
The clever 3D Print software that comes with your 3D Printer does the hardest job of all. No matter how complex your 3D model is, the visual printer software driver will work out where it needs to support the model during printing. Then the 3D Printer prints the support material in a lower density at the same time as printing the part. That’s smart stuff! Once the model has been printed, you simply just break away the support material. So no need to worry if your part or model will print. Since it is all automatic, all you need to do is click ‘Print’. The UP Plus 3D printer and software will analyse your design, see where support will be required and then build it all for you. No worries! Just an easy to use 3D printer.
Full Metal Jacket
With a strong and durable steel structure and linear bearings on each axis, the UP Plus 2 is built for making quality parts endlessly 24hrs a day. The registration of each layer is absolutely spot-on the previous layer. So you get constant build quality every print.
Easiest to use
There is no other 3D Printer that is as easy to use as the new UP Plus 2.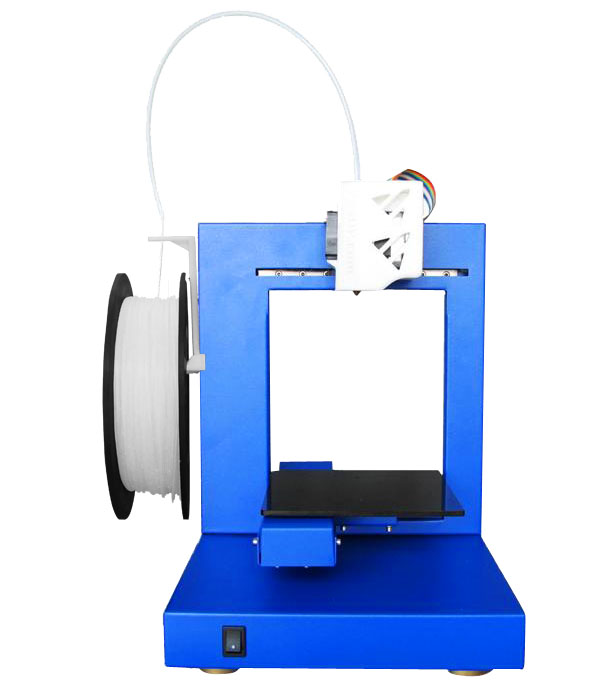 With it’s innovative auto levelling (the hardest job for any 3D Printer operator is to level the print platform, as it is essential to have a flat and level surface before your 3D model is printed.) Everything you need is in the box! Our printers are easy to use, with minimal setup, USB connectivity and include the Smart visual print driver. 3D Printing has never been so easy. Just load in your STL and click ‘print’ and away you go! There is no need to worry about over hangs or under cuts. [tagline_box title=” description=”From the home, the classroom, and to the office. Our 3D Desktop Printers are easy to use for everyone! With a network of local Australian and Australia resellers with local support.”]
Ideal for the Prosumer
With the “UP Plus 2” 3D Printer you can print professional (150 micron detail), tough and functional parts faster and more affordable right on your desk. Pair that with our open consumable design, you can keep the cost of printing low. When using our filament, the cost of printing is about 6-8c per gram! When selecting a 3D Printer it is important to take into account the total cost of ownership. Traditional inkjet printing has been locked down to manufacturers inks, the UP Plus 2 uses an open consumable design, if it meets the specifications you can print with it and save!
Colour 3D Printing
With over 15 colours to choose from and in three different ABS plastic material types. A high impact translucent crystal ABS, a white ABS+ that is tough and can flex ideal for snap lock fitting parts. Many more to come, including glow in the dark, high impact and star burst. Create the rose in red, stem in green and the vase in lime. Give your designs that extra bling, let them glow in the night. If you prefer to stick to the basics, our white plastic is the most versatile. You can dye it using clothing dye to any colour you want! It just soaks it right up! What about creating the full colour model? Grab your paint brush and get to it! ABS plastic is very versatile – you can sand it, paint it, dye it, drill it and use it for functional parts.
Create Super Large Parts
Just because it’s a desktop 3D Printer, doesn’t mean you can’t make super large parts. By slicing your model into several components, then printing and gluing together you can make some impressive models. For example the Eiffel Tower in the picture, stands nearly a meter tall and is made of thirteen separate parts. Amazing engineering, amazing 3D printing.
Materials
The UP Plus 2 can print in ABS (acrylonitrile butadiene styrene) thermoplastic which is the same plastic as Lego. ABS is the plastic of choice for 3D Printers, as the printed parts are tough and durable. The parts are built tough and can be used as usable parts and functional end-use parts. Removal of support material is easy and safe. No dangerous chemicals are required, just simply break away the support that is printed in the same material but in a lower density. You can slice your models into parts, print them in components and then just glue using nail varnish remover (Acetone).
PLA
The UP Plus 2 3D Printer can also print with PLA (Polylactic acid). PLA is derived from corn and is biodegradable. The big advantage of printing with PLA is that it can be used for investment casting / lost wax casting. In general, PLA is not the recommended plastic to print with, as the material starts breaking down after a few months and printed parts are fragile. The material is very sharp when broken and can be a hazard when removing support material from the printed parts.
Smart Software
The UP Plus 2comes with our easy to use Smart Visual Print Driver software. Just open up your STL (Most 3D CAD software packages can export to STL) – with the software you can rotate, scale and resize to your heart’s content. Much like a traditional 2D where printer where you can choose different settings, you can also choose your 3D print settings. Layer thickness, fill type (Honeycomb hollow or solid), quality and amount of Smart Support you want for each print. If that’s too much for you, don’t worry the default settings will work just fine by just clicking ‘print’! [tagline_box title=”Printing out multiples of the same thing?” description=”It’s easy! Just click ‘reprint’ . It saves time by printing an exact copy of the previous model.”] So there is no need to use special software. Just about anything will do! As long as you can get it into a water tight STL file.
Digital Design Software (3D CAD)
There are so many great 3D CAD options available to turn your idea into a professional 3D CAD model in just a few minutes. Tinkercad has got to be the easiest to use, it’s cloud based so will run on multiple platforms. 3DTin also deserves a mention as another cloud based design option. Both of these export to STL files so they are ready for 3D Printing. Did I say they are both Free! Another free alternative is Google Sketchup. The majority of 3D CAD software can export to STL, so the UP Plus 2 works with Autodesk Inventor, Solidworks, Rhino, 3DSMax, Creo and many others.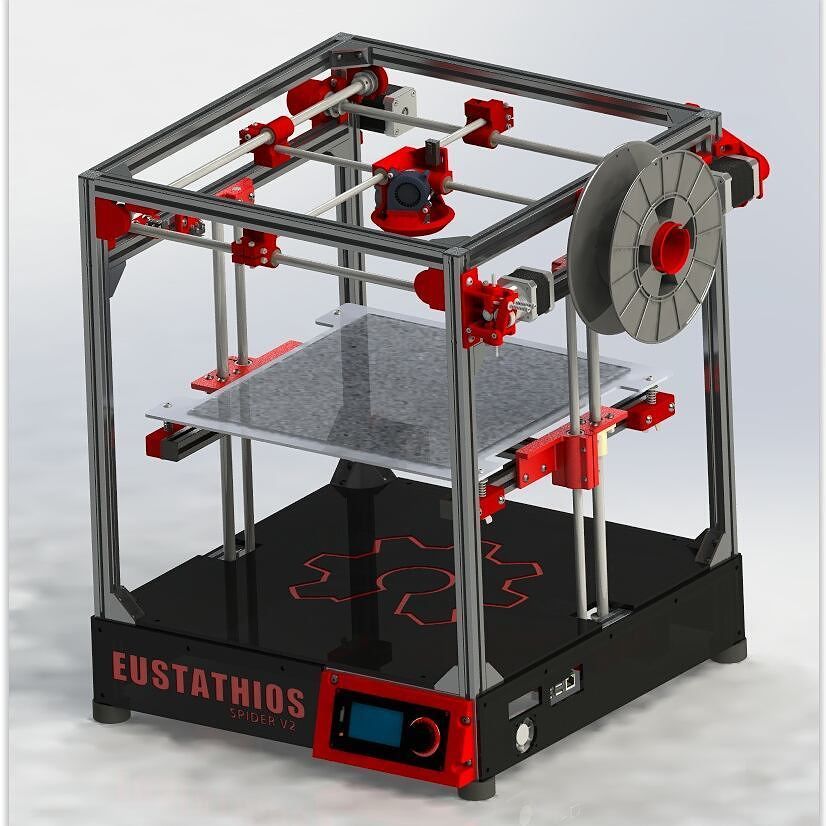
Small on size, big on features
All the features of industrial sized 3D printers packed into a form factor that fits right on your desk.
It has 90% of the quality of the bigger machines at 10% of the price. With its wonderful smart support and is easy to use, you will be pumping out professional parts, model after model!Mark Stolten, Senztek Ltd
I’ve seen the UP 3D Printer in operation at three different organizations and it has made a favourable impression. I believe it could serve as a tool for product design and concept modelling as well as for education and training in additive manufacturing.Terry Wohlers, Wohlers Report
UP Plus 2 3D Printer Specifications
What’s in the box
Everything you need is in the box, ready for you to start turning your ideas into real parts. You don’t require any extras. We even give you a free roll of white ABS plastic filament included with your new 3D Printer.
- UP! Plus 2 Desktop 3D Printer
- One free 500g spool of 1.75mm tough ABS white plastic filament
- Perfboard x 3
- Heat resistant gloves
- USB Cable
- Selection of tools to maintain and self service the printer
Smart 3D Print Software
Visual 3D Print Software and drivers
The included Smart 3D Print software included with your UP Plus 2 3D Printer is very easy to use and is very smart. It automatically calculates the required support material for the most demanding 3D models. Just load any STL file (Just about every 3D CAD modelling software can export to STL). It doesn’t matter how complex your 3D model is, it will churn through the 3D model at lightning speeds and then start printing it out.
- Scale, Rotate, Move & Print
- Supported File Types: STL
- Extrusion temperatures 260 and 200 degrees
- Print Preview with material usage and time estimates
- Automatic placement
- Repeat last print
- Rotate, Resize, Scale, Move 3D object
- Select layer thickness
- Select print speed vs.
 quality
 - Variable fill of models with honeycomb fill.
- Fine to large honeycomb mesh
- Smart Support
- Automatic Support material angles, 10 to 80 degrees
Software installation
For the 3D printer to work, you need to download and install the following software:
- Virtual COM port driver
- Control program Repetier-Host
- Slicer and printer settings
Some anti-virus programs may falsely detect files from the network. In this case, turn off the antivirus during the installation.
Installation sequence
- First install the driver - download and run as Administrator (right click "run as administrator") file serial_install.exe (notes and installation on 64 bit systems below)
After installing the driver, connect the printer to the USB port computer, it will find the device and determine its COM port.
- - Download and install the Repetier Host software.
 Along with it, the necessary programs will be installed, including slicer programs.
During installation, we recommend disabling the "Server" installation, as it is not needed for operation and may interfere with normal operation.
-
- Set the settings for your printer.
Together with the settings, the corrected Russian interface, scripts and a link to the help section will be installed.- Magnum Creative 2 UNI
- Magnum Creative 2 PRO
- Magnum Creative 2 PLA
- Magnum Education
- Magnum Modus A
- Magnum TT
Please note! Slicing profiles "Magnum 3D" and "Magnum 3D Vase" will be overwritten! If you have made changes to them and want to save them, then just rename them in the slicer before installing.
- After setting the settings, when you first start the Repetier-Host program, select the COM port to which your 3D printer is connected, because by default, the installer prescribes COM3 (more).

- - Update the scripts according to instruction (these updates will be included in the next version of the installer).
Installation on 64x Windows 7 and above
Installation on such systems requires a signed driver.
Restart your computer, press F8 at boot and select option
Disable driver signing enforcement
Install the driver as described in point #1. Reboot to normal mode.
Installation on 64x Windows 10 systems
Go to the start menu in "Settings" - "Update and security" - "Recovery". Then, in the "Special Boot Options" section, click "Restart Now".
After the reboot, go to the following path: "Diagnostics" - "Advanced Options" - "Boot Options" and click the "Restart" button. After the reboot, a menu of options will appear that will be used this time in Windows 10.
To disable driver digital signature verification, select the appropriate item by pressing the 7 or F7 key. Done, Windows 10 will boot with verification disabled and you can install the unsigned driver.
Alternative driver installation
This method is recommended when connecting to 64-bit systems if you failed to install the driver following the instructions above.
When connecting the printer to a computer for an unknown USB Serial device, you must select the driver yourself - in the Modems section, select Compaq and then the Ricochet Wireless USB Modem device.
Driver for 3D printer
For the correct operation of any 3D printer, you need a special device that will be responsible for controlling the stepper motor. Incorrect installation or malfunction will result in printing problems or damage to the printer itself.
What is a 3D printer driver?
The 3D printer driver is a device whose main function is to control the kinetic movement of the printer's stepper motors. The driver sends commands to the microcontroller that describe the movement of the shaft - the number of steps and direction, at the output receiving a sequence of signals specified in a certain way for the motor winding. The driver in this process is responsible for converting one signal to another.
Manufacturers offer many models of 3D printing drivers that vary greatly in quality. Top models are able to maintain high output currents while maintaining an acceptable operating temperature, and are able to control the motor so that it does not make excessive noise, does not overheat, and the print head moves smoothly, without jerks and accelerations.
Drivers are used everywhere where stepper motors are used: in all CNC machines, actuators, 3D printers, laser engravers, etc.
Modern 3D printers use kinematics and a control method, which consists in the sequential transmission of the coordinates specified for the movement of the hotend. Methods is the generally accepted standard for controlling all devices equipped with a CNC unit. Data transfer is carried out in a specially developed programming language called G-code.
Control boards and drivers are responsible for the physical movement according to the given code.
Boards, in turn, are divided into two types based on their capacity:
- 8-bit.
- 32-bit.
The first 3D printers were designed using the self-replicating mechanism used to rapidly reproduce REPRAP prototypes and were based on one of the most common boards used in robotics, the Arduino. To develop the firmware of devices in these cases, a special environment was used - the Arduino IDE. In the future, in order to expand its capabilities, the RAMPS expansion board was additionally developed, which allows you to effectively control the rotation of stepper motors and take into account the zero position using limit switches.
Additionally, drivers were developed to control stepper motors that could be combined with these boards (Pololu drivers).
To date, the installation of such a driver is required for each stepper motor of a printing device controlled by the Arduino + RAMPS bundle. RAMPS is able to work effectively when connected to up to five stepper motors.
Other All-in-one boards are equipped with special pads for Pololu drivers, which are widely used among users.
Many drivers have been developed that are compatible with the boards used in modern 3D printers. The most popular include:
- Driver A4988. The manufacturer produces the device in green and red colors, the maximum divider step is 1/16.
- There are purple and blue devices on the market. The main drawback of the model is the lack of a well-thought-out hold mode, which causes the device to get very hot. Such a chip is recommended to be installed only in conjunction with a powerful heatsink that can compensate for excessive heating. The maximum divider step is 1/32.
- The original driver is made in Germany and the USA, but it is easy to buy a similar one made in China on the market. Copies differ from the original only in the accompanying piping - resistors, capacitors, etc., therefore, when using non-original devices, it may be difficult to select the voltage to power stepper motors.
 The device is characterized by quiet operation, background noise and engine sounds are minimized by manufacturers. The driver is equipped with its own chip, which is able to interpolate a 1/16 divisor to 1/256 without creating additional load on the processor.
 - Made in China by Makerbase. A distinctive feature of the driver is the wide possibility of adjusting the microstep divider - from full to 1/128. There is no internal share in this driver model. The device is intended for installation on 32-bit boards only.
- Manufactured by Panucatt Devices. The driver is able to support microstepping from full to 1/32 and has well-thought-out protection against excessive voltage and high temperatures. Two model options are available: in the standard version, the voltage adjustment pin pad is shorted, so voltage adjustment can be made by the user in a manual setting format using a screwdriver and a multimeter. In the version with digital adjustment, debugging is performed at the software level and can only be supported by its own controllers - Azteeg X3, X3 PRO and X5 mini V3.

- This model is also manufactured by Panucatt Devices. The driver is equipped with a sensor that protects it from overheating and high voltage and also comes in two versions - standard and digital. The device is based on the THB6128 chip. Designed for installation on eight-bit boards.
- A new version of the driver from Trinamic and Watterott. A special board is responsible for dividing the microstep via the UART interface. The built-in board allows you to connect the driver to a computer using a USB cable and configure it using your own software.
Installing and configuring the driver for the 3D printer
For the correct operation of the 3D printer, before starting it for the first time, it is necessary to install and configure the drivers.
IMPORTANT! Before debugging, it is recommended to temporarily disable the anti-virus programs installed on the computer. This will help to avoid false triggering on files downloaded from external devices or the Internet.

The installation process takes place in several stages:
- Start the installation by downloading the driver file and running it. To do this, you will need to log in with an administrator account and run a file called "exe file". Next, following the instructions of the installer, complete the process and connect the 3D printer to your computer using a USB cable. The program will automatically find the device and assign it a COM port.
- Next, you need to download and install a program called Repetier Host. Once the download is complete, launch the program file and wait for the download to complete. After the installation is completed, along with the program, all the necessary accompanying programs will be launched, including slicer programs. During installation, it is recommended to uncheck the box next to the item about installing the Server utility, since it will not be required for further work and will take up device resources unreasonably.
- The next step is setting up the settings for the personal computer. During this, a corrected interface in Russian will also be configured, the necessary scripts and an active link to the help section. At this point, the Magnum 3D and Magnum 3D Vase slicing profiles will be rewritten, so any changes made by the user should be renamed before starting the process. Otherwise, they will not be saved after reinstalling the program.
- After the installation is completed and the settings are set, you should run the Repetier-Host program and select the COM port to which the printer was connected. This step is mandatory because the installer automatically assigns COM3 to the device, which can interfere with further debugging.
- Next, following the instructions of the program, you need to update the downloaded scripts and restart the computer.
- During the reboot, you will need to press the F8 button and select the "Disable Driver Enforcement Signing" option.
- After downloading, you will need to do the following: open the Start menu, open the Settings tab, go to the Update and Security section and select Recovery. Then, going to the tab "Special boot options", you must select the item "Restart now".
- When the process is completed (the reboot should go through in normal mode), you should open the "Diagnostics" tab, go to the "Advanced Options" section, select the "Boot Options" item and restart the computer again. When the device reboots, a menu will appear on the screen with a choice of parameters that will be used by the system in the future.
IMPORTANT! In order to install an unsigned driver, you must disable automatic digital signature verification by selecting the appropriate item in the menu and pressing the F7 button.
There is an alternative method for installing the driver for 3D printers. It is used if the system to which you plan to connect is 64-bit.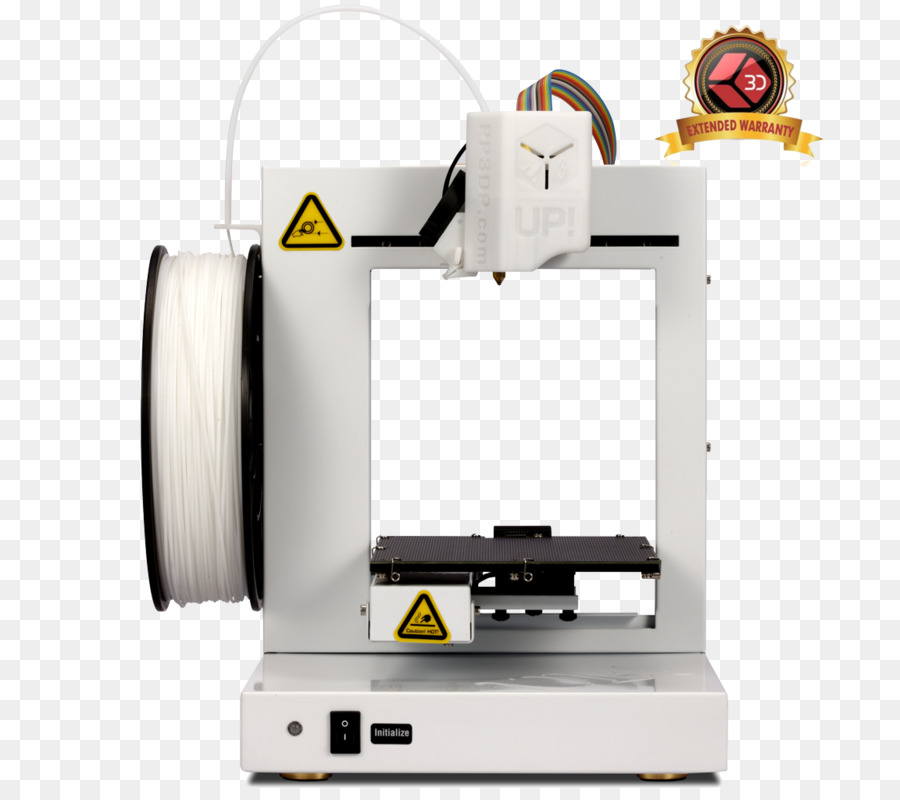 In this case, the instructions above will not work.
In this case, when connecting the CNC device to the computer for the first time, for an unrecognized USB Serial device, you must select the driver yourself by opening the Modems section and selecting Compaq, and then Ricochet Wireless USB Modem devices.
Errors and how to avoid them
During the driver installation process, some errors may occur that prevent the process from completing.
The most common reasons for their occurrence include:
- Technical malfunction of the device. Even if the driver is detected by the system when connected to a computer, if it malfunctions, the installation will not be able to proceed correctly.
- Faulty installation program. The installer may have been corrupted during download or may have been infected with malicious code. The cause of errors may also be the absence of one or more files in the archive.
- The driver version does not match the installed device.
 Most often, such a problem is encountered by those users who install a driver downloaded from third-party sites, and not the one that came with the device when purchased. The error may be caused by the fact that the driver version does not match the specific device or operating system version installed on the computer.
 - An attempt to install a new driver over the previously installed one will also cause an error. To fix the error, uninstall the old version of the program, and then start the installation again with a new file.
- The user is trying to install unlicensed software. If the downloaded driver does not have a special certificate that allows the operating system to recognize it, then the computer, when trying to install it, will give a corresponding error when the file is first launched.
Correct operation of a 3D printer is impossible without installing drivers - devices responsible for the movements of stepper motors. Their market for 3D printing is huge, so each user can choose the device that suits him.