Best 3d printer bed surface
Choosing the Best 3D Printing Bed Surface
From general purpose print beds to tips and tricks with acetone, finding the right bed surface to print on is an important step in the 3D printing process.
Tyler Anderson
December 21, 2016
The key to a successful 3D print is a good first layer, and the key to a successful first layer is choosing the right print bed surface for the material you are 3D printing. In this guide, we will go through the most popular 3D materials to print with and describe the best techniques for getting them to stick to the bed and achieving a stellar first layer.
BuildTak and FlexPlate
BuildTak is a popular all purpose 3D bed surface. It comes as a sheet with an adhesive back. Simply peel the protective film off and then stick it to your bed.
In addition, the FlexPlate System makes utilizing BuildTak sheets even easier. Available in many sizes to fit all kinds of 3D Printers, simply add the Magnetic Base on top of the existing print bed and the FlexPlate with attached BuildTak sheet will magnetically connect. After a 3D Print is finished the top two sheets easily slide away from the print bed and with a twist the part releases cleanly. Replace the FlexPlate and BuildTak sheet to the magnetic base and you're ready to print your next part!
BuildTak on the Ultimaker 2+
3D Gloop
Both an adhesive for finished prints and for bed surfaces, 3D Gloop does a great job at holding onto 3D prints. There are specific formulations for multiple 3D printing filaments, so you'll want to make sure to only use the ABS formula with ABS. Make sure you are using this on a glass bed only, because while it'll pop off with a little help from a spatula on glass, Buildtak and PEI could permanently weld to your 3D print. To apply, simply squeeze the tube onto the glass plate and spread with a business card or if using the brushtop bottle just brush it on. 3D Gloop recommends printing ABS with a bed temperature of 60°C for successful prints (which is incredibly low for ABS), but it's possible for it to work at room temperature as well!
Disclaimer: Be sure to use 3DGloop! in a well-ventilated area and to wear PPE (Personal Protective Equipment) when using this product.
3D Gloop in Squeeze Tube form
Magigoo
It doesn’t matter if you’re using PLA, ABS, PETG and more - Magigoo works for them all. This easy, no-mess solution was born from the frustration of occasional print bed adhesion issues. One of the best things about Magigoo - it cleans up with just a damp cloth or water!
Magigoo in Action
3D printers come in many shapes and sizes, but one thing is certain - they all have a print bed. Print beds can be made of different materials, such as glass, acrylic, or metal, usually with an added compound layered across where your filament will stick. We prefer a 3D printer with a glass print bed due to its hardness, rigidity, and smooth surface.
PLA Filament
PLA (Polylactic Acid) is the most common 3D printing material because it is easy to use and is made from renewable resources and thus, biodegradable. PLA filament is useful in a broad range of 3D printing applications, has the virtue of being both odorless and low-warp, and does not require a heated bed.
Blue Painter's Tape
Blue painter’s tape is our preferred fallback solution for many 3D materials, especially PLA filament. It is simple, cheap and effective. Just cover the bed with strips of the tape. We recommend traditional 3M brand blue tape. It can even be bought in very large rolls, making it easy to cover your whole bed. Do not use the newer type of tape with a glossy finish. You may also want to apply some Elmer's glue stick the first time for extra adhesion. Using this technique, no bed heating is required.
Heated Glass Print Bed
Many people like printing directly on glass because it is easy to remove your print when done and leaves a nice glossy finish on the bottom of the 3D part. 3D Printing on glass should be done with moderate heating (60 C). You should also make sure the glass is clean. Use some Windex on it if necessary. Prints with very thin sections may be pulled off easily. To prevent this, you might try adding a brim.
ABS Filament
ABS (Acrylonitrile Butadiene Styrene) is another commonly used 3D printer material.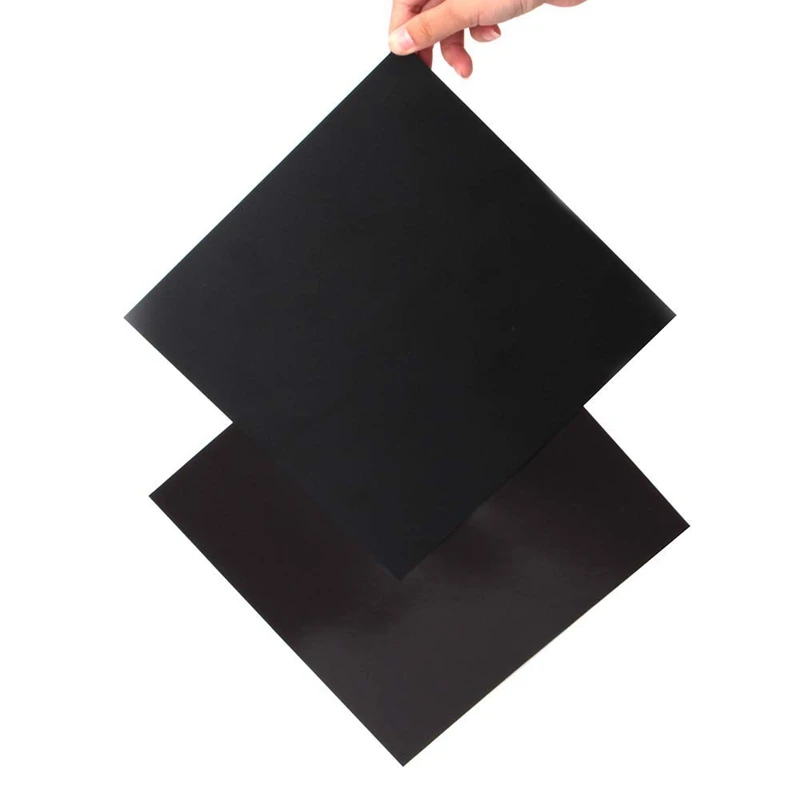 It's best used for making durable parts that need to withstand higher temperatures. In comparison to PLA filament, ABS plastic is less ‘brittle.’ It can also be post-processed with acetone to provide a glossy finish.
Kapton Tape + Hair Spray
Kapton tape is a high temperature adhesive tape with a translucent gold tint that works great for ABS filament. It is famously used on spacecraft, but also makes a good protective surface for 3D printing. Apply Kapton tape to the bed, then spray on hair spray as if you were spraying cooking oil onto a baking sheet. Generic hair spray is fine. We typically use non-scented Aqua Net, which comes in a purple can and can be bought in bulk.
ABS Juice
For the most stubborn ABS filament prints, you might use ABS juice instead, which is a mixture of ABS and acetone. To make ABS Juice, start with 2-3oz of acetone and 6-7 inches of ABS 3D printing filament, then adjust as needed. More ABS plastic dissolved in the acetone equals greater bed adhesion. The ideal consistency is thicker than water but thinner than milk. If your mixture is too thick - like paste or yogurt - just add some more acetone to dilute.
Wolfbite
Wolfbite is a very potent solution for sticking ABS to glass. Wolfbite holds firmly while the bed is hot, but as it cools off, it slowly releases. At room temperature, the print is not attached to the bed at all. Apply the Wolfbite directly to the glass in a thin even coating. Caution: Use sparingly. Otherwise, when you remove your print from the bed it may take chunks of the glass with it. Do not try to remove the print until the bed is cold.
PET Filament
PET (polyethylene terephthalate) is an industrial strength filament that is much stronger than PLA filament. It is FDA approved for food containers and tools used for food consumption, it barely warps, and produces no odors or fumes when printed.
For PET filament you generally want to use the same surface as you would for PLA, except with a little more bed heating.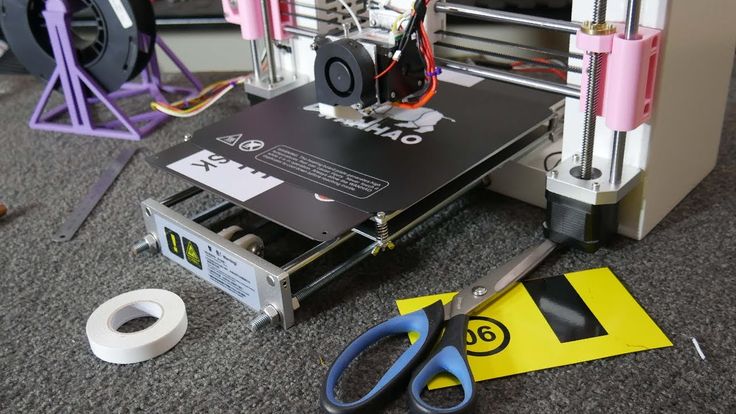 I recommend 75 C.
Nylon Filament
Nylon is an incredibly strong, durable, and versatile 3D printing material. Flexible when thin, but with very high inter-layer adhesion, nylon lends itself well to things like living hinges and other functional parts. Nylon filament prints as a bright natural to white with a translucent surface, and can absorb color added post process with most common, acid-based clothing dyes. Nylon filament is extremely sensitive to moisture, so taking drying measures during storage and immediately prior to printing (using desiccant, vacuum, or elevated temperature) is highly recommended for best results.
Garolite
This is the type of bed surface used in the Markforged Nylon composite 3D printer. Garolite is a fiberglass/epoxy laminate similar to the material used for making circuit boards. There are many types of garolite and certain ones are especially well suited for printing Nylon filament. No bed heating is required with this surface.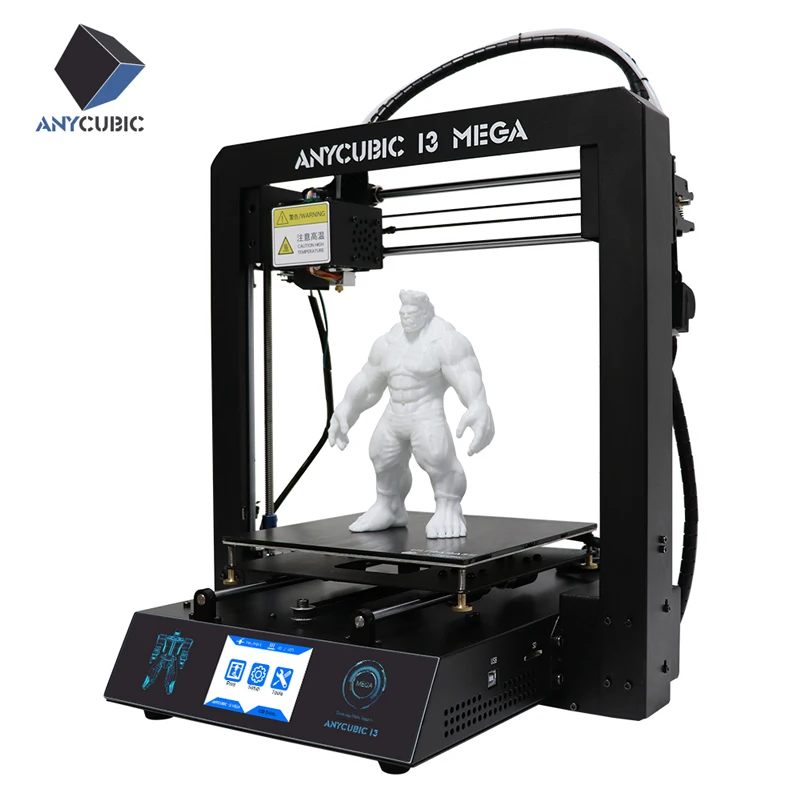 Usually, no other compounds are necessary, although a little glue stick may help on occasion.
The garolite surface on the Pulse XE
TPU Filament
TPU (Thermoplastic Polyurethane) is an elastic, oil/grease resistant, and abrasion-resistant material with a Shore Hardness of 95A. TPU Plastic has several applicable uses including automotive instrument panels, caster wheels, power tools, sporting goods, medical devices, drive belts, footwear, inflatable rafts, and a variety of extruded film, sheet and profile applications. It is also commonly used in mobile phone cases.
Blue Painter's Tape
You would think that a flexible material like TPU filament would require some special 3D bed adhesion solution, but it's actually quite similar to PLA filament. We recommend following the Blue Painter's Tape steps in the PLA filament section above to get a great first layer with flexible TPU.
Blue Painter's Tape on the Pulse 3D Printer
General Purpose Surfaces
In addition to the specialized surfaces listed above, many 3D printers come out of the box with general purpose surfaces to get you started.
PEI
PEI film comes stock on many printers, like the LulzBot TAZ 6. It works with both ABS, PLA, and many other 3D materials. It makes it easy for beginners to start printing as soon as they take their machine out of the box. However, for printing more difficult (i.e. large) objects we recommend using different bed surfaces suited specifically to the 3D plastic you are printing with.
PEI film on the LulzBot TAZ 6
Silicon Wafers
Silicon, with its high thermal conductivity, makes an excellent heat spreader. Most heated beds will be warmer in the center than near the edges, and the difference can be extreme (20 C). Using a silicon wafer allows the heat to be distributed more evenly over the bed surface.
The silicon wafers can be used as either a heat spreader underneath your glass plate or as a replacement for the glass altogether. Be careful when using silicon as a replacement for glass, since it is more fragile.
Silicon wafer on SeeMeCNC Orion
We hope that this guide for selecting the right 3D print bed surface was helpful. If you have any other suggestions, please feel free to leave them in the comments below.
Happy Printing!
What Build Plate Surface Should I Use? We Review The Most Commonly Used
We’ve all been there. You start a print job and right away things begin to go off the rails. The first layer of your print material isn’t properly adhering to the surface of your print bed. As a result, it begins to move or slide.
Subsequent layers are laid down on top of this unstable substrate. They too move or deform. In the end, instead of ending up with a cleanly printed object, you’re stuck with a monster made of spaghetti or a semi-shapeless blob of thermoplastic. Not quite what you were envisioning.
Alternatively, your initial layers seem to adhere fine. The object seems to be printing out nicely.
However, as the print head begins moving upward further away from the print bed, and those initial layers begin to cool, you notice that the corners of your object begin to pull up and inward.
Instead of clean angles, you end up with an object whose bottom edges are warped. At best, this makes your object unsightly. At worst, it makes it unusable.
Those first few layers really are the most important of the whole print. Get them wrong and it’s clean up and restart time. Which all wastes your valuable time, and at best is just disappointing and frustrating.
The problem here is build plate
surface adhesionMost 3D printers come with a print bed that is made of glass or aluminum. Both of these materials are quite durable and relatively impermeable. Therein lays the problem. Glass and aluminum, by themselves, both have extremely smooth surfaces.
This smooth 3D printer build plate surface offers the print material very little purchase to grab onto. As a result, the material tends to resist adhering to the surface of the print bed. The result is the movement of the initial print layers or warping of the material as it cools.
So, what are the advantages of a heated bed for your 3D printer?
Heated print beds have tended to somewhat reduce this problem, especially for materials with a lower printing temperature like PLA. However, even a heated bed does not eliminate all adhesion problems all the time, especially for materials that need a higher printing temperature, like ABS.
The solution to the problem is to find a build plate surface that will provide greater adhesion for the print material to hand on to as the job progresses. In this article, we’re going to take a look at some of the more common and successful build plate surface solutions out there, so that you can choose one that’s right for you and the print material that you’re working with.
Before we look at the common 3D printer bed surfaces available to you, you may be wondering “What is a 3D printing raft, and when should I print with one?”
A raft is a couple of layers printed before your main print. Some printers (like the Zortrax M200) have a perforated heated bed, requiring you to print with a raft every time. This does work well, because you never have to worry about bed adhesion with a raft on a perforated bed.
For anyone with a regular solid bed, we think the only times you’ll likely want to print with a raft is when you’re printing objects with a very small contact area on the bed and you’re worried the print might unstick during printing. But for most instances, if you get the right surface for your bed – you shouldn’t need to worry about rafts.
The Best 3D Printer Build Surfaces
Hairspray
Let’s deal with this one right away. Some people swear by hairspray as a great way to ensure 3D printer bed adhesion. We’re not that much of a hairspray fan for a couple of reasons.
First, hairspray was a great solution to adhesion problems back when most printers didn’t have heated beds. Today, not only do most printers have heated beds, but there are also better and more durable solutions available.
Second, let’s face it, hairspray is a mess to use. It gets on your printer, it’s a pain to clean up and you have to reapply it for every new print job. We recommend you go with different adhesion solution, but if you’re set on trying hairspray, make sure you choose one that’s extra hold and contains plenty of vinyl, acetate, and copolymer.
If you spray it outside and leave it to dry, it should provide an acceptable bed surface.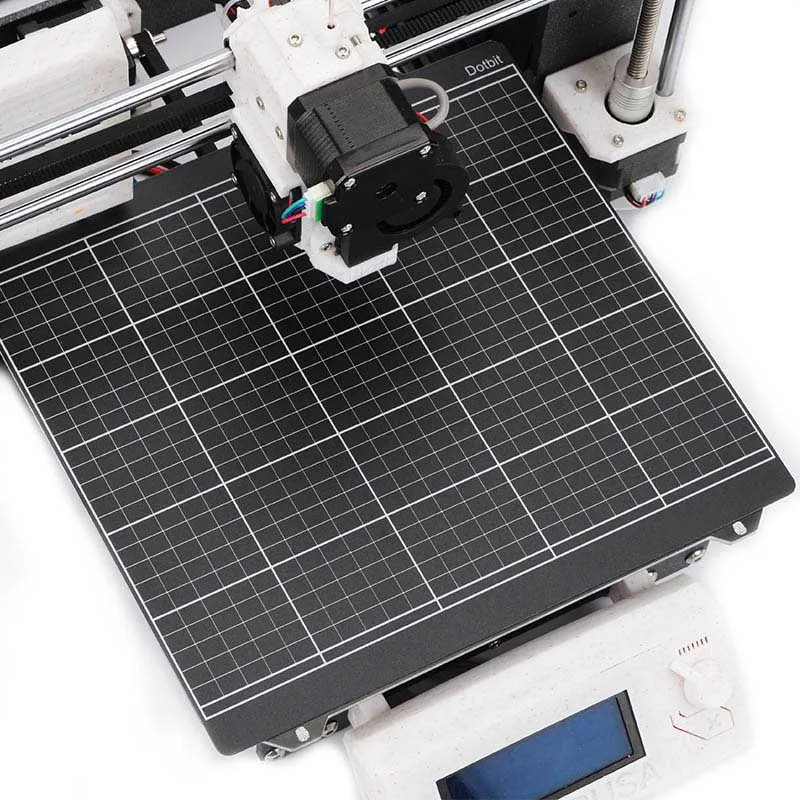
Blue Painter’s Tape
Blue painter’s, or blue masking tape, is an easy way to give your build plate surface more adhesion, especially if you’re using a material with a lower print temperature like PLA. This is a commonly used bed, because it’s not too messy, works OK, and is relatively easy to get hold of.
Because it is easy to remove at the end of a job, many people apply it directly to the surface of their print bed. It is easy to apply, mainly because it can be easily placed and replaced, over and over, to ensure that it lies evenly with no bubbles and with tight seams between rows.
One problem with painter’s tape is that no matter how careful you are, the seams between the rows will still be slightly raised. This will, of course, affect the look of the bottom of your printed object.
For some objects, this presents no problem. For other objects, where the look of the bottom is an issue, you can use super wide painter’s tape. Its 6-inch width can give a seam-free print surface to smaller objects and cut the number of visible seams in half for larger objects.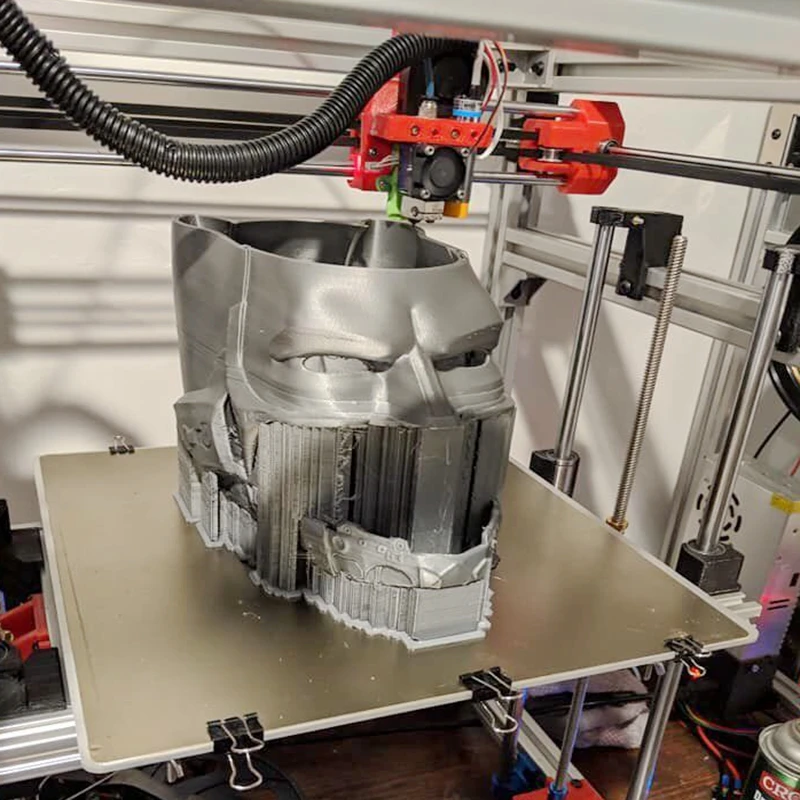
Kapton Tape
Kapton tape is a great solution for bed adhesion if you’re working with a material that has a high printing temperature, like ABS.
Kapton tape was developed by NASA for use in space. It is a super-thin, film-like material that is extremely heat resistant.
Kapton can also be difficult to apply and remove. To solve these problems, many people have a 1.5mm piece of window glass cut to the size of their printer bed. They then apply the Kapton tape to the glass using the “water method” and then attach the Kapton coated glass to the print bed using clamps or adhesive.
Make sure that your build surface is level after attaching it to the bed. Like painter’s tape, Kapton comes in a 6 inch wide roll that makes covering your surface quicker and easier.
Pritt Stick
Pritt stick is another great way to get adhesion on your build surface. It works well with both our PLA and ABS and it’s neat and easy to use to boot.
You simply apply a layer of the Pritt stick to a 1.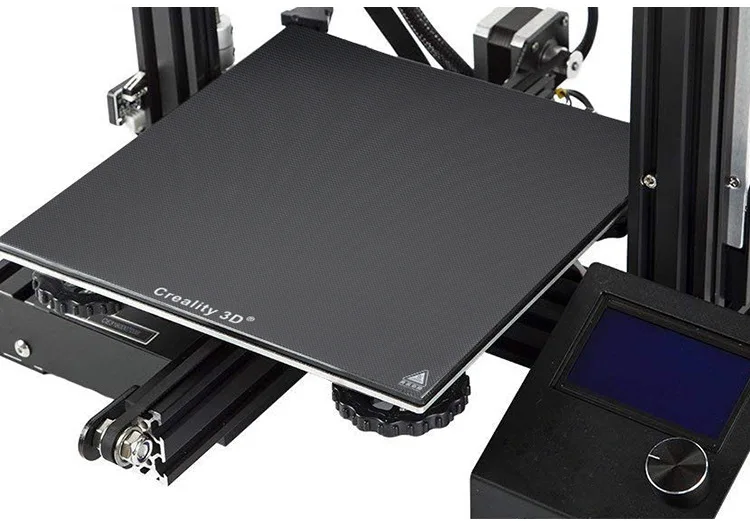 5mm piece of glass cut to the shape of your print bed (or your print bed itself, if the surface is already glass). Let the glue air dry and then attach the glass to your print bed using clamps or an adhesive. Double-sided tape works well. Heat your bed to the proper temperature as normal, and wait about 30 minutes before beginning your print job.
The key to Pritt Stick and similar, is that you get an even coating, without blobs. If you apply in a too-cold environment, the coating will be too thin. And if you apply with the heated bed too hot, it can get gloopy and leave blobs everywhere.
The good news is once a good layer is applied, it should last a good few prints before it needs re-doing. Voila, near-perfect 3D printing bed adhesion. Essentially though, like the above methods, it’s still some degree of messy and not exactly ‘plug and play’.
Buildtak
Buildtak is a thin plastic material that self-adheres to the build surface and, according to its manufacturer, “provides an optimal printing surface for 3D objects to adhere to for the duration of a print, while allowing for a clean, easy removal of completed builds. ”
”
Buildtak is manufactured and marketed by the Ideal Jacobs Company who, interestingly enough, developed Buildtak after purchasing a 3D printer and finding that it was difficult to get objects to adhere to the build surface.
Buildtak comes in 13 different sizes, so finding a size that fits your build surface shouldn’t be an issue. It comes with a self-adhesive backing that can be somewhat easily applied to the build surface. As always, make sure that the build surface is leveled after installation. Buildtak works with both PLA and ABS, as well as more exotic materials like HIPS and PETG and users report that you can expect to get about 50 to 100 hours of use out of one Buildtak sheet.
It’s worth noting that with Buildtak and PEI (below) you may need to increase your heated bed temps by a few degrees – as these surfaces can very slightly insulate the heat from your bed.
PEI Sheet
PEI, or polyetherimide, is a thermoplastic that provides a good build plate surface adhesion solution for a wide variety of printing materials, including both PLA, ABS, Nylon and others.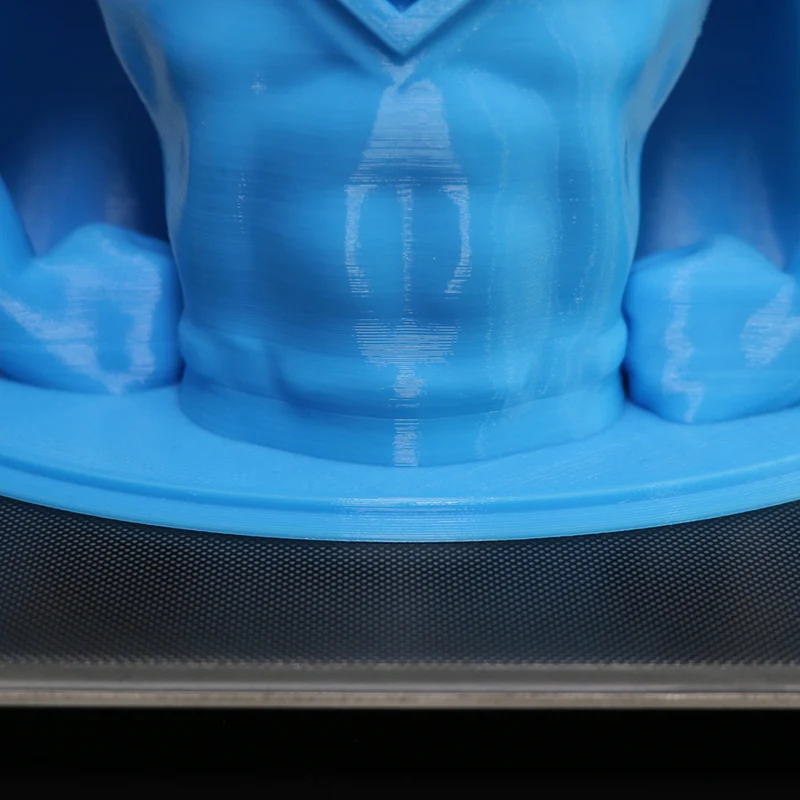 It is extremely heat resistant, performing well in temperatures up to 170C.
It is also reusable, relatively inexpensive, and requires almost no maintenance between print jobs, other than a wipe down with an isopropyl alcohol and water solution.
You want to use a sheet of PEI that is between 0.5mm and 1.0mm thick (approx. 0.03”) and around the size of your bed. Common sizes are 200mm x 200mm up to 300 x 300mm (12” x 12”). Thicker sheets will only be harder to apply to your build surface, require more heat, and due to the raw material cost – are more expensive.
Once you’ve got your PEI sheet, you can easily cut it to size with a box cutter or Exacto knife. The sized sheet can then be laminated to one side of a two-sided adhesive transfer sheet like these. Once laminated, the sheet can then be attached to your build surface using the other adhesive side of the transfer sheet. A short video tutorial detailing this process can be found here.
Once you’re finished, remember to re-level your print bed and you’re ready to pretty much kick you surface adhesion problems to the curb.
PEI is our favorite; mess-free, fit & forget print surface that more or less copes well with every material we’ve thrown at it. If it doesn’t work for you, it’s likely it has some grease or is dirty. Just use some alcohol wipes, and very fine grit sandpaper to restore it.
Ultimately if you’re still having issues with bed adhesion, you may want to try using a better quality filament. Cheap and poor-quality filaments can be inconsistent with sticking to the heated bed.
Related articles:
- 3D printer heatbeds: a guide
- Ender 3 glass bed – buyer’s guide and tips
- Warping and curling issues? Here’s how to fix them
Best Bed Upgrades for Maker Select v2 and Select Plus 3D Printers - Accessories
Tiffany Garrett
Accessories
Best Maker Select v2 and Select Plus 3D Printer Bed UpgradeWindows Central 2021
Maker Select v2 and Plus are great 3D printers for the price, but there are upgrades that can make them really great. Upgrades like the Anycubic Heatbed will make printing easier, and a Y-carriage upgrade from Gulfcoast Robotics will make your prints look better. Here are some of our favorites that will really enhance your typing experience.
Upgrading the Y carriage is very important. By increasing the rigidity of the Y carriage, you reduce the number of problems that arise when trying to level the bed. As a result, you will see better quality prints.
$28 at Amazon
Polished Glass: Borosilicate Glass Plate
Printing glass tables offer a non-deformable and cheap surface. You'll likely need some glue to help hold the prints together, especially with more exotic threads, but I've found a light dusting of Aquanet hairspray does the job just fine. Smells nice too.
$19 at Amazon
Complete Bed Replacement: Anycubic Ultrabase Glass and Heated Bed
This is one of the best upgrades I have added to my Maker Select Plus. The Anycubic system completely replaces your heated bed with an advanced heating element and a specially coated glass bed. If you can only make one upgrade to your bed, do it.
$30 at Amazon
Extended Upgrade: Anycubic Mosfet
Mosfet is an almost essential upgrade if you are using Maker Select v2 to print high temperature fibers. This is a more difficult upgrade as it requires you to open the case and install it inside. If you heat the v2 bed above 50 degrees Celsius, use one of these to avoid burnout.
$18 at Amazon
Bed Surface Leaders: Buildtak Bed Surface
The Buildtak Bed Surface is similar to the surface that comes standard on your Maker Select. The big difference is that Buildtak was the first company to do this and it shows in the quality of the product.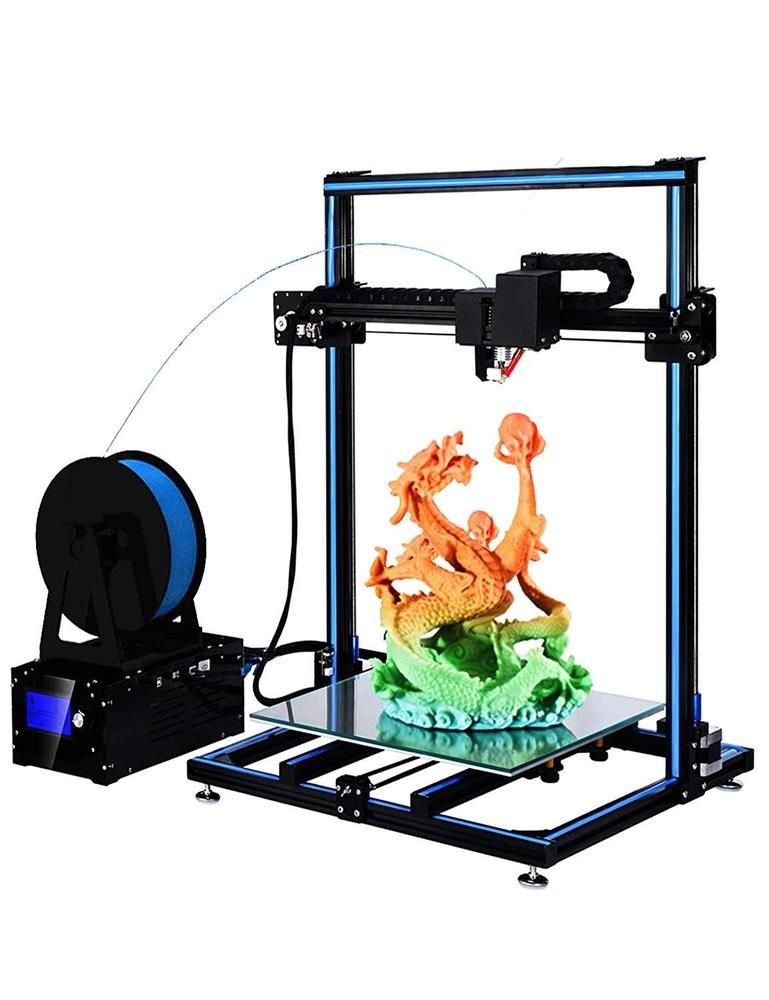 If you take care of a good Buildtak surface, it will last you over 150 prints.
$20 at MatterHackers
Removable beds are amazing: Buildtak Flex System
Another offering from Buildtak, this time in the form of a complete bed overhaul. The Flexplate system adds two magnetic plates to your bed, and the print surface can be removed and folded to make your prints come off easily. No more scraping the surface to leave marks.
$84 at MatterHackers
Silent Running: Solid Polymer LM8UU 3D Printer Bearing 8mm Shaft
One of the easiest ways to reduce noise and smooth the print bed is to replace the steel ball bearings with Drylin. Drylin is self-lubricating, which means your bed should always move smoothly, as long as the rods are not bent. It is always important to remember that your rods are not bent.
which Microsoft Office is the best
$13 at Amazon
Magic Surface: Gizmo Dorks Sheet PEI
When it comes to ABS plastic, PEI is almost a magic surface to build. Even PLA holds up surprisingly well. Without any other adhesive, the PEI sheet will hold the print securely when hot and release it when it cools. You will need to increase the temperature of the bed if you are using it, but it is worth setting it up to get it right.
$15 at Amazon
Firm Hold: GeckoTeck Bed Surface
GeckoTeck is another professional building surface company. Like Buildtak, it makes excellent reusable surfaces, but its surfaces can be used for a wide variety of filaments. From standard PLA to flexible filaments like Ninjflex, GeckoTeck will grip it properly and securely.
$21 at Amazon
Rigid Frame: Gulfcoast Robotics Z-Bracket
While not technically a bed upgrade, the Z-Brace is an upgrade that will help keep everything, including your build plate, square and correct. To get a flat bed you will need a square frame and this will help you with that.
- $40 at Amazon for Maker Select v2
- $40 at Amazon for Maker Select Plus
Built-in Stick: Wide Wing Glass Plate
Textured glass is one of the latest innovations in 3D printing plates.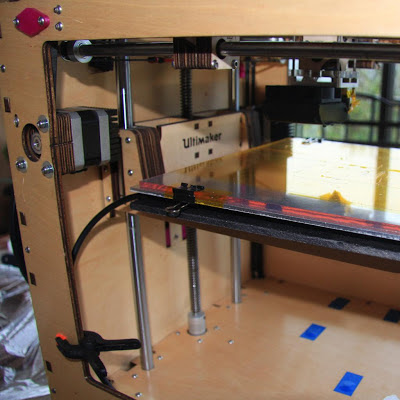 The glass will give you a durable and natural surface to print on, while the textures will help keep your prints firmly on the bed. You will need to run the printer at a slightly higher temperature, but this is a cheap and easy way to get much better prints.
$22 at Amazon
Any of these upgrades will improve print quality on Maker Select v2 or Plus. For my money, the most important upgrade is the Y carriage from Gulfcoast Robotics. Having a solid Y-plate will iron out many of the issues you might see in your 3D prints and give you a solid foundation for more upgrades in the future.
everything you need to know
3DPrintStory Reviews BLTouch sensor for 3D printer: everything you need to know
Automatic table calibration is a fairly common feature in desktop FDM 3D printers. However, most 3D printers with automatic table calibration use a non-contact inductive sensor, which is easy to install, operate and configure. These inductive sensors work well with metal 3D printer tables, but tables made from other common materials such as glass are virtually invisible to inductive sensors.
Perhaps it's because of this lack of inductive sensors that many people hear about BLTouch sensors: if you need to use a non-metallic 3D printer slot base but need automatic calibration, these sensors are a great option. Another plus of these sensors is its high accuracy. BLTouch raw readings have one of the lowest standard deviations of any sensor type for automating 3D printer bed calibration.
In this article we will look at the BLTouch sensor, its advantages and how to use it for a 3D printer (by the way, there are many clones of BLTouch sensors, but the original design belongs to Antclabs from South Korea).
What is a BLTouch sensor?
According to Antclabs, the original manufacturer of the sensor, "BLTouch is an automatic table calibration sensor for 3D printers that can accurately measure the angle of the table surface. " This sensor works on any type of surface, be it metal, glass, wood and others.
The 3D printer table tilt level sensor itself has a rather complex design. It consists of a microcontroller, a solenoid switch and a handpiece that is in direct contact with the table. The original BLTouch uses a Hall sensor for high accuracy, and this sensor, combined with the physical handpiece, allows it to be used with many types of tables.
In a sense, this sensor is equivalent to a microswitch mounted on a servo. When the tool head is lowered to "return" the nozzle in the Z-axis, the table pushes the tip slightly up, the Hall sensor is activated, and then the tool head rises.
TheBLTouch is one of the most accurate and reliable sensors out there, so it's no wonder some manufacturers like MakerGear and CraftBot use this device on their high end 3D printers.
Now that we know exactly what we're dealing with, let's compare the BLTouch with the other two types of sensors.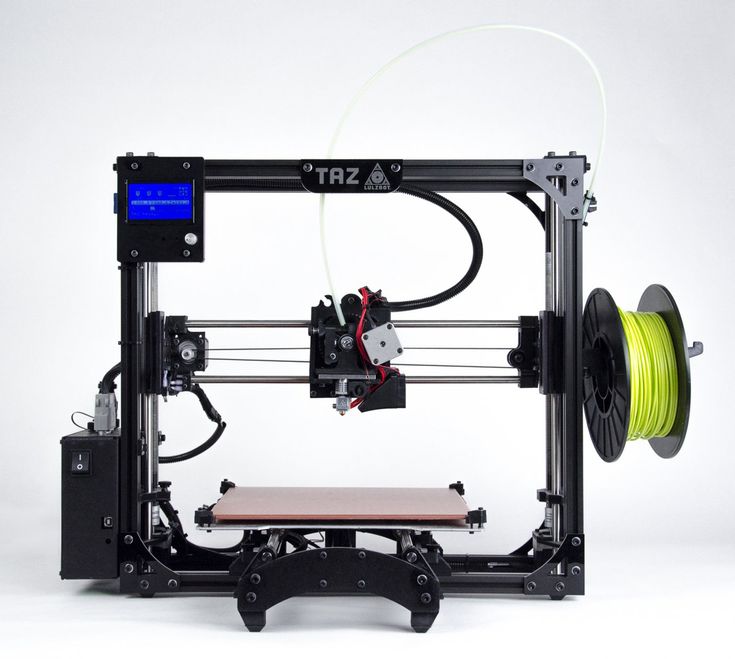
Different types of sensors for automatic 3D printer table calibration
Inductive sensor
The key difference between the inductive sensor and BLTouch is that the BLTouch sensor physically touches the table during the calibration process. The inductive sensor uses currents induced by magnetic fields to detect nearby metal objects, so there is no direct physical contact with the table.
But therein lies the problem: induction sensors only work with metal tables, as they only work when they come into contact with metal. So if you are using glass, then this type of sensor will not work for you.
Microswitch (mechanical limit switch)
Don't discount the old-fashioned physical microswitch either. Compared to the BLTouch, this sensor is less accurate and possibly less reliable in the long run because the measurement is dependent on physical parts that can wear out over time.
However, these mechanical switches outperform other options when it comes to cost and ease of setup.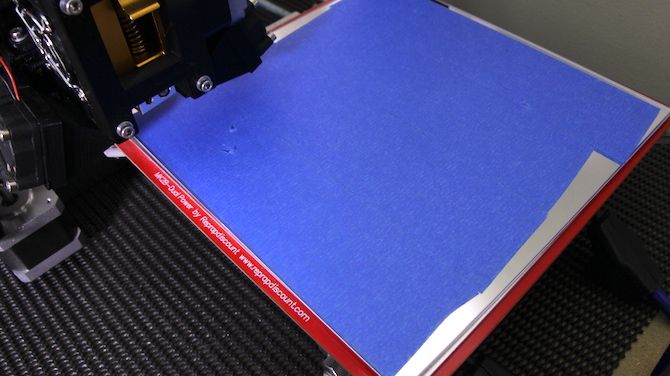 Since mechanical switches are very simple to implement, easy to set up and cheap, they have found quite a wide application.
Alternatives
Pinda Probe
Pina Probe is a sensor developed by Prusa Research that is an induction sensor with a thermistor to account for changes in bed temperature. The Pinda probe is specially designed for the Prusa line of 3D printers, which have special dot-mounted calibration markers on the table that help with alignment and skew correction.
This is said to be a very accurate sensor for 3D printers, and although there aren't many numbers on the internet, the reviews seem to be positive. So it is worth considering that this is a good option if your 3D printer has a metal table.
Ezabl Pro
Ezabl Pro is a capacitive sensor manufactured. It comes with a connection board that uses an optical isolator to prevent high voltage damage to the motherboard in case of connection errors.
In terms of accuracy, it can measure to one thousandth of a millimeter, which is what 3D printers need.![]() Ezabl Pro also has useful features such as double shielding that prevents any interference from other signals.
Ezabl Pro also has useful features such as double shielding that prevents any interference from other signals.
The main disadvantage of Ezabl Pro is the cost, which is about 65 dollars. But this sensor can work with glass tables.
Piezo Sensors
Piezoelectric Sensor uses the piezoelectric effect to detect changes in force, pressure or strain and convert those changes into an electrical impulse. Precision Piezo is one of the few companies in the UK that makes piezo sensors for 3D printers. They have an accuracy close to 7 microns, which is pretty accurate for a 3D printer.
The advantage of the piezoelectric sensor is that a nozzle can be used as a sensing element without the need for additional components. In addition, a piezoelectric sensor can be placed on the print head or under the pressure platform. As for the price, it is in the same range as BLTouch.
BLTouch Sensor Setup Basics
Before you start modifying your 3D printer for BLTouch, you need to work out the following points.
Mounting the sensor
The BLTouch sensor must be installed as close to the print head as possible. You can find many designs available for download on the internet. If you would like to design the mounting structure yourself, be sure to read the BLTouch documentation to take into account the overall dimensions of the sensor.
Some users have experienced a problem where the nozzle hits the table on one side and prints perfectly on the other. The reason for this is that the BLTouch is mounted at an angle to the nozzle. Therefore, when designing and installing equipment, make sure that the BLTouch is mounted perfectly at right angles and aligned with the nozzle.
After installing the sensor, be sure to record the distance between the BLTouch sensor and the center of the nozzle in both the X and Y directions.
3D printer firmware configuration
To run BLTouch, you will need to change the 3D printer firmware in several places.
We used Marlin firmware version 1. 1.9 which was updated in March 2020. Enter the marlin.ino file and go to the configuration.h tab.
The first step is to activate the BLTouch sensor by declaring it. Remove the two slashes to uncomment the define statement:
#define BLTOUCH
The next step is to set the BLTouch offset using the X and Y distances you should have measured when you installed the sensor. Z-shifting may seem like a more complicated procedure, as the BLTouch probe protrudes below the nozzle for direct measurements. You will need to find the distance between the sensor and the end of the nozzle when the sensor is fully extended.
Also, since the probe goes below the nozzle, the offset must be negative. We recommend setting it to around -2.5 for safe first runs and then adjusting. You need to change the values of the following lines to match your numbers:
#define X_PROBE_OFFSET_FROM_EXTRUDER 30 // X offset: -left + right [nozzles] #define Y_PROBE_OFFSET_FROM_EXTRUDER 20 // Y offset: -front + back #define Z_PROBE_OFFSET_FROM_EXTRUDER -2.5 // Offset Z: -below + above
After you're done with the offset, you'll need to choose a table alignment type. You can choose from five different compensation methods, below we will give an example using the bilinear method as it is easy to get started with.
To select the appropriate option, uncomment it by removing the slash. Please note that only one option can be left without comment. Your code should look something like this:
//#define AUTO_BED_LEVELING_3POINT //#define AUTO_BED_LEVELING_LINEAR #define AUTO_BED_LEVELING_BILINEAR //#define AUTO_BED_LEVELING_UBL //#define MESH_BED_LEVELING
You can also set the number of mesh points that you will base your calibration on. Default is 9points that form a 3-by-3 grid along the x and y axes. The number of points can be increased for more accurate results, but keep in mind that the probing time will also increase proportionally.
#if ENABLED (AUTO_BED_LEVELING_LINEAR) || ENABLED (AUTO_BED_LEVELING_BILINEAR)
// Set the number of grid points per size.
#define GRID_MAX_POINTS_X 3 #define GRID_MAX_POINTS_Y GRID_MAX_POINTS_X
Testing
After setting up the firmware, you will need to check if the BLTouch is working properly by doing a basic test. Once it's complete, you can start adjusting the Z offset. There's a great video from 3DMakerNoob that walks you through the process step by step.
Slicer setup
Be sure to add the G29 command to your Gcode right after the G28 command.
Troubleshooting
Troubleshooting
The creators of the original BlTouch at Antclabs mentioned that the original sensors come with a QR code built into the circuit board on the back. Other Chinese manufacturers, called TL Touch and 3D Touch, are also known to produce lower quality products, resulting in poorer quality. When buying online, be sure to purchase from one of the authorized resellers that are listed on the Antclabs website.
Known Issues with BLTouch Sensor
The latest version of BLTouch V3 had issues with Creality printers where it did not work properly. The Marlin firmware developers worked closely with Antclabs and determined that certain changes needed to be made to the firmware.
An excellent tutorial video on how to fix this problem was made by Teaching Tech. After making changes, many users finally solved the problem.
BLTouch Disadvantages
Although the BLTouch is an extremely accurate level sensor, it also has several disadvantages.
When using the BLTouch, it is important that the surface of the bed is free of debris. A mechanical sensor detects the surface of the table and any damage or debris on the surface will result in inaccurate readings.
The BLTouch is also known to suffer from interference from currents in the hot end heater wires.