Yellow 3d print
Yellow best STL files for 3D printer・Cults
Wedding rings 004.
€5 -50% €2.50
Anime character design, The yellow hair Wu Kong in energy form, STL 3D model design print
€4
Wedding rings 003.
€5 -50% €2.50
Wedding rings 002.
€5 -50% €2.50
Pikachu Agumon cosplay
€2.92
Agumon Pikachu Cosplay
€2.92
Cute Palmtop Tiger from Toradora (2 Models) - Toytaku Prints
€8.08 -15% €6. 87
The Wizard of Oz: Winkie Castle Guard
€5.06
Yellow Eledee
€5
CUSTOM SINESTRO YELLOW LANTERN HEADSCULPT
€7.08
Grinder Atlanta, Pica Atlanta
€0.68
Yellow Lantern Coaster
€0.66
RUBIKS CUBE STAND QUICK PRINT (UPDATED V5)
Free
Friends Yellow Peephole Picture Frame
Free
Earring 001.
€4.50 -50% €2.25
Pokemon Trainer Yellow
€1.26
Rubiks Cube Stand Quick Print
Free
Nozzle Filament Model Decoration
€1.49
Text Flip - Smiley
Free
MinionPhoneHolder
€0. 66
66
Jake from Adventure Time
€0.68
Lantern Corps LED rings Set All 9
€202.32
Yellow Lantern Ring Sinestro corps with LED light
€40.46
Pikachu Voronoi
Free
Flexi Lazy Giraffe
€0.88
Bart Character
€3.40
Lightning
€6.05
Axel
€6.05
Kev
€8.06
Chicken Terrace
€10.08
Xavi
€6.05
Miranda
€8.06
Denisse
€8.06
THE GIRL IN THE YELLOW RAINCOAT
€4.95
Power Rangers Dino Thunder Morpher 3 Pack - Rex- Tricera - Ptera (Red/Blue/Yellow)
€11.37
Power Rangers Dino Thunder Ptera Morpher / Abaranger Yellow
€4. 64
64
saber fang tiger zord - yellow ranger -MMPR
€5
Jake the dog Shelf buddy (lofi version)
€4.05
Hiker -pokemon- R/B/Y
€7.60
Duck with knife meme
€1.95
Snoopy and Emilio Cookie Cutters
Free
MINION KEVIN FANART
€1.92
Christmas Star
€3.03
Glass olive oil bottle
€3.03
Pikachu
€0.50
Female Pikachu Low Poly
Free
Orange Piccolo (Dragon Ball Super Hero) 3D Model
€2.50
yellow power ranger morpher
€1.15
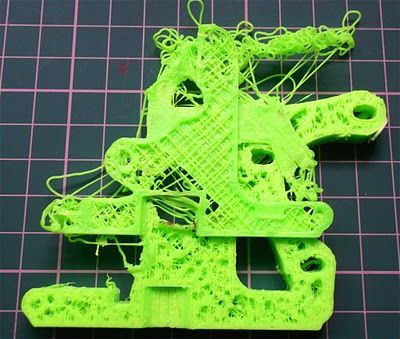
How to Print & Cure Clear Resin 3D Prints – Stop Yellowing – 3D Printerly
When it comes to 3D printing clear resin models, I’ve heard a lot of people having trouble with cloudy prints, or even yellowing.
I had to go and find out how the experienced 3D printer users out there stop their clear, transparent resin prints from looking imperfect and low quality.
The trick to 3D printing clear resin prints is to minimize the amount of UV light the models are getting. Over exposure to UV light is most commonly what makes clear prints yellow. Make use of resin coating, spray coating, or manual sanding for the best clear resin 3D prints.
Keep reading through the rest of this article for the main details and methods that actually work.
Can You 3D Print Clear Resin Models?
You can print clear resin models by using clear or transparent resin from brands such as Anycubic or Elegoo. It’s important to get the right exposure time settings and cure times after the print has finished. There are other techniques you can use to make prints clearer such as spray coating.
Techniques have been tested and refined to properly 3D print clear models with resin 3D printers, which will be discussed in this article.
You can print completely transparent print models clear enough that you can clearly see through them and look at the material sitting behind your models.
People usually think that they can only print opaque models using a 3D printer but this printing technology has much more to offer.
There are many objects that someone would want to be transparent such as phone cases, containers, or any of your models really. Although most models have color behind them for details, clear 3D prints can look really good.
A key difference that people look at is whether they want to print a translucent print or a transparent print. Depending on what results you are looking for, you’ll have to dial in certain techniques to get there.
Translucent Resin 3D Prints
Translucent 3D prints allows the light to pass through the model but you cannot see through the print properly. Frosted paper, wax papers, and different types of sheets are some of the major examples of translucent 3D print models.
Transparent Resin 3D Prints
Transparent resin 3D prints are the models that allow the light to completely pass through them and make you able to see through the print and the thing behind the models without any hassle.
Cellophane, clear glass, test tubes, funnel tubes are the most common examples of transparent materials and prints.
Clear and transparent 3D printing is ideal for models that you want to have a certain look to them, though most models printed in clear look really good. If you’ve seen a picture of a clear statue or sculpture model, you know what I’m talking about.
Without the right knowledge, it can be quite tough to get things as clear and fully transparent as you want.
I’ve seen how some FDM filament printers can 3D print some pretty clear models, in things like remote control planes or something like the top panel of a tool box, though this will be focused on resin.
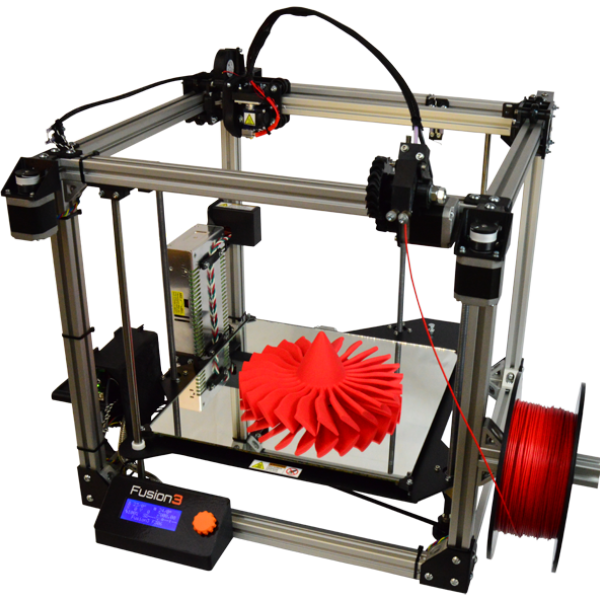
SLA 3D Printers Using Clear Resins
The benefit to using SLA technology to 3D print clear models is that it can print such fine layers with precision and detail. It’s the way light bounces off an object that creates that transparency.
Surfaces need to be very smooth and not have many scratches or bumps.
Resins like Anycubic Plant-Based Clear Resin are specially designed to get excellent clarity, smooth finish, and print the most efficient transparent resin models that meet your requirements in functionality and appearance as well.
I’ll talk about the best resins a little further down in this article, so we can focus on the actual methods to use.
No print model will be perfectly transparent when it comes out of the machine, the curing and post-processing plays an important role in making them crystal clear. The more efficient your curing process is, the clearer, beautiful, and perfect your prints will be.
Spraying, sanding, or coating will help you give a better and smooth finish to your 3D print models so that you can get the models you were expecting and working on.
Some materials can also be fused into colorful resins that will allow you to print 3D models of different colors with acquiring transparency as well. This will add to the charm of the model or may help you as well on some specific models.
How to 3D Print & Cure Resin Prints Properly
Manufacturers have come up with a brilliant method to make fully transparent 3D prints using SLA printing technology.
Below are some of the best techniques that will help you to make your 3D prints transparent properly.
- Resin Polishing
- Spray Coating
- Manual Sanding
Resin Polishing
Let’s start this off with the most effective way to make your resin prints transparent.
Resin polishing is the most suitable method if you need to make your prints fully transparent like glass. It works best on prints with flat or near to flat surfaces.
This method works by:
- 3D printing your resin print as normal and washing it with your chosen cleaning solution (mine is isopropyl alcohol)
- Now carefully dip your resin print in the clear resin to give it a thin coat all around.
 You can also use a syringe to apply the resin.
 - Remove any large excess of resin on the print such as bubbles with a syringe or very lightly dabbing with a paper towel
- Cure the 3D print as normal and if done correctly, come out with a transparent resin print!
You may be thinking, well why can’t I just cure my 3D print straight off the build plate since it has that same coat of clear resin around it. It’s possible to do this but you are more likely to end up with a yellow print due to needing extra UV light exposure.
When you wash the model with isopropyl alcohol, you remove that excess of uncured resin which shows up those scratches and layer lines that prevent full transparency with resin prints.
Leaving layers that aren’t so thin with the resin, you can start to lose details and dimensional accuracy in your models.
Some people only require certain parts of a 3D print to be transparent so you could simply dip your desired part and use that as a coat to remove the scratches and imperfections.
You should try to dip the resin a little at a time, alternating sides if the model is a little more complex and not so flat. Letting it then air dry a little is a good idea so the coat of resin hardens and fills in those marks on the model.
Once you have done all of this correctly, curing the model under some UV lights should produce some great results.
Now cure your print under UV lights in a UV curing chamber from making it safe to touch and use.
If done well, it really transforms those translucent prints into transparent prints nicely.
Spray Coating
Next up, this method is the one many people will like because it’s a lot easier to do.
What you’ll do here is print your resin print as normal and wash it with your cleaning solution then let it dry or pat dry it.
After doing that, you simply spray your resin print, effectively giving it a coating like above. You want to ensure you don’t cure the print right after spraying because it can actually make the yellowing worse.
It’s always advised to cure your models when they are dry rather than wet. You can invest in a small fan to help speed up your print drying times.
A simple one that you can get from Amazon is the SmartDevil Small Personal USB Desk Fan. It has 3 speeds, is ultra quiet, and only weights 6oz for maxiumum convenience.
We’re actually going to be going for further coats, so once your print has dried, spray it again for a second coat, and some people even go for three coats.
It is recommended to spray the prints in a clean dust-free place to prevent any impurities from sticking to the 3D prints.
Spray coating is an easy to implement and quick method to improve the transparency of the 3D prints without compromising much on the prints’ detail.
This method is recommended and effective for almost all types of 3D resin prints even if they have many complex patterns.
Simply spray coating can cover the layers of the prints preventing them from UV lights, this can lead to the yellowing of the prints sometimes.
If you want prints that need to be transparent like glass then it will be beneficial to do resin polishing, or the third method that I’ll discuss below, then applying the spray coat after.
Manual Sanding
This method can be pretty difficult when it comes to getting total transparency, though it can work really well with practice and the right model.
It involves smoothing your 3D prints using different levels of sandpaper grits and then polish the prints with a micro-fiber cloth and acrylic cleaner. The prints should become shiny at the 3,000 grit mark, and should become reflective at about 12,000.
Try using sandpaper and micromesh of different varieties gradually ranging from 400 grits to 12,000 and to remove the scratches/impurities to make it perfectly transparent.
A great assortment of sandpaper that should set you on the right track with this method is the CenterZ 18-Sheets Sandpaper 2,000-12,000 Assortment from Amazon.
You want to max out the sandpaper grit to a high number before you start the polishing process.
The video below is an example of what you’d be expected to do to get the best results.
The method of manual sanding and polishing is only beneficial for the prints that have fewer details and are not very complex. Getting perfect and fully transparent could be difficult using this method especially if your print has too many complex patterns.
You may need more effort while manually sanding and polishing your 3D prints but if you put this effort in your work, you can get print transparent just like clear magnifying glass.
It may take a few tries to get this down properly.
For the polishing side of things, I’d recommend using the Turtle Wax T-230A Rubbing Compound from Amazon, the same as in the video above. After that initial rubbing of the heavy duty wax, move onto the Turtle Wax T-417 Premium Grade Polishing Compound, also from Amazon.
A great tool to support your goal of clear resin 3D prints is the Tacklife Rotary Tool Accessories Kit. It comes with a whole host of accessories, including those pieces for sanding and polishing.
Do keep in mind that removing the marks from each layer is difficult since there may be small imperfections from sanding. They become a lot more visible when light shines at different angles.
A combination of manual sanding, resin coating, then a final coating of spray is the perfect method of getting clear, transparent 3D prints. In addition, minimize the UV light exposure that you give to the resin prints.
In order to prevent cloudy resin 3D prints, many people mention how cleaning with Yellow Magic or ResinAway really helped out. Those white cloudy patches may be caused by the water content in isopropyl alcohol.
I’d recommend going with the 1-Gallon Yellow Magic 7 Cleaner, which has low VOCs and is human & pet-safe. It’s usually used for cleaning indirect food surfaces, but it works really well for clear resin prints.
One user who used it for their clear resin prints described it as the ‘holy grail of resin 3D printing’.
How to Find the Best Curing Times for Resin 3D Prints
Many people are stuck when it comes to figuring out the ideal curing times for their resin prints, since there are a few different factors at play.
To get the best curing times, you need to do your own trial and testing of times with test prints, then seeing how the quality comes out with each time. You can set normal exposure times at 1 second increments, then once you find the best 2, use 0.2 second increments to narrow down the very best quality.
The video below is a great one to follow to dial in the exposure settings for your brand of clear resin and the resin printer you are using.
You can download and use the Resin XP2 Validation Matrix .stl file (direct download) as a test print.
For me on my Anycubic Photon Mono X (link to Anycubic store) that has a 4K Monochrome screen, I’d need a lot less normal exposure as compared to a resin 3D print with a 2K Monochrome screen, so keep this in mind.
You can check out my in-depth review of the Photon Mono X to see just how it performs.
Comparing other people’s results is a good starting point for testing, rather than a setting that you should assume to work really well for you.
Here is the test print in the Anycubic Photon Workshop slicer. Simply enter in the normal exposure time, slice the file and save it as usual, then repeat this for each testing second values.
It’s a good idea to do them all at once and print them out one by one, with a similar wash & cure process/timing to get some consistency.
Here is an example of how the test looks.
This is a 2.8 second exposure time as I wrote on there to help me remember. A normal exposure time of 2.8 seconds is lacking with some of the details such as in the bottom right, with the faded rectangles.
Even though the middle of the infinity is touching, there are other details that aren’t the best, so look around the whole test for the best exposure timing.
You want to be able to:
- See the writing clearly
- Have the infinity points touching perfectly
- Ensure the holes are actually producing a gap and not filling in
- Check the ‘positive’ and ‘negative’ rectangles are fitting like a jigsaw puzzle
- See detail in the large rectangle on the right, as well as the shape at the bottom of that rectangle
1.6 seconds looks a little better since we can make out those rectangles a little better, but it isn’t the best.
Below is 4 different tests put together to compare, though it’s hard to see on camera versus in person, but the 1 second test shows much more detail in the lower rectangles when compared against the others.
My ideal exposure with the Anycubic Photon Mono X at 0.05mm layer height and 60% UV power is between 1 second and 2 seconds. You can then narrow down the times to really dial it in.
Best Clear Resins for 3D Printing
There are many clear and transparent resins for 3D printing but Anycubic Eco Resin Clear and IFUN 3D Printer Resin Clear are considered the best because of their quick curing and best transparency results.
Anycubic Plant-Based Eco Clear Resin
I’ve used plenty of Anycubic’s Plant-Based Resin from Amazon and it does a great job with producing high quality prints with fast curing times, and low odor. It’s one of the best clear resins on the market right now, and is compatible with all types of resin printers.
The prints have a high degree of clarity and detail without any visible sign of warping or shrinkage. The prints are not very prone to breakage during printing because of its chemical properties and strength.
The hardness and strength factors allow you to remove the print easily without breaking the model like other resins out there.
The post-processing and curing process of this resin is easy because it can be washed with water then cured under water which can add extra clarity, details, and smoothness to your prints.
Some of its major features include:
- Accuracy and High Precision
- Reduced Formation and Curing Time
- Low Shrinkage
- Easy to Print with
- Good Strength
- No Warping
- High Resistance
- Efficient Fluidity
- Non-Brittle
A buyer’s feedback stated that he bought 500ml of Anycubic Resin Clear for testing and he finds it quite helpful and his straightforward answer was that he liked it the most. He said the prints were of high quality and were transparent just like glass.
He was working on a new 3D printer and to understand the working of the printer he spent and went through a lot of different brands of resin.. After his first experience, he went out and bought the resin in bulk because it is worked so well and was quite inexpensive as well.
If you are buying in bulk make sure that you keep the resin away from the reach of children and animals in a cool and dark place.
You can get yourself a few bottles of Anycubic Plant-Based Clear Resin from Amazon for a great price.
IFUN 3D Printer Clear Resin
IFUN Clear 3D Printer Resin from Amazon can provide great transparent prints as compared to many of its competitors.
It allows you to print models that need to show the inner parts and details clearly. It is quite expensive as compared to Anycubic Plant-Based Clear Resin due to the effective formula of this resin.
One user managed to get a clear resin print even with 30 minutes of UV exposure which is more than impressive.
Its amazing features include:
- Higher Precision and Accuracy
- Low Shrinkage less than 2%
- Quick Printing
- Fast Curing
- High Strength
- Low Odor
Shake well before use as usual and make sure that you pay proper attention to the post-curing process because it plays an extremely important role in bringing transparency.
To summarize:
- Get some clear resin, either Anycubic Eco Resin or IFUN Clear Resin
- Test the normal exposure time with the Resin Validation Test print
- Wash the print with a good cleaner like the Yellow Magic 7
- Dry the clear resin print and apply one or a combination of the above methods (resin coating, spray coating, manual sanding)
- Minimize UV light exposure as much as you can when curing
- Enjoy your transparent resin 3D print!
3D Fiber Printer Yellow 1.75mm PLA 1KG Roll
JavaScript seems to be disabled in your browser.
You must have JavaScript enabled in your browser to utilize the functionality of this website.
Proceed to Checkout
Total price
$0.00
Basket 0
Want free shipping? click here Learn more!
{{/findAutocomplete}}
SKU: {{sku}} {{#isFreeshippingEnabled}} Free shipping on eligible orders {{/isFreeshippingEnabled}}
{{#isDiscountFlag1Enabled}}
{{/isDiscountFlag1Enabled}} {{#isDiscountFlag2Enabled}}
{{/isDiscountFlag2Enabled}} {{#isDiscountFlag3Enabled}}
{{/isDiscountFlag3Enabled}} {{#isDiscountFlag4Enabled}}
{{/isDiscountFlag4Enabled}} {{#isDiscountFlag5Enabled}}
{{/isDiscountFlag5Enabled}} {{#isDiscountFlag6Enabled}}
{{/isDiscountFlag6Enabled}} {{#isDiscountFlag7Enabled}}
{{/isDiscountFlag7Enabled}} {{#isDiscountFlag8Enabled}}
{{/isDiscountFlag8Enabled}} {{#isDiscountFlag9Enabled}}
{{/isDiscountFlag9isProhibited}} More {{/isProhibited}} {{/is_combo_product}} {{#isProhibited}}
We are sorry, this product is not available in your country
{{/isProhibited}}
{{#hbk_price. stock_2_group_0_original_formated}} {{hbk_price.stock_2_group_0_original_formated_label}} {{hbk_price.stock_2_group_0_original_formated}} {{/hbk_price.stock_2_group_0_original_formated}} {{#is_combo_product}} {{hbk_price.stock_2_group_0_combo_price_label}} {{/is_combo_product}} {{hbk_price.stock_2_group_0_formated}} {{#hbk_price.stock_2_group_0_original_formated}} {{hbk_price.stock_2_group_0_you_save_formated_label}} {{hbk_price.stock_2_group_0_you_save_formated}} {{/hbk_price.stock_2_group_0_original_formated}}
ABS plastic for 3D printer Bestfilament Yellow 1 kg (1.75 mm)
ABS plastic for 3D printer Bestfilament Yellow 1 kg (1.
 75 mm)
 Color yellow. Diameter 1.75 mm. Thread weight 1 kg
Goods receipt notice
Article: st_abs_1kg_1.75_yellow Categories: Bestfilament, ABS (acrylonitrile butadiene styrene) Tags: abs, Bestfilament
- Description
- Details
- Origin of goods
- Reviews (0)
Description
Material type ABS
Color yellow.
Diameter 1.75 mm. Thread weight 1 kg.
ABS (acrylonitrile butadiene styrene) is an impact resistant technical thermoplastic resin derived from petroleum products.
One of the most popular 3D printing filaments. ABS plastic is more flexible than PLA and can be processed well. The printed product can be sanded, coated with primer, and later with acrylic paint. Processing with acetone allows you to smooth out the bumps characteristic of 3D printing (“steps”).
Due to its high strength, ABS plastic is suitable for printing structural elements, housings, and mechanism elements. ABS printing will require good ventilation in the room as the plastic has an odor. If you need odorless plastic, use PLA or everyone's favorite PETG.
Advantages of ABS Bestfilament:
- Wide color palette.
- Easy to sand and paint.
- Post-processing with acetone is possible to smooth out the "steps" of the layers.
- Parts can be held together with superglue.
- The deviation of the diameter of the rod within one coil is not more than 0.02 mm.
Specifications:
- Hardness: 5/10
- Durability: 8/10
- Density: 1040 kg/m3
- Softening point - 98°C
- Hardness (Rockwell) - R109
- Nominal elongation at break - 12%
- Bending strength - 65 MPa
- Flexural modulus - 2.
 1 GPa
1 GPa - Operating temperature - 80°C
- Printing accuracy - ± 1%
- Shrinkage in the manufacture of products - up to 0.8%
- Moisture absorption - 0.24%
Recommended print settings for ABS Bestfilament:
Extruder temperature: 230-260°C
Bed temperature: 90-110°C
Print speed: 40-60 mm/s
required for small parts)
Retract: Yes
Printer body: Closed
Print shrinkage: 0.4%
Solvents: Dichloroethane, dichloromethane, acetone, ethyl acetate glue varnish or a solution of ABS plastic in acetone.
Tip from Mir3D:
To improve the quality of printed products, we recommend drying the plastic before use.
The origin of the goods
Country production: Russian Federation
Manufacturer:
Homestail LLC
Legal address: 634021 Tomsk, 49/B building 3, Russian Federation 9000
Importer Importer in the Republic of Belarus:
IE Shalashenko Evgenia Aleksandrovna
Legal address: 222728, Minsk region Dzerzhinsky district, Shatili village, st.