Upbox 3d printer software
What 3D printers can match or beat the UP Box? - No category - Talk Manufacturing
kylerwinters
#1
Instead of going the injection molding route my boss bought 6 UP Box 3d printers. We are printing in ABS @.15mm layers and the end product has been beautiful. I manage the printers and the OEM software is terrible. It only lets you do one task with one printer at a time and has no debugging like I could do with Marlin. My workplace is looking at getting 20-30 printers in the next week or two. I’m trying to avoid the upbox route due to the shear amount time involved in using the software. We are also looking at the TAZ 6 with enclosures but I’m worried I wont be able to get the quality I’m we are getting currently. We have a Taz 5 with a .3mm nozzle. Today I just started to try and dial the slicer settings in to see how it would compare. Is there any 3D printers that can match or beat the UP Box in terms of surface quality and ease of support removal. Thank you!
Steelmans
#2
@kylerwinters I’ve had many FDM printers from Makerbots through to Cubicons and nothing compares to the support removal on UP printers. You can try to replicate it with other printers and slicing with Simplify3D but it still isn’t a good.
The print quality of the Cubicon Single (and Single Plus) is the best I have seen but, as with many printers, the software lets it down and support is poor because it is based on an old version of Cura.
The best software by a long way, work flow wise for multiple printers is AutoMaker for the CEL Robox but that is a very different machine. The new Robox Dual can use PolySupport or similar but again is based on an old version of Cura so can’t have a support roof like the old seen on UP printers.
cobnut
#3
What about Zortrax? I’ve not used their printers but I understand their support removal is supposed to be pretty good, and they’re fully enclosed so should be OK with ABS.
If it’s surface quality you’re looking for, then SLA is really the way to go, but you’re limited in terms of material options.
edservices
#4
My ex-employer has 2 Upbox printers, connected via a USB hub to a single laptop. When doing large job (multiple parts), I’ll select one printer, set parameter, send a job, then select another and send another job, no problem. I have a personal Upbox+ as well. I assume you are using UP Studio?
Anyway, I don’t completely understand your complaint. Were you…
1. Wanting to do additional task with a printer while it was printing? Why? The only tasks you can do while printing are PAUSE or STOP, not sure what else you want to do. Or…
2. Trying to engage multiple printer at the same time to do the same job? Don’t think any software that comes with any 3D printer can do such thing. I’m not a software developer but I do know each device have unique hardware ID (mouse/keyboard/printer/etc.) and communication between devices has to be addressed individually. In this case the PC has to first engage, then send a print job, to one printer at a time. Not possible to mass-sending a print job and expect every printer on the same network to pick up and do the job! May end up very badly if this is the case… A specially written software may be able to automatically switch device/printer and send the same print job over an over again but doubt such software exist in commercial market. By the way, after you’ve sent a job to a printer, I suspect it would take more than an hour to finish? Taking additional 3 or maybe 5 minutes to setup another printer, then another, then another, while the previous ones were printing isn’t really a waste of time, is it? Just my thought…
Have not came across debugging tool on UP STUDIO, so far no need for such feature (for me).
Lab 3Dnatives: UP Box 3D Printer Test
Published on February 22, 2018 by Jamie D.
Since being recently unveiled, the UP Box is one of the most anticipated desktop FDM 3D printers at the moment. While TierTime‘s previous 3D printers were widely acclaimed by the community, will their new models live up to the hype? The UP Box is stated to be 30% faster and 50% more accurate than the UP Plus 2, so we investigated.
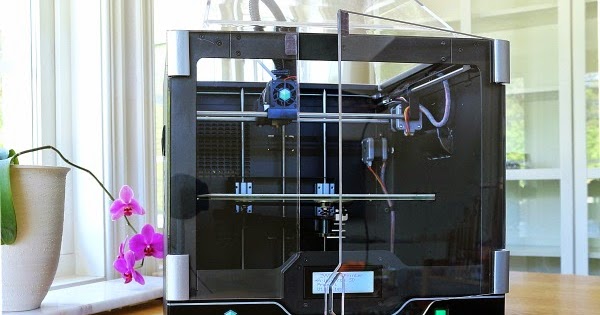
The Up! Box has a sleek, modern style.
1. Unpacking
On first inspection, the Up Box’s box depicts a rather large machine. The 3D printer comes well-protected in the packaging and is accompanied by the necessary equipment for long printing sessions. The Up Box comes with 3 printing trays with a build volume of 20.5 x 25.5 cm, a power cable with transformer, a USB cable, a 500g ABS coil, a spatula, a pair of cutting pliers, a pair of gloves, various screwdriver keys, screws, and a spare nozzle. The 3D printer also comes with an instruction manual for whichever language you speak.
The different accessories and instruction manual that comes with the UP Box.
With dimensions of 48.6 x 49.5 x 52 cm, the orange and black colorway, and rounded shapes, Tiertime have modernised their machines. The front view of the Up Box shows their logo which changes color during printing. The upper part is equipped with a hatch which facilitates the loading of filament, while the coil fits on the right side of the machine.
Several pieces of the Up Box are 3D printed from black ABS, mostly situated inside the machine.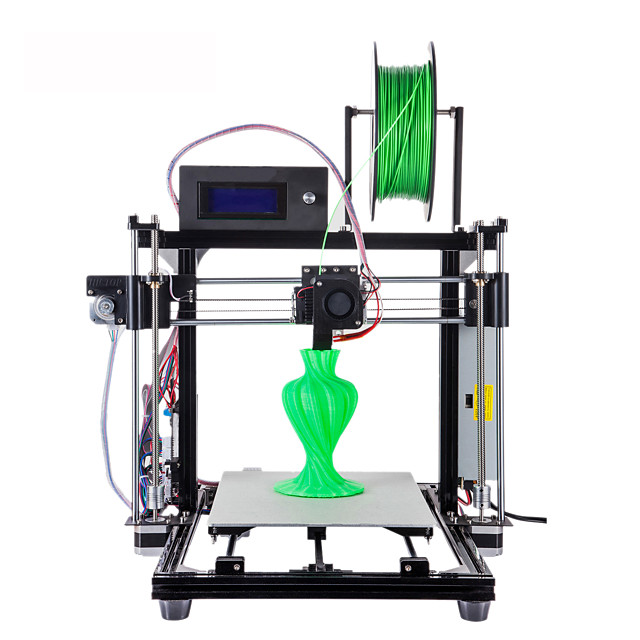 This is perhaps proof of the Up Box’s print quality. There is also a small, round case located on the left inside the machine. This is an air filtration system that requires changing every 6 months of 300 hours of printing. This contraption negates any smell resulting from printing ABS.
There is a negative point however. The lack of an SD card reader is frustrating, as even if you an safely disconnect a USB cable when 3D printing, it is still more awkward than just being able to use an SD card.
Opening of the Up! Box by the top cover
2. Installation
You firstly need to fix the heated plate into place, as the Up Box also prints in ABS as well as PLA. This can easily be fixed into place with the fastening system.
You then need to install the filament spool. This slips under the magnetic black part on the right of the UP Box. This is very simple to do, requiring only two small clicks to load the filament, loaded left of the extruder and close to the upper fan. A protective area would have helped here as it would have prevented the risk of accidentally breaking the blades.
A close-up of the Up Box’s extruder.
3. Software
The UP! software is the proprietary 3D software that comes with Tiertime brand printers. The software is very simple and compatible with Windows and Mac. You can download the latest versions HERE.
Once installed, we switch to automatic adjustment and calibration on the software. The motor next to the extruder will use the sensor to take the 9 measurements in under 2 minutes and ensure the tray is ready for use. Adjusting the nozzle height is also simple and quick. If you wish to fine-tune these steps, you can change these settings manually as you wish.
The software Up! works with all 3D printers from Tiertime
The Up software and app allows you to manage, visualise, and position your models. It also includes all the necessary parameteres such as model generation, filling, layer thickness, support angle, space between models, printing speed, and more. Once the 3D file has been sliced by the software, you will be able to see the estimated printing time and the quantity of material it will require.
The 3 control buttons on the side of the Up Box allow you to pause or cancel printing instantly. You can also start the pre-heating of the tray or change the filament using the central button. Our only criticism of the software are the aesthetics. The Up! software can’t compete with the graphics from Cura or MakerBot Desktop.
4. Printing
We didn’t find any problems during the printing process. We have posted examples of some 3D prints made on the Up Box below. First are the TreeFrog prints designed by MorenaP, printed in 100 and 200 microns. The top 2 white frogs are printed in ABS, whilst the 3 others are printed in PLA.
We also printed the torture test that tests a variety of accuracies and offsets of the 3D printer. Note that supports can be removed very quickly and easily.
If you enjoyed this 3D printer test, you can read all our other tests here.
What do you think of the UP Box? Let us know in a comment below or on our Facebook and Twitter pages! Don’t forget to sign up for our free weekly Newsletter, with all the latest news in 3D printing delivered straight to your inbox!
Up Box First, I found one of them on the side of the road, dusted with rain. While he was figuring out if he was a worker, he got acquainted with all the service companies in Moscow (and a couple in Siberia, hello to them) and with a lot of offices that sell these devices in Moscow (then there were no more than 20).
Now I have the honor to write, most likely the very first review of the new UP BOX (at the time of writing, I did not find any English-language reviews).
The Chinese did their best this time too. They invited Italian designers and now the printer does not look like a sewing machine, it is very stylish (which is worth the graceful slope of the front panel), they packed their 8 years of experience in creating industrial 3d printers in this BOX, made a bold visual interface and took care to equip the printer with a system filtration (and heating) of air and minimized noise to the level of a cooler on a laptop. A plus in karma for Chinese engineers.
The UP mini, UP Plus and UP Plus 2 3d printers were and still are great workhorses. Many prototyping agencies bought half a dozen printers, lined them up on shelves several stories high, and printed non-stop.
Here are some of the awards from MAKE Magazine:
(as well as the MakeFare 2015 New York and Audience Award at the 3D Print Expo in Paris)
Company Profile
Beijing Tiertime Technology Co. , Ltd. (Tiertime) is Asia's largest 3D printer manufacturer. Offices in Beijing, California and New York.
Founded in 2003 and produced industrial 3d printers. In 2012, the Up Plus desktop printer was launched.
Industrial printers
Industrial models:
Inspire S Series, Inspire d Series, Inspire a Series
9000 9,
Up B. Announcement:
It all started with the New York exhibition in September 2014, where the Chinese presented a working sample of a new 3d printer:
0055 renders pictures.
Vase printed on UP mini and UP BOX
Appearance:
more stylish photos
And just recently, the very first Up Box arrived in Russia:
The first thing that impressed me was the size: 485 (W) x 520 (H) x 495 (D) mm, weight - 20 kg.
The second is quietness.
Third - the interface, namely - three buttons and the absence of the usual display, all information is given in an analog way - by the progress bar and the color of the lights. There is no language discrimination.
And here is the instruction for decoding the signals:
Remarkably, in case of an error, each letter carries its own message.
Here are the control buttons. There are three of them, but you can click on them in different ways.
All main control functions are placed on the printer body. It can be controlled without even connecting to a computer. For example, you can print the previous printed model by pressing just 2 buttons.
Instructions are located on the top cover, which can be opened even during printing:
Instructions will be translated into Russian soon
This is what you see when you open the top cover:
Boards, cables, axles - everything is done flawlessly. Each cable and part is marked TierTime
But what you can see when the printer is working:
Now the printer is more like a MakerBot and Ultimaker - the platform moves only along the Z axis
But the front door cannot be opened during printing. Inside there is a powerful "hair dryer" that heats the insides.
It's not actually a hair dryer, it's “Air HEPA smart system” is a unique air filtration system that absorbs all unpleasant odors and fumes that may occur during printing.
The temperature uniform distribution and stabilization system in the chamber, adopted from the TierTime line of industrial 3D printers, makes print quality even better, helps to avoid most of the main printing problems, such as plastic sticking from the platform, cracks, deformations.
The next surprise is the size of the platform (255mm x 205mm), while the construction area is 255 x 205 x 205mm
Compared to platforms with UP plus and UP Plus 2
Fully automated platform calibration in all axes . No manual intervention is required.
The Teflon-coated perforated platform (a patented invention by TierTime) further increases adhesion (from lat. adhaesio - sticking) and, therefore, the stability and stability of the model.
New mechanism for fastening the platform, now you do not need to use clothespins:
The bolts are not completely tightened, and the platform is attached to the wall like a Soviet shelf
Modified extruder with a replaceable nozzle. Gives a layer thickness of 0.1/0.15/0.20 /0.25 /0.30 /0.35 /0.40 mm:
Unusually and stylishly placed coil with plastic. On the right wall:
Reduces the risk of “chewing” a foreign object from the desktop, and the cat will not attack the coil
The power supply is still huge (110-240VAC, 50-60 Hz, 180W) wall - renewed brains.
The software has remained practically the same (available in Russian):
Added the "Turbo" mode. This is a super fast print feature for creating quick "sketch" prints at the fastest speed and no padding. Model outline only.
And platform size increased:
<
img src="habrastorage.org/files/87b/7fd/764/87b7fd764b0b493588dfb41a4cc06de8.jpg"/>
“Smart Support Technology” is a smart support technology, a patented algorithm that allows you to calculate and build supports only in the most necessary places, easily print the most complex objects and easily separate supporting structures.
A few more words about the software:
- Own software. Simplicity and at the same time multifunctional. Suitable for beginner 3D printing experts.
- Has a built-in slicer (that is, all the necessary tools are collected in one software, and not scattered across several different programs). Designed for both Windows (the latest version of the software has built-in drivers for Win 8.1, which allows you to get started right away), and for Mac OSX.

- Automatic creation of supports and backings, allowing even the most complex models to be printed
- Unique Surface mode allows for ultra-thin models to be printed
- Variable print speed: 10 to 130 cm3/h
- Possibility to adjust model filling and material consumption
- Print Quality Adjustment
- Prints equally well not only with ABS and PLA plastics, but also with special materials such as rubber, plastic with the effect of "cement", "wood", HIPS, Nylon, etc.!
- Possibility to change the color of the plastic during printing, which makes it possible to create multi-color models
- Universal thread thickness - 1.75mm
- Includes white ABS reel (0.5kg)
Outlet
- Design, quietness, air filtration and closed chamber. 3D printers can now be safely installed in schools, offices and design studios
- Platform size, temperature support and automatic platform adjustment.
 And this means you can print even the most complex samples at a very high level
 - Simple software, smart supports, easy nozzle and platform change. Performing minimal maintenance simply and quickly
- Once again design, illumination and ease of operation. Everything is closer to the ideal.
- Price — 139,000 rubles
Thanks to 3DPhome, the official representative of TierTime in Russia and the CIS, for providing the printer for review.
UP BOX! or How I transplanted a palm tree :)
Hello! I'll tell you a little story about my palm tree :)
There was a palm tree, its pot was printed on Printbox3D One, almost in the entire possible size of the desktop. So the palm tree lived for about a year, I understood that there was less and less space for it in the pot, so it was decided to print a new house for the palm tree, and in order for it to last for a long time, it must be large, strong and most importantly unusual.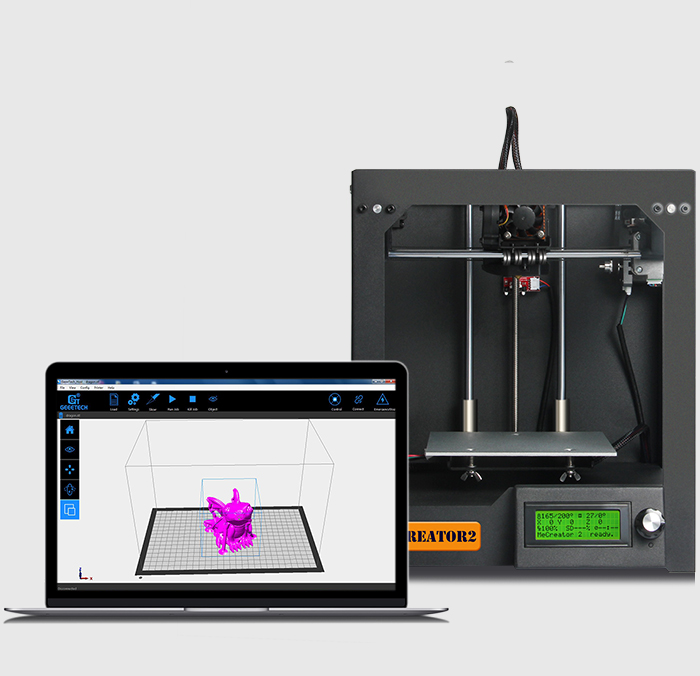
After a little searching for options, my Indian friends from the 3D Tribe company suggested that I use a brand new printer model, namely a brand new UP Box.
Of course, I decided not to miss the chance and play with it to the fullest, or at least try to learn it to the maximum.
I decided to approach the 'testing' of the printer not as an experienced user of a 3d printer with software knowledge, but to try to renounce my previous knowledge to the maximum, and tried to pretend to be a beginner in this matter.
I'll start in order, and then how it goes.
I decided not to start printing right away and count the time of the first start out of the box, as the guys from picaso like to do here, but to see the printer in more detail.
The appearance of the printer is simply stunning. This is a really good product, in good packaging, a complete feeling of completeness of the design. Two elegantly opening lids through which you can observe the printing process.![]() Moreover, when printing, you can open the top cover and observe openly how and what is happening there, but this will not work with the front cover. A certain magnetic sensor is installed on the front cover door, which, when the cover is opened during printing, pauses printing and asks to close the door. All this is done to keep the heat in the chamber so that the ABS models do not crack, in principle a logical solution, but a bit inconvenient, as for me.
Moreover, when printing, you can open the top cover and observe openly how and what is happening there, but this will not work with the front cover. A certain magnetic sensor is installed on the front cover door, which, when the cover is opened during printing, pauses printing and asks to close the door. All this is done to keep the heat in the chamber so that the ABS models do not crack, in principle a logical solution, but a bit inconvenient, as for me.
Then I climbed to look at the extruder, and was pleasantly surprised. The extruder is removable, and no engineering skill is needed to remove it, it is connected by one connector and rests on three magnets. Now this is probably not very relevant, but maybe in the future, some new extruder will be released for flex printing, you just change the extruder in half a minute and print with flex.
Then my eyes fell on the desktop, it was wearing a native perforated platform, I was very pleased with the fastening, the platform is held not on stationery clothespins, but on bolts that are tightly fixed on the platform.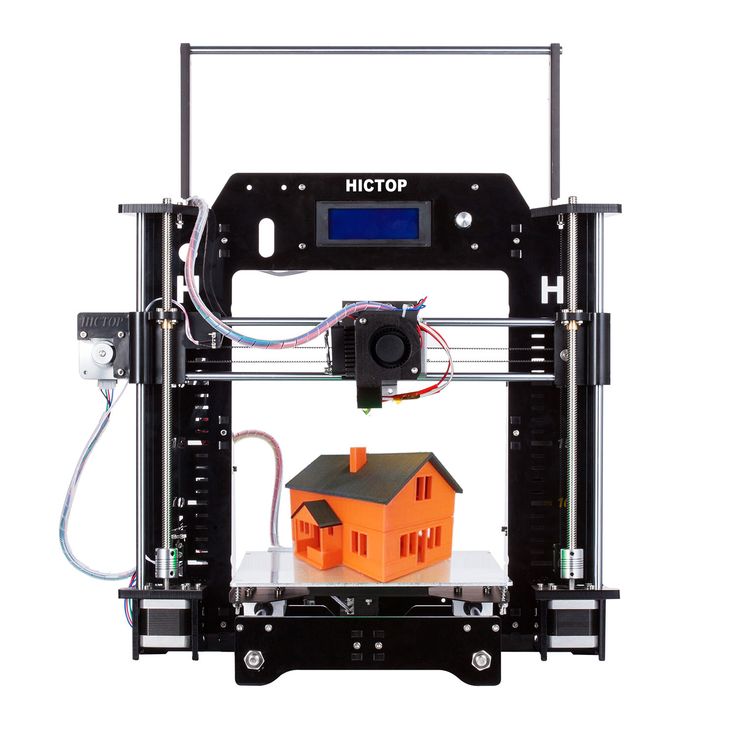 A very convenient and quick solution. True, there are some disadvantages, as in my opinion, if you print without a raft, then the first layer of the model that falls on the bolt holes will turn out, roughly speaking, not very good. Also included is a smooth platform, apparently for PLA printing. If desired, it will be possible to put on glass and the first layer will be beautiful.
And I think the last observation is a place for a plastic coil. Made very neatly and ergonomically, the cover that closes the coil is held on magnets and is very pleasant to remove / install in its place. But, the place for the coil is designed for a native plastic coil weighing 0.5 kg, therefore it is narrower than the coils we are used to seeing. A third-party coil from BF stands up well, but you can’t put on the cover anymore, though if this doesn’t suit someone, you can print any external holder, there are a lot of these ready-made models on the Internet and printing with any plastic from any manufacturer.
All printer control is carried out either from a PC or from three buttons on the side of the printer, all key combinations are drawn on the top cover, as well as the color signals of the printer, which are displayed in the inscription 'UP BOX' on the desktop of the printer.
After looking at the printer and turning it around, I decided to connect it and see how its control is arranged and finally print it.
I downloaded native utility from the official site and installed it.
The UP BOX software turned out to be not entirely clear to me, since I have a lot of experience using various slic3r, cura, kiss. And here, somehow everything is simple, loaded the model, scaled it if necessary and clicked Print. Next, you choose the wall thickness, layer height, supports if necessary, and that's it, the printer is ready to print. A very handy program for those who have no idea what a 3D printer is.
After scrolling through the utility a bit, I realized it was time to start printing.