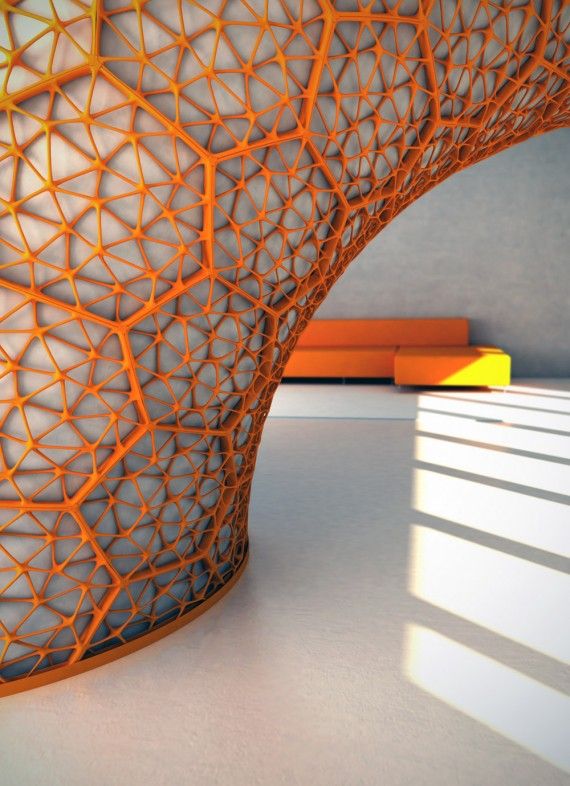
3D print structure
3D Printing Support Structures: A Complete Guide
17 October 2018
Support structures are one of the most important elements for successfully producing 3D printed parts. While a key advantage of 3D printing is its ability to create freeform and intricate geometries, much of the design freedom offered by 3D printing wouldn’t be possible without the use of support structures.
Supports are vital for preventing distortion and collapse within a part, among other uses. In this tutorial, we’ll be taking a deep dive into the world of support structures, the requirements for different technologies and how to minimise their usage.
What are support structures?
Used with almost all 3D printing technologies, support structures help to ensure the printability of a part during the 3D printing process. Supports can help to prevent part deformation, secure a part to the printing bed and ensure that parts are attached to the main body of the printed part. Much like scaffolding, supports are used during the printing process and then subsequently removed.
Parts with complex design features like overhangs, holes and bridges are more challenging to print. Since these features are likely to collapse if not supported, support structures can aid in preventing collapse during the printing process.
Supports can also work as heat dissipators in processes where high temperatures are involved, as is the case with metal 3D printing. With metal AM technologies, support structures help to draw heat away from the part preventing residual stresses that occur due to high temperatures experienced during the printing process.
When do you need support structures?
Almost all 3D printing technologies will require you to consider support structures to some degree. So let’s have a closer look at how 3D printing methods differ in using supports:
| Technology | Material used | Support required? |
|---|---|---|
| Stereolithography (SLA) | Photopolymers | Yes |
| Fused Deposition Modelling (FDM) | Thermoplastics | Yes |
| Selective laser melting (SLM) Direct Metal Laser Sintering (DMLS) Direct Energy Deposition (DED) Electron Beam Melting (EBM) | Metal materials | Yes |
| Material Jetting | Powder materials | Yes |
| Binder Jetting | Powder materials | No |
| Selective laser sintering (SLS) | Powder materials | No |
Metal 3D Printing
Powder Bed Fusion (SLM, DMLS, EBM)
With metal powder bed fusion technologies, 3D printed parts are surrounded by loose powder.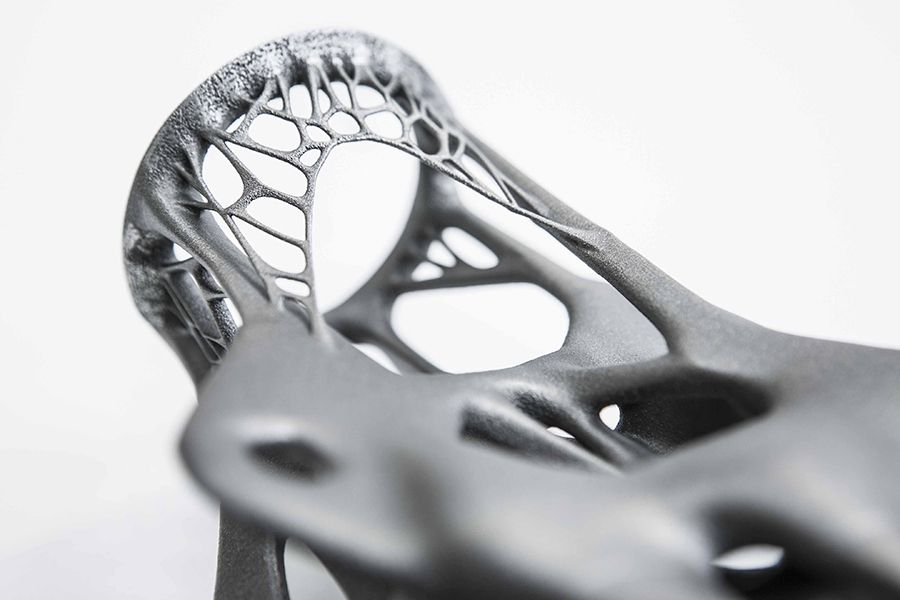 However, these technologies will always require supports to ensure that they are anchored to the base plate and to mitigate the effects caused by residual stresses.
Supports can be added to the contact area between the bottom of a printed part and the print bed, which is where the highest concentration of residual stress is found. This helps to draw heat away from the part, thereby minimising thermal distortion which can lead to cracking, warping, sagging, delamination, and shrinkage.
Take a look at our guide to common issues faced in metal 3D printing to find out how to avoid these problems.
Direct Energy Deposition (DED)
Direct Energy Deposition covers a series of metal 3D printing technologies that work by melting and fusing material to create a part. Like powder bed fusion technologies, parts printed using DED will always require support structures to ensure part stability, the printability of complex features and for thermal dissipation.
Design
When designing supports for parts produced with powder bed fusion techniques, it’s important to ensure that they are easy to access, otherwise they cannot be removed during the post-processing stage. Supports for metal parts are generally printed as lattice structures. In this manner, they act as a heat sink, transferring heat away from the part, allowing it to cool in a more controlled manner and avoid distortion as well as save material costs and build time.
Adding more supports will generally result in a more accurate part, but this will also add greater costs and post-processing time.
Interestingly, Dutch company MX3D has created a metal 3D printing tool that can print metal parts without supports, by combining a multi-axis robotic arm with a welding machine.
Support removal
Support removal for metal parts is typically more difficult than polymer-based processes, and cutting tools will typically be required. Additionally, if the appearance of the finished part is important, metals parts will also require post-processing (e.g. sanding) to achieve a smooth surface finish.
Stereolithography (SLA)
[Image credit: Formlabs]
Stereolithography works by using a light source to solidify liquid resins. For this technology, support structures are required to securely attach a part to the print bed and to prevent warping.
Supports used in SLA are very thin and, to save material, only slightly touch the part. This means that they are quite easy to remove manually, either by hand or using pliers. However, since removing supports can leave marks on the final part, sanding will be needed to ensure a smooth surface finish.
Design
SLA is very often used for applications where appearance or a smooth surface finish is required, such as visual prototypes, moulds and hearing aids. If this is the case, it’s important to design your part to ensure that the forward-facing areas of your print are not in contact with support structures. This is where part orientation comes in.
Part orientation is an important consideration in the design stage, as reorienting a part can help reduce the amount of support needed. For example, horizontal orientation for a tubular part will take up more space and therefore require more supports. In contrast, a vertical orientation of the same part will ensure that the part is attached to the build plate with minimum supports needed.
Fused Deposition Modelling (FDM)
With Fused Deposition Modelling, parts are created by extruding heated filament layer by layer. As each layer cools, it solidifies, bonding with the previous layer.
Design
Each layer in the FDM process is printed slightly protruding so that it can expand beyond its previous layer width. This means features with angles up to 45° can be created without supports. However, when an FDM part has an overhang of more than 45° or includes features like bridges and protruding surfaces greater than 5mm, supports will be needed.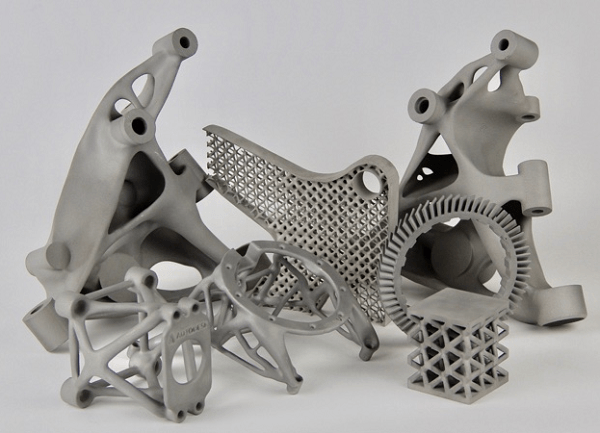 FDM supports can take the form of a lattice structure or, alternatively a tree-like structure.
Support removal
One of the techniques used to remove supports from FDM prints is a dissolvable solution. Typically, industrial FDM 3D printers (with two print heads) use dissolvable support materials like Polyvinyl Alcohol (PVA) and High-Impact Polystyrene (HIPS). These are added by a separate extruder.
While PVA dissolves in water, it can be affected by temperature changes, which can lead to blockages int he printer head. HIPS dissolves in limonene instead of water, and is less susceptible to temperature changes.
Using dissolvable supports is hands-free and doesn’t require further sanding and polishing to remove the marks left by supports. On the flip side, this process can be time-consuming (taking several hours) and costly.
Material Jetting
When using Material Jetting 3D printers, the supports are always required for overhangs, regardless of the angle.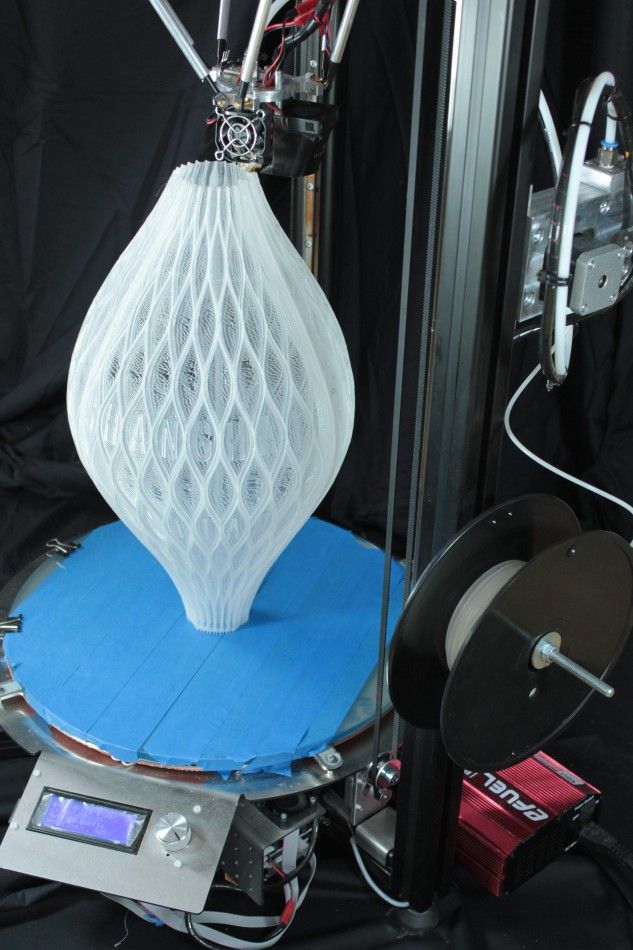 However, these supports are typically built in a different material, which is either water-soluble or can be easily removed afterwards using pressurised water or by immersion in an ultrasonic bath.
Selective Laser Sintering and Binder Jetting
Selective Laser Sintering and Binder Jetting are both powder-based technologies that typically do not require any support structures. This is because with both technologies, printed parts are encapsulated in the loose powder which takes the role of the support structure.
The downside of supports
Despite the necessity of support structures, they will add additional printing time and material costs to the overall production process.
Material costs: Support generation will require additional material during the printing process, increasing both time and material costs. It’s also important to note that supports are not reusable and usually disposed of, resulting in a wasted material.
Limited geometric freedom: when removing supports manually, hand or tool access needs to be factored in when designing supports. This, however, can restrict you from designing certain geometries which will require support structures but cannot be reached by hand or tool.
Extra time: designing a part to accommodate support structures and subsequently designing the supports themselves requires extra time. Although there are software offering automated support generation, creating support structures for industrial applications will still need some manual touchup and a certain level of design expertise.
Additional post-processing: Once a part is complete, supports will have to be removed, sometimes manually, increasing the time needed for post-processing.
Risk of damage: Bear in mind that removing supports may leave marks on the surface of a part, which can affect its dimensional accuracy and aesthetics. Additionally, when supports are incorrectly placed, for example on fine features, these can break off along with the support structure – ruining a part altogether.
4 ways to reduce supports
It’s generally good practice to reduce the number of supports needed as much as possible. This will help to save on both material costs and production time. Here are 4 top tips on how to minimise their usage, saving you printing time and material.
1. Choose the optimal part orientation
To date, experimenting with part orientation is one of the best ways to reduce the number of support structures needed. Choosing the right part orientation can have a significant impact on the printing time, costs and a part’s surface roughness.
Depending on a part’s orientation (vertical, horizontal or angled), there may be fewer or more support structures needed. Consider a part printed in the shape of the letter T. In its ordinary position, both branches of the letter will collapse without support structures in place. If the part is oriented differently, i.e. ⊥, then supports will not be required.
This example demonstrates that a part can be built up in different ways. Each side of a part can have a different surface attached to the print bed, meaning that the need for supports can vary and be heavily dependent on the orientation of the part.
Another example: when designing a part with hollow tubular features, horizontal orientation will take up more space, while a vertical or angled orientation will save space and reduce the amount of supports needed.
2. Optimise your support structures
When supports cannot be avoided, they should be optimised to use as little material as possible, and to speed up the printing process. For example, topology optimisation can be used to design, supports with lattice structures, reducing the support volume of and saving material.
With many 3D printing processes, commonly used support generation techniques are limited to producing strictly vertical structures. These are not space-efficient, particularly when there are many regions to be supported high above the print bed.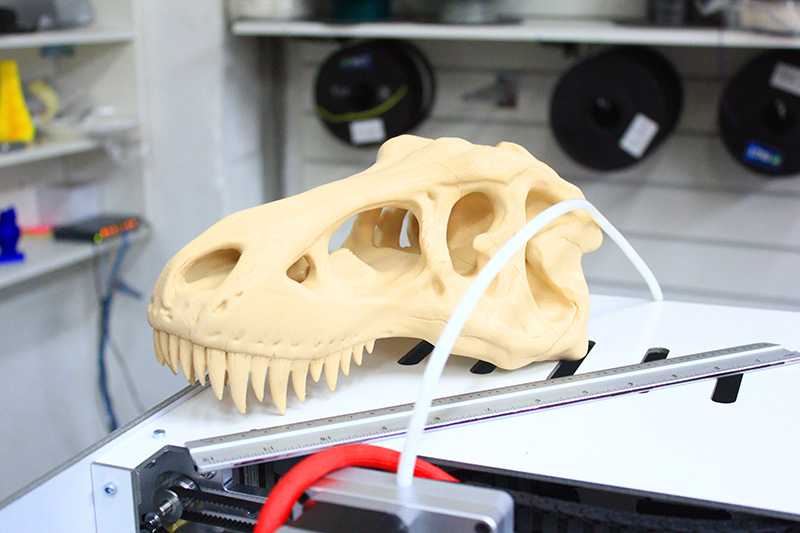
Creating tree-like support structures instead may be a viable alternative. Such supports look like a branching tree and arguably consume 75 % less material compared to straight vertical structures. Autodesk Meshmixer is one of the software tools that can be used to create such structures for FDM, SLA and DMLS processes.
3. Use fillets and chamfers
Using fillets and chamfers can be an alternative solution to creating support structures for overhanging surfaces greater than 45 degrees.
A chamfer is a sloped or angled corner or edge, and a fillet is a rounded corner or edge. Essentially, these features turn an angle that is greater than 45 degrees into an angle that is 45 degrees or less and can be added to either the interior or the exterior of a part.
4. Split your part
For very complex 3D models, it can often make sense to print the part separately and assemble them together afterwards. This will not only reduce the amount of supports but also speed up the printing process while saving material.
However, keep in mind that if the 3D printed parts need to be assembled, they have to be printed in the same direction so that they fit each other properly.
3D printing supports: a necessary evil?
Support structures have long been considered a necessary evil in 3D printing. However, recent advancements in hardware and software are slowly changing this perception.
For example, metal 3D printer manufacturer, Desktop Metal has recently developed and patented ‘separable supports’ for its Studio and Production Systems. These supports for the 3D printed metal parts can be removed by hand. Desktop Metal’s separable supports work by using ceramic powder as the interface layer between the part surface and the support structure. Following the sintering process, the ceramic layer is dissolved so that the support can be easily removed from the part.
Another company aiming to simplify and speed up the support removal step for 3D printed parts is PostProcess Technologies.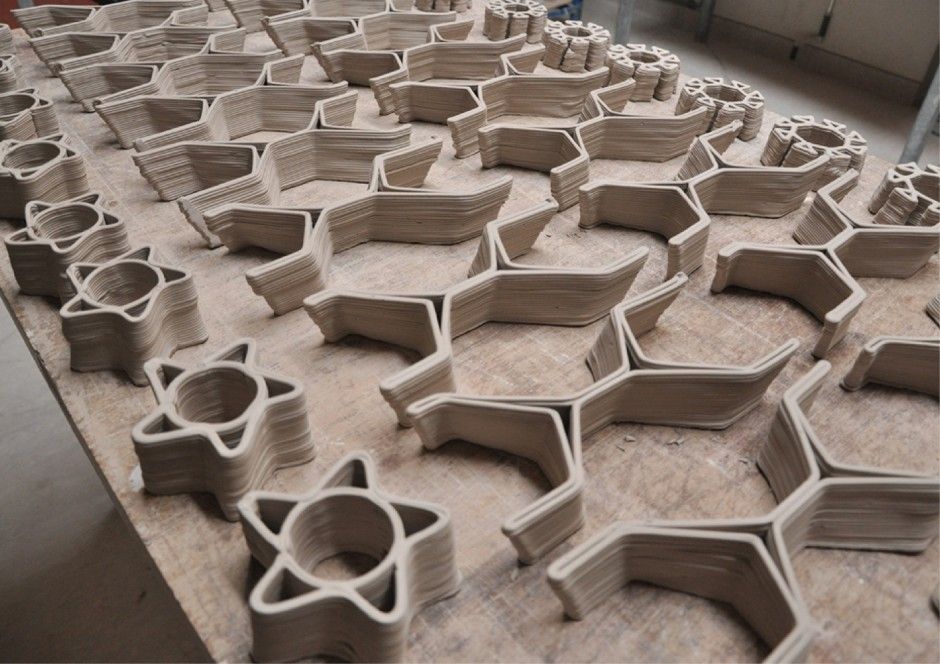 The company offers a range of automated, hands-free support removal solutions for parts additively manufactured by FDM, SLA, PolyJet, and CLIP technologies.
However, one company has stepped even further. Velo3D, the company behind the powder-based Sapphire system, has powered its system with a technology it calls Intelligent Fusion, which enables complex metal parts to be printed with few to zero supports. Using Velo3D’s proprietary simulation software and closed-loop monitoring, parts can be produced with up to five times fewer supports needed compared to other powder-bed metal systems.
Overall, optimising support design and removal are key challenges in making 3D printing workflows faster and simpler. But, as seen from the examples above, the industry is constantly developing solutions to overcome the challenges. Alongside any technology, however, will be the need for greater skill and know-how for successful implementation. Hopefully, this guide has expanded your knowledge on how to use support structures in 3D printing more efficiently, helping to turn them from an enemy into an ally.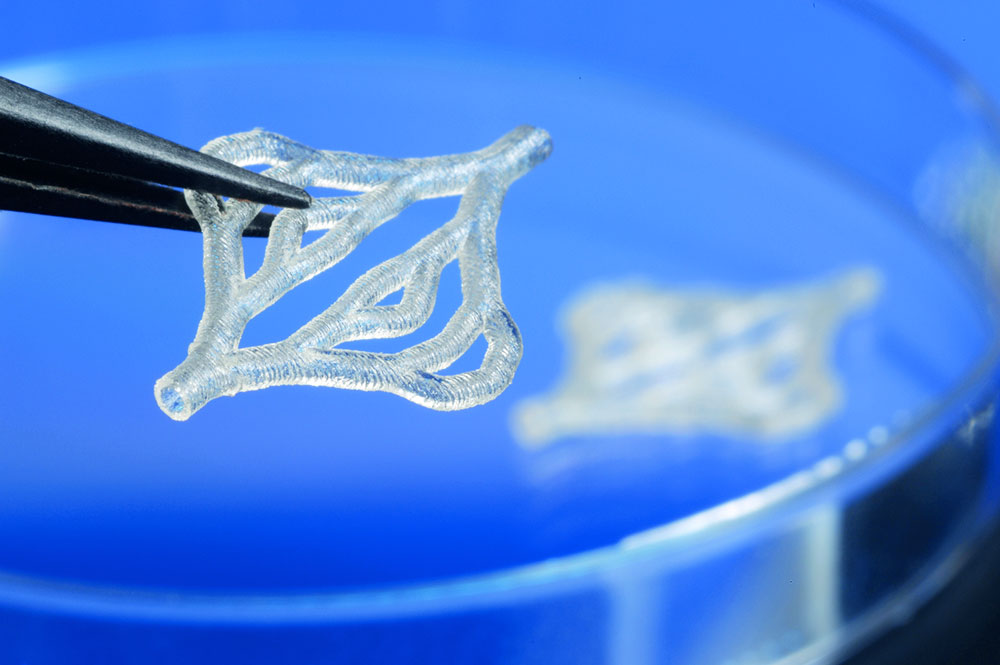
Types of 3D Printers, Materials, and Applications
3D printing or additive manufacturing (AM) technologies create three-dimensional parts from computer-aided design (CAD) models by successively adding material layer by layer until physical part is created.
While 3D printing technologies have been around since the 1980s, recent advances in machinery, materials, and software have made 3D printing accessible to a wider range of businesses, enabling more and more companies to use tools previously limited to a few high-tech industries.
Today, professional, low-cost desktop and benchtop 3D printers accelerate innovation and support businesses in various industries including engineering, manufacturing, dentistry, healthcare, education, entertainment, jewelry, and audiology.
All 3D printing processes start with a CAD model that is sent to software to prepare the design. Depending on the technology, the 3D printer might produce the part layer by layer by solidifying resin or sintering powder. The parts are then removed from the printer and post-processed for the specific application.
See how to go from design to 3D print with the Form 3 SLA 3D printer. This 5-minute video covers the basics of how to use the Form 3, from the software and materials to printing and post-processing.
3D printers create parts from three-dimensional models, the mathematical representations of any three-dimensional surface created using computer-aided design (CAD) software or developed from 3D scan data. The design is then exported as an STL or OBJ file readable by print preparation software.
3D printers include software to specify print settings and slice the digital model into layers that represent horizontal cross-sections of the part. Adjustable printing settings include orientation, support structures (if needed), layer height, and material. Once setup is complete, the software sends the instructions to the printer via a wireless or cable connection.
Some 3D printers use a laser to cure liquid resin into hardened plastic, others fuse small particles of polymer powder at high temperatures to build parts. Most 3D printers can run unattended until the print is complete, and modern systems automatically refill the material required for the parts from cartridges.
With Formlabs 3D printers, an online Dashboard allows you to remotely manage printers, materials, and teams.
Depending on the technology and the material, the printed parts may require rinsing in isopropyl alcohol (IPA) to remove any uncured resin from their surface, post-curing to stabilize mechanical properties, manual work to remove support structures, or cleaning with compressed air or a media blaster to remove excess powder. Some of these processes can be automated with accessories.
3D printed parts can be used directly or post-processed for specific applications and the required finish by machining, priming, painting, fastening or joining. Often, 3D printing also serves as an intermediate step alongside conventional manufacturing methods, such as positives for investment casting jewelry and dental appliances, or molds for custom parts.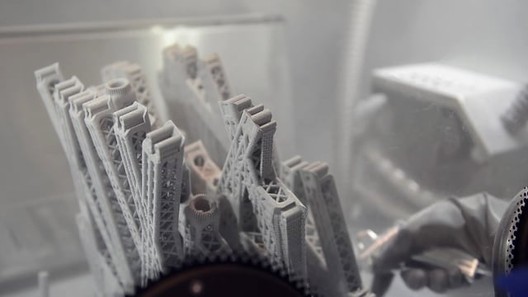
The three most established types of 3D printers for plastics parts are stereolithography (SLA), selective laser sintering (SLS), and fused deposition modeling (FDM). Formlabs offers two professional 3D printing technologies, SLA and SLS, bringing these powerful and accessible industrial fabrication tools into the creative hands of professionals around the world.
Stereolithography was the world’s first 3D printing technology, invented in the 1980s, and is still one of the most popular technologies for professionals. SLA 3D printers use a laser to cure liquid resin into hardened plastic in a process called photopolymerization.
SLA resin 3D printers have become vastly popular for their ability to produce high-accuracy, isotropic, and watertight prototypes and parts in a range of advanced materials with fine features and smooth surface finish. SLA resin formulations offer a wide range of optical, mechanical, and thermal properties to match those of standard, engineering, and industrial thermoplastics.
Resin 3D printing a great option for highly detailed prototypes requiring tight tolerances and smooth surfaces, such as molds, patterns, and functional parts. SLA 3D printers are widely used in a range of industries from engineering and product design to manufacturing, dentistry, jewelry, model making, and education.
- Rapid prototyping
- Functional prototyping
- Concept modeling
- Short-run production
- Dental applications
- Jewelry prototyping and casting
Learn More About SLA 3D Printers
Stereolithography (SLA) 3D printing uses a laser to cure liquid photopolymer resin into solid isotropic parts.
SLA parts have sharp edges, a smooth surface finish, and minimal visible layer lines.
Selective laser sintering (SLS) 3D printers use a high-power laser to sinter small particles of polymer powder into a solid structure. The unfused powder supports the part during printing and eliminates the need for dedicated support structures.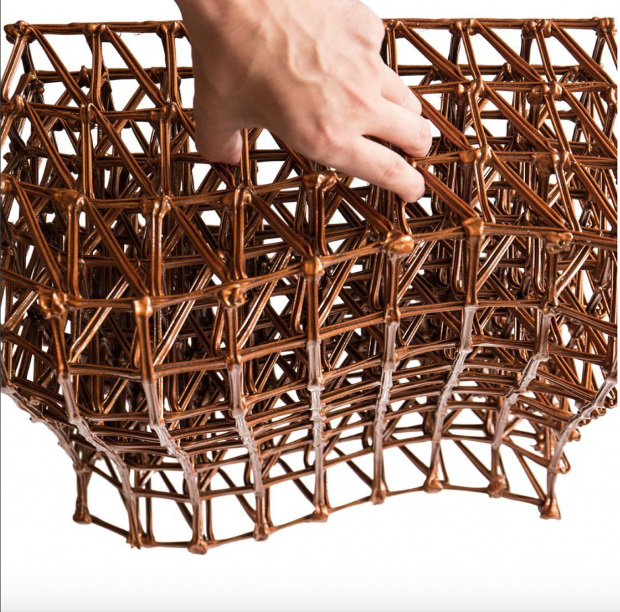 This makes SLS ideal for complex geometries, including interior features, undercuts, thin walls, and negative features. Parts produced with SLS printing have excellent mechanical characteristics, with strength resembling that of injection-molded parts.
The most common material for selective laser sintering is nylon, a popular engineering thermoplastic with excellent mechanical properties. Nylon is lightweight, strong, and flexible, as well as stable against impact, chemicals, heat, UV light, water, and dirt.
The combination of low cost per part, high productivity, and established materials make SLS a popular choice among engineers for functional prototyping, and a cost-effective alternative to injection molding for limited-run or bridge manufacturing.
- Functional prototyping
- End-use parts
- Short-run, bridge, or custom manufacturing
Learn More About SLS 3D Printers
SLS 3D printers use a high-powered laser to fuse small particles of polymer powder.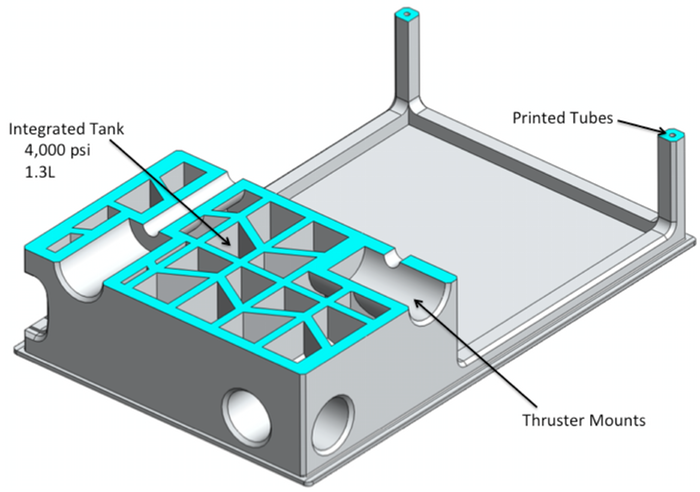
SLS parts have a slightly rough surface finish, but almost no visible layer lines.
Fused deposition modeling (FDM), also known as fused filament fabrication (FFF), is the most widely used type of 3D printing at the consumer level. FDM 3D printers work by extruding thermoplastic filaments, such as ABS (Acrylonitrile Butadiene Styrene), PLA (Polylactic Acid), through a heated nozzle, melting the material and applying the plastic layer by layer to a build platform. Each layer is laid down one at a time until the part is complete.
FDM 3D printers are well-suited for basic proof-of-concept models, as well as quick and low-cost prototyping of simple parts, such as parts that might typically be machined. However, FDM has the lowest resolution and accuracy when compared to SLA or SLS and is not the best option for printing complex designs or parts with intricate features. Higher-quality finishes may be obtained through chemical and mechanical polishing processes. Industrial FDM 3D printers use soluble supports to mitigate some of these issues and offer a wider range of engineering thermoplastics, but they also come at a steep price.
- Basic proof-of-concept models
- Simple prototyping
Learn More About FDM 3D Printers
FDM 3D printers build parts by melting and extruding thermoplastic filament, which a printer nozzle deposits layer by layer in the build area.
FDM parts tend to have visible layer lines and might show inaccuracies around complex features.
Having trouble finding the best 3D printing process for your needs? In this video guide, we compare FDM, SLA, and SLS technologies, the most popular types of 3D printers, across the most important buying considerations.
Each 3D printing process has its own benefits and limitations that make them more suitable for certain applications. This video compares the functional and visual characteristics of FDM, SLA, and SLS printers 3D printers to help you identify the solution that best matches your requirements.
Do you need custom parts or prototypes fast? Compared to outsourcing to service providers or using traditional tools like machining, having a 3D printer in-house can save weeks of lead time.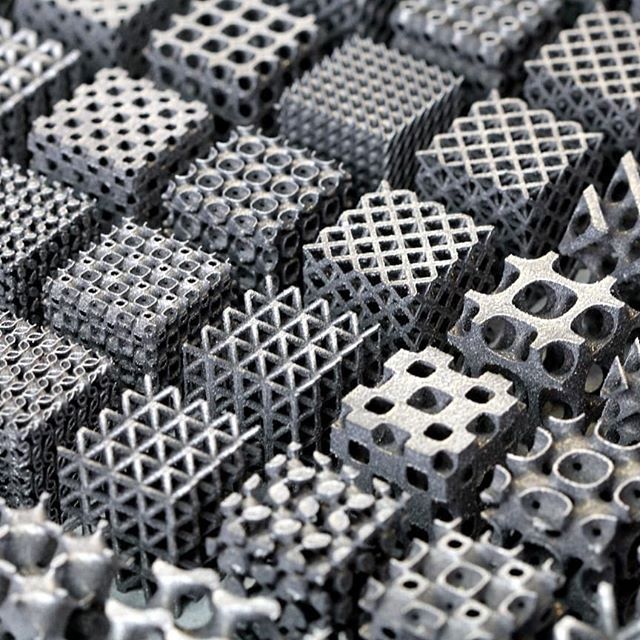 In this video, we compare the speed of FDM, SLA, and SLS 3D printing processes.
Comparing the cost of different 3D printers goes beyond sticker prices—these won’t tell you the full story of how much a 3D printed part will cost. Learn the three factors you need to consider for cost and how they compare across FDM, SLA, and SLS 3D printing technologies.
As additive manufacturing processes build objects by adding material layer by layer, they offer a unique set of advantages over traditional subtractive and formative manufacturing processes.
With traditional manufacturing processes, it can take weeks or months to receive a part. 3D printing turns CAD models into physical parts within a few hours, producing parts and assemblies from one-off concept models to functional prototypes and even small production runs for testing. This allows designers and engineers to develop ideas faster, and helps companies to bring products more quickly to the market.
Engineers at the AMRC turned to 3D printing to rapidly produce 500 high-precision drilling caps used in drilling trials for Airbus, cutting the lead time from weeks to only three days.
With 3D printing, there’s no need for the costly tooling and setup associated with injection molding or machining; the same equipment can be used from prototyping to production to create parts with different geometries. As 3D printing becomes increasingly capable of producing functional end-use parts, it can complement or replace traditional manufacturing methods for a growing range of applications in low- to mid-volumes.
Pankl Racing Systems substituted machined jigs and fixtures with 3D printed parts, decreasing costs by 80-90 percent that resulted in $150,000 in savings.
From shoes to clothes and bicycles, we’re surrounded by products made in limited, uniform sizes as businesses strive to standardize products to make them economical to manufacture. With 3D printing, only the digital design needs to be changed to tailor each product to the customer without additional tooling costs. This transformation first started to gain a foothold in industries where custom fit is essential, such medicine and dentistry, but as 3D printing becomes more affordable, it’s increasingly being used to mass customize consumer products.
Gillette's Razor Maker™ gives consumers the power to create and order customized 3D printed razor handles, with the choice of 48 different designs (and counting), a variety of colors, and the option to add custom text.
3D printing can create complex shapes and parts, such as overhangs, microchannels, and organic shapes, that would be costly or even impossible to produce with traditional manufacturing methods. This provides the opportunity to consolidate assemblies into less individual parts to reduce weight, alleviate weak joints, and cut down on assembly time, unleashing new possibilities for design and engineering.
Nervous System launched the first-ever 3D printed ceramic jewelry line, consisting of intricate designs that would be impossible to manufacture using any other ceramic technique.
Product development is an iterative process that requires multiple rounds of testing, evaluation, and refinement. Finding and fixing design flaws early can help companies avoid costly revisions and tooling changes down the road.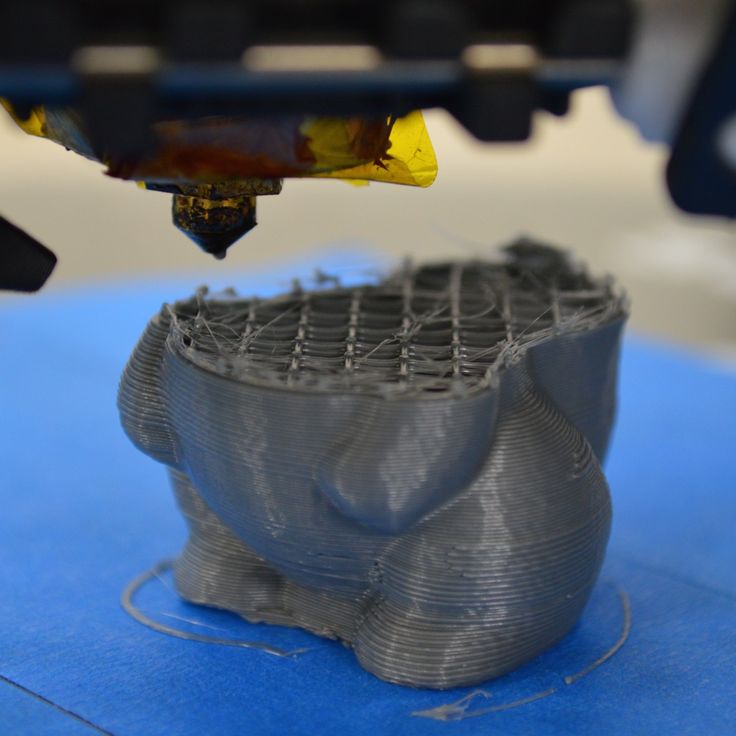 With 3D printing, engineers can thoroughly test prototypes that look and perform like final products, reducing the risks of usability and manufacturability issues before moving into production.
The developers of Plaato, an optically clear airlock for homebrewing, 3D printed 1,000 prototypes to fine tune their design before investing in expensive tooling.
3D printing accelerates innovation and supports businesses across a wide range of industries, including engineering, manufacturing, dentistry, healthcare, education, entertainment, jewelry, audiology, and more.
Rapid prototyping with 3D printing empowers engineers and product designers to turn ideas into realistic proofs of concept, advance these concepts to high-fidelity prototypes that look and work like final products, and guide products through a series of validation stages toward mass production.
Applications:
- Rapid prototyping
- Communication models
- Manufacturing validation
Learn More
Manufacturers automate production processes and streamline workflows by prototyping tooling and directly 3D printing custom tools, molds, and manufacturing aids at far lower costs and lead times than with traditional manufacturing. This reduces manufacturing costs and defects, increases quality, speeds up assembly, and maximizes labor effectiveness.
Applications:
- Jig and fixtures
- Tooling
- Molding (injection molding, thermoforming, silicone molding, overmolding)
- Metal casting
- Short run production
- Mass customization
Learn More
3D printers are multifunctional tools for immersive learning and advanced research. They can encourage creativity and expose students to professional-level technology while supporting STEAM curricula across science, engineering, art, and design.
Applications:
- Models for STEAM curricula
- Fab labs and makerspaces
- Custom research setups
Learn More
Affordable, professional-grade desktop 3D printing helps doctors deliver treatments and devices customized to better serve each unique individual, opening the door to high-impact medical applications while saving organizations significant time and costs from the lab to the operating room.
Applications:
- Anatomical models for surgical planning
- Medical devices and surgical instruments
- Insoles and orthotics
Learn More
High definition physical models are widely used in sculpting, character modeling, and prop making. 3D printed parts have starred in stop-motion films, video games, bespoke costumes, and even special effects for blockbuster movies.
Applications:
- Hyper-realistic sculptures
- Character models
- Props
Learn More
Jewelry professionals use CAD and 3D printing to rapidly prototype designs, fit clients, and produce large batches of ready-to-cast pieces. Digital tools allow for the creation of consistent, sharply detailed pieces without the tediousness and variability of wax carving.
Applications:
- Lost-wax casting (investment casting)
- Fitting pieces
- Master patterns for rubber molding
Learn More
Hearing specialists and ear mold labs use digital workflows and 3D printing to manufacture higher quality custom ear products more consistently, and at higher volumes for applications like behind-the-ear hearing aids, hearing protection, and custom earplugs and earbuds.
Applications:
- Soft silicone ear molds
- Custom earbuds
Learn More
The market for 3D printing materials is wide and ever-growing, with printers for everything from plastics to metals, and even food and live tissue in development. Formlabs offers the following range of photopolymer materials for the desktop.
Standard 3D printing materials provide high resolution, fine features, and a smooth surface finish ideal for rapid prototyping, product development, and general modeling applications.
These materials are available in Black, White, and Grey with a matte finish and opaque appearance, Clear for any parts requiring translucency, and as a Color Kit to match almost any custom color.
Explore Standard Materials
3D printing materials for engineering, manufacturing, and product design are formulated to provide advanced functionality, withstand extensive testing, perform under stress, and remain stable over time.
Engineering materials are ideal for 3D printing strong, precise concept models and prototypes to rapidly iterating through designs, assess form and fit, and optimize manufacturing processes.
Explore Engineering Materials
Medical resins empower hospitals to create patient-specific parts in a day at the point of care and support R&D for medical devices. These resins are formulated for 3D printing anatomical models, medical device and device components, and surgical planning and implant sizing tools.
Explore Jewelry Materials
Jewelry resins are formulated to capture breathtaking detail and create custom jewelry cost-effectively. These resins are ideal for jewelry prototyping and casting jewelry, as well as vulcanized rubber and RTV molding.
Explore Jewelry Materials
Specialty Resins push the limits of 3D printing, featuring advanced materials with unique mechanical properties that expand what’s possible with in-house fabrication on our stereolithography 3D printers.
Explore Specialty Materials
In recent years, high-resolution industrial 3D printers have become more affordable, intuitive, and reliable. As a result, the technology is now accessible to more businesses. Read our in-depth guide about 3D printer costs, or try our interactive tool to see if this technology makes economic sense your business.
Calculate Your Savings
New to 3D printing? Explore our guides to learn about the key terms and specific characteristics of 3D printing to find the best solution for your business.
For further questions,
Explore 3D Printing Resources
All about 3D printing. additive manufacturing. Basic concepts.
- 1 Technology
- 2 Terminology
- 3 Fundamentals
- 4 Printing Technologies
- 5 3D printers
- 6 Application
- 7 Domestic and hobby use
- 8 Clothing
- 9 3D bioprinting
- 10 3D printing of implants and medical devices
- 11 3D printing services
- 12 Research into new applications
- 13 Intellectual Property
- 14 Influence of 3D printing
- 15 Space research
- 16 Social change
- 17 Firearms
Technology
Charles Hull, the father of modern 3D printing
3D printing, or “additive manufacturing”, is the process of creating a digital model of almost any solid three-dimensional shape. 3D printing is based on the concept of building an object in successive layers that display the contours of the model. In fact, 3D printing is the complete opposite of traditional mechanical production and processing methods such as milling or cutting, where the appearance of the product is formed by removing excess material (so-called "subtractive manufacturing").
3D printers are computer-controlled machines that build parts in an additive way. Although 3D printing technology appeared in the 80s of the last century, 3D printers were widely used commercially only in the early 2010s. The first viable 3D printer was created by Charles Hull, one of the founders of 3D Systems Corporation. At the beginning of the 21st century, there was a significant increase in sales, which led to a sharp drop in the cost of devices. According to the consulting firm Wohlers Associates, the global market for 3D printers and related services reached $2.2 billion in 2012, growing by 29%.% compared to 2011.
3D printing technologies are used for prototyping and distributed manufacturing in architecture, construction, industrial design, automotive, aerospace, military-industrial, engineering and medical industries, bioengineering (to create artificial fabrics), fashion and footwear, jewelry, in education, geographic information systems, food industry and many other areas. According to research, open source home 3D printers will allow you to win back the capital costs of your own purchase through the economy of household production of items.
Terminology
Additive manufacturing involves the construction of objects by adding the necessary material, and not by removing excess, as is the case with subtractive methods
The term "additive manufacturing" refers to the technology of creating objects by applying successive layers material. Models made using the additive method can be used at any stage of production - both for the production of prototypes (so-called rapid prototyping) and as finished products themselves (so-called rapid production).__VULCAN__Parkview_Green__Beijing_Design_Week_2015._Courtesy_LCD_and_BJDW-14.jpg?1446040569)
In manufacturing, especially machining, the term "subtractive" implies more traditional methods and is a retronym coined in recent years to distinguish between traditional methods and new additive methods. Although traditional manufacturing has used essentially "additive" methods for centuries (such as riveting, welding, and screwing), they lack a 3D information technology component. Machining, on the other hand, (the production of parts of an exact shape), as a rule, is based on subtractive methods - filing, milling, drilling and grinding.
The term "stereolithography" was defined by Charles Hull in a 1984 patent as "a system for generating three-dimensional objects by layering".
Fundamentals
3D printed models
3D models are created by hand-held computer graphic design or 3D scanning. Hand modeling, or the preparation of geometric data for the creation of 3D computer graphics, is somewhat like sculpture. 3D scanning is the automatic collection and analysis of data from a real object, namely shape, color and other characteristics, with subsequent conversion into a digital three-dimensional model.
Both manual and automatic creation of 3D printed models can be difficult for the average user. In this regard, 3D printed marketplaces have become widespread in recent years. Some of the more popular examples include Shapeways, Thingiverse, and Threeding.
3D printing
The following digital models are used as drawings for 3D printed objects , powder, paper or sheet material, building a 3D model from a series of cross sections. These layers, corresponding to virtual cross-sections in the CAD model, are connected or fused together to create an object of a given shape. The main advantage of this method is the ability to create geometric shapes of almost unlimited complexity.
"Resolution" of the printer means the thickness of the applied layers (Z-axis) and the accuracy of positioning the print head in the horizontal plane (along the X and Y axes).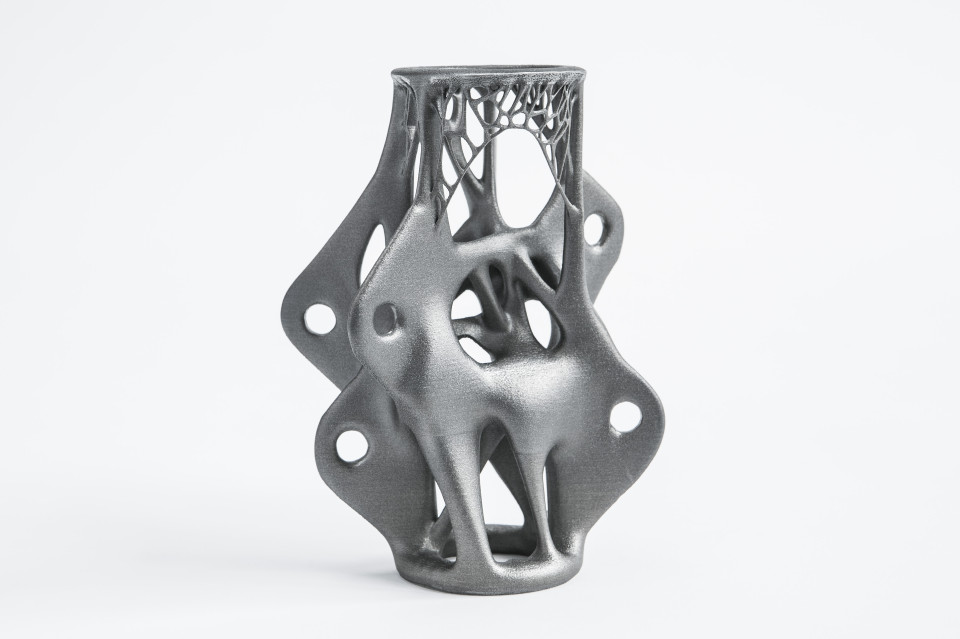 Resolution is measured in DPI (dots per inch) or micrometers (an obsolete term is "micron"). Typical layer thicknesses are 100µm (250 DPI), although some devices like the Objet Connex and 3D Systems ProJet are capable of printing layers as thin as 16µm (1600 DPI). The resolution on the X and Y axes is similar to that of conventional 2D laser printers. A typical particle size is about 50-100µm (510 to 250 DPI) in diameter.
One of the methods for obtaining a digital model is 3D scanning. Pictured here is a MakerBot Digitizer
3D Scanner Building a model using modern technology takes hours to days, depending on the method used and the size and complexity of the model. Industrial additive systems can typically reduce time to a few hours, but it all depends on the type of plant and the size and number of models produced at the same time.
Traditional manufacturing methods such as injection molding can be cheaper for large-scale production of polymer products, but additive manufacturing has advantages in small-scale production, allowing for higher production rates and design flexibility, along with increased unit cost. In addition, desktop 3D printers allow designers and developers to create concept models and prototypes without leaving the office.
Machining
FDM Type 3D Printers
Although the resolution of the printers is adequate for most projects, printing slightly oversized objects and then subtractively machining them with high-precision tools allows you to create models of increased accuracy.
The LUMEX Avance-25 is an example of devices with a similar combined manufacturing and processing method. Some additive manufacturing methods allow for the use of multiple materials, as well as different colors, within a single production run. Many of the 3D printers use "supports" or "supports" during printing. Supports are needed to build model fragments that are not in contact with the underlying layers or the working platform. The supports themselves are not part of the given model, and upon completion of printing, they either break off (in the case of using the same material as for printing the model itself), or dissolve (usually in water or acetone - depending on the material used to create the supports). ).
).
Printing technologies
Since the late 1970s, several 3D printing methods have come into being. The first printers were large, expensive and very limited.
Complete skull with supports not yet removed
A wide variety of additive manufacturing methods are now available. The main differences are in the layering method and consumables used. Some methods rely on melting or softening materials to create layers: these include selective laser sintering (SLS), selective laser melting (SLM), direct metal laser sintering (DMLS), fusing deposition printing (FDM or FFF). Another trend has been the production of solid models by polymerization of liquid materials, known as stereolithography (SLA).
In the case of lamination of sheet materials (LOM), thin layers of material are cut to the required contour, and then joined into a single whole. Paper, polymers and metals can be used as LOM materials. Each of these methods has its own advantages and disadvantages, which is why some companies offer a choice of consumables for building a model - polymer or powder. LOM printers often use regular office paper to build durable prototypes. The key points when choosing the right device are the speed of printing, the price of a 3D printer, the cost of printing prototypes, as well as the cost and range of compatible consumables.
Printers that produce full-fledged metal models are quite expensive, but it is possible to use less expensive devices for the production of molds and subsequent casting of metal parts.
The main methods of additive manufacturing are presented in the table:
| | ||
| Method | Technology | Materials used |
| Extrusion | Fused deposition modeling (FDM or FFF) | Thermoplastics (such as polylactide (PLA), acrylonitrile butadiene styrene (ABS), etc. ) ) |
| Wire | Manufacture of arbitrary shapes by electron beam fusing (EBFȝ) | Virtually all metal alloys |
| Powder | Direct Metal Laser Sintering (DMLS) | Virtually all metal alloys |
| Electron Beam Melting (EBM) | Titanium alloys | |
| Selective laser melting (SLM) | Titanium alloys, cobalt-chromium alloys, stainless steel, aluminum | |
| Selective heat sintering (SHS) | Powder thermoplastics | |
| Selective laser sintering (SLS) | Thermoplastics, metal powders, ceramic powders | |
| Inkjet | 3D Inkjet Printing (3DP) | Gypsum, plastics, metal powders, sand mixtures |
| Lamination | Lamination Object Manufacturing (LOM) | Paper, metal foil, plastic film |
| Polymerization | Stereolithography (SLA) | Photopolymers |
| Digital LED Projection (DLP) | Photopolymers |
Extrusion Printing
Fused Deposition Modeling (FDM/FFF) was developed by S. Scott Trump in the late 1980s and commercialized in the 1990s by Stratasys, a company of which Trump is credited as one of the founders. Due to the expiration of the patent, there is a large community of open source 3D printer developers as well as commercial organizations using the technology. As a consequence, the cost of devices has decreased by two orders of magnitude since the invention of the technology.
3D printers range from simple do-it-yourself printers to plastic...
Fusion printing process involves the creation of layers by extrusion of a fast-curing material in the form of microdrops or thin jets. Typically, consumable material (such as thermoplastic) comes in the form of spools from which the material is fed into a printhead called an "extruder". The extruder heats the material to its melting temperature, followed by extrusion of the molten mass through a nozzle. The extruder itself is driven by stepper motors or servomotors to position the print head in three planes. The movement of the extruder is controlled by a manufacturing software (CAM) linked to a microcontroller.
A variety of polymers are used as consumables, including acrylonitrile butadiene styrene (ABS), polycarbonate (PC), polylactide (PLA), high pressure polyethylene (HDPE), polycarbonate-ABS blends, polyphenylene sulfone (PPSU), etc. Typically, polymer supplied in the form of a filler made of pure plastic. There are several projects in the 3D printing enthusiast community that aim to recycle used plastic into materials for 3D printing. The projects are based on the production of consumables using shredders and melters.
FDM/FFF technology has certain limitations on the complexity of the generated geometric shapes. For example, the creation of suspended structures (such as stalactites) is impossible by itself, due to the lack of necessary support. This limitation is compensated by the creation of temporary support structures that are removed after printing is completed.
Powder print
Selective sintering of powder materials is one of the additive manufacturing methods. Model layers are drawn (sintered) in a thin layer of powdered material, after which the work platform is lowered and a new layer of powder is applied. The process is repeated until a complete model is obtained. The unused material remains in the working chamber and serves to support the overhanging layers without requiring the creation of special supports.
The most common methods are based on laser sintering: selective laser sintering (SLS) for working with metals and polymers (e.g. polyamide (PA), glass fiber reinforced polyamide (PA-GF), glass fiber (GF), polyetheretherketone) (PEEK), polystyrene (PS), alumide, carbon fiber reinforced polyamide (Carbonmide), elastomers) and direct metal laser sintering (DMLS).
... to expensive industrial plants working with metals
Selective Laser Sintering (SLS) was developed and patented by Carl Deckard and Joseph Beeman of the University of Texas at Austin in the mid-1080s under the auspices of the Defense Advanced Research Projects Agency (DARPA). A similar method was patented by R. F. Householder in 1979, but has not been commercialized.
Selective laser melting (SLM) is characterized by the fact that it does not sinter, but actually melts the powder at the points of contact with a powerful laser beam, allowing you to create high-density materials that are similar in terms of mechanical characteristics to products made by traditional methods.
Electron Beam Melting (EBM) is a similar method for the additive manufacturing of metal parts (eg titanium alloys) but using electron beams instead of lasers. EBM is based on melting metal powders layer by layer in a vacuum chamber. In contrast to sintering at temperatures below melting thresholds, models made by electron beam melting are characterized by solidity with a corresponding high strength.
Finally, there is the 3D inkjet printing method. In this case, a binder is applied to thin layers of powder (gypsum or plastic) in accordance with the contours of successive layers of the digital model.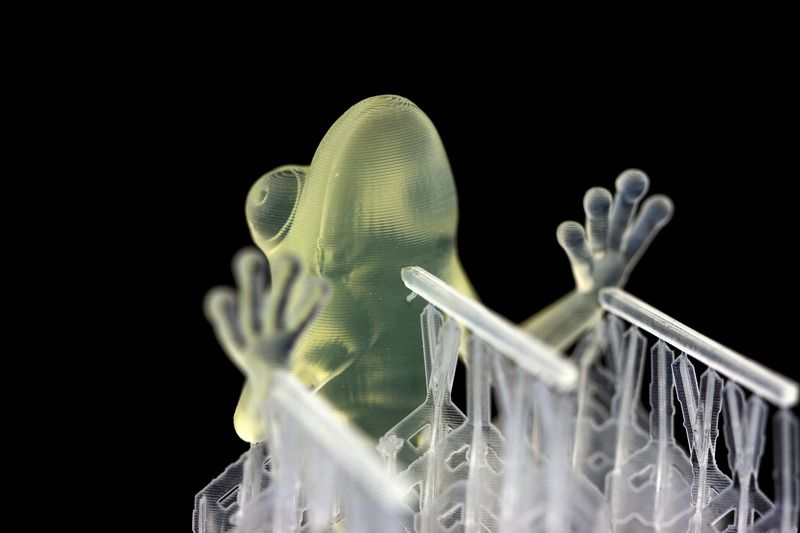 The process is repeated until the finished model is obtained. The technology provides a wide range of applications, including the creation of color models, suspended structures, the use of elastomers. The design of models can be strengthened by subsequent impregnation with wax or polymers.
Lamination
FDM 3D printers are the most popular among hobbyists and enthusiasts
Some printers use paper as a material for building models, thereby reducing the cost of printing. Such devices experienced the peak of popularity in the 1990s. The technology consists in cutting out the layers of the model from paper using a carbon dioxide laser with simultaneous lamination of the contours to form the finished product.
In 2005, Mcor Technologies Ltd developed a variant of the technology that uses plain office paper, a tungsten carbide blade instead of a laser, and selective adhesive application.
There are also device variants that laminate thin metal and plastic sheets.
Photopolymerization
3D printing allows you to create functional monolithic parts of complex geometric shapes, like this jet nozzle
Stereolithography technology was patented by Charles Hull in 1986. Photopolymerization is primarily used in stereolithography (SLA) to create solid objects from liquid materials. This method differs significantly from previous attempts, from the sculptural portraits of François Willem (1830-1905) to photopolymerization by the Matsubara method (1974).
The Digital Projection Method (DLP) uses liquid photopolymer resins that are cured by exposure to ultraviolet light emitted from digital projectors in a coated working chamber. After the material has hardened, the working platform is immersed to a depth equal to the thickness of one layer, and the liquid polymer is irradiated again. The procedure is repeated until the completion of the model building. An example of a rapid prototyping system using digital LED projectors is the EnvisionTEC Perfactory.
Inkjet printers (eg Objet PolyJet) spray thin layers (16-30µm) of photopolymer onto the build platform until a complete model is obtained. Each layer is irradiated with an ultraviolet beam until hardened. The result is a model ready for immediate use. The gel-like support material used to support the components of geometrically complex models is removed after the model has been handcrafted and washed. The technology allows the use of elastomers.
Ultra-precise detailing of models can be achieved using multiphoton polymerization. This method is reduced to drawing the contours of a three-dimensional object with a focused laser beam. Due to non-linear photoexcitation, the material solidifies only at the focusing points of the laser beam. This method makes it easy to achieve resolutions above 100 µm, as well as build complex structures with moving and interacting parts.
Another popular method is curing with LED projectors or "projection stereolithography".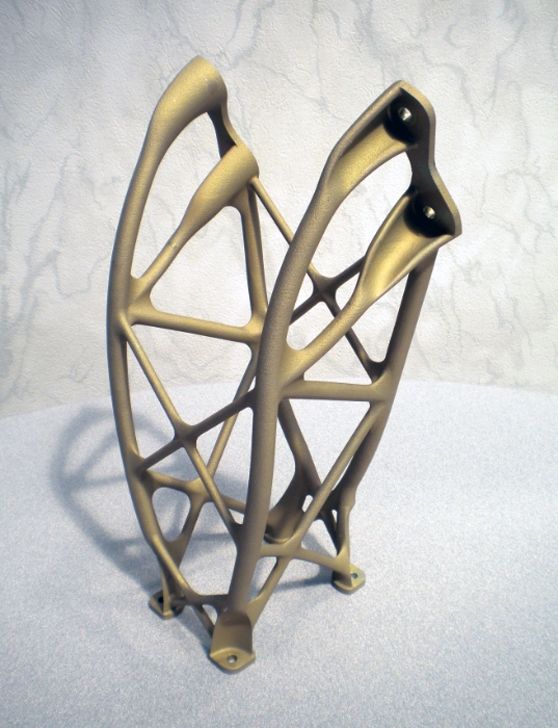
Projection stereolithography
This method involves dividing a 3D digital model into horizontal layers, converting each layer into a 2D projection similar to photomasks. The 2D images are projected onto successive layers of photopolymer resin that harden according to the projected contours.
In some systems, the projectors are located at the bottom, helping to level the surface of the photopolymer material when the model moves vertically (in this case, the build platform with the applied layers moves up, rather than sinking into the material) and reduces the production cycle to minutes instead of hours.
The technology allows you to create models with layers of several materials with different curing rates.
Some commercial models, such as the Objet Connex, apply resin using small nozzles.
3D printers
Industrial plants
Industrial adoption of additive manufacturing is proceeding at a rapid pace.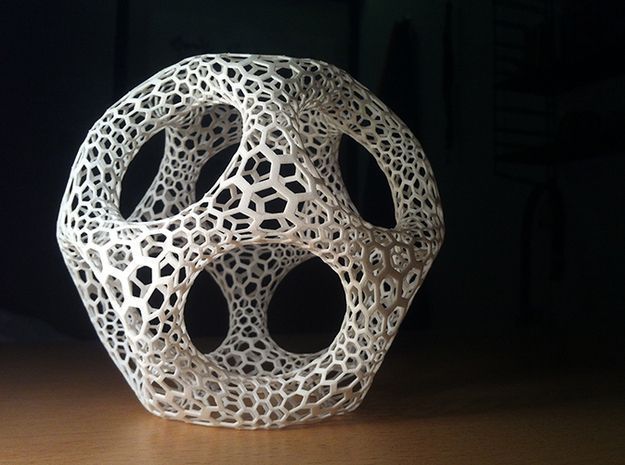 For example, US-Israeli joint venture Stratasys supplies $2,000 to $500,000 additive manufacturing machines, while General Electric uses high-end machines to produce gas turbine parts.
Home appliances
LOM takes papier-mâché to the next level The development of 3D printers for home use is being pursued by a growing number of companies and enthusiasts. Most of the work is done by amateurs for their own and public needs, with help from the academic community and hackers.
The oldest and longest running project in the desktop 3D printer category is RepRap. The RepRap project aims to create free and open source (FOSH) 3D printers provided under the GNU General Public License. RepRap devices are capable of printing custom-designed plastic components that can be used to build clones of the original device. Individual RepRap devices have been successfully applied to the production of printed circuit boards and metal parts.
Due to the open access to drawings of RepRap printers, many of the projects adopt the technical solutions of analogues, thus creating a semblance of an ecosystem consisting mostly of freely modifiable devices.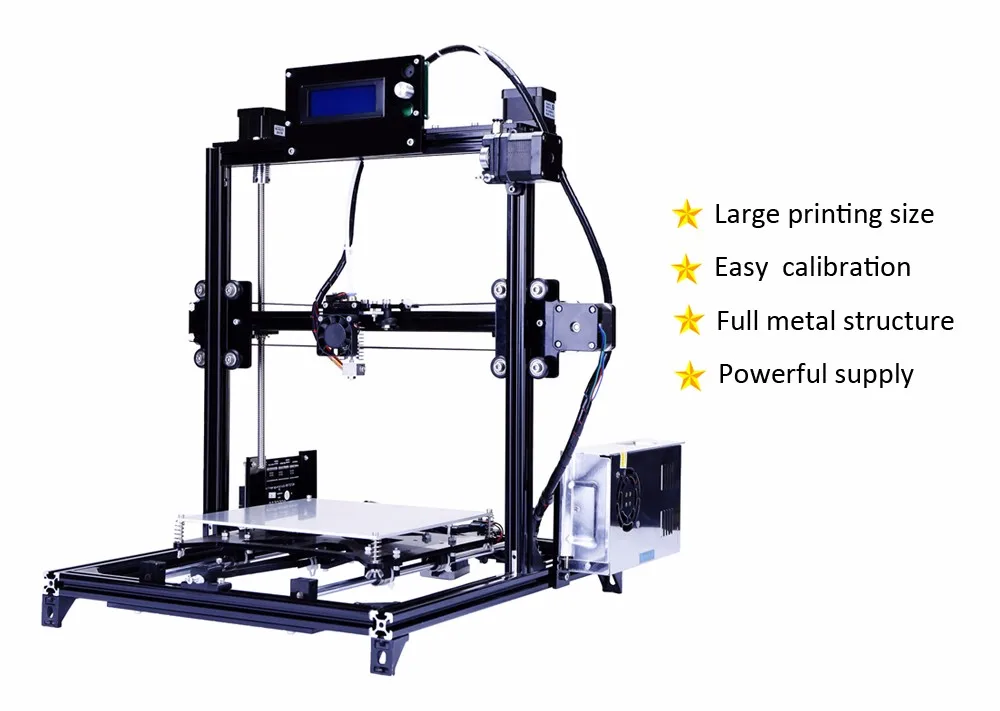 The wide availability of open source designs only encourages variations. On the other hand, there is a significant variation in the level of quality and complexity of both the designs themselves and the devices manufactured on their basis. The rapid development of open source 3D printers is leading to a rise in popularity and the emergence of public and commercial portals (such as Thingiverse or Cubify) offering a variety of printable 3D designs. In addition, the development of technology contributes to the sustainable development of local economies through the possibility of using locally available materials for the production of printers.
Stereolithographic 3D printers are often used in dental prosthetics
The cost of 3D printers has been declining at a significant rate since about 2010: devices that cost $20,000 at the time are now $1,000 or less. Many companies and individual developers are already offering budget RepRap kits under $500. The Fab@Home open source project has led to the development of general purpose printers capable of printing anything that can be squeezed through a nozzle, from chocolate to silicone putty and chemicals.
Printers based on this design have been available as kits since 2012 for around $2,000. Some 3D printers, including the mUVe 3D and Lumifold, are designed to be as affordable as possible from the start, with the Peachy Printer being priced around $100. .
Professional Kickstarter funded printers often perform well: Rapide 3D printers are quiet and fumes free at $1499. 3D Doodler's '3D Printing Pen' Raised $2.3M in Kickstarter donations, with a selling price of $99 for the device itself. True, it is difficult to call the 3D Doodler a full-fledged 3D printer.
3D Systems Cube is a popular consumer 3D printer
As prices drop, 3D printers are becoming more attractive for home production. In addition, home use of 3D printing technologies can reduce the environmental footprint of industry by reducing the volume of consumables and the energy and fuel costs of transporting materials and goods.
Parallel to the creation of home 3D-printing devices, the development of devices for processing household waste into printed materials, the so-called. Recyclebot. For example, the commercial model Filastrucer was designed to recycle plastic waste (shampoo bottles, milk containers) into inexpensive consumables for RepRap printers. Such methods of household disposal are not only practical, but also have a positive impact on the ecological situation.
The development and customization of RepRap 3D printers has created a new category of semi-professional printers for small businesses. Manufacturers such as Solidoodle, RoBo and RepRapPro offer kits for under $1,000. The accuracy of these devices is between industrial and consumer printers. Recently, high-performance printers using a delta-shaped coordinate system, or the so-called "delta robots", are gaining popularity. Some companies offer software to support printers made by other companies.
Application
The use of LED projectors helps reduce the cost of stereolithography printers. In the illustration DLP printer Nova
3D printing allows you to equalize the cost of producing one part and mass production, which poses a threat to large-scale economies. The impact of 3D printing may be similar to the introduction of manufacture. In the 1450s, no one could predict the consequences of the printing press, in the 1750s, no one took the steam engine seriously, and transistors 19The 50s seemed like a curious innovation. But the technology continues to evolve and is likely to have an impact on every scientific and industrial branch with which it comes into contact.
The earliest application of additive manufacturing can be considered rapid prototyping, aimed at reducing the development time of new parts and devices compared to earlier subtractive methods (too slow and expensive). The improvement of additive manufacturing technologies leads to their spread in various fields of science and industry. The production of parts previously only available through machining is now possible through additive methods, and at a better price.
Applications include breadboarding, prototyping, molding, architecture, education, mapping, healthcare, retail, etc.
Industrial applications:
Rapid prototyping: Industrial 3D printers have been used for rapid prototyping and research since the early 1980s . As a rule, these are quite large installations using powder metals, sand mixtures, plastics and paper. Such devices are often used by universities and commercial companies.
Advances in rapid prototyping have led to the creation of materials suitable for the production of final products, which in turn has contributed to the development of 3D production of finished products as an alternative to traditional methods. One of the advantages of fast production is the relatively low cost of manufacturing small batches.
Rapid production: Rapid production remains a fairly new method whose possibilities have not yet been fully explored. Nevertheless, many experts tend to consider rapid production a new level of technology. Some of the most promising areas for rapid prototyping to adapt to rapid manufacturing are selective laser sintering (SLS) and direct metal sintering (DMLS).
Bulk customization: Some companies offer services for customizing objects using simplified software and then creating unique custom 3D models. One of the most popular areas was the manufacture of cell phone cases. In particular, Nokia has made publicly available the designs of its phone cases for user customization and 3D printing.
Mass production: The current low print speed of 3D printers limits their use in mass production. To combat this shortcoming, some FDM devices are equipped with multiple extruders, allowing you to print different colors, different polymers, and even create several models at the same time. In general, this approach increases productivity without requiring the use of multiple printers - a single microcontroller is enough to operate multiple printheads.
Devices with multiple extruders allow the creation of several identical objects from only one digital model, but at the same time allow the use of different materials and colors.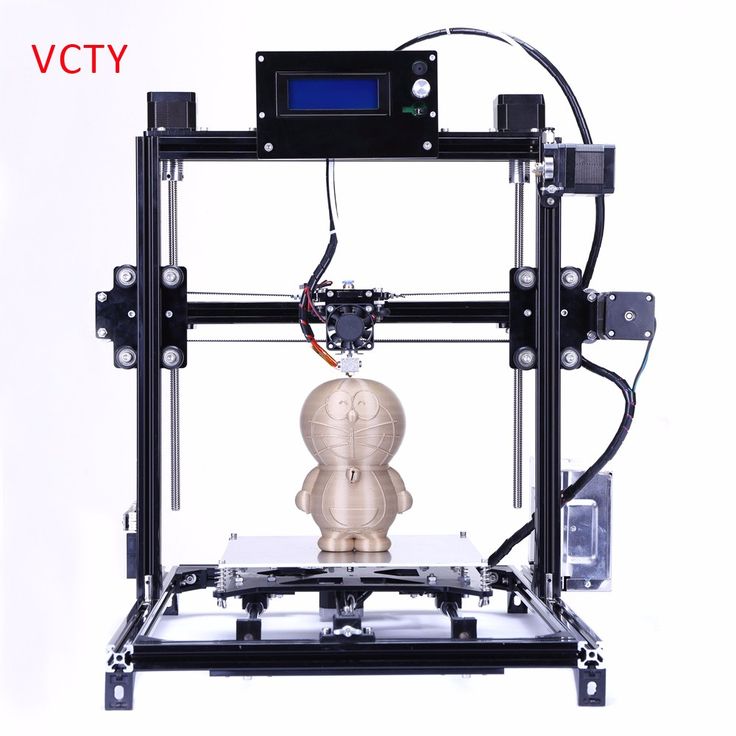 The print speed increases in proportion to the number of print heads. In addition, certain energy savings are achieved through the use of a common working chamber, which often requires heating. Together, these two points reduce the cost of the process.
Many printers are equipped with dual printheads, however this configuration is only used for printing single models in different colors and materials.
Consumer and hobby use
Today, consumer 3D printing mainly attracts the attention of enthusiasts and hobbyists, while practical use is rather limited. However, 3D printers have already been used to print working mechanical clocks, woodworking gears, jewelry, and more. Home 3D printing websites often offer designs for hooks, doorknobs, massage tools, and more.
3D printing is also being used in hobby veterinary medicine and zoology – in 2013, a 3D printed prosthesis allowed a duckling to stand up, and hermit crabs love stylish 3D printed shells.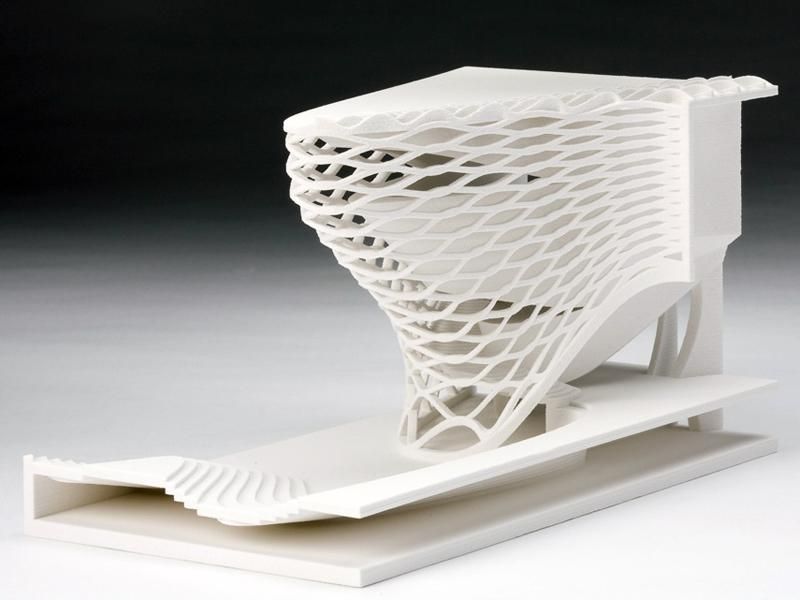 3D printers are widely used for the domestic production of jewelry - necklaces, rings, handbags, etc.
The Fab@Home open project aims to develop general purpose home printers. The devices have been tested in research environments using the latest 3D printing technologies for the production of chemical compounds. The printer can print any material suitable for extrusion from a syringe in the form of a liquid or paste. The development is aimed at the possibility of home production of medicines and household chemicals in remote areas of residence.
Student project OpenReflex resulted in a design for an analog SLR camera suitable for 3D printing.
Clothing
3D printing is gaining ground in the fashion world as couturiers use printers to experiment with swimwear, shoes and dresses. Commercial applications include rapid prototyping and 3D printing of professional athletic shoes - the Vapor Laser Talon for soccer players and New Balance for track and field athletes.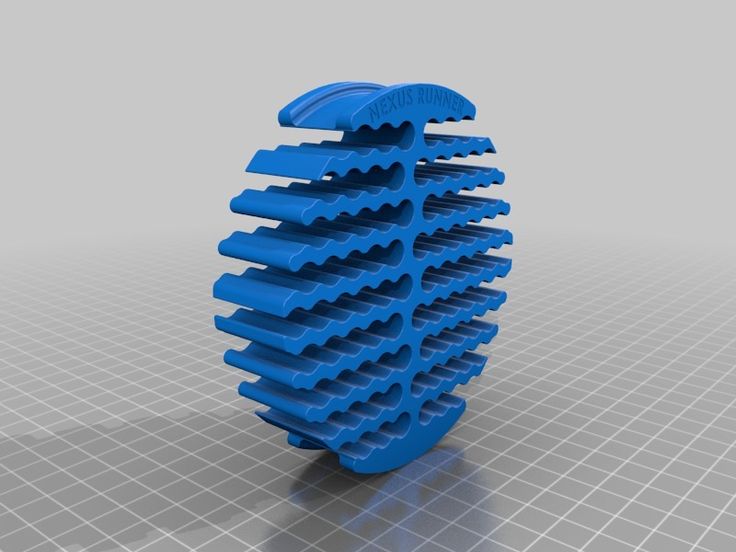
3D bioprinting
EBM titanium medical implants
3D printing is currently being researched by biotech companies and academic institutions. The research is aimed at exploring the possibility of using inkjet/drip 3D printing in tissue engineering to create artificial organs. The technology is based on the application of layers of living cells on a gel substrate or sugar matrix, with a gradual layer-by-layer build-up to create three-dimensional structures, including vascular systems. The first 3D tissue printing production system based on NovoGen bioprinting technology was introduced in 2009year. A number of terms are used to describe this research area: organ printing, bioprinting, computer tissue engineering, etc.
One of the pioneers of 3D printing, research company Organovo, conducts laboratory research and develops the production of functional 3D human tissue samples for use in medical and therapeutic research. For bioprinting, the company uses a NovoGen MMX 3D printer. Organovo believes that bioprinting will speed up the testing of new medicines before clinical trials, saving time and money invested in drug development. In the long term, Organovo hopes to adapt bioprinting technology for graft and surgical applications.
3D printing of implants and medical devices
3D printing is used to create implants and devices used in medicine. Successful surgeries include examples such as titanium pelvic and jaw implants and plastic tracheal splints. The most widespread use of 3D printing is expected in the production of hearing aids and dentistry. In March 2014, Swansea surgeons used 3D printing to reconstruct the face of a motorcyclist who was seriously injured in a road accident.
3D printing services
Some companies offer online 3D printing services available to individuals and industrial companies.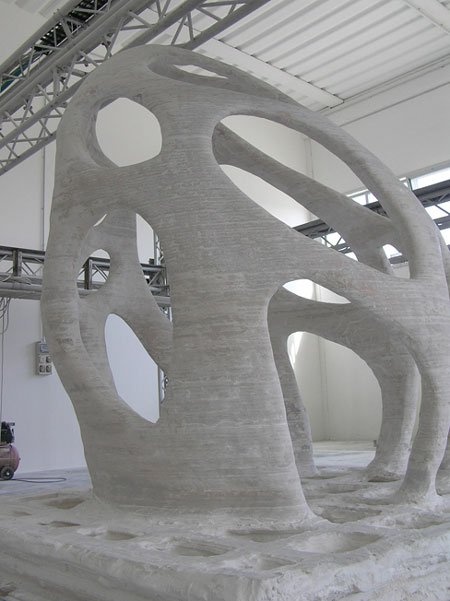 The customer is required to upload a 3D design to the site, after which the model is printed using industrial installations. The finished product is either delivered to the customer or subject to pickup.
Exploring new applications
3D printing makes it possible to create fully functional metal products, including weapons.
Future applications of 3D printing may include the creation of open source scientific equipment for use in open laboratories and other scientific applications - fossil reconstruction in paleontology, the creation of duplicates of priceless archaeological artifacts, the reconstruction of bones and body parts for forensic analysis, the reconstruction of heavily damaged evidence collected from crime scenes. The technology is also being considered for application in construction.
In 2005, academic journals began to publish materials on the possibility of using 3D printing technologies in art. In 2007, the Wall Street Journal and Time magazine named 3D design one of the 100 most significant achievements of the year. The Victoria and Albert Museum at the London Design Festival in 2011 presented an exhibition by Murray Moss entitled "Industrial Revolution 2.0: how the material world materializes again", dedicated to 3D printing technologies.
In 2012, a University of Glasgow pilot project showed that 3D printing could be used to produce chemical compounds, including hitherto unknown ones. The project printed chemical storage vessels into which “chemical ink” was injected using additive machines and then reacted. The viability of the technology was proven by the production of new compounds, but a specific practical application was not pursued during the experiment. Cornell Creative Machines has confirmed the feasibility of creating food products using hydrocolloid 3D printing. Professor Leroy Cronin of the University of Glasgow has suggested using "chemical ink" to print medicines.
The use of 3D scanning technology makes it possible to create replicas of real objects without the use of casting methods, which are costly, difficult to perform and can have a destructive effect in cases of precious and fragile objects of cultural heritage.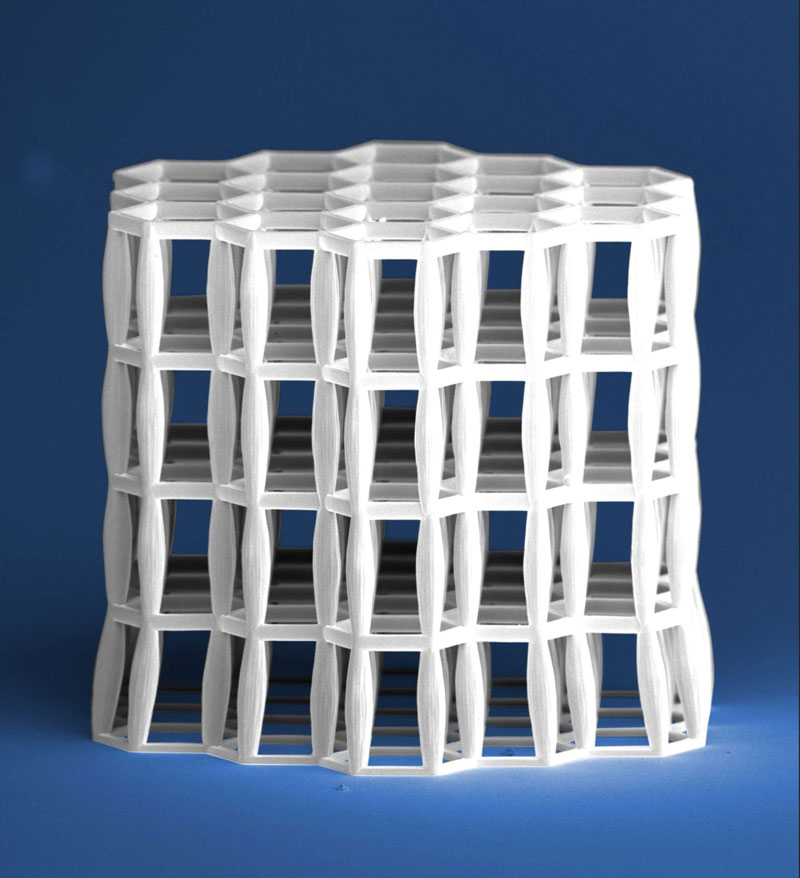
An additional example of 3D printing technologies being developed is the use of additive manufacturing in construction. This could make it possible to accelerate the pace of construction while reducing costs. In particular, the possibility of using technology to build space colonies is being considered. For example, the Sinterhab project aims to explore the possibility of additive manufacturing of lunar bases using lunar regolith as the main building material. Instead of using binding materials, the possibility of microwave sintering of regolith into solid building blocks is being considered.
Additive manufacturing allows you to create waveguides, sleeves and bends in terahertz devices. The high geometric complexity of such products could not be achieved by traditional production methods. A commercially available professional EDEN 260V setup was used to create structures with a resolution of 100 microns. The printed structures were galvanized with gold to create a terahertz plasmonic apparatus.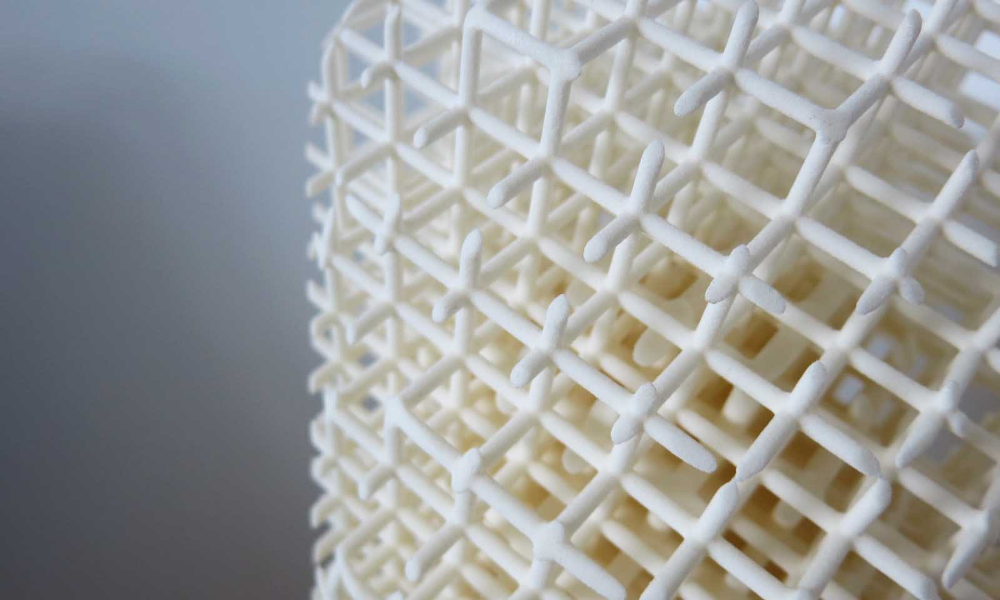
China has allocated nearly $500 million. for the development of 10 national institutes for the development of 3D printing technologies. In 2013, Chinese scientists began printing living cartilage, liver and kidney tissue using specialized 3D bioprinters. Researchers at Hangzhou Dianqi University have even developed their own 3D bioprinter for this challenging task, dubbed Regenovo. One of Regenovo's developers, Xu Mingeng, said it takes less than an hour for the printer to produce a small sample of liver tissue or a four to five inch sample of ear cartilage. Xu predicts the emergence of the first full-fledged printed artificial organs within the next 10-20 years. That same year, researchers at the Belgian Hasselt University successfully printed a new jaw for an 83-year-old woman. After the implant is implanted, the patient can chew, talk and breathe normally.
In Bahrain, sandstone-like 3D printing has created unique structures to support coral growth and restore damaged reefs. These structures have a more natural shape than previously used structures and do not have the acidity of concrete.
Intellectual property
Section of liver tissue printed by Organovo, which is working to improve 3D printing technology for the production of artificial organs
3D printing has been around for decades, and many aspects of the technology are subject to patents, copyrights, and trademark protection. However, from a legal point of view, it is not entirely clear how intellectual property protection laws will be applied in practice if 3D printers become widely used.
distribution and will be used in household production of goods for personal use, non-commercial use or for sale.
Any of the protective measures may negatively affect the distribution of designs used in 3D printing or the sale of printed products. The use of protected technologies may require the permission of the owner, which in turn will require the payment of royalties.
Patents cover certain processes, devices, and materials. The duration of patents varies from country to country.
Often, copyright extends to the expression of ideas in the form of material objects and lasts for the life of the author, plus 70 years. Thus, if someone creates a statue and obtains copyright, it will be illegal to distribute designs for printing of an identical or similar statue.
Influence of 3D printing
Additive manufacturing requires manufacturing companies to be flexible and constantly improve available technologies to stay competitive. Advocates of additive manufacturing predict that the opposition between 3D printing and globalization will escalate as home production displaces trade in goods between consumers and large manufacturers. In reality, the integration of additive technologies into commercial production serves as a complement to traditional subtractive methods, rather than a complete replacement for the latter.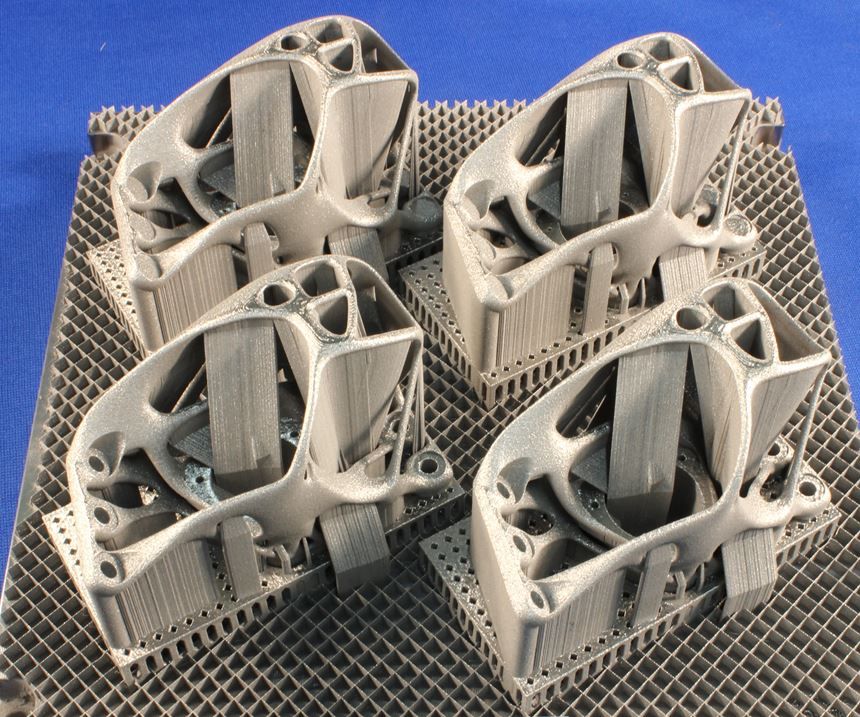
Space exploration
In 2010, work began on the application of 3D printing in zero gravity and low gravity. The main goal is to create hand tools and more complex devices "as needed" instead of using valuable cargo volume and fuel to deliver finished products to orbit.
Even NASA is interested in 3D printing
At the same time, NASA is conducting joint tests with Made in Space to assess the potential of 3D printing to reduce the cost and increase the efficiency of space exploration. Nasa's additive-manufactured rocket parts were successfully tested in July 2013, with two fuel injectors performing on par with conventionally produced parts during operational tests subjecting the parts to temperatures of around 3,300°C and high pressure levels. It is noteworthy that NASA is preparing to launch a 3D printer into space: the agency is going to demonstrate the possibility of creating spare parts directly in orbit, instead of expensive transportation from the ground.
Social change
The topic of social and cultural change as a result of the introduction of commercially available additive technologies has been discussed by writers and sociologists since the 1950s. One of the most interesting assumptions was the possible blurring of boundaries between everyday life and workplaces as a result of the massive introduction of 3D printers into the home. It also points to the ease of transferring digital designs, which, in combination with local production, will help reduce the need for global transportation. Finally, copyright protection may change to reflect the ease of additive manufacturing of many products.
Firearms
In 2012, US company Defense Distributed released plans to create a "design of a functional plastic weapon that could be downloaded and played by anyone with access to a 3D printer." Defense Distributed has developed a 3D printed version of the receiver for the AR-15 rifle, capable of withstanding more than 650 shots, and a 30-round magazine for the M-16 rifle. The AR-15 has two receivers (lower and upper), but legal registration is tied to the lower receiver, which is stamped with a serial number. Shortly after Defense Distributed created the first working drawings for the production of plastic weapons in May 2013, the US State Department requested that the instructions be removed from the company's website.
The distribution of blueprints by Defense Distributed has fueled discussion about the possible impact of 3D printing and digital processing devices on the effectiveness of gun control. However, the fight against the proliferation of digital weapon models will inevitably face the same problems as attempts to prevent the trade in pirated content.
Go to the main page of the 3D Printing Encyclopedia
3D Printing Support Structures - Complete Guide
An Easier Approach to Caliper Structures
Caliper Structures for 3D Printing - The Complete Guide
Everything you need to know about caliper structures used in 3D printing. Feel free to use overhangs and bridges in your models!
Caliper Structures: If you have a lot of experience with FDM 3D printing (FDM - Fused Deposition Modeling), you may have found yourself in situations a couple of times in which you had to use such structures. An FDM 3D printer creates a 3D object by sequentially applying layers of thermoplastic materials. In this case, each new layer rests on the layer below it. If the model has an overhang that is not supported from below, it will likely sink or even fall off, and you will need to print additional support structures to ensure successful printing.
Caliper structures are seen as a necessary evil in 3D printing. On the one hand, they are absolutely necessary for models with dangerous overhangs or bridges. On the other hand, the cost of materials rises, finishing work is added, and there is a risk of damage to the surface of the model. Therefore, proper application of printed caliper structures is a very important aspect of 3D printing complex models.
Caliper structures in 3D printing: 3 easy steps to success
In this article, we will cover everything you need to know about support structures used in 3D printing. Detailed explanations are provided later in the text.
WHEN DO YOU NEED THEM?
In general, when a model has an unsupported overhang or bridge, caliper structures may be required to enable 3D printing. The figure below shows overhangs and bridges using the letters Y, H and T as an example.
Classic example of overhangs and bridges using the letters Y, H and T as an example.0054
Caliper structures are not needed for all overhangs - 45 degree rule
Caliper structures are not needed for all eaves. As a general rule of thumb, if the overhang slopes less than 45 degrees from vertical, it can be printed without the use of caliper structures.
Support structures are required for overhangs greater than 45 degrees from vertical.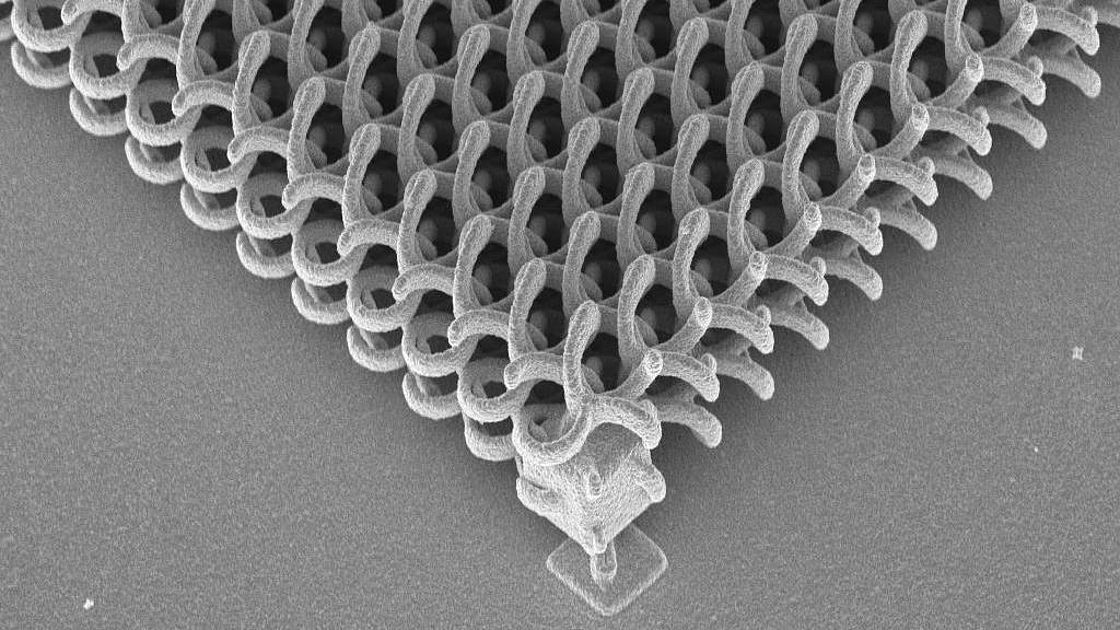
3D printers provide a slight (barely noticeable) horizontal displacement between successive layers, i.e., the applied layer is placed on the previous one with a slight displacement. This ensures that overhangs are printed that do not deviate too much from the vertical. Anything less than 45 degrees can be supported by previous layers, and anything above that number can't. A value of forty-five degrees is considered a break line.
This statement is best supported by the examples of the letters Y and T. The two slanted parts of the letter Y have an angle of less than 45 degrees with respect to the vertical. Therefore, if necessary, the letter Y can be printed without using any caliper structures performed by 3D printing.
For overhangs in the letter Y, printing of support structures is not required. But for overhangs in the letter T - yes. (source: 3DHubs online production platform)
On the other hand, the protruding parts of the T are at an angle of 90 degrees from vertical.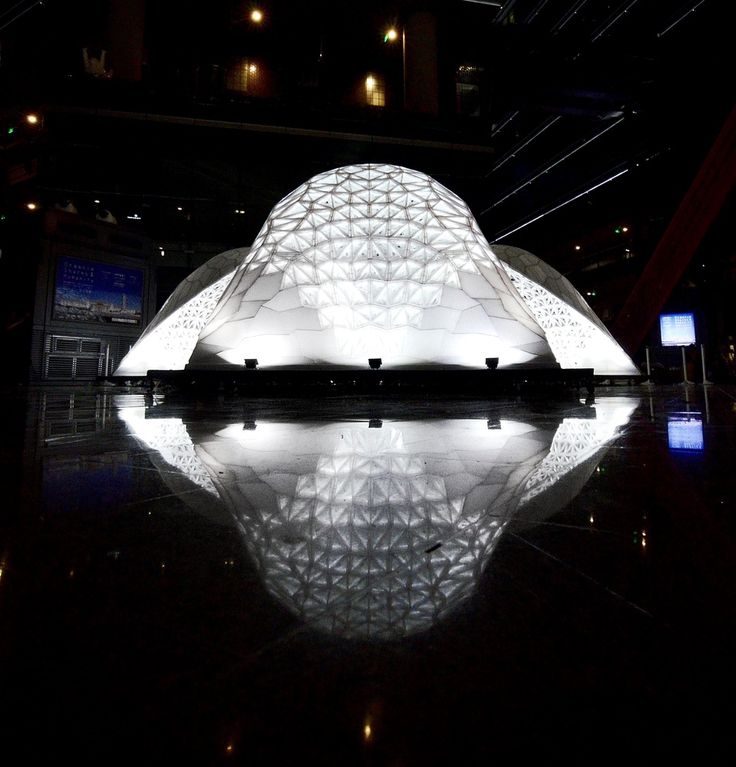 Thus, in this case, for the 3D printing of the letter T, the use of support structures is a necessary condition, otherwise the result will be a nightmare (see the figure below).
Without caliper structures, it is not possible to properly print the letter T (source: 3DHubs online manufacturing platform)
2
Not all bridges need supports - the 5 mm rule.
As with overhangs, supports are not required for all bridges. A rule of thumb that has been proven in practice is that if the bridge length is less than 5 mm, the printer is able to print it without the need for a caliper structure.
This uses the bridging printing method, in which the printer stretches the hot material over short distances and prints it with minimal sagging.
However, if the bridge length is greater than 5 mm, this method does not work. In this case, it is necessary to additionally print support structures.
Bridges longer than 5 mm cannot be printed without support structures.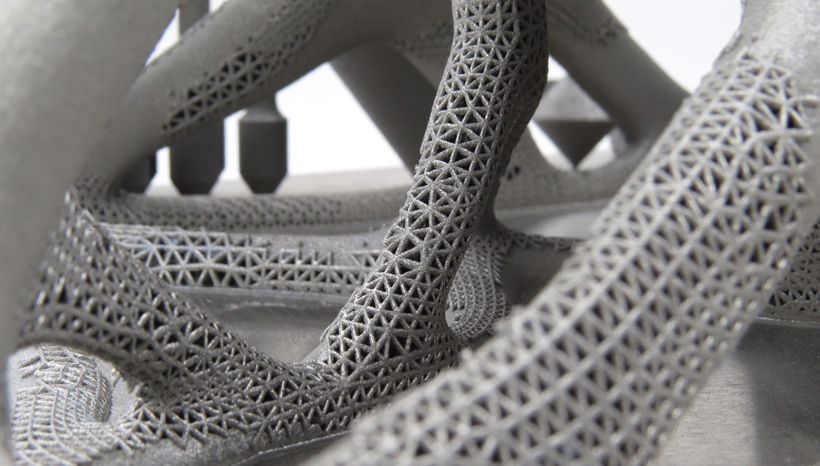 Notice how they warp and deform.
TESTING PRINTER'S ABILITY TO PRINT OVERHEADS WITHOUT SUPPORT
The rule of thumb that if an overhang slopes less than 45 degrees from vertical, it can be printed without the use of support structures is just a rule of thumb. Much depends on the printer, its condition and the materials used. Printers that are in poor condition may not print 35 or 40 degree overhangs from vertical.
Before printing a model with overhangs, it is recommended that you evaluate the printer's ability to print small overhangs.
It's easy to do. Simply download the Massive Overhang Test print model from the Thingiverse website and print it. This model presents overhangs from 20 to 70 degrees in 5-degree increments.
Overhang print test model from the Thingiverse website (source: Thingiverse website)
Determine the angle at which the printer starts to print abnormally. This is the maximum overhang angle at which the printer can print without support.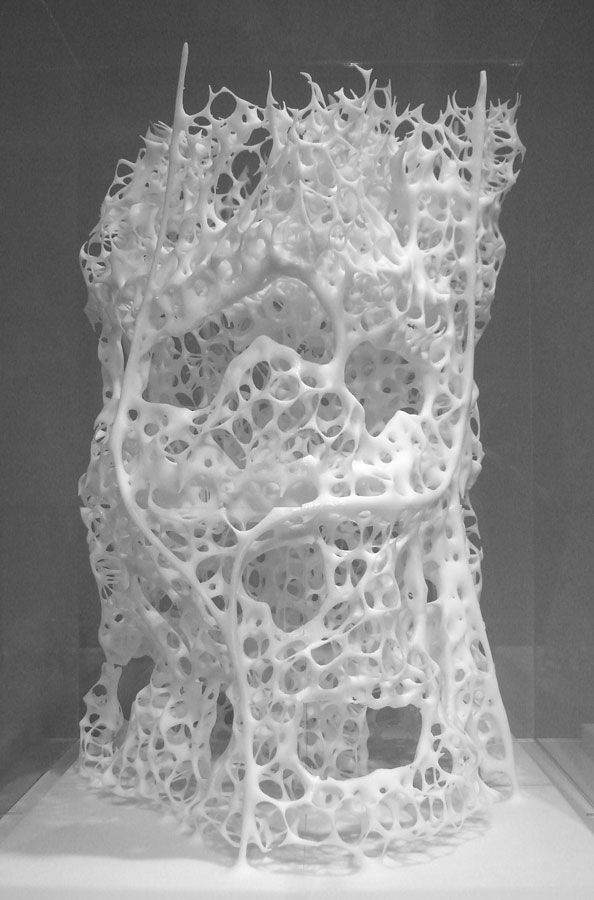 It is recommended to remember it for making further decisions on the need to use support structures.
DISADVANTAGES
Like many things in life, the use of support structures in 3D printing has certain weaknesses. There are several of them, so let's look at them.
1
Increased material costs
Support structures require additional materials. In this case, these designs after printing must be removed and thrown into waste.
When using 3D printing at the manufacturing level, the focus may be on the cost per model. If this is your hobby and you are limited in funds, then, for sure, this is also not indifferent to you.
3D printing of support structures means an obvious additional cost per model. Caliper structures require material that is subsequently removed and discarded, so any 3D caliper structures go to waste, which increases the cost of the printed product.
2
Print time increase
3D printing of support structures also increases print time as the printer prints additional volumes.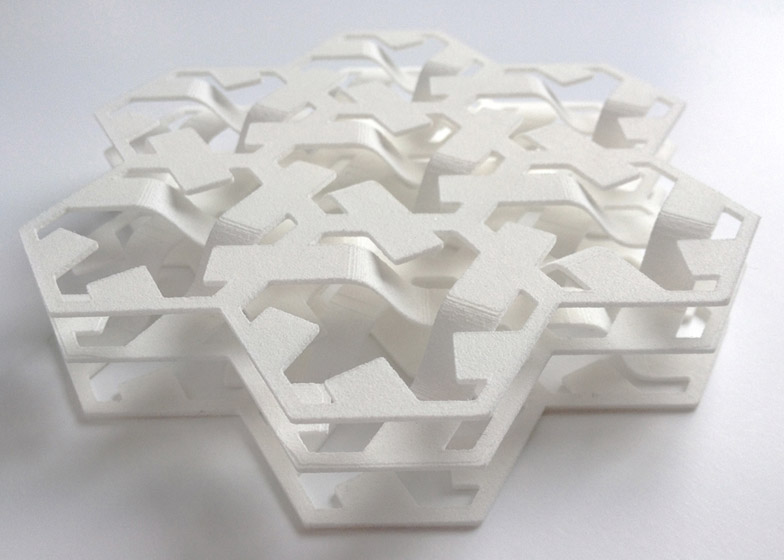 It is quite obvious that the additional time spent depends on the number and height of the caliper structures.
3
Additional finishing
Additional finishing is required when printing support structures. (source: Formlabs)
3D printed support structures are not part of the model. They are used as a support for parts of the model during printing. This means that at the end of printing, there is an additional need to remove these structures before the model is ready for use.
In a production setting, extra work means additional costs for the model.
4
Risk of product damage
Left: Printing with supports. Middle: Removal of calipers with product damage. Right: Removal of calipers without significant damage to the product. (source: 3DHubs online manufacturing platform)
3D caliper structures come into contact with the walls of products and often stick to them.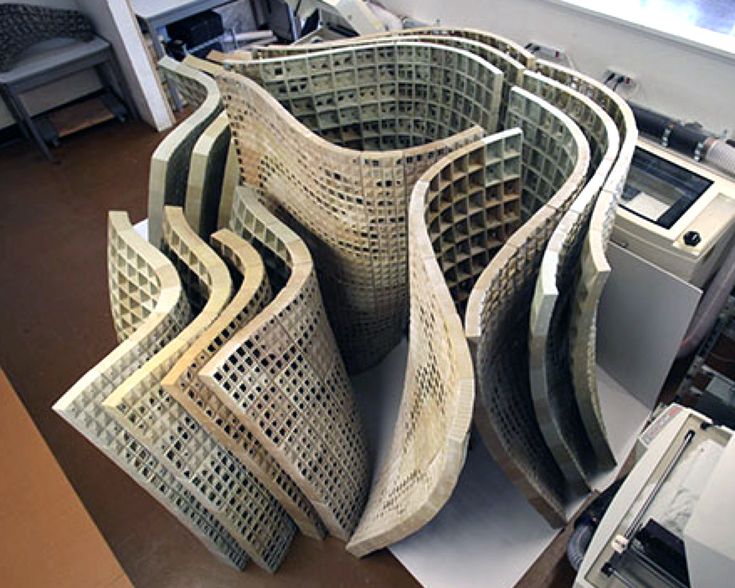 They are the only means of providing support under overhangs and bridges. If care is not taken when removing 3D caliper structures, defects may remain on the surface of the product. In the worst case, part of the model may break off along with the 3D support structure.
In general, there are significant disadvantages when using support structures. Therefore, here's another tried-and-tested rule: Minimize the use of 3D support structures and add them only when needed . The following sections will explore the application of this principle, starting directly from the computer-aided design (CAD) stage and ending with printing.
GEOMETRY OF THE CALIPER STRUCTURE
Two types of support structures are commonly used: tree-like (“tree”) and linear / “accordion”.
Tree calipers
The tree caliper is a tree structure that serves as a support for the overhangs of the model. Calipers of this type only come into contact with the overhang at certain points.
3D caliper tree structures (source: Flashforge)
The advantage of using a 3D caliper tree structure is that it can be removed more easily without significant damage to the underside of the overhang. However, it should be noted that this type of caliper is only suitable for non-flat overhangs, such as the tip of the nose, toe or arch. For flat overhangs, it does not provide sufficient stability.
Linear support or "accordion"
This is the most commonly used type of support in 3D printing. It consists of vertical posts that are in contact with the overhang over the entire surface. This type of caliper is suitable for any overhangs and bridges. However, it is more difficult to remove without damaging the surface of the model.
Linear 3D support structures (source: Flashforge)
TYPES OF SUPPORT STRUCTURES BY REMOVAL DEGREE
1
Tear-off 3D support structures
Single-extruder printers use tear-off support structures by default.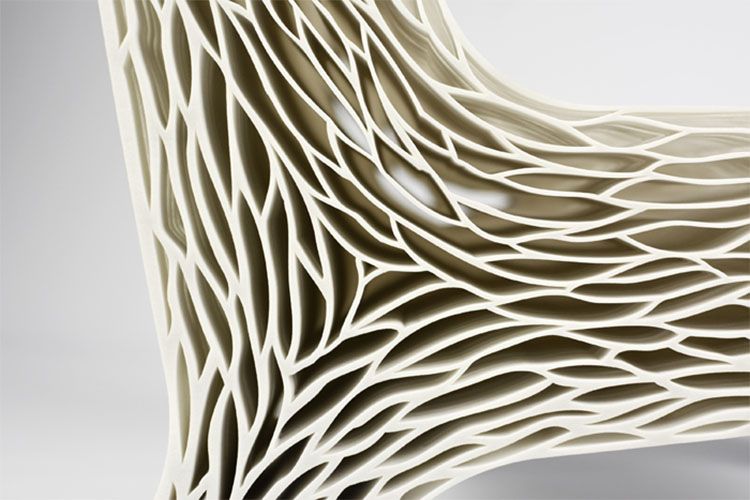
If you have one extruder, you have to use the same material to 3D print the support structures that is used to print the model. Of course, the density of the caliper structures can be adjusted to be much lower than the density of the model, but this is the only remedy that can be applied to the material of the caliper.
Because the model and 3D caliper structures are made from the same material, the only way to separate them is to either break off the caliper by hand or carefully cut it off with a knife.
These removal methods carry a high risk of damage to the model, and during removal, you must use the proper methods and be extremely vigilant and careful.
2
Dissolvable 3D calipers
Dissolvable calipers are easier to remove, but requires a printer with two extruders.
If you have a dual extruder printer, you have a better choice. You can load one extruder with PLA for model printing and the other with water soluble material such as PVA or limonene soluble material such as HIPS (polystyrene) for caliper structure printing.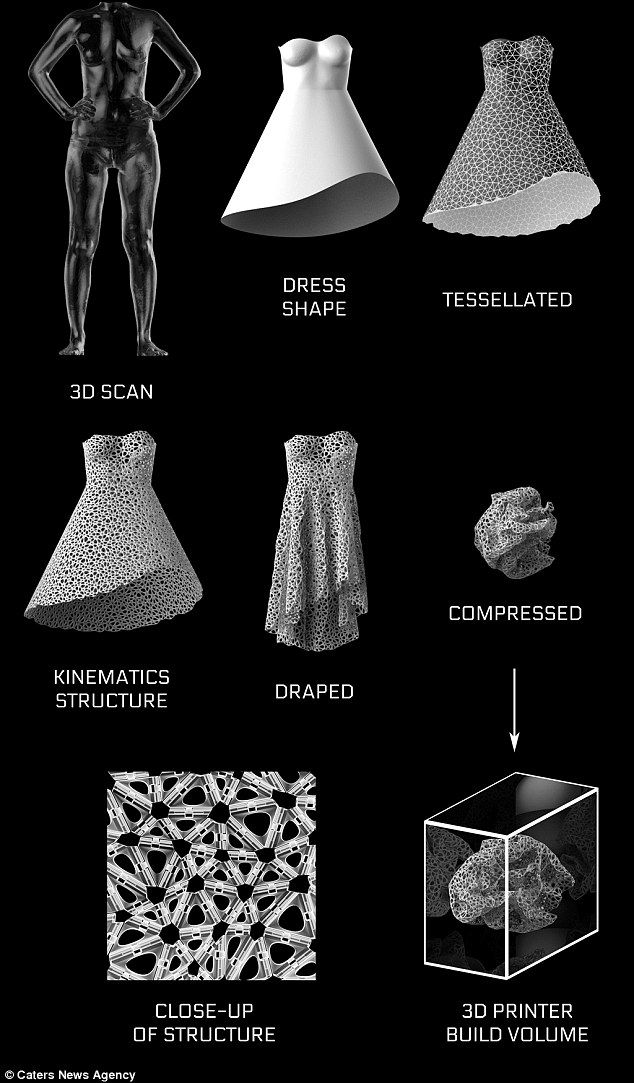 At the end of printing, it is enough to simply remove the support structure by washing off by immersing the model in water or limonene.
This removal method reduces the risk of model damage and simplifies finishing, making it ideal for complex prints.
HOW TO REMOVE 3D SUPPORT STRUCTURES
Because 3D caliper structures are difficult to remove and can damage the model, here are some tried and tested techniques for removing them properly.
- First you need to determine which support structures are completely open and can be easily reached with your fingers. Try prying these calipers off with your fingers. Exercise caution. Extreme caution. If this operation is performed correctly, most caliper structures should come off without much effort.
- Then take a tool to remove 3D support structures that are difficult to reach. There are many opinions about which tools are best. You can use needle-nose pliers, a spatula, or a utility knife.
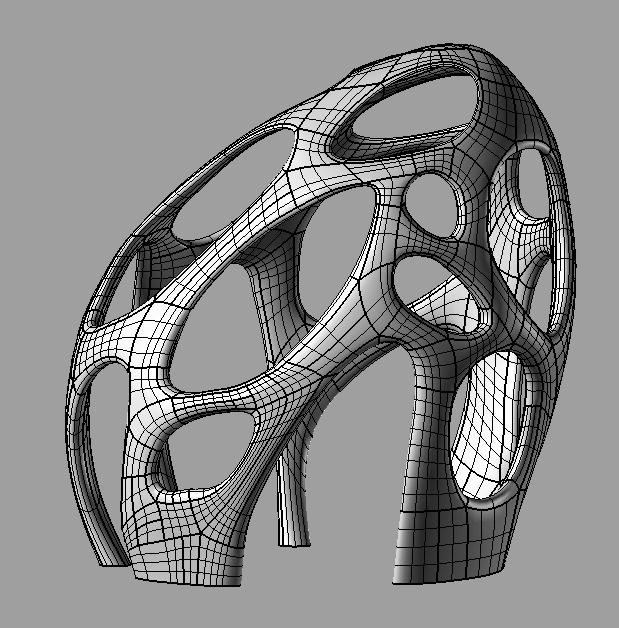 You can also use all these tools together.
 - When using a knife or scraper, it is a good idea to heat up the model or blade. This contributes to better delamination of the 3D support structures. A small butane torch will help, but care must be taken not to damage the model.
- Handle utility knives with care as they are very sharp.
- Sandpaper is also excellent for removal. When wet grinding with fine-grained sandpaper (from 220 to 1200), not only the removal of 3D caliper structures is performed, but also the model is polished. For best results, it is recommended to spray the part with water and sand in smooth, light strokes until the desired surface finish is achieved.
Wet sanding can be used to remove residual 3D caliper structures and smooth the surface of the model (Source: Formlabs) scratches and surface defects. Nail polish is great for partially or completely covering these marks.
If you are interested in how other users solve this problem, it is recommended to view the web page on the best ways to remove supports, calipers and filament structures - Best ways to remove foundations, caliper structures and other external filaments.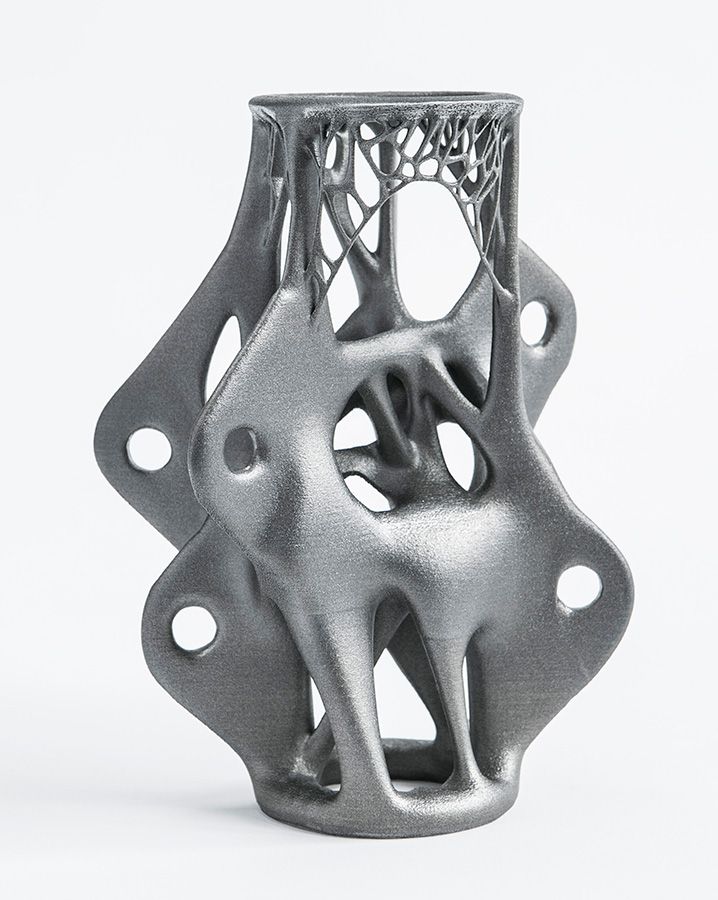
MINIMIZING 3D CALIPER STRUCTURES WITH SMART DESIGN
Integrating 3D caliper structures into the model
One way to avoid the use of caliper structures in 3D printing is to use additional elements in the model that perform a similar function. Sculptors have been using this technique for centuries. As an example, consider the sculpture "Venus the Conqueror" by Antonio Canova.
Venus the Conqueror, sculptor Antonio Canova
Here the right arm is an overhang, but rests on pillows. The left leg is another overhang, but here the folds of the toga serve as a support.
The next example is the Guardian model by @fantasygraph. As a support for the legs and buttocks of the model, he guessed to use a dress flowing in folds. The left hand rests on the spear lowered down.
@fantasygraph's Sentinel is a prime example of how support structures can be integrated into a model.
Integrating 3D support structures into a design is more art than science.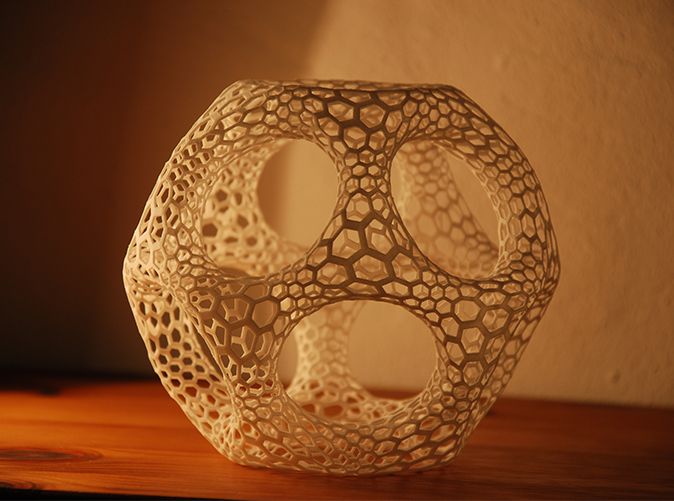 It is necessary to find such elements that fit into the overall design and at the same time can be a support for overhangs or bridges. If done correctly, the model will be more beautiful and the printing process will be freed from unnecessary 3D caliper structures, which means saving time, money and labor.
Bevels
Another way to get rid of 3D support structures is to use bevels. With proper chamfering, dangerous overhangs can be turned into innocuous structures with angles less than 45 degrees.
For example, if you have a sloped or folded edge, you can replace it with an angled edge that does not require supports. Such an angular pattern is called a bevel.
Left: Gradually rounded edge that requires supports. Right: A beveled edge that can be printed without 3D caliper structures (source: Rigid Ink)
Similarly, if your model has a hole, you can turn it into a beveled teardrop hole. For the most part, this won't ruin the overall aesthetic of the model, but will help reduce the amount of 3D support structures needed to print the model.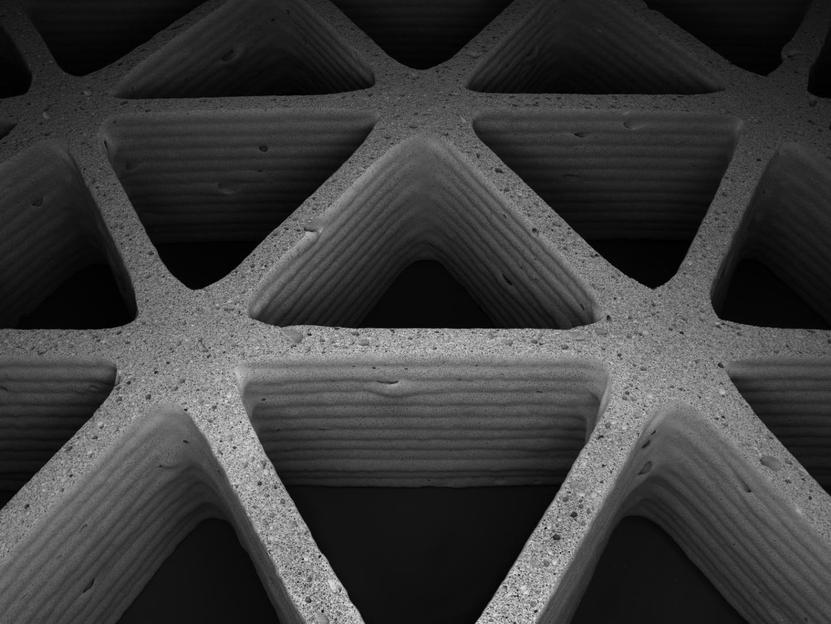
Beveled Hole (source: Markforged)
MINIMIZING 3D SUPPORT STRUCTURES BY REORIENTATION
. For example, it is much better to print the open box shown below with the open side up.
You can often minimize the use of 3D support structures by properly positioning the model on the build plate (Source: Markforged)
Below is a more non-trivial example, again from designer @fantasygraph. This is a model of a man with a horizontally outstretched arm pointing forward and to infinity.
If you print the model as is, you will need to support the left hand. And it, in fact, is a long overhang with an angle of 90 degrees.
Removing the supports will most likely leave imperfections on the underside of the arm. To avoid this, you can rotate the whole model by 45 degrees and simply add a support for its base. In any case, the quality of the basis of the model does not really matter. Thus, it is possible to print a model with fewer 3D caliper structures and save the left hand from damage.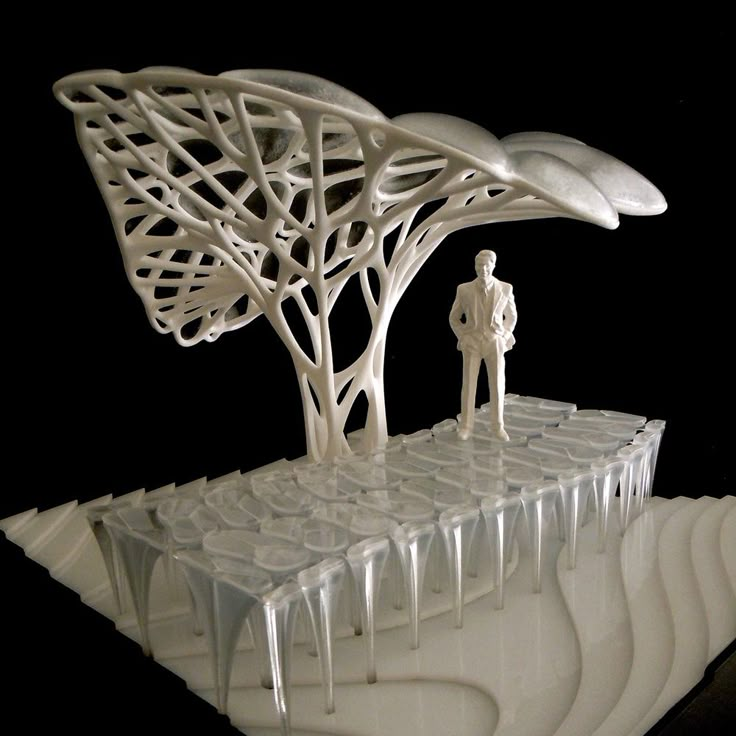
A simple and ingenious solution. Maybe you can do it too?
PRINTING OVERHEADS AND BRIDGES WITHOUT 3D SUPPORT STRUCTURES
In the previous sections, attention was drawn to the fact that, if possible, you should try to use as little 3D support structures as possible. However, this means that it will often be possible to find yourself in a difficult situation in which the risk of model instability is inevitable. To minimize these risks, here are a few general tips.
- Make sure the 3D printer is in optimal condition.
- Cool the printed material as quickly as possible. The longer the material cools, the more likely it is that the bridge or overhang will warp or fall off. To do this, it is necessary to maximize the cooling capacity of the layers by cooling fans. Also, reduce the print temperature to the lowest possible.
- Reducing the print speed also speeds up cooling and is especially helpful when printing longer bridges and complex overhangs.
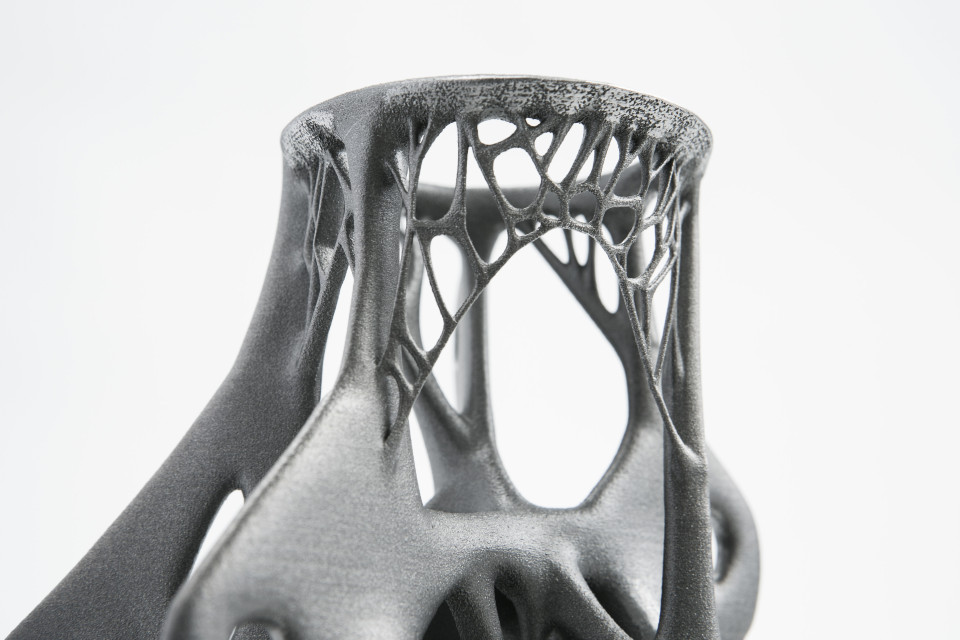
- It is recommended to print with the minimum layer thickness. Less layer thickness means less weight applied with each pass of the print head. In addition, it contributes to faster cooling of the material.
SUPPORT STRUCTURE SETTINGS IN CURA
Sometimes you simply cannot do without 3D support structures. But even in this case, every effort must be made to ensure the stability of the 3D support structures, so that they do not consume a lot of material, they are easily removed and do not damage the surface of the model.
The layering program has many additional functions for fine-tuning support structures. Most layering programs can automatically create calipers, but they also have a manual mode that lets you add or remove calipers anywhere. In addition, the layering manager has many different settings to control the following aspects of the caliper structures.
- Location of 3D supports
- Strength of 3D supports
- Easy removal after printing
- Damage to the printed surface
In this article, we decided to focus on Cura, one of the most popular free layering software.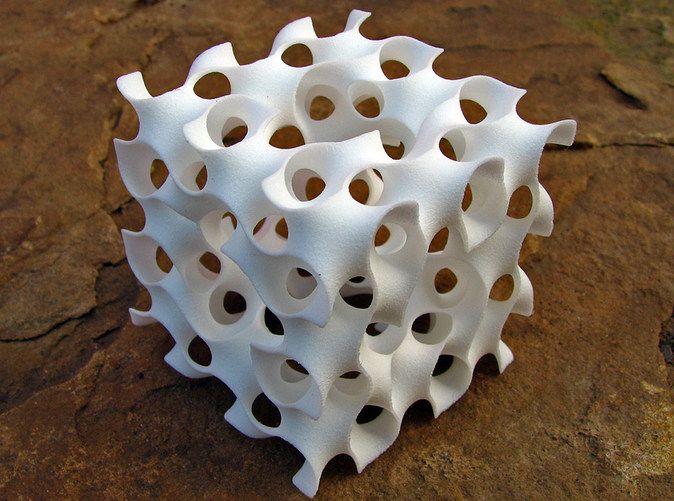
Cura has a number of settings related to support structures located in the Support section of the Custom Settings menu. With the correct setting of these settings, you can create 3D support structures that meet most of the basic requirements.
1
Enable automatic creation of 3D support structures for unstable models
Let's start from the beginning. How can I check if a model needs additional supports?
Cura makes this easy. Immediately after importing the model into Cura and placing it on the virtual working base, you should pay attention to the areas colored in red. These are the areas where Cura found instability. It should be noted that, possibly, areas without supports will not be visible until the camera is rotated.
If the bottom of the part is painted red where the model touches the work base, don't worry that there is no support underneath. This problem will be solved by a working base. Small red areas at the top of holes or between two structures are called bridges and Cura will process them automatically.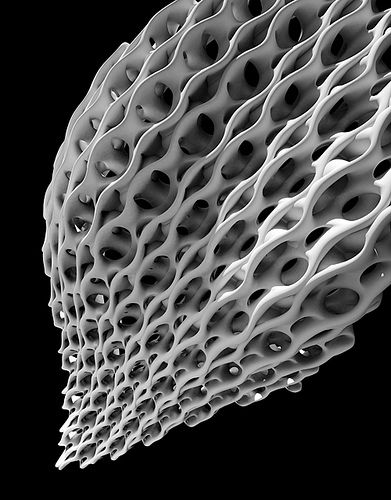
You should start to worry if there are other parts highlighted in red. First you need to activate the automatic creation of support structures in order to ensure that these red areas are successfully printed. To do this, just check the Generate Support checkbox in the Support section.
So, the function of automatic creation of support structures is activated, but no external changes to the model occur. The reason is that Cura does not show support structures in the default Solid view. To view the generated 3D support structures, you must change the view mode to Layer View (View layers). The material of the calipers (lines and volume) will be displayed in turquoise. You need to move the layer slider up and down to see where the support is added to the model.
2
Selecting a tree or linear support
Tree support structures in Cura
Cura creates 3D linear support structures by default. Version 3.2 beta of Cura provides the option to use tree supports instead of the default linear ones.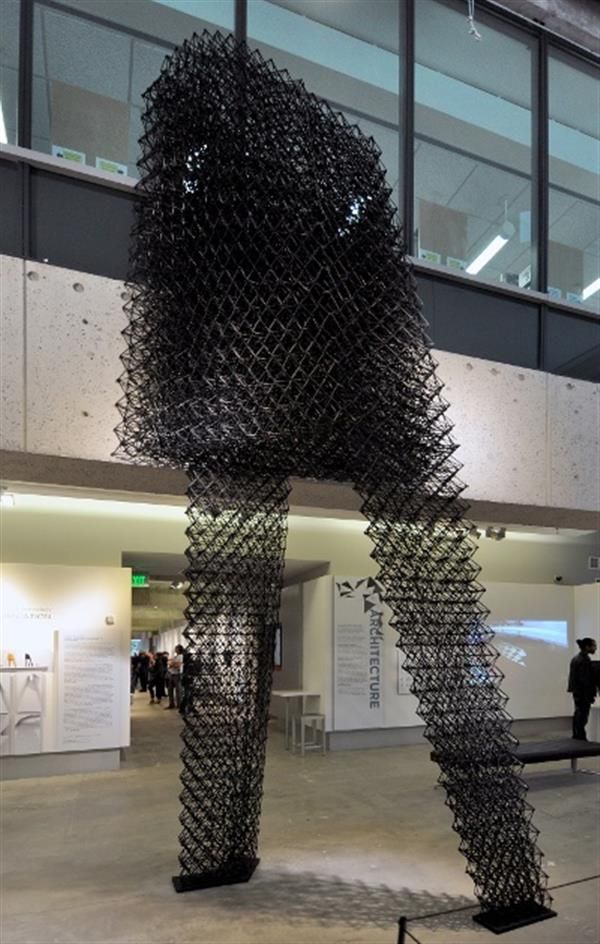
3
Controlling the position of 3D supports
Two types of support structures in Cura: Everywhere and Touching Build plate
When you activate the option to create support structures, the Placement item automatically appears in the Support section. The Placement option provides the ability to control the approximate location of support structures. There are two options: Everywhere and Touching Build plate. The Everywhere option is selected by default.
When the Everywhere option is selected, Cura 3D tries to create support structures where they are needed. This means that not only 3D caliper structures will be created that will be placed on the working base, but also caliper structures that will be based on the details of the model. This is the rational choice for most cases, as it guarantees the necessary support for all unstable areas.
However, if you select the Everywhere option for very complex models, the model may be completely covered with the material used for the calipers.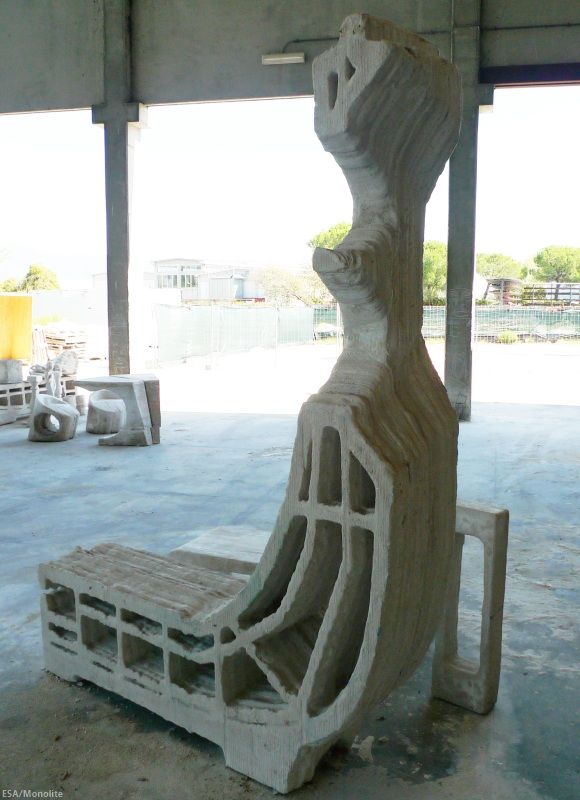 If there is no such intention, you just need to set the Touching Build plate option in the Placement settings. This option will create 3D caliper structures under the hanging parts of the model only between the working base and the model.
4
The Enable Support Roof option can improve the surface finish of overhangs, but will incur some additional cost.
Since the overhang of the model is always printed on top of the 3D caliper structures, the optimal surface finish of the parts is not always guaranteed. And in this case, the hidden setting Enable Support Roof can help.
The arch of the support is a dense layer in the upper part of the caliper structure, which does not significantly impair the surface quality of the overhangs. When this option is activated in the Cura 3D program, by checking the appropriate box, a better quality finish is obtained. But this improvement comes at a cost, as removing the caliper structures becomes more difficult than usual when choosing this option.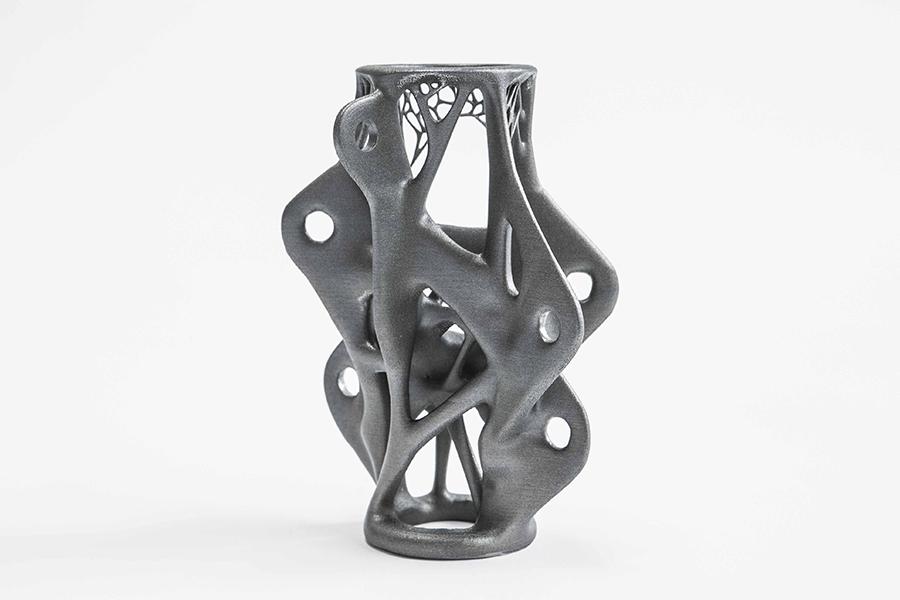 This option is only recommended if the surface quality of the overhang is important to the finished part itself.
5
Prevent 3D support structures from damaging the outer walls of the model by using the Support X/Y Distance setting
Sometimes 3D support structures are too close to the outer wall and leave traces on the outer surface of the model. This can be avoided by using the hidden Support X/Y Distance setting in the Support section.
In Cura, the Support X/Y Distance setting generally controls the minimum allowable distance between the model's vertical walls and the support structure in the X-Y plane. If the 3D support structure damages or sticks to the walls, you can increase this value in 0.2 mm increments until the walls are smooth. However, it is highly recommended to ensure that there are no small overhangs protruding from the outer walls, which would be left unsupported by leaving a small distance between the support and the walls. With these small overhangs, you may even need to decrease the X/Y distance instead of increasing it. Otherwise, printing will fail.
6
Z Distance setting to allow easier removal of 3D support structures model layers. The Cura software creates this weaker connection by leaving a certain space between the top and bottom of the support structure and the model - this space is known as the Z distance.
By setting the hidden Z-Distance settings in the Support section, you can make the 3D support structures easier to separate from the model. The default value of this setting is equal to the height of the layer. So if the layer height is 0.1mm, the default Z distance will also be 0.1mm.
If the support material is difficult to separate from the model, it is recommended to increase this value in increments of layer height until it separates cleanly. Cura may or may not provide additional support for any particular layer. Unfortunately, half layer values do not exist. That is, if the Z Distance value of 0.2 mm is too large for printing with a layer height of 0.1 mm, and the Z-Distance value of 0.1 mm is not enough, there are no other options for setting the Z Distance value.
7
Selecting the right 3D caliper structure to strike the right balance between strength and ease of removal
Support patterns in Cura
Cura provides one of seven 3D caliper patterns. The pattern can be changed using a hidden setting called Support Pattern in the Setting section.
In most cases, the default pattern, Zig Zag, provides the best balance between strength and ease of removal. Other scheme options: Triangles (Triangles), Lines (Lines), Grid (Lattice), Concentric (Concentric), Concentric 3D (Concentric 3D) and Cross (Cross). If the default schema doesn't work, you can experiment with other options. Each provides a different balance between strength and ease of removal.
Caliper structures are a necessary evil in 3D printing.