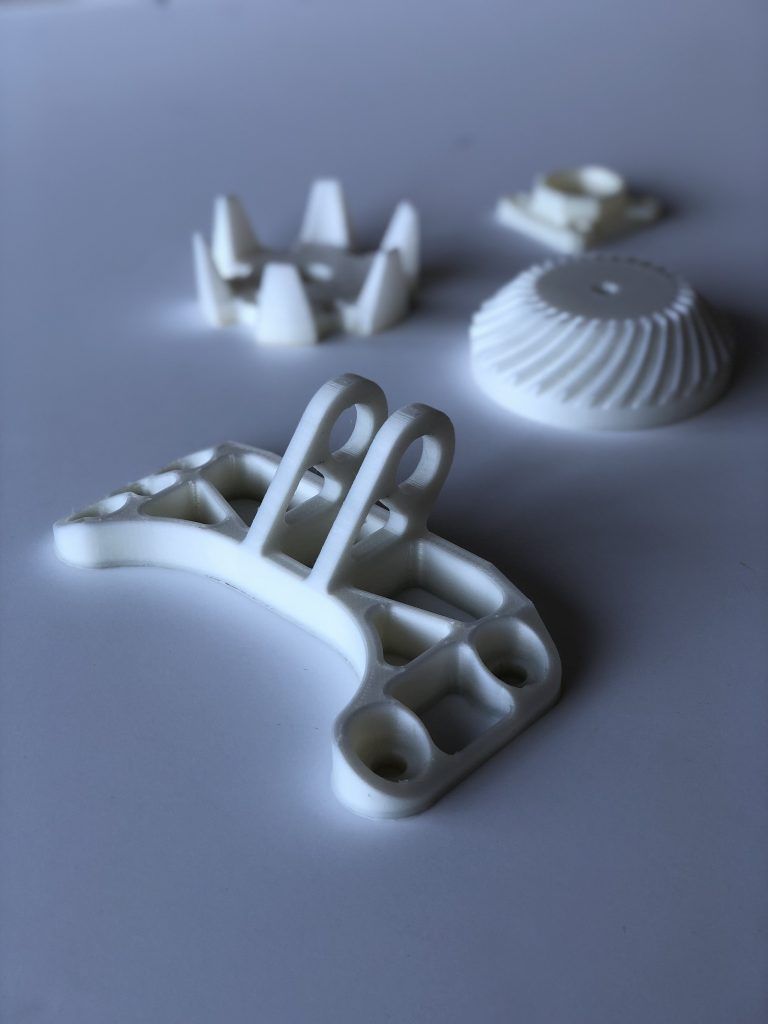
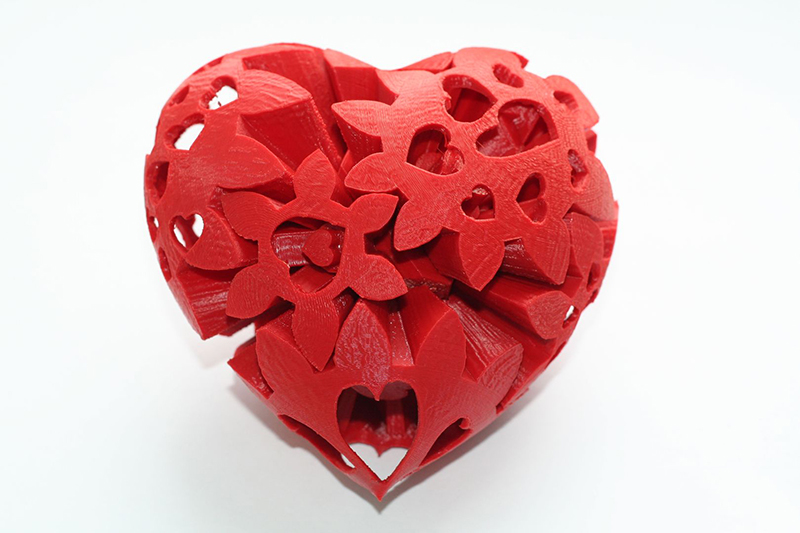
3D printer shows
3D Printing Events 2022 - List of Shows, Fairs & Meetups
If you are following 3D printing community on social media, you cannot miss occasionally heated activities. This includes a lot of talks about meetups, followed by live streams, live chats, interviews, group pictures, etc. Usually, all this happens when some maker or 3D printing-related event happens.
We’ve put together a table with important 3D printing events, exhibitions, and fairs that happened or will happen in near future. Here you can also find a brief coverage of the events made by 3D printing community members. Read more below the table.
Shows, Fairs & Meetups
NB! As COVID-19 spreads across the globe, please take extra care and follow official guidance.
| Name | Description | Place | Date |
|---|---|---|---|
| Maker Fare OC | Maker Faire is a gathering of fascinating, curious people who enjoy learning and who love sharing what they can do. Coverage by: 3D Printing Nerd | Orange County, US | 2021.09.10 |
| ERRF 2022 | The East Coast RepRap Festival (ERRF) invites all community members connected to 3D printing to join us and celebrate the diversity throughout our community and industry. Coverage by: | Bel Air, Maryland, USA | 2022.10.08 2022.10.09 |
| 3D Print Congress & Exhibition | The whole industry gathers for 3 days to present their latest innovations and industrial solutions in additive manufacturing. Coverage by: | Paris France | 2022.10.19 2022.10.20 |
| Formnext South China 2022 | Formnext + PM South China will hold its inaugural edition in the brand-new Shenzhen World Exhibition and Convention Center Coverage by: | Schenzhen China | NA NA Postponed |
| 3D Additive Expo | Participation in 3D ADDITIVE EXPO is a unique opportunity to present products, services, innovations, listen to the market, renew contacts and close deals.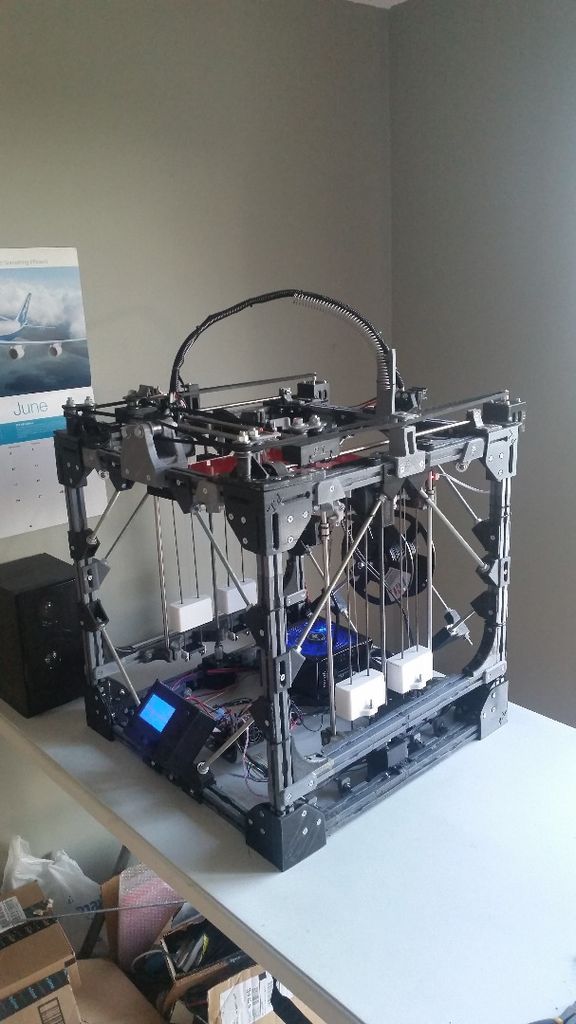 It will be a meeting point for all professionals looking for solutions to optimize their business. It will be a meeting point for all professionals looking for solutions to optimize their business.Coverage by: | Batalha, Portugal | 2022.11.09 2022.11.12 |
| Formnext 2022 | International exhibition and conference on 3D printing/additive manufacturing & tooling. Coverage by: | Frankfurt Germany | 2021.11.15 2021.11.18 |
| Maker Faires (Map) | Maker Faire is the Greatest Show (and Tell) on Earth—a family-friendly festival of invention, creativity, and resourcefulness, and a celebration of the Maker movement. Find the event near you: use an interactive map. | Planet Earth | Year Around |
| MRRF | What is MRRF? It's the worlds largest celebration of open source 3D printing. If you are a hobbyist, enthusiast or any level user of 3D printing then come and enjoy the weekend with others. Not sure what 3D printing is or want to learn more about it? Perfect! Come out and see what it's all about. Coverage by: Greg's Maker Corner Coverage by: 3D Printing Nerd Twitter: #MRRF2022 | Goshen, Indiana, USA | 2022.06.25 2022.06.26 |
| 3D Printed Biomaterials & AM Conference | The purpose of the meeting is to bring together engineers, scientists, regulators, and clinicians from academia, industry, and government to present leading-edge research on advancements in medical-grade UHMWPE, PEEK, and the rapidly growing field of polymer implant additive manufacturing technology. Coverage by: | Torino, Italy | 2022.06.23 2022.06.24 |
| SMF Auction | Sanjay Mortimer Foundation for gifted & talented potential engineers, who are lacking financial or practical resource to fulfil their potential, focusing on those, who, like Sanjay, have ADHD. Live Stream: E3D Twitter: #SanjayMortimerFoundation | England UK | 2022.06.11 |
| TCT 3Sixty 2022 | TCT 3Sixty will offer attendees innovative and interactive 360-degree insights, of how to get the best from their existing additive technology or to provide them with the opportunity for new technology.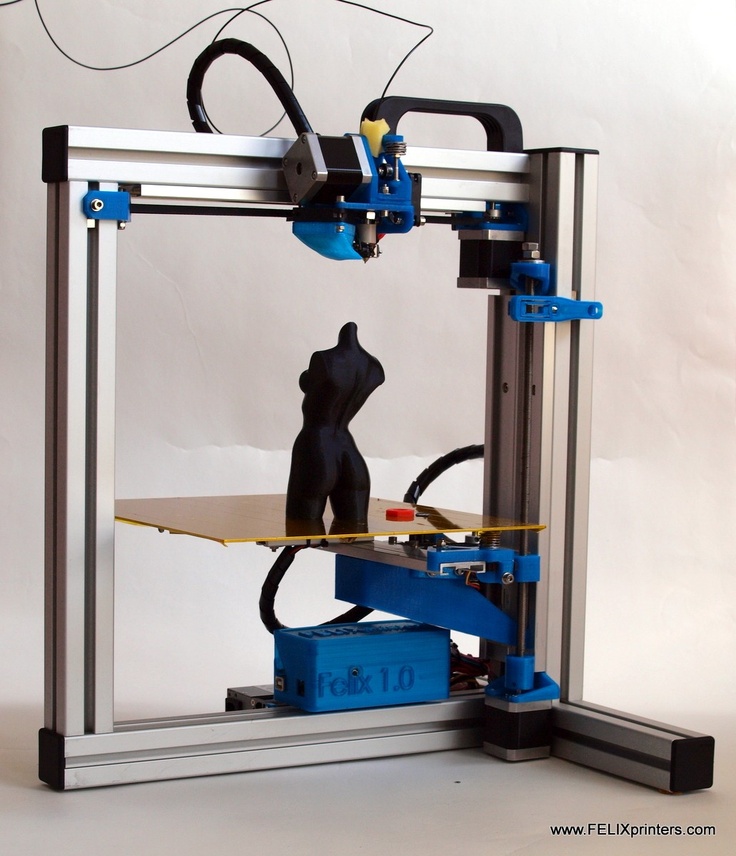 Coverage by: 3DWithUs Twitter: #TCT3Sixty | Birmingham UK | 2022.06.08 2022.06.09 |
| Rapid.Tech 3D | Rapid.Tech 3D is one of the most important information events in the field of generative manufacturing processes. The status and progress of rapid prototyping through to the implementation of end products with the help of additive manufacturing and the introduction of technology into series production are examined. Coverage on: #rapidtech3022 | Messe Erfurt Germany | 2022.05.17 2022.05.19 |
| Rapid + TCT | For more than 30 years, RAPID + TCT has defined the crucial role of additive manufacturing and empowered the establishment of an industry that continues to conceive, test, improve and manufacture new products at a faster, more cost-efficient pace. #rapidtct2022 Coverage by: 3DPN | Detroit US | 2022.05.17 2022.05.19 |
| 3D Print Congress & Exhibition | The whole industry gathers for 3 days to present their latest innovations and industrial solutions in additive manufacturing. Coverage by: 3DWithUs | Lyon France | 2022.04.05 2022.04.07 |
| AMUG 2022 | AMUG educates and advances the uses and applications of additive manufacturing technologies. Coverage by: #AMUG2022 | Chicago US | 2022.04.03 2022.04.07 |
| MACh3022 | MACH is the established UK showcase of the latest in manufacturing technologies. Coverage: #MACh3022 | Birmingham UK | 2022.04.04 2022.04.08 |
| 3D Meetup Sweden | Join your fellow makers, entrepreneurs, enthusiasts, and suppliers for a weekend of networking and knowledge. Have a look at what others around you are doing and get inspired. Perhaps the next big idea will start right here? Coverage: @3DMeetupSweden | Helsingborg Sweden | 2022.03.26 2022.03.27 |
| TIPE 2022 | With a focus on case studies, additive manufacturing user applications, visionary talks on the future, and people shaping the industry, TIPE | 2022 curates an inspirational all-women agenda of speakers and panelists. Coverage by: Women in 3D Printing | Virtual Global | 2022.01.18 2022.01.20 |
| CES 2022 | For 50 years, CES has been the launch pad for new innovation and technology that has changed the world. Held in Las Vegas every year, it is the world’s gathering place for all who thrive on the business of consumer technologies and where next-generation innovations are introduced to the marketplace. Coverage by: The Verge | Las Vegas USA | 2022.01.05 2022.01.08 |
| 3D Printech 2021 | This global forum is anticipated to attract a large number of participants across the world including researchers and industry professionals to foster strong networking opportunities aimed at enhancing career and business goals. Coverage by: | Frankfurt Germany | 2021.12.02 2021.12.04 |
| Formnext 2021 | International exhibition and conference on 3D printing/additive manufacturing & tooling. Coverage by: 3Dnatives | Frankfurt Germany | 2021.11.16 2021.11.19 |
| GITEX Technology Week | Right from global tech enterprises to Silicon Valley’s hottest startups – companies from around the world exhibit at GITEX in anticipation of high-value new business deals, future-empowering innovations and government partnerships. Coverage: #GITEX2021 | Dubai, UAE | 2021.10.17 2021.10.21 |
| Additive Conference | Join the Additive Manufacturing team and the top names in production 3D printing to discuss what’s next for additive technology. Coverage by: AM Media | Cincinnati, OH, US | 2021.10.12 2021.10.14 |
| Inside 3D Printing | Inside 3D Printing plays a major role in helping 3D printing technology to expand across industries as manufacturing, molding, construction, aerospace, automotive, medical, dental, fashion, and jewelry. Coverage by: | Seoul, Korea | 2021. 10.13 10.132021.10.15 |
| TCT 3Sixty 2021 | TCT 3Sixty will offer attendees innovative and interactive 360-degree insights, of how to get the best from their existing additive technology or to provide them with the opportunity for new technology. Coverage by: Matt Denton | Birmingham UK | 2021.09.28 2021.09.30 |
| Rapid + TCT 2021 | North America’s largest and most influential Additive Manufacturing event. Coverage by: AM Media | Chicago US | 2021.09.13 2021.09.15 |
| MRRF 2021 | What is MRRF? It's the worlds largest celebration of open source 3D printing. If you are a hobbyist, enthusiast or any level user of 3D printing then come and enjoy the weekend with others. Not sure what 3D printing is or want to learn more about it? Perfect! Come out and see what it's all about. Coverage by: 3D Printing Nerd: https://youtu.be/lLJRIU5YNOg | Goshen US | 2021.06.26 |
| CES 2020 | For 50 years, CES has been the launch pad for new innovation and technology that has changed the world. Held in Las Vegas every year, it is the world’s gathering place for all who thrive on the business of consumer technologies and where next-generation innovations are introduced to the marketplace. Held in Las Vegas every year, it is the world’s gathering place for all who thrive on the business of consumer technologies and where next-generation innovations are introduced to the marketplace.Coverage by: Print 3D Channel: https://youtu.be/DynbK3Ii2U8 | Los Angeles USA | 2020.01.07 |
| Formnext | International exhibition and conference on 3D printing/additive manufacturing & tooling. Coverage by: 3D Printing Nerd: https://youtu.be/82ZZVIl72yE | Frankfurt Germany | 2019.11.19 |
| Maker Faire Orlando | Maker Faire is the Greatest Show (and Tell) on Earth—a family-friendly festival of invention, creativity, and resourcefulness, and a celebration of the Maker movement. Coverage by: Josef Prusa: https://youtu.be/O--3s4uHCug | Orlando USA | 2019.11.09 |
| ERRF 2019 | The East Coast RepRap Festival (ERRF) invites all community members connected to 3D printing to join us and celebrate the diversity throughout our community and industry. We are inviting companies and individuals to bring out their 3D printers and projects big & small. Bring your passion for 3D and share your creations with our community! This is not a trade show, but a community-powered 3D printing people connecting weekend! We are inviting companies and individuals to bring out their 3D printers and projects big & small. Bring your passion for 3D and share your creations with our community! This is not a trade show, but a community-powered 3D printing people connecting weekend!More details: https://goo.gl/1yk8qa Coverage by: 3DPN: https://youtu.be/D6x_9OleY5Y | Bel Air, Maryland USA | 2019.10.12 |
| TCT Show | For over 20 years, TCT Show has set the industry agenda, bringing together dozens of inspirational speakers, 300+ exhibiting companies and more than 10,000 visitors from over 40 countries. More details: https://goo.gl/c37yz5 Coverage by: Thomas Sanladerer: https://youtu.be/pQ_FTlTxPm8 | Birmingham UK | 2019.09.24 |
| Maker Faire Bay Area | Maker Faire is the Greatest Show (and Tell) on Earth—a family-friendly festival of invention, creativity, and resourcefulness, and a celebration of the Maker movement. More details: https://makerfaire.com/map Coverage by: 3D Printing Nerd: https://youtu.be/2hwCPxLLQPY | Prague Czech Republic | 2019.06.22 |
| Maker Faire Bay Area | Maker Faire is the Greatest Show (and Tell) on Earth—a family-friendly festival of invention, creativity, and resourcefulness, and a celebration of the Maker movement. More details: https://makerfaire.com/map Coverage by: 3D Printing Nerd: https://youtu.be/0cj6dqMgja4 | San Mateo California | 2019.05.17 |
| 3D Meetup UK | 3Dmeetup is coming back in 2019 as a two-day event and promises to be bigger and better than before with the addition of workshops and even more talks. More details: https://goo.gl/BhMhu6 | Birmingham UK | 2019.05.18 |
| Maker Faire Vienna 2019 | Maker Faire is the Greatest Show (and Tell) on Earth—a family-friendly festival of invention, creativity, and resourcefulness, and a celebration of the Maker movement. More details: https://makerfaire.com/map Coverage by: Josef Prusa: https://youtu.be/bELUucZeVWg | Vienna Austria | 2019.05.04 |
| 3D Meetup Sweden | Join your fellow makers, entrepreneurs, enthusiasts and suppliers for a weekend of networking and knowledge. More details: https://goo.gl/PGvPhc Coverage by 3DMN: https://youtu.be/J_uCMf4WFkQ | Helsingborg Sweden | 2019.04.27 |
| Advances in 3D Printing & Modelling | Theme: Trembling the notion of what CAN AND CANNOT be developed in 3D Printing. More details: https://goo.gl/RgCcWq | Amsterdam, Netherlands | 2019.04.15 |
| MRRF 2019 | What is MRRF? It's the worlds largest celebration of open source 3D printing. If you are a hobbyist, enthusiast or any level user of 3D printing then come and enjoy the weekend with others. Not sure what 3D printing is or want to learn more about it? Perfect! Come out and see what it's all about.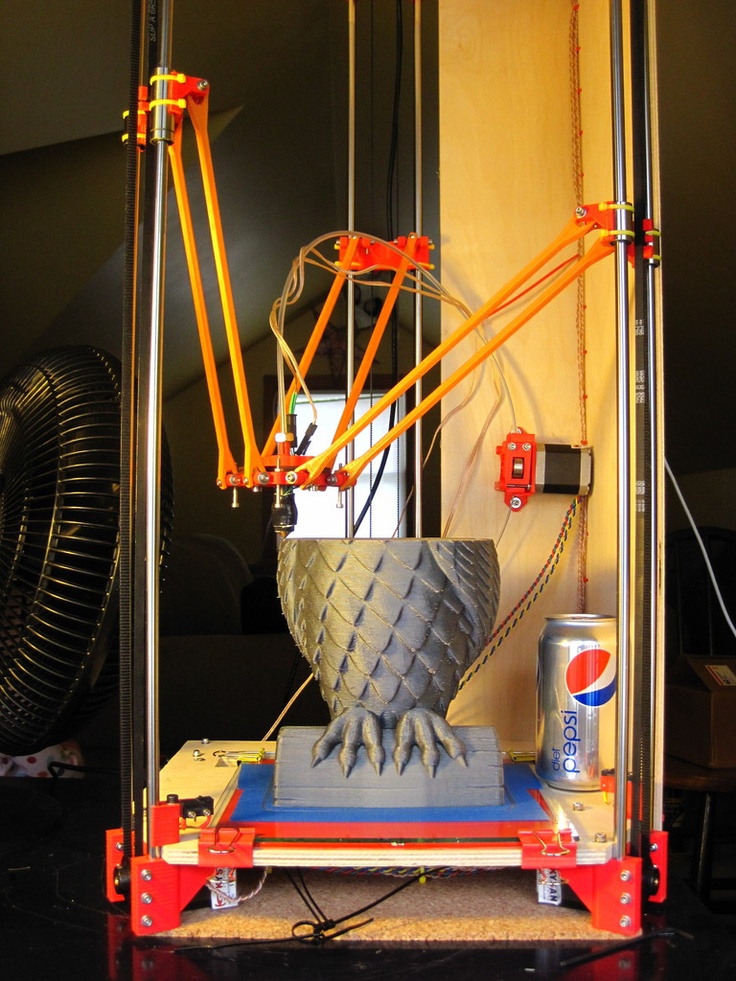 More details: http://bit.ly/2HFVF2l Coverage by: Thomas Sanladerer: https://youtu.be/Czsn3sdHTFQ | Goshen US | 2019.03.29 |
| Maker Faire Lille 2019 | Maker Faire is the Greatest Show (and Tell) on Earth—a family-friendly festival of invention, creativity and resourcefulness, and a celebration of the Maker movement. More details: https://goo.gl/nWeLHT Coverage by: Josef Prusa: https://youtu.be/PqA5s4exArY | Lille France | 2019.03.23 |
| Flexible Materials Roundup! | Stop being so rigid! 3D Printing is more than just hard plastics. Come on out and learn about the huge list of various types of flexible materials from around the world, and how to print with them. More details: https://goo.gl/tYqgmu | West Des Moines USA | 2019.01.21 |
| CES 2019 | For 50 years, CES has been the launch pad for new innovation and technology that has changed the world.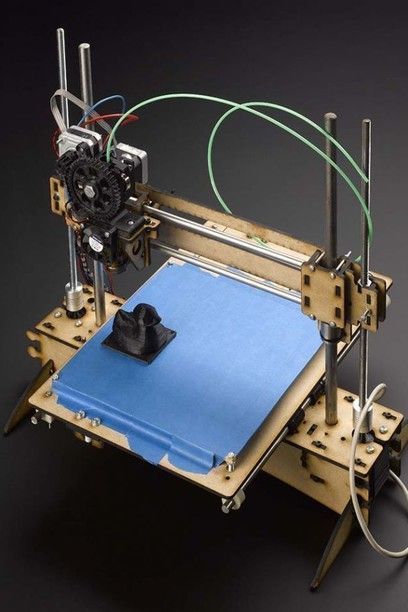 Held in Las Vegas every year, it is the world’s gathering place for all who thrive on the business of consumer technologies and where next-generation innovations are introduced to the marketplace. Held in Las Vegas every year, it is the world’s gathering place for all who thrive on the business of consumer technologies and where next-generation innovations are introduced to the marketplace.More details: https://goo.gl/Vj6BhC Coverage by: The 3D Print General: https://youtu.be/jz9oVjuL6p8 | Los Angeles USA | 2019.01.08 |
| formnext | International exhibition and conference on the next generation of manufacturing technologies. More details: https://goo.gl/Bd8i2H Coverage by: DyeMansion GmbH: https://youtu.be/bN2D98Poiko | Frankfurt Germany | 2018.11.13 |
| Viaggio a Shamballa (Travel to Shamballa) | Presentation of the new technology for architectural 3d printing. The Crane WASP “ the infinity 3d printer” will be presented on 6th and 7th October in Massa Lombarda. More details: https://goo.gl/hRrBkx Trailer: https://youtu.be/KS1mb8QVE-E Coverage by: | Massa Lombarda Italy | 2018.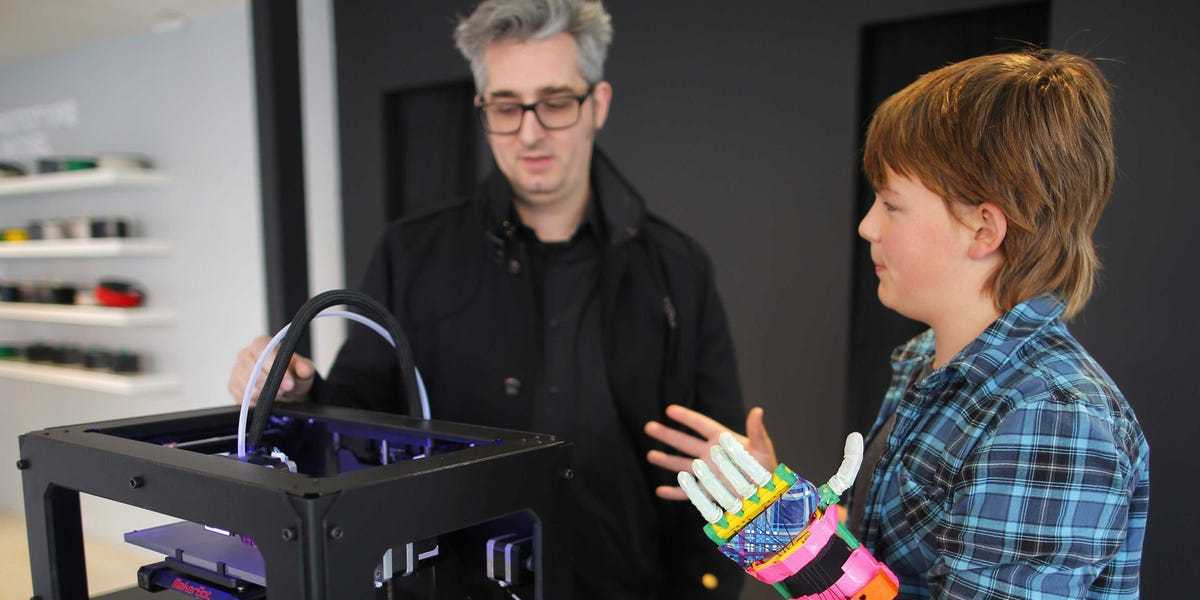 10.06 10.06 |
| TCT Show | For over 20 years, TCT Show has set the industry agenda, bringing together dozens of inspirational speakers, 300+ exhibiting companies and more than 10,000 visitors from over 40 countries. #tctshow18 #tctshow More details: https://goo.gl/c37yz5 Coverage by: Highlights by 3DWithUs | Birmingham UK | 2018.09.25 |
| Maker Faire New York | Maker Faire is the Greatest Show (and Tell) on Earth—a family-friendly festival of invention, creativity and resourcefulness, and a celebration of the Maker movement. #wmfny18 More details: https://goo.gl/nWeLHT Coverage by: | New York USA | 2018.09.22 |
| Advanced Manufacturing Yesterday & Today | Stanley+Techstars Additive Manufacturing Accelerator Presents A Panel Discussion: Advanced Manufacturing Yesterday & Today. More details: https://goo.gl/bjQRSd Coverage by: | Hartford US | 2018. 09.20 09.20 |
| 3D Meetup UK | We are pleased to announce our the first 3dmeetup.UK event will be held on Saturday the 18th of August From 11 am till 5 pm. We want this to be a forerunner to more 3D printing events and meetups. More details: NA Coverage by @3dmeetupUk: https://goo.gl/5FjKkZ | Birmingham UK | 2018.08.18 |
| ERRF 2018 | The East Coast RepRap Festival (ERRF) invites all community members connected to 3D printing to join us and celebrate the diversity throughout our community and industry. We are inviting companies and individuals to bring out their 3D printers and projects big & small. Bring your passion for 3D and share your creations with our community! This is not a trade show, but a community powered 3D printing people connecting weekend! More details: https://goo.gl/1yk8qa Mosaic Palette+ at ERRF 2018 by DesignMakeTeach: https://youtu.be/tHyENnP4E48 | Bel Air, Maryland USA | 2018. 06.23 06.23 |
| 3D Printing Live | The Nordic Additive Manufacturing Show More details: https://goo.gl/dH7s2a Coverage by: | Copenhagen Denmark | 2018.05.31 |
| Maker Faire Bay Area | Maker Faire is the Greatest Show (and Tell) on Earth—a family-friendly festival of invention, creativity and resourcefulness, and a celebration of the Maker movement. More details: https://goo.gl/t9NKP2 Coverage by Thomas Sanladerer: https://youtu.be/bhZv04JzE9I | San Francisco USA | 2018.05.18 |
| #3DPIAwards 2018 | 3DPI will host the awards in May at a venue in London, UK. Nominees will be invited to attend and winners will receive a unique trophy, especially designed by a prize-winning 3D designer and 3D printed for the event. More details: https://goo.gl/ujwWxN Winners Announced by 3DPI: https://goo.gl/CzRDrs | London UK | 2018. 05.17 05.17 |
| 3D Meetup Sweden | Join your fellow makers, entrepreneurs, enthusiasts and suppliers for a weekend of networking and knowledge. More details: https://goo.gl/PGvPhc Coverage by Daniel Norée: https://youtu.be/iYh59P_EomM Coverage by Cat: https://youtu.be/gy3OiGnaxTc Fundraising by 3D Printing Nerd: https://youtu.be/GgXdnn01ZnI | Helsingborg Sweden | 2018.04.14 |
| Maker Meetup +MakersMuse | We will be showcasing all the latest 3D technology and we will also be inviting industry experts to share their experiences and knowledge. There will be various workshops from 3D scanning, printing, laser cutting plus many more. More details: https://goo.gl/3gGtcm Coverage by: | Melbourn Australia | 2018.03.24 |
| Midwest RepRap Fest | What is MRRF? It's the worlds largest celebration of open source 3D printing. If you are a hobbyist, enthusiast or any level user of 3D printing then come and enjoy the weekend with others.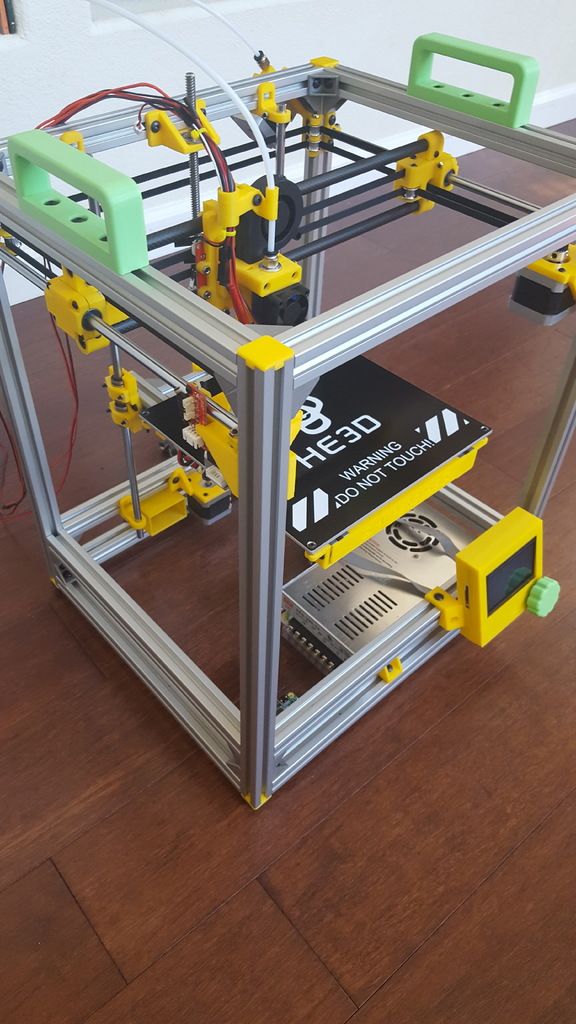 Not sure what 3D printing is or want to learn more about it? Perfect! Come out and see what it's all about. Not sure what 3D printing is or want to learn more about it? Perfect! Come out and see what it's all about.More details: https://goo.gl/9QYBJ5 Coverage by: Thomas Sanladerer: https://youtu.be/J54OfY1__fU Coverage by: Nerys: https://youtu.be/kBhOZS5ADxw Coverage by: 3D Printing Nerd: https://youtu.be/08Y6tlDX2o8 | Goshen, IN USA | 2018.03.23 |
| 3D Printing Pop-up Event | The one of a kind event will operate on a drop-in basis, with several one-hour application seminars each day, and represents a perfect opportunity for people to find out from industry experts how the latest 3D printing technology might help them. More details: https://goo.gl/RiUjxd Coverage by: | London UK | 2018.03.07 |
| CES 2018 | For 50 years, CES has been the launch pad for new innovation and technology that has changed the world. Held in Las Vegas every year, it is the world’s gathering place for all who thrive on the business of consumer technologies and where next-generation innovations are introduced to the marketplace. More details: https://goo.gl/Vj6BhC Coverage by: 3D Print General: https://youtu.be/HbqJzi_TcE0 | Los Angeles USA | 2018.01.09 |
| TCT Show | The 22nd TCT Show continues to set the agenda for the industry bringing together dozens of inspirational speakers. They come together for insight, education, innovation and most importantly to do business. The mix of expert speakers, real world applications and innovations alongside product launches, live demonstrations and exciting features creates an event that bristles with energy. More details: https://goo.gl/c37yz5 Coverage by 3D Maker Noob: https://youtu.be/v3Xnb0XzlAs | Birmingham UK | 2017.09.26 |
| Maker Faire New York | Maker Faire is the Greatest Show (and Tell) on Earth—a family-friendly festival of invention, creativity and resourcefulness, and a celebration of the Maker movement. More details: https://goo.gl/nWeLHT Coverage by Maker's Muse: https://youtu.  be/2GviaIvT9Uk be/2GviaIvT9Uk | New York USA | 2017.09.23 |
| 3D Printing Industry Awards | 3DPI will host the awards in May at a venue in London, UK. Nominees will be invited to attend and winners will receive a unique trophy, especially designed by a prize-winning 3D designer and 3D printed for the event. More details: https://goo.gl/ACVqMy Coverage by Afro3dprinter: https://youtu.be/vV2QtpJ_0Qg | London UK | 2017.05.17 |
| Maker Faire Bay Area | Maker Faire is the Greatest Show (and Tell) on Earth—a family-friendly festival of invention, creativity and resourcefulness, and a celebration of the Maker movement. More details: https://goo.gl/t9NKP2 Coverage by 3D Printing Nerd: https://youtu.be/06_1kygG_Z8 | San Mateo, USA | 2017.05.19 |
| CES 2017 | For 50 years, CES has been the launch pad for new innovation and technology that has changed the world. Held in Las Vegas every year, it is the world’s gathering place for all who thrive on the business of consumer technologies and where next-generation innovations are introduced to the marketplace. Held in Las Vegas every year, it is the world’s gathering place for all who thrive on the business of consumer technologies and where next-generation innovations are introduced to the marketplace.More details: https://goo.gl/Vj6BhC Coverage by 3D Printing Nerd: https://youtu.be/QjcfDdRYNkI | Las Vegas USA | 2017.01.05 |
| DIGICAL Show | The DIGICAL Show aims to bring together all the latest developments in the desktop 3D printing and 3D scanning industry. More details: https://goo.gl/6q9wBw Coverage by 3DWithUs: DIGICAL Show - 3DWithUs | London UK | 2016.09.30 |
Please feel free to contact us if you think that a particular Event or Coverage should be added.
3D Printing Conventions and Conferences
General tech events, like CES in Las Vegas or GITEX in Dubai, are essentially global conventions. They draw together businessmen, engineers and the curious from all over the world. At such conventions and associated conferences, the real-life experience exchange in technology innovation takes place.
With the 3D printing industry going strong in the past two decades, we see more and more AM manufacturers taking part in such conventions and conferences.
Meetups at 3D Printing Events
Every community has its own leaders and celebrities. So does 3D printing community. It is a good chance to meet a YouTuber, for example, whose channel you are subscribed to and following most of the tutorials, reviews or other entertaining videos. In some cases, you can get a sticker or a selfy picture with them.
Thomas Sanladerer Interviewing Ian From Duet3D(Image: 3DWithUs)
What to do if you are unable to visit an event? No worries, the dedicated 3D printing community members often share their experience with others. You can follow them on social media such as Twitter or YouTube where they often share it live.
If you are unable to watch a video but want to be updated live, then we would recommend following a particular hashtag on Twitter on Instagram like #CES22, #TCT21, #ERRF21, etc.
Coverage by …
We will find corresponding materials that could describe the events that have already happened. In the playlist below, you can find cherry-picked 3D printing-related event’s recaps that caught our glimpse.
Read More: Formnext – Yearly Highlights and Preview
Formnext has established itself as the key 3D printing industry event, and it is well-known for the innovations. Additive manufacturers are holding off from making their announcements until it’s the right time and place.
PEEK 3D Printing & Delta WASP 3MT on Formnext(Image: 3DWithUs)
Read More: TCT3Sixty – Yearly Highlights and Preview
TCT3Sixty covers all aspects of additive manufacturing from design to production. Every year it attracts all sort of companies involved in 3D printing, from big names to start-ups.
(Image: 3DWithUs)
Mon, 10 - Wed, 12 Oct 2022 | Dubai, UAE | The Prime Meetings takes the pleasure to invite you to the Global Meet on 3D Printing and Additive Manufacturing (GM3DPRINT) will be held in Dubai. GM3DPRINT, is an annual meeting organized with the intend... | ConferenceIndustrial Engineering | ||
Thu, 13 Oct 2022 | Glasgow, UK | TradeshowPacking & Packaging | |||
Featured Events | |||||
Mon, 10 - Fri, 14 Oct 2022 | Dubai, UAE | GITEX Global is the largest regional IT exhibition will play a more significant role. As well as defining the latest trends, presenting high caliber speakers & showcasing product innovations from across. | TradeshowIT & TechnologyArtificial Intelligence3D Printing | ||
Tue, 18 - Thu, 20 Oct 2022 | Singapore • Online | A premier trade show & conference for Industry 4.0 solutions | TradeshowIndustrial EngineeringVirtual Reality3D Printing | 115 3.8 | |
Wed, 19 - Thu, 20 Oct 2022 | Tel Aviv-Yafo, Israel | ConferencePacking & PackagingPrint & PrintingIT & Technology | |||
Wed, 19 - Thu, 20 Oct 2022 | Paris, France | TradeshowPacking & PackagingIndustrial Engineering | |||
Thu, 20 - Fri, 21 Oct 2022 | Alzenau, Germany | ConferenceIndustrial Engineering | |||
Mon, 24 - Tue, 25 Oct 2022 | Rotterdam, Netherlands | ConferenceMedical & Pharma | |||
Mon, 07 - Tue, 08 Nov 2022 | Paris, France | Future Innovations and Magnifying Discoveries in the Field of 3D Printing | ConferenceIndustrial EngineeringScience & Research4D PrintingPaid entry | 617 3. | |
Mon, 07 - Wed, 09 Nov 2022 | Chicago, USA | International Meet & Expo on 3d Printing and Additive Manufacturing share an insight into the recent research and cutting-edge technologies, which gains immense interest with the colossal and exuberant... | TradeshowPacking & PackagingIndustrial Engineering | ||
Wed, 09 - Fri, 11 Nov 2022 | tp. Bắc Ninh, Vietnam | TradeshowPacking & PackagingIT & Technology3D Printing | |||
Wed, 09 - Sat, 12 Nov 2022 | Shenzhen, China | TradeshowPacking & PackagingIndustrial Engineering | |||
Thu, 10 - Sat, 12 Nov 2022 | Seoul, South Korea | KoreaA¢a‚¬a„¢s largest sign and design industry show | TradeshowEntertainment & Media | 259 4. | |
Mon, 14 - Wed, 16 Nov 2022 | Valencia, Spain | ConferencePacking & Packaging | |||
Tue, 22 - Wed, 23 Nov 2022 | ConferencePacking & PackagingIndustrial Engineering | ||||
Wed, 23 - Thu, 24 Nov 2022 | Kolmården, Sweden | ConferenceMinerals, Metals & OresPrint & PrintingIndustrial EngineeringIT & Technology | |||
Thu, 24 Nov 2022 | Eindhoven, Netherlands • Online | 3D Food Printing for professionals | ConferencePrint & PrintingFood & Beverages | ||
Sun, 27 - Wed, 30 Nov 2022 | Cairo, Egypt | The Digital Experience | TradeshowComputer & GadgetsTelecommunicationIT & Technology3D Printing | ||
Sat, 17 Dec 2022 | Porto, Portugal • Online | MANUFACTURE PLANET provides people around the world the opportunity to hear the most remarkable leaders in the field. | ConferenceIndustrial Engineering3D PrintingPaid entry | ||
Wed, 15 - Thu, 16 Feb 2023 | Eindhoven, Netherlands • Online | ConferenceMedical & PharmaPacking & PackagingPrint & Printing | |||
Sat, 25 Feb 2023 | Online | In this program is for you who dream with changing the world and making at better place. In the first day you will learn about the worlds’ most urgent problems, including: poverty, water, food, shelter,... | ConferenceIT & Technology3D PrintingPaid entry | ||
Mon, 20 - Tue, 21 Mar 2023 | Dubai, UAE | Exploring New Innovations in 3D Printing & Manufacturing Technologies | ConferenceIndustrial EngineeringIT & TechnologyPaid entry | ||
Featured Events | |||||
Wed, 29 - Thu, 30 Mar 2023 | Lyon, France | ConferencePrint & PrintingIndustrial EngineeringSecurity & Defense3D Printing | |||
Tue, 28 - Fri, 31 Mar 2023 | Kielce, Poland | TradeshowPacking & PackagingPrint & PrintingIT & Technology3D Printing | |||
Thu, 20 Apr 2023 | Milton Keynes, UK | 3D Printing Expo is a platform where you can explore the business applications of 3D printing through conference sessions led by industry experts, demonstrations of the latest 3D printers and services,. | TradeshowPacking & PackagingPrint & Printing3D Printing | ||
Thu, 20 Apr 2023 | Vienna, Austria | ConferenceIndustrial Engineering | |||
Thu, 20 Apr 2023 | Vienna, Austria | ConferenceIT & Technology | |||
Thu, 27 - Sun, 30 Apr 2023 | Hong Kong | Sealing Success for the Printing and Packaging Industries | TradeshowPacking & PackagingPrint & PrintingAdvertising3D Printing | 967 3.9 | |
Wed, 17 May 2023 | Tel Aviv-Yafo, Israel | TradeshowPacking & PackagingPrint & PrintingIT & Technology3D Printing | |||
Tue, 23 - Wed, 24 May 2023 | Dublin, Ireland | TradeshowPacking & PackagingPrint & Printing3D Printing | |||
Mon, 29 - Wed, 31 May 2023 | Guangzhou, China | International Exhibition on Shoes & Leather Industry | TradeshowApparel & ClothingLeather & Leatherite3D Printing | 690 4. 1 1 | |
Tue, 06 - Thu, 08 Jun 2023 | Lyon, France | 3d Print Conference & Exhibition is definitely the gathering of the additive manufacturing community that links all markets: aeronautics, automotive, medical health, electronics, construction, jewelry,... | TradeshowPacking & PackagingIT & Technology | ||
Wed, 07 - Thu, 08 Jun 2023 | Birmingham, UK | The Event For 3D Printing & Additive Manufacturing Intelligence | TradeshowAuto & AutomotiveAerospaceIT & Technology3D Printing | 122 4.9 | |
Wed, 21 - Fri, 23 Jun 2023 | tp. Thủ Dầu Một, Vietnam | 3D Print Fiesta in VIMF Series | TradeshowAuto & AutomotiveIT & Technology | ||
Wed, 21 - Fri, 23 Jun 2023 | Koto, Japan | TradeshowPacking & PackagingPrint & Printing | |||
Wed, 12 - Thu, 13 Jul 2023 | Nottingham, UK | ConferencePrint & PrintingIndustrial EngineeringFabrications3D Printing | |||
Wed, 23 - Sat, 26 Aug 2023 | Taipei, Taiwan | Integrate all types of exhibitor in industry supply chain, present comprehensive solution | TradeshowPacking & PackagingPrint & PrintingIT & Technology | ||
Wed, 23 - Sat, 26 Aug 2023 | Taipei, Taiwan | The leading industrial procurement platforms in Asia | TradeshowElectric & ElectronicsIT & Technology3D Printing | ||
Mon, 28 - Wed, 30 Aug 2023 | London, UK | It is a great pleasure to host the 3DPrinting2023 will be held in London, UK. | ConferenceIndustrial EngineeringEducation & TrainingPaid entry | ||
Wed, 18 - Sat, 21 Oct 2023 | Heidelberg, Germany • Online | ConferenceMedical & PharmaNatural & OrganicInfectious Diseases | |||
Fixing the 20 Most Common 3D Printing Problems
3DPrintStory 3D printing process Fixing the 20 Most Common 3D Printing Problems
3D printing allows you to create amazing models. But everyone faces unpleasant moments when even a simple model does not print well.
You checked the model, made sure that many people have already printed it and they had no problems.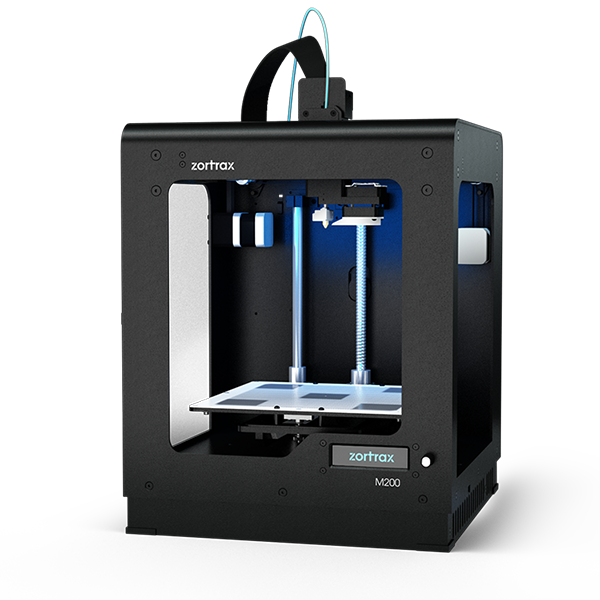 What are you doing wrong?
This article has collected 20 of the most common 3D printing problems. We hope that the article will help you quickly identify the problem and find a solution for it. In addition, the article details the causes of problems during 3D printing, which will help you avoid them in the future.
Model tearing off
Problem description
At the base, the model rises up relative to the table (English - warping). In addition to the quality of the manufactured part, this problem can prevent the printing of tall parts that can finally fall off the table.
What causes this problem during 3D printing?
Part breakage is a very common problem due to the nature of the printable plastic. As the ABS or PLA plastic cools, it begins to make poor contact with the surface, so the "warping" effect occurs when the plastic cools too quickly.
Solve the problem: part is torn off
- Use a heated table.
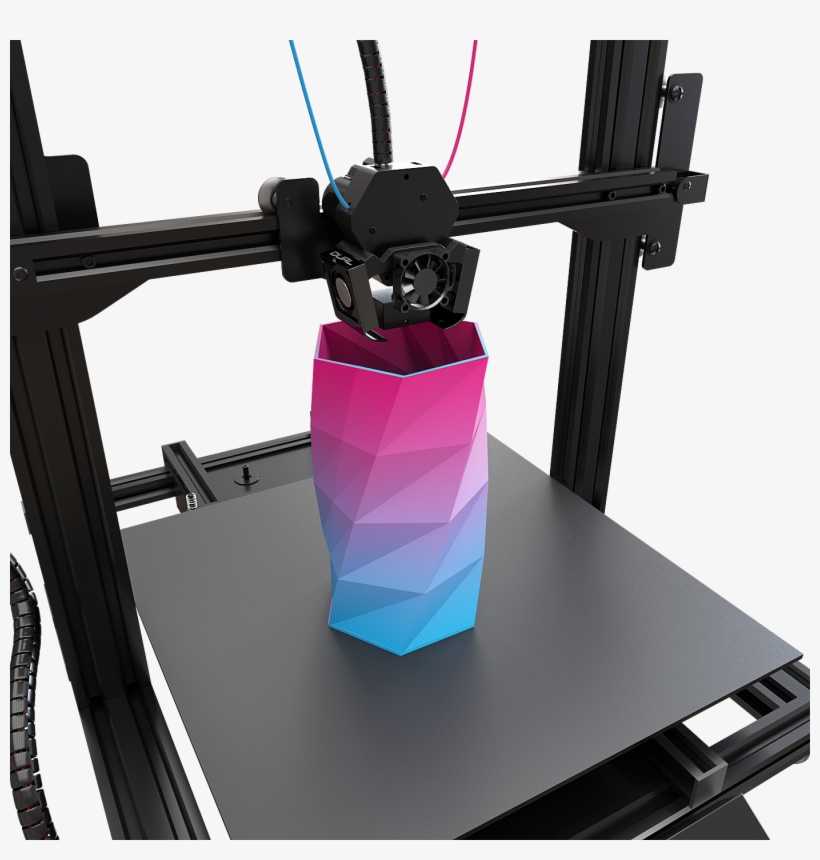 The simplest solution is to use a heated table slightly below the melting point of the plastic. If the temperature is correct, the first layer will be in firm contact with the table. Most often, the platform temperature is set in the program to generate the g code for the model. The recommended temperature is often indicated on plastic packaging.
 - Use glue. If your model still wraps around the corners, apply some glue to the print bed.
- Try another table. Replace your print bed with a model that offers better adhesion. Manufacturers such as Lulzbot use PEI (Polyetherimide) surfaces. XYZPrinting add special tape to the printer box and that works great too (but they don't have heated tables). Zortrax 3D 3D printers solve the problem differently - with the help of small holes in the table.
- Level the print table. The print bed may need to be calibrated. During calibration, make sure that the tip of the extruder is at a suitable, uniform height from the stage along its entire plane.
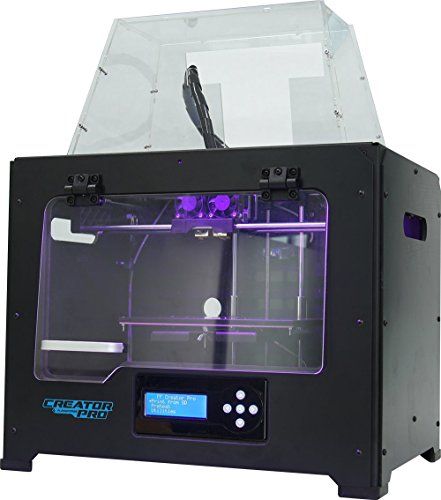
- Reinforce contact. Increasing the contact between the model and the print table is another easy way. Most 3D printing software has the ability to add additional layers to the base.
- Play around with the temperature. If none of the above work, try increasing the print bed temperature in 5-degree increments. Also pay attention to the operating modes of the coolers. Usually coolers start to work at full capacity when the model height is about 0.5 mm. Try increasing this height to 0.75mm so that the base layers have more time to cool naturally.
And finally, even if you have a heated table, applying a little glue is unlikely to hurt.
3D Printing Problem Checklist: Part 9 Tear Off0017
- Use a heated bed
- Add glue to the print bed
- Use a high-adhesion bed from quality manufacturers
- Calibrate the bed
- Add extra layers to the model base in your 3D printing software
- Play around with temperature and settings cooler
Elephant leg
Description of the problem
The base of the model is printed with a clear indentation to the outside.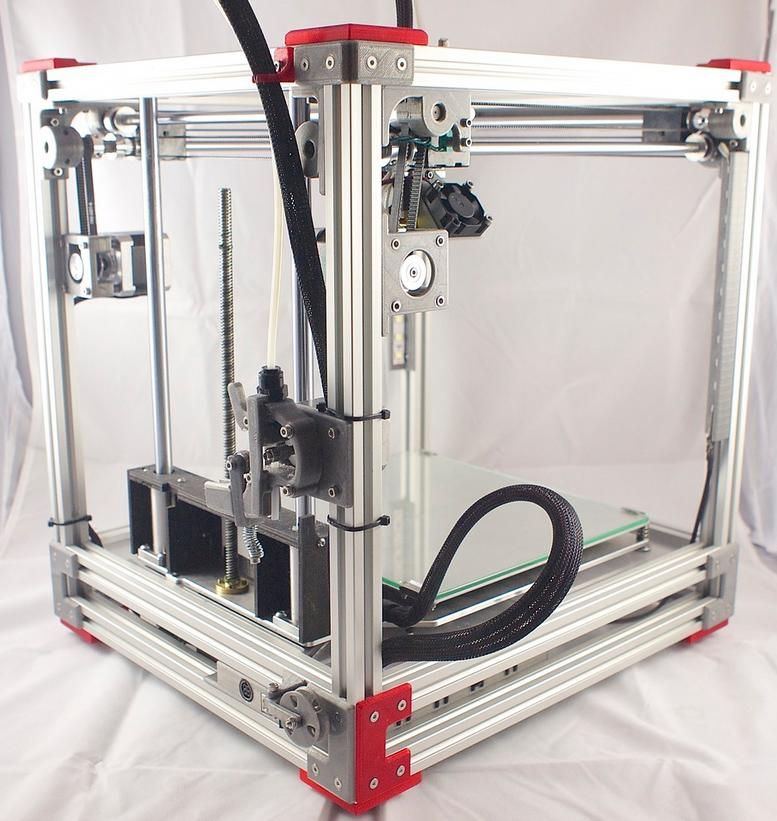 It is called - “elephant's foot”
What causes this problem during 3D printing?
This undesirable effect is caused by the mass of the model itself, which presses on the first, insufficiently cooled layers. In particular, this problem occurs if you have a heated table.
Solve the problem: "Elephant's foot"
- Correct balance. In order to avoid this problem, it is necessary to properly cool the layers at the base of the model. The base layers must be able to support the mass of the part, but not overcool, so that the part does not start to come off the table. Finding the right balance can be tricky. Start by lowering the table temperature in 5 degree increments (within +/- 20 degrees from the recommended temperature). If your bottom and top layers are set to 0.6mm, start cooling earlier.
- Level the table. Most 3D printing problems are caused by improper table alignment. Start with calibration recommendations from your printer manufacturer.
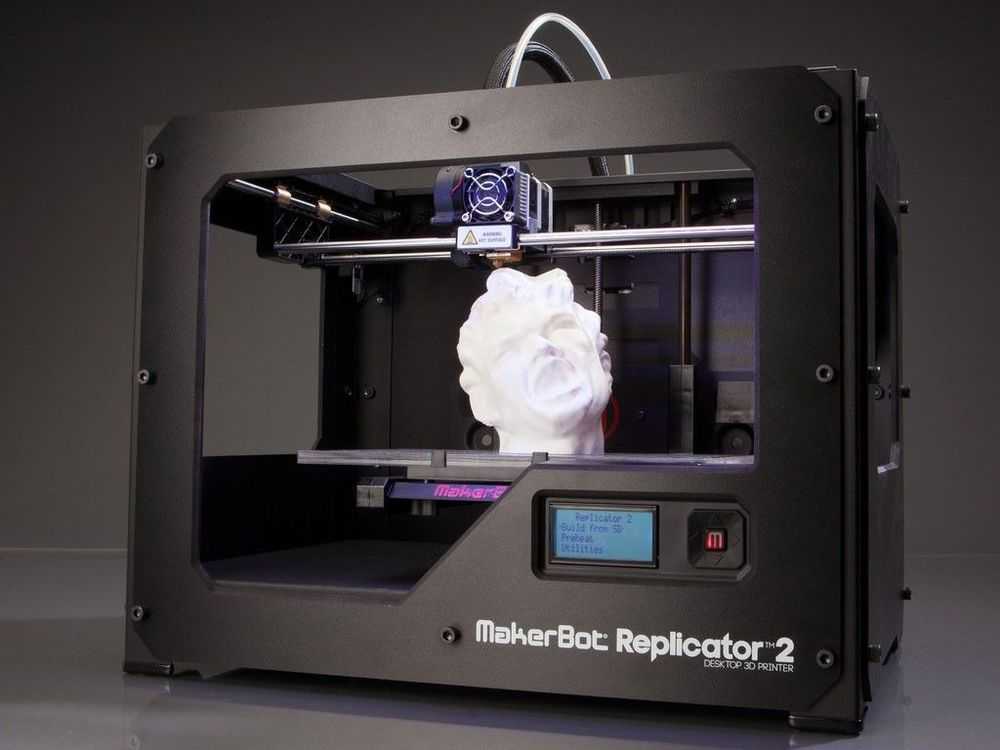 After that, print a square for calibration and evaluate how the plastic lays down. After printing, you will be able to see how evenly the plastic lays down depending on the height of the extruder relative to the table.
 - Raise the extruder. A simple increase in the distance between the extruder and the table can help. But if the distance is too large, the plastic will not stick to the table.
- Chamfer the base of the model. If none of the above work, you can chamfer the base of your model. Of course, this is only possible if you developed the print model yourself or have access to the original file. Start with a 5mm 45º bevel and experiment for the best result.
3D Printing Problem Checklist: Elephant Leg
- Adjust Table Temperature and Cooler Speed
- Calibrate Table
- Check the distance between the extruder and the table
- Chamfer the base of the model
If you are interested in more detailed information on this problem, we recommend that you read our detailed material on eliminating the "elephant leg" problem.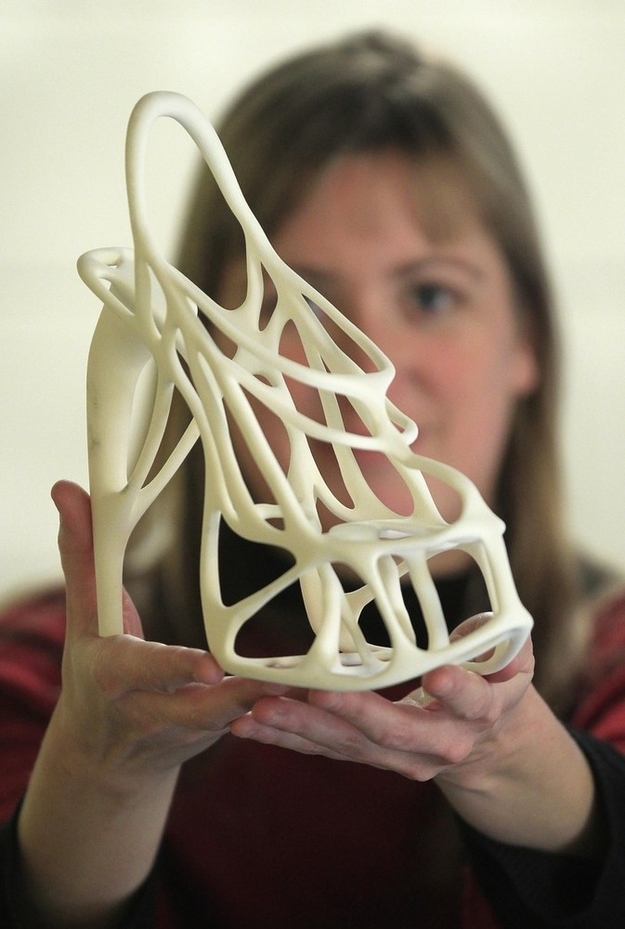
Other first layer problems
Description of the problem
The first layer does not adhere well to the table and some parts come off. Unwanted lines appear at the base of the model.
What causes this problem during 3D printing?
Such problems are a sign that the table has not been correctly calibrated (table calibration on the example of the Anet A8 3D printer). If the extruder is too far from the table, unwanted lines appear on the base and/or the first layer does not stick. If the extruder is too close, voids may appear.
Important: The print bed must be as clean as possible. Even fingerprints can cause the model to come off.
Solve the problem: The remaining problems of the first layer
- Calibrate the table. Each printer has its own table calibration features. For example, the latest Lulzbot models have an automatic calibration system. Ultimaker 3D printers are configured manually according to the corresponding guide.
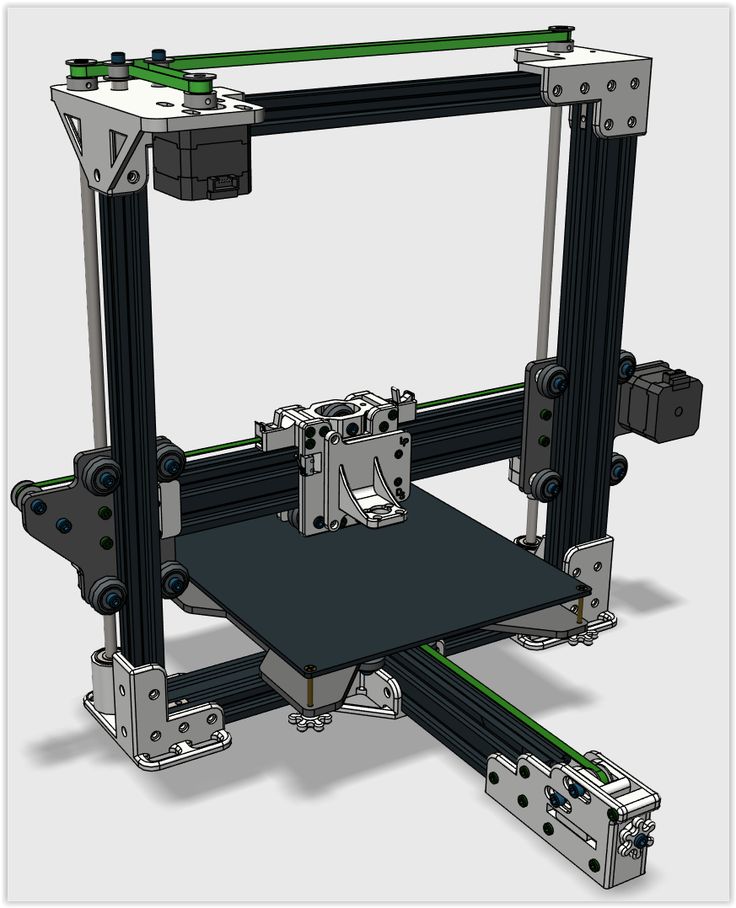 With Prusa i3 printers, you have to tinker a little longer and think for yourself.
 - Adjust the distance between the extruder and the table. If the extruder is too high, the plastic will not grip the platform. If too low, you may damage the table.
- Clean the print table. It is advisable to clean the table before each new print. Especially if you are using glue. Fingerprints and adhesive residue may cause the model to come off.
- Add glue. A small layer of adhesive can significantly improve adhesion. But do not forget that if you do not clean the table, then the use of glue can lead to the opposite effect.
- Special tape for non-heated table. If you are using an unheated platform, try applying tape to improve the contact between the base of the model and the table.
Cheklist of 3D Problem: the remaining problems of the first layer
- Calibrate the table
- Check the height of the extruder relative to the table
- Clean the table
- Use the special tape without heated 9009
- Check belts. Start by checking belt tension. You should feel resistance as you bring them together with your fingers. If the top of the belt is stiffer than the bottom, this is a clear sign that they need to be tightened.
- Check table top plate. Check the top plate and screw sets in the printer. Make sure everything is taut and aligned where needed.
- Check the Z-axis screws. Most 3D printers use a screw-nut pair instead of a ball screw. In general, this does not particularly affect the print quality, but over time, the screw may deform. Do not disassemble the printer to check the screws. It is enough to use a program like ‘Printrun’ and move the extruder up and down.
 If one of the screws is deformed, you will notice it. Unfortunately, it's almost impossible to fix this. But, on the other hand, this is a great chance to modify your 3D printer and replace the screws with screw-nut pairs.
 - Check belt tension
- Check the reliability of fixation of the upper part of the table for printing
- Make sure that the Zears of the Z axis are not deformed 9009
Last layers
9000 9000 description of the problem 9000 the model has voids because some layers were simply skipped (partially or completely).What causes this problem during 3D printing?
The printer did not feed the required amount of plastic. This may be due to problems with the plastic (for example, it has a different diameter), the extruder, or the plastic feed mechanism.
Friction has caused the table to stop temporarily. The reason may be that the vertical screws are not calibrated.
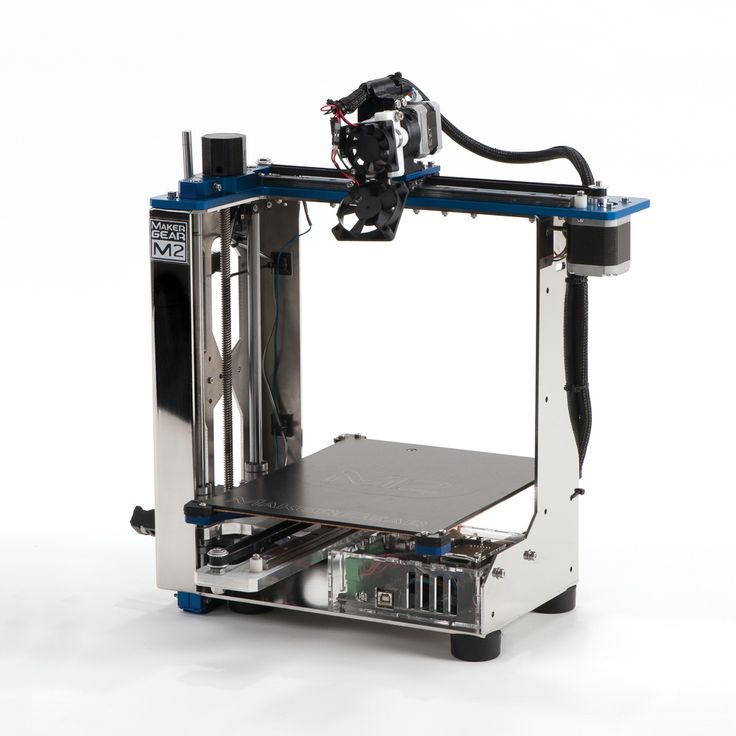
There is a problem with one of the screws or the Z-axis nut. For example, the screw is damaged, dirty, or not well lubricated.
Troubleshooting: Missing layers
- Mechanics check. A 3D printer, like any other piece of equipment, needs maintenance. If you have this problem, this is a clear sign that you should pay attention to its service. Start by checking the screws. Make sure they are well seated in the bearings/holes, with no undue misalignment.
- Screw alignment check. Check that all screws are aligned and not bent. You can appreciate this by turning off the power and carefully moving the extruder along the coordinate axes (depending on the layout of your 3D printer). If you feel resistance, then something is wrong.
- Damaged bearings. Damage to the bearings is manifested in the characteristic vibration during the operation of the 3D printer. If you notice vibrations, turn off the power and manually move the carriage with the extruder to find exactly where the bearing failed.
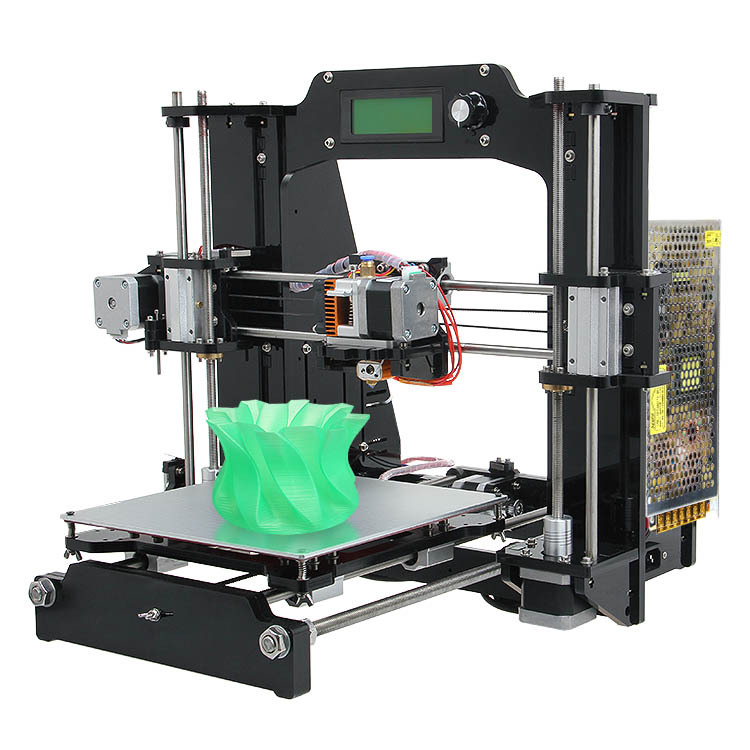
- Check lubrication. Many people forget about the lubrication of joints. But this is a very important point for the correct operation of your 3D printer. Regular machine oil is inexpensive and is great for maintaining printer connections. Before lubricating, check the guides. They must not be dirty. You need to apply a little oil. If you have applied too much lubricant, simply wipe off the excess with a rag. Naturally, after lubrication, check that the carriages run smoothly.
- Plastic feed problem. The last possible problem is insufficient plastic supply. The solution to this problem may not be simple, so it is considered separately below.
3D Printing Issue Checklist: Missing Layers
- Check mechanics and make sure all screws are tight
- Check screw alignment
- Check bearings
- 0016 Problem Description
Dimples form on the sides of the model, especially on tall models.
 One of the most unexpected problems, the solution to which is usually not where you are looking for it.
 What causes this problem during 3D printing?
In higher layers, the material cools faster because the heating from the table does not reach this height. Because of this, adhesion on higher layers is lower.
Solve the problem: Dimples on high models
- Extruder temperature. Start by raising the extruder temperature in 10ºC increments. The specifications for your plastic should list operating temperatures. Try to keep the temperature within the specified range.
- Cooler direction and speed. Check the coolers, make sure they work and point to the model. If so, try reducing their speed.
3D Printing Problem Checklist: Dimples on Tall Models
- Check extruder temperature and raise it in 10 degree increments
- Check the location and speed of the coolers aimed at the 3D model
Dimples, holes on the top of the model
Description of the problem
Dimples or even holes form on the top of the model.
What causes this problem during 3D printing?
The two most common causes are improper cooling of the top layer or insufficient thickness.
Solve the problem:
hollows, holes on the top of model- Printable plastic diameter. Most common when printing with 1.75 plastic. Similar problems can appear in any 3D printer, but most often they appear when using plastic with a diameter of 1.75 mm, not 2.85.
- Check cooler location. Any cooling problems are naturally related to coolers. At the start of printing, the coolers run slowly or turn off altogether, but after the first coat they should work much harder. Be sure to rate the performance of the coolers at the end of the print. If everything works, just in case, check the direction of their rotation. Cold air should flow to the model, and not vice versa.
- Set the fan speed in G-code. As the last layers of the model are formed, the cooling must be very intense so that the plastic does not fall into the holes of your mesh in the model.
 Cooler speed can be configured in G-code. The standard code for an on cooler is M106 and M107 for off. That is, adjust the maximum speed for the upper layers. An example would be a 1 cm by 1 cm cube with a layer thickness of 0.1 mm. In this case, the G-code obtained from CURA for the Prusa i3 3D printer will be 97 layers. Knowing that we have the 'Bottom / Top Thickness' settings set to 0.6mm, we can look at ;LAYER:91 and add M106 S255 at the end of the line. The M106 kicks off the cooler, while the S255 makes it run at full capacity.
 - Increase the thickness of the top layer. The simplest solution is to increase the thickness of the top layer. In most applications, this can be done in the advanced settings under ‘Bottom / Top Thickness’. It is desirable to form a minimum of 6 layers and 8 for extruders with a smaller nozzle diameter and, accordingly, a smaller plastic diameter. So if the layer height is 0.1mm, set ‘Bottom / Top Thickness’ to 0.6mm. If this does not help, increase the thickness to 0.
 8 mm.
8 mm.
3D printing problem checklist:
hollows, holes on the top of the model- Increase the diameter of the printing plastic
- Make sure the coolers are correctly installed and working
- Specify the speed of the cooler in manual mode - in G-code 9027 Increase top layer thickness
Plastic Residue
Problem Description
Unwanted plastic residue forms between model parts.
What causes this problem during 3D printing?
When the extruder is moving and not printing (in idle mode), plastic residue is still coming in.
Solving the problem:
plastic residue (more detailed article on troubleshooting plastic residue between parts of the 3D model)- Activate the Retraction option. Retraction is a very useful option, especially when it comes to finishing. It works very simply - before the print head begins to move, the plastic flows back into the extruder, and is not fed.
 Thus, the problem can be nipped in the bud.
 - One-click backfeed activation. Most apps like Cura offer a one-click option to activate this option. The default settings are used, which is sufficient for most cases. However, if you want more flexibility, there should be other options. For example, you can set the minimum printhead path before activating plastic backfeed.
- Minimum travel (mm). Reducing the minimum path is usually the quickest fix if the standard retraction settings didn't help. Decrease this value by 0.5 mm until the problem goes away. By the way, activating reverse feed will increase the speed of 3D printing.
- Just cut off the rest of the plastic. This is not the most elegant solution, but by far the easiest and fastest.
Cheklist of 3D Problem:
Residual plastic- Turn on the return submission of plastic (Retraction option)
- Set up the minimum path before starting feedback
- Just delete the remaining plastic with a knife
Regularly
The 3D printer cannot feed the required amount of plastic (or at the required speed).
 As a result, thin layers are formed, layers with unwanted depressions or layers are completely absent.
 What causes this problem during 3D printing?
There may be several reasons. The first is that the diameter of the plastic for printing does not match the diameter specified in the software for forming layers. The second - the amount of plastic supplied is insufficient, due to incorrect settings in the software. Well, perhaps your extruder is very dirty.
Solving the problem: Insufficient supply of plastic
- Check the diameter of the plastic. Start with the simplest case - check the plastic diameter settings in your software. If you are not sure about the correct diameter, it and the temperature are usually indicated on the packaging of the plastic.
- Measure the plastic diameter. If the problem still persists, measure the plastic diameter manually and enter more precise settings in your G-code generation software.
- Check the print head. In most printers, the print head is retracted from the print table. Check extruder. There should be no obvious contamination on it.
- Set the extrusion ratio. If there is no difference between the actual plastic diameter and the settings in the software, check the extrusion coefficient (extrusion multiplier or flow rate or flow compensation). Perhaps these settings are too small. Each program handles these settings differently, but the principle is the same - increase the value in the settings by 5% and restart 3D printing.
In Simplify3D open Edit Process Settings and go to Extruder tab - extrusion ratio set to 1.0 corresponds to 100%; If you are using Cura, open the Material tab and increase the Flow setting (you may need to activate the Flow settings in the Preferences panel).
3D Printing Problem Checklist: Plastic Insufficiency
- Check Print Plastic Diameter
- Manually Check Plastic Diameter
- Check Extruder Cleanliness
- Increase extrusion ratio by 5%
Too much plastic feeding
Problem description
Your 3D printer is feeding too much plastic.
 Because of this, the material peels off at the edges of the model.
 What causes this problem during 3D printing?
This is usually caused by the Extrusion multiplier or Flow in your G-code generation software being set too high (see section above).
Solve the problem: Too much plastic feed
- Extrusion ratio. Open your layering software and make sure the extrusion factor is set to the correct value.
- Feed settings. If the previous point did not help, reduce the flow value (Flow).
3D Printing Problem Checklist: Too Much Plastic Feed
- Check extrusion ratio settings
- Decrease plastic feed value
Layer misalignment
Problem description
Bottom and top layers are shifting relative to each other during 3D printing. Usually the offset is not as large as in the figure, but the above case can also occur.
What causes this problem during 3D printing?
Layer misalignment can occur for a variety of reasons, including a blow to the printer during printing! This problem may manifest itself due to incorrect belt tension or misalignment of screws.
 Or due to the fact that the extruder hooked the model and it shifted a little right during printing.
 Solving the problem: Layer misalignment
- Check the stability of the printer. The 3D printer must be placed on a stable surface. Even slight shocks can cause the layers to shift.
- Check table stability. Most 3D printers have removable tables. Although this is convenient in terms of replacing it, over time the mounting screws can loosen. So it's worth checking them periodically.
- Check the bottom layers. If you print at high quality, the underlying layers may break off due to cooling. If a break occurs, the plastic rises and the extruder can hit it. In most cases, the model will come off the table, but if there is no lift, the powerful motors can push the model and the table. So if you have problems with the first layers, try reducing the rotation speed of the coolers.
- The print speed is too fast.
 Raising the temperature and increasing the feed can speed up 3D printing. However, even though the plastic will feed properly, your printer may not be able to handle the selected mode. If you hear clicks while printing, this is a sure sign that the printer is running at too fast speeds. In this case, check if the plastic breaks in the extruder itself, and then go to the settings for the actual speed of the 3D printer. The speed can be adjusted in your software to generate the g-code. If you are using Simply 3D go to ‘Other > Default Printing Speed (mm/min)’, if Cura go to ‘Basic > Print Speed (mm/s)’.
 - Check belts. If the layers are still shifting, it's time to check the belts. The tension of all belts must be the same. Timing belts tend to stretch over time (this is clearly manifested when the belts begin to slip on the pulleys). If the tension is very weak, you should consider replacing them. Strong belt tension can also be a problem. But usually this is a problem with DIY 3D printers.
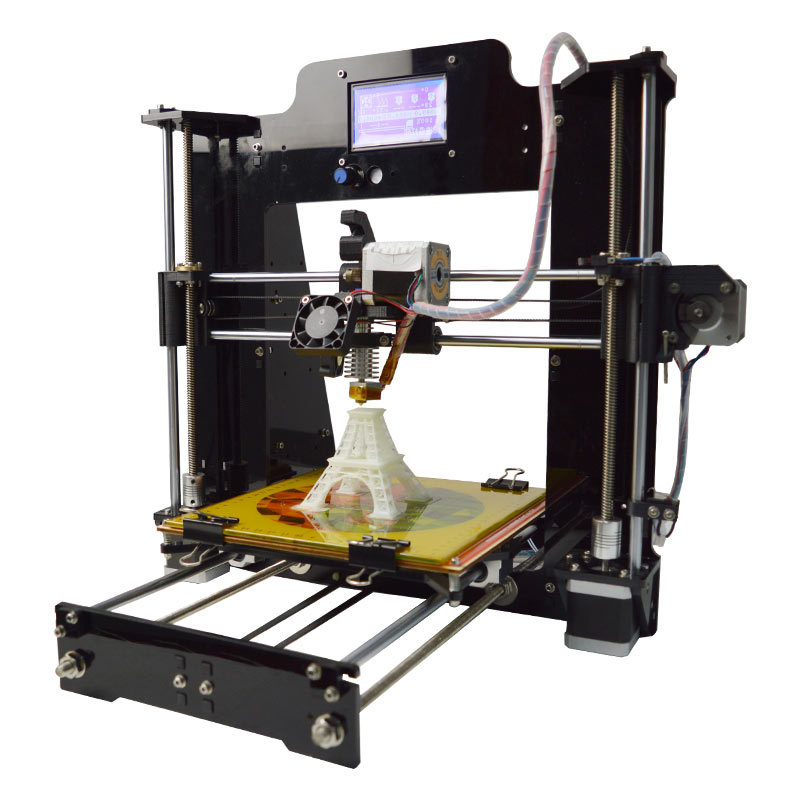 Some 3D printers (such as the Prusa i3) have special screws to adjust the tension.
 - Guide shafts must be clean and lubricated. Over time, the guides become covered with dirt in places with maximum friction. This, in turn, can cause problems when moving and shifting layers. A quick cleaning and lubrication usually solves the problem.
- Curved or misaligned rails. If you notice that the print head position error occurs in a certain place, this may be a sign that one of the guides is deformed. You can check this by turning off the 3D printer and moving the print head along the coordinate axes. Check axle alignment. If everything is in order, remove the guides and lay them on a flat surface. If there is a bend, you will immediately see it.
3D Printing Problem Checklist: Layer Misalignment
- Check the stability of the 3D printer base.
- Check table stability.
- The first layers of the model should not form cliffs.
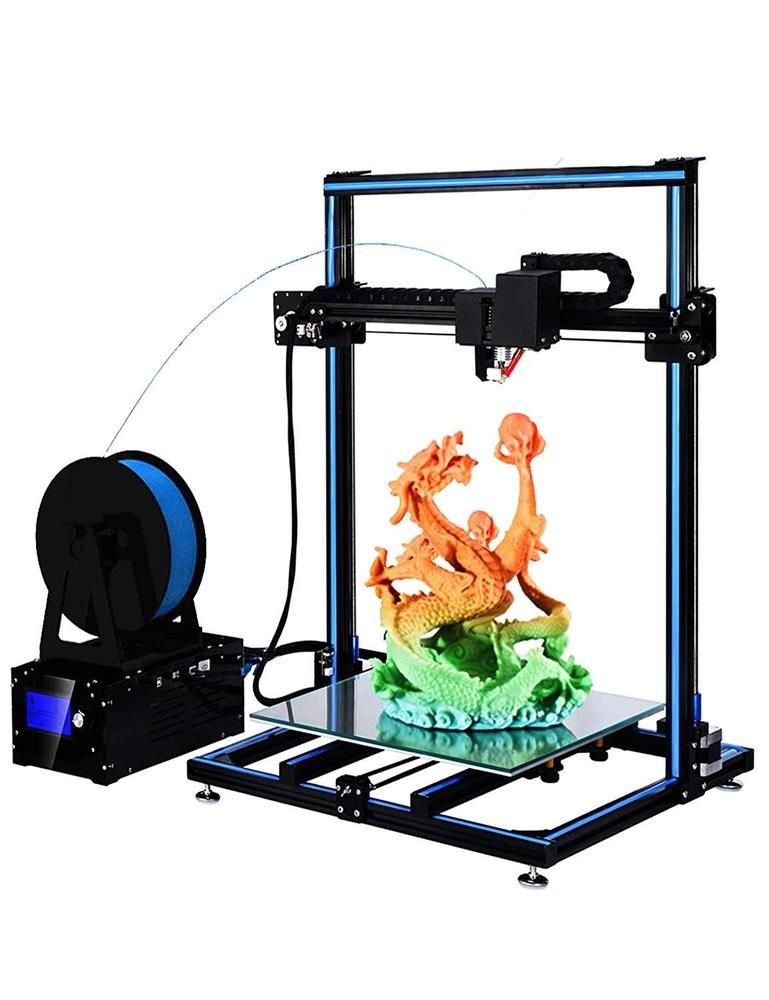
- The print speed is too fast.
- Check belts.
- Guide shafts must be clean and lubricated.
- Curved or misaligned rails.
Blocked plastic feed mechanism
Problem description
You start 3D printing, but no plastic comes out of the extruder. You took the rod out of the extruder, put it back in, but it didn't work.
What causes this problem during 3D printing?
After replacing the plastic, a small piece of bar remained in the feed mechanism. Most often, the break occurs at the very end. When you insert a new rod, the remnants of the old one block the flow of plastic.
The second option - the remnants of the old plastic dried up at the end of the extruder. In this case, the remnants of the frozen plastic must be removed manually.
Solving the problem: blocked plastic feed mechanism
- Unlock with a needle. If you're lucky, unlocking the feed mechanism is quick and easy.
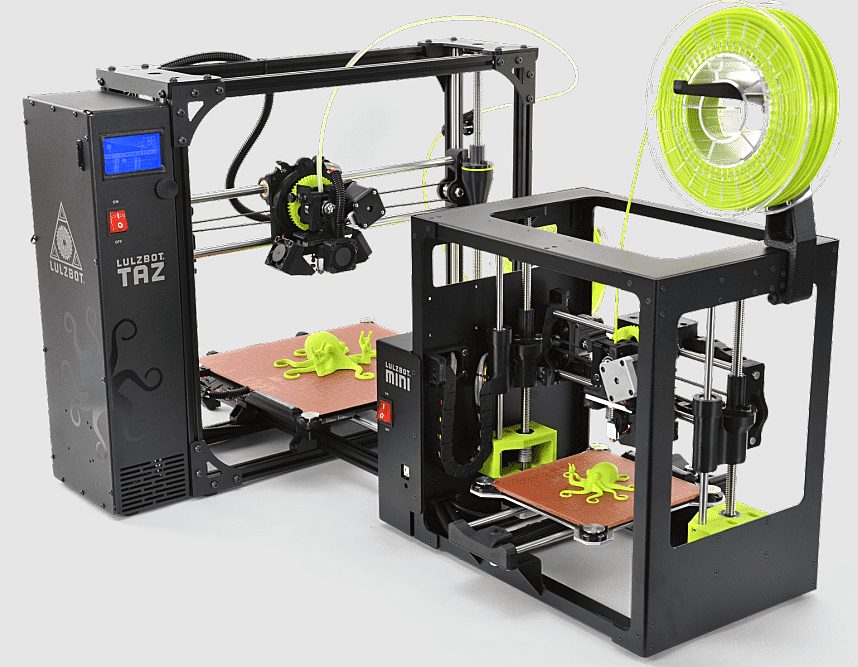 Start by removing the plastic. After that, on the control panel, select the option “heat up nozzle” (heat up the extruder) and increase the temperature to the level of plastic melting. If you have an Ultimaker 2 3D printer, go to Maintenance > Heat Up nozzle. For PLA plastic, set the temperature to 220 C. When the extruder is hot, use a needle or something with a small diameter and clean the hole (be careful not to burn your hands!). By the way, it is useful to clean the outside of the extruder.
 - Push through the old plastic. If the extruder is still blocked, you may be able to push the stuck plastic through with a new rod. Remove the plastic supply tube from the print head. Preheat the extruder to 220 C for PLA plastic and then, using a new rod, try to push the stuck plastic through the extruder. It may take some effort, but be careful not to bend the printer's horizontal guides. After that, you can clean the nozzle with a needle in accordance with the instructions from point 1.
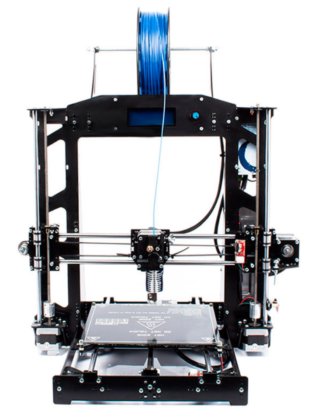
- Remove and reassemble the extruder. In extreme cases, you will have to disassemble and reassemble the plastic feed mechanism. If you've never done this before, consider taking photos or recording your every step as you take apart the feed mechanism, as you'll need to put it back together afterwards. First remove the plastic bar. After that, read the instructions for dismantling the print head in the instructions for your 3D printer. Wear gloves while doing this, as the nozzle will be hot. Let's take a closer look at the Ultimaker 2 3D printer as an example. Move the print head to the center of the printer. Loosen the four screws on the print head. Preheat the nozzle to 220 C (for PLA). When the extruder reaches the desired temperature, turn off the power. Holding the cooler's plastic case, remove the rest of the interfering plastic. Clean the nozzle with a needle. You can also clean its outer surface. When the nozzle is cool, assemble the extruder, turn on the 3D printer and load the new plastic.

3D printing problem checklist: blocked plastic feed mechanism
- Warm up the nozzle and clean it inside and out with a needle.
- Remove the plastic feed tube and try pushing through the remaining plastic with a new rod.
- Disassemble the feed mechanism and try to remove any remaining plastic.
Faulty plastic
Problem description
Plastic appears to be fine, correctly seated in the feed mechanism, and exits the nozzle when printing. This happens most often in Bowden-feed 3D printers rather than straight-feed 3D printers, as the plastic isn't visible or noticeable when it's broken.
What causes this problem during 3D printing?
Printing plastic breakage can occur for various reasons, but mostly because the plastic is old or cheap. Most plastics like PLA and ABS last a long time, but if stored in poor conditions (such as direct sunlight), they can become brittle. If you use such plastic, no settings will help.
The second possible reason is the bar diameter, which may vary slightly depending on the manufacturer. And if the pressure in the feed mechanism is too high, it can break.
Troubleshooting: broken plastic
- Remove the plastic. The first thing to do is to remove the plastic from the 3D printer. If you are using Ultimaker, you can use the Maintenance and Change Material option. Heat up the extruder and remove the plastic.
- Try another plastic. If the problem persists after reinstalling the plastic, try a different one to make sure the media quality is not the issue.
- Reduce feeder pressure. If the new plastic also breaks, loosen the pressure on the feed mechanism. Start 3D printing and increase the pressure until the slip is complete.
- Check nozzle. Check nozzle for cleanliness.
- Check flow and temperature. If problem persists, check nozzle heating.
 Also make sure the pitch is 100% and no more.
3D Printing Problem Checklist: Plastic Breakage
- Check the shelf life of plastic
- Check the diameter of the plastic
- Set up the pressure in the supply mechanism
- Check the cleanliness of the nozzle and its temperature
- set the supply of 100%
Glorment of the rod
Description of the problem
Prrukta can start slipping for love. 3D printing stage. And it does not depend on the type of plastic. As a result, no plastic is fed.
What causes this problem during 3D printing?
Clogged nozzle, insufficient feed force, incorrect nozzle temperature. As the motor rotor rotates, the small wheel that normally grips and feeds the plastic will pinch the bar and prevent it from being printed.
Solving the problem: bar slippage
- Help the feed system. If the plastic has just begun to slip, this will show up as a characteristic noise.
 Try applying some pressure to the bar to get this section through. This often helps and the 3D printer continues to print well.
 - Adjust the feed force. Start by depressurizing. After that, start increasing the force until the bar stops slipping. Heads vary in diameter, so some require fine tuning.
- Remove the plastic. More one solution is to remove and reload the plastic into the feed mechanism. After removing the bar, cut off the plastic over the place where the slip marks are visible and reload it into the feeder. If slippage remains, try this operation again. If that doesn't help, replace the plastic as this one is most likely no longer printable.
- Check nozzle temperature. If you installed a new plastic and the problem persists, or vice versa, check the temperature of the nozzle.
Cheklist of 3D Problem: slippage of the rod
- Help the supply mechanism with an additional force
- Set up the force in the supply mechanism
- Eliminate the plastic and load the
- temperature
Bad Semit Sthics 9D SEC0016 Description of the problem
The printed product is missing an internal mesh or it is obviously incorrect
What causes this problem during 3D printing?
There can be several reasons why the internal structure of the 3D model does not print well.
 The most common is incorrect settings in your software for generating a G-code. It may turn out that the problem is a clogged nozzle.
 Solving the problem: Poor 3D printing of the inner mesh
- Check the fill factor. This is checked in your software. A value of about 20% is quite acceptable. If less, problems may arise. This parameter should be increased for large models.
- Speed for printing inner layers. The speed at which printing takes place can have a direct effect on the quality of the inner mesh. If you see problems, try reducing the print speed of the inner grid.
- Change the mesh configuration. Most programs allow you to change the grid configuration. Squares, triangles, hexagons, etc. Experiment with these settings.
- Check nozzle. It may be that the cause is a clogged nozzle. At the same time, the outer parts of the model will be printed well, since plastic is fed more intensively on them.
3D Printing Problem Checklist: Poor 3D Printing of Inner Mesh
- Check and Adjust Inflation Ratio of Model
- Reduce Inner Mesh Print Speed
- Change Mesh Configuration
- Check Inner Nozzle
- 0013
Description of the problem
The printed model generally looks normal, but the internal mesh is visible through the outer walls of the model.
What causes this problem during 3D printing?
See-through problem occurs when your model has thin walls and the internal structure intersects with the outer wall line.
Normally the outer wall thickness should be proportional to the nozzle diameter. That is, if your nozzle diameter is 0.4 mm, the wall thickness of the model should be 0.5, 0.8, 0.12 mm, etc. If the proportion is not maintained, the effects of the clearance of the internal structure may occur.
Problem Solved: Inner mesh showing through
- Check the outer wall thickness of your 3D model.
 Check that the wall thickness value is proportional to the nozzle diameter.
 - Increase the outer wall thickness. The simplest solution is to increase the wall thickness. Doubling the thickness will most likely help solve the clearance problem.
- Use the filling option after the walls have been formed. Most g-code programs have the ability to generate the internal structure after printing the outer walls.
- In Cura open 'Expert Settings' and in the Infill section activate the option 'Infill prints after perimeters'
- In Simply3D click on 'Edit Process Settings', then select 'Layer' and in 'Layer Settings' select 'Outside-in' next to 'Outline Direction'.
- Check the print table. Examine the printed model. If the effect is more on one of the sides, the cause may be in the calibration. If so, calibrate.
- Use this effect to your advantage. Depending on the task, you can use the print sequence to your advantage.
 If you need a model of high quality, with a good outer surface and at the same time the rigidity of the model is not critical, choose Outside-in printing (first the outer layer, then the inner filling). If the rigidity of the model is important, print inside-out, doubling the wall thickness.
3D printing problem checklist: inner mesh shows through
- Check the outer wall thickness of the model.
- Thicken the outer wall.
- Use the filling option after wall formation.
- Check print bed and calibrate if necessary.
- Use this effect to your advantage.
Gaps between inner mesh and outer walls
Problem Description
If you look at the bottom or top surfaces of the model, you will see gaps between the inner mesh and outer walls.
What causes this problem during 3D printing?
Gaps between outer wall and inner mesh used to be a common problem, but with the increasing accuracy of 3D printers, this is now a rare bug.
 However, there are new materials for 3D printing that can cause this problem again.
 The most common cause of these gaps is that your software does not have an overlap of the mesh and outer walls set, or this value is set to "0". Your 3D printer considers this so that the wall and mesh should not intersect, and gaps may occur.
Another possible reason is the sequence in which you set the printing of the inner mesh and the outer wall. If you print the outer wall first, there may be no or minimal overlap. Accordingly, there is a chance of occurrence of these gaps.
Solving the problem:
gaps between the inner mesh and the outer walls of the 3D model- Check the parameter of the intersection of the walls and the inner mesh of the model. This is the most common problem and is very easy to fix. Find the "Infill Overlap" option in your gcode generation software and increase this value.
- Cura defaults to 15%.
 Increase it to 30%.
 - In Simplify3D these settings are in the 'Edit Process Settings > Infill > Outline Overlap' tab. Again, increase this value. This setting is directly related to the thickness of your head. So the % value will be % of the bar thickness to be printed. When tuning, do not set this value above 50%, as you will go beyond the walls.
- Cura defaults to 15%.
- Form the inner mesh before printing the walls. If at the same time the inner mesh begins to show through, increase the thickness of the outer wall of the model as indicated in the section above.
- Increase extruder temperature. Some newer 3D printing materials (such as XT-CF20) may require finer temperature settings. Try increasing the extruder temperature by 5-10º. It might work.
- Reduce speed. You probably want to print your model faster, but faster speeds can cause a lot of problems. Especially if the 3D printer is not perfectly calibrated.
 If print speed is still important to you, try lowering it for the top layer only.
3D printing problem checklist: gaps between inner mesh and outer walls of the 3D model
- Check the intersection parameter between the walls and the inner mesh of the model.
- Print the inner mesh first and then move on to the outer walls.
- Increase extruder temperature.
- Reduce the print speed.
Intersection of objects
Problem description
Parts of the model are missing or the final model is not rigid enough. The finished product and the 3D model are different and there are incomprehensible errors in the geometry of the printed product.
What causes this problem during 3D printing?
Virtual walls are one of the most common causes. Vertical walls only exist in 3D space, not in the real world.
For example, if you have two cubes in the real world and you try to match them, it won't work because the outer walls won't let the two objects intersect.
 In the 3D world you can combine two objects and still exist as two separate objects and your slicing program will also allow them to intersect in the virtual world.
 For correct printing, these two objects must be combined into one so that the inner walls disappear and one object remains.
Another possible problem - for example, you have a cube object and you have deleted one of its surfaces. In fact, you have an object with a hole. It may look like a 3D correct object, but it only exists as such in 3D space. Such an object cannot exist in the real world.
Deleting one of the surfaces leaves only two coordinates. The wall thickness, the third coordinate, has no dimension in the real world. We only see it in 3D modeling software. And when we start to form the layers of the model, the program will try to fix this bug and add the third coordinate. However, in more complex models, this can lead to unpredictable effects.
Solving the problem: object intersection
- Use the latest slicing software.
 Most recent versions of slicing programs support automatic correction of intersecting objects, but it's still better to make sure that your 3D model is formed correctly.
 - Set the Fix Horrible settings in Cura. In Cura, open the Expert Settings tab with the 'Fix Horrible' option set to match all (Type-A).
- Set Silmplify3D's Non-manifold settings. In the 'Process settings' select the 'Advanced' menu and then 'Heal' next to Non-manifold.
- Use layered representation. Use the layer view in your slicing software to check for problem areas in your model. A superficial view of the layers can help you quickly identify problem areas and fix the problem.
- Use your software to fix object intersections. One of the easiest solutions is to use additional software to solve the problem. Blender and Meshmixer have built-in mechanisms for identifying problems and fixing the 3D model before slicing.

- Merge objects. It's better to fix your 3D model before importing it into the slicing software. When doing this, make sure that if your two objects intersect or overlap, you use the appropriate intersect, merge, or subtract function.
3D Printing Problem Checklist: Object Intersection
- Please use the latest version of your slicing software.
- Use the "Fix Horrible" option (in Cura).
- Use the “Fix Non-manifold” option (in Simplify3D).
- Use layered view to identify the problem.
- To correct errors, use additional software like Blender or Meshmixer.
- Merge objects.
No base for next layers
Description of the problem
You have loaded your 3D model into the slicing software and everything looks good. We started printing and as a result part of the model was printed well, and some parts - badly. This is a fairly common problem in 3D printing.
What causes this problem during 3D printing?
During 3D printing, each layer is built on top of the previous one.
 Naturally, if your model has a part that does not have plastic underneath (for example, as shown in the figure above - horizontally outstretched arms), printing problems will arise.
 Ideally, the slicing software should somehow detect and point out this problem. However, in most cases, the programs will let us print without indicating that additional supports are needed for the model.
Problem solved: no base for next layers
- Add supports. The quickest and easiest solution is to add calipers. In most programs, this is done quite simply. For example, in Simplify3D go to Edit Process Settings > Support > Generate support material; you can customize the quantity, shape and specify other caliper settings. If you are using Cura, just select Support type in the Basic settings.
- Make your own calipers. Software generated calipers may not suit you, so you can create your own in the base 3D model. This will require a little more skill, but can give fantastic results.
- Add an additional object to your 3D model. Most often, problems occur when printing hands and similar details. In this case, adding supports from the base of the model to the arm can also result in a problem, since the distance can be quite large. Considering that the calipers should be easy to remove, the high height may prevent them from being printed correctly. You can get around this by adding an additional object to your model (a piece of wall, a bench, a box, a flower, etc.) and printing an additional rack already from this object.
- Change the angle. For example, models of people whose arms are raised at 45º will print well and it is absolutely impossible to print arms stretched horizontally at 90º relative to the body.
- Divide the model into separate parts. Another option is to divide the model into separate parts and print two pieces instead of one. The only problem that will need to be solved is how to combine the resulting parts into one model after printing.

3D printing problem checklist: no base for next layers
- Add Software for Slosing
- Add calipers in the original model
- Add an object that can be replaced by a caliper
- Change the angle of the problem node
- Separate the
Slove
description problems
As the model builds, the layers begin to shift. As a result, instead of a straight vertical model, displacements appear. In this case, the offsets are not the same over the entire height of the model. The offset can increase/decrease at different heights.
What causes this problem during 3D printing?
The reason is quite simple. One of the belts connected to the stepper motor has lost tension. To eliminate model drift, it is enough to check the tension of the belts and the pulleys that keep the belts in tension.
At first glance, the solution to the problem is simple. However, before you fix it, you should find out which belt is causing it, as getting to the belt can be a difficult task.
Solving the problem: layer shift
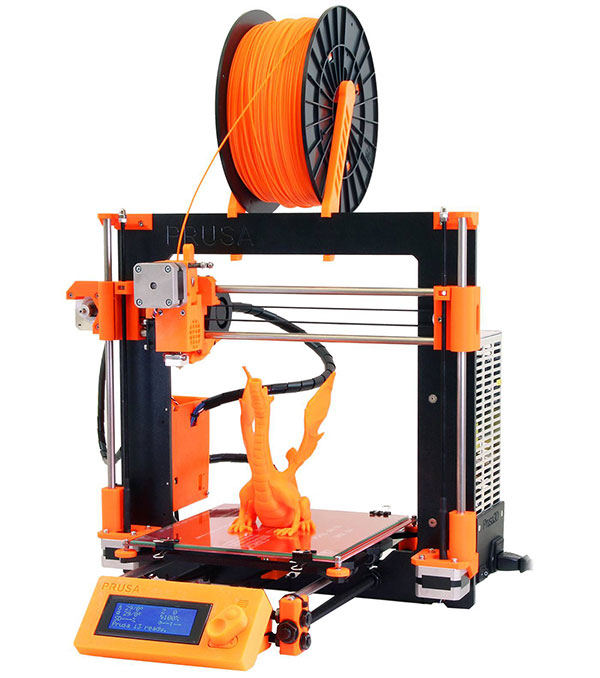
- Check the X and Y axes. If the model moves to the left or right, the problem is in the X axis. Forward or backward, the problem is in the Y axis. When you have decided on the coordinate, check the belts and pulleys. If you have a Prusa i3 3D printer, this shouldn't be a problem since the pulleys are mounted on the stepper motors themselves. In printers like Ultimaker, you will have to tinker.
- Tighten the pulleys on the stepper motors. Check all belts and pulleys. More complex arrangements such as the Ultimaker 2 have multiple belts and pulleys. On the main axes X, Y, eight pulleys are installed on top of the printer. Review and pull up each of them.
3D Printing Problem Checklist: Layer Offset
- Check the X and Y axes.
- Tighten all pulleys along the problem axis.
3d printer defects: errors, main problems
Causes of Defects in 3D Printing and How to Fix Them
Buying a 3D printer is only half the battle.
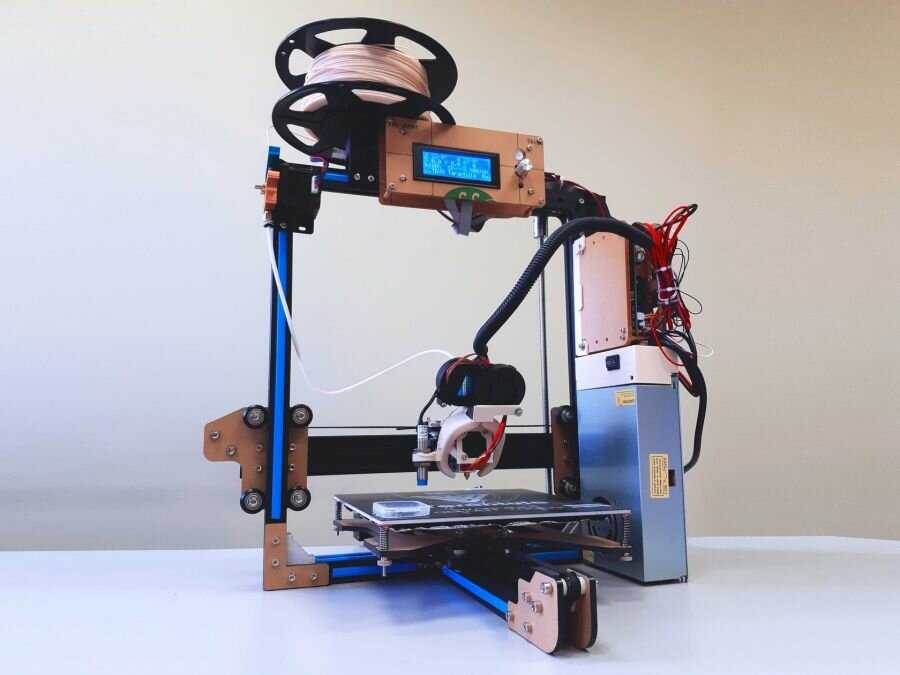 A beginner printer has a lot to go through. First, he will learn how to set up the device, calibrate the print head, set the necessary parameters, and test different types of filaments. But that's not all. The most unpleasant thing that can appear during operation is printing defects. And they need to be eliminated.
 - What are 3D printing defects?
- Classification of defects
What are 3D printing defects?
After the printing process is completed, various defects can be found on the finished model. Most often they are associated with improper distribution of plastic. Defects appear for various reasons. But the main result is always the same - the model is damaged, you need to do the project on a new one. Printing defects cause downtime. Lost time and meters of filament.
Important! Within the framework of this article, defects that occur on FDM printers will be described. These are models of printing devices operating on the technology of hot deposition of plastic.

Sometimes mistakes can be seen right from the start. For example, when printing the first layer of a model. In these and other cases, it is necessary to prevent the defect in time. However, the press all the same should be stopped. But this way you can save material and time. This article will discuss the most common defects, as well as ways to eliminate them. At the end of the article, a comparative classification of faults will be given.
Layer displacement
The second name for this defect is skew. There are several options for the development of events at once. The skew can be slightly noticeable, with a slight deviation along the Z axis. The second option is a strong offset, the model is printed in pieces. In all these cases, the reason lies in the mechanical part of the printer.
Solutions:
- Check tension belts. They should be clearly in the grooves. It is not allowed to fray or stretch the belt. Sometimes it is easier to replace the entire set of belts with a new one.

- Sometimes small misalignments are caused by an incorrectly set pulley. Make a mark with a black marker before printing, after the end of the process, check the result. Calculate the difference. Tighten the problem area if necessary.
- The printer's Y and X axes are not properly aligned. They are not perpendicular to each other. They need to be set at 90°.
Attention! In rare cases, the problem is electrical. This option must be disassembled separately, armed with a multimeter.
First layer does not stick
The initial layer acts as a foundation. If it "floats", then the whole model will get the wrong geometry. The second and subsequent layers may slightly shift the entire workpiece. The most unpleasant thing is that this defect can be found at the very end of the print.
Solution methods:
- Platform calibration.
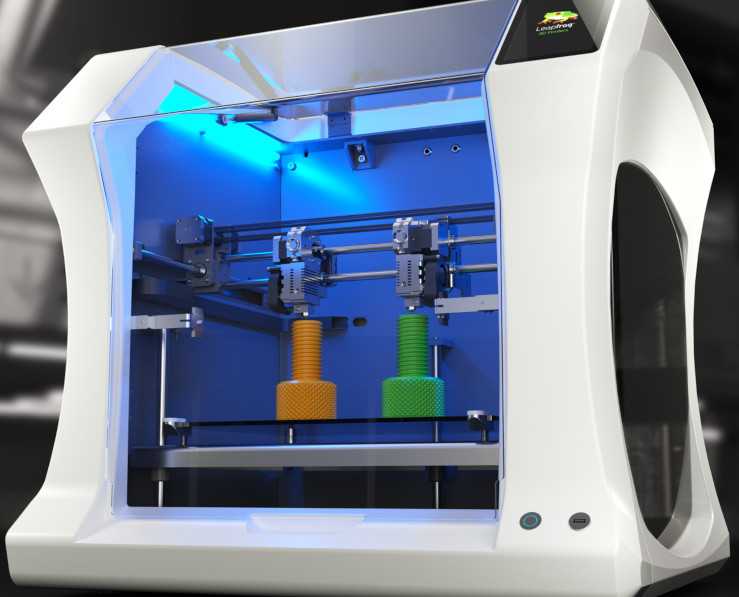 If the print bed is skewed, there is a good chance that the first layer will not stick. It is best to check platform calibration before starting printing. Many 3D printing programs help to go through this setting in a semi-automatic mode.
 - Wrong print nozzle height. Another point worth considering. Most often, the extruder height setting is set through the printer parameters: Edit Process Settings → G-Code. They are located in the main menu of the device.
- The first layer was printed too quickly. The plastic just didn't cure. This setting must be found in the menu of the printing device. Approximate location: Settings → First Layer Speed. It is worth setting the print speed of the first layer 50% lower than the rest.
- Plastic cooling temperature. This option can be found on printers with a cold platform. The filament hits a cold surface, quickly hardens and rebounds. Here you need to experiment with the settings for the melting temperature of the filament or initially take a printer with a heated surface.
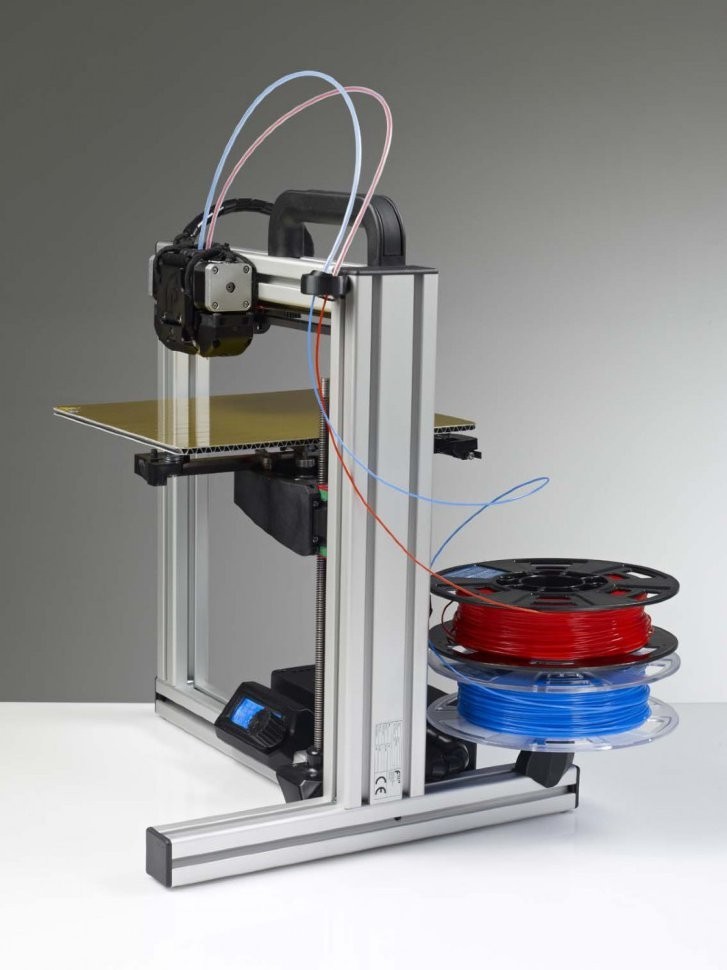
Important! Poor adhesion can be caused by covering material placed on top of the platform. Different glue, tape, adhesive tape - all this can repel plastic.
Pimples on the model
This also includes such defects as “snot”, sagging, sagging. All these faults are of approximately the same nature. They are related to the operation of the extruder. As it moves, it should stop, then start working again. Not all devices can lay even layers without defects. This is how the irregularities described above appear.
Solving methods:
- Retract and coast setting. The first parameter is responsible for starting the extruder. In this case, you need to configure the retraction through the device menu: Edit Process Settings → Extruders. Here you need to find the parameter Extra Restart Distance. Try reducing the fill length.
 When unevenness occurs when the nozzle stops, you need to tighten the roll-on stroke (roll-up movement). This setting is referred to as Coasting. It is in the same section where the retraction is set.
 - It is better to avoid retraction and coasting altogether. That is, the filament must be flush with the edge of the nozzle. This parameter is especially critical for Bowden printheads. Another option is to set up retraction. You need to find the Advanced tab. It contains the Ooze Control Behavior setting. This option controls filament leakage and retraction start time.
If minor defects are still present, it is worth pointing out the entry points to the printer. This setting is found in the Edit Process Settings menu on the Layer tab. For example, you can leave small flaws inside the shape, starting printing from the inner layers.
3D printer won't print
This is one of the scariest things for a beginner 3D maker.
 The device appears to be broken. However, in most cases this is not the case. The printer turned on, but did not start to push through the plastic? There are four reasons for this.
 Solutions:
- Plastic does not come out of the extruder due to leakage. This can often be seen in some cheap Chinese models. The filament is preheated in the extruder, it can seep through the hot end. The same effect can be observed after the end of the work. In this case, printing starts 3–4 seconds after the start. Automatic broken geometry of the first layer. To avoid this defect, experienced printers make the so-called skirt. This is a thin circle of filament around the future model. It is printed to bring the printer to life and fill the nozzle with plastic.
- The extruder is too close to the platform. The plastic just gets stuck inside the nozzle. The situation continues on the second layer. Only by the 3rd or 4th layer does the plastic begin to come out. The solution is to adjust the Z-axis height through the G-Code command.
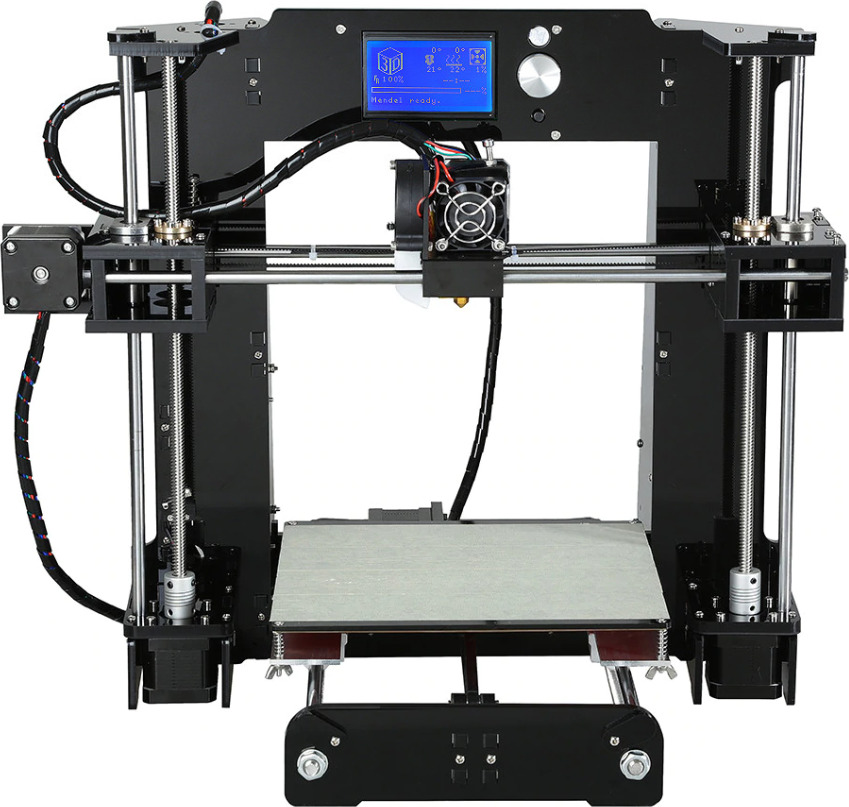
- Sometimes the filament is simply chewed off by the drive gear. This is the part that pushes the thread forward. If a small amount of filament shavings is visible near the printer, it is likely that the gear has worn off the filament. You need to calibrate this node.
- Clogged extruder. There may be several reasons: ordinary dirt or rubbish, plastic coked inside the extruder, poor cooling of the filament. Mechanical cleaning of the nozzle with special needles or drills will help. They are sold in specialized stores.
Important! Just do not need to clean the nozzle with a screwdriver or other improvised tools. You can completely ruin the extruder.
Prints in the air
Various users are experiencing this problem. The reasons for printing by air are related to setting new plastic settings in the slicer. Sometimes a defect appears due to incorrect setting of the Z axis.
All solutions come down to the fact that the user needs to carefully study the G-code of the printer.
 Sometimes the reason lies in the lowered Z-axis height settings. You can also see the print step here, perhaps it exceeds the required parameter. In the slicer, you need to check the plastic installation parameters. View the heating temperature of the nozzle and platform. All settings must be checked manually. When importing a profile, the left parameters can be picked up.
 Prints in reverse: how to fix
A rare defect that is not always visible at the start of printing. That is, the model comes out normal, but mirrored. Such malfunctions are often found in Chinese kits or noname devices. There are two solutions. One is simple, the other is more difficult.
Methods of solution:
- It is necessary to invert one of the axes: X or Y - it does not matter. But only one. This can be done by flipping the contacts on the power board or on the motor itself.
- Invert axis via device firmware. This method is suitable for advanced users who are familiar with programming skills.
In any case, it's better to first check all the settings in the slicer again, only then go into the electronics of the device.
Layers skipped
The finished model shows that one or more layers have been skipped. This is eloquently evidenced by the gaps in the finished model. In rare cases, this defect is associated with insufficient extrusion. Perhaps there are problems with the capture and supply of the filament. Sometimes the reason lies in the wedging of the Z axis.
Solution methods:
- Check the mechanical part of the printer. If gaps began to appear frequently, you need to arrange an unscheduled maintenance of the device. Examine all shafts. Check that they are level and not misaligned. Power off the printer, try moving the head with your fingers. If resistance is felt, then one of the shafts is not installed correctly.
- Bearing wear. This element may simply wear out. You can see that the printer vibrates slightly. There is an unusual sound when printing.
 Diagnose a breakdown in the same way as the shaft. Turn off the power and move the extruder with your hands to find the problem part.
Attention! Remember to maintain your printer regularly. Lubricate the shafts with special oil. For example, for sewing machines. Before lubricating, clean the moving parts from dirt and plastic residues. Just don't overdo the oil. A large amount of lubricant can lead to the opposite effect.
Doesn't print in the center of the bed
Some users are having trouble printing on one side of the bed instead of the center. At the same time, in the slicer, the model is clearly in the center. There may be several solutions here.
Methods of solution:
- Slicer settings are down or incorrectly set. It is necessary to change the characteristics of the kinematics. Set the Delta robot parameter instead of the Cartesian robot. You also need to set the size of the table, equal to the square inscribed in the specified print area.
 In this case, set the Origin Offset parameter to half the side of the square.
 - Try to adjust the position of the X-axis limit switch. In some cases, it is moved a little to the right.
What are the problems with the 3D printer test cube?
This figure is used to check the print quality. Naturally, during the test, she can clearly demonstrate where there are problems. It can be completely different defects. Most often, the test shows bulges and dents on the model.
These defects are caused by overheating and shrinkage. To find out for sure the cause and eliminate these factors, you need to print four cubes in different angles. For some ABS plastics, you need to reduce the temperature, as well as turn on the blower by 5-10%.
3D printing echo
This problem can be described as thin streaks that appear when printing layer by layer. That is, the final model does not have a formed and even surface. There is waviness (echo) on the edges.
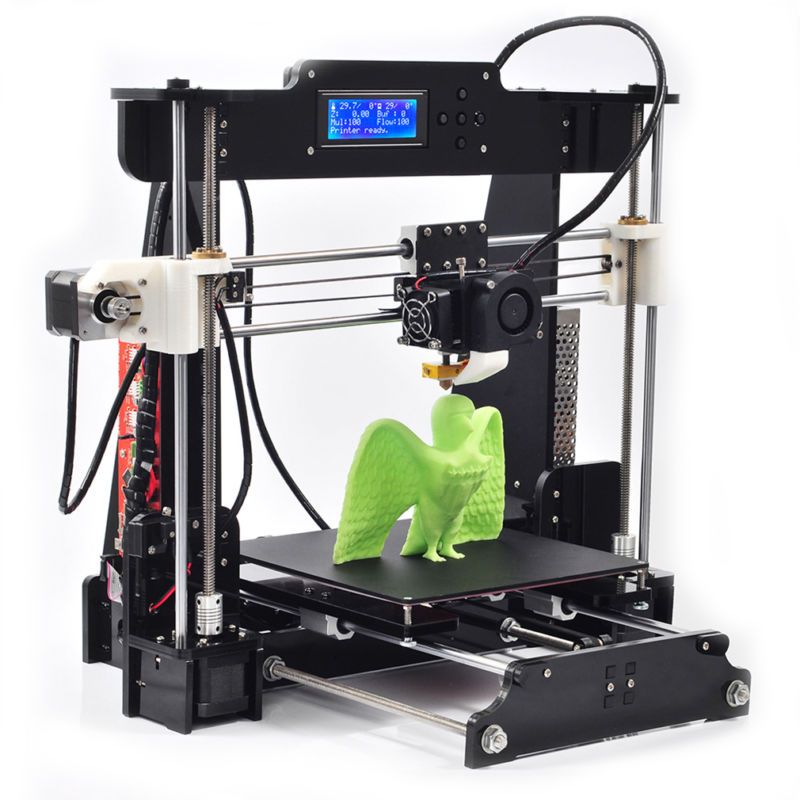 This defect is also called ringing on the walls. Typically, two factors are the cause: print speed and vibration.
 Solutions:
- Reduce vibration. Make sure the printer is on a level and stable surface. Assess the condition of the bearings. Replace them if necessary.
- Inspect the shafts. Clean them of dirt and dust, lubricate with oil.
- Reduce the print speed through the printer settings.
Try changing the typing speed first, then check the mechanics.
Interesting! Even one loose bolt can cause strong vibrations. Check all fasteners. Pull the bolts.
Salmon leather
This defect is somewhat similar to the previous one. Only there are no obvious waves or ripples. The defect manifests itself in the form of a pattern. It is similar to the representation of heights on topographic maps or the structure of salmon skin that is drawn on the walls of the model. In English resources it is called salmon skin.
 The defect appears due to two reasons: vibrations and incorrect characteristics of the current coming to the motors.
 Solutions:
- Remove any vibrations that may occur in the device. Tighten the bolts and check the frame geometry. You can also slightly reduce the print speed.
- Installation of a special impulse reducer (TL-Smoother) in the circuit between the driver and the axle motor. This solution balances the current indicators. The edges are more even.
Salmon skin defect is common on DRV8825 stepper motor drivers.
Ripple
In this case, we are talking about the partial impact of waves on some parts of the model. The ripples are often of the same nature as the echo. It is also tied to vibrations and the speed of the extruder. However, unlike waves, ripples are especially pronounced at sharp corners, when the nozzle abruptly changes direction.
Methods of solution:
- Reduce the print speed. You need to find the Edit Process Settings menu in the printer settings, and then open the Other tab.
 Change two settings: Default Printing Speed and X/Y Axis Movement Speed. The first is responsible for the speed of all movements of the nozzle, the second - the speed in the absence of plastic supply. Sometimes the reason lies in the factory firmware. It initially indicates increased extruder acceleration.
 - We remove vibrations. Check the geometry of the device, stretch all the bolts, assess the condition of the shafts and bearings. Lubricate the device if necessary.
We recommend checking the print speed settings first.
Poor filling
If the figure is not filled enough, it means that it will not receive sufficient strength. The model may simply break or crack. Usually the causes of poor coverage lie in the slicer settings or print speed settings.
Solutions:
- Try changing the fill pattern. It is indicated by the Internal Fill Pattern parameter.
 There are presets in the settings with complicated filling options that give more strength to the finished model: Grid, Triangular and Solid Honeycomb. The printing time will increase, but the strength will also increase.
 - Reduce print speed. The fast movement of the print head results in less infill. You need to tweak this parameter through the settings of the device itself or through the slicer parameters.
- Change extrusion width parameter. Some 3D printing programs allow you to set different infill values for individual elements. For example, for the outer layers, set the size to 0.4 mm, for the inner layers - 0.8 mm. These settings can be viewed in the menu Edit Process Settings → Infill. In it you need to find the parameter Infill Extrusion Width. It is shown as a percentage. The higher the number, the thicker the layer.
Attention! When setting the Infill Extrusion Width parameter, make sure that the set value (in percent) is supported by the printing program (slicer).

Plastic is leaking from the extruder threads
This fault can be attributed to local printer failures, although they can create a number of defects in the form of "snot" on the model. Plastic oozes through various slots, flows down the extruder thread, exits the opening of the heating element. There may be several options for solving the problem.
Solutions:
- Check all screw connections. Sometimes a caked piece of plastic gets stuck between them. It creates a gap, the filament flows out.
- Clean and polish the surfaces of the thermal barrier tube and nozzle. Installing a fluoroplastic washer or winding a fum tape can also help.
- Reinforced cold drawing of threaded connections.
Attention! Sometimes the reason lies in a manufacturing defect. Nothing can be done here. Just completely change the extruder.
Plastic is not coming out of the nozzle
For some reason the printer has stopped feeding filament.
 The device continues to make noise with the engines, but the plastic does not come out of the nozzle. There may be several reasons and solutions for this.
 Solving methods:
- The plastic is out. For some printers, the filament spool is covered with a casing. Therefore, it is impossible to immediately understand that the thread is over. Check for material in the spool.
- The thread has broken. There was a gap between the hot end and the extruder. A common cause is with Bowden printheads. Perhaps the problem is with the filament itself. You need to try other material.
- Low plastic melting point set. The thick filament cannot pass through the narrow nozzle opening. Recommended temperature parameters for different types of plastic: PLA - heating t 180 °C, table heating t 60–80 °C; ABS - heating t 240 °C, table heating t 110 °C.
Interesting! Sometimes a clogged nozzle is the cause of interrupted printing.
 This can happen even during work.
 Model delamination
Visually, this defect looks like an accordion. In some places, the layers move away from each other. At the same time, it is clear that this is not a pass, but the absence of sticking of plastic. Layer separation occurs due to incorrect setting of the filament thickness or its melting temperature.
Solving methods:
- Reduce layer thickness (height). Here you need to follow the rule: the maximum layer thickness should be no more than 80% of the nozzle diameter. Otherwise, the layers will not stick to each other.
- Raise the melting point of plastic. If the height parameter is in order, then you need to look at the temperature settings. For example, the optimum melting temperature of ABS plastic is 220–240 °C, but some users set it to only 190 °C. You can increase the melting temperature in the slicer settings: Edit Process Settings → Temperature.
If standard temperatures are not suitable, try raising the setting by 10 °C.
 See if the adhesion of the layers improves or not.
 3D printer extruder does not heat up
At the same time, the device shows 100% heating power, the set temperature is on the display, but the extruder is cold. In most cases, the cause lies in a break in the wires or in the heating element itself. Ring all circuit elements after the controller. To cut off problems on the heating element, apply 12 V to it. It should start to heat up.
Attention! Newer printers may encounter factory extruder defects. This element needs to be changed. There is no point in repairing the item.
Plastic falls in waves
Another name for this defect is “elephant foot”. In this case, the upper layers of the model are pushing against the lower parts, causing a wave effect. It sort of descends from top to bottom, forming a thick layer at the base of the model. This problem is especially common on models of printers with a heated bed.

Methods of solution:
- Find the optimal temperature regime between heating the table and blowing the model. Lower the heating temperature in steps of 5 °C. It is important to find a balance here, when the lower layers have already gained strength, but still retain adhesive properties for the following layers.
- Calibrate the table. Try applying the default settings. If the problem persists, slightly change the Z-axis height settings. Calibrate the new settings on the test cube. This is the base shape that clearly shows how the layers are laid down.
- Chamfer the base. The option is suitable for homemade devices. You need to start with a bevel of 5 mm and 45 °, after which you can make small adjustments.
Wall gaps
Such defects can be found when printing rather thin walls in the model. For example, when the extruder nozzle prints strips up to 0.4 mm thick, and the user needs to make a 1 mm edge. In such places, cracks may appear at the joints of the two layers.
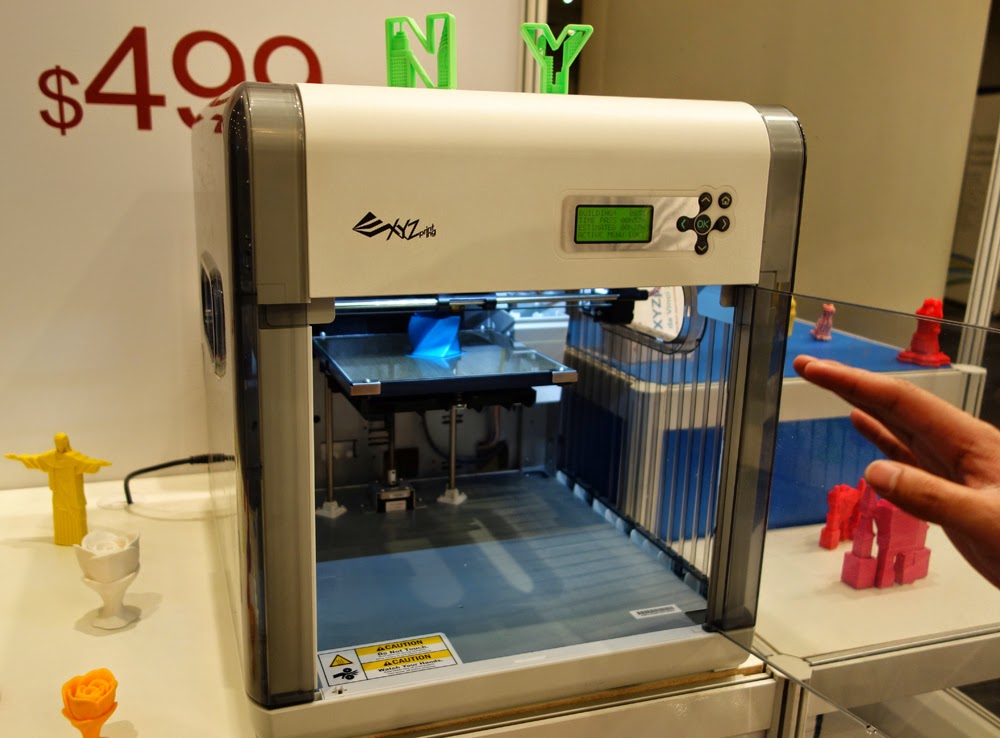 Typically, the defect is eliminated through the adjustment of the slicer.
 Solution methods:
- We need to find the setting that is responsible for the wall thickness. Usually they are in the menu: Edit Process Settings → Advanced. Here you need to find the Gap Fil parameter. He is just responsible for overlapping areas and filling the gaps between thin walls. Check the box next to Allow gap fill when necessary. There is also an alternative. Go to the Infill tab and tweak the Outline Overlap parameter.
- Simply adjust the extrusion width. Increase the parameter value if possible. The strip width can be set on the Extruders tab via the Edit Process Settings menu.
Try and experiment to get the best fit.
Web
A special case of filament leakage, when sloppy plastic threads remain between the parts. This happens for the same reasons as influxes. The solution methods are exactly the same:
- Changing the speed and distance of thread retraction.
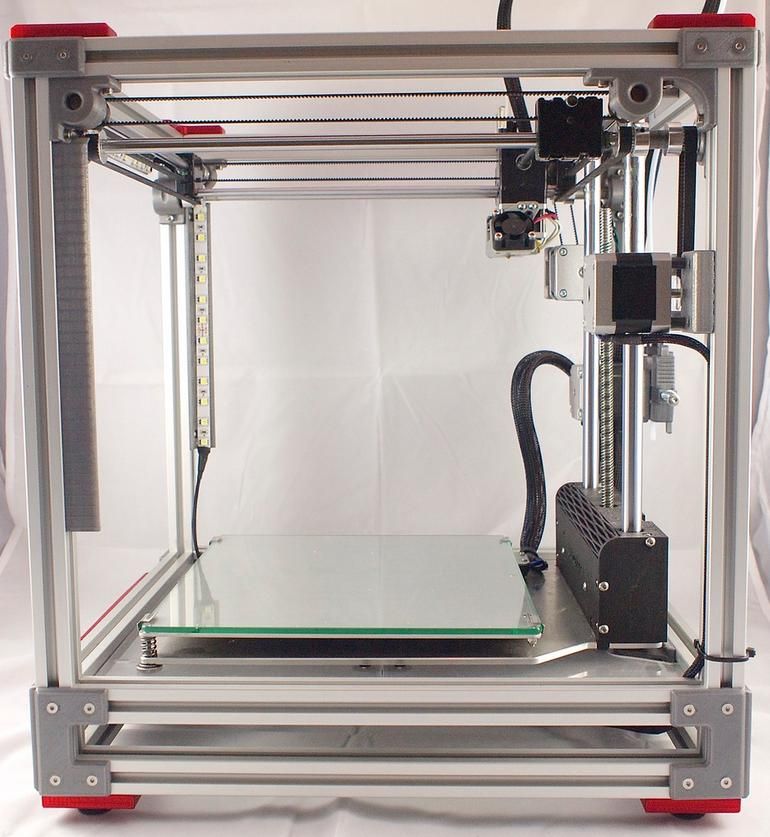 Full instructions are listed above.
 - Lower print temperature. Try tweaking this setting to reduce the fluidity of the plastic. Here you need to be careful. Excessive decrease in temperature can lead to a delamination defect.
- A separate solution is to set a parameter in the slicer that launches the print head in a long and winding path over empty space. The web falls near the model without sticking to its walls. No bridge is formed between the layers. To enable this option, go to the advanced settings of the slicer (Advanced). Check the box next to the Avoid crossing outline for travel movement option.
Interesting! Some 3D makers do not consider a web defect as something serious. They simply cut off the excess filament with a knife after the print is finished.
Extruder does not feed plastic
This problem is in the filament feeder. Or the nozzle is too close to the table.
Solution methods:
- Check the plastic filament.
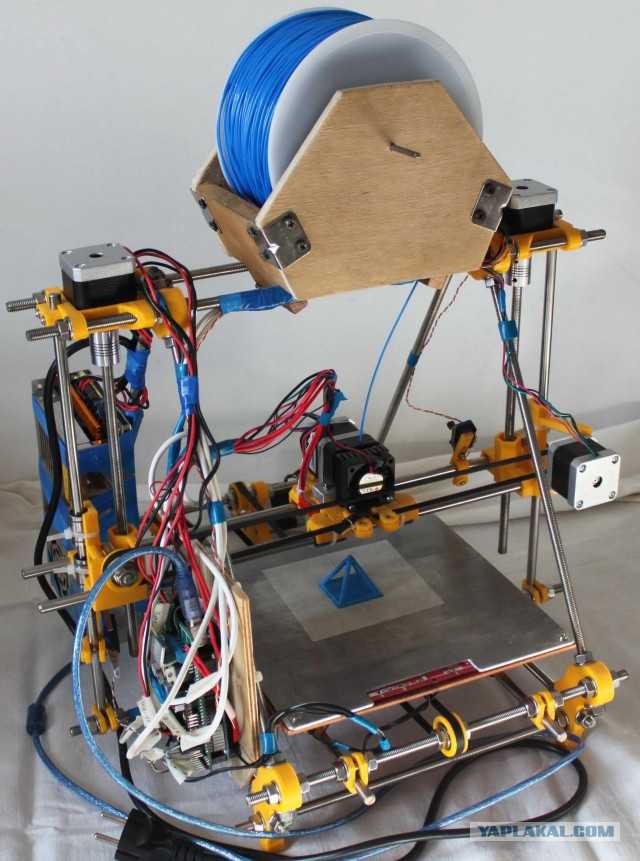 It may have burrs on it. The feed gear has slipped. Check the condition of the thread, you may need to tweak the gear settings a little. Or change the plastic.
 - Calibrate the table position. Raise the Z-axis a little.
Sometimes the extruder refuses to feed plastic due to a clogged nozzle. It needs to be cleaned up.
Classification of defects
Almost all defects are one way or another related to two reasons: a malfunction of the mechanical part of the printer or incorrect software settings. Based on these parameters, it is possible to make a classification based on the most common problems in printing:
- Deterioration of nodes and the absence of a normal fastener feed. This parameter affects vibrations, nozzle movement trajectories.
- Poor extruder maintenance. The print head needs to be cleaned from time to time, to remove the sintered filament.
- Inaccurate (wrong) calibration of the platen and nozzle height. Another common mistake that causes a lot of print defects.
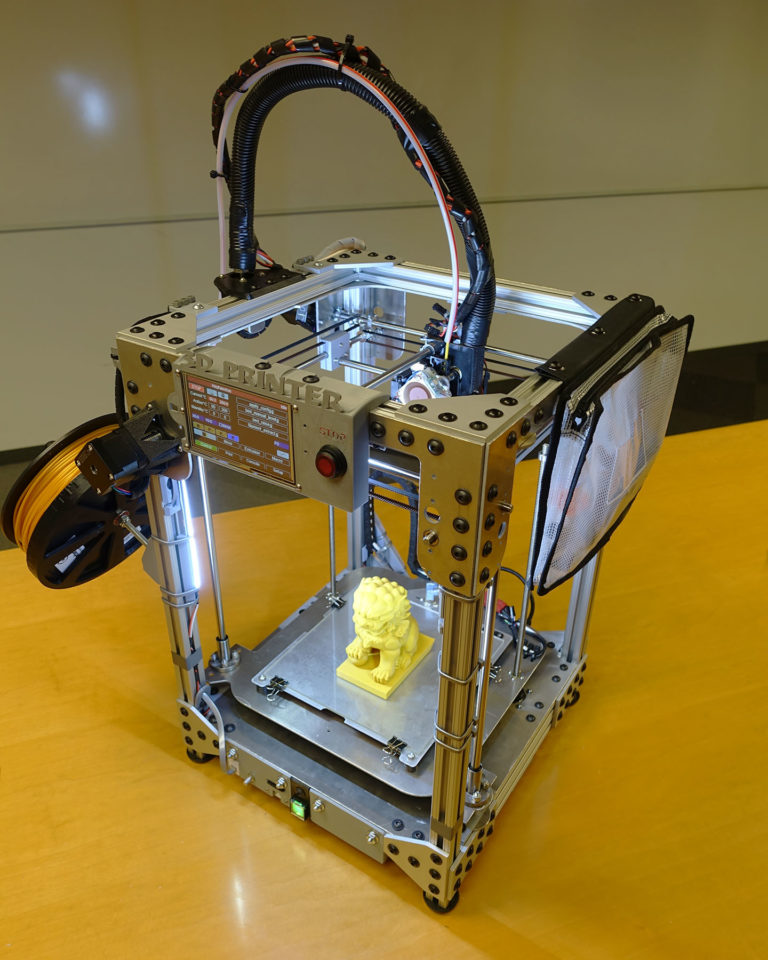
- Problems with printer settings. Most often solved through manual setting of parameters or adjustment of the G-code.
- Lost settings in the slicer. This includes: changed parameters, errors or inaccuracies in the firmware.
- Poor quality filament. The problem may lie in the quality of the plastic. It is necessary to monitor its condition, quantity. If necessary, try to replace the manufacturer, or even switch to another type of filament.
- Electrical problems. To find such a malfunction, you need to arm yourself with a multimeter and ring all the circuits after the controller.
- Factory defect. The problem is solved by replacing a low-quality part.
These are the main printer malfunctions that in one way or another affect its operation, which leads to printing defects. The printer may have several problems at once. They will lead to the appearance of a group of defects. You need to be able to recognize the first signs of breakdown in time and eliminate them.

- Check the outer wall thickness of your 3D model.
Slid of the layer 9000.
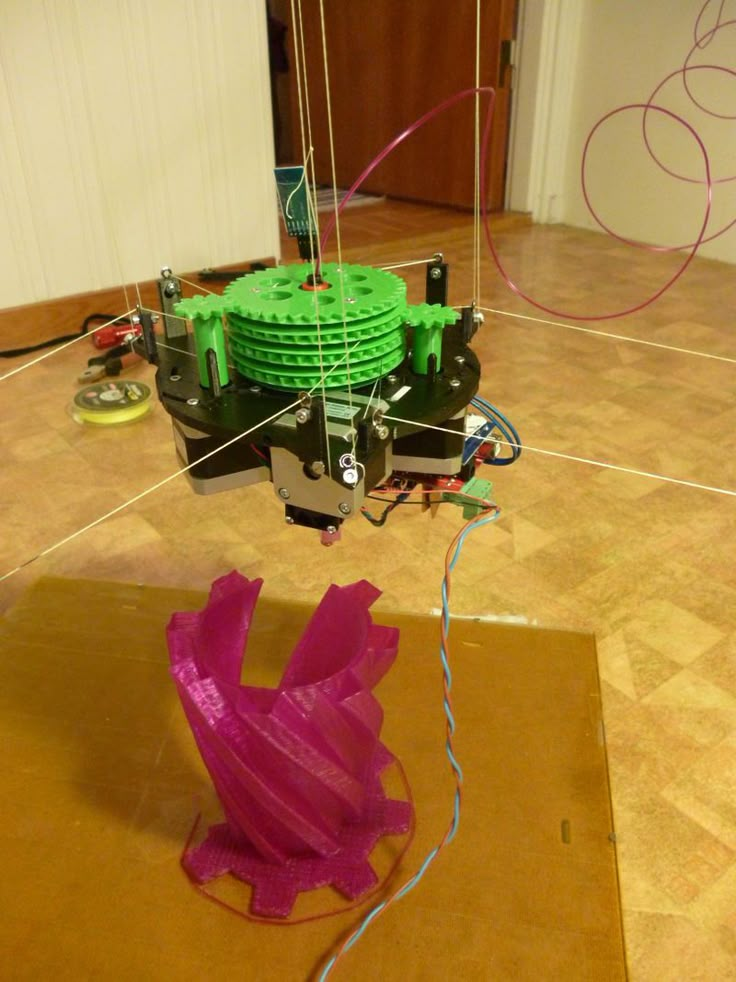 Description of issue
 Some layers in the model are misaligned.
What causes this problem during 3D printing?
Your 3D printer belts are not tight enough. The top of the print table is not stable. One of the Z guides is not a straight line.


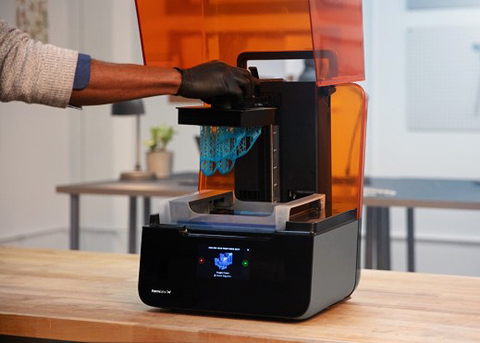 ..
..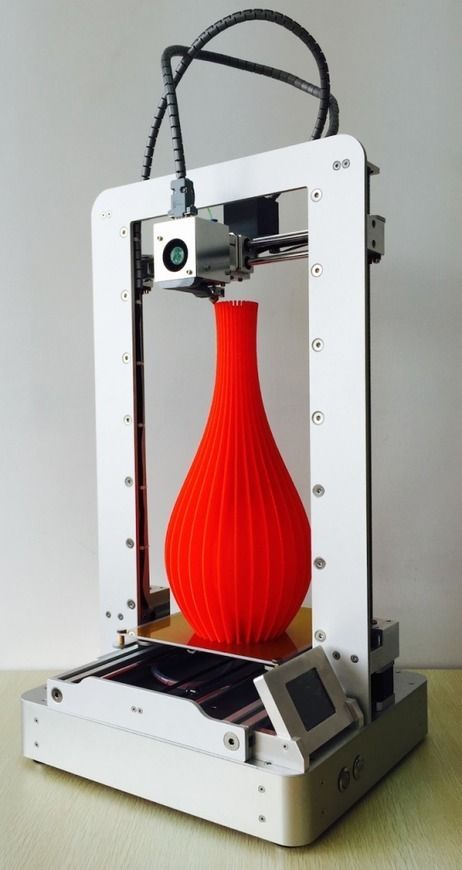 7
7 7
7 Our purpose is to empower everyone to join our efforts, and to provide everyone with...
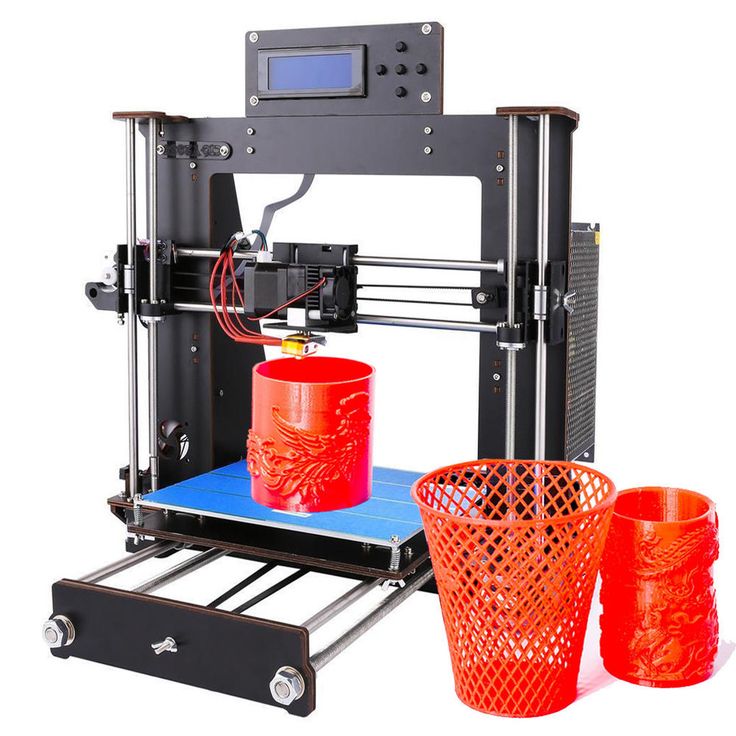 ..
.. August 28-30, 2023.