Ord solutions 3d printer
Using an Ord Solutions™ RoVa3D™ 3D Printer with Simplify3D™ Software
Introduction
The purpose of this page is to guide you through the use of the RoVa3D 3D printer. This is meant to accompany an actual demonstration on this device. Do not attempt to use the device without that demonstration.
3D printing is a type of additive manufacturing. This particular technology is called fused deposition modeling (FDM) or fused filament fabrication (FFF). This works by heating and extruding a spaghetto-like strand of thermoplastic filament on the bottom of a build platform to create the lowest layer in building a model. The table then moves down and the second layer is deposited on the first. The layers bond, though parts do have a grain, and it is generally easier for them to fail due to de-lamination between layers. There are many 3D printers on the market these days.
For a comparison, see 3ders.org or similar reviews (http://www.3ders.org/pricecompare/3dprinters/).
A great source of information is the user manual for the RoVa3D published by Ord Solutions at
http://www.ordsolutions.com/content/RoVa3D_Manual.pdf.
Caution: Do Not Steal Another's Intellectual Property.
The rapid prototypers in this lab may not be used to "steal" the intellectual properties of others. Please only build objects that are not the intellectual property of others, unless you have the owner's written permission.
A. Safety
A1. Make sure you have received instruction on the use of this 3D printer. If you have any questions, ask an instructor.
A2.
Wear safety glasses in the lab.
A3. Avoid burns. The extruder head and recently extruded plastic can be hot. Do not let them contact your skin.
A4. Do not place any material other than an approved 3D printer filament into the extrusion head.
B. Designing a Model and Getting the File Ready
Using Assignments, References, & Resources
B1. Please refer to references as needed. These might include reference manual for the RoVa3D or the Simplify3D tutorials at their website, as well as the software's built-in help feature.
Capturing Illustrations and Taking Notes
B2. Throughout this process, be sure to document each step, if requested, by capturing selected screen grabs, taking photographs, and writing down notes.
Creating and Check an Object File
B3.
Please use a computer that is not connected to a rapid prototyper to create a 3D object file. You may use solid object creation software such as Rhinoceros (pictured below), 3DS Max, AutoCAD, Lightwave, Maya, Google Sketchup, and Unigraphics, to name a few. A digitizer can also be used to capture the surface geometry of an object in hand. However, be sure your models do not violate copyright and trademark rights. In addition, try to create files that identify actual (closed) solids. If there are surfaces evident that do not seem to be part of the solid, you may need to edit the object
B4. You will need to select the object in Rhinoceros or some other program and then export the object as an .stl (stereolithography) file. This is a format that can be read by the Simplify3D software that communicates with the RoVa3D. Use the binary rather than ASCII sub-type for the .
stl file, and a precision setting of .01, if prompted. The native unit of measurement for the RoVa3D is metric, so if you create objects in inches, you might need to later scale them.
Simplify3D Import File Types: .stl .obj
Simplify3D Settings / Profile File Types: .fff .gcode .xrr
Design Notes
Design it as a solid.
It is possible to form a cube by moving six surfaces in what looks like the right position, though some of them might have edges that almost meet or corners that extend too far. But this cube shape is not a solid; it is a group of surfaces. In order to build an object, the file you use has to describe a solid. There cannot be a feature that has zero thickness.
One solution is to begin by using solids: rectangular prisms, cylinders, spheres, etc.
, and to use Boolean addition, subtraction, and intersection to get the final form you want. Another approach would be to begin with 2-dimensional geometry and to extrude it along an axis so as to create a 3-dimensional virtual object. Or maybe you want to take a curve and revolve it around an axis to create a lathed solid. Whatever methods you use, though, make sure the result is a virtual solid.
Multi colored models?
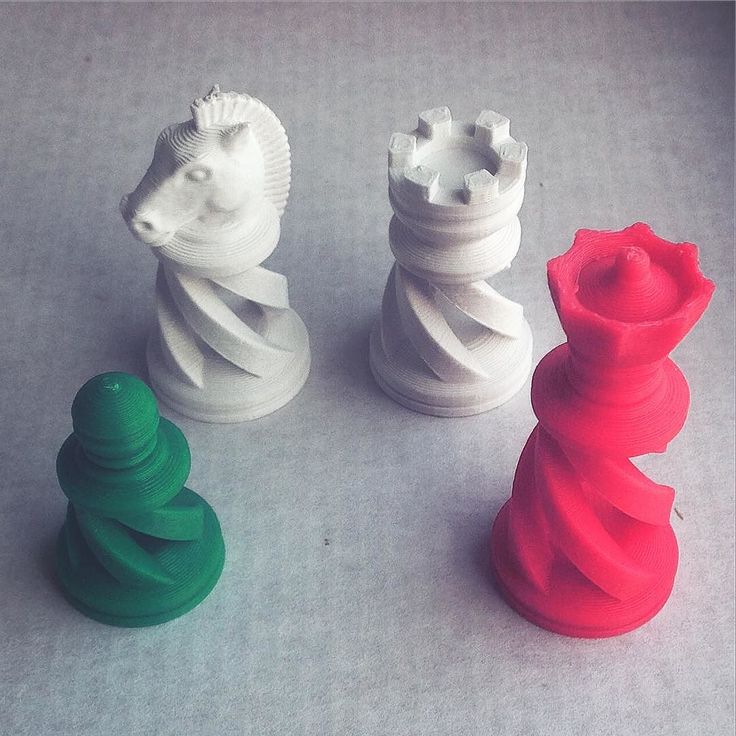
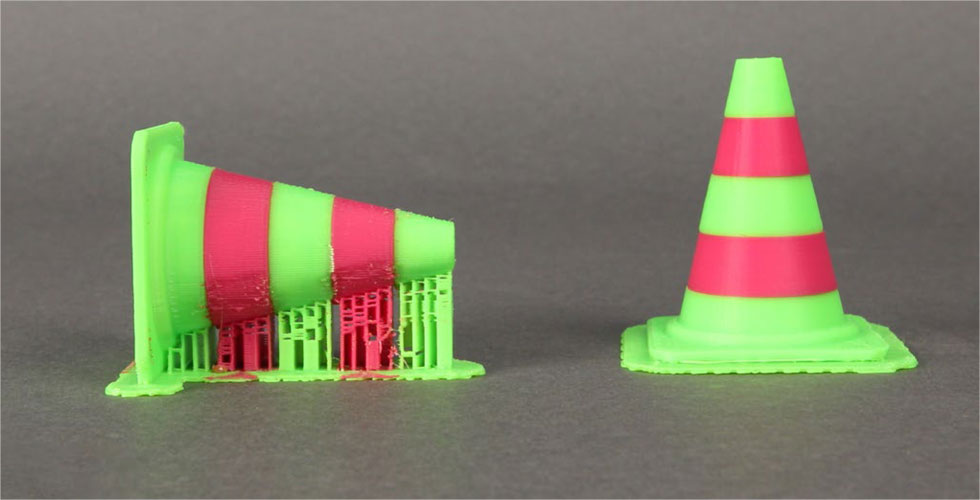
The RoVa3D allows for up to five different filaments to be printed simultaneously. One of the extruded materials could be a support material, or they can all be different colors or types of model materials*. If you intend to design a multi colored model, read up on dual extrusion at the Simplify3D website and experiment with design tools such as the Boolean Split command in Rhino.
Note
Printing with multiple extruders and materials is experimental.
Different materials require different settings. Some materials may also have issues adhering to other materials.
You do not have to design supports.
If your model needs to be built using either supports or a raft (that can increase adhesion to the build plate), you can later select these as options. You should not generally design geometry to act as supports; this is automatic when you select the Add Supports option.
Check your virtual model.
It is a good idea to check the integrity of a virtual model. If there are overlapping solids that occupy the same space, perform a union on them. Look at the volume of the object. View it in different orientations and judge whether the resulting model at the size you intend to build it will likely be strong enough to withstand building, clean-up, and handling.
Sometimes, designs have overhangs, so support systems have to be generated. In other instances, models do not have sufficiently large lowest layers to ensure that they temporarily stick to the build plate, so a raft has to be created.
If the model is a mesh, you might be able to use some mesh repair tools. One typical repair is to re-build surfaces. Another is to unify normals, which means to flip some of the triangles making up the surface so their outside faces are all actually on the outside.
Save and export your virtual model.
Be sure to save a copy of the model in the native file format for your design software to your own storage space (such as a personal thumbdrive.) In addition, select the design and export the file in a format that allows it to be input by the modeler you are using.

C. 3D Printing on the RoVa3D
Starting up the RoVa3D and Simplify3D
C1. Make sure that the last person's model has been removed.
C2. Some plastics, like ABS, work better with an encolosed build chamber so that they don't shrink too much during building, causing them to separate from the platform. Others, like PLA, work better with an open build chamber. If the RoVa3D needs to have the acrylic cover taken off or put on, check with the lab staff before you do this.
C3. Get the plastic filament you intend to use.
C4. Power on the RoVa3D and the computer that controls it.
C5. Open the Simplify3D software.

Tip
There are several tutorials on using Simplify3D that you may wish to view prior to using it. You can find them at: https://www.simplify3d.com/support/videos/
C6. Open your stl file in Simplify3D, or drag it's icon to the Simplify3D build platform.
Manipulating the Model
C7. Manipulate the model within Simplify3D as needed, changing:
The scale or size of the model
The number of additional copies of a model
A mirror of the model
The rotation or orientation of the model
Location in the xy plane
Location in the z axis, so the model rests on the platform (possibly using the Place Surface on Bed command)
Specifying Build Parameters as you Establish a Process
C8.
Establish processes for the job. If the same settings will be used to 3D print all parts on the tray, you only need a single process. It is recommended that you begin doing this as follows
C9. If there is a process listed in the processes list (possibly Process1), double click on it. If not, then click Add under the processes list.
C10. Unless you have already created a process definition you wish to use, begin by using one of the stock definition files on this computer, and by saving it using a different filename. There is a process profile called RoVa PLA and there is another called RoVa ABS. Select the one of these corresponding to your material. Click the Save as new button, and give the profile a new name, so you can make changes without changing the original profile. One advantage of doing it this way is that you have the initial and ending codes and the tool offsets for this 3D printer already loaded.
C11. Make changes as needed to the build parameters. You may need to click Show Advanced so that you can see all of the tabs used to customize settings. After making changes, be sure to click Update Profile so they will be saved.
Starting with a default profile for the RoVa3D will cause the two machine-specific scripts to be in your profile. The M218 command establishes nozzle offsets. Starting Script:
M218 T0 X0 Y0
M218 T1 X66 Y0
M218 T2 X-.3 Y30
M218 T3 X67.3 Y27
M218 T4 X36 Y28
G1 Z10 F250 ; lift nozzle
T0 ; make sure this happens before the homing or it will shift the print
G28 ; home all axes
G1 Z5 F250 ; lift nozzleEnding Script: M104 S0 ; turn off extruder
M140 S0 ; turn off bed
G1 E-1 F1000 ; retract extruder to prevent final string
T0
G28 Y0 ; home Y axis
G90
G0Z190
G0Y200
M84 ; disable motorsC12.
On the bottom of the FFF Settings dialog box, clic Select Models and assign this process to the appropriate model or models.
C13. Begin filling out the machine log for this job, noting the specific build parameters you are using.
Establishing a Connection
C14. You already established temperatures when you specified the build parameters. Now you need to communicate with the RoVa3D using Simplify3D to pre-heat the nozzles and build platform (if you are using a heated build platform).
C15. If there is no indication that the 3D printer is connected, select 250000 as the Baud Rate and click Connect. If this fails, try again. If it fails again, turn off the power to the RoVa3D, wait five seconds, turn it on, then try again. Make sure the USB cable connects the RoVa3D to the computer.
Setting Temperatures
C16.
Select the Temperature Plot tab so you can monitor the temperatures.
C17. Set the temperatures. This includes the heated bed temperature if you are using a heated build platform. After typing in the temperature, click the On button and you will see the red indicator on the screen get brighter near Heated Bed. Remember that the first extuder is sometimes called Extruder 1 and sometimes it is called Tool 0. This is confusing. under Active Toolhead, select the extruders where you will load filament, then enter the initial extrusion temperature and click On.
Loading Filament
C18. As the extruders are heating, prepare to load the material by first removing the small white tube from below the feed mechanism if there is one there.
C19. Look at the extruder drive mechanism for the first station you are using. Again, remember that this is likely Extruder 1, but that it is called Tool 0 in Simplify3D.
Carefully remove the two small nuts and do not lose them.
C20. Swing open the extruder drive mechanism hatch.
C21. Remove your spool of filament from its bag. Use diagonal cutters to cut the end of the filament if necessary so it comes to a point rather than ends as a blunt cylinder.
C22. Thread the end of the filament through the small white tube, and then up through the hole beneath the drive mechanism for that extruder. While it is possible to use Simplify3D to push the filament through the long white tube between the drive mechanism and the hot end, it is faster if you do this manually. So thread the filament up into the hold above the drive rollers and into the long tube. Check the temperature readout, and if the nozzle is at temperature, you should be able to manually push the filament through the long tube and into the heated nozzle, actually extruding a few inches of it onto the platform.
As you do this, notice whether there is some filament of a different color that first begins to extrude, and if so then push through several inches to purge the old material out of the nozzle.
C23. Replace the two small nuts so that they provide moderate force to squeeze the filament onto the feed roller.
C24. Fit the small white tube into the hole just beneath the feed mechanism.
C25. Optionally, tie a small piece of cloth to the filament just below the small white tube so that it can clean the dust off the filament.
C26. Place the filament spool onto the spool holder.
C27. Repeat for any additional extruders and filaments you might be using.
Final Preparations
C28. Before sending your job to the RoVa3D, do a final small purge of materials. To do this, select the extruder as the Active Toolhead. Then click the Jog controls tab and click the button for "10" above the word "Extrude," which causees 10 mm to be extruded.
If that is insufficient, click it again. Realize, however, that there is often a lengthy delay when switching between toolheads.
C29. Use a brass brush, but very gently. Brush the material from the end of the hot nozzle, but do not allow the brush to touch the white insulating material.
C30. In the Jog Controls tab, click Home All.
Building the Product
C31. Back in the main screen for Simplify3D, clic Prepare to Print!. This takes you to Preview Mode.
C32. In Preview Mode, click Begin Printing over USB.
C33. Observe the first few layers as they build. If there is a build error, then click the Cancel button on the Machine Control Panel, clear out any material from the platform and nozzle, and try again. If you are trying to clear out a failed build and you need to lower the build platform, use Jog controls, and select a +Z value of 100, which moves the platform down 100m (thereby increasing the relative position of the nozzle by a positive 100m in the Z axis.
C34. Open the machine log again and fill out the information provided under Build Statistics in Preview mode.
D. Removing and Post Processing the Builds
D1. When the job has finished, remove all plastic that is on the build platform. Do not damage the surface of the build platform when you do this.
D2. If you are finished using this filament, then remove it from the RoVa3D. The fastest way to do this is to make sure the nozzle is at temperature, then to remove those two small screws at the feed mechanism and to attempt to pull the filament back onto the spool. Be sure to return those two small nuts to their bolts.
D3. Secure the end of the filament with tape against the spool and place it into an airtight bag with dessicant.
D4. Turn off the power supply to the RoVa3D.
D5. If necessary, save any files you have not yet saved, then power-down the computer and its monitor.

D6. Return any tool you might have used.
D7. Open the build log a final time and indicate a note as to the success of the build.
D8. If necessary, you might need to post-process the model. This could include removing a brim, a raft, or supports, filing, sanding, machining, or gluing.
Caution
Do not place any model from the RoVa3D into the Support Cleaning Apparatus used with uPrints. The SCA dissolves away only special uPrint support material, and you may end up contaminating the bath and ruining your object if you place it in the SCA bath.
Appendix A: Instructions and Notes for Laboratory Staff
S1. Do not allow users to create items where the intellectual property rights do not allow it.
S2. Make sure that the model is appropriate for the RoVa3D.
S3. Those using the RoVa3D for the first time are encouraged to do single-material builds.
S4. Have the user fill out the machine log.
S5. When a spool of filament is installed, keep a Ziploc bag for its waste handy.
S6. Do not leave the filament on the machine where it can absorb water from the air. Have the user unload the filament and bag it at the end of each job.
S7. Ideally the user will be the one to remove their build from the platform. When someone starts a build, ask them when they intend to return to remove their work. Do not let the user damage the build platform covering when removing their work.
S8. If necessary, use a small scale to weigh the finished pieces, since costs are based on grams of filament.
S9. When necessary, replace the covering on the table. See the lab administrator regarding this.
S10. Level the bed frequently.
Use the .004 or .005 inch feeler gage for this.
S11. This machine should have a clean area around it, and there should be a standard set of tools neatly arranged.
S12. If there is a clog in the nozzle, unload the filament and try reloading it after clipping off a new leading end at a slight bevel. Check the preheat temperature settings and make sure these are the best ones for this particular material, then try reloading. If you think the nozzle has to be cleaned or the head disassembled, first check with the lab administrator before attempting this.
S13. This machine is for use only by students in Department of Technology classes who were assigned by their DOT instructors to use the RoVa3D, and by DOT faculty. If anyone else requests to use them, have them contact the lab administrator.
Appendix B: RoVa3D Specifications
The following specifications for the RoVa3D 5-headed 3D printer were provided by OrdSolutions at
http://www.ordsolutions.com/rova3d-5-extruder-3d-printer-package/
| "Printing technology: FDM (Fused
Deposition Modeling) / FFF (Fused Filament Fabrication) Print area size: 284 W x 301 L x 191 H mm (11” W x 11” L 7.5” H) Build volume: Up to print area size, depending on multi- nozzle configuration Automatic Bed Leveling: Yes Layer height: Min 25 microns (0.0009”), Max 1000 microns(0.039”) Print resolution: X: 5 microns (0.0002”) Y: 5 microns (0.0002”) Z: 0.25 microns (0.00001”) Filament Diameter: 1.75mm (0.069”) Nozzle Diameter: Available 0.35, 0.5, 0.7, 1.0 mm (0.014”, 0.020”, 0.028”, 0.039”) Footprint: 280 W x 381 L mm (11” W x 15” L) Overall Dimensions: 665 W x 430 L x 680 H mm (26. 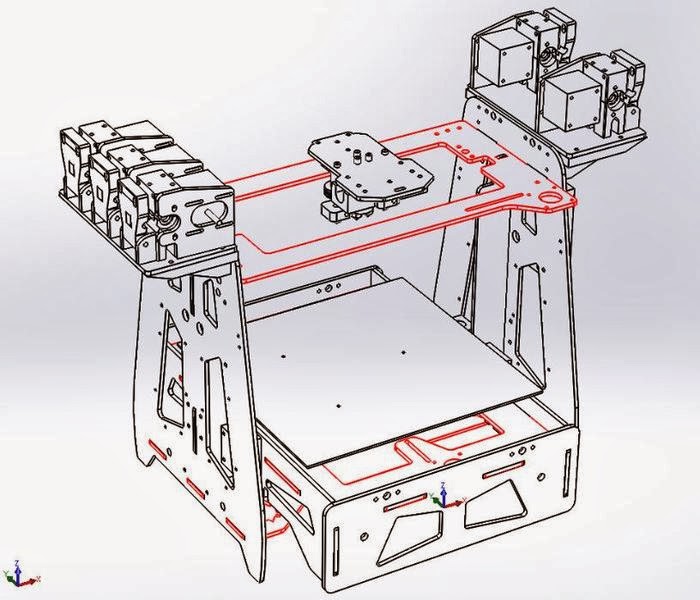 18” W x 16.93” L x 26.77”
H) 18” W x 16.93” L x 26.77”
H)Weight: 18.1kg (40 lbs) Shipping box: 711 W x 508 L x 660 H mm (28” W x 20” L x 26” H) Shipping Weight: 24kg (53lbs) without extra items Electrical: 115/240V, 10A/6A, 50/60Hz Mechanical: Anodized Aluminum, Stainless Steel, Injection Molded ABS Plastic Stepper motors: NEMA 17 1.8 Step with 1/32ndmicro stepping Optional “Cool Muscle” Ultra-High-Performance Drive Motors with Closed Loop Vector Control Print Materials: PLA, ABS, Soft PLA, HIPS, PVA, PET, PETT, Taulman, Laywoo, Laybrick, ESD, Conductive, POM, Carbon Fiber, Wood, Brick, Nylon, Polycarbonate, carbon nanotube, and future high temperature materials that are in development" |
"Using an Ord Solutions™
RoVa3D™ 3D Printer with Simplify3D™ Software"
All information
is subject to change without notification.
©
Jim
Flowers
, Ball
State University
The Top Full Color 3D Printers on the Market
Published on December 2, 2021 by Carlota V.
When it comes to choice of a 3D printer, several criteria must be taken into account: which applications it will be used for, the desired printing speed, the final quality of the parts, the quantity to be produced, among others. For some, a particularly essential aspect is the possibility to design parts in color. It is true that color integration is rarely the number one choice, but for some users, it is key. For example when creating a visual prototype that must look like a perfume bottle, or an anatomical model where blood vessels need to be distinguished from nerves and arteries. Enter full color 3D printers.
Integrating color into additive manufacturing is currently possible, whether through machines that are capable of offering a wide range of colors, accessories to be added to the printers, or post-processing solutions that offer options for dyeing, painting, varnishing, etc. In this listing, we focus on color 3D printers, i.e. machines that can produce a multi-color part at the end of the printing process. We have sorted them by printing process: extrusion, material jetting and powder binding.
Fused Deposition Modeling
FDM technology offers several possibilities for creating coloured parts. For some color 3D printers, the presence of several extruders will allow the user to choose different filaments and combine them. Other manufacturers have developed a system that can color filaments directly inside the 3D printer: the machine releases color inks at the print head, resulting in a colored filament. Finally, there exist additional accessories available to mix different filaments together.
Crane Quad
Known for launching the Micro 3D, a successful desktop 3D printer on Kickstarter in 2014, M3D continued to develop various FDM/FFF machines. Among its latest creations, the Crane Quad, a 3D printer capable of combining several filaments to create new combinations of colors or hybrid materials. In fact, the Crane Quad mixes 4 CMYK filaments to achieve more than 50,000 different colors. In addition, it offers a maximum manufacturing volume of 230 x 230 x 250 mm for a minimum layer height of 25 microns. It is marketed by M3D at a price of $999. You can find more information HERE.
da Vinci Color 3D printer and its mini
The da Vinci Color 3D printer combines FDM and Inkjet technologies, as it uses an absorbent, colorless PLA filament that can be mixed with different color inks. According to the manufacturer, CMYK ink cartridges can be used in an almost unlimited color gamut, up to 16 million shades. It has a print volume of 200 x 200 x 150 mm for a maximum print speed of 180 mm/s. In addition, XYZprinting also has a more compact version, the da Vinci Color Mini, with a smaller print volume of 130 x 130 x 130 x 130 mm. Features of this latest version include automatic calibration, wireless connectivity to connect to the printer remotely, and an optional laser engraving module for further customization of projects.
Element from Mosaic Manufacturing
The Element 3D printer was launched by the Canadian company Mosaïc Manufacturing. This professional machine makes it possible to achieve complex prints with different materials while obtaining realistic full-color and functional prints by combining flexible and rigid materials. It has a printing plate that reaches 120°C and a layer resolution of between 20 and 230 microns. With a maximum printing volume of 355 x 355 x 355 mm, the Element 3D printer has an all-metal gantry and a precision motion system. Other features include an internal camera for viewing the print, a touch screen control and connectivity via Wifi, LAN or USB. It is compatible with the Canva laminator, with which you can easily create, cut and manage any 3D printing project.
Palette 3
While the Palette 3 is not a 3D printer, it is probably one of the most accessible ways to design color parts. Developed by the Canadian company Mosaic Manufacturing, the machine should be connected to an extrusion 3D printer. It allows the combination of flexible and rigid materials, and users can not only create parts with complex shapes but also print in color in one go. A Pro version of the Palette 3 is also available, with advanced properties that allow users to print with technical materials and create durable, high-volume prints. Finally, the Palette 3 Pro features Splice Core Pro, a cooling system that makes filament bonding more reliable. The Palette 3 is available from €650 and the Palette 3 Pro from €850.
RoVa4D
The RoVa4D 3D printer grew out of a successful Kickstarter campaign by Canadian company ORD Solutions, which after its first Kickstarter campaign has dedicated itself to improving the capabilities of its 3D printer. This latest version supports 5 spools and a print head that allows printing with different materials and colors, from flexible materials to soluble materials. It has a printing volume of 120 x 120 x 180 mm. In order to be able to successfully achieve color printing, the machine has 5 different spools for CMYK colours (cyan, magenta, yellow, black and white), which are then mixed within the patented hotend to give the expected color as a result. The printer can currently be purchased at the manufacturer’s website for $7,500. You can find more information HERE.
XRIZE
The XRIZE is an industrial 3D printer that uses a hybrid process called Augmented Deposition to produce objects in multiple colors. This hybrid process combines extrusion-based 3D printing with a inkjet technology we know from 2D printers. While the part is created layer by layer with traditional colorless PLA, the 3D printer simultaneously releases CMYK inks (cyan, magenta, yellow, black) in the print head to add color. For example, text, images and QR codes can be printed on the part. Although the device can be described as a desktop machine, its build volume being 310 x 200 x 200 mm, the XRIZE with a price of $55,000 is less suitable for manufacturers and hobbyists but rather for industrial applications. You can find more information HERE.
Material Jetting
3DUJ-553 and 3DUJ-2207 from Mimaki
Japan’s Mimaki, a manufacturer of traditional 2D printers, was the first to make a UV-curable, colored material jet 3D printer. Its 3DUJ-553 solution was launched in 2017 and can create parts with more than 10 million colors. It uses a UV light curing process and is intended for the professional sector. During this process, a layer of material is applied and then covered with a UV-sensitive ink that light can solidify. The process is repeated until the final part is obtained.
More recently, Mimaki developed the 3DUJ-2207, a more compact 3D printer that offers the same color printing capabilities. It is more accessible and easier to use, unlocking a larger section of the current market. The 3DUJ-2207 is particularly suited to medical professionals, researchers and teachers, but also to designers and artists.
ActiveLab Digital Fabrication by Voxel8
The ActiveLab Digital Manufacturing System from Voxel8, acquired earlier this year by Kornit Digital, is another multi-material 3D printing solution using a technology based on material jetting. Its ActiveMix® technology consists of three possible elements, ActiveMix Extrusion, ActiveMix Spray and ActiveImage. The extrusion works to build 3D structures and thick films on any surface or texture with theologically tuned fluids while the spray rapidly covers large areas of a substrate with an elastomeric spray for textiles. Finally, the ActiveImage uses inkjet technology either through spray or extrusion, or both, to embed high-resolution graphics into elastomers. Users can expect full color graphics and the company points to its use especially in the creation of sporting goods, though it also has industrial and medical applications. You can find out more HERE.
Photo Credits: Voxel8
J55 Prime
One of the most well-known names in the world of full color 3D printers is of course Stratasys with their PolyJet technology, which has the distinction of enabling the mixing of colors, materials and even textures in one part. Though they have many different machines using Polyjet, we wanted to draw your attention to their J55 Prime which was released in 2020. This more compact solution still has the multi-material and multi-color capabilities of its larger predecessors but at a fraction of the price. It is able to print with 5 materials simultaneously meaning that users can create over 640,000 unique combinations, including Pantone Verified colors. As it has been designed for an office or studio it is also ultra-quiet, operating at the same level as a household refrigerator. Finally, it has a ProAero™ Air Extractor to capture and filter out fumes. You can find out more about the printer HERE.
ProJet CJP Series
The ProJet CJP 260Plus is 3D Systems’ most affordable and office friendly color 3D printing option. The ProJet CJP 260Plus creates photo-realistic parts in full CMY color with small feature details and the ability to use full texture/UV mapping to better evaluate the look, feel, and style of product designs. This 3D printer is based on 3D System’s ColorJet Printing technology, and has a maximum build volume of 236 x 185 x 127 mm.
3D Systems manufactures an entire range of color 3D printers, including the ProJet CJP 360, CJP 260 Plus, CJP 860Pro, CJP 660Pro, and the CJP 460Plus. They vary according to their build volume, the 860Pro being the largest solution, with a build volume of 508 × 381 × 229 mm. You can find more information HERE.
Binder Jetting
ComeTrue T10
Developed by Taiwanese manufacturer ComeTrue, the ComeTrue T10 3D printer is based on a Binder Jetting technology and coloured inks (CMYK). The advantage of such a process is the possibility of printing parts without printing supports as well as its speed, the T10 is indeed able to reach a printing speed of 20mm/h. The ComeTrue T10 allows the manufacture of parts with a maximum size of 200 x 160 x 150 mm with a resolution of 1200 x 556 DPI for a minimum layer height of 0.08 mm. The ComeTrue 3D printer requires a post-processing machine to remove the finished prints (Dry Vacuum Cleaner). The ComeTrue T10 is available for a price of about 25,000€.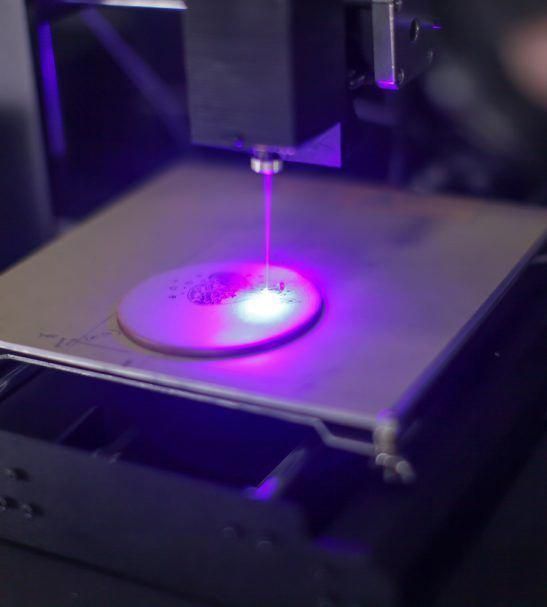 You can find more information HERE.
PartPro350 xBC from XYZprinting
Launched in 2018 by Chinese manufacturer XYZprinting, the PartPro350 xBC 3D printer uses Binder Jetting. It is compatible with standard thermoplastics, such as ABS and PLA and the machine has been designed for professionals. With a printing volume of 350 x 222 x 200 mm, the printer is, according to the manufacturer, 150% faster than machines using the same technology. Finally, the PartPro350 xBC has a removable tray so that users can easily remove parts after the printing process. According to some retailers, the price is between €25,500 and €35,000.
What did you think of our listing of full color 3D printers? Let us know in a comment below or on our Facebook and Twitter page! Don’t forget to sign up for our free weekly Newsletter, with all the latest news in 3D printing delivered straight to your inbox!
10 reasons to contact the prototyping center
Analytics and business
Rapid prototyping
Experts recommend
Author: Andrey Kombarov
Author: Andrey Kombarov
1. Supply chain management | 2. Large selection of materials | 3. Variety of colors and finishes | 4. Large format 3D printing | 5. Professional quality parts | 6. Cost reduction | 7. Save time | 8. Scalability | 9. Expert advice and assistance | 10. Services of professional designers
The 3D printing services business is growing faster than ever. This happens because more and more people are striving to realize their ideas by means of additive technologies. Many solo enthusiasts, research groups, and manufacturing companies are not interested in investing in 3D printers, but prefer to go to a prototyping center first.
Today, 3D printing services are based mainly on working with professional clients. Of course, orders are also carried out for individuals, but most of the market is the B2B segment.
Even if you have access to a 3D printer, sometimes it's better to hire an outside contractor. Let's say you need a part in a material or color you don't have, and you'd rather not buy the whole lot.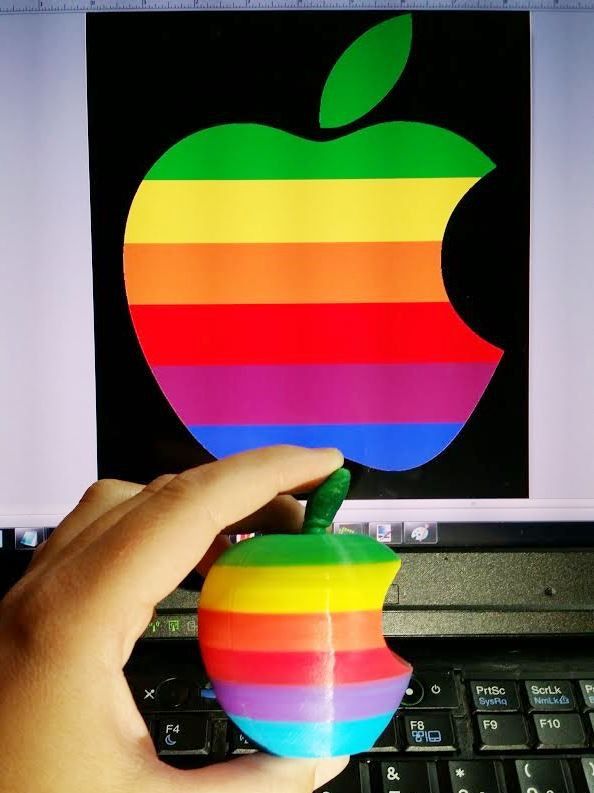 It is much wiser to order the missing part, and not to purchase all the equipment and inventory that may not be needed in the future.
We will look at ten reasons why additive manufacturing using a service can be more profitable.
Do you have projects that you would like to realize using 3D printing, 3D scanning or 3D modeling? Order a service from our company!
Leave a request
1. Supply chain management
Additive technologies have been improved over the years, and today they allow the production of both prototypes and final parts, especially when solving certain problems.
In general, the development and manufacture of a particular part can be expensive due to high tooling costs. 3D printing is an extremely flexible technology. Manufacture of many different products and refinement of their designs is no longer a complex problem, which makes additive manufacturing a reliable solution to problems with the active use of redesign.
Outsourcing 3D printing jobs saves costs and lead times © Leo Gregurić via All3DP
Today, many research groups and companies rely on 3D printing services as a supply chain. It is extremely useful for them to be able to easily create and deliver custom parts.
2. Large selection of materials
One of the strong selling points for 3D services is the variety of consumables (and technologies) on offer. Thanks to the constant introduction of innovations in this area, service providers are able to work with the latest developments, especially large companies.
Prototyping centers offer, as a rule, the three most popular additive technologies: FDM, SLA and SLS. Accordingly, polymer filaments or granules, photopolymer resin and plastic powders are used as consumables.
A wide range of options gives the customer the opportunity to obtain the material that is required for a particular project, based on mechanical and chemical properties and aesthetic requirements.
The variety of materials is practical not only for professional needs. The Professional 3D Services Center will also offer simple materials that may not be available to a private person. Buying a certain material and printing a product from it on your own can be more expensive than simply ordering the manufacture of a single part from this material.
iQB Technologies experts recommend an article: 9 products that are more profitable to make on a photopolymer 3D printer
3. Variety of colors and finishes
With such a wide range of materials available, 3D printing service customers are not limited in their choice of colors and finishes. Creating the perfect combination for a specific task has never been easier.
Colors
FDM filaments (PLA, ABS, PETG, and others) are typically offered in a wide range of colors. The plastic granules from which the thread is made are easily dyed.
More advanced combinations of plastics in the form of filaments, such as polymer composites or nylon, are difficult to dye and their color range is not as rich.
With regard to SLA technology, various colors are available for photopolymers. True, there are not as many of them as for PLA. Methods like SLS use industrial grade nylon powder, which comes in white, black, or some color in between. This is also due to the difficulty of coloring.
Technology available for full-color 3D printing © Hubs
There are full-color 3D printers that are ideal for creating visually appealing prototypes and teaching models, such as anatomy and geography. Given the high cost of professional machines, the ability to use technology that is not otherwise available through a 3D printing service is of great importance to the end user.
Finish
The surfaces of products created on a 3D printer can be subjected to various post-processing methods. Details are processed until the layers are completely indistinguishable and, as a result, look as if they were not printed at all.
But this is only the beginning. Processing can include sanding, polishing, galvanizing and painting, and many other finishes. Not every 3D printing material is suitable for all post-processing methods, and the service provider should explain this point to you when ordering.
In addition to the huge selection of options, one of the biggest benefits of ordering a finishing service is quality and convenience. Post-processing can take a lot of time, and entrusting the work to professionals, you will be sure of a high-quality and reliable result.
4. Large Format 3D Printing
Sometimes you may need a large printer © WASP Team via Youtube
An additive manufacturing services company typically operates multiple 3D printers to meet high demand (and meet deadlines) and various other requests. This provides a number of advantages, among them - the flexibility of product sizes.
Sometimes splitting a large part into multiple sub-elements is not the best solution, so an additive setup with a large build platform is needed. An individual or company often does not have access to large 3D printers, while many 3D service providers do.
5. Professional quality parts
3D printers are becoming more reliable, and even the most affordable technology is showing impressive accuracy. However, many products (say, jewelry) require more precise workmanship or tighter tolerances to ensure perfect compatibility (for example, functional units). The professional results offered by the 3D printing service guarantee consistently high-quality workmanship in terms of precision and finish.
Professional machines are more reliable in terms of repeatability. This is an important factor to consider when printing a large number of parts that require constant and tight tolerances.
But not only machines determine the final result. The people who work with 3D printers make a significant contribution to the production of professional quality parts. They have the knowledge and experience to advise you on how to best prepare your model, select the most suitable material, and finally create the final part.
A high-quality prototype created on an industrial SLA printer at the TWIZE Prototyping Center © TWIZE
6. Cost reduction
If you need to make something on a 3D printer, there are two options: either buy equipment and print the parts yourself, or order printing and receive finished products. Using a 3D printing service can save you money.
When a business is considering launching its own additive manufacturing, outsourcing through a service provider first makes sense. This will allow an individual or company to access 3D printing technologies while avoiding the cost of equipment, materials and maintenance. Once you understand that 3D printing meets the needs of your business, this may be the right time to start thinking about buying equipment.
There are other scenarios as well. Some businesses can save money in the prototyping phase by having them 3D printed before putting the final version into production through another process such as injection molding.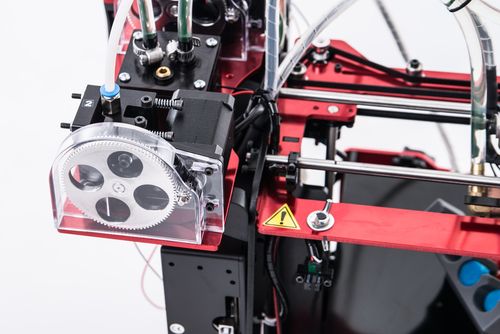
However, outsourcing a project can save a lot of money until a “tipping point” is reached, at which point the cost of acquiring the equipment becomes a worthy investment.
Considering starting a 3D services business?
We share our experience in the article 3D printing as a business: the most profitable concepts of the RP Center
We will consult and select ready-made solutions. Contact us!
7. Save time
When ordering 3D printing from a service provider, you don't have to worry about printer setup and maintenance. In fact, you make a payment and get the parts you need. Everything is done on a turnkey basis, and you don't have to think about all the additional costs associated with setting up, maintaining and operating the equipment.
3D printing of some parts may require time that you do not have © Leo Gregurić via All3DP
And even if you have printers, they may not be enough to print a large number of products in a short time.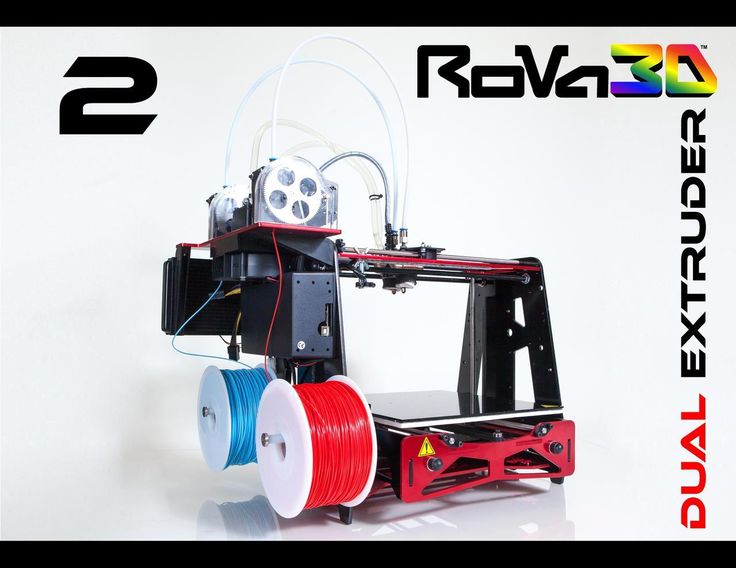 Since prototyping centers usually have a large stock of equipment, large batches can be produced very quickly.
Of course, the order may take a long time, so choose the service wisely. But the turnaround time for an order (printing from standard media with standard post-processing) may well be shorter than the total time it takes to set up, maintain, and operate the related equipment. For many, this alone is enough to apply for a service to a contractor.
In addition, the production of an object on a 3D printer takes hours or days - this requires control, which not everyone can do.
8. Scalability
Since the advent of 3D printing, it has been described in the mainstream media as a slow process. What is usually meant is that additive manufacturing cannot compete with traditional methods such as injection molding when it comes to high volume production.
There is some truth in this, but it is important to understand that 3D printing is a very effective process in certain circumstances. When you need to produce large batches of the same parts, this is not the best option, but 3D printers are more than capable of producing in small and medium volumes.
This is especially beneficial when we are dealing with individual designs or iterations, that is, when classical methods involve much more time and money.
For this reason, 3D printing services in particular can provide scalable manufacturing solutions that meet the needs of even medium volume production. Small-scale production is possible in a garage or a small office, something larger is hardly imaginable, and this is where the use of a 3D printing service makes sense.
3D service providers can deliver scalable solutions © BMW Group
9. Expert advice and assistance
As already mentioned, 3D printing services are available to a large number of different customers. These can be both individuals who want to print a cartoon character figurine on a 3D printer, and world-famous corporations seeking to optimize their workflows.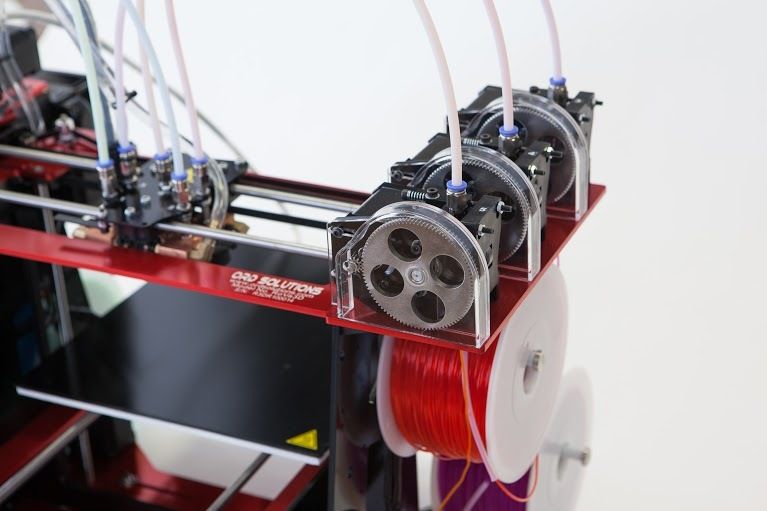 In any case, consultation is an important factor that can help close the deal.
The additive manufacturing experts at the 3D Services Center can help customers determine the right course of action before launching a project. Working with the client on the specific needs of his project, he is explained the available options.
Identifying the exact applications for 3D printing as well as discussing technical issues and specifics (such as what material is best for the purpose) are all part of the consulting service. Sometimes good preparation based on consultation can save money as the project progresses. For large projects, this is certainly an important advantage.
10. Professional design services
Most 3D service companies expect you to already have a 3D model ready to print. Often this is the case, but some clients still need additional help. In cases where the customer needs to develop a part from scratch and he does not have 3D modeling experience, a service with the involvement of full-time professional designers will come in handy.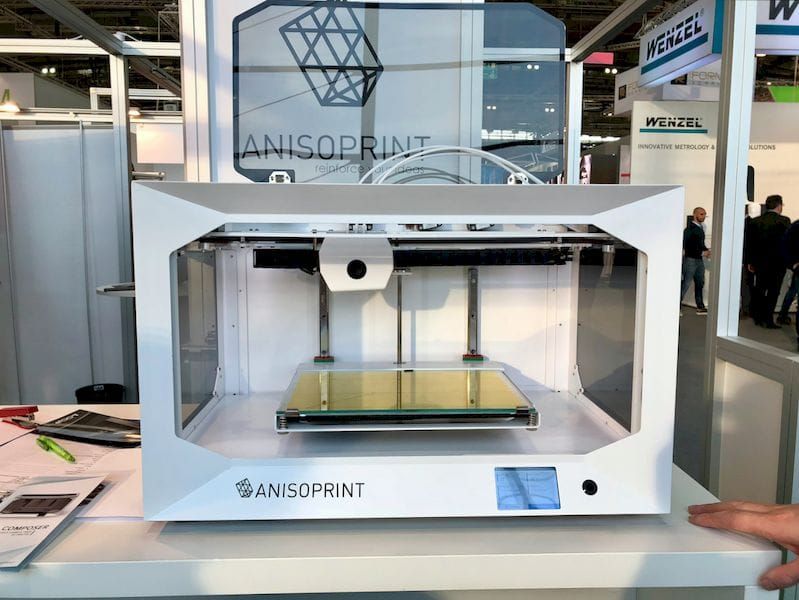
Moreover, not all 3D models are ideal for 3D printing in production. In these cases, the advice (or adjustments) from the AM specialist is really helpful. It may not be useful to all customers, but for new customers it will be a nice bonus.
Author of the material: Leo Gregorich. Source: all3dp.com
Article published on 04/28/2022, updated on 08/01/2022
specialization and new revenue models
While some foundries only produce wax and resin samples for independent jewelry designers, facilities with their own equipment can not only select but also sell parts for 3D printing.
There is an increasing number of foundries accepting design files from jewelers to 3D printing, casting and polishing.
Foundries are finding great value in acquiring a desktop 3D printer to complement their industrial additive manufacturing tools to serve the ever-growing wave of "digital" jewelers.
Rise of the digital jeweler
Digital jewelers work primarily with CAD and produce designs using 3D printing technology.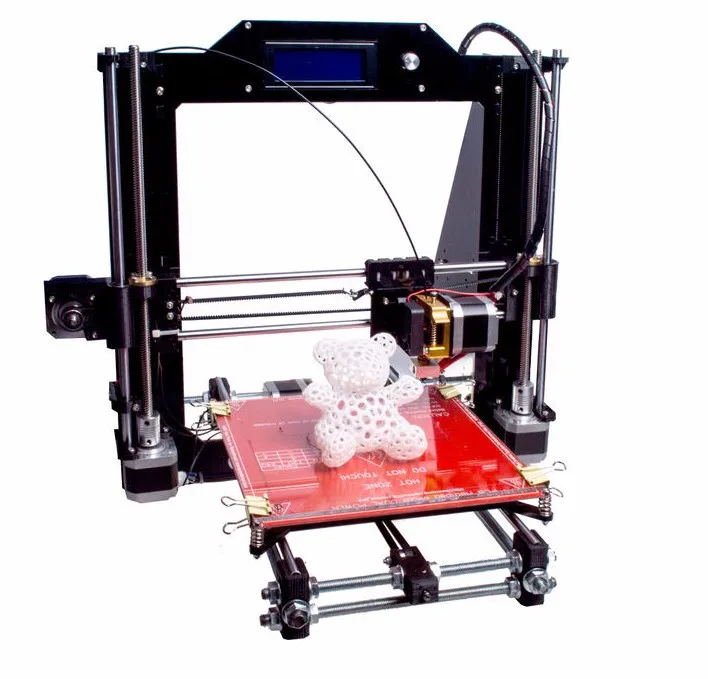 In this article, we dive into the history of two foundry houses, Q Branch Bespoke Casting (UK) and Ulrich Wehpke GmbH (Germany), who used as part of their one-stop printing and casting service for jewelry customers.
Adding new meaning to custom projects
Q Branch Bespoke Casting, based in the United Kingdom, was founded in 2016 by Dan Roy, who has been 3D printing since 2006 and casting since 2008.
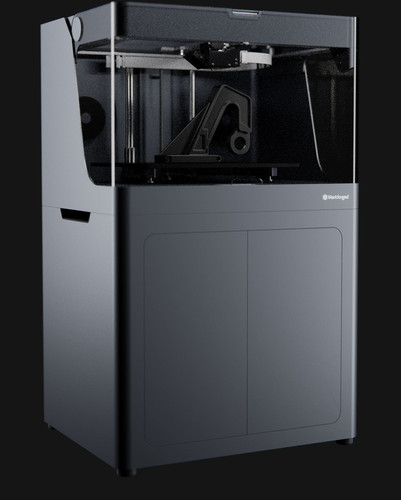
Roy has been in the jewelry business since he was 15 years old. His company specializes in platinum, palladium and gold castings, some of the most difficult metals to trade. Roy and his team have been using a Formlabs Form 2 3D printer since December 2017 as the only resin 3D printer.
Q Branch 3D Printing
Q Branch Bespoke Casting works with jewelry designers, fabricators and jewelers for 3D CAD models, turning resins and cast parts into metal. They also create wax injection molds and work with 3D scans.
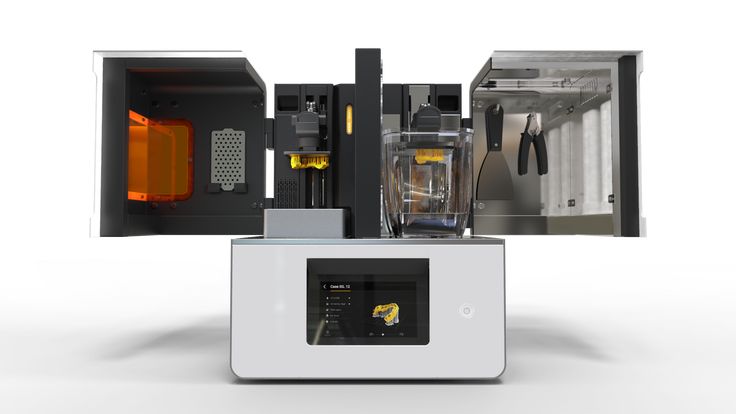
The Formlabs Form 2 3D printer is part of the team's daily workflows and combines the convenience and speed of prototyping for clients to review before making a final decision. Previously, Q Branch Bespoke Casting used the EnvisionTEC machine.
“ We most often use the Formlabs Form 2 3D Printer to create models for our clients to review and sample before moving on to the precious metal,” said Roy.
« Precious metal casting can be as perfect as the supplied model. The Formlabs Form 2 3D printer strikes a great balance between two key components: detailing and the surface finish.”
The Formlabs Form 2 3D Printer complements an industrial 3D printer foundry facility and often removes workflow bottlenecks within months.
« We use other 3D printers that work well but are slow. We recently had a big order for some really big pieces that were needed to build the box after they were printed. They would link our other printers for a few days, but from Formlabs Form 2 , I got all the parts printed in just a weekend! ,” said Roy.
« This is a great gap filling machine - when all other printers are just getting started, we often get orders printed on the Formlabs Form 2 3D printer at the end of the day! Now we have the opportunity to fulfill our orders using the Formlabs Form 2 3D printer, for their investment the very next day !”.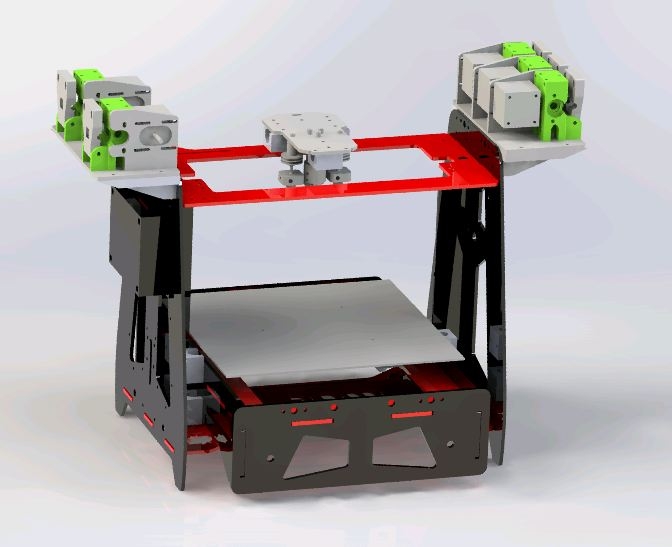
The evolution of jewelry from a caster's point of view
3D printing technology has radically changed the jewelry manufacturing process, and Q Branch has used its knowledge of the technology to evolve with these changes.
« From a caster's perspective, I've seen progress from hand carved wax master models that are molded to 2-axis wax milled models and the dawn of CAD-CAM to 3D printed thermoplastics and the current mass of photopolymer resins and stereolithography (SLA ) and digital light processing (DLP) machines ,” said Roy
“The spread of affordable 3D printing makes it much easier to get on the custom route and sort through projects if you are planning or already building a collection.”
3D printing as a core business model
Traditional foundry houses are moving away from wax-based casting methods and industrial 3D printers to using desktop 3D printing and injection molding printers such as the Formlabs Form 2. Ulrich Wehpke, a foundry based in Krefeld, Germany, switched to SLA-based 3D printing about three years ago.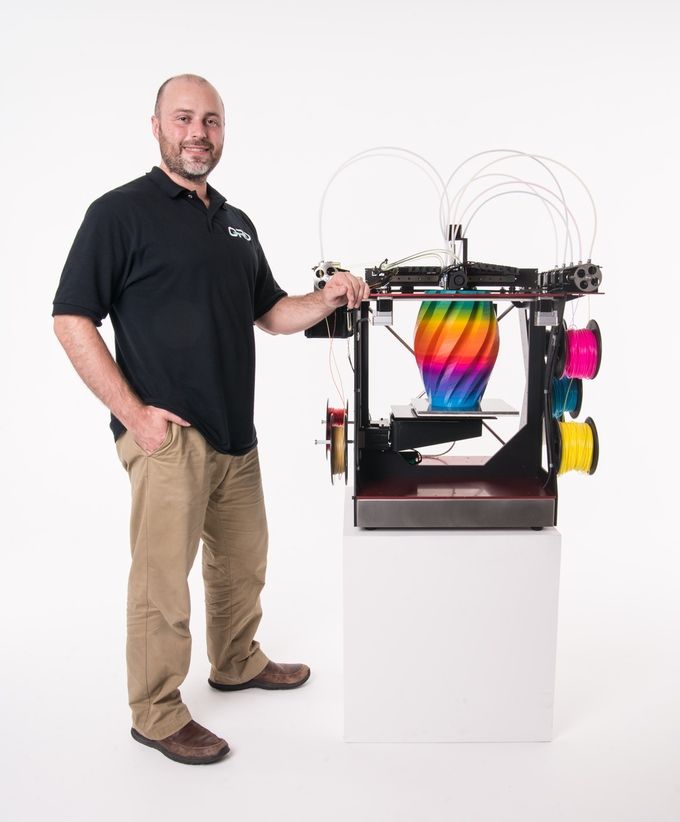 With over 30 years in the foundry business, a team of three master jewelers work with metals such as silver and gold alloys and platinum. It is known that they cast engagement and wedding rings, and also engraved men's rings. In addition, Wehpke has a subsidiary business in jewelry and watch repair.
- 1967: Wehpke is a company founded by Ulrich Wepke as a jewelry workshop with a small shop.
- 1980: Wehpke closed their shop and began focusing entirely on their workshop to serve jewelers throughout Germany.
- 2000: Bought my first 3 axis CNC station.
- 2001: Started using Rhino CAD.
- 2005: Acquired his first five-axis CNC station and a Solidscape T66 splash and began offering CAD, prototyping and casting services in conjunction with his classic jewelry workshop to make finished jewelry.
- 2008: Bought my first industrial 3D printer.
- 2011: started casting their first resin models.
- Today: 3D printing is a major part of business, print and casting models printed on the Formlabs Form 2 3D printer.

For several years, Solidscape and EnvisionTEC have been the main print side of their business, along with Asiga Pico for model building.
« Our first machines needed complicated periodic repairs and took too long to start when they weren't running 24 hours a day ,” Wehpke said. « That's when we decided to focus exclusively on personalized printing for our customers. A friend of mine bought a Formlabs Form 2 3D printer and did some test prints for us. We were very impressed, the details were much better than we expected! ".
Foundry Business Expansion with Formlabs Form 2 3D Printer Wehpke purchased a Formlabs Form 2 3D printer and started printing models using Formlabs Castable resin.
A side effect of working with Formlabs products was that the company began to receive customer models from other owners of Formlabs Form 2 3D printers to mold their designs.
“ As Formlabs became popular, many companies started shipping their Form 2 prints to us and it became an important part of our business model,” said Wolfram.
« Today's digitally adopted independent jewelry designers are working more often with a foundry house like Wehpke, who can cast Formlabs material with ease. Wehpke's advantage is not only to cast resin material, but also to be familiar with Formlabs Form 2 3D printing and SLA technology. »
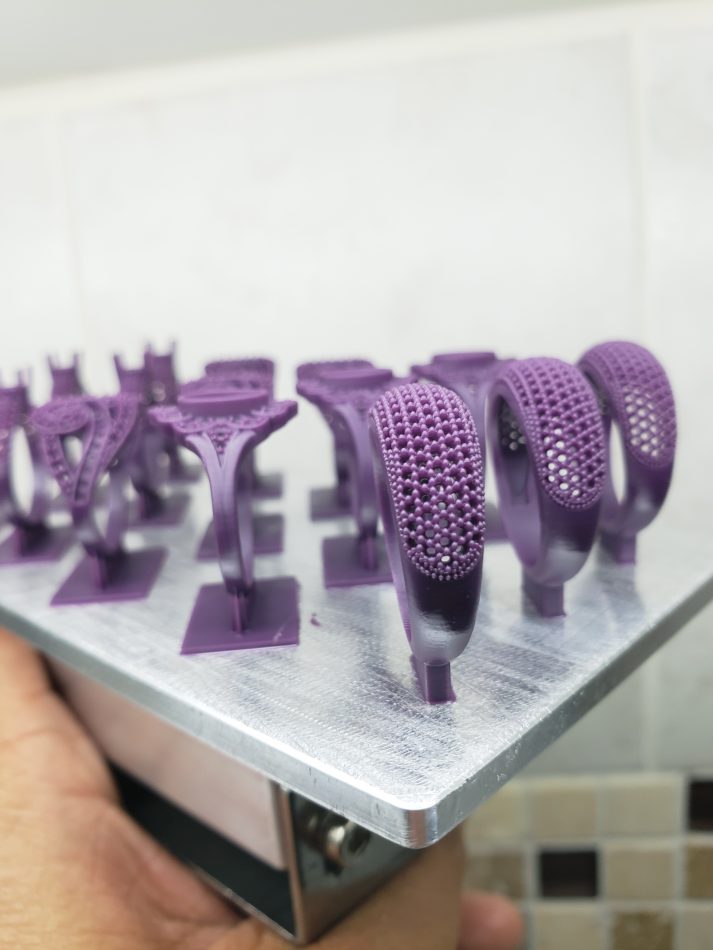
Wehpke uses the Formlabs Form 2 3D printer primarily to print the Eternity and Solitaire rings, which he finds suitable for printing due to their durability and attractiveness.
Foundry houses developing along the path of specialization
Wehpke is known for casting platinum-iridium. In recent years, this material has become more popular, but not many companies can use this special metal.
« It took some time to find a way to get better, consistent casting results with the wide range of metals we work with ,” Wehpke said. « But it's worth all the work, because now we can use our own models and those that customers send us with ease» .