3D print orientation strength
3D Printing Settings Impacting Part Strength
Part Orientation
Whether plastic or composite, FFF or CFF, 3D printed parts are strongest in planes parallel to the print bed — so the print orientation can literally make or break a part. Deposition-based 3D printers build parts in layers of plastic laid down on top of one another. Almost always, the molecular bonds forming the material extrusion itself are stronger than the adhesive bonds of one extrusion of plastic laid on another. Think of the layers like cracks or wood grain - they are slices of material stacked together, so it’s easy to pull those slices apart vertically, or push them past each other in shear.
Vertical forces will split parts along layer lines, while horizontal forces generally distribute those loads along the filament strands.
Before printing your part, consider where the pressures and loads are in your part and how it will propagate through the model. Where will it undergo bending forces? Tensile forces? Shear forces? If you’re not sure, think about how and where the part is being contacted, and from what directions. Draw a diagram if you need to! This will help you to make an informed decision about printing orientation.
Assess the loading conditions of your part to determine print orientation.
Layer Height
Layer height in 3D printing doesn’t substantially affect part strength. Thinner layers have more extrusions of material per part, but the strands have a smaller cross section. Thicker layers have fewer, thicker extrusions. Layer height and bead cross-section essentially balance each other out and make the strength of different layer heights roughly equivalent. The specifics often come down to the settings of certain materials and printers.
This diagram represents a cross-section of a fine versus a coarse layer height, showing that they have roughly the same amount of material per extrusion. A fine layer height improves part precision, but does not substantially improve strength.
Infill & Shells
Because of Sandwich Panel Theory, the number of shells or roofs and floors you have will always have a greater impact on part flexural strength than infill. Shells will also generally improve tensile strength along planes parallel to the build plate, since they tend to follow load paths based on part geometry.
You can adjust the infill & shell settings of your part in your 3D printing slicer.
While infill does not affect part flexural strength as much as shells do, there are some reasons why infill is valuable. The infill serves as the internal support structure for the part, so without it, nothing would be holding the walls or shells together! Infill does add some stiffness to the part and prevents the walls of a part from deforming and the roof from caving in. With a less dense infill pattern comes decreased print quality and part success, so typical 3D printing infill patterns usually range from 30-50%.
The type of infill you use has minimal impact on flexural strength - to create stronger parts you can reinforce the shells with a backbone of continuous fiber to achieve If you need your part to be stronger or stiffer, you’ll see better success with continuous fibers. Faster, more reliable, etc. than printing a fully solid part. but different infill geometries can be used for different needs.
Triangular Infill: Triangular infill is the strongest infill pattern because triangles are the strongest shape. They are least likely to deform and provide the best support structure behind the walls of the part. This type of infill prints relatively quickly because the printhead mostly travels in straight lines across the part. The strength and the speed combined makes triangular infill one of the best choices for infill in 3D printing.
A slice of a part with triangular infill.
Rectangular Infill: Rectangular infill is the only infill type that can achieve a 100% dense part because it consists of a grid of parallel and perpendicular extrusions. Rectangular infill prints fast as well because the printhead travels in straight lines.
A slice of a part with rectangular infill.
Hexagonal Infill: This fill type has the highest strength-to-weight ratio of any of the infill patterns as it is composed of tessellating hexagons.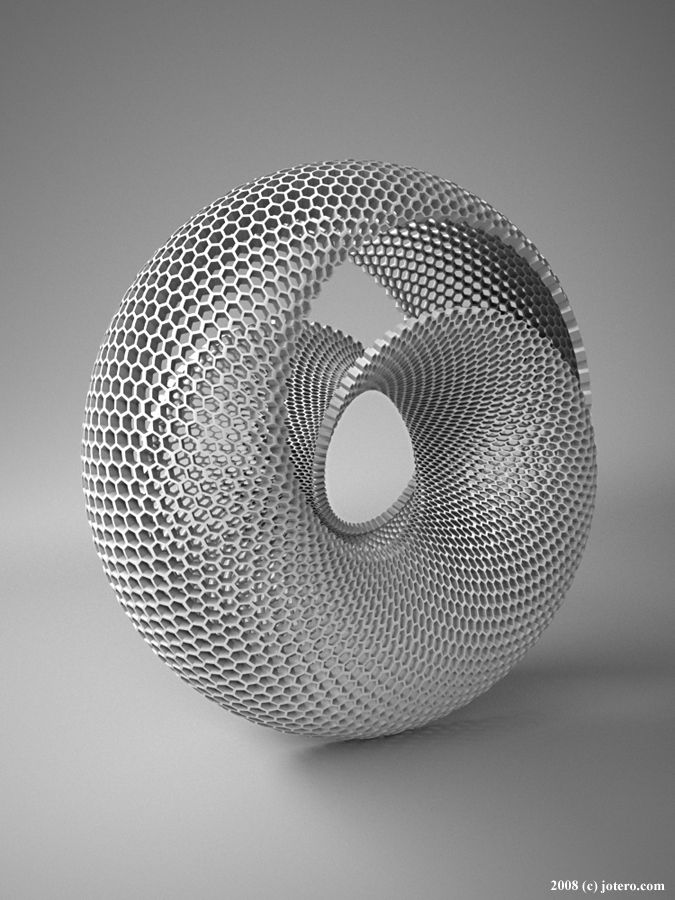 However, it takes the longest to print of any infill type because the printhead has to keep changing direction.
A slice of a part with hexagonal infill.
Continuous Fiber Fill
Regardless of infill type or layer height, parts utilizing FFF printing techniques can only achieve the strength of their base plastic at maximum. The strength of a part can be increased far beyond plastic strength with continuous fiber filament by routing continuous strands of fibers like carbon fiber, fiberglass, or Kevlar to the part. Different fiber placement options allow you to optimize where the fiber is laid out within your part to correspond with how your part will be loaded. For example, since the infill of a 3D printed part is a low-density scaffold structure, once infill is exposed it compromises part strength. If your part is intended to experience heavy wear, you can use Kevlar continuous fiber reinforcement, which, once exposed, is highly abrasion resistant.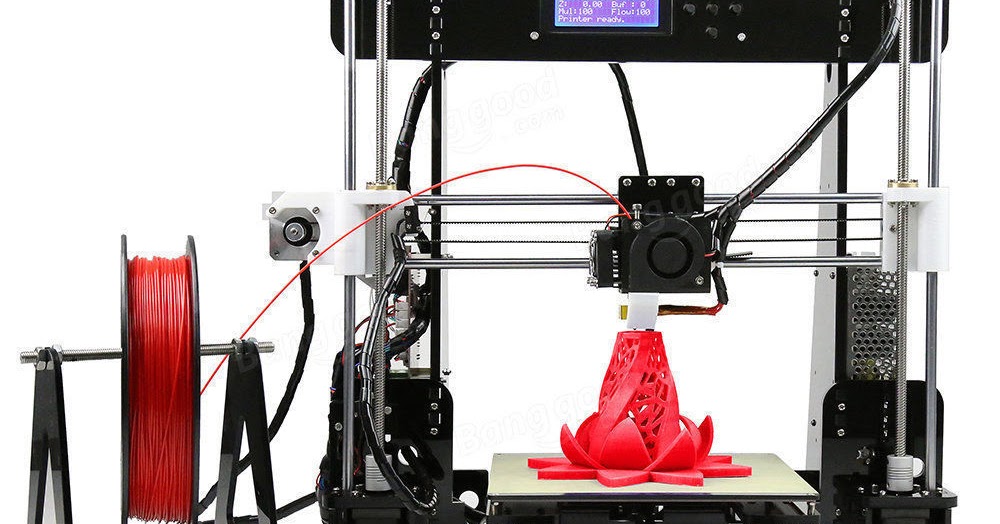 You can read more about fiber selection, application, and settings in Fiber Reinforcement Strategies.
A continuous fiber reinforced beam on the left, followed by a chopped fiber beam, and then ABS and PLA. Each is loaded with a 7.5 lb weight.
How 3D Printing direction/orientation affects strength?
Estimated reading time: 3 min
| Technique | Mechanical Attribute |
| FDM | anisotropy |
| SLS | isotropic |
| DMLS | isotropic |
| SLA | isotropic |
It’s crucial for industrial and commercial customers to know the physical attributes of different 3D printing techniques, including strength in different axis, which is part of anisotropy and isotropic.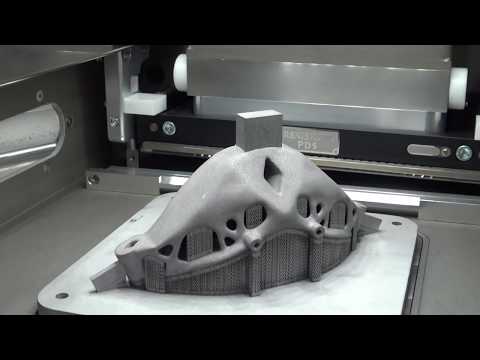 We all know the tensile strength varies between types of 3D printing technology and materials, the manufacturing process and structure of the product, etc. And here we want to introduce how strong is a 3D printed object, made from the mainstream of FDM, SLA, SLS, and DMLS, when it’s elongated in X, Y, and Z directions.
A general conclusion for 3D printing
We usually build the object layer by layer, so the strength in the Z-axis is impacted by the internal bonds between the layers. The part made by most 3D printing technologies is strong in X- and Y- axes, and weak in Z-axis, cause the bonds formed between layers are weaker. The general conclusion is: all the internal bonds are referred to as anisotropic, which means their physical properties are different when measured in different directions.
Typically people would rotate the part so that it would be printed with layers matching the required axis of strength, and it often works when part receives mechanical stress from only one direction.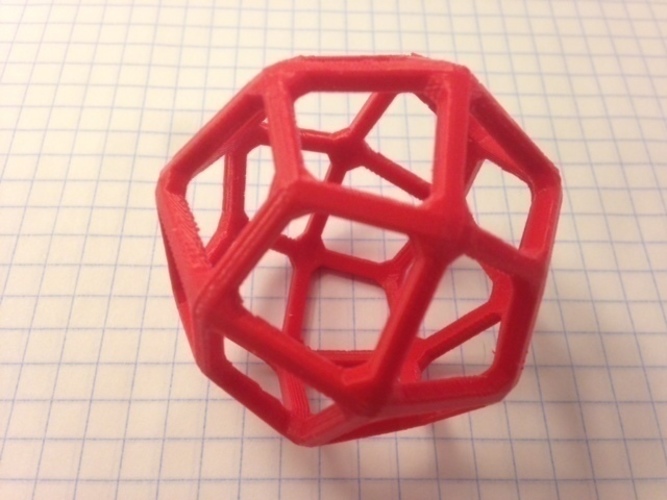 Or else you need to choose a compromise axis and it’s restricted by the geometry of the part and the circumstances of its use.
The brief introduction of main 3D printing technology
The difference of strength in various 3D printing technology lies in how the layers are overlaid upon each other. Firstly we need to own the basic knowledge of 3D printing technology.
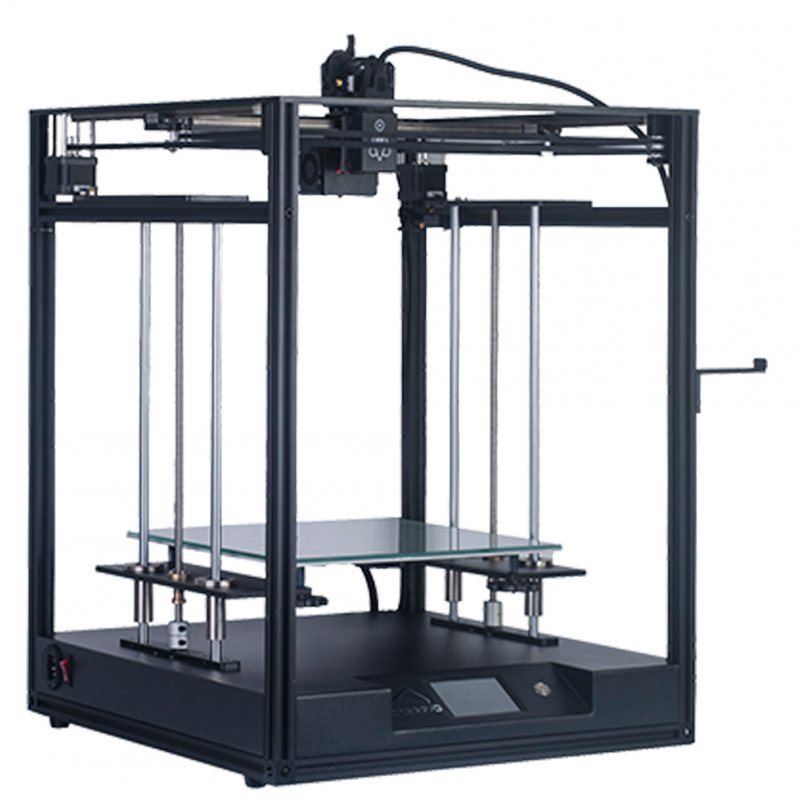
- FDM, i.e. fused filament fabrication is a method of extruding small beads or streams of material(wax, ABS and nylon) which harden immediately to form layers.
- SLA, known as stereolithography, optical fabrication, photo-solidification or resin printing, produce parts using photochemical processes by which light causes chemical monomers to link together to form polymers.
- SLS: Selective laser sintering, is a technique that uses a laser as the power source to sinter powdered material, aiming the laser automatically at points in space defined by a 3D model, binding the material together to create a solid structure.

- DMLS, whose full name is direct metal laser-sintering, can fully melt the alloys and produce products with organic geometries, internal features and challenging passages that could not be cast or otherwise machined.
Z-strength comparison for different techniques
The above-mentioned conclusion is based on generalizations, corresponding with our intuition. It’s more evident for some of the 3D printing techniques when scientists perform experiments on different specimens, but we will briefly sum up the research results and concentrate more on the principle of why the main printing methods behave differently in anisotropy and isotropic attributes.
The principle and experimental results of the difference
The difference can be explained both on mechanical and chemical aspects, the former one focuses on the microscopic bonding effect while the latter one concern about how tightly the polymer chains are entangled.
FDM
When FDM printers melt plastic layers on top of layers, incompact mechanical adhesion (not chemical adhesion) was created. Even when the previous layer is partially melted, the surrounding layers are only partially adhered to their neighboring layers. As a result, FDM-printed objects are pervaded by microscopic voids and holes, thus they are porous. On a molecular level, the highly entangled polymer chains hold each other tightly on the XY plane but behave more individually on the orthogonal Z-axis. Research shows that FDM parts lose approximately more than 55% of their Z-strength.
DMLS & SLS
Out of its production process, the printed object is not likely to delaminate and fracture when placed in tension in the Z direction compared to XY directions. Scientists from Lawrance Technological University conducted research in 2016 with 120 samples built from stainless steel powder using DMLS machines. Those samples revealed the average ultimate tensile strength as well as yield strength in different orientations.Because the principle of DMLS, SLS, and SLM are similar, the corresponding printed objects have good isotropic mechanical properties, making them ideal for functional parts and prototypes.
SLA
In SLA printing, there is no difference between the Z-axis and XY plane in terms of chemical bonds. There is a polymerization reaction between layers and SLA lines are fully bonded to their neighboring lines. There are no voids or microscopic cracks in SLA prints so that they are watertight and fully dense. The Young’s Modulus data, which is a measure of a solid’s stiffness or resistance to elastic deformation, supports the hypothesis that SLA printed parts are isotropic in fact.
To summarize, FDM < SLS & DMLS & SLA in Z-axis strength tension. FDM parts cannot be equally strong in all directions, which means that orientation should be seriously considered when design and print load-bearing parts. As for DMLS, SLS and SLA, the quality of layer adhesion is excellent, proved to be proper for functional parts.
Some progress for improving the Z-strength
A piece of common knowledge is that you can infuse the vacuum chamber of FDM print with epoxy to help increase tensile strength, which means the higher cost will be generated. In March 2019, Kai Parthy, a specialist who has over 10 years of experimentation about smart filaments, developed a new method that could strengthen FDM 3D printed components locally with little material efforts. His solution is using the Z-anchors as a reinforce to avoid layer cracks, save weight, optimize the local static within the object, and reduce the wall thickness. The principle is shown as below image, Z-anchors can hold the object together and make it more stable in the z-axis. It’s also applicable to SLS and FFF printing techniques. We’d like to share with you the methods of building Z-anchors.
Tags: anisotropy isotropic mechanical attributes strength
Was this article helpful?
Like 3 Dislike 0
Views: 3674
SLA Technology. How SLA 3D printing works.
Hello everyone, 3DTool is with you!
Today we will look at the basic principles of technology SLA . After reading this article, you will understand the main points of the printing process using this technology, the advantages and disadvantages of this method 3D printing .
On our website, you can find a list of 3D printers working on SLA technology, at this link: Catalog of 3D printers printing on SLA / DLP technology
Technology 3 D printing SLA
Stereolithography (SLA) is an additive manufacturing process that achieves the result by means of resin polymerization. In SLA printing, the object is created by selectively curing a polymer resin, layer by layer, using an ultraviolet (UV) laser beam. The materials used in SLA printing are photosensitive thermoset polymers that are available in liquid form.
SLA is known as the first 3D printing technology : its inventor patented this technology back in 1986 . When you need to print parts with very high precision or a smooth surface, the SLA comes to the rescue. In this case, it is the most cost-effective and efficient technology 3D printing . The best results can be achieved only if the operator of the equipment on which the printing process takes place is familiar with the technology and some of the nuances. That is, he has the necessary qualifications.
SLA shares many characteristics with Direct Light Processing (DLP ), another photopolymerization technology. For simplicity, both technologies can be considered equal.
SLA printing process
1) 2) 3)
1) A platform is placed in the tank with liquid photopolymer, at the same height from the resin surface.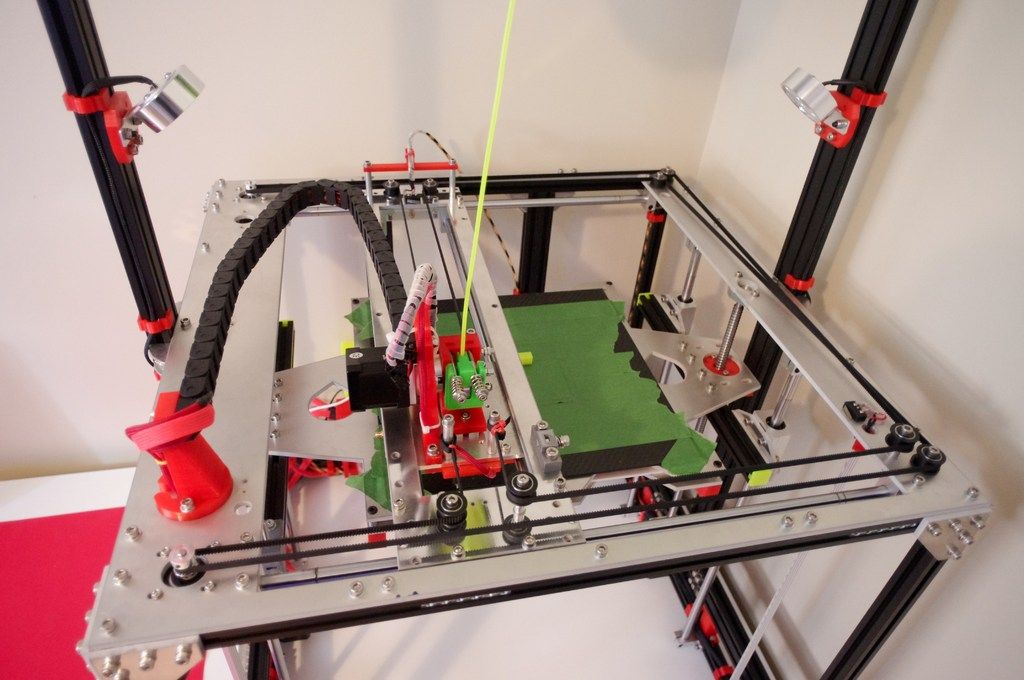
2) The UV laser then selectively cures the required areas of the photopolymer resin according to a predetermined algorithm.
The laser beam is focused on a given path using a set of mirrors called galvos. Then the entire cross-sectional area of the model is illuminated. Therefore, the resulting part is completely solid.
3) When one layer is finished, the platform moves to a safe distance and the mixing foot inside the tub mixes the resin.
This process is repeated until the part is printed. After printing, the part is not fully cured and requires further post-processing under the UV lamp . At the end of UV illumination, the part acquires very high mechanical and thermal properties.
The liquid resin solidifies through a process called photopolymerization: during solidification, the monomer carbon chains that make up the liquid resin are activated by an ultraviolet laser and become solid, creating strong, inextricable bonds with each other.
The photopolymerization process is irreversible, and there is no way to convert the resulting parts back into a liquid state. When heated, they will burn, not melt. This is because the materials that are produced by SLA technology are made from thermoset polymers, as opposed to the thermoplastics that FDM uses.
Operation scheme SLA printer
Specifications SLA printer
On SLA systems, most print settings are set by the manufacturer and cannot be changed. The only inputs are the layer height and the part orientation ( last, locates the supports ).
The typical layer height in a SLA print ranges from 25 to 100 micron .
The lower the layer height, the more accurately the complex geometry of the model will be printed, but at the same time the printing time and the likelihood of failure will increase. A layer height of 100 microns is suitable for most common geometries and is the golden mean.
Another important parameter for the operator is the size of the platform. It depends on the type of SLA printer. There are two main types: orientation top to bottom and orientation from bottom to top .
In the first case, the laser is above the tank, and the part is face up. The platform sits at the very top of the resin vat and moves down after each layer is sintered.
Schematic SLA top-down printer
In " bottom up " layout on SLA printers , the light source is placed under the resin tank (see picture above) , and the part is built upside down.
The tank has a transparent bottom with a silicone coating that allows the beam of light to pass through but prevents the cured resin from sticking. After each layer, the cured resin separates from the bottom of the tank as the platform moves up. This is called the sintering step.
Schematic SLA bottom-up printer
The orientation " bottom to top " is mostly used in desktop printers like Formlabs. The " top - down " orientation is used in the industrial SLA printer .
Printers SLA " bottom-up " are easier to manufacture and operate, but the size of the possible print will be smaller, since the forces applied to the part during the sintering stage can cause printing to fail.
Top-down printers, on the other hand, can print very large parts without much loss in accuracy. The wide possibilities of such systems naturally cost more.
The following are the main characteristics and differences between the two orientations:
| "Top down " | |
| Pros: | |
| lower cost | |
| Wide market availability | |
| Minuses: | |
| Small platform size | |
| Smaller range of materials | |
| Requires additional post-processing due to extensive use of supports | |
Popular brands:
FORMLABS
Printable area: Up to 145 x 145 x 175 mm
Typical layer height and print accuracy: 25 to 100 µm and ± 0.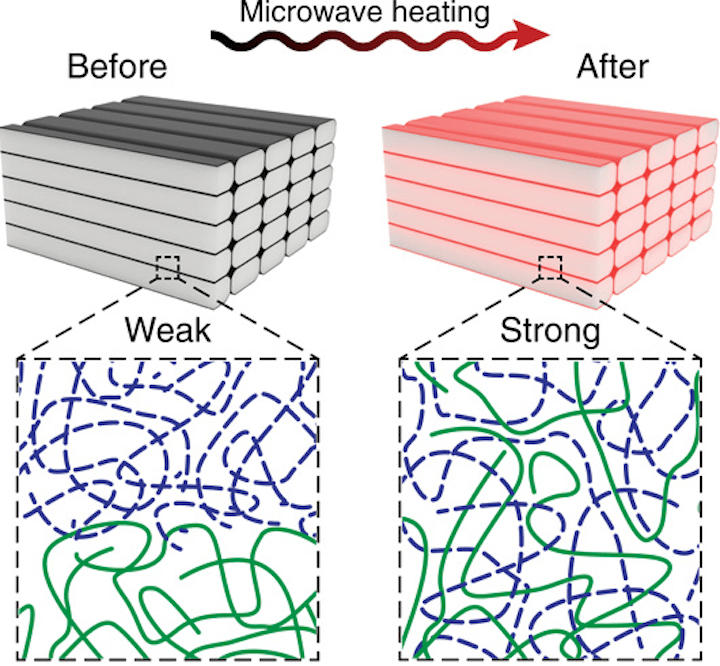 5% (lower limit: ± 0.010 to 0.250 mm) respectively
| "Upwards" | |
| Pros: | |
| Very large platform | |
| Faster Print Time | |
| Minuses: | |
| High price | |
| Qualified operator required | |
| Material change involves emptying the entire tank | |
Popular brands:
PRISMLAB
Print area size: Up to 1500 x 750 x 500 mm
Typical layer height and print accuracy: 25 to 150 µm and ± 0.15% (lower limit ± 0.010 to 0.030 mm) respectively
Support during printing 3 D
Supports are always required at Print SLA . Structural structures are printed from the same material as the part and must be manually removed after printing.
Part orientation determines the location and amount of supports. It is recommended that the part be oriented so that surfaces that require maximum quality do not come into contact with supports.
In different types of SLA printers, support is used in different ways:
For top - down printers , support requirements are the same as FDM . They are essential for accurate printing of overhangs and bridges ( the critical overhang angle is typically 30 degrees ).
The part can be oriented in any position and is usually printed flat to minimize the number of supports and the total number of layers.
In printers like " from bottom to top " everything is more complicated. Overhangs and bridges also need to be supported, but minimizing the cross-sectional area of each layer is the most important criterion.
Forces applied to the part during the sintering step can cause it to come off the platform. These forces are proportional to the cross-sectional area of each layer.
For this reason, the parts must be oriented at an angle, and minimizing supports here is not a primary concern.
On the left - a detail oriented on the SLA printer "from top to bottom" (support minimization).
On the right is a part oriented on the SLA printer "from the bottom up" (minimizing the cross-sectional area).
Removing supports for an SLA printed part
Curl
One of the biggest problems with the accuracy of parts made with SLA is curling. This problem is similar to the deformation in FDM when materials shrink.
During curing, the resin shrinks slightly when exposed to the printer's light source. When shrinkage is significant, large internal stresses develop between the new layer and the previously cured material, causing the part to twist.
Adhesion (sintering) between layers
SLA printed parts have isotropic mechanical properties. This is due to the fact that one pass UV beam is not enough to completely cure the liquid resin.
Further passes help the previously hardened layers to fuse together. In fact, in the SLA of printing, curing continues even after the printing process is complete.
To achieve the best mechanical properties, parts printed using this technology should be post-cured by placing them in a chamber under intense ultraviolet radiation ( and sometimes at elevated temperatures ).
This greatly increases the hardness and heat resistance of SLA , but does not make it stronger. Rather the opposite.
For example.
Test specimens printed with standard clear resin on a SLA desktop printer have almost 2 times tensile strength after curing ( 65 MPa compared to 38 MPa).
Can operate under load at higher temperatures ( 58 degrees Celsius, compared with 42 degrees ), but their elongation at break is half as much ( 6.2% compared to 12% ).
If you leave the part in the sun, then nothing good will come of it.
Prolonged exposure to ultraviolet radiation has a detrimental effect on physical properties and appearance. The part may curl, become very brittle, and change color.
For this reason, before using the part, it is recommended to apply a spray of transparent acrylic paint resistant to UV .
SLA media
SLA Printing Materials is available in the form of a liquid resin. The price per liter of resin varies greatly - ranges from $50 for standard material to $400 for specialty materials such as casting or dental resin.
Industrial systems offer a wider range of materials than desktop systems SLA printers, which give the designer more control over the mechanical properties of the printed part.
SLA materials ( thermosets ) are more brittle than materials made using FDM or SLS ( thermoplastics ) and for this reason SLA parts are not typically used for functional prototypes that will be subjected to significant stress. However, new advances in materials development may change this in the near future.
The following table lists the advantages and disadvantages of the most commonly used resins:
| Material | Features |
| Standard resin | + Smooth surface Relatively fragile part |
| transparent resin | + Transparent material - Requires post-processing for Presentable appearance |
| casting resin | + Used to create mold templates + Low ash after burnout |
| Rigid or durable resin | + ABS-like or PP-like mechanical properties - Low thermal resistance |
| High temperature resin | + High temperature resistance + Used for injection molding · - High price |
| dental resin | + Biocompatible + High abrasion resistance · - High price |
| Rubber-like resin | + Rubber-like material - Poor printing accuracy |
Post-processing SLA 3D printing
Parts printed with SLA technology can be processed to a high quality using various methods such as sanding and polishing, staining and mineral oil treatment. Widely developed articles about post-processing can be found on the Internet.
Transparent resin housing cover for electronics in various finishes. From left to right: removal of the main support, wet sanding, UV irradiation, acrylic and polishing
Advantages and disadvantages of SLA
Pros:
-
SLA 3D printers can produce parts with very high dimensional accuracy and complex geometries.
-
The parts will have a very smooth surface, making them ideal for visual prototypes, for example.
-
Special materials are available such as clear, flexible and cast resins.
Cons:
-
Parts printed using SLA technology tend to be fragile and not suitable for functional prototypes.
-
The mechanical properties and appearance of these parts deteriorate over time.
 They are adversely affected by exposure to sunlight.
 -
Supports and post-processing when printing are always required.
The main characteristics of the SLA are shown in the table:
materials
Photopolymer resins (thermosetting
materials)
Dimensional accuracy
± 0.5% (lower limit: ± 0.10 mm) - domestic
± 0.15% (lower limit ± 0.01 mm) - industrial
typical size
print area
Up to 145 x 145 x 175 mm - for desktop printers
Up to 1500 x 750 x 500 mm - for industrial
Total layer thickness
25 - 100 µm
Support
Always required
(Needed to make an accurate part)
Total
-
SLA print is best for producing visual prototypes with very smooth surfaces and very fine detail.
-
Desktop SLA 3 D The printer is ideal for making small, about the size of an adult's fist, injection molded parts. Moreover, such a printer can be purchased at an affordable price.
-
Industrial SLA 3 D printers can produce very large parts (up to 1500 x 750 x 500 mm)
Well, that's all we have! Thank you for being with us, see you soon. Further it will be more interesting!
You can purchase the 3D printers mentioned in the article , consumables for them, ask your question, or track the order, you can
-
By phone: 8(800)775-86-69
-
E-mail: [email protected]
-
Or on our website: https://3dtool.ru/
Don't forget to subscribe to our YouTube channel:
And to our groups in social networks:
In contact with
The Complete Guide to Stereolithographic (SLA) 3D Printing
Stereolithographic (SLA) 3D printing is gaining immense popularity due to its ability to produce highly accurate, isotropic and waterproof prototypes and models with fine details and smooth surfaces from a variety of modern materials.
This comprehensive guide explains how SLA printing technologies work, why thousands of professionals use them today, and how this 3D printing technology can be useful in your work.
White Paper
Download our white paper to find out how SLA printing works, why thousands of professionals use it today, and how this 3D printing technology can help your work.
Download technical report
The development of 3D printing technology continues to influence how companies approach prototyping and manufacturing. This technology is becoming more accessible, and equipment and materials are developing in accordance with the possibilities and requirements of the market. That's why today designers, engineers and others are integrating 3D printing into workflows at all stages of development.
3D printing is helping industry professionals reduce recruitment costs, accelerate iteration, streamline manufacturing processes, and even discover entirely new business models.
Stereolithographic 3D printing technology has evolved significantly. In the past, resin 3D printers were monolithic and costly, requiring skilled technicians and costly service contracts to operate. Today's small desktop printers are highly flexible and produce industrial-quality products at a much lower cost.
Stereolithography is a type of additive manufacturing. It is also known as photopolymerization in the bath or 3D printing using polymer resin. Devices that use this technology have a common principle of operation: under the influence of a light source (laser or projector), a liquid polymer turns into a solid plastic. The main differences are in the location of the main components such as the light source, work platform and resin tank.
See how stereolithography 3D printing is done.
Stereolithographic 3D printers use light-sensitive curable materials called "polymers". When stereolithographic polymers are exposed to specific wavelengths of light, short molecular chains join together causing the monomers and oligomers to polymerize into either rigid or flexible patterns.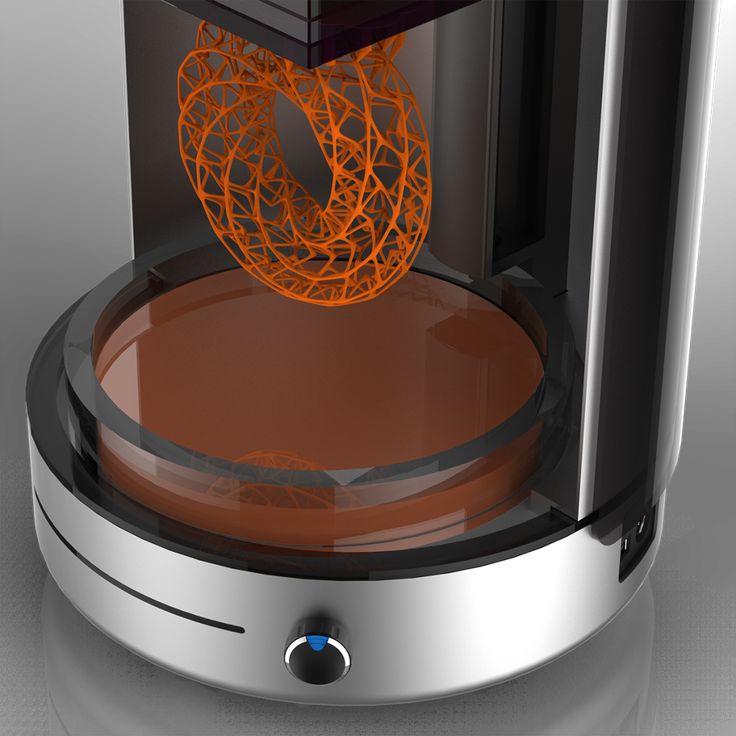
Graphical representation of the main mechanisms of stereolithographic 3D printing.
Models printed on SLA printers have the highest resolution and accuracy, the sharpest detail, and the smoothest surface of any 3D printing technology, but the main advantage of this method is its versatility.
Materials manufacturers have developed innovative formulas for stereolithographic polymers with a wide range of optical, mechanical and thermal properties similar to standard, engineering and industrial thermoplastic resins.
Comparison of 3D stereolithography with two other common plastic modeling technologies: Fused Deposition Modeling (FDM) and Selective Laser Sintering (SLS).
Sample
Experience the quality of 3D stereolithography for yourself. We will send a free sample of the printed model directly to your office.
Request a Free Print Sample
Learn how to go from design to 3D printing with a Form 3 3D printer. Watch this 5-minute video to learn the fundamentals of using a Form 3 printer, from software and materials to processes printing and post-processing.
Use any CAD software or 3D scan data to design the model and export it to a 3D print file format (STL or OBJ). All printers based on SLA technology work with software that allows you to set print parameters and separate the digital model into layers. After the settings are complete, the model preparation software sends instructions to the printer via a wireless or cable connection.
More advanced users can design directly for SLA technology or, for example, print models with voids to save materials.
After a quick check of the settings, the printing process begins. The printer may run unattended until printing is complete. In printers with a cartridge system, material is replenished automatically.
Formlabs' online Dashboard allows you to remotely manage printers, resins, and employee access.
After printing is completed, models should be rinsed with isopropyl alcohol to remove resin residue from their surface. After the washed models have dried, some materials require final polymerization, a process that ensures the best possible strength and stability of the parts. Finally, remove the support structures from the models and sand down the remaining traces of the supports for a clean finish. Models produced with SLA technology can be machined, primed, painted or assembled depending on the intended use.
Final polymerization is especially important for functional polymer resins used in engineering, dentistry and jewellery.
Engineers, designers, fabricators and others choose 3D stereolithography because it provides excellent detail, smooth surfaces, superior model fidelity, isotropy, and water resistance. In addition, it allows you to work with various materials.
Because 3D printing creates models layer by layer, the strength of finished parts can vary depending on the orientation of the part relative to the printing process: the X, Y, and Z axes will have different properties.
Extrusion-based 3D printing processes such as deposition filament modeling (FDM) are anisotropic due to a special approach to creating different layers during the manufacturing process. This anisotropy limits the application of FDM technology or requires additional changes in the design of the model to compensate for it.
Check out our detailed guide comparing FDM vs. SLA 3D printers to see how they differ in terms of print quality, materials, application, workflow, speed, cost, and more.
Stereolithographic 3D printers, on the other hand, allow the production of highly isotropic models. Achieving detail isotropy relies on a number of factors that can be tightly controlled by integrating the chemical composition of materials with the printing process. During printing, the components of the polymers form covalent bonds, but when creating subsequent layers, the model remains in an "immature" state of partial reaction.
When immature, the resin retains polymerizable groups that can form bonds between layers, giving the model isotropic and waterproof properties after final curing. At the molecular level, there are no differences between the X, Y, and Z planes. This results in models with predictable mechanical characteristics critical for applications such as jigs and fixtures and finished parts, as well as functional prototyping.
SLA printed parts are highly isotropic compared to FDM parts.
Due to their isotropic nature, stereolithographically printed models, such as this jig for Pankl Racing Systems, can withstand directional loads during the manufacturing process.
SLA printed objects are continuous, whether they are solid or have internal channels. Watertightness is important when it is necessary to control and predict the impact of air or liquid flows. Engineers and designers are using the water resistance of stereolithography printers for air and fluid flow applications in the automotive industry, biomedical research, and to test the design of parts in consumer products such as kitchen appliances.
OXO relies on the water resistance of stereolithographic printed models to create durable working prototypes of air and liquid products such as coffee makers.
Stereolithographic 3D printing is used to produce precise, reproducible components in a variety of industries, including dentistry and manufacturing. In order to produce accurate models during the printing process, many factors must be strictly controlled.
The quality of stereolithographic 3D printing is somewhere between standard and precision machined. SLA has the highest tolerance compared to other commercial 3D printing technologies. Learn more about tolerances, accuracy and precision in 3D printing.
The heated resin tank combined with the closed working environment provide nearly the same conditions for every model. The higher accuracy also depends on the lower printing temperature compared to thermoplastic-based technologies in which the raw material is melted. Because stereolithography uses light instead of heat, it prints at close to room temperature and models are not subject to thermal expansion and contraction.
Dental example (comparing a scanned component to an original CAD model) demonstrating the ability to maintain tight tolerances for an entire stereolithographic model.
LFS stereolithography 3D printing involves an optic in a Light Processing Unit (LPU) that moves along the X axis. A single galvanometer positions the laser beam in the Y direction and then guides it along the deflection parabolic mirrors so that it is always perpendicular to the plane of the platform, so it always moves in a straight line, ensuring maximum precision and accuracy. This allows consistency to be achieved as the size of the equipment increases, for example, when working with a large-sized Formlabs Form 3L stereolithography printer. The LPU also uses a spatial filter, which forms a clear laser spot.
The characteristics of the individual materials also play an important role in ensuring the reliability and reproducibility of print results.
Formlabs Rigid Resin has a high green modulus, or modulus of elasticity, prior to final polymerization, allowing very thin models to be printed with high precision and reliability.
Stereolithographic printers are considered the best 3D printers due to the smooth surface of the produced models, the appearance of which is comparable to parts produced by traditional methods such as machining, injection molding and extrusion.
This surface quality is ideal when a perfect finish is needed and also helps reduce post-processing time because it is easy to sand, polish and paint. For example, large companies like Gillette use stereolithography 3D printing to create finished products such as razor handles in their Razor Maker platform.
Large companies such as Gillette use stereolithography 3D printing to create finished products such as razor handles in their Razor Maker platform.
The z-layer height is often used to determine the resolution of a 3D printer. On Formlabs stereolithographic 3D printers, it can be adjusted from 25 microns to 300 microns to trade off speed and print quality.
FDM and SLS printers typically print Z-axis layers between 100 and 300 microns wide. At the same time, a part printed with 100 micron layers on an FDM or SLS printer is very different from a part printed with 100 micron layers on an SLA printer. Models printed on a stereolithographic printer have a smoother surface immediately after printing, because their outer walls are straight, and each new printed layer interacts with the previous one, smoothing out the effect of the stairs. When printed on an FDM printer, layers are often visible in models, and the surface of models printed on an SLS printer has a grainy structure due to sintered powder.
In addition, the stereolithography printer can print fine details: the Form 3 laser spot size is 85 microns, while industrial SLS printers have a laser spot size of 350 microns, and FDM-based devices use nozzles with a diameter of 250– 800 microns.
Models printed on FDM printers often show layer lines and may have inaccuracies around complex features. Models printed on stereolithography printers have sharp edges, a smooth surface, and almost imperceptible layer lines.
The advantage of SLA polymers lies in a wide range of formulations offering a variety of characteristics: they can be soft or hard, contain additives such as glass and ceramics, or have special mechanical properties such as high bending temperature under load or impact resistance. Materials can be designed for a particular industry, such as dentures, or have properties close to those of final materials to create prototypes that can be tested and run under stress.
Ceramic Resin can be 3D printed with a stone-like texture and then fired to create a ceramic product.
In some cases, it is this combination of versatility and functionality that is leading businesses to use polymer-based 3D printing in-house. After solving existing problems through the use of a certain functional polymer, other applications are usually quickly discovered. In this case, the printer becomes a tool for discovering the various properties of different polymers.
For example, hundreds of engineers in the Design and Prototyping group at the Advanced Manufacturing Equipment Research Center (AMRC) at the University of Sheffield have access to 12 stereolithographic 3D printers and various construction materials that they use in numerous research projects for these partner companies.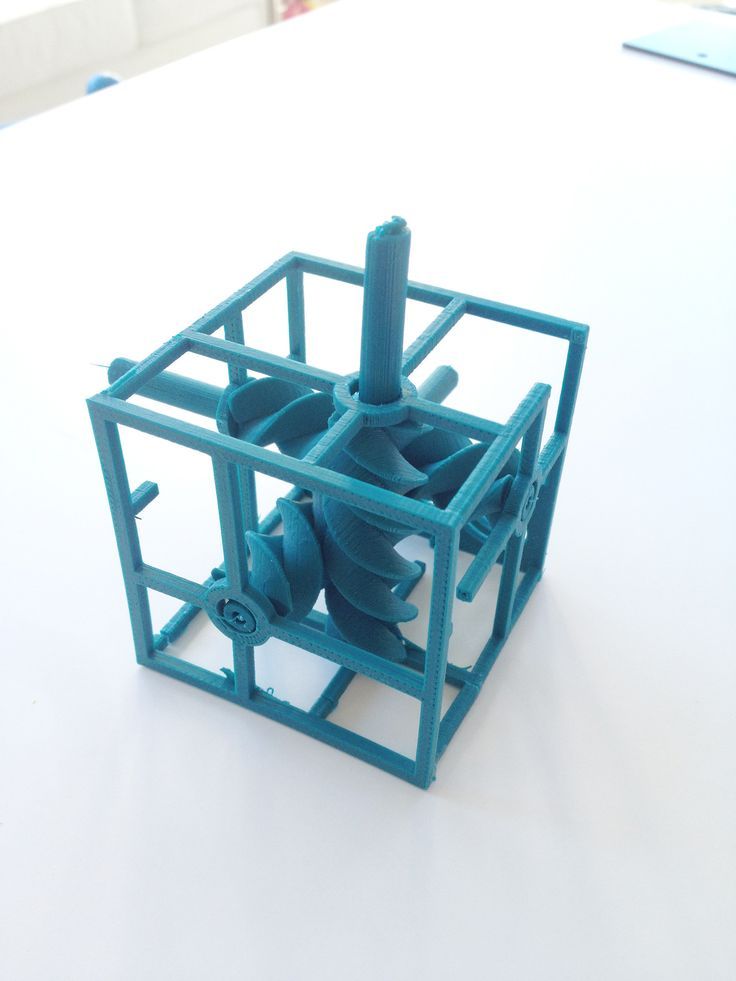 like Boeing, Rolls-Royce, BAE Systems and Airbus. They printed High Temp Resin washers, brackets, and a mounting system for a sensor that must operate in high temperature conditions, and used Durable Resin to create complex spring components for a material handling robot as part of a composite manufacturing automation system.
AMRC engineers have access to 12 stereolithographic 3D printers and various construction materials, allowing them to create custom-designed parts for a variety of research projects, such as brackets for a stacking robot (above) and mounts for an environmental sensor. high temperature (below).
Material selection
Need help choosing a 3D printing material? Our new interactive materials wizard will help you make the right material decision based on what you're going to use it for and the properties you care most about in our growing range of polymers.
Get material recommendations
Stereolithographic 3D printing makes it easier for businesses across industries to innovate. Such industries include engineering, manufacturing, dentistry, healthcare, education, entertainment, jewelry, and audiology.
Rapid prototyping with 3D printing enables engineers and developers to turn ideas into working proofs of concept, transform concepts into high-quality prototypes that look and work like final products, and take products through testing phases to launch into mass production.
Find out more
By creating the necessary prototypes and 3D printing special tools, molds and production aids, manufacturing companies can automate production and optimize workflows at a much lower cost and in much faster time than traditional manufacturing. Thus, production costs are reduced and defects are prevented, quality is improved, assembly is accelerated and labor productivity is increased.
Find out more
Digital Dentistry reduces the risks and uncertainties associated with human error, enabling consistent quality and precision at every step of the workflow, and improving patient care. 3D printers can produce a range of high quality custom products at low cost, providing exceptional fit and reproducible results.
Learn more
3D printers are multifunctional tools for creating immersive learning and research environments. They stimulate creativity and introduce students to professional-level technology, enabling the implementation of the STEAM method in the fields of science, technology, art and design.
Find out more
Affordable, professional-grade desktop 3D printers help clinicians create medical devices that meet individual needs and improve patient outcomes. At the same time, the organization significantly reduces time and money costs: from laboratories to operating rooms.
Learn more
High resolution printed physical models are widely used in digital sculpting, 3D character modeling and prop making. 3D-printed models have been featured in animated films, video game characters, theatrical costumes, and even special effects for blockbuster films.
Learn more
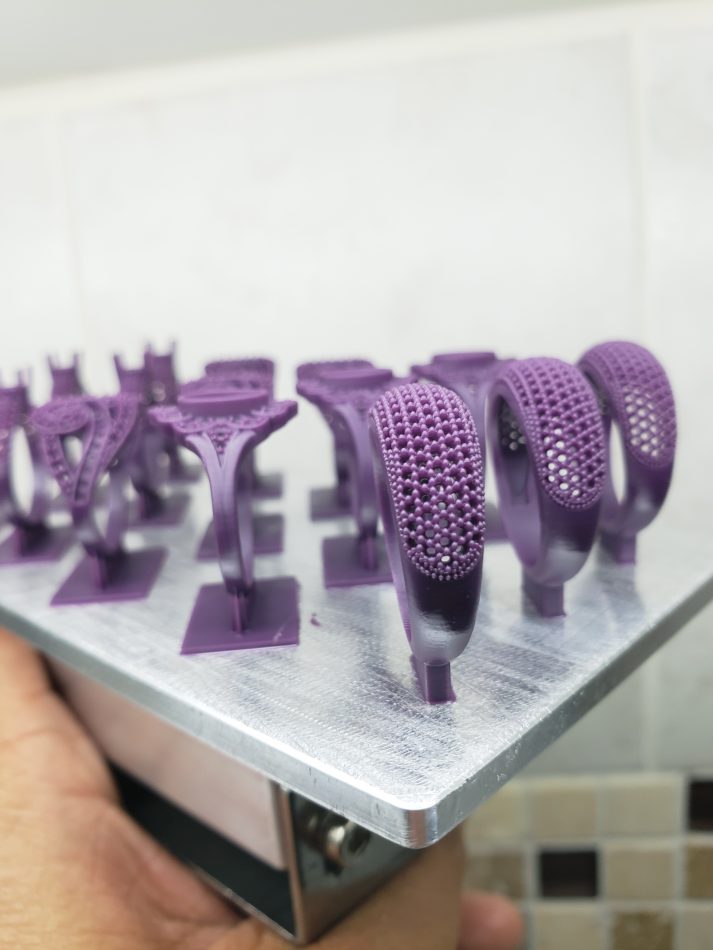
Professional jewelers use the power of CAD and 3D printing to rapidly prototype, customize jewelry to customer specifications and produce large batches of blanks for casting. Digital tools allow you to create dense, highly detailed models without the tedious, error-prone production of stencils.
Learn more
Hearing professionals and hearing care labs use digital workflows and 3D printing to simplify the production of high-quality custom and hearing aids, as well as to mass-produce behind-the-ear hearing aids, hearing protectors, custom earmoulds and headphones .
Find out more
Many companies are starting to use 3D printing technology through service bureaus and laboratories. Outsourcing can be a great solution when the need for 3D printing is infrequent or you need to do one-off jobs using materials that have unique properties or produce special models. Service bureaus can also provide advice on various materials and offer additional services such as design or improved finishes.
The main disadvantages of outsourcing are the high cost and duration of production. Often, outsourcing becomes a step on the way to in-house production as needs grow. One of the main advantages of 3D printing is its speed compared to traditional production methods. But it is noticeably reduced when the delivery of the model produced by the involved organization takes several days or even weeks. As demand and production capacity increase, the costs of outsourcing are rising rapidly.
With the increasing availability of industrial-quality 3D printing today, more companies are opting to immediately bring 3D printing into their facility, vertically integrating it into existing workshops or labs, or providing printers to engineers, designers, and other professionals who benefit from digital transformation. projects into physical models or are engaged in the production of products in small batches.
Compact desktop stereolithography 3D printers are an excellent solution for rapid model production. Depending on the number of parts needed and the volume of prints, the investment in a compact 3D printer can pay for itself in just a few months. In addition, compact appliances allow you to purchase just the amount of equipment you need to run your business and scale your production by adding more units as demand grows. Using multiple 3D printers also allows you to print models from different materials at the same time. And when the need arises for the production of large parts or the use of non-standard materials, service bureaus can come to the rescue.
INTERACTIVE
Try our interactive ROI tool to see how much time and money you can save by printing with Formlabs 3D printers.
Calculate savings
High production speed is an important argument in favor of purchasing a desktop 3D printer. When working with a print bureau, there are delays related to the speed of production, communication and delivery. A desktop 3D printer like the Form 3 delivers models in hours, allowing designers and engineers to print multiple parts a day. This contributes to faster iterations and significant time savings in product development, as well as rapid testing of mechanisms and assemblies, avoiding costly tool changes.
Purchasing a desktop 3D printer saves a lot of money by eliminating bureau services and traditional processing methods, as their cost rises sharply with demand and production volumes.
For example, a production engineer and others at Pankl Racing Systems used stereolithographic 3D printing technology to produce products on a tight schedule. This allowed them to independently manufacture custom-designed jigs and other small-sized components for the production line. While stereolithography was initially viewed with skepticism, this technology proved to be an ideal solution to replace the machining of a number of tools. In one of the cases, it made it possible to reduce the manufacturing time of conductors by
By 3D printing custom-designed jigs, Pankl Racing Systems has significantly reduced both order preparation time and production costs.
Learn more