N4 lcd resin 3d printer
Hands On With the ANET N4 LCD 3D Printer, Part 1 « Fabbaloo
A brand-new ANET N4 LCD 3D printer [Source: Fabbaloo]An ANET N4 showed up in our lab, so we thought we’d run it through some tests.
This is part one of a two-part story on the ANET N4 3D printer. Part two is here.
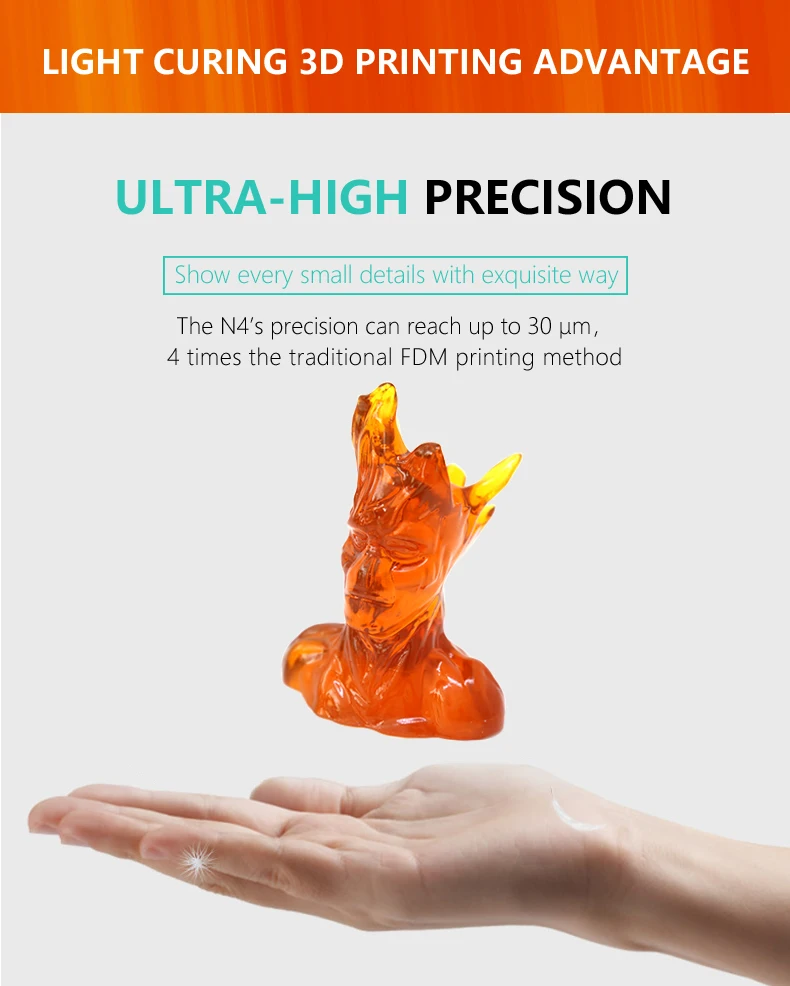
The ANET N4 is an LCD-Resin 3D printer that can produce high-resolution prints with greater detail than can typically be obtained from common filament-based devices. It uses a 2560 x 1440 pixel LCD screen to solidify photopolymer resin in layers as small as 0.03mm.
Unboxing The N4
Unboxing the ANET N4 LCD 3D printer [Source: Fabbaloo]The ANET N4 is actually quite a small device. It measures only 380mm tall and weighs about 10kg. This is somewhat a function of the relatively small build volume of 120 x 65 x 138 mm, but that volume is quite typical for inexpensive resin-based 3D printers.
The device comes fully assembled, and there’s little to do other than remove the copious amounts of packing foam that keeps it secure during shipping — and plug it in.
There are some interesting bits included with the package:
Accessories accompanying the ANET N4 LCD 3D printer [Source: Fabbaloo]Here we see the entire slate of extras that come with the ANET N4, including two pairs of disposable gloves — you will need plenty more, and I strongly recommend buying a large package of them. There’s also two scrapers for removing prints from the plate. One is plastic; the other is metal. I used only the metal one as it seemed far more useful.
There’s a USB stick containing half a dozen pre-sliced files you can print, as well as a power supply and cable.
You’ll notice the resin vat at bottom right. This is where the resin lays during printing, and it includes a clear bottom sheet through which the LCD pixels will shine to solidify the photopolymer resin. It’s imperative to keep this plastic sheet clear and free of debris, as any stray bits will disturb the LCD light passing through that location, and therefore can corrupt the print.
The sheet will eventually wear out after many prints through a gradual degradation as it repeatedly peels freshly printed layers off of it during printing. However, ANET has very conveniently provided a set of replacements that you can install when necessary. During my printing I had no need for this, as I suspect you probably have to print a huge number of models and layers to wear it out.
Setting Up the ANET N4
Rear view of ANET N4 3D printer showing power cable, power on switch and USB-A port [Source: Fabbaloo]Once you’ve ripped off all the foam, what is there to do before printing? Unlike many 3D printers that keep you busy for a while, there are only two things to do with the N4.
The first, and most important, is to level the print plate. The N4 uses an upside-down printing process, in which the plate gradually rises as layers are solidified. The printed models are upside down, as well.
But consider the very first layer: the print plate must be uniformly spaced from the transparent sheet at the bottom of the resin tank in order for all parts of the first layer to stick to the plate. This requires leveling.
Getting ready to level the bed on the ANET N4. Note swivel joint on build plate [Source: Fabbaloo]
Fortunately, the leveling process is ridiculously simple: you loosen a bolt holding the plate, which turns out to be on a swivel joint. The plate can then twist freely. Then, place a sheet of paper on the still-dry resin tank.
On the ANET N4’s control panel, you then invoke the leveling process, which slowly lowers the loose print plate to the bottom. When it hits the paper layer, the swivel joint automatically twists into a fully flat position — because it’s loose, remember? Then you simply tighten up the bolt and it’s ready to go.
In my testing I found I never needed to routinely re-do the leveling procedure, although I also did not remove the resin tank. I simply filled and re-filled the resin tank as prints proceeded. I suspect that if I were to remove the tank, for example to clean it when changing resins, I’d likely have to re-do the leveling. But it’s very easy to do nevertheless.
You will also have to re-level the build plate if you happen to drop it on the floor when moving it to the cleaning station after a print completes. Do not ask why I know this.
The second thing you need to do before printing is pretty easy: put some resin in the tank. This is done by simply pouring some carefully from a bottle. In my testing I used some Elegoo gray photopolymer resin.
I should point out that the N4 is actually an open materials machine. That is to say, it does not require any particular company’s resin, as do some other resin 3D printers. You are free to use literally any resin that solidifies when exposed to 405nm radiation, which is what the LCD panel does.
That’s important, because if you happen to attempt use of a resin that does not work with 405nm resin, no 3D printing will occur. Be very cautious when buying resins for this (or any) open materials resin 3D printer.
ANET N4 Printing
3D printing on the ANET N4 is very straightforward. On the color touchscreen are three prominent buttons, one of which is labelled “PRINT”. Upon striking that button you’ll get a list of files present on the USB stick (which you presumably plugged into the back of the machine).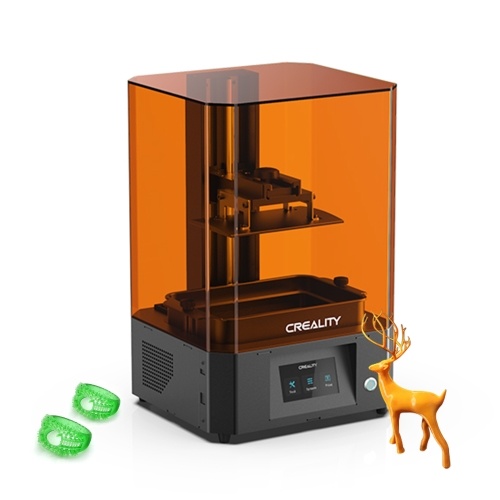 Touch one of the file names and then you can preview — although in a very tiny view — to ensure it’s the correct file, and then hit the check mark to get the print started.
Printing proceeds by the device lowering the plate deep into the liquid resin to rest at the bottom, where the first layer is solidified by illumination from the LCD panel. The first few layers are typically exposed for a longer duration to ensure they are strong and fully attached to the plate.
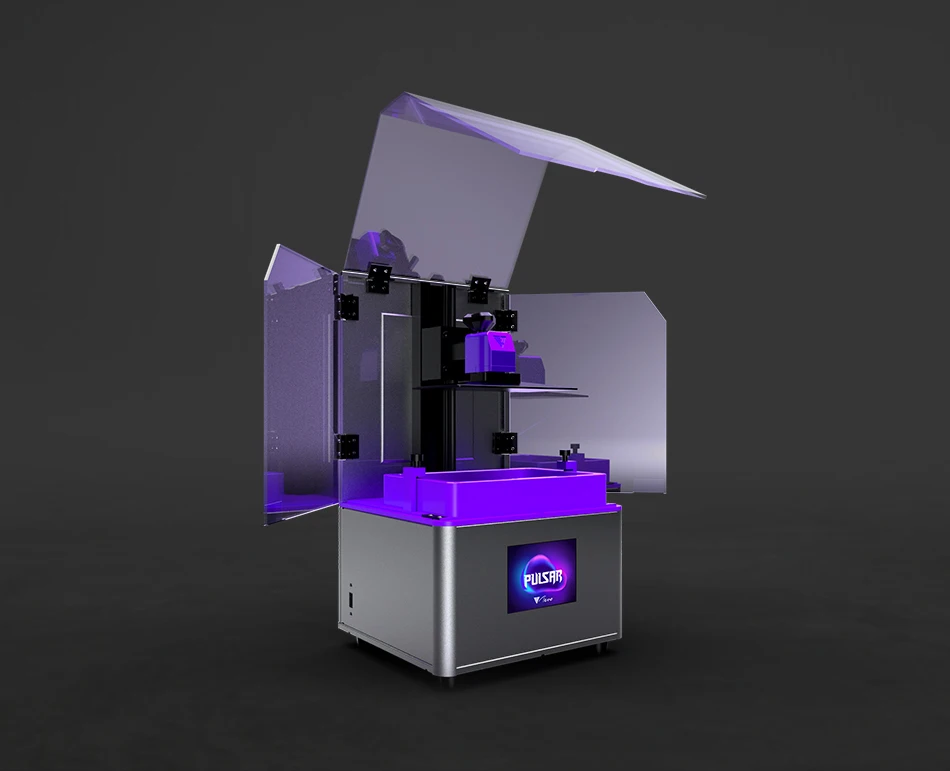
ANET N4 build plate submerged in resin tank during printing [Source: Fabbaloo]Unfortunately you cannot see the action for a while, as all activity takes place submerged in resin. Only when the print is large enough do you see some of it gradually emerge from the resin during printing. At job completion, the N4 will lift the print up for full view and removal.
Larger print emerging from the ANET N4 as the job proceeds [Source: Fabbaloo]Subsequent layers are printed with the “normal” exposure and can be done much faster than the first few.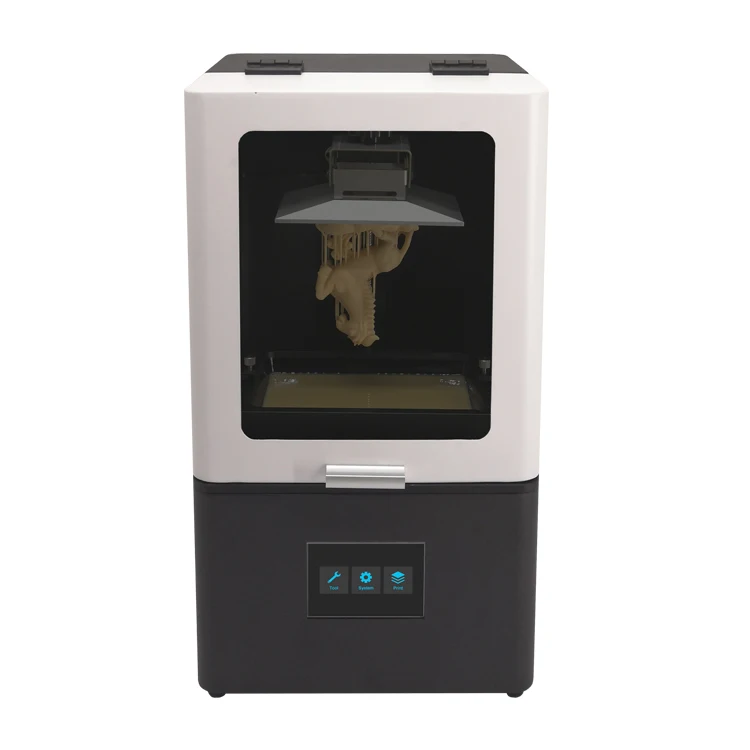 Each layer’s illumination pattern is displayed on the screen as they occur:
The LCD panel offers an interesting advantage, and that is speed. The LCD panel illuminates ALL the pixels required for a full layer, all at once. This is quite different than a filament machine, for example, which must laboriously trace each and every solid part of each layer. Thus, the N4 can print pretty fast.
It’s also different from other resin 3D printers that use lasers. Like filament machines, these devices must trace each and every portion of the layer with the laser. LCD (or DLP) resin 3D printing is almost always faster.
The other effect is that the printing process speeds along independent of the model’s geometry. That’s because the entire layer is done all at the same time. The only factor determining the print duration is the number of layers to do. A laser-powered resin 3D printer would take longer to 3D print a complex layer, but in the N4’s LCD system each layer takes exactly the same time.
This is part one of a two-part story on the ANET N4 3D printer. Part two is here.
Via ANET
Hands On With the ANET N4 LCD 3D Printer, Part 2 « Fabbaloo
The ANET N4 LCD 3D printer [Source: Fabbaloo]An ANET N4 showed up in our lab, so we thought we’d run it through some tests.
This is part two of a two-part story on the ANET N4 3D printer. Part one is here.
Touchscreen Issues
I did encounter challenges with the otherwise nicely appearing touchscreen. The idea is that you simply touch options with your finger, and that’s what I tried to do.
However, very frequently the button selected was not the one I had touched, as if the screen was mapping the location of the finger impact to the wrong location. It’s not so much of an issue with the bigger buttons, but the smaller the area to touch — like a filename — the more difficult it was to get to work.
Very often when selecting a print from the file menu the N4 would pick a file other than the one I had touched.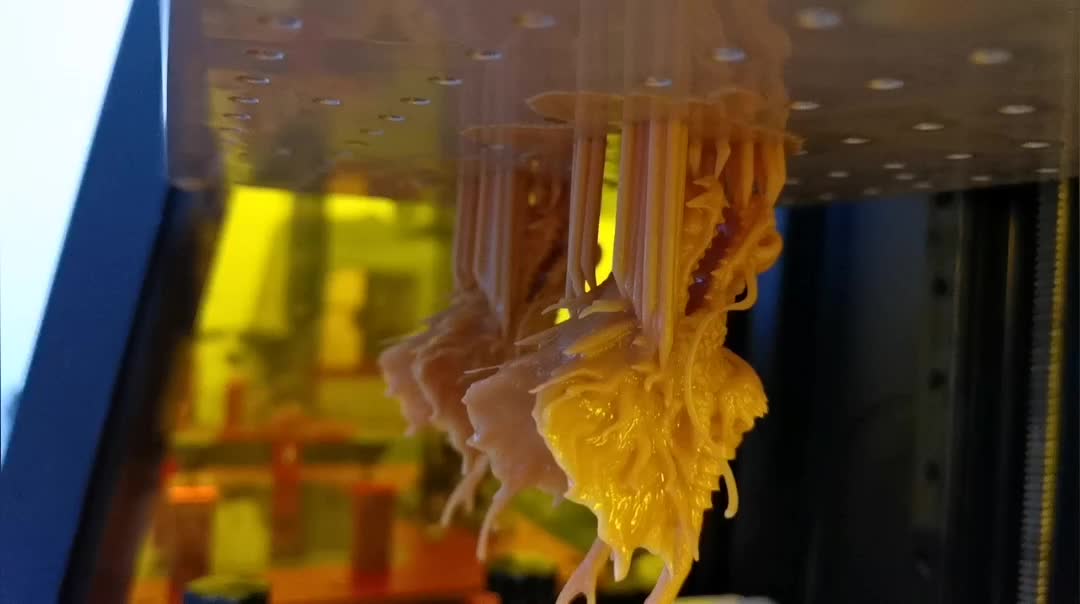 This was quite frustrating, and especially so when I would attempt to cancel the selection, only to find it had confirmed the print and started the process! I had to frantically cancel the print and start over.
I reported the issue to ANET and they immediately sent a replacement unit. I found the touchscreen worked perfectly on the new unit. It seems that the screen must have been faulty or installed incorrectly on the first unit. In any case, ANET very quickly corrected the issue for us.
ANET N4 Post-Processing
ANET N4 touchscreen showing a completed print job [Source: Fabbaloo]Once the print is complete, it remains hanging upside down in the print chamber. Next, you’ll have to do potentially messy post-processing tasks to finish the object.
The first thing to do is to remove the print plate, with the print attached. This is quite easy to do by loosening the round bolt at the top and sliding the whole mechanism off.
Note: this is the point where you will make a mess.
The freshly completed print will have its surface coated with liquid resin, simply because it was pulled from a vat of liquid. This resin drips off after printing, except where niches capture it due to the geometry of the model. But when you loosen the plate and inevitably tip it, prepare for a surprise, as you will certainly drip some resin.
A best practice is to always hold the freshly completed print over the resin tank. That way any stray drips will fall into the vat when you tip the print. This also allows the drips to be re-used in a subsequent print.
This is the point where I tell you that you MUST be wearing disposable rubber gloves for the remainder of the processing. This is to ensure you are safe. Safety glasses are also a good idea, just in case there is a splash of either resin or the cleaning solvent.
Photopolymer resins are typically toxic, and you don’t want to get any on your skin or any surface where someone could touch it.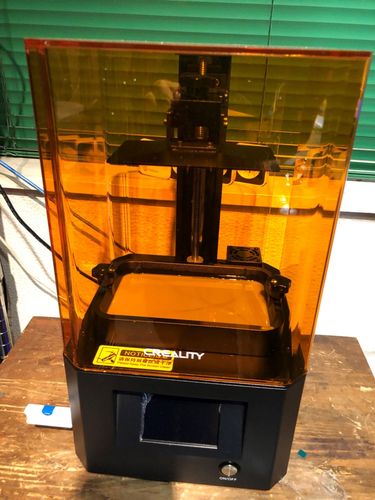 Thus, you should be extremely careful when removing the plate. I would attempt to keep the print always over the resin tank until it stops dripping. Tipping the print different ways will extract more drips.
You want the resin to drip back into the tank, not only for toxicity reasons, but also because it’s quite expensive. The more drips you keep, the more prints you can do.
Once the dripping has completed, you then move to a post-processing station. This should be a surface with a removable and disposable surface to catch any more stray drips.
There will be more drips.
Uncured resin slowly dripping off a 3D print into the tank [Source: Fabbaloo]Place the plate on its side and then use the metal scraper to gently pry up one side of the print as it attaches to the build plate. Once you’re “under”, give it a push and the rest should pop loose. Note that the print will definitely fall off, so be prepared to have it land somewhere secure. Remember, it is still coated with toxic liquid resin. You may want to have some “walls” ready to catch the print if it skitters off towards the edge of your post-processing table upon sudden release.
You want to clean off the resin not only for safety reasons, but also because this liquid material will solidify if exposed to UV light (e.g., sunlight or other curing approaches). If that happens, you could suddenly find your print has unexpected bumps where leftover droplets had solidified.
For this reason you absolutely should never have your post-processing station located where sunlight could intrude. No windows allowed!
Cleaning resin is typically done using a bath of IPA, but this is not supplied by ANET in the N4 package. You’ll have to arrange for a tub of IPA on your own.
For my testing, I happened to have a wonderful set of Formlabs Form Wash and Form Cure post-processing devices handy. The Form Wash not only provides a bath of IPA, but also circulates the liquid around the print in different directions. There is no resin on it after a 10 minute wash.
After washing it’s a good idea to finish the UV curing, as the LCD light from the N4 is sufficient to hold the object together, but not make it completely strong for permanent use. For this you could simply put the print on a windowsill and wait for the sun to get at it (rotating the object periodically), but I used the Form Cure, which provides a rotational platform and intense UV light.
ANET N4 3D print being cured in a Formlabs Cure station [Source: Fabbaloo]Once this is all done, I washed the prints in soap and water to get them perfectly clean and they were done.
N4 Print Results
The N4 produces pretty high-quality output, although I have seen better resin prints from other machines. The catch, though, is that the N4 is a very inexpensive machine and the others I’ve seen are multiple times as expensive.
A slightly wobbly 3D print from the ANET N4 [Source: Fabbaloo]One issue I observed in the prints was a slight wobble in the vertical axis. Here you can see a print of the Eiffel Tower (a 3D model all resin 3D printer owners should print).
Notice there is a slight wobble in the height of the tower. I wasn’t sure how this happened. I thought perhaps the print was a bit soft after printing and somehow bent during washing as it was laying on its side.
So I 3D printed another copy of the same tower on the N4 and instead washed it by hand, carefully keeping it vertical the entire time to avoid any slumping.
However, the result was literally identical to the first version. It seems there is a slight wobble in the Z-axis of this particular N4.
Another test print also exhibited this wobbly phenomenon:
Slight wobbles on the Z-axis of a print on the ANET N4 3D printer [Source: Fabbaloo]This effect was only apparent in very regular 3D models that had straight edges or very smooth curves. Organic shapes, such as a figurine, did not appear to exhibit any such issues:
A figure being 3D printed on the ANET N4 3D printer [Source: Fabbaloo]However, the replacement N4 provided by ANET did not have this issue at all and tall prints were quite straight. It may be that ANET is continually tuning their design and assembly process at the manufacturing plant, and more recent machines are even better.
N4 Software
After printing the pre-sliced models, I was eager to print my own. For this, you must use ANET’s slicing software, AIPrint.
This is where I started encountering challenges, as this software seems to need a bit of help.
One was the language, which by default is set to Mandarin on some pages:
ANET N4’s slicing software support settings [Source: Fabbaloo]The software is used to import 3D models into a build plate layout and prepare them for printing. The major things to do are:
- Place items on the build plate and arrange them to avoid overlap
- Select a layer thickness, and you can go down to 0.03mm
- Select the number of “first layers”, which I mentioned previously
- Select the exposure duration for the first and subsequent layers
And finally, you must prepare any required support structures. These are a bit different from filament-based machines simply because the print is upside down.
At first I attempted to use ANET’s automatic support structures, but I found many problems with the automatically generated supports feature. For example, insufficient support was generated:
Insufficient support structures generated automatically by ANET’s AIPrint software [Source: Fabbaloo]Or support was generated underneath the print plate:
Odd placement of support structures generated automatically by ANET’s AIPrint software [Source: Fabbaloo]Or supports that didn’t touch the object:
Strange gap between support structures and model generated automatically by ANET’s AIPrint software [Source: Fabbaloo]Other things happened. When I contacted ANET about this, they suggested I simply use the manual support process instead, which actually worked pretty well.
Adding support structures manually in ANET’s AIPrint software [Source: Fabbaloo]The catch is that you must, by eye, identify any portion of the model that might require supports, and then add them with a click. From my long experience with 3D printing this is pretty straightforward, but I suspect for a novice user this could be challenging.
That said, software is always a moving target and I am quite certain ANET will (or maybe has already) addressed these automatic support issues with new software releases.
These supports must then be clipped off after curing the completed 3D print.
N4 Print Quality
Excellent Eiffel Tower 3D print from the ANET N4 showing no wobbles [Source: Fabbaloo]I found the prints to be decent from the N4, particularly for a machine at its price point. The lines were typically quite crisp. For free form objects, like figurines you likely would not notice them at all.
Detail of an Eiffel Tower 3D print from the ANET N4 [Source: Fabbaloo]There is a limit to the N4’s resolution, however, as you can see at the top of the Eiffel Tower model. The cross-pieces there essentially merged together as they overwhelmed the resolution of the device, but that effect also happens on most other resin printers. A very good print nevertheless.
The resolution is vastly better than you’d see on any filament-based 3D printer, even ones that cost far more than the N4. This tiny figurine shows virtually no layer lines at all. I really like the prints that come off this device!
ANET N4 Availability
The ANET N4 LCD 3D printer is available for purchase worldwide through several vendors, and tends to have a price near US$300, which is a pretty good price for a unit with these capabilities.
This is part two of a two-part story on the ANET N4 3D printer. Part one is here.
Via ANET
Top 5 Resin 3D Printers (2021 Review)
Resin 3D printer produces highly reliable prints using SLA, LCD or DLP technology. It cures UV resin and turns liquid into high quality 3D models at a faster rate.
To go into more detail, stereolithography (SLA) is the earliest form of resin 3D printing, which works by adding a light sensitive liquid resin substrate to a UV laser beam. The resin is then cured to the desired pattern and the product is formed layer by layer to completion.
On the other hand, when we talk about digital light processing (DLP), we mean the process of projecting one image in each layer with a digital projector by emitting UV radiation. And with the advent of LCD technology, resin 3D printing with LCD screen is becoming predominant in the 3D printing industry today. Since the LCD screen acts as a mask over the UV light source, it is sometimes referred to as MSLA (masked stereolithography).
Having said that, getting the right resin 3D printer has never been easier with so many brands and models available on the market. So, to help you on your buying journey, we've provided the top five resin 3D printers, along with advice from our technical experts and 3D printer enthusiasts, to give you the most important information before you buy.
Just click the buttons below that we have prepared for you to view their best deals on Amazon. That being said, we hope you find the best resin 3D printer to suit your next printing project in the future!
The best polymer 3D printers in comparison and rating
| Smol 3D printers | Features | 1. 3D-PHOMOV |
| |
|
 5-2 seconds
 Quality and accuracy
Functions
Ease in use
Plus :
- It has a large assembly of 192 mm x 120 mm X 24 mm, that allows us to maximize our creativity and imagination.
- Offers an 8.9-inch 4K monochrome LCD display with a resolution of 3840 x 2400 pixels, which can return print information to its original form, and has a lifespan of up to 2000 hours.
- Has a short exposure time of 1.5-2 seconds and delivers a high print speed of 60mm per hour, which is 3 times faster than a standard 3D printer.
- Features a dual effect cooling system specially designed for consistent print performance and longevity.
- Uses a UV LED matrix to distribute light more evenly throughout the print.
- Comes with a dual Z-axis that prevents Z-axis wobble and improves printing efficiency.
- Has Wi-Fi connectivity for remote monitoring of print operations.
Cons:
- The firmware is unstable, but this can be fixed by updating it.
- Vapors seem very smelly, so a more well ventilated print shop is required.
Final take:
This ANYCUBIC Photon Mono X resin 3D printer revolutionized resin 3D printing.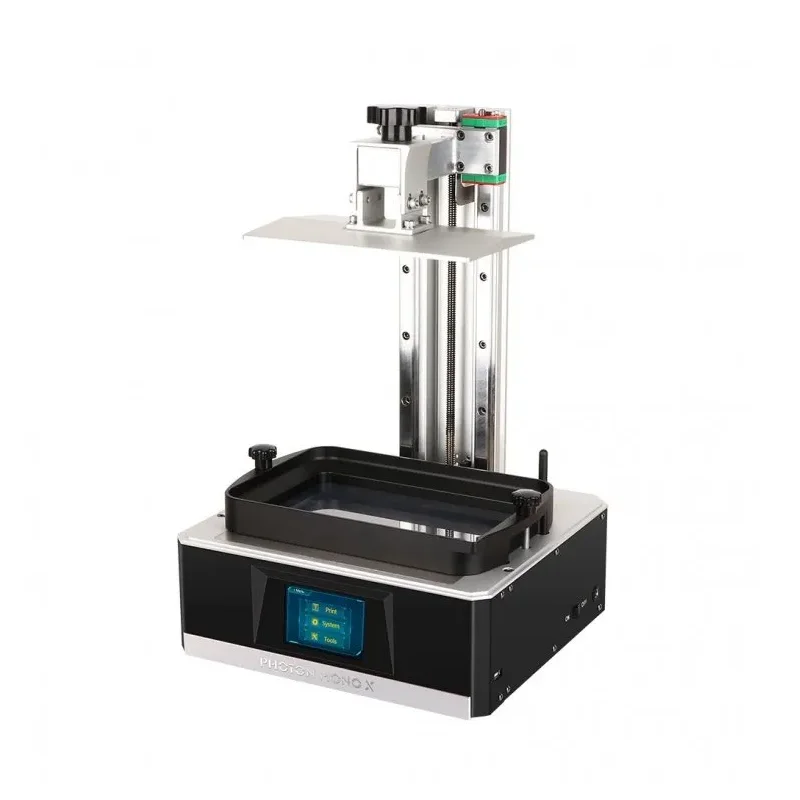 It impressed us during the testing process as it printed consistently at 3 x 192 x 120 mm. It has a monochrome LCD in the center as well as a 245K resolution panel with 4 micron pixel size (XY). We printed with a thickness of 50mm and were impressed by the quality of the print, which perfectly brings out important and small details. The slicer program is simple but accurate. So far, the auto support feature has been reliable because we haven't had missed or failed prints due to insufficient support. The Z-axis is indeed a thread-height bar, while the plastic tank is anodized aluminum, so we've never experienced any Z-axis wobble before this entry. It also features a brushed aluminum platform that improves the adhesion between the platform and prints, as well as its design and durability. Ultimately, this ANYCUBIC Photon Mono X 05D Resin Printer is an excellent entry-level resin UV printer with exceptional print efficiency. We were blown away by its printing capabilities and we can't say enough about the print quality!
30-50 mm per hour
SLISER software
Chitaboks
Equal for use
Simplication in use
simplicity in the use Pros of :
- Features a COB UV LED light source that emits more stable UV light, and a 2K monochrome LCD display, which greatly improves printing performance and accuracy.
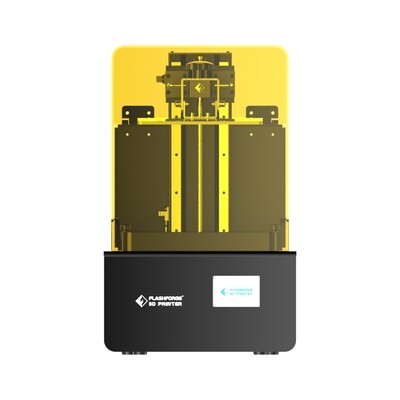
- Comes with a 6.08-inch 2K HD monochrome LCD, which has a much longer life and high stability in long-term printing.
- It only takes 2 seconds to apply cured resin to one layer, which can greatly improve print quality.
- Features a durable CNC machined aluminum body and its state of the art sandblasted build plate also has excellent adhesion throughout the print for more reliable printing.
- Supports 12 different languages, allowing customers from all over the world to easily use this 3D printer. (Japanese, Dutch, Korean, French, German, Russian, Italian, Spanish, Turkish and Portuguese).
- Offers a replacement resin tank made from a special engineering plastic that is environmentally friendly and biodegradable.
Cons:
- The slicer app is a little hard to use.

Final take:
The ELEGOO Mars 3 Mono MSLA 2D printer is among the most affordable 3D printers we have seen so far. It features a monochrome LCD, COB UV light source and a 6.08-inch 2K HD LCD. We printed everything from industrial parts to board game mini-games with a build volume of 129mm x 80mm x 150mm. Compared to RGB LCD 3D printers, it has four times the shelf life and twice the print speed, making it one of the most powerful, reliable and maintenance free resin 3D printers. In the process of testing the transparent resin, we set at least 8 seconds per layer at a height of 0.05 mm, and it showed outstanding consistency. Also, at 11-12 seconds for opaque resins per 0.05mm layer, the prints from this 3D printer are really beautiful and flawless. We had a great time with this ELEGOO Mars 3 Mono MSLA 2D Printer as it is incredibly easy to operate while in use and comes with amazing support. In addition, it creates amazing objects with stunning detail and resolution.
30 mm/h
Slicer software
Longer in-house developed slicing software. CHITUBOX4
Quality and accuracy of
Functions
Simplication in use
Plus :
- also supported an increetized LCD-3D prisoner with a faster. and finer details compared to FDM printers.
- Comes with an advanced UV LED module that provides specialized optical path configuration and even power distribution to help improve prototype accuracy and print performance.
- Has a self-developed slicing program that creates a 100 MB slicing file in one minute, which is three times faster than others.
- Features 24 parallel LEDs for improved print efficiency, cure speed, layer adhesion support, and consistent light output compared to other printers.
- Features a full color touch screen interface, real-time display and monitoring of print status, fast bed leveling, strong steel body, strong adhesion, and a temperature warning system for greater safety.
Cons:
- We are a little limited in the printing area because it is a little small.
Final take:
This Longer Orange 3 Resin SLA 10D printer is one of the most iconic SLA 3D printers available and is a great entry level LCD light curing device. Assembly takes minimal time as we were able to start printing within minutes of unboxing and the entire process took only 15 minutes. The self-developed slicing program is incredibly easy to use and very fast.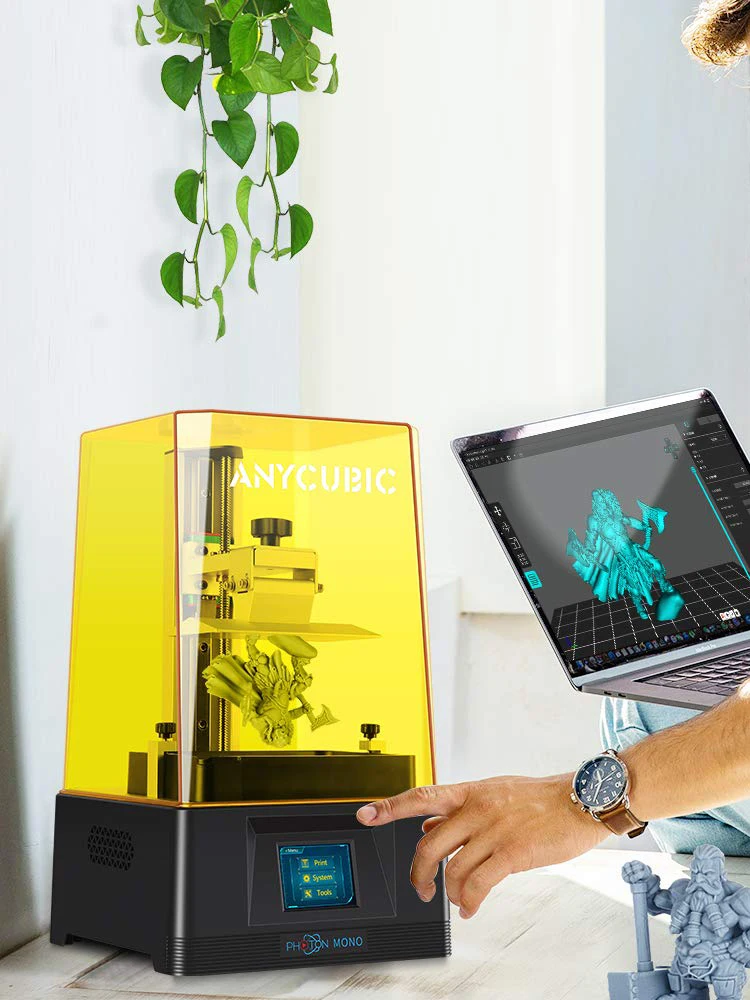 We printed 28mm high mock-ups which took about 3 hours to complete. One thing to note when printing with resin is that the printing process is proportional to the height of the model, meaning that it takes the same amount of time to print six models as it takes to print one model. It produces highly accurate prints and can print complex models such as miniatures including accessories. Ultimately, there is no doubt about its effectiveness, because it produces quality products of an exceptionally high level! This Longer Orange 3 Resin SLA 10D printer is a great buy when it comes to 3D printing.
4C per layer (50-70 mm per hour)
SLISER software
CHITU CHITU DLP
FURTS INSIDE BUILDS AND COMMUNICATION BE value for money
Pros :
- Delivers exceptional accuracy and precision with 30W dynamic UV for fast printing, delivering 4 seconds per layer using a 2560 x 1440 2K HD masking LCD.

- Equipped with a dual fan air filtration system for impressive ventilation that uses activated carbon air filtration to effectively minimize odor differences.
- Uses the latest ChiTuBox slicing software for an exceptional user interface.
- Provides easy cleaning of the resin reservoir, plus a distinctive FEP release film reinforced at both ends.
- With a print volume of 119 mm x 65 mm x 160 mm, we can produce larger and larger prints one after the other.
- Has an integrated computer board that allows us to print directly from a USB stick.
- The body of the system is all-metal manufactured using CNC cutting technology, which improves the structural system, reduces friction and provides relatively smooth printing.
Cons:
- The manual is useless because there doesn't seem to be any cleaning or post-processing procedures, and even all the instructions are written in Chinese.
Final take:
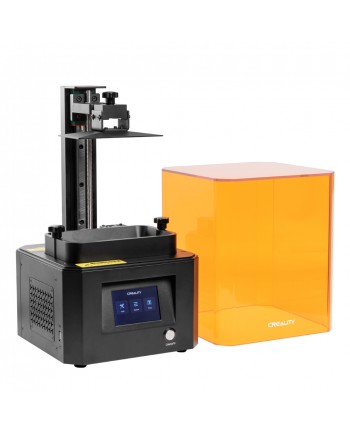
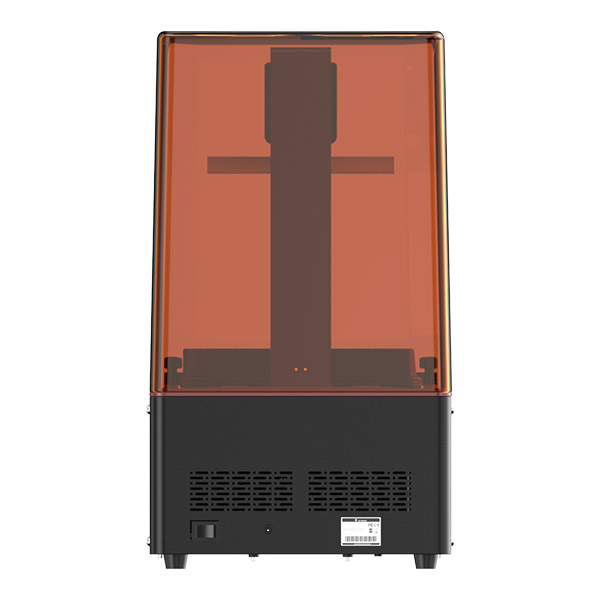
Creality 3D printers are gaining popularity and this Creality LD3R Resin 002D printer is another great resin 3D printer in the industry. It is economical yet effective as its powerful UV output delivers 4 seconds per coat with exceptional precision and resolution. During the testing procedure, the initial calibration and setup is extremely easy and our first prints were pretty good. After weeks of continuous testing and use, we can confidently state that this 3D printer is a fantastic piece to get started with resin 3D printing. The resolution is really very good, and the surface quality of the printed parts is impressive. We have been using the printer for two months now, and since we have used it, it has not disappointed us. In addition, the performance of this 3D printer is amazing. Without a doubt, this Creality LD3R Resin 002D Printer is a fantastic way to start your 3D printing journey.
Cons:
- The work table is not tilted and holds a significant amount of resin.
- Compared to other 3D printers in the same price range, it usually has a smaller build volume.
Final take:
This PHROZEN Sonic Mini Resin 3D printer is an impressive low cost resin 3D printer with high speed printing, high precision and ease of use. It has a very advanced production and processing method that cures the resin in a fraction of a second. In the same way, it uses a thermally stable mono-LCD display, which will better last about 2000 hours, so we don't have to worry about maintenance and care. During testing, we tested this 3D printer with 0.03mm resolution accessories along with aqua green resin. The standard resin profile allowed only 2 seconds, but we accurately tested it for 1.35 seconds to achieve more accurate measurements and fewer filled loops. In addition, this resin 3D printer is so easy to operate that we can start printing in 5 minutes with just 3 clicks. We liked how the touchscreen feels responsive and the user interface looks attractive along with the lightweight body it has.
Top 5 Resin 3D Printers (2021 Review)
Resin 3D printer produces highly reliable prints using SLA, LCD or DLP technology. It cures UV resin and turns liquid into high quality 3D models at a faster rate.
To go into more detail, stereolithography (SLA) is the earliest form of resin 3D printing, which works by adding a light sensitive liquid resin substrate to a UV laser beam. The resin is then cured to the desired pattern and the product is formed layer by layer to completion.
On the other hand, when we talk about digital light processing (DLP), we mean the process of projecting one image in each layer with a digital projector by emitting UV radiation. And with the advent of LCD technology, resin 3D printing with LCD screen is becoming predominant in the 3D printing industry today. Since the LCD screen acts as a mask over the UV light source, it is sometimes referred to as MSLA (masked stereolithography).
Having said that, getting the right resin 3D printer has never been easier with so many brands and models available on the market. So, to help you on your buying journey, we've provided the top five resin 3D printers, along with advice from our technical experts and 3D printer enthusiasts, to give you the most important information before you buy.
Just click the buttons below that we have prepared for you to view their best deals on Amazon. That being said, we hope you find the best resin 3D printer to suit your next printing project in the future!
The best polymer 3D printers in comparison and rating
| Smol 3D printers | Features | 1. |
| |
|
 3D-PHOMOV
 Quality and accuracy
Functions
Ease in use
Plus :
- It has a large assembly of 192 mm x 120 mm X 24 mm, that allows us to maximize our creativity and imagination.
- Offers an 8.9-inch 4K monochrome LCD display with a resolution of 3840 x 2400 pixels, which can return print information to its original form, and has a lifespan of up to 2000 hours.
- Has a short exposure time of 1.5-2 seconds and delivers a high print speed of 60mm per hour, which is 3 times faster than a standard 3D printer.
- Features a dual effect cooling system specially designed for consistent print performance and longevity.
- Uses a UV LED matrix to distribute light more evenly throughout the print.
- Comes with a dual Z-axis that prevents Z-axis wobble and improves printing efficiency.
- Has Wi-Fi connectivity for remote monitoring of print operations.
Cons:
- The firmware is unstable, but this can be fixed by updating it.

- Vapors seem very smelly, so a more well ventilated print shop is required.
Final take:
This ANYCUBIC Photon Mono X resin 3D printer revolutionized resin 3D printing. It impressed us during the testing process as it printed consistently at 3 x 192 x 120 mm. It has a monochrome LCD in the center as well as a 245K resolution panel with 4 micron pixel size (XY). We printed with a thickness of 50mm and were impressed by the quality of the print, which perfectly brings out important and small details. The slicer program is simple but accurate. So far, the auto support feature has been reliable because we haven't had missed or failed prints due to insufficient support. The Z-axis is indeed a thread-height bar, while the plastic tank is anodized aluminum, so we've never experienced any Z-axis wobble before this entry. It also features a brushed aluminum platform that improves the adhesion between the platform and prints, as well as its design and durability.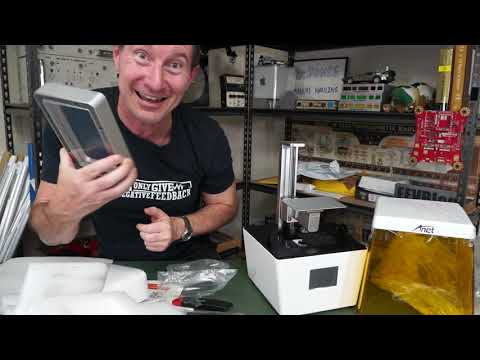 Ultimately, this ANYCUBIC Photon Mono X 05D Resin Printer is an excellent entry-level resin UV printer with exceptional print efficiency. We were blown away by its printing capabilities and we can't say enough about the print quality!
30-50 mm per hour
SLISER software
Chitaboks
Equal for use
Simplication in use
simplicity in the use Pros of :
- Features a COB UV LED light source that emits more stable UV light, and a 2K monochrome LCD display, which greatly improves printing performance and accuracy.
- Comes with a 6.08-inch 2K HD monochrome LCD, which has a much longer life and high stability in long-term printing.

- It only takes 2 seconds to apply cured resin to one layer, which can greatly improve print quality.
- Features a durable CNC machined aluminum body and its state of the art sandblasted build plate also has excellent adhesion throughout the print for more reliable printing.
- Supports 12 different languages, allowing customers from all over the world to easily use this 3D printer. (Japanese, Dutch, Korean, French, German, Russian, Italian, Spanish, Turkish and Portuguese).
- Offers a replacement resin tank made from a special engineering plastic that is environmentally friendly and biodegradable.
Cons:
- The slicer app is a little hard to use.
Final take:
The ELEGOO Mars 3 Mono MSLA 2D printer is among the most affordable 3D printers we have seen so far.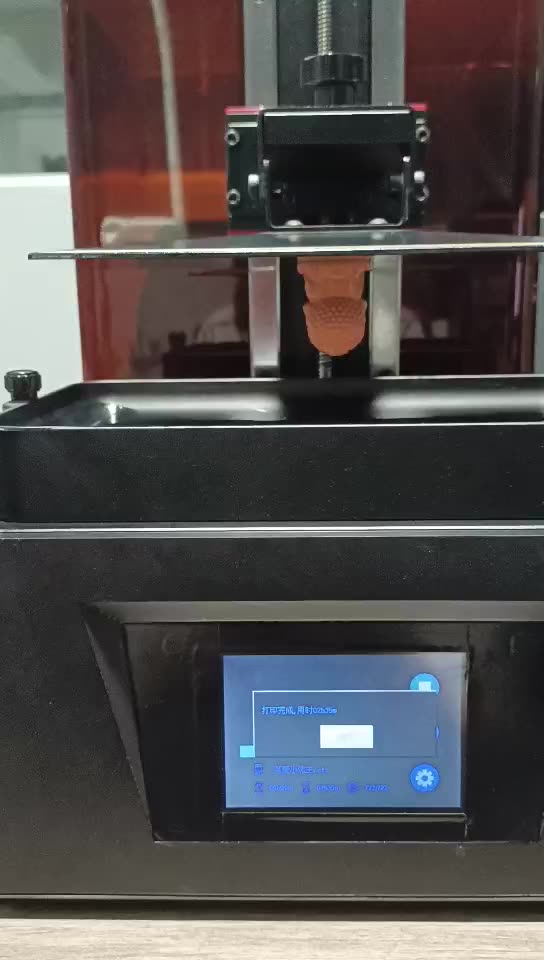 It features a monochrome LCD, COB UV light source and a 6.08-inch 2K HD LCD. We printed everything from industrial parts to board game mini-games with a build volume of 129mm x 80mm x 150mm. Compared to RGB LCD 3D printers, it has four times the shelf life and twice the print speed, making it one of the most powerful, reliable and maintenance free resin 3D printers. In the process of testing the transparent resin, we set at least 8 seconds per layer at a height of 0.05 mm, and it showed outstanding consistency. Also, at 11-12 seconds for opaque resins per 0.05mm layer, the prints from this 3D printer are really beautiful and flawless. We had a great time with this ELEGOO Mars 3 Mono MSLA 2D Printer as it is incredibly easy to operate while in use and comes with amazing support. In addition, it creates amazing objects with stunning detail and resolution.
30 mm/h
Slicer software
Longer in-house developed slicing software.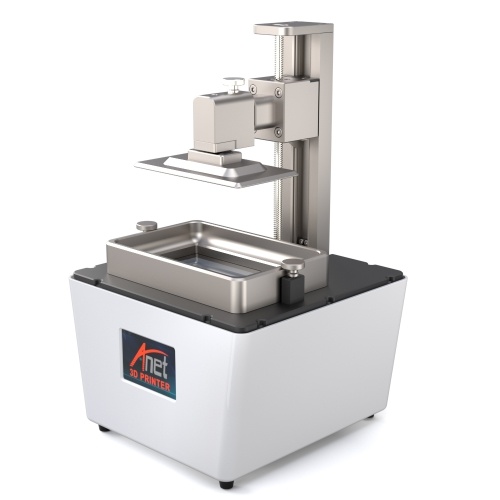 CHITUBOX4
Quality and accuracy of
Functions
Simplication in use
Plus :
- also supported an increetized LCD-3D prisoner with a faster. and finer details compared to FDM printers.
- Comes with an advanced UV LED module that provides specialized optical path configuration and even power distribution to help improve prototype accuracy and print performance.
- Has a self-developed slicing program that creates a 100 MB slicing file in one minute, which is three times faster than others.
- Features 24 parallel LEDs for improved print efficiency, cure speed, layer adhesion support, and consistent light output compared to other printers.
- Features a full color touch screen interface, real-time display and monitoring of print status, fast bed leveling, strong steel body, strong adhesion, and a temperature warning system for greater safety.
Cons:
- We are a little limited in the printing area because it is a little small.
Final take:
This Longer Orange 3 Resin SLA 10D printer is one of the most iconic SLA 3D printers available and is a great entry level LCD light curing device. Assembly takes minimal time as we were able to start printing within minutes of unboxing and the entire process took only 15 minutes. The self-developed slicing program is incredibly easy to use and very fast. We printed 28mm high mock-ups which took about 3 hours to complete. One thing to note when printing with resin is that the printing process is proportional to the height of the model, meaning that it takes the same amount of time to print six models as it takes to print one model. It produces highly accurate prints and can print complex models such as miniatures including accessories. Ultimately, there is no doubt about its effectiveness, because it produces quality products of an exceptionally high level! This Longer Orange 3 Resin SLA 10D printer is a great buy when it comes to 3D printing.
4C per layer (50-70 mm per hour)
SLISER software
CHITU CHITU DLP
FURTS INSIDE BUILDS AND COMMUNICATION BE value for money
Pros :
- Delivers exceptional accuracy and precision with 30W dynamic UV for fast printing, delivering 4 seconds per layer using a 2560 x 1440 2K HD masking LCD.
- Equipped with a dual fan air filtration system for impressive ventilation that uses activated carbon air filtration to effectively minimize odor differences.
- Uses the latest ChiTuBox slicing software for an exceptional user interface.
- Provides easy cleaning of the resin reservoir, plus a distinctive FEP release film reinforced at both ends.
- With a print volume of 119 mm x 65 mm x 160 mm, we can produce larger and larger prints one after the other.
- Has an integrated computer board that allows us to print directly from a USB stick.
- The body of the system is all-metal manufactured using CNC cutting technology, which improves the structural system, reduces friction and provides relatively smooth printing.
Cons:
- The manual is useless because there doesn't seem to be any cleaning or post-processing procedures, and even all the instructions are written in Chinese.
Final take:
Creality 3D printers are gaining popularity and this Creality LD3R Resin 002D printer is another great resin 3D printer in the industry. It is economical yet effective as its powerful UV output delivers 4 seconds per coat with exceptional precision and resolution.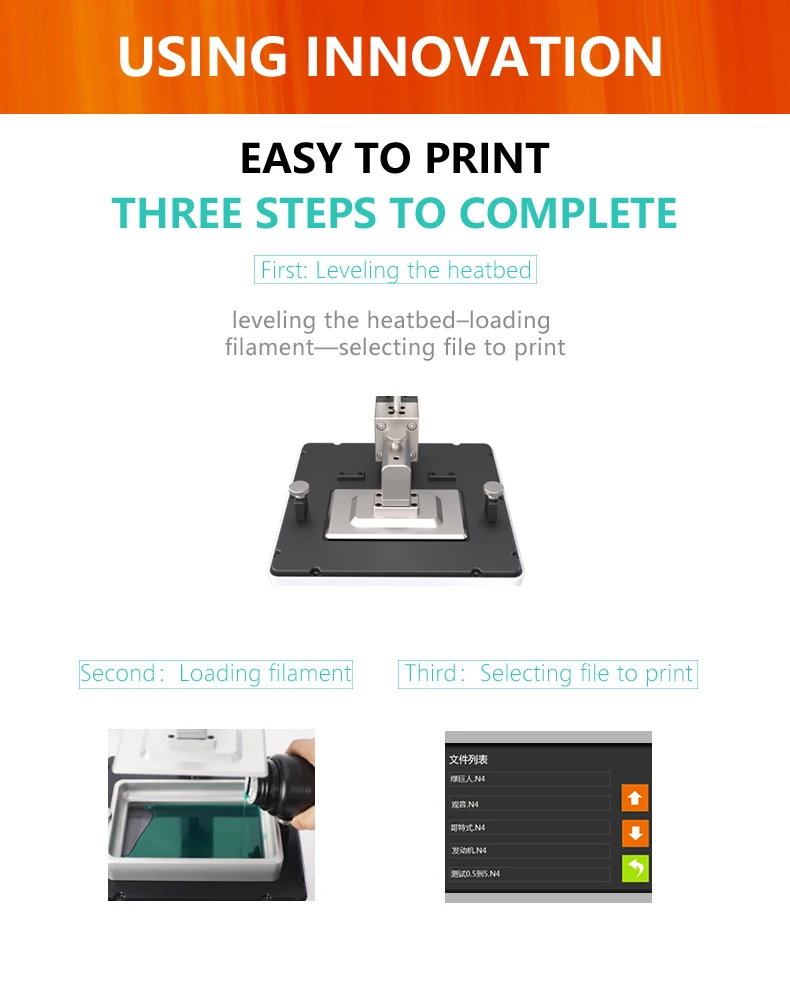 During the testing procedure, the initial calibration and setup is extremely easy and our first prints were pretty good. After weeks of continuous testing and use, we can confidently state that this 3D printer is a fantastic piece to get started with resin 3D printing. The resolution is really very good, and the surface quality of the printed parts is impressive. We have been using the printer for two months now, and since we have used it, it has not disappointed us. In addition, the performance of this 3D printer is amazing. Without a doubt, this Creality LD3R Resin 002D Printer is a fantastic way to start your 3D printing journey.
Cons:
- The work table is not tilted and holds a significant amount of resin.
- Compared to other 3D printers in the same price range, it usually has a smaller build volume.
Final take:
This PHROZEN Sonic Mini Resin 3D printer is an impressive low cost resin 3D printer with high speed printing, high precision and ease of use. It has a very advanced production and processing method that cures the resin in a fraction of a second. In the same way, it uses a thermally stable mono-LCD display, which will better last about 2000 hours, so we don't have to worry about maintenance and care. During testing, we tested this 3D printer with 0.03mm resolution accessories along with aqua green resin. The standard resin profile allowed only 2 seconds, but we accurately tested it for 1.