Monoprice 3d printer cura
Powerful, easy-to-use 3D printing software
Trusted by millions of users, Ultimaker Cura is the world’s most popular 3D printing software. Prepare prints with a few clicks, integrate with CAD software for an easier workflow, or dive into custom settings for in-depth control.
Slicing features
At the heart of Ultimaker Cura is its powerful, open-source slicing engine, built through years of expert in-house development and user contributions.
Intent profiles print specific applications at the click of a button
Recommended profiles tested for thousands of hours ensure reliable results
‘Custom mode’ gives over 400 settings for granular control
Regular updates constantly improve features and printing experience
Integrated workflow
If you own a 3D printer, software matters. Get the most from your printer with software designed to suit your workflow.
Seamless integration with all Ultimaker products
CAD plugin integration with SolidWorks, Siemens NX, Autodesk Inventor, and more
Compatible file types: STL, OBJ, X3D, 3MF, BMP, GIF, JPG, PNG
Easy to use
Manufacturing doesn’t need to be complicated. We design our software so anyone can use it – both experienced or rookie 3D printer users.
Prepare your 3D model for print in minutes with recommended settings
Simply choose speed and quality settings, and you can start printing
Ultimaker Cura is free and open source software
Ultimaker Marketplace
Being open and collaborating is in our DNA. Now we bring this to the professional 3D printing market with the Ultimaker Marketplace.
Download material profiles from leading brands for your application
Avoid manual setup when using third-party materials
Download useful plugins to customize the print preparation experience, star-rated by our community
An Ultimaker Cura experience that keeps your infrastructure rock-solid
Ultimaker Cura Enterprise delivers stability and security with features that are tailor-made for businesses.
Utimaker Cura Enterprise can be deployed, configured, and managed with cross-platform systems distribution
Ultimaker Cura Enterprise receives two updates a year.
 These are thoroughly tested by our community and ensure the most stable desktop application. We support updates for 12 months after release (including security patches and bug fixes)
Each release of Ultimaker Cura Enterprise is independently scanned, tested, and analyzed for vulnerabilities. We publish a summary of that report and we commit to continuously improving security
Backup & sync your materials & plugins
Save projects to the Digital Library
Access 3D printing e-learning courses
Join a community of 40,000+ active users
3D printers that simply work
Our award-winning 3D printers are robust, reliable, and easy to use. They deliver quality parts time and again. Designed and tested to run 24/7, they allow you to achieve the results you need more quickly and easily.
Learn about our 3D printers
Software ready for Industry 4.0
Trusted by millions of users across 14 languages, Ultimaker Cura slices your model and integrates with any workflow through Marketplace plugins. Then scale production and digital distribution with Ultimaker Digital Factory.
Material choice like never before
Ultimaker offers the widest material choice on the market. Through our Material Alliance, choose the perfect filament for your application – from advanced polymers to carbon fiber composites.
Learn about our materials
Support dedicated to your success
Wherever you are in the world, Ultimaker support is close by. Our global network of service partners offer professional installation, training, and maintenance in your language and time zone.
Learn about our support
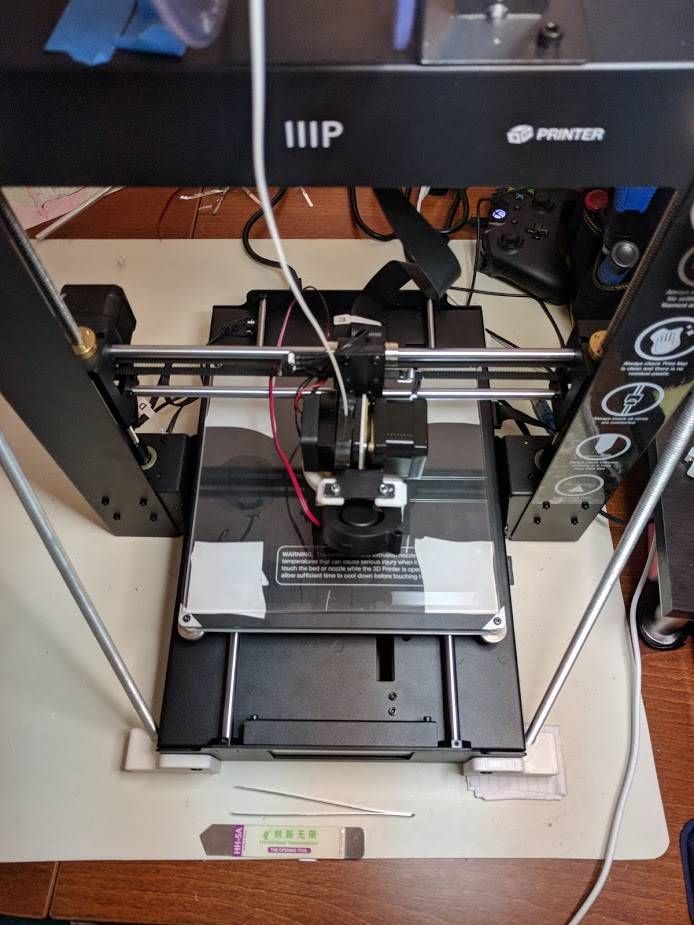
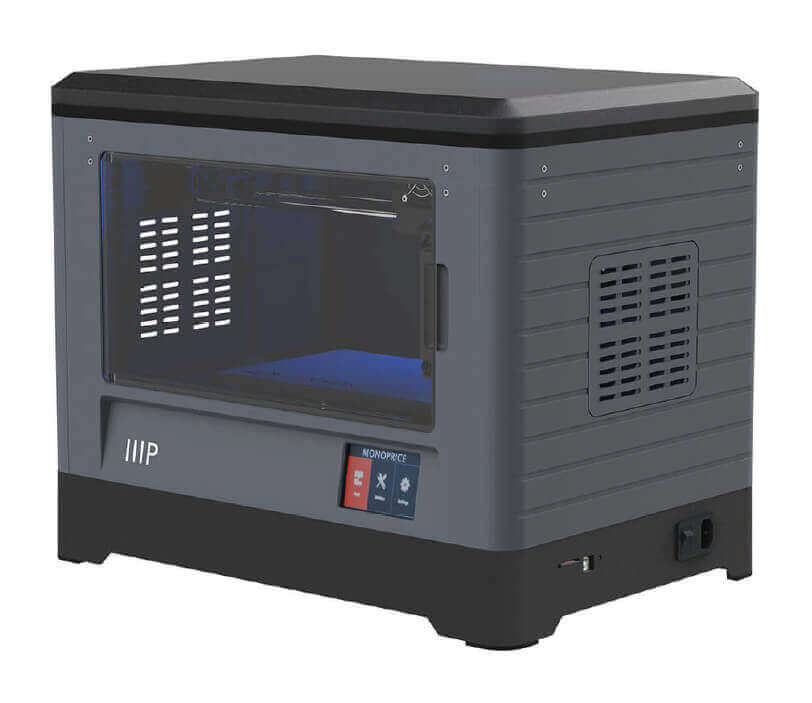
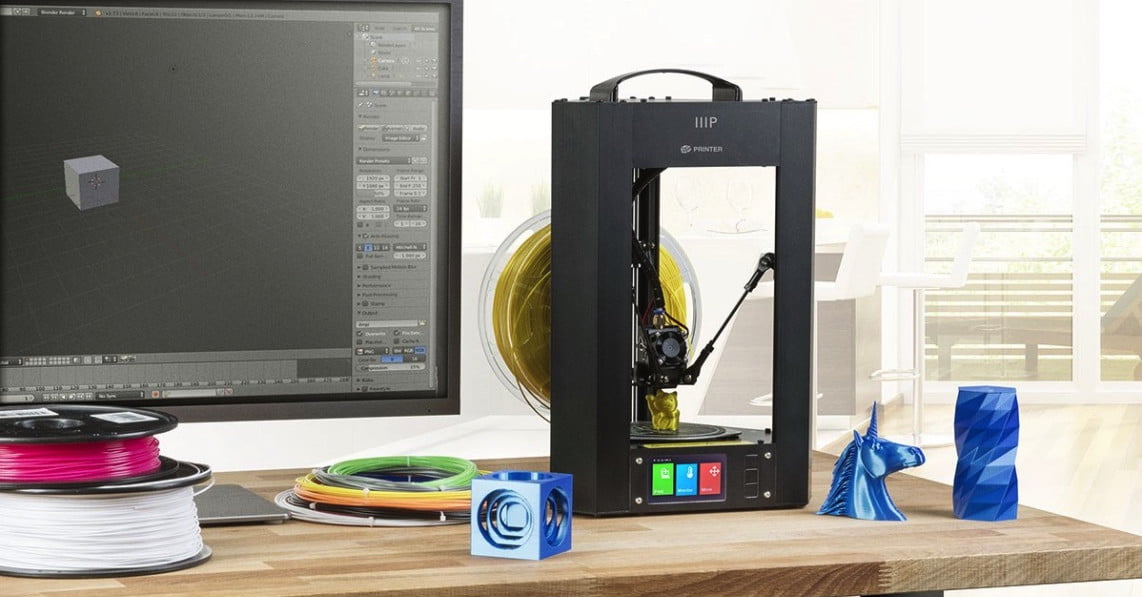
Using the Monoprice Voxel (FlashForge Adventure 3) With Ultimaker Cura – Andy Bradford
Recently I bought a Monoprice Voxel (a rebranded FlashForge Adventurer 3) 3D printer, and I’ve spent the last couple of weeks getting to grips with it. I’m very impressed – it works well and I’ve had a lot of fun building parts of my projects.
One interesting this about the printer is that it comes with its own slicing software called FlashPrint. This seems to work quite well, slicing all the models I threw at it and sending them to the printer. However, I was curious if it was possible to use the printer with the Ultimaker Cura slicer, which has some more advanced features and is supported more widely by the community.
I did a load of research and found some interesting topics on reddit and Ultimaker forum, I also examined the .gx files produced by FlashPrint and thoes sent to the printer by PolarCloud. I’ve gathered all this together into a this guide for using Cura, but it stands on the shoulders of a whole bunch of other people in the community, so thanks to those people you really helped me figure all this out.
Update (January 2011): A YouTube user confirmed that these steps also work for the FlashForge Adventurer 3 Lite.
DisclaimerEvery model I have printed in this way has worked well and I am very pleased. However, follow this guide at your own risk – If something bad happens to your printer, on your own head be it.
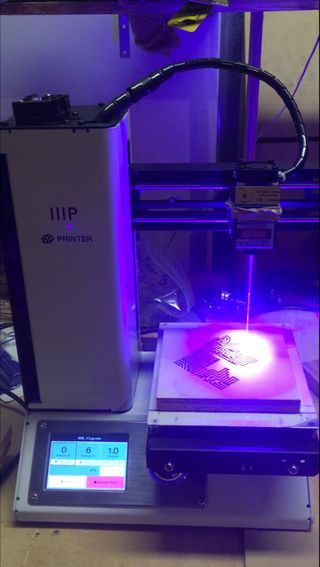
FlashPrint and the printer appear to use a custom file format for printing – .gx. This is identical to the .g file used by other printers but with some additional metadata at the top. I suspect this is the image of the model that’s shown while printing, as well as the print time estimation.
The printer is perfectly happy to print .gcode files, provided the file extension is changed to .g first. While printing a .g file the time estimation on the printer screen does not count down the remaining time, it counts up the elapsed time. Also instead of a small image of the model being shown, a generic icon is displayed.
Update (November 2021): I’m hearing from some people that after updating the printer to the latest firmware, that they get a “file format error” on the printer when using Cura sliced files. It seems like FlashForge have changed something (deliberate or otherwise) that is blocking Cura. I don’t have a solution to this right now, if you have more information, do get in contact. If this works for you do not update the printer.
Firstly, you need to install the latest version of Cura from the Ulimaker website.
Adding a custom printer- In Cura select Settings > Printer > Add Printer
- Select “Custom FFF Printer” and change the name to something meaningful
- On the machine settings, change the Height, Width and Depth to all be 150mm. Then tick the “Origin at Center” and “Heated Bed” settings.
- In the Start G-Code box, remove the text that is currently there and enter the following:
M118 X15.00 Y15.00 Z0.51 T0 M140 S{material_bed_temperature} T0 M104 S{material_print_temperature} T0 M104 S0 T1 M107 G90 G28 M132 X Y Z A B G1 Z50.00 F400 G161 X Y F3300 M7 T0 M6 T0 M651 M907 X100 Y100 Z40 A100 B20 M108 T0- In the End G-Code box, remove the text that is currently there and enter the following:
M140 S0 M104 S0 T0 G28 X Y M132 X Y Z A B G91 M18
- On the “Extruder 1” tab set the “Compatible material diameter” to 1.
 75mm
75mm
- Click “Next” to save your custom printer. You can now use Cura to slice your model as with any other printer.
Now that you’ve got your model into Cura and sliced with with your settings of choice, you need to get that onto the printer. To do that you have four options…
USB Stick
You can save the .gcode file from Cura onto a memory stick, move it to the USB port on the front of the printer and select the file from the build menu.
However, you must manually change the file extension from .gcode to .g or the printer will not see it. Unfortunately there’s no way to convince Cura to save it with the right extension – you’ll just end up with a .g.gcode file if you try.
With Adventurer Client
I recently released a little tool that allows you to quickly send files to the printer by dragging them into the app (no need to rename them as with FlashPrint). I’m still building it out with more functionality, but is available here now for both Windows and macOS.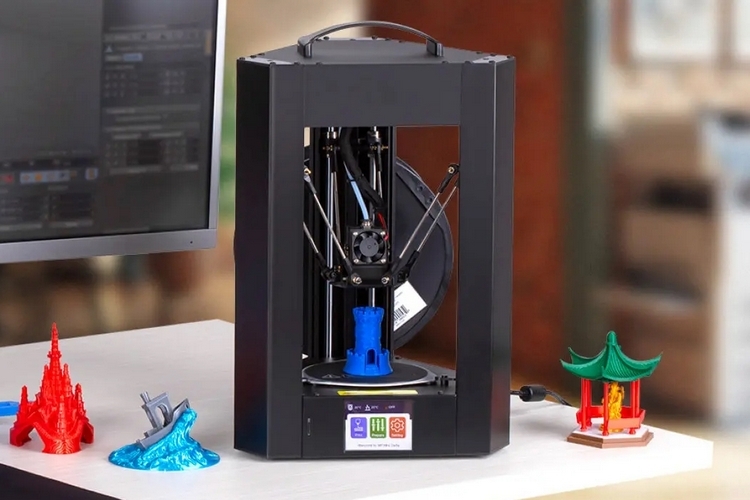
With FlashPrint
If you rename the exported .gcode file to .g, you can simply open it with FlashPrint. This will allow you to print the file over the network. As this is an already sliced file, FlashPrint will not re-slice it – it will just send it to the printer.
[Advanced Users] With AdventurerClientDotNet
I wanted to know how files actually got transferred to the printer, so I spent some time sniffing the network traffic between FlashPrint and the printer. Then with the help of this command reference and DarkDiamondV’s comments on this thread I wrote a little library using C# and .NET core.
I’ve uploaded the source to GitHub here – its still a work in progress, it supports reading some information off the printer and transferring .gcode (no rename required) files from Cura.
A self contained build for Windows can be found on the releases tab – Simply run the .exe file and follow the prompts.
Using this method is obviously very experimental, so is probably best used only if you’re comfortable with digging into things when they don’t go to plan. I wrote it more as a interesting challenge as much as anything. Obviously, use this at your own risk :).
Video
You can also follow this guide as a video, below.
Wrap Up
I’ve tested all of the above with the Monoprice Voxel, which should be the same as a FlashForge Adventurer 3, and possibly other FlashForge products, but as I do not have access to them right now, I’m not able to say with certainly.
If you do try this, and it works (or not) on your device, I’d love to hear your feedback or anything you learned along the way – leave a comment or tweet me. If you’re feeling especially pleased, you can buy me a coffee.
Like this:
Like Loading...
Posted in SoftwareTagged 3D Print, FlashForge, GitHub, Maker, Monoprice, open source, Software74 Comments
Custom Supports plugin for Cura by Lokster
3DPrintStory 3D printing process Custom Supports plugin for Cura by Lokster
The lack of "custom support" functionality is something many users often cite as an argument against Cura.
Well, this problem no longer exists, as a custom support generation plugin has been created in Cura that works similarly to the custom support function from other 3D slicing programs such as CraftWare or Simplify3D.
I know (maybe you do too) that in Cura you used to be able to adjust the placement of the calipers, but it was so unintuitive and awkward to use that it was more like a bug than a feature. To be honest, I've rarely needed to add custom props, and I've always been able to get good results by changing existing Cura settings. But I see a lot of people swearing they can't live without special support in their slicer of choice, and it's a must-have feature for them... or they just say so...
In general, the enthusiasts decided to take matters into their own hands and correct the universal injustice. Actually, why else do we need open source code and open source solutions ... :) The good thing is that the basis necessary for the implementation of custom supports already existed. Namely, in the Support Blocker plugin that comes with the latest versions of Cura. Using the code from these sources, it turned out to implement the opposite effect and soon we got quite convenient user support.
As you can see, everything is quite simple and intuitive. Click, click, click ... cut.
Tested and works with Cura versions 3.3 and 3.4. Older versions will most likely not work.
The code is hosted on GitHub under the LGPLv3 license. You can download it from the link.
Installing the custom supports plugin in Cura
- First, make sure you have Cura version 3.3 or newer.
- Open the Cura Marketplace from the main menu and find the "Custom Supports" plugin.
- Click on the plugin and install it
- Restart Cura
exactly what you expect...
- Load some 3D model into Cura and select it.
- Uncheck "Generate Support" in the right pane (if you want ONLY custom support)
- Click the "Custom Supports" button on the left toolbar.
- Click anywhere in the 3D model to place the reference block there.
- Clicking on an existing support block deletes it. Note. It is easier to add/remove supports in "Solid View" mode.
- You can configure individual support settings in the support settings on the right panel. Even if you turn off automatic support generation, custom supports will still be generated and use these settings.
- You can also use the "Per model settings" tool on the toolbar to select and configure settings for specific custom support blocks.
- You can move/rotate/scale each individual reference block at any time, just like any normal model.
Subscribe to our Telegram channel 3DPrintStory and stay up to date with the most interesting posts and news in the world of 3D printing!
Cura 3D tutorial for beginners
3DPrintStory 3D printing process Cura 3D tutorial for beginners
Cura 3D is such a handy slicing program that many users don't even realize what they are doing. Simply upload your model, select the 3D print quality and start printing. It's as easy as printing with a regular 2D printer.
Intro
Basically, Cura 3D is a 3D printing program - a method of transferring a digital file from your personal computer to a 3D printer so that the latter can process the data and start printing.
Compared to many other slicing programs, Cura 3D seems extremely simple. But if you need more flexible settings, they are also there. It's just that the user interface is implemented really competently and conveniently.
Cura 3D is developed and maintained by Ultimaker, a 3D printer manufacturer known for its perfectionism and strong support for the open source movement. There are a lot of manual settings, but they are hidden from the user (not really that deep), so if you are one of those who are interested in experimenting or need certain non-standard 3D printing settings, you can implement them.
For those who just want to print a part, just adjust the speed and quality.
This tutorial is aimed at those who are just getting started with their 3D printer. We assume that you have just turned on the printer and loaded the media. From now on, we will look at the necessary steps in Cura 3D to start 3D printing.
What is Cura 3D?
Cura 3D is a slicing software for 3D printers. Cura takes a 3D model as input and forms separate vertical layers to create a G-coded file that your 3D printer understands.
Before getting started with Cura, it's worth understanding the entire process of preparing a 3D model file. Even if you use ready-made 3D models, there should be a general understanding.
Three main steps in preparing files for 3D printing:
- Modeling. Modeling (formation of a virtual solid 3D model) is implemented in special applications like 123D Design or SketchUp, etc. These applications support their own specific file formats and allow you to open, edit, save, and export these files.
- Export 3D model file. After you have created your model, it must be exported to an STL or OBJ file. These formats are supported by Cura 3D. They differ from native 3D modeling application formats in that they only contain information about the final geometry, without separate nodes and editable content.
- Slicing file export. STL or OBJ file can be imported into Cura 3D, where it is processed and G-code is generated as output. G-code is just a text document, with commands that a 3D printer follows. For example, the temperature of the extruder, movement to the left, right, etc. are indicated.
The first step is to develop a solid model, but if you have no such experience, don't worry, on Thingiverse, Youmagine you will find a huge number of finished models. There are other sites where you can download models for free 3D printing. As a rule, in such repositories, models are already exported in STL format, so you can immediately import them into Cura 3D.
What exactly does Cura3D do?
Cura 3D converts a .stl or .obj file of a 3D model into a format that the 3D Printer can process. FFF 3D printers form each new layer on top of the previous one. Cura 3D takes a 3D model, cuts it into layers, and feeds those instructions to the 3D printer, layer by layer.
These instructions are transmitted as a G-code, a text document with a .gcode extension. If you open the file, you can view the code itself and even understand the commands.
For example, here is a small piece of code:
G0 F7200 X19.698 Y28.262 Z.36 G1 F1500 E0 G1 F1350 X22.467 Y26.175 E0.15654 G1 X23.338 Y25.568 E0.20447 G1 X24.246 Y25.027 E0.25218
Over time, as you become more familiar with 3D printing, you will be able to adjust the speed of the coolers, the height of the layers, the temperature of the extruder at different points. This is a very useful skill for troubleshooting some 3D printing issues.
Since each 3D printer has its own characteristics: print volume, table area and nozzle diameter, Cura 3D needs to know these parameters in order to correctly generate the G-code.
After you specify the design features of your 3D printer model, you can proceed to the settings for the height and layer thickness. Only then will Cura 3D be able to generate a valid G-code with motion path calculations.
The resulting G-code can be saved to an SD card or transferred to 3D printing via WiFi (depending on the interface that your 3D printer supports).
Getting Started with Cura 3D
In this part of the article, we will explain how to get started with Cura 3D. Namely - downloading and installing, optimizing your .stl and .obj files for further export to G-code.
Step 1: Install Cura 3D
Cura 3D is a multi-platform program that is available for Linux, Mac and Windows OS. All versions can be downloaded free of charge from the Ultimaker website.
You will download a file that will install Cura 3D. The installation procedure may differ slightly depending on your OS. In this tutorial, we used Cura 3D version 2.3.1.
- Launch Cura 3D.
- Select your 3D printer model. The first time you launch Cura 3D, it will ask you to select your printer model. If you have Ultimaker or Lulzbot, then they come with a special version of Cura 3D with ready-made settings. If not, or if you want to set up a new 3D printer, then after loading the program select ' Select -> Printer '.
The 3D printer selection menu will load. If you downloaded the program from the link above, then all available printers will be Ultimaker. To select another model, press Other . If you're lucky, your 3D printer will be on the list.
If not, you can go to your printer manufacturer's website and look for a custom version of Cura 3D to download. If it is not there, then select Custom -> Add Printer .
A window will open with the option to add 3D printer settings. At this point, you will need information about your model. Again, you can probably find this information on the manufacturer's website. And if you assembled a 3D printer yourself, then you probably remember all the parameters!
Enter all required parameters and click Finish .
Step 2: Overview of the Cura 3D interface
The screenshot below shows the main blocks of the Cura 3D interface.
Block
Top Navigation- Open File : Use the button in the top left corner of the menu or the option File -> Open File to open your .stl or .obj file.
- Edit : Use to select all models, delete or combine 3D models. Standard, useful commands.
- View Mode : This button allows you to switch between Solid, X-Ray and Layers views of the model.
- Settings : Opens the media and 3D printer settings.
- Extensions : This is for more advanced users. Allows you to install Cura 3D Extensions, which, for example, activate the ability to manually edit the G-code.

- Help : If you have questions, you can't figure something out - this is a great place for
Block
Tool bar (left)- Open File : Allows you to open the .stl or .obj file you want to print.
- Move : When clicked, arrows will appear around the selected model. Using the arrows you can move the model on the desktop.
- Scale : Increase or decrease the size of your 3D model.
- Rotate : A handy tool for adjusting the orientation of the model, its rotation.
- Mirror : When clicked, arrows appear around the selected model. Click to mirror the position of your model.
- Select Settings : A handy feature for adding frequently used settings to the sidebar. For example, you can display the wall thickness ( wall thickness ), model infill ( infill ) and speed ( speed ).
 Active only for loaded 3D model.
 - View Mode . Solid X Ray and Layers . If Layers is selected, a slider will appear that allows you to "cut" the model into layers.
Settings Palette box (right)
In this box, you can adjust the print quality and select media.
Printer . This is the 3D printer you chose in the first step. If you have more than one 3D printer, they can be configured and selected from this list.
Material . Quick selection of the material that is used for 3D printing.
Profile . There are three available 3D print qualities: Low , Normal and High . Selected from dropdown. At the first stages, it is recommended to use the provided blanks. Over time, as you get comfortable with your 3D printer and printing, you can experiment and create your own profiles that suit you better.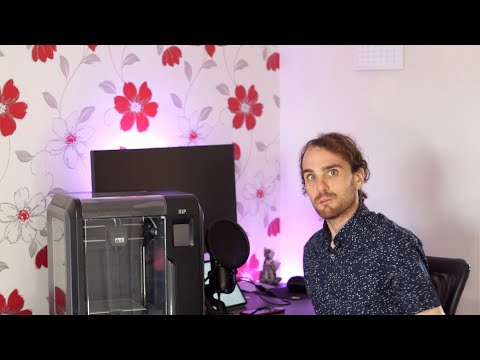
Print Setup . There are two options - Simple (Recommended) and Advanced (Custom)
- Simple (Recommended) . The settings Simple (Recommended) are pulled from the 3D printer settings you enter when you first start Cura 3D. This option is a great option for beginners or for the first launches of a new 3D printer model to see if the connection between the printer and the software is established. The number of settings is limited, but you can still quickly adjust the infill percentage of the 3D model, print table adhesion and add support material.
- Advanced (Custom) . This is where the main fan begins. With custom advanced settings, you can customize everything from quality to 3D print speed. We will explore this section and its capabilities later in the article.
Step 3: Processing the model in Cura 3D
Now that you are familiar with the Curs 3D interface, you can get to work. The first step is to upload the 3D model file. You can export your own model to STL or OBJ file or download from one of the sites with models for 3D printing.
Loading a 3D file into Cura 3D:
- Click on the "Open File" icon or use the menu File -> Open File and select the desired STL or OBJ file. For this tutorial, a 3DBenchy 3D model was used. This is a great model for testing new 3D printers or software.
- When the model has loaded, you can check if it is positioned correctly. If everything is OK, then the model will be highlighted in yellow. If there is a problem, it will turn gray and Cura 3D will tell you exactly why it is not possible to start printing.
It is also useful to learn the navigation options in the Cura 3D workspace.
Travel . Hold Shift and the left mouse button to move the workspace along the coordinate axes. This is a useful option when you are zooming in to check small details of a model.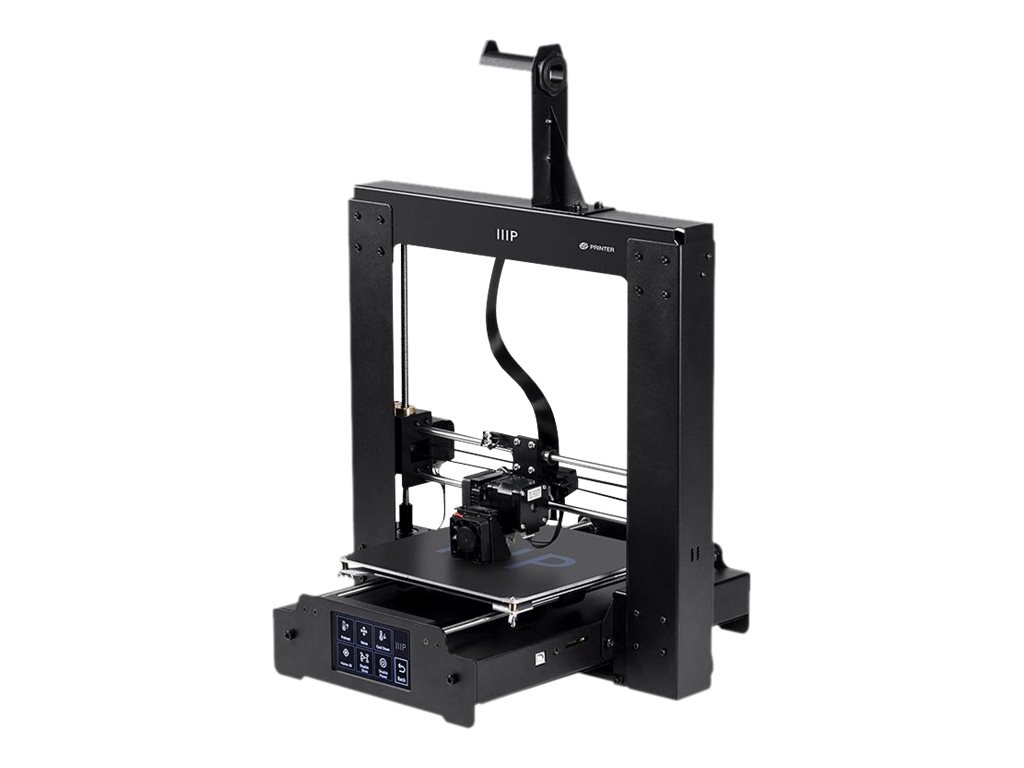
Rotation . Hold Ctrl and left mouse button to rotate around the workspace. This is useful for checking the model from different angles.
Zoom (zoom) . If your mouse has a wheel on the middle key, use it to zoom. If not, then we recommend to buy :).
Different 3D model display options
Cura 3D has three basic model display options. Each option is useful in its own way, and if you're having trouble with 3D printing, one or the other option can help you sort it out.
Solid . This display is used by default and makes it possible to evaluate how the model will look after 3D printing. The dimensions and shape of the model are shown relative to your print table. As a general rule, if you have looked at the model from all angles and it looks good, 3D printing will be successful.
X-Ray . If you encounter problems during 3D printing, this display option will help you evaluate the internal structure of the model. Perhaps you will see what exactly needs to be reworked into details (for example, intersecting planes may appear inside).
Layers (Layers) . If you have a problem with 3D printing at the same point, or you just want to see a specific cut across a layer, you can use this option. The most accurate way to move between layers is to use the up/down buttons on the keyboard. There is a second option - to use the slider for a quick view. Over time, as you gain experience with 3D printing, this display option will help you to change settings in the G-code (for example, increase the speed of the cooler, adjust the height of the layer or the amount of material fed to the extruder) at the level of certain layers.
3D model setup for Cura 3D . If you need to tweak the model, all you have to do is click on it to highlight it and select one of the options from the toolbar on the left. Here you can quickly move, rotate and scale the model.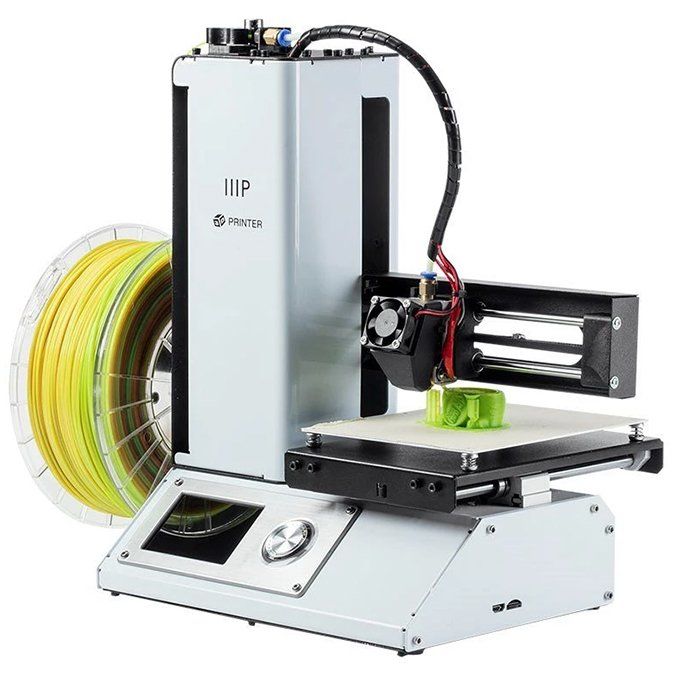
When you click on one of the options provided, arrows will appear around the model. Just grab the arrow or ring to apply changes in the direction you want. If you make a mistake right click and select R eset .
If you need to print more than one model, right-click on the base surface and select Duplicate . Cura 3D will automatically try to place the models as well as possible. If there is enough space to print two or more models, the platform will be yellow. If there is not enough space, the print space will be highlighted in gray.
Step 4: Simple (Recommended) 3D printing settings
The easiest 3D printing option is to let Cura 3D apply settings Simple (Recommended) . Although most of the settings will already be specified, you will be able to select the 3D print quality and specify the support material settings.
- Printer . Make sure your 3D printer is selected.
- Material . Make sure the 3D printing material is up to date.
- Profile . Select the 3D print quality.
- Infill . Hollow - printing will be as fast as possible, but inside the model will not be filled with material. Solid (Full filling) - the model will be with maximum rigidity due to full filling, but printing will take a lot of time and material. For starters, it is better to use the most versatile setting Light (Low filling) .
- Helper Parts These are the settings for the support material and adhesion. If you are typing for the first time, it is best to enable both options. If the contact area of your model with the print table is large, then you can disable option Print Build Paste Adhesion . If the model does not have sharp changes in angles and peculiar "overhangs" (for example, arms placed at 90 degrees in the human model), then you can disable the option Print Support Structure .

Step 5. G-code Generation
At this point your model is ready to be 3D printed and all you have to do is export the file from Cura 3D to an SD card or send it directly to your 3D printer. Cura 3D will take care of all the necessary steps to convert an STL or OBJ file into a G-code that your 3D printer will understand.
- Save the 3D model file . In Cura, press Save to file , Save to SD or Send to Printer .
- Estimate 3D printing time . Cura 3D will provide you with an estimate of the time it will take to print your model.
- Start 3D printing . If you transmitted the G-code directly, sit back and relax while your printer prints. If you are using an SD card, install it in your 3D printer and start printing.
Cura 3D Settings
Using Simple (Recommended) settings is just the beginning. Over time, you will want to implement more flexible settings. You can find these settings in the Advanced tab . We will review them below.
Select Advanced (Custom) in the print settings panel on the right.
- Quality . This is related to Layer Height (Layer height) . This setting depends on the capabilities of your 3D printer. The lower the layer height, the better the quality, and increasing the layer height will increase the print speed. By default, the layer height is set to 0.1mm for Ultimaker 2 Extended.
- Shell . This parameter controls the thickness of the walls of your model, as well as the thickness of the bottom and top layers. This parameter must be proportional (1x, 2x, 3x, etc.) to the nozzle diameter. For example, a wall thickness of 0.8, if you are printing on an Ultimaker 2 3D printer, will mean that the wall will consist of two lines, since this model has a nozzle diameter of 0.
 4 mm.
4 mm. - Speed . Generally speaking, the lower the speed, the better the 3D printing.
- Cooling . An important component of any 3D printer and you definitely need to activate this option. As a rule, coolers do not operate at full capacity until the end of the 5th layer.
- Support . Allows you to add support structures.
- Build Plate Adhesion . Not all models have sufficient footprint to make good contact with the print bed. If so, this setting will help you make good contact with the substrate.
- Special Modes . If you are printing more than one model, this option will allow you to specify that they will be printed one by one.
3D Print Quality Settings
- Quality . Every 3D printer has a maximum and minimum material layer height. In this window, you can specify the desired layer height. 0.02 mm is high quality and slow 3D printing speed, and 0.
 6 mm is the opposite, low quality and high printing speed.
 - Shell . Choice of wall thickness. Thicker walls will allow you to print a more rigid model with a better surface. If a nozzle with a diameter of 0.4 mm is used, then the wall thickness must be set proportionally: 0.4, 0.8, 1.2 mm, etc.
- Top/Bottom Thickness . Again, as a rule, it is set in proportion to the size of the nozzle. One recommended practice is to start with twice the size of the nozzle diameter.
Material settings
- Material . Each material for 3D printing has its own characteristics. In most cases, the ability to use a particular material is determined by the structural components of a 3D printer, and not by software. So this setting is unlikely to be useful to you.
- Enable Retraction . It is recommended to always enable this option. Thanks to it, the material is fed in the opposite direction during the idle movements of the extruder.
Speed settings
- Print Speed . This is the overall speed of 3D printing during direct feed. Generally speaking, the lower the speed, the better the print quality. The recommended 3D printing speed is 60mm/s. If you want to increase this speed, it is recommended to increase the printing temperature at the same time ( Printing Temperature ).
- Travel Speed . This is the speed at which the print head moves when no media is being fed. On the Ultimaker 2, this speed is set to 120 mm/s by default. This speed is recommended to be set depending on the speed of direct printing. And to be more precise, it is 2 times more. In this case, acceleration and deceleration will occur smoothly enough to provide high-quality and at the same time fast printing.
Infill settings
Infill Density . This is the amount of material that is fed to the inside of the model.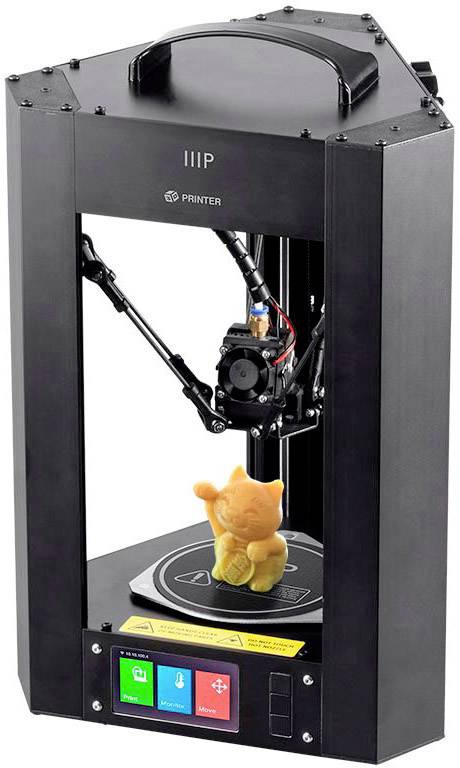 The higher the filling, the greater the rigidity of the model. As a rule, this parameter is set to 20%.
Cooling
Enable Fan Cooling . Disabling this option is not recommended. As a rule, no matter what material you use, cooling is necessary for high-quality 3D printing.
Support material settings
- Option Enable Support is best left unchecked unless you are 100% sure you don't have nodes with sudden angle changes.
- Option Placement allows you to choose where the supports will be located: Touching Build Plate means that the supports will be located only on the print table. Everywhere means that support structures can also be based on the part.
Bed adhesion settings
One of the most common 3D printing problems is when the model comes off the print bed. Buil Plate Adhision are just the settings that help improve the contact between model and bed. There are three options for improved contact - Skirt , Brim or Raft .
Skirt . This is the setting that is best used at all times. This is the line around the 3D model during the first layer printing that helps clear the nozzle when the 3D print starts.
Brim . These are a few additional lines that are printed before the first layer of the model and provide better adhesion of the bottom layer of the model and the table.
Raft . Grid under the first layer of the 3D model, thanks to which the contact between the model and the table is significantly improved.
Each of the listed settings has additional options that will allow you to more flexibly adjust the quality of the contact between the 3D model and the print table.
G-code file generation
Once you have defined these settings, the model will be ready to print. All that's left is to export the file from Cura 3D to a card or directly to a printer.