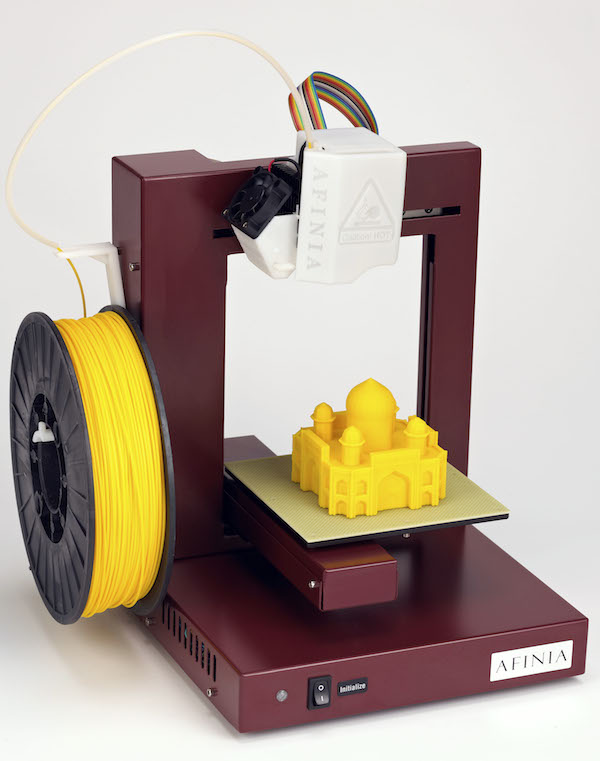
3D printer thermocouple
Temperature sensors used in 3D printers
This post will help you understand the differences and the operation of most common temperature sensors used in 3D Printing.
Each type of sensor has many key performance aspects and the goal of this topic is to compare them in details.
Part 1 will explain the most common sensor types and will take a look at the boards.
Part 2 will go in details about the performance between sensors while keeping in mind the 3D printer application.
Part 3 will provide explanations regarding our choice to go with a thermistor. Finally, some common mistakes are explained regarding temperature sensors.
Do not hesitate if you have any comments or suggestions that could improve this blog.
The most common sensor types are the following:
Thermistor
Thermistor are resistor whose resistance changes with temperature. Most commonly used type in 3D printers is NTC, standing for “Negative Temperature Coefficient”. When the temperature increase, the resistance decrease.
They are made from semiconductors, mostly silicon and germanium, and their resistance value can vary by many order of magnitude in their temperature range. A 100k NTC thermistor has a resistance of 100kΩ (100 000Ω) at room temperature (20°C) and drops as low as 100Ω at 300°C.
RTD
RTD are very similar to thermistors in term of operation. Rather than having a semiconductor, these are made from metals, mostly platinum, nickel or copper. RTD stands for “Resistance Temperature Detectors”. Most commonly used type in 3D printers is PT100. It has a resistance of 100Ω at 0°C.
With an RTD sensor, the resistance slowly increases with temperature. At 400°C, a PT100 will reach 250Ω. The variation is almost linear.
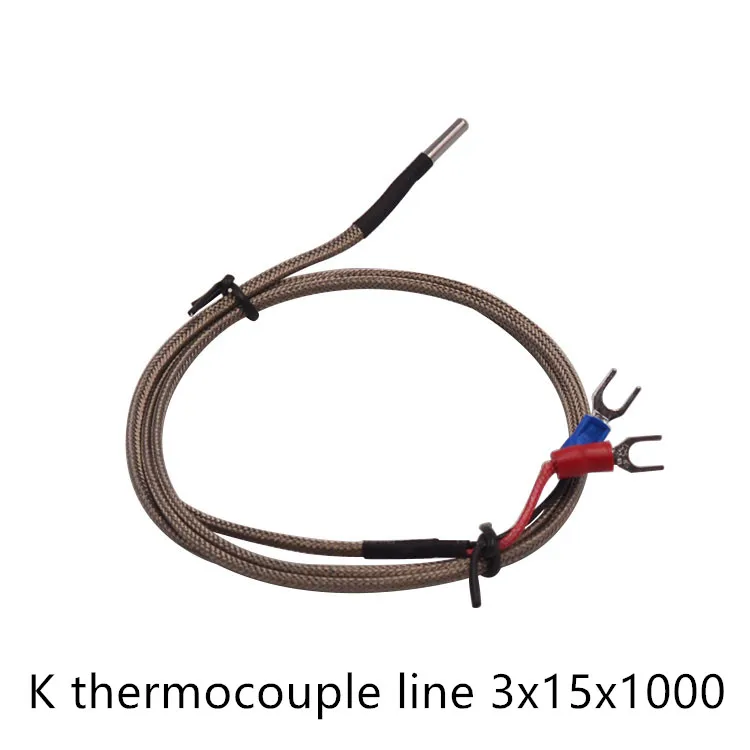
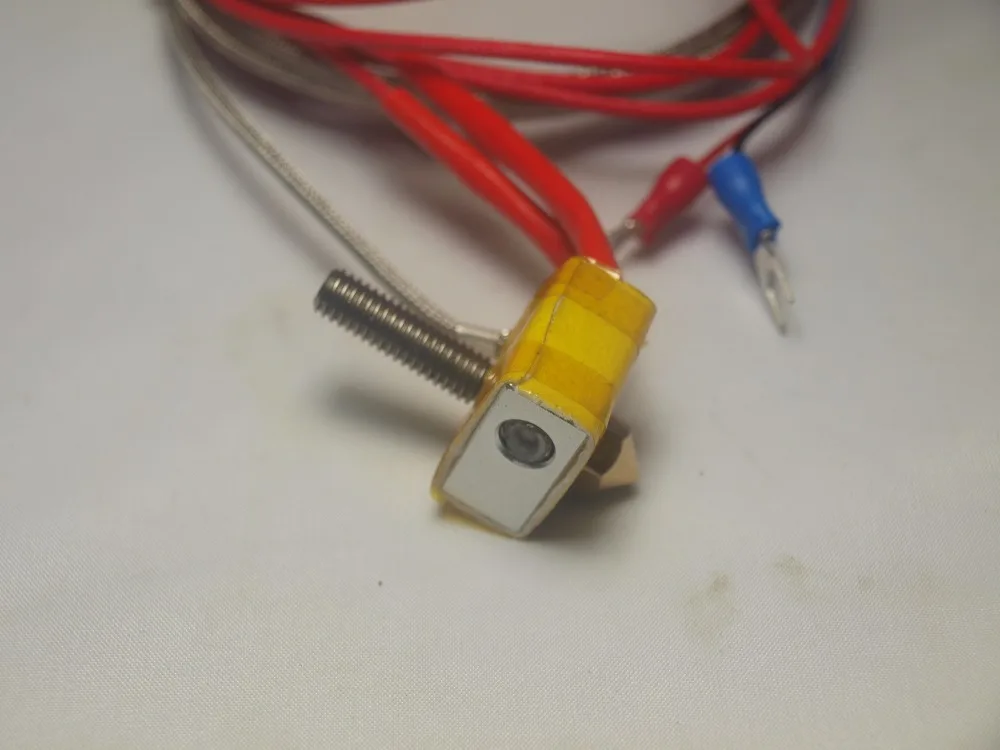
Thermocouple
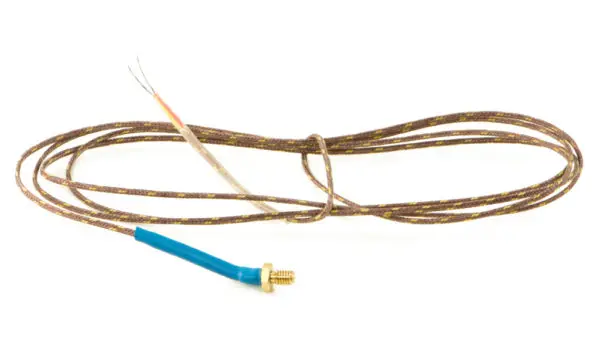
Thermocouple operates in a totally different way than the other sensors. They are made from two different metals which generate a very small voltage depending on temperature. The most common type used in 3D printers is K and is made from chromel and alumel.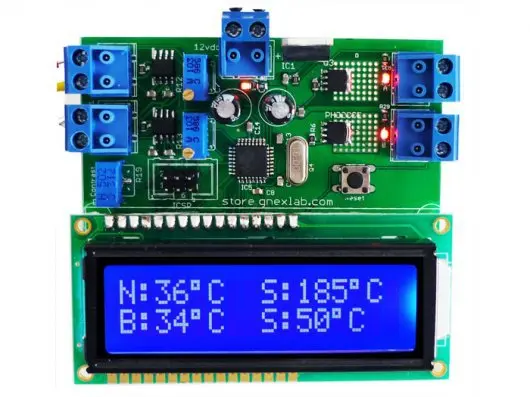
The voltage increase from 0mV to 20mV from 0°C to 500°C. As with PT100, the variation is almost linear at 41 µV/°C.
Please note that the picture shows a welded bead sensor which shouldn’t be used inside a 3D printer. The actual thermocouple should be inside an electrically insulated housing to prevent any noise or ground effect. A housing can be threaded, cylindrical or flat (crimped).
3D Printers manufacturer and motherboard sensor table
Here is a list of 3D printer manufacturers with the sensor types they are using.
The main driving part inside a printer for sensor choice is the motherboard. Each motherboard has unique components which decide what sensor is meant to be used. The most common is the thermistor, which only requires a pull-up resistor to work.
Both RTD and thermocouple require an IC (Integrated Circuit) built for processing their respective signal. These add-on boards are compatible with most boards via I2C and SPI pins for communication, or analog pins.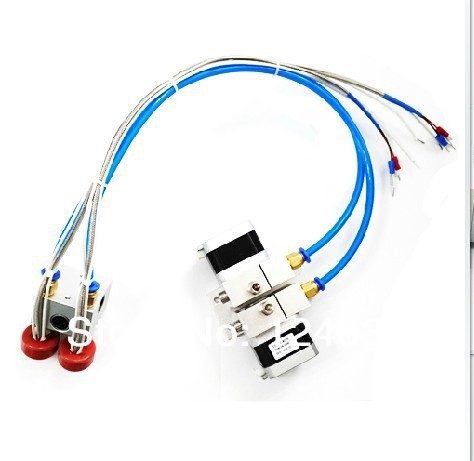 Some specialized boards, such as the Duet Wifi, offer specialized add-on board to enable thermocouple and RTD readings.
| Thermistor | RTD | Thermocouple | |
|---|---|---|---|
| Printers | Prusa, Robo3D, BCN3D, Kossel, Makergear, MendelMax, LulzBot, Printrbot, Mendel90, And many more RepRap… | Ultimaker | MakerBot, FlashForge, CTC, Wanhao Duplicator |
| Motherboards 8 bits | RAMPS, Rambo RUMBA, Melzi, Sanguinololu, Generation 6, Azteeg X1, Azteeg X3 | Ultimaker PCB, Ultimaker Board | MightyBoard, Azteeg X3 Pro, Megatronics |
| Motherboards 32 bits | Smoothieboard, AZSMZ, R2C2, Generation 7, Duet, Replicape | Alligator Board | RADDS |
Thermal sensor performance
Below is a graphical comparison for certain key aspects of temperature sensing in 3D printers.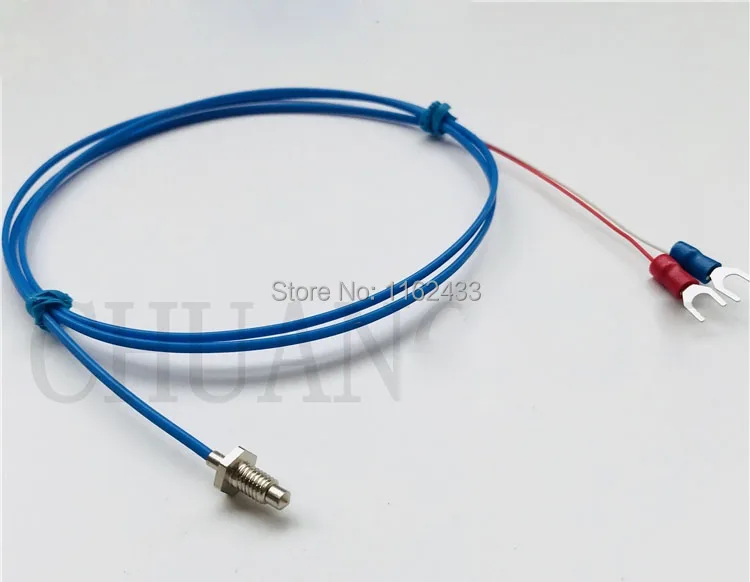 Please note that these values are based on the most common microcontroller configuration used in 3D printing, which is 8 bits microcontroller with 10 bits ADC. Having a higher resolution will improve resolution. Most 32 bits microcontroller benefit from a 12 bits ADC.
Better resolution can be obtained with specialized measurement devices, such as MAX31855, AD595, MAX6675 for thermocouple and MAX31865 for RTD, these are considered with both the RTD and thermocouple, as they are required.
The key performance aspects will be explained and detailed in part 2.
Thermistor
RTD
Thermocouple
Conclusion
Thanks for reading! This part was a short summary of thermal sensors used in 3D printer.
Follow on the next part, there will be a lot of interesting details about performance and in depth analysis!
Source
Sources
Control Engineering : Temperature tutorial
Improving the accuracy of temperature measurements
Overview of temperature sensors
RTD and thermistor comparison
PT100 tolerance classes
Thermocouple accuracy
Thermistor Accuracy
3D Printer Thermistor Guide – Replacements, Problems & More – 3D Printerly
The thermistor on your 3D printer serves an important function, though some people can get confused on what exactly it does, and how it helps out.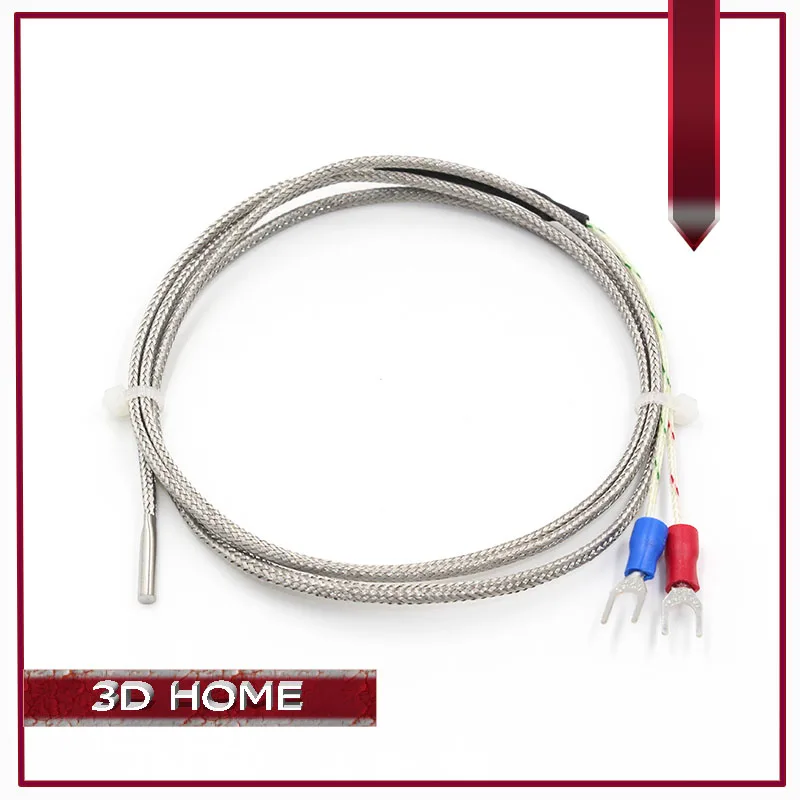 I wrote this article to set people on the right path on thermistors so they can understand it better.
In this article, we are going to explain all about thermistors to you. We’ll show you everything you need to know, from how to calibrate your thermistor to how to change.
So, let’s get started with a simple question, “What do thermistors do?”.
What Does a Thermistor Do in a 3D Printer?
A thermistor is an important component in FDM printers. Before we talk about its job, let’s define what a thermistor is.
Thermistors – short for “Thermal Resistors”- are electrical devices whose resistance varies with temperature. There are two types of thermistors:
- Negative Temperature Coefficient (NTC) Thermistors: Thermistors whose resistance decreases with increasing temperature.
- Positive Temperature Coefficient (PTC) Thermistors: Thermistors whose resistance increases with an increase in temperature.
The sensitivity of thermistors to changes in temperatures makes them suitable for temperature-sensitive applications.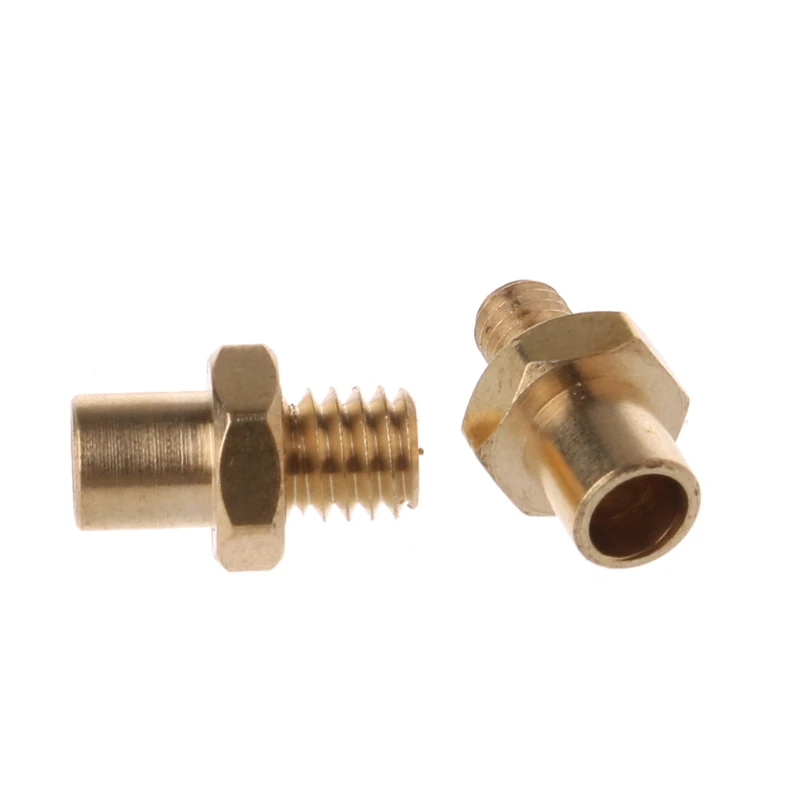 These applications include circuit components and digital thermometers.
How Is A Thermistor Used In 3D Printers?
Thermistors in 3D printers serve as temperature sensing devices. They are found in temperature-sensitive areas like the hot end and the heated bed. In these areas, they monitor the temperature and relay the data back to the micro-controller.
The thermistor also serves as a control device. The printer’s micro-controller uses the thermistor’s feedback to control the print temperature and keep it within the desired range.
3D printers mostly use NTC thermometers.
How Do You Replace & Attach a Thermistor to a 3D Printer?
Thermistors in 3D printers are very fragile instruments. They can break or lose their sensitivity easily. Thermistors control important parts of the printers, so it’s necessary to make sure they are in tiptop shape all the time.
Thermistors in 3D printers are often in hard to reach areas, so removing them can be a bit tricky.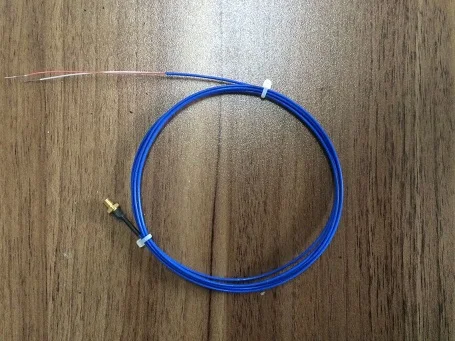 But don’t worry, as long as you exhibit caution and follow the steps carefully, you will be fine.
Two main 3D printer components contain thermistors- The hot end and the heated print bed. We’ll be taking you through the steps for replacing thermistors in both.
What You’ll Need
- Set of screwdrivers
- Tweezers
- A set of Allen keys
- Pliers
- Kapton tape
Replacing the Thermistor on Your Hot End
When replacing a thermistor in the hot end, unique procedures exist for different printers. But for most models, these procedures are the same with a little variation. Let’s go through them:
Step 1: Consult the datasheet for your printer and get the appropriate thermistor for it.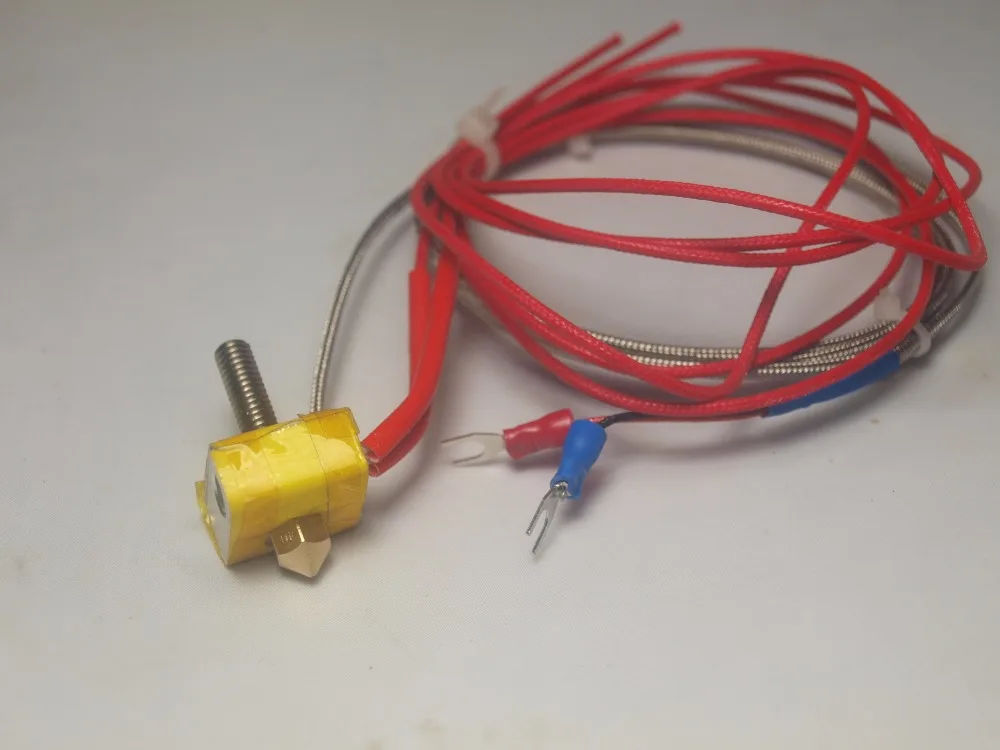 You can find more information about this in the article.
Step 2: Before you start, make sure you follow the appropriate safety tips.
- Make sure the 3D printer is powered down and disconnected from all power sources.
- Ground yourself if necessary.
- Make sure the hot end is cooled to room temperature before you attempt to disassemble it.
Step 3: Remove the hot end from the printer’s frame.
- This might not be necessary if the thermistor’s position is accessible from the outside.
- Remove all the screws holding the hot end and its wires in place.
Step 4: Remove the old thermistor from the hot end.
- Loosen the screw holding it in place on the bloc and remove it.
- Sometimes, there can be caked plastic on the block preventing this. You can use a heat gun to melt this away.
Step 6: Disconnect the thermistor from the micro-controller.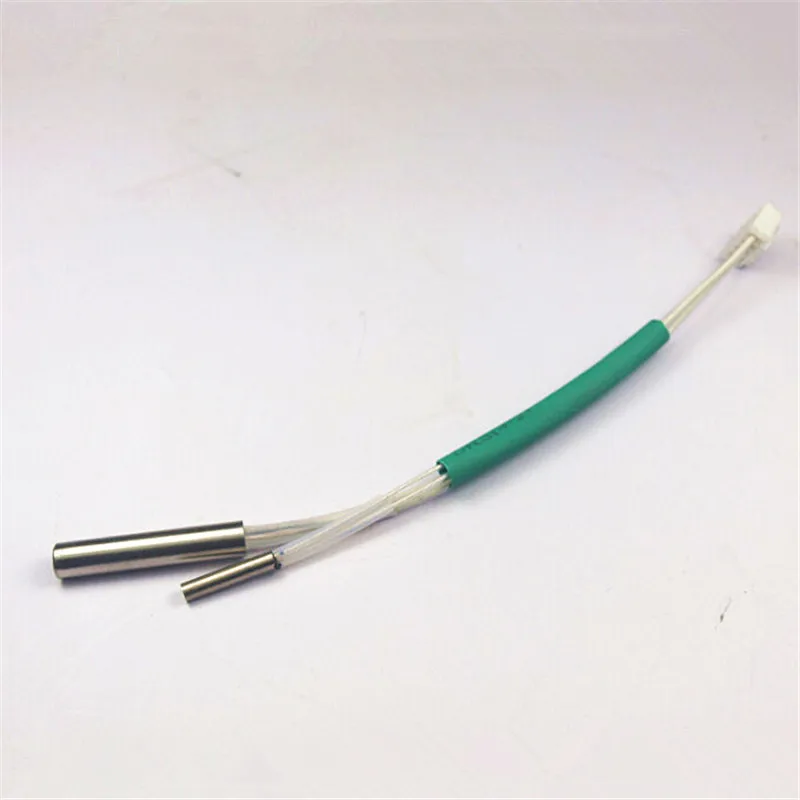
- Open the processing unit of the printer.
- Access the micro-controller and remove the thermistor connection with a tweezer.
- Be careful to make sure you remove the right wire. Consult your manufacturer’s specifications to make sure you know the wire to remove.
Step 7: Install the new thermistor
- Plug the end of the new sensor into the micro-controller.
- Carefully place the head of the new thermistor in its hole in the hot end.
- Screw it in place lightly. Be careful not over-tighten the screw so as not to damage the thermistor.
Step 8: Finish up
- Cover up the printer’s processing unit.
- You can use the Kapton tape to hold the wires firmly together to avoid movement.
- Re-attach the hot end to the printer’s frame.
Replacing the Thermistor on Your Print Bed
If your 3D printer comes with a heated print bed, there’s a good chance that it also has a thermistor there.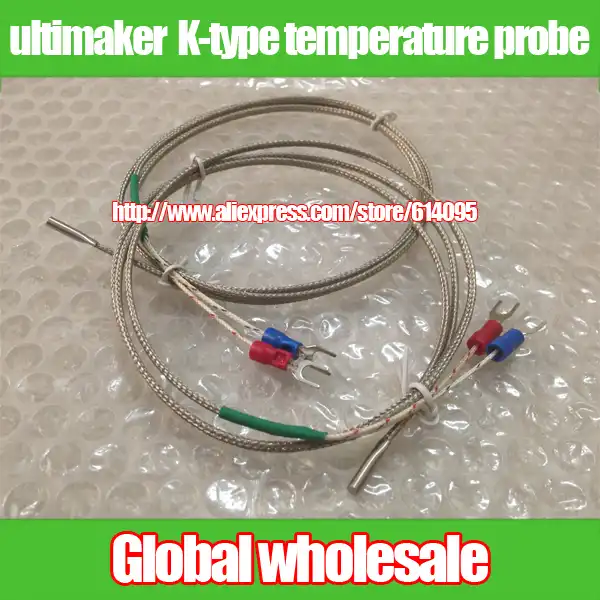 The steps for replacing the thermistor on a print bed varies from model to model, but it’s mostly similar. Let’s how you how to:
Step 1: Follow the appropriate safety tips before starting.
Step 2: Remove the print bed
- Disconnect the print bed from the PSU (Power Supply Unit).
- Remove all the screws holding it to the frame of the printer.
- Lift it up and away from the frame
Step 3: Remove the insulation covering the thermistor.
Step 4: Remove the thermistor
- The thermistor can be arranged in many ways. It can be secured to the bed with Kapton tape or secured with a screw.
- Remove the screws or the tape to free the thermistor.
Step 5: Replace the thermistor
- Cut off the legs of the old thermistor from the sensor’s wire.
- Attach the new thermistor to the wire by joining them together.
- Cover the connection with electrical tape
Step 6: Finish up
- Attach the thermistor back to the bed
- Replace the insulation
- Screw the print bed back onto the frame of the printer.
How Do You Check the Resistance of a Temperature Sensor?
Resistance is not a value that can be measured directly. To find the thermistor’s resistance, you’ll have to induce current flow in the thermistor and measure the resulting resistance to it. You can do that with a multimeter.
Note: It’s a thermistor, so the reading will vary across temperature. It’s best to take your reading at room temperature (25℃).
Let’s go through the steps on how to check the resistance.
What You’ll Need:
- A multimeter
- Multimeter probes
Step 1: Expose the legs of the thermistor (strip away the fiberglass insulation).
Step 2: Set the Multimeter range to the rated resistance of the thermistor.
Step 3: Apply the multimeter probes to both legs, and the multimeter should display the resistance.
Most 3D printing thermistors have a resistance of 100k at room temperature.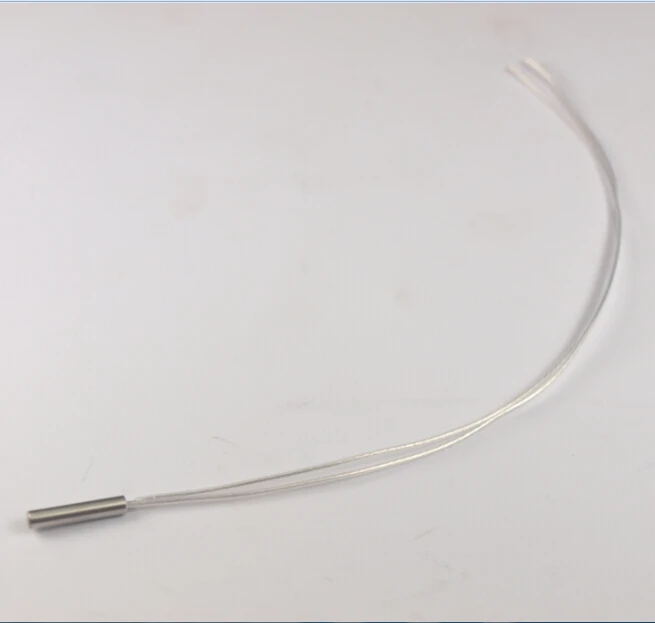
How to Calibrate Your 3D Printer Thermistor
An uncalibrated thermistor is very bad for 3D printing. Without accurate temperature measurement and control, the hot end, and the heated bed cannot function properly. So, as part of routine maintenance, you should make sure your hot end is always calibrated properly.
Let’s show you how to do it:
What You’ll Need:
- A thermocouple equipped multimeter
Step 1: Test the multimeter’s thermocouple.
- Boil a small amount of water.
- Dip the thermocouple into the water.
- It should read 100℃ if it’s accurate.
Step 2: Open the printer’s firmware.
- In the printer’s program file, there’s going to be an Arduino file controlling the hot end.

- You can check with your manufacturer or on online forums to find the file’s location for your printer.
Step 3: Attach the multimeter’s thermocouple to the hot end.
- Find a space between the hot end and the nozzle and stick it in.
Step 4: Open the temperature table in the firmware.
- This is a table containing the values of thermistor resistance versus temperature.
- The printer uses this file to determine the temperature from the resistance measured.
- Copy this table and delete the temperature column in the new table.
Step 5: Fill out the table.
- Set the hot end to the temperature value in the old table.
- Measure the correct temperature reading on the multimeter.
- Input this reading to the resistance value on the new table corresponding to the value on the old table.
- Repeat these steps for all resistance values.
Step 6: Replace the table.
- After finding the accurate temperature for all the resistance values, delete the old table and replace it with the new one.
How Do You Know If a Thermistor is Bad on a 3D Printer?
The signs of a malfunctioning thermistor vary from printer to printer. It can be as clear as a diagnostic message flashing on the printer’s interface, or it can be as bad as a thermal runaway.
We’ve compiled a list of some of the most common signs that indicate a problem with your 3D printer’s thermistor. Let’s go through them:
Thermal Runaway
Thermal Runaway is the worst-case scenario for a bad thermistor. It occurs when a faulty sensor supplies the wrong temperature to the printer. The printer then keeps transmitting power to the heater cartridge infinitely until it melts the hot end down.
Thermal runaway can be very dangerous. It can result in fires that can destroy not just your printer but the surrounding areas. Luckily, most manufacturers have included firmware safeguards in place to prevent this from occurring.
Higher Than Usual Print Temperatures
Materials usually come with recommended print temperatures. If the printer requires a higher temperature than the rated temperature to extrude the materials, the thermistor can be faulty.
You can run a diagnostic test on the thermistor to find out.
Symptoms of a faulty thermistor can also include:
- A large number of print errors due to temperature issues.
- Wild variations in temperature readouts.
If your thermistor cracks, it is going to fail so you want to prevent that from happening. Most times, a thermistor would break due to the screw that holds them being too tight, which shorts them out.
The screw should be slightly loose, at around half a turn back from being tight on there, since the thermistor just needs to be held in place rather than securely pressed against the hotend.
The good thing is that thermistors are fairly cheap.
Best Thermistor Replacement for Your 3D Printer
When selecting a thermistor for your 3D printer, there are some key factors to consider to get the right one.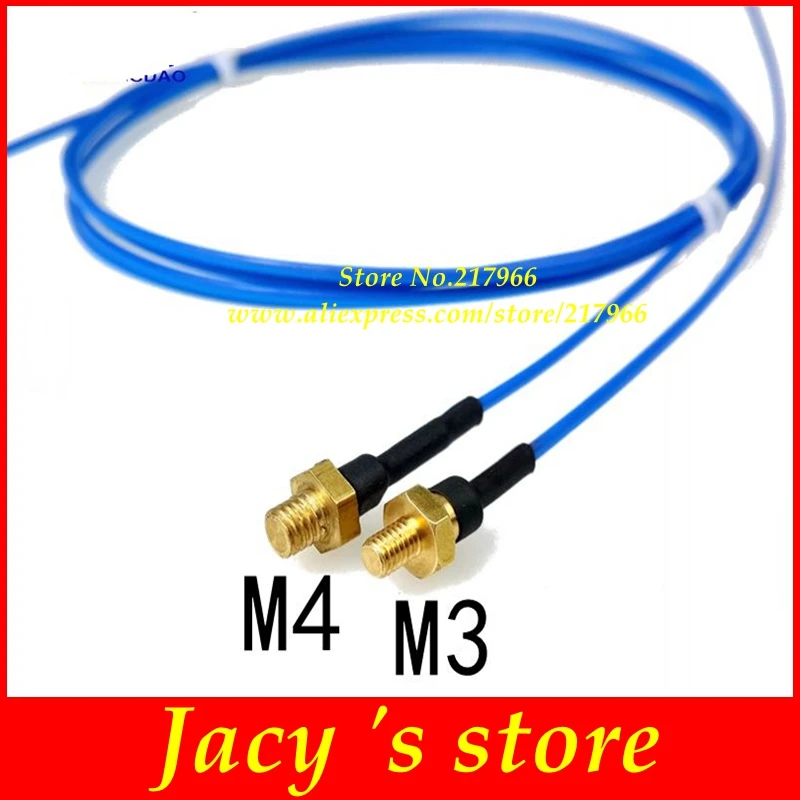 Let’s go through them.
The most important of these factors is resistance, the resistance of the thermistor matters. It determines the range of temperature the thermistor will be able to measure. 3The resistance of 3D printer thermistors is mostly 100kΩ.
The temperature range is another important factor. It determines the magnitude of temperature your thermistor will be able to measure. An acceptable temperature range for an FDM printer should be between -55℃ and 250℃.
Finally, the last factor you should look at is the build quality. The thermistor is only as good as the materials used in building it. The materials can have a high effect on sensitivity and durability.
To get the best quality, it’s advisable to go for aluminum thermistors with suitable insulation like fiberglass for the legs. This is because aluminum is very conductive to heat while fiberglass is not.
Using all the factors listed above as a yardstick, we’ve compiled a list of some of the best thermistors on the market for your 3D printer.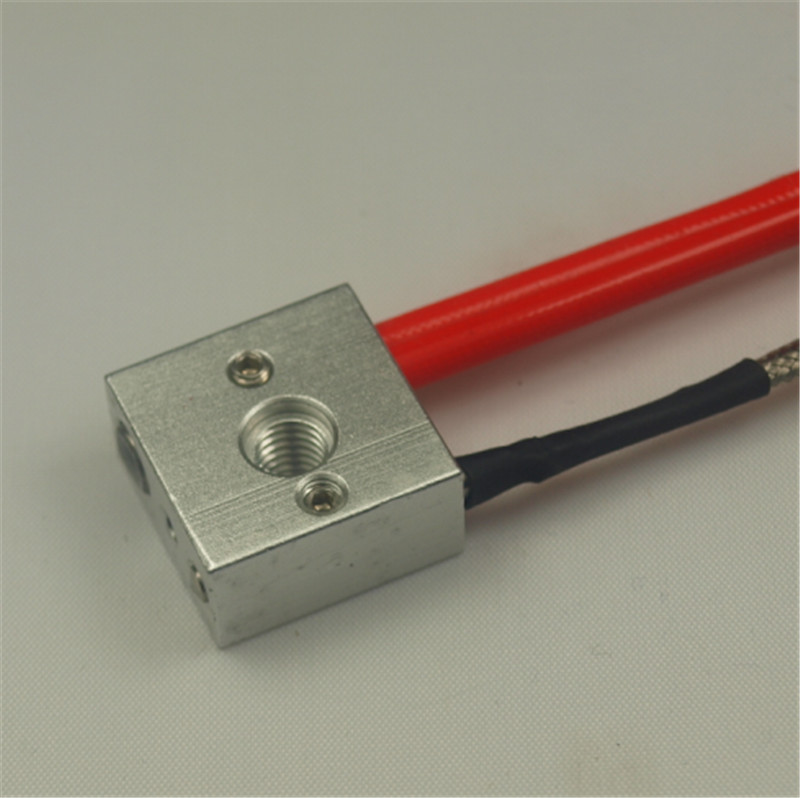 Let’s have a look at it.
HICTOP 100K ohm NTC 3950 Thermistors
Many people mention just how useful the HICTOP 100K Ohm NTC 3950 Thermistors are after using it on their 3D printers. There is more than enough length for it to suit your needs and is a perfect job for your 3D printer.
You should make sure that your firmware is set correctly beforehand.
If you’ve had the thermistors on your Ender 3, Anet 3D printer or many others out there, then this should work very nicely for you.
These thermistors can fit on a Prusa i3 Mk2s bed without issues. The temperature range is okay to go up to 300°C, then after that kind of temperature, you’ll need a thermocoupler.
Creality 3D Printer NTC Thermistor Temp Sensor
Another set of thermistors that you can go for are the Creality NTC Thermistors, which list down the Ender 3, Ender 5, CR-10, CR-10S and more. Basically any 3D printer that takes a thermistor is good to go with these.
It’s used perfectly with your heated bed or extruder as you desire.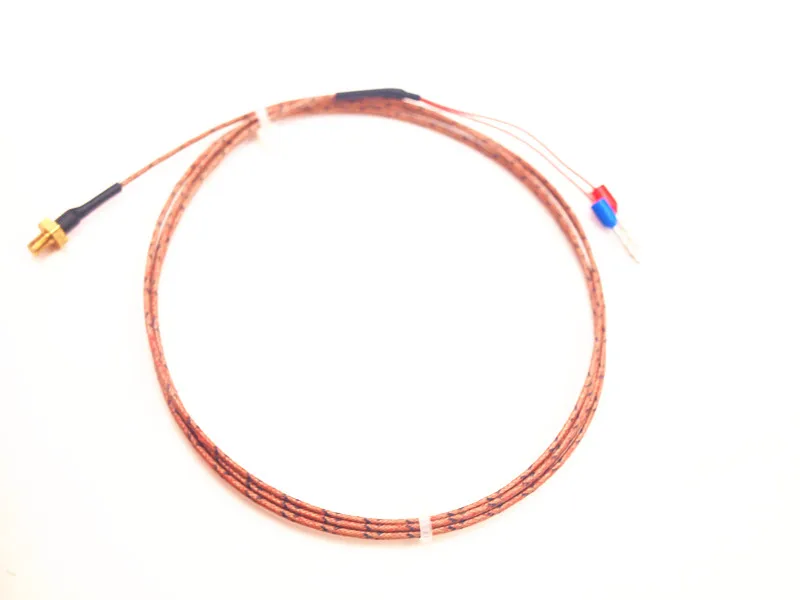
It has the standard 2-pin female connector with a wire length of 1m or 39.4 inches. The package comes with 5 thermistors with a temperature accuracy ±1%.
You should set the temp sensor number to “1” in Marlin for the best results.
If you’ve had some type of minimum temperature error on your 3D printer, these can definitely come to the rescue.
Most people had a positive experience with these, where they fit and work fine, as well as having spares just in case.
One user who purchased an Ender 5 Plus had temperature readings of -15°C or 355°C max. temperature change their thermistor to these and solved the issue.
Some people have complained that they can come up a little short on the Ender 3, and required the wiring for the fans and heater cartridge to be looped above the assembly to use the sleeve and keep it together.
You can splice the thermistor, then solder it in if needed.
Others have used it as a direct plug replacement on the Ender 3 though.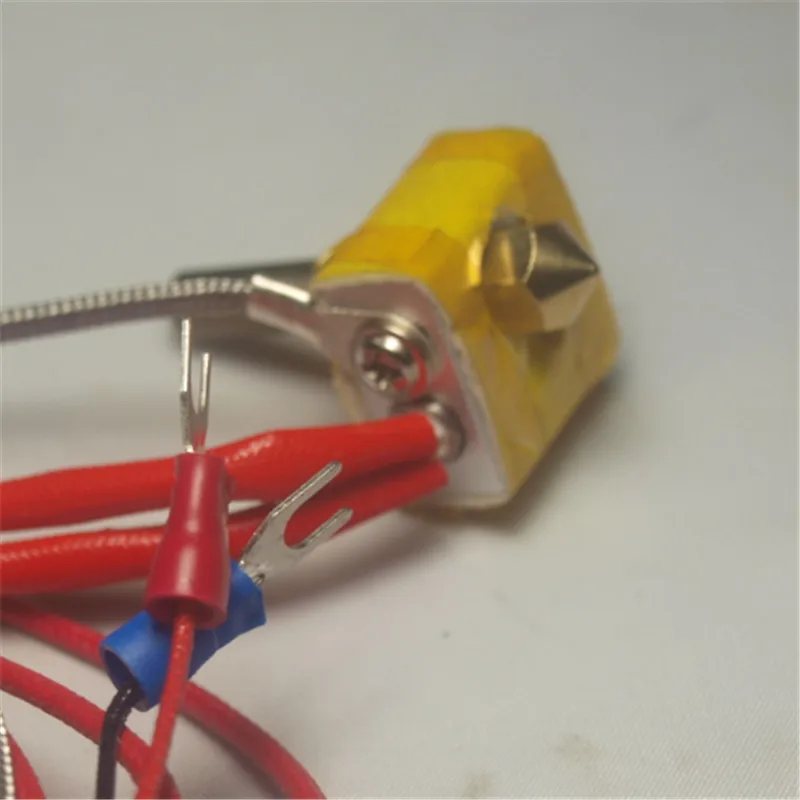
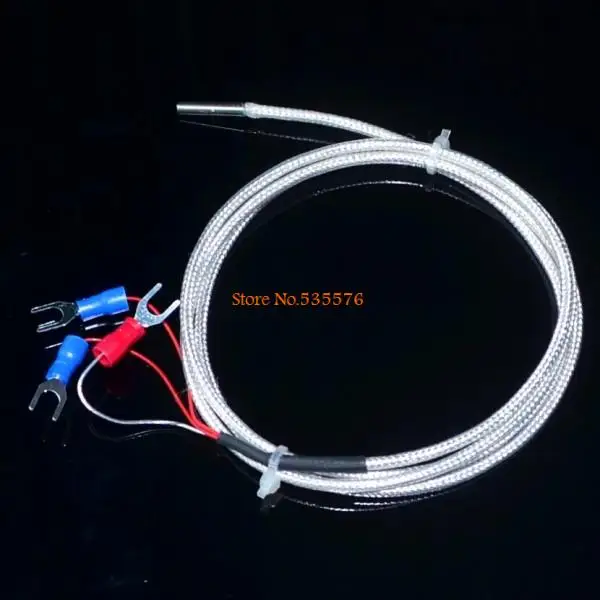
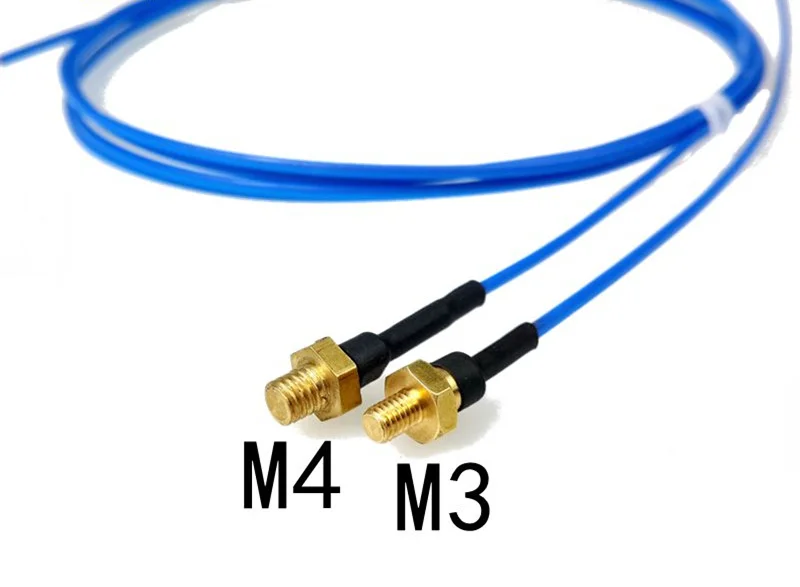
415 rub. Thermocouple PT100 M6 for 3D printer, 3 pin, 1m
1-click order
Delivery:
The PT100 thermocouple is the simplest form of thermocouple. It consists of two pieces of thermocouple wires connected together with a weld. Because the wire bead is exposed, there are several application limitations.
Beaded wire thermocouple should not be used with liquids that can corrode or oxidize the thermocouple alloy. Metal surfaces can also be problematic. Often, metal surfaces, especially pipes, are used to ground electrical systems. Indirect connection to the electrical system may affect thermocouple measurement. In general, beaded wire thermocouples are a good choice for measuring gas temperatures. Because they can be made very small, they also provide very fast response times.
How does a thermocouple work?
When two wires of dissimilar metals are connected at both ends and one of the ends is heated, a continuous current flows in the thermoelectric circuit.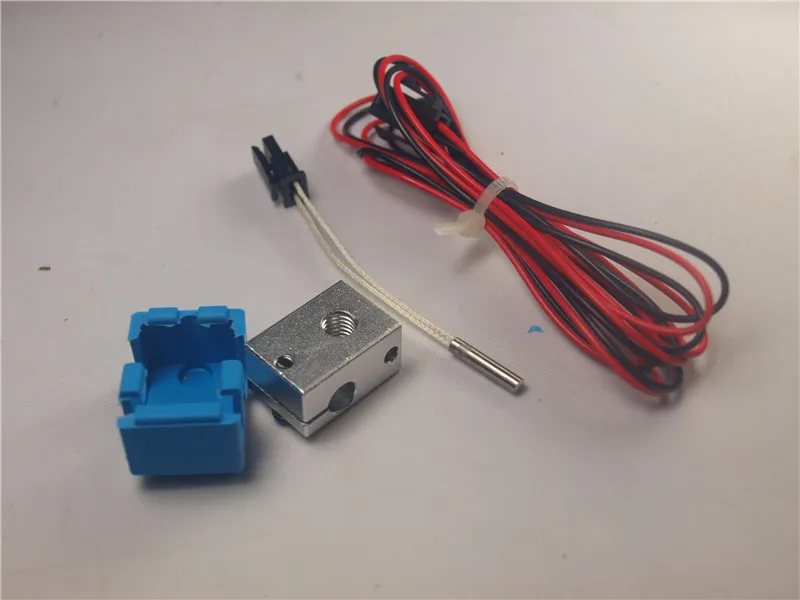 If this circuit is broken at the center, the open circuit network voltage (Seebeck voltage) is dependent on the degree of transition and the composition of the two metals. This means that when a PT100 thermocouple junction heats up or cools down, a voltage is created that can be correlated back to temperature.
Types of couples
Different combinations of thermocouples with calibrations are available. The most common are "Base Metal" thermocouples, known as types N, T, E, J, and K. There are also high temperature calibrations known as Noble Metal thermocouples - types R, S, C, and GB.
Note that thermocouple calibrations define temperature ranges. However, the maximum ranges of such a definition are limited by the diameters of the wires themselves. That is, a very thin thermocouple may not reach the full temperature range.
Type K thermocouples are known as general purpose thermocouples due to their low cost and temperature range.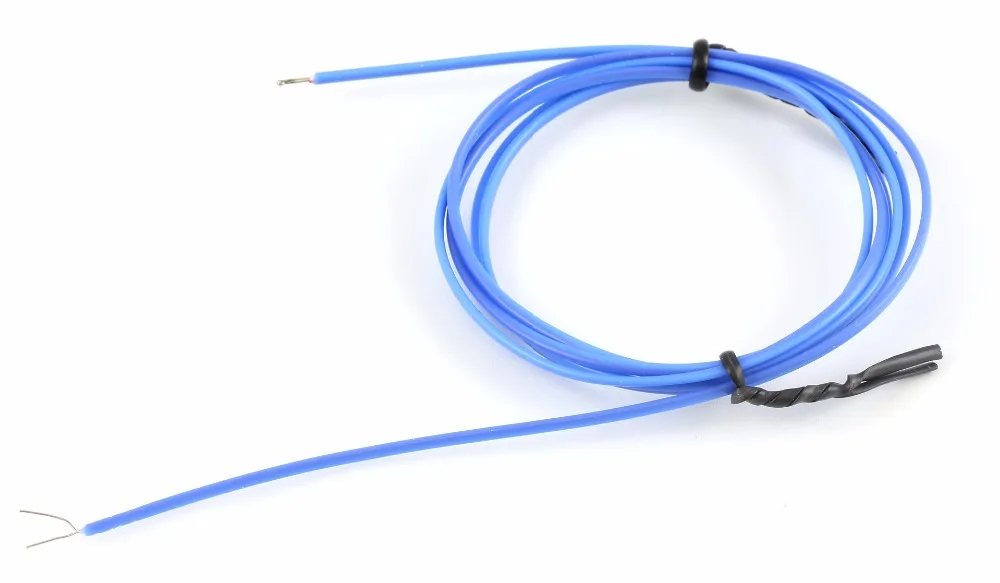
How to choose the type of thermocouple?
Because thermocouples measure over wide temperature ranges and can be relatively rugged, thermocouples are very commonly used in industry.
The following criteria are used when selecting a thermocouple:
- temperature range;
- chemical resistance of thermocouple or sheath material;
- abrasive and vibration resistance;
- definition of response time.
The basic response time of a pair depends on the straight type and its material density. The usual stable density stress is 63%. In addition, in order to stepwise measure the step values at 100% determination, 5 time variables are required. Thermocouple types that have an open connection type respond much faster than the closed type. Another indicator is the diameter of the umbrella itself. The smaller it is, the greater the response, but this may affect the measurement temperature of a particular area.
How do I know which connection type to choose?
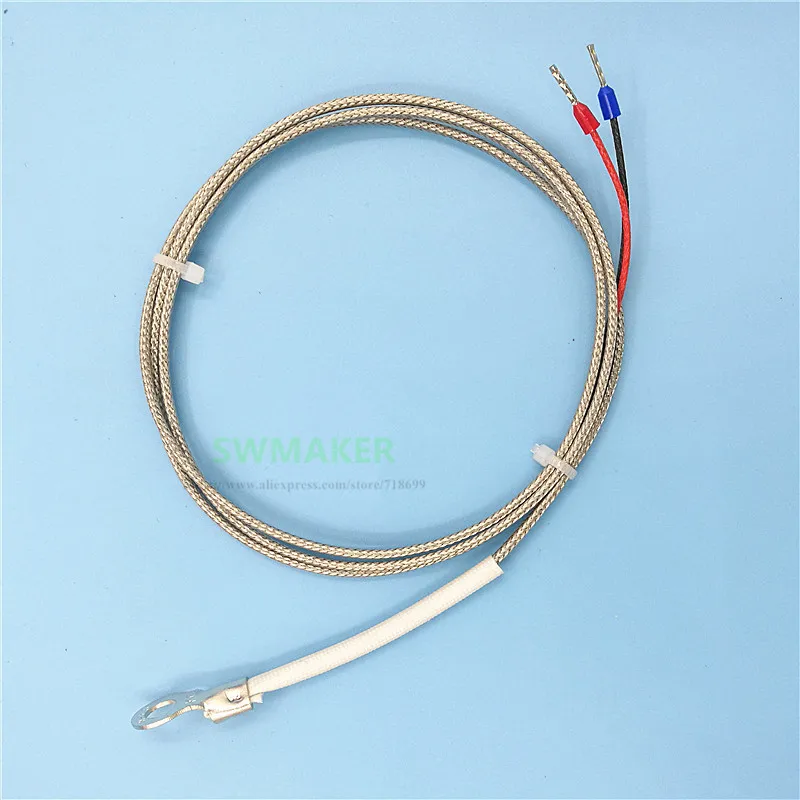
Available in 3 different designs.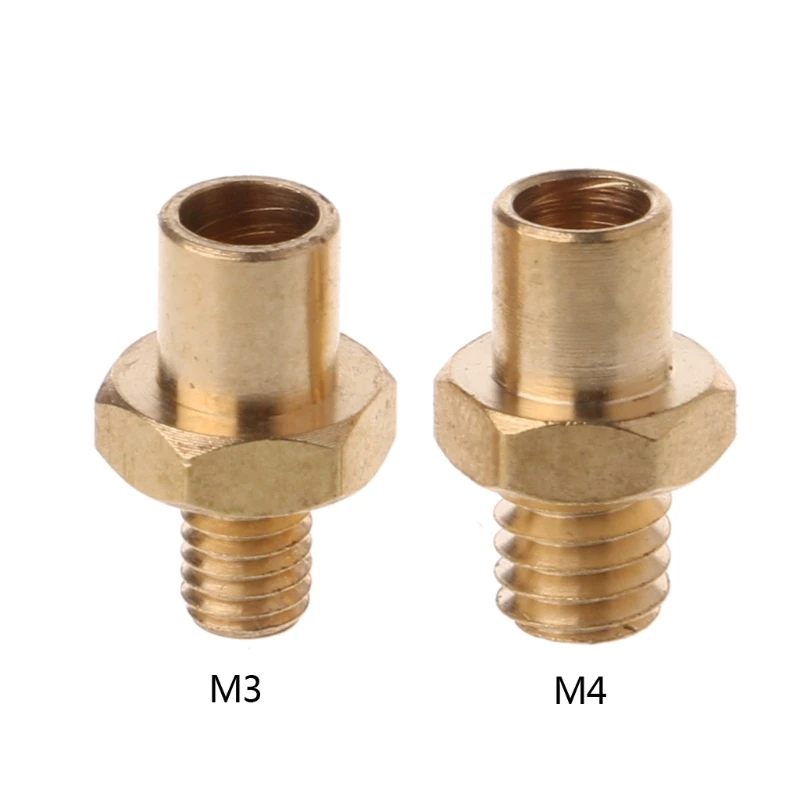
It can be:
- earthed;
- open;
- ground.
On ungrounded types of thermocouples, the probes are attached to the tips of the connecting drives by a physical method. Fixation is made on the inner wall of the probe. This allows a good transfer of heat from the outside from the probe itself to the thermocouple. The ungrounded type of thermocouple allows disconnection from the probe. At the same time, the response time is much lower than that of a grounded pair. However, it has much more electrical insulation.
The exposed thermocouple protrudes from the sheath tip and is exposed to the environment. This type provides the best response time, but limited use in non-corrosive and non-hermetic applications.
Earth connection recommended for measuring static or flowing corrosive gases and liquids and for high pressure applications. The grounded thermocouple connection is welded to the containment, providing a faster response than the ungrounded connection type.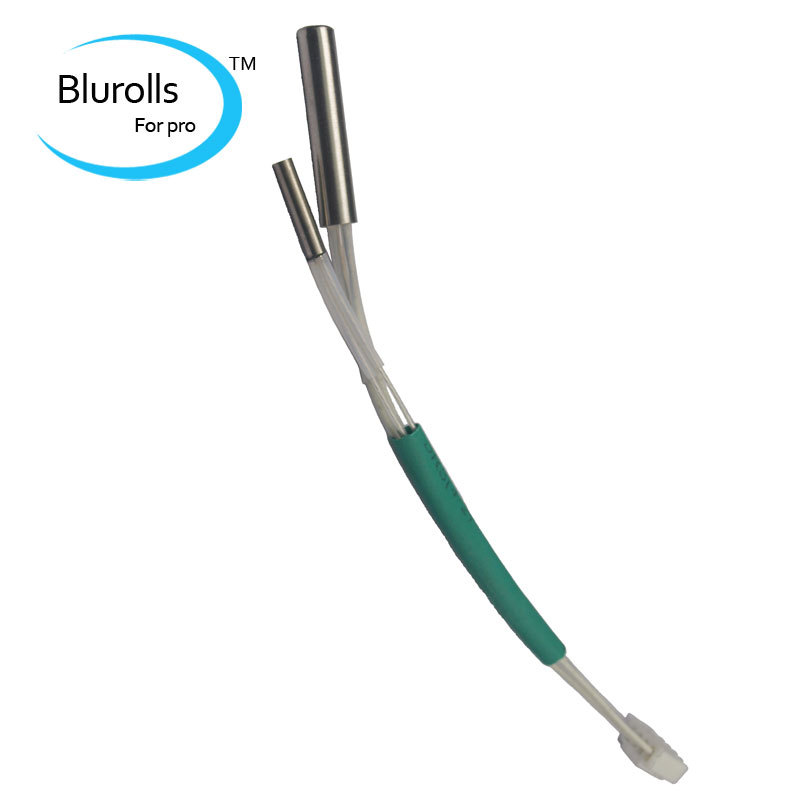
The emergency connection is recommended for measurements in harsh environments where it is desirable to have a thermocouple electronically isolated from the sheath and protected by the sheath. The weld wire thermocouple is physically isolated from the thermocouple sheath by MgO (soft) powder.
For measuring static or flowing non-aggressive gas temperatures, an open connection is recommended where a fast response time is required. The connection extends beyond the protective metal sheath to ensure accurate fast response. The shell insulation is sealed when the connection is expanded to prevent moisture or gas from entering, which can cause errors.
90,000 characteristics, photos and customer reviews 74.87 ₽ in the storeThe product is no longer sold, look at the similar
links copied, share it
or send
through social networks 0.7 ₽ 9008
Cheaper than average, slightly -0.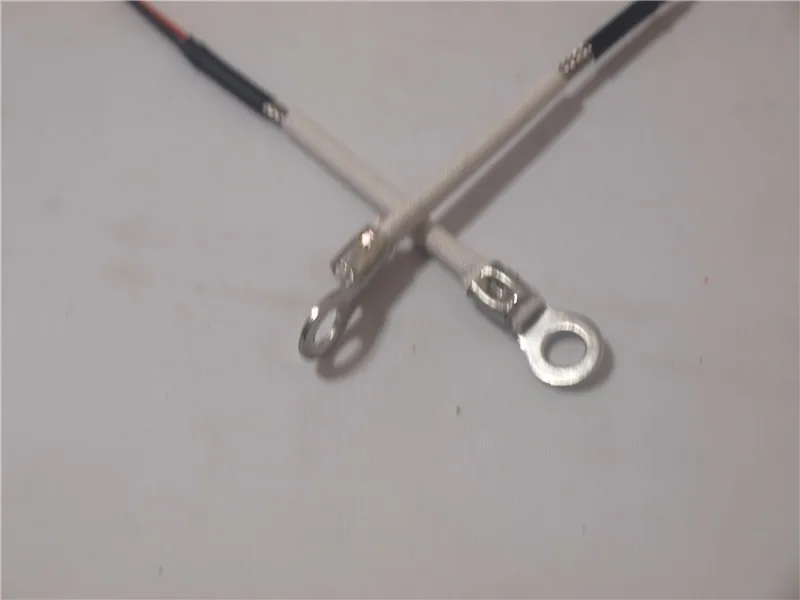 9
9
%
Reliable seller - 100%
You can safely buy, YTF Technology
- On the site for more than 7 years
- High overall rating (23501)
- Customers satisfied with communication
- Items as described
- Ships goods quickly
- 1.8% of customers were dissatisfied last 3 months
other sellers prices from 314.19 ₽
314.19 ₽
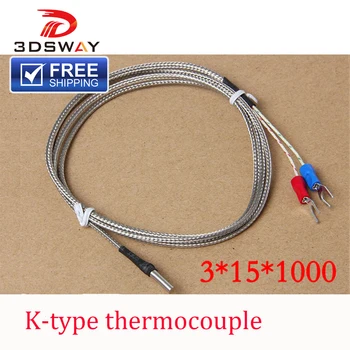
K-type thermocouple temperature sensor, thermocouple temperature measurement line 0 ~ 600℃ 3*15*1000mm, aimso5 9002 3D printer parts 0 ratings
2 orders
Reliability -100 %
Seller Aimsoar Official Store
In the store to store
found 48 similar products
-3
%
. 13.13 ₽
 WANHAO 3D -Printer, Termopri type K for d5mopra , duplicator 5/5s/duplicator, mini 3D printer, thermocouple, temperature sensor
0
1
The seller’s reliability 100 %
-3
%
97.27 ₽
9000 3D Part of thermal steam type thermal steam temperature monitoring line m3*25 for ultimaker0
0
The reliability of the seller is 100 %
-1
%
98.67 ₽
Thermocouple type E, the temperature sensor K -type thermocouple 3*15*1000
0
0 9000
Salespan 100%
-2
%
503.13 ₽
SWMAKER CTC 3D K-type thermocouple Temperature sensor-Hotend-CTC 3D Parts
0
1
Relief of 100%
9000 9,000 9,000 -0.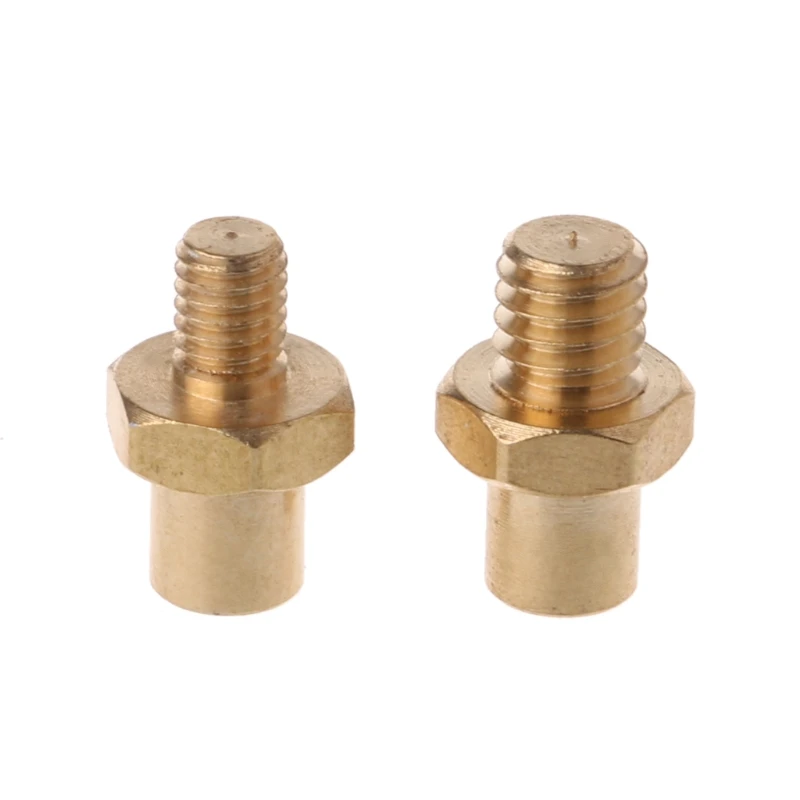 5
5
%
1 738 ₽
Accessories for 3d printer, type k thermocouple, type k temperature sensor, thermocouple 3*15*1000, standard wire, 20 pcs.
0
0
The reliability of the seller 100 %
-11
%
377.17 ₽
SWMAKER 1 pc CTC 3D K-Type Temperature-Hotend-CTC 3D Printer
1 9000 1
0
Reliability of the seller 100%
-2
%
332.38 ₽
Type k thermocouple temperature sensor, 3 m, temperature probe, temperature detection lines, type k mini connector, thermocouple wire, 5 pcs.
0
0
Reliability of the seller 83%
-1
%
k type thermocouple installation temperature sensor industrial controller 3*15*1000 for ramps 1. 4 prusa delta 3d printer parts
0
0
Seller Reliability 72%
-1
%
136.45 ₽
The temperature measurement sensor of the thermocouple type K, 2 meters
1
1
The reliability of the seller 100 %
-2
% 9000 9000 5 357 ₽
100 m 100 m 100 m 100 m /roll, k-type thermocouples, temperature sensor, standard wire 1/032kl-aff (blue temperature measurement line)
0
0
Seller reliability 89%
-3
%
swmaker 905 503. type k (tc) for original ultimaker 3d printer, 3mm type k thermocouple for original ultimaker 9 3d printer0005
3
4
The reliability of the seller is 100%
48. 98-63.68 ₽
k the temperature sensor of the temperature of 1 m of thermopara-20 ~ 500c
2
4
The reliability of the seller is 100%
582.20-
Type k fluorescent thermocouple line, high temperature glass fiber temperature measurement line, temperature measurement line 2pcs/lot
0
1
Reliable seller 89%
-22
%
48.28 ₽
Supported thermal heaters K -type YYT, 1 pc, Open -temperature sensor, high temperature measurement 1 m
1
0
The reliability of the seller is 100 %
9000222 -3
%
22.39 ₽
100 cm type k thermocouples, temperature sensor, probe, cable line for temperature controller, thermostat, thermometer
1
4
Reliability of the seller 0 0 8
125. 26 ₽
26 ₽
Thermocouple type K, 3x15x1000 mm, thermocouple of type K, electric heating, accessories for a 3D printer, free delivery
0
0
Reliability of the seller 100%
9000 308.59 ₽ 9000 9000 k type temperature 1m wire thermocouple probe -20~500c 10pcs1
1
Seller Reliability 100%
247.71 ₽
Free shipping 5 pcs k type thermocouple temperature sensor with bolt kxff accurate temperature sensor k-type 9 sensor0005
5
0
Seller Reliability 100%
Data Incomplete
90.27 – 106.36 ₽
K-type wired thermocouple, m6 thermocouple temperature controller/m6, industrial screw probe 0.5 temperature sensor
1
0
Reliability of the seller 0%
276. 40 ₽
40 ₽
Thermocouple thread temperature sensor pt100 1 m, high temperature thermocouple probe type 09 - 400c type k 50 mm
005
0
Reliability of the seller 72%
-3
%
Partial data
0
0
Seller Reliability 0%
Partial data0005
0
0
Reliability of the seller 0%
-12
%
147.65 ₽
Thermocouple module type k max31855, temperature sensor, 1 pcs.
1
5
Reliable seller 100%
692.06 ₽
K-type thermocouple for 3d printer, with temperature sensor-ctc, spare parts for 3d printer, 2 pcs.
0
1
Reliability of the seller 100%
124. 56 ₽
56 ₽
2 m cable k type thermocouple the temperature sensor white
0
0
The reliability of the seller 55%
9000.65 ₽White temperature sensor of the thermal heat 2 m
0
0 9000 0 9000 0 9000 0,000 0000 0000 0000 0000 0000 0000 0000 0000 0000 0000 0000 0000 0000 0000 0000 0000 0000 0000 0000 0000 0000 0000 0000 0000 0000 0000 0000 9000 0 9000 0 9000 0 9000 0 9000 0 9000 0 9000 0EL000 Creatbot 3d printer ktc/ntc temperature sensor kit k-type thermocouple with cables pinboard creatbot printer accessory p
0
0
Reliability of the seller 55%
235.82 – 330.29 ₽
Thermocouple with wire 1 m, 2 m, 3 m, temperature sensor 0 ~ 600 degrees Celsius type k, thermocouple temperature sensor 100 mm, 20 , measured ...
1
4
The reliability of the seller is 89%
163. 74 ₽
74 ₽
Module thermocouple Max31855 MAX6675 K, Temperature Sensor, Tempension Module for Arduino
0
0
The reliability of the seller is 100%
129.46 ₽
New cable 2 m k type thermocouple, temperature sensor, white
0
0
The reliability of the seller 72%
-0.3
%
384.87 -513.62 ₽ 9000 ₽ 9000 ₽ ₽
WRNT-03 The temperature sensor of the thermocouple type K-Type Wret-03
0
0
The reliability of the seller 55%
-2
%
75.57 ₽
9000 3D temperature sensor Termistor 1% 1m 1m 1m 1m 1m Line0
0
The reliability of the seller is 100%
1 048 ₽
Module of the AD597 thermocouple AD597 K, ANALIC OPTITION sensor, PLC
1
1
The seller’s reliability 66%
- 28
%
20. 29 ₽
29 ₽
Type k thermocouple, thermocouple surface temperature sensor, 1m wire, thermocouple probe -20 ~ 500c
4
7
Reliable seller
0072 -3
%
246.31-615.79 ₽
Thermocouple for a K-type 3D printer, temperature sensor for a 3D printer, thermal printing accessories, temperature sensor
0
0
The reliability of the seller 100 %
222 4ir0005
Thermocouple type K, the temperature sensor of the thermocouple, the wire 1 m, the thermoparas-20 ~ 500c
1
1
The seller’s reliability 100%
223.92 ₽
Thermopara temperature sensor K, a rogue compression spring with a cable with a cable 2 m
0
0
Reliability of the seller 89%
-6
%
0005
1
2
Reliability of the seller 100%
2 326 ₽
Free delivery, 10 sets, module Max6675 + The temperature sensor of the thermal heat type K
0
0
The reliability of the seller 89% 9000,0002 1 465 - 2 384 ₽
max31855 k module thermocouple temperature sensor new temperature measurement module
1
1
Reliable seller 100%
763. 43 ₽
43 ₽
5 pcs 1.5m k type thermocouple smd sensor k type nose sensor inner size 6mm k type thermocouple temperature sensor
1
0
Reliability of the seller 100%
111.96 ₽
2 m cable K type thermocouple temperature sensor white
0
0
Reliability of the seller 85%
-3 9000 9000%
369.47 - 1 355 ₽
Miniature high temperature thermocouple type k thermo-couple wire type k temperature measuring head 500c 700c sensor cable
0
0
Reliability of the seller 66%
-1
%
55.28 ₽
Thermocarar type K Greatzt, the temperature temperature sensor of thermocouple, wire 1 m, thermopara -20 ~ 500c
1
1
Reliability of 100 %
-1
%
$12.