3D printing mechanism
How do 3D printers work?
by Chris Woodford. Last updated: April 24, 2021.
Even the best artists struggle to show us what real-world objects look like in all their three-dimensional (3D) glory. Most of the time that doesn't matter—looking at a photo or sketch gives us a good-enough idea. But if you're in the business of developing new products and you need to show them off to clients or customers, nothing beats having a prototype: a model you can touch, hold, and feel. Only trouble is, models take ages to make by hand and machines that can make "rapid prototypes" cost a fortune (up to a half million dollars). Hurrah, then for 3D printers, which work a bit like inkjets and build up 3D models layer by layer at up to 10 times the speed and a fifth the cost. How exactly do they work? Let's take a closer look!
Photo: 3D printing in action: this is the printhead of an Invent3D printer, slowly building up an object, layer by layer, by squirting molten blue plastic out of its precisely moving nozzle. Photo by Cpl. Justin Updegraff courtesy of US Marine Corps.
Contents
- From hand-made prototypes to rapid prototyping
- How does a 3D printer work?
- Q: What kind of "ink" does a 3D printer use? A: ABS plastic!
- Advantages and disadvantages
- Applications
- Medicine
- Aerospace and defense
- Visualization
- Personalized products
- The future of 3D printing
- Find out more
From hand-made prototypes to rapid prototyping
Photo: A high-quality rapid prototype of a space plane made in wax from a CAD drawing by NASA. Photo courtesy of NASA Langley Research Center (NASA-LaRC).
Before there were such things as computer-aided design (CAD) and lasers, models and prototypes were laboriously carved from wood or stuck together from little pieces of card or plastic. They could take days or even weeks to make and typically cost a fortune. Getting changes or alterations made was difficult and time-consuming, especially if an outside model-making company was being used, and that could discourage designers from making improvements or taking last-minute comments onboard: "It's too late!"
With the arrival of better technology, an idea called rapid prototyping (RP) grew up during the 1980s as a solution to this problem: it means developing models and prototypes by more automated methods, usually in hours or days rather than the weeks that traditional prototyping used to take.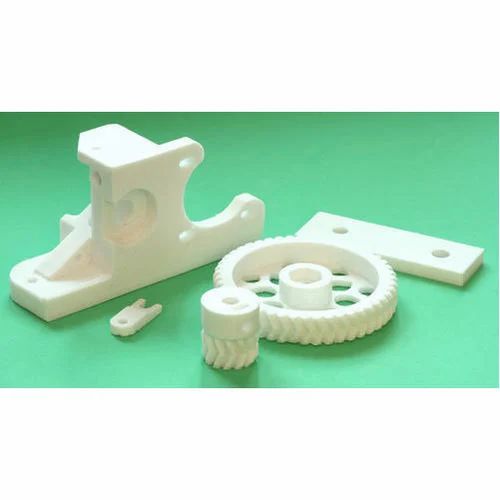 3D printing is a logical extension of this idea in which product designers make their own rapid prototypes, in hours, using sophisticated machines similar to inkjet printers.
How does a 3D printer work?
Artwork: One of the world's first three-dimensional FDM printers, developed by S. Scott Crump in the 1980s. In this design, the model (pink, 40) is printed on a baseplate (dark blue, 10) that moves in the horizontal (X–Y) directions, while the print head and nozzle (2 and 4, orange) move in the vertical (Z) direction. The raw material for printing comes from a plastic rod (yellow, 46), melted by the print head. The heating process is carefully regulated by a thermocouple (electrical heat sensor) connected to a temperature controller (purple, 86). The rod is extruded using compressed air from the large tank and compressor on the right (green, 60/62). Things have changed a bit since then, but the basic principle (of building up an object by melting and depositing plastic under three-dimensional control) remains the same. Artwork from US Patent 5,121,329: Apparatus and method for creating three-dimensional objects by S. Scott Crump, Stratasys Ltd, June 9, 1992, courtesy of US Patent and Trademark Office.
Imagine building a conventional wooden prototype of a car. You'd start off with a block of solid wood and carve inward, like a sculptor, gradually revealing the object "hidden" inside. Or if you wanted to make an architect's model of a house, you'd construct it like a real, prefabricated house, probably by cutting miniature replicas of the walls out of card and gluing them together. Now a laser could easily carve wood into shape and it's not beyond the realms of possibility to train a robot to stick cardboard together—but 3D printers don't work in either of these ways!
A typical 3D printer is very much like an inkjet printer operated from a computer. It builds up a 3D model one layer at a time, from the bottom upward, by repeatedly printing over the same area in a method known as fused depositional modeling (FDM). Working entirely automatically, the printer creates a model over a period of hours by turning a 3D CAD drawing into lots of two-dimensional, cross-sectional layers—effectively separate 2D prints that sit one on top of another, but without the paper in between. Instead of using ink, which would never build up to much volume, the printer deposits layers of molten plastic or powder and fuses them together (and to the existing structure) with adhesive or ultraviolet light.
Q: What kind of "ink" does a 3D printer use? A: Plastic!
Where an inkjet printer sprays liquid ink and a laser printer uses solid powder, a 3D printer uses neither: you can't build a 3D model by piling up colored water or black dust! What you can model with is plastic. A 3D printer essentially works by extruding molten plastic through a tiny nozzle that it moves around precisely under computer control. It prints one layer, waits for it to dry, and then prints the next layer on top. Depending on the quality of the printer, what you get is either a stunning looking 3D model or a lot of 2D lines of plastic sitting crudely on top of one another—like badly piped cake icing! The plastic from which models are printed is obviously hugely important.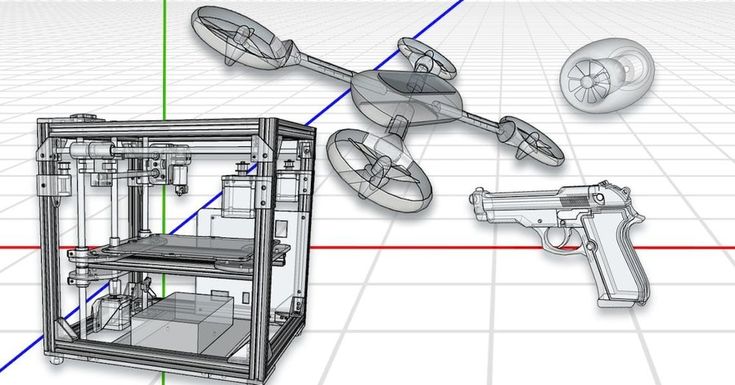
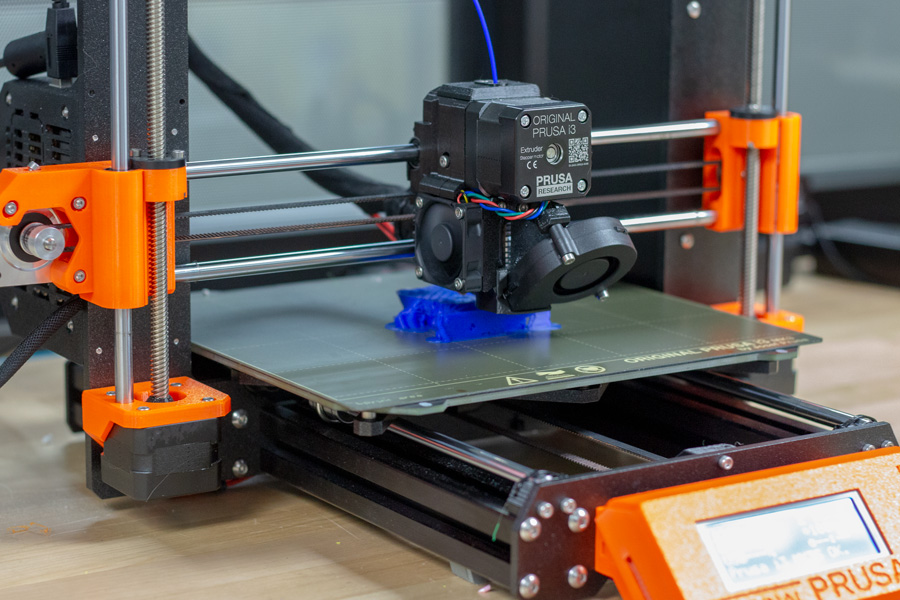
Photo: A Lulzbot 3D printer. You can see the little reel of raw, red plastic (the "filament") that feeds into the print head from the top. Photo by Stephane Belcher courtesy of US Navy.
When we talk about plastic, we generally mean "plastics": if you're a diligent recycler, you'll know there are many types of plastic, all of which are different, both chemically (in their molecular makeup) and physically (in the way they behave toward heat, light, and so on). It's hardly surprising that 3D printers use thermoplastics (plastics that melt when you heat them and turn solid when you cool them back down), and typically either ABS (acrylonitrile butadiene styrene), PLA (polylactic acid), or PETG (polyethylene gerephthalate glycol).
Perhaps most familiar as the material from which LEGO® bricks are made, ABS is also widely used in car interiors (sometimes in outside parts such as hubcaps too), for making the insides of refrigerators, and in plastic computer parts (it's quite likely the mouse and keyboard you're using right now are made from ABS plastic). So why is this material used for 3D printing? It's really a composite of a hard, tough plastic (acrylonitrile) with a synthetic rubber (butadiene styrene). It's perfect for 3D printing because it's a solid at room temperatures and melts at a little over 100°C (220°F), which is cool enough to melt inside the printer without too much heat and hot enough that models printed from it won't melt if they're left in the Sun. Once set, it can be sanded smooth or painted; another useful property of ABS is that it's a whiteish-yellow color in its raw form, but pigments (the color chemicals in paint) can be added to make it virtually any color at all. According to the type of printer you're using, you feed it the plastic either in the form of small pellets or filaments (like plastic strings).
PLA is easier to use than ABS and a little more environmentally friendly, though it's softer and less durable. PETG is a halfway house, closer to the strength of ABS, easy to shape, and relatively easy to recycle.
You don't necessarily need to print in 3D with plastic: in theory, you can print objects using any molten material that hardens and sets reasonably quickly. In July 2011, researchers at England's Exeter University unveiled a prototype food printer that could print 3D objects using molten chocolate!
Advantages and disadvantages
Photo: A B9Creator™—a typical low-cost, DIY 3D printer. It was originally available in kit form, priced at $2495; now it comes ready-assembled in three different versions priced from $6000–12000. Photo by courtesy of Windell H. Oskay, www.evilmadscientist.com, published on Flickr in 2012 under a Creative Commons Licence.
Makers of 3D printers claim they are up to 10 times faster than other methods and 5 times cheaper, so they offer big advantages for people who need rapid prototypes in hours rather than days. Although high-end 3D printers they are still expensive (typically about $25,000–$50,000), they're a fraction the cost of more sophisticated RP machines (which come in at $100,000–$500,000), and vastly cheaper machines are also available (you can buy a Tronxy 3D printer kit for around $100–200). They're also reasonably small, safe, easy-to-use, and reliable (features that have made them increasingly popular in places such as design/engineering schools).
On the downside, the finish of the models they produce is usually inferior to those produced with higher-end RP machines. The choice of materials is often limited to just one or two, the colors may be crude, and the texture may not reflect the intended finish of the product very well. Generally, then, 3D-printed models may be better for rough, early visualizations of new products; more sophisticated RP machines can be used later in the process when designs are closer to finalization and things like accurate surface texture are more important.
Applications
What can you use a 3D printer for? It's a bit like asking "How many ways can you use a photocopier?" In theory, the only limit is your imagination. In practice, the limits are the accuracy of the model from which you print, the precision of your printer, and the materials you print with. Modern 3D printing was invented about 25 years ago, but it's only really started to take off in the last decade. Much of the technology is still relatively new; even so, the range of uses for 3D printing is pretty astonishing.
Medicine
Photo: 3D-printed plastic hearts make it possible for surgeons to practise operations with no risk. Model by Dr. Matthew Bramlet. Public domain photo published on Flickr courtesy of US NIH Image Gallery and 3D Print Exchange.
Life's a one-way journey; fallible, aging humans with creasing, crumbling bodies naturally see great promise in a technology that has the potential to create replacement body parts and tissue. That's why doctors were among the earliest people to explore 3D printing. Already, we've seen 3D printed ears (from Indian company Novabeans), arms and legs (from Limbitless Solutions, Biomechanical Robotics Group, and Bespoke), and muscles (from Cornell University). 3D printers have also been used to produce artificial tissue (Organovo), cells (Samsara Sciences), and skin (in a partnership between cosmetics giant L'Oreal and Organovo). Although we're some way away from having complete 3D printed replacement organs (such as hearts and livers), things are rapidly moving in that direction. One project, known as the Body on a Chip, run by the Wake Forest Institute for Regenerative Medicine in North Carolina, prints miniature human hearts, lungs, and blood vessels, places them on a microchip, and tests them out with a kind of artificial blood.
Apart from replacement body parts, 3D printing is increasingly being used for medical education and training. At Nicklaus Children's Hospital in Miami, Florida, surgeons practise surgery on 3D-printed replicas of children's hearts. Elsewhere, the same technique is used to rehearse brain surgery.
Aerospace and defense
Designing and testing airplanes is a complex and expensive business: a Boeing Dreamliner has about 2.3 million components inside it! Although computer models can be used to test quite a few aspects of how planes behave, accurate prototypes still need to be made for things like wind-tunnel testing. And 3D printing is a simple and effective way to do that. While commercial airplanes are built in quantity, military planes are more likely to be highly customized—and 3D printing makes it possible to design, test, and manufacture low-volume or one-off parts both quickly and cost-effectively.
Photo: The US Navy has been testing 3D printers on ships since one was installed on USS Essex in 2014. In theory, an onboard printer makes a ship more self-reliant, with less need to carry spare parts and materials, especially during wartime. This is a 3D-printed undersea wireless charger, typical of the objects that might be printed during a mission at sea. Photo by Devin Pisner courtesy of US Navy.
Spacecraft are even more complex than airplanes and have the added drawback that they are "manufactured" in tiny quantities—sometimes only one is ever made. Instead of going to all the expense of making unique tools and manufacturing equipment, it can make much more sense to 3D print one-off components instead. But why even make space parts on Earth? Shipping complex and heavy structures into space is difficult, expensive, and time-consuming; the ability to manufacture things on the Moon, or on other planets, could prove invaluable. It's easy to imagine astronauts (or even robots) using 3D printers to produce whatever objects they need (including spare parts), far from Earth, whenever they need them. But even conventional, Earth-spawned space projects can benefit from the speed, simplicity, and low-cost of 3D printing. The latest, human-supporting NASA Rover uses 3D-printed parts produced with help from Stratasys.
Photo: Spares and repairs are no problem. Closeup view of a Lulzbot Taz 6 3D printer being used to make spare parts onboard a US naval ship. Photo by Christopher A. Veloicaza courtesy of US Navy.
Visualization
Making prototypes of airplanes or space rockets is an example of a much broader use for 3D printing: visualizing how new designs will look in three dimensions.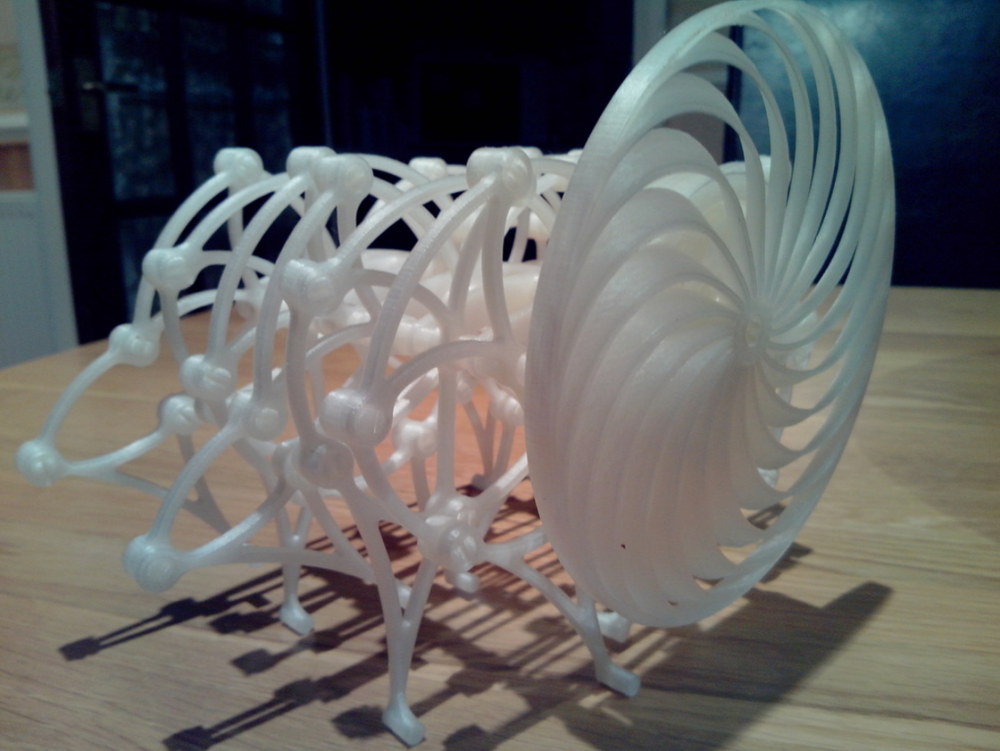 We can use things like virtual reality for that, of course, but people often prefer things they can see and touch. Increasingly, 3D printers are being used for rapid, accurate architectural modeling. Although we can't (yet) 3D print in materials such as brick and concrete, there's a wide range of plastics available and they can be painted to look like realistic building finishes. In the same way, 3D printing is also now widely used for prototyping and testing industrial and consumer products. Since many everyday things are molded from plastic, a 3D printed model can look very similar to the finished product—perfect for focus-group testing or market research.
Personalized products
From plastic toothbrushes to candy wrappers, modern life is here-today, gone-tomorrow—convenient, inexpensive, and disposable. Not everyone appreciates off-the-shelf mass production, however, which is why expensive "designer labels" are so popular. In the future, more of us are going to be able to enjoy the benefits of affordable, highly personalized products custom-made to our exact specification. Jewelry and fashion accessories are already being 3D printed. Just as the Etsy website created a worldwide community of artisan crafters , so Zazzy has now replicated that using 3D printing technology. Thanks to simple online services like Shapeways, anyone can make their own 3D printed nick-nacks, either for themselves or to sell to other people without the expense and hassle of using their own 3D printer (even Staples is now offering 3D printing services in some of its stores).
"Customized products" aren't simply things we buy and use: the food we eat can fall into that category too. Cooking takes time, skill, and patience, because preparing a mouthwatering meal goes far beyond mixing ingredients and heating them on a stove. Since most food can be extruded (squeezed through nozzles), it can (theoretically) also be 3D printed. A few years ago, Evil Mad Scientist Laboratories playfully printed some weird objects out of sugar. In 2013, New York Times columnist A.J. Jacobs challenged himself to print an entire meal—including the plate and cutlery. In the process, he chanced upon the work of Cornell University's Hod Lipson, who believes meals may one day be personally, 3D printed to match your body's exact nutritional needs. Which brings us neatly to the future...
Photo: In theory, you can make 3D prints from any raw material you can feed into your printer. Here are some fantastic 3D objects printed with granulated sugar by a "CandyFab 4000" (a hacked old HP plotter) by the always entertaining folk at Evil Mad Scientist Laboratories. Photo by courtesy of Windell H. Oskay, www.evilmadscientist.com, published on Flickr in 2007 under a Creative Commons Licence.
The future of 3D printing
Many people believe 3D printing will herald not merely a tidal wave of brash, plastic gimmicks but a revolution in manufacturing industry and the world economy that it drives. Although 3D printing will certainly make it possible for us to make our own things, there's a limit to what you can achieve by yourself with a cheap printer and a tube of plastic. The real economic benefits are likely to arrive when 3D printing is universally adopted by big companies as a central pillar of manufacturing industry. First, that will enable manufacturers to offer much more customization of existing products, so the affordability of off-the-shelf mass-production will be combined with the attractiveness of one-off, bespoke artisan craft. Second, 3D printing is essentially a robotic technology, so it will lower the cost of manufacturing to the point where it will, once again, be cost-effective to manufacture items in North America and Europe that are currently being cheaply assembled (by poorly paid humans) in such places as China and India. Finally, 3D printing will increase productivity (since fewer people will be needed to make the same things), lowering production costs overall, which should lead to lower prices and greater demand—and that's always a good thing, for consumers, for manufacturers, and the economy.
Photo: Two views of the printhead (sometimes called the "tool head") of a 3D printer.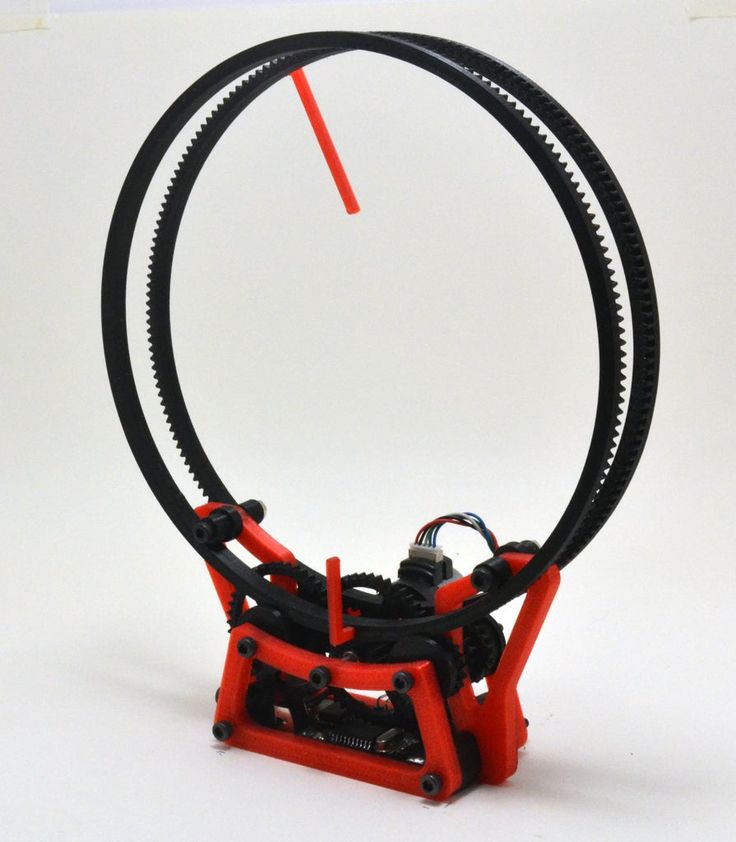 Photo by Ashley McLaughlin courtesy of US Marine Corps.
3D Printing: What It Is, How It Works and Examples
3D printers might seem like they're right out of a science fiction movie, but they're proving to be useful in a variety of industries. | Image: ShutterstockHow Do 3D Printers Work?
3D printing is part of the additive manufacturing family and uses similar methods to a traditional inkjet printer — albeit in 3D. Additive manufacturing describes the process of creating something in layers, adding material continuously until the final design is complete. This term most often refers to molding and 3D printing.
It takes a combination of top-of-the-line software, powder-like materials and precision tools to create a three-dimensional object from scratch. Below are a few of the main steps 3D printers take to bring ideas to life.
How Does a 3D Printer Work?
3D printers are related to additive manufacturing. 3D printers use computer-aided design to understand a design.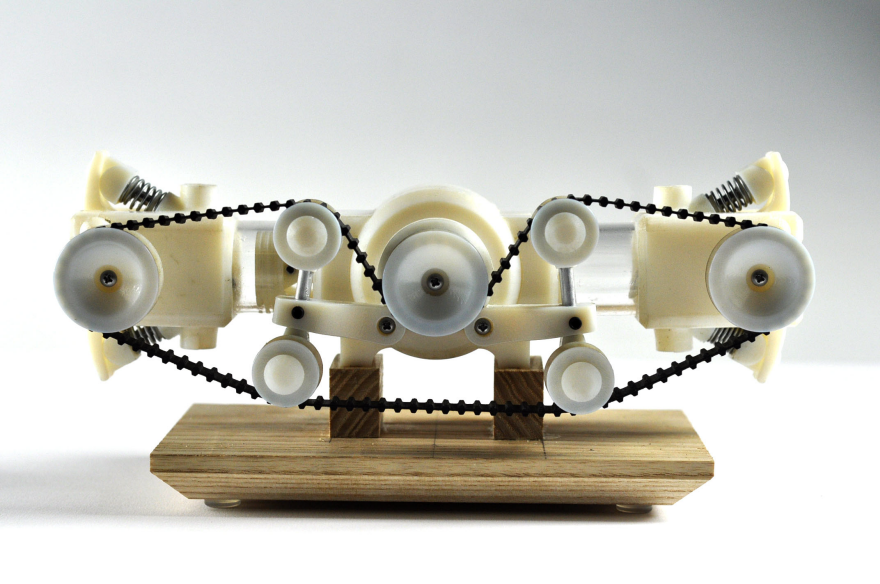 When a design is ready, a material that can be dispensed through a hot nozzle or precision tool is printed layer by layer to create a three-dimensional object from scratch.
3D Modeling Software
The first step of any 3D printing process is 3D modeling. To maximize precision — and because 3D printers can’t magically guess what you want to print — all objects have to be designed in a 3D modeling software. Some designs are too intricate and detailed for traditional manufacturing methods. That’s where CAD software comes in.
Modeling allows printers to customize their product down to the tiniest detail. The 3D modeling software’s ability to allow for precision designs is why 3D printing is being hailed as a true game changer in many industries. This modeling software is especially important to an industry, like dentistry, where labs are using 3D software to design teeth aligners that precisely fit to the individual. It’s also vital to the space industry, where they use the software to design some of the most intricate parts of a rocketship.
3D PRINTERS USE MODELING AND SLICING SOFTWARE TO GUIDE THE PRINTER IN CREATING EACH OBJECT. Video: Digital Trends
Slicing the Model
Once a model is created, it’s time to “slice” it. Since 3D printers cannot conceptualize the concept of three dimensions, like humans, engineers need to slice the model into layers in order for the printer to create the final product.
Slicing software takes scans of each layer of a model and will tell the printer how to move in order to recreate that layer. Slicers also tell 3D printers where to “fill” a model. This fill gives a 3D printed object internal lattices and columns that help shape and strengthen the object. Once the model is sliced, it’s sent off to the 3D printer for the actual printing process.
The 3D Printing Process
When the modeling and slicing of a 3D object is completed, it’s time for the 3D printer to finally take over.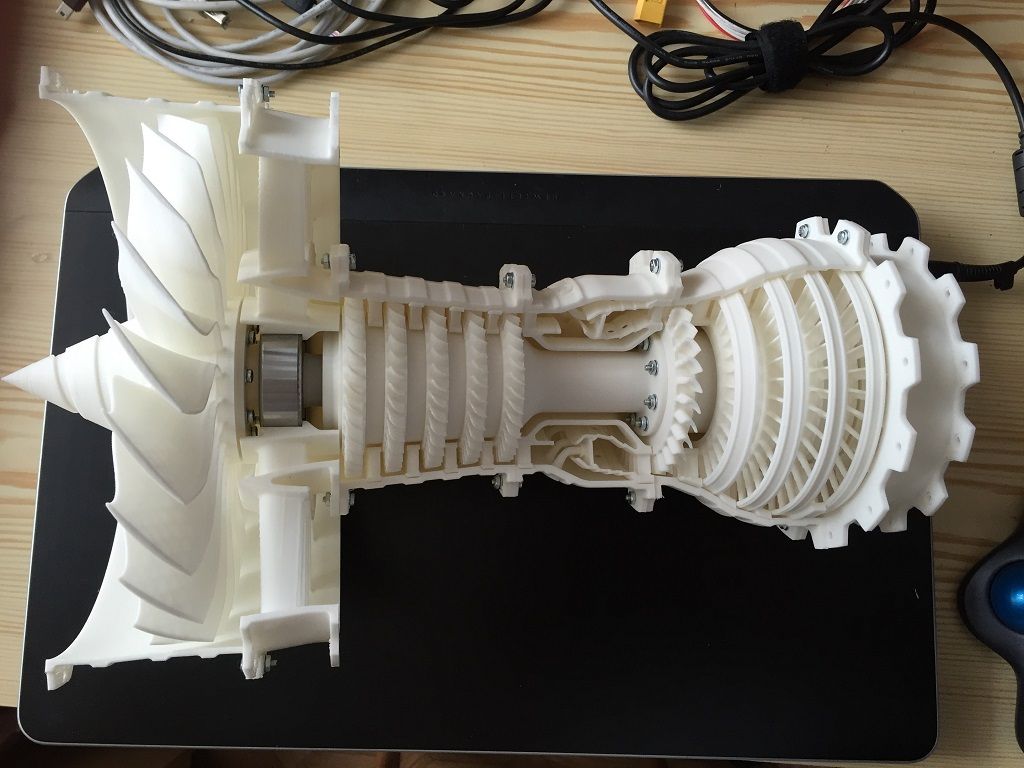 The printer acts generally the same as a traditional inkjet printer in the direct 3D printing process, where a nozzle moves back and forth while dispensing a wax or plastic-like polymer layer-by-layer, waiting for that layer to dry, then adding the next level. It essentially adds hundreds or thousands of 2D prints on top of one another to make a three-dimensional object.
3D Printing Materials
There are a variety of different materials that a printer uses in order to recreate an object to the best of its abilities. Here are some examples:
Acrylonitrile Butadiene Styrene (ABS)
Plastic material that is easy to shape and tough to break. The same material that LEGOs are made out of.
Carbon Fiber Filaments
Carbon fiber is used to create objects that need to be strong, but also extremely lightweight.
Conductive Filaments
These printable materials are still in the experimental stage and can be used for printing electric circuits without the need for wires.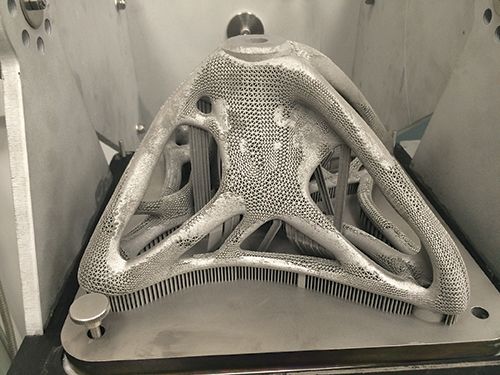 This is a useful material for wearable technology.
Flexible Filaments
Flexible filaments produce prints that are bendable, yet tough. These materials can be used to print anything from wristwatches to phone covers.
Metal Filament
Metal filaments are made of finely ground metals and polymer glue. They can come in steel, brass, bronze and copper in order to get the true look and feel of a metal object.
Wood Filament
These filaments contain finely ground wood powder mixed with polymer glue. These are obviously used to print wooden-looking objects and can look like a lighter or darker wood depending on the temperature of the printer.
The 3D printing process takes anywhere from a few hours for really simple prints, like a box or a ball, to days or weeks for much larger detailed projects, like a full-sized home.
How Much Do 3D Printers Cost?
The cost of 3D printers vary based on the size, specialty and use. The cheapest 3D printers, for entry level hobbyists, typically range from $100 to $500. More advanced models can range between $300 and $5,000. Industrial 3D printers can cost up to $100,000.
3D Printing Processes and Techniques
here are also different types of 3D printers depending on the size, detail and scope of a project. Each different type of printer will vary slightly on how an object gets printed.
Fused Deposition Modeling (FDM)
FDM is probably the most widely used form of 3D printing. It’s incredibly useful for manufacturing prototypes and models with plastic.
Stereolithography (SLA) Technology
SLA is a fast prototyping printing type that is best suited for printing in intricate detail. The printer uses an ultraviolet laser to craft the objects within hours.
Digital Light Processing (DLP)
DLP is one of the oldest forms of 3D printing. DLP uses lamps to produce prints at higher speeds than SLA printing because the layers dry in seconds.
Continuous Liquid Interface Production (CLIP)
CLIP is amongst the faster processes that use Vat Photopolymerisation. The CLIP process utilizes Digital Light Synthesis technology to project a sequence of UV images across a cross-section of a 3D printed part, resulting in a precisely controlled curing process. The part is then baked in a thermal bath or oven, causing several chemical reactions that allow the part to harden.
Material Jetting
Material Jetting applies droplets of material through a small diameter nozzle layer-by-layer to build a platform, which becomes hardened by UV light.
Binder Jetting
Binder Jetting utilizes a powder base material layered evenly along with a liquid binder, which is applied through jet nozzles to act as an adhesive for the powder particles.
Fused Deposition Modeling (FDM)
FDM, also known as Fused Filament Fabrication (FFF), works by unwinding a plastic filament from a spool and flowing through a heated nozzle in horizontal and vertical directions, forming the object immediately as the melted material hardens.
Selective Laser Sintering (SLS)
A form of Powder Bed Fusion, SLS fuses small particles of powder together by use of a high-power laser to create a three-dimensional shape.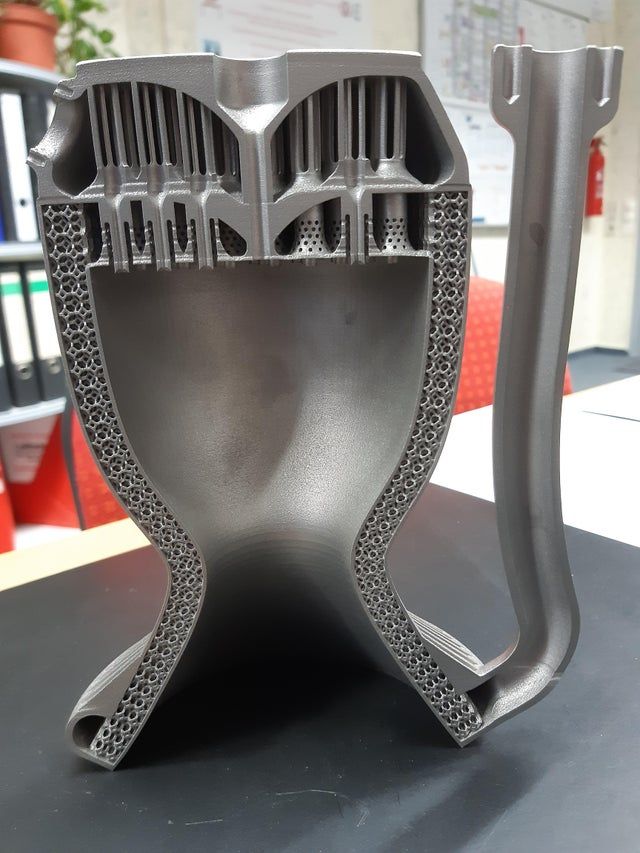 The laser scans each layer on a powder bed and selectively fuses them, then lowering the powder bed by one thickness and repeating the process through completion.
Multi-Jet Fusion (MJF)
Another form of Powder Bed Fusion, MJF uses a sweeping arm to deposit powder and an inkjet-equipped arm to apply binder selectively on top. Next, a detailing agent is applied around the detailing agent for precision. Finally, thermal energy is applied to cause a chemical reaction. Direct Metal Laser Sintering (DMLS) also utilizes this same process but with metal powder specifically.
Sheet Lamination
Sheet Lamination binds material in sheets through external force and welds them together through layered ultrasonic welding. The sheets are then milled in a CNC machine to form the object’s shape.
Directed Energy Deposition
Directed Energy Deposition is common in the metal industry and operates by a 3D printing apparatus attached to a multi-axis robotic arm with a nozzle for applying metal powder.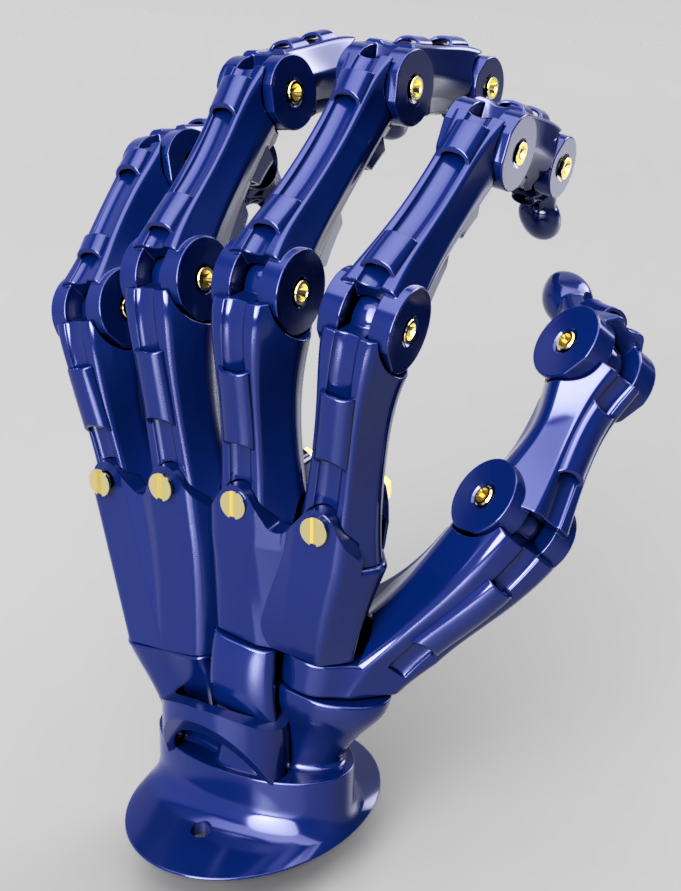 The powder is applied to a surface and energy source, which then melts the material to form a solid object.
Examples of positive and negative applications of the 3D printer
Every year 3D printing becomes more and more popular. The 3D printer, as a tool for turning a digital model into a physical object, is gaining popularity, outperforming other production methods in many ways due to its affordability.
But do not forget that a 3D printer is just a tool. A lot depends on how this tool will be used.
Available 3D printing technologies
All 3D technologies can be conditionally divided into 4 types.
Layer by layer welding with molten material.
The principle of operation is similar to the familiar glue gun. The print media is melted to a semi-liquid state in the print head and applied with a nozzle to the print surface where it solidifies. This is how the finished 3D model “grows” layer by layer on the printing table. Not only thermoplastics can be used as consumables, but, for example, chocolate, icing, concrete, etc.
This is the most common type of printer. Inexpensive FDM printers are often used as home assistants. This is facilitated by an inexpensive price and a variety of consumables.
Selective curing of resin (photopolymer printers).
The material used is a photopolymer resin that hardens under the influence of UV radiation. As a source of UV radiation, a thin laser beam, a DLP projector or an LCD screen with a UV matrix, or any other design can be used. For example, some industrial 3D printers apply a photopolymer using thin nozzles and immediately illuminate it with a UV lamp.
Previously, these printers were quite expensive. Today, with advances in technology, photopolymer 3D printing has become affordable and photoresin printers have become popular as home hobby printers.
Selective bonding of powdered material.
On the print head of the printer there are several nozzles through which a binder is supplied, which is selectively applied to the powdered material.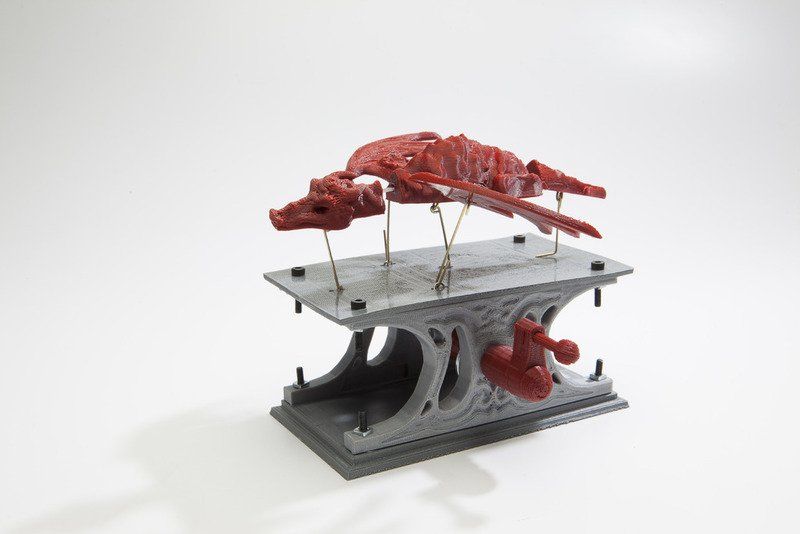 Various materials can be used as a material: for example, gypsum or metal powders. But gypsum is most often used.
Since dye can be added to the "glue" during printing, such printers are usually used for the production of color demonstration models or souvenirs.
Laser sintering of powdered materials.
The youngest technology, but with great potential for use in large-scale industries. With the help of a laser or a heated print head, selective sintering of the metal powder occurs in an environment filled with an inert gas.
These are already serious industrial printers that are used for the production of functional metal assemblies and parts. Currently, such 3D printers are actively used in the aerospace industry.
Unethical use
3D piracy
Where there is duplication of objects, there are always disputes about copyright and piracy.
The production of any product is a long and painstaking work, and often more than one person. Before you get a finished decorative product, for example, a figurine, you need to think through everything to the smallest detail. Usually, before modeling, the artist draws a lot of sketches, the details of clothing and accessories are thought out. Only after that the 3D modeler gets to work and begins painstakingly recreating the 3D model.
Functional models are often redesigned by engineers after the prototype has been made. There can be a very long way between the initial idea and a stable working mechanism. And it’s very disappointing when such work is simply copied and posted in the public domain.
LEGO
It was one of the first mass manifestations of "3D piracy". At that time, 3D printing was only gaining popularity, and many users, having printed a dozen figurines, were looking for a useful application for a 3D printer. Given the low plastic consumption, the printed LEGO blocks were very inexpensive.
3D printed LEGO bricks
Despite the far from ideal surface, many were satisfied with such a copy. Some have argued that the accuracy of a home FDM printer is not enough for the bricks to fit well with the original LEGO, but for most users everything fit perfectly.
At the moment, LEGO is actively removing models that copy the original sizes of the famous bricks and men from the network. On popular sites, only custom elements of LEGO-men and LECO are left that are not the original size.
Custom heads for LEGO men
Games Workshop
Games Workshop, which produce the most expensive table soldiers in the world, sued Thomas Valenti (USA) back in 2012. Thomas has modeled, printed and made publicly available several miniatures based on the Warhammer universe. The court sided with Games Workshop and the models had to be removed.
3D Printed Chaplain
Chaplain 3D model from Warhammer 40k
Games Workshop went one step further by banning fans from creating art and other work based on the original settings and characters.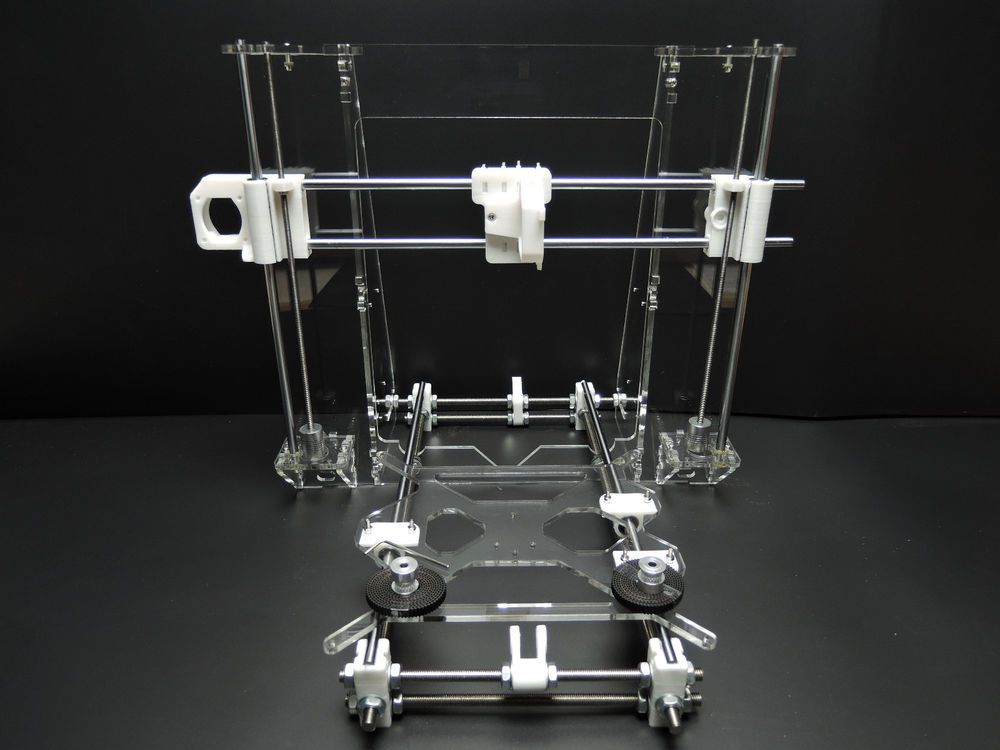 As a boycott, users of the Warhammer 40,000 section on Reddit are proposing to abandon the company's products as much as possible - print game figures on 3D printers, use paints from other companies, or switch to other universes.
Hollywood
The production of modern films is not a cheap pleasure, and film companies try to recoup their costs not only by showing them in cinemas, but, for example, by producing souvenirs.
DreamWorks has an entire consumer goods division that helps recoup the cost of a movie if it fails at the box office. Film companies recognize that fan-made productions often surpass the official "souvenir" in accuracy and detail.
DC Universe Batman fan model
Many film companies are closely following the development of 3D printed merchandise, but do not yet know how to respond. For example, Paramount Pictures, Marvel Studios and Warner Bros. They themselves began to upload models for 3D printing to the network, before the release of new films.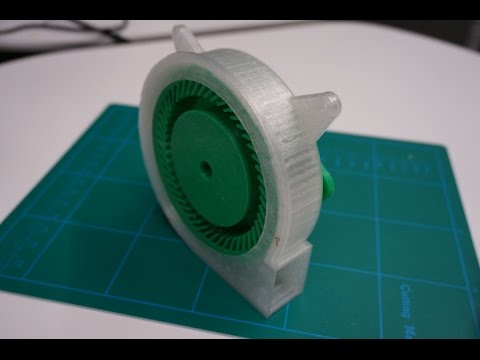
Weapon Seal
Seal of weapons
24-year-old law student Cody Wilson was the first to make a gun on a 3D printer. Cody designed and 3D printed a combat pistol on his own. After 8 years, the idea of making firearms using 3D printing has not only not died out, but flared up with a bright fire.
It started in Texas in 2012. It was there that the company Defense Distributed was registered, the ideology of which was the development of models of firearms that anyone could make on a home 3D printer.
Guns
Liberator
The first “swallow” was the Liberator - a compact plastic pistol printed on a 3D printer from ABS plastic. The only thing that could not be made on a 3D printer was the striker, which was successfully replaced by an ordinary nail. The first printed pistol was made on a Stratasys Dimension SST 3D printer.
Liberator - the name is borrowed from a cheap pistol that was developed in 1942 in the USA.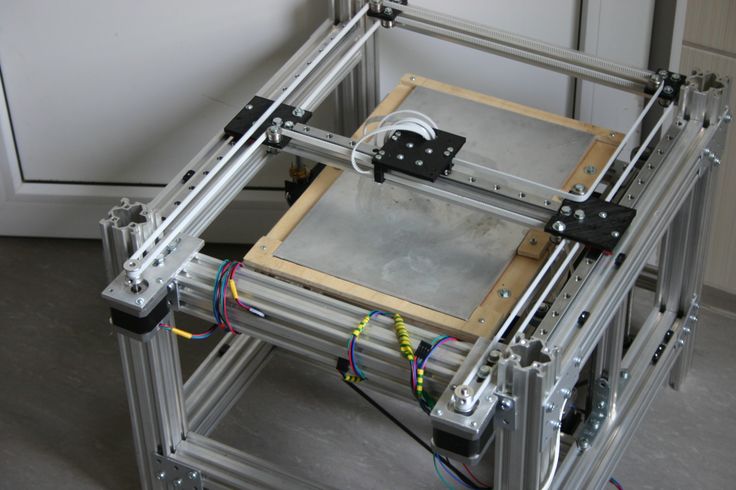
The Liberator fired a fairly weak .380 ACP round and could only last a dozen rounds at most.
Failed Liberator
Zig Zag
In the spring of 2014, a video appeared on the Internet with a man shooting from a plastic revolver with a huge drum. The video greatly stirred up all of Japan.
Zig Zag
Unknown was Yoshitomo Imura (Yoshitomo Imura) - 28-year-old employee of the Shonan Institute of Technology. Despite Imuru's claim that he fired blanks on the tape, he was arrested and sentenced to 2 years in prison.
The Zig Zag design was a reimagining of revolvers popular in the 19th century, which used a rotating .38 caliber barrel block mounted on a pistol grip.
Washbear
In 2015, mechanical engineering student James Patrick posted a video online showing a 3D printed PM522 Washbear in operation.
PM522 Washbear
The PM522 visually resembled a children's pistol from a science fiction movie, but at the same time the pistol had a strong and rigid frame. Washbear is also safer than its predecessors. At rest, the firing mechanism was not in line with the primer, so the PM522 was protected from accidental firing, for example, when dropped. The only metal part was the nail that replaced the striker.
Rifle
Grizzly
Canadian with the nickname CanadianGunNut, ThreeD Ukulele or simply Matthew, inspired by the Liberator project, designed and posted his project - Grizzly. Grizzly is an ABS+ plastic rifle. It took the Canadian 3 days to design the rifle and another 27 hours to manufacture it using a Stratasys Dimension 1200es industrial 3D printer.
Grizzly 9 Rifle0063
The first version of the Grizzly had a smooth and straight .22 barrel. But this turned out to be not a very good decision, and the barrel cracked after the first shot. Subsequently, Matthew replaced the barrel with a tapered barrel with rifling inside.
Plastic “cutting” could not affect the ballistics of the bullet in any way, but added strength to the barrel.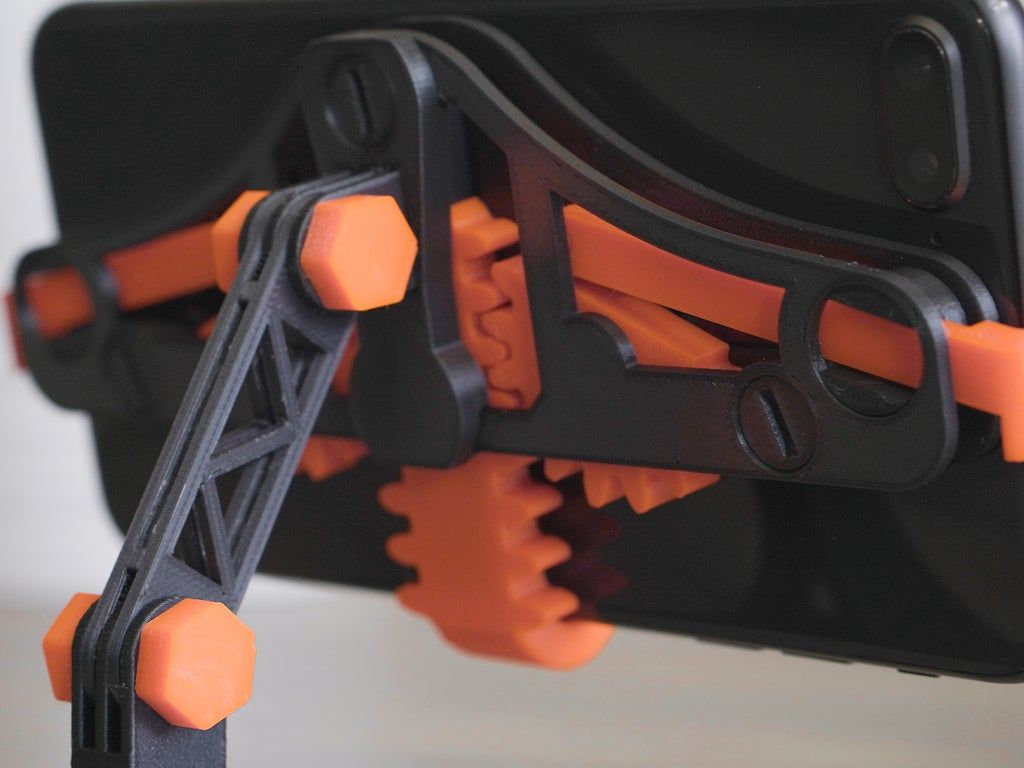
Shotgun
Liberator 12k
The Liberator 12k is a 12-round shotgun made by a well-known, in narrow circles, enthusiast in the world of 3D printing - Jeff Rodriguez.
Liberator 12k
Rodriguez managed to create a simple and at the same time reliable design, "mixing" a pistol and a pump-action shotgun in the design of the Liberator 12k. A huge plus for manufacturing and reliability was the absence of small parts in the shotgun mechanism.
Since the plastic was not strong enough, Rodriguez reinforced the design of the Liberator 12k with metal pins and added metal tubes inside the barrel and drum. The metal parts were purchased from a regular hardware store, so anyone could easily make a Liberator 12k with their home 3D printer.
Semi-automatic weapons
Shuty-MP1
The first sign was the Shuty-MP1, a semi-automatic pistol made by an amateur gunsmith with the nickname Derwood, in April 2017.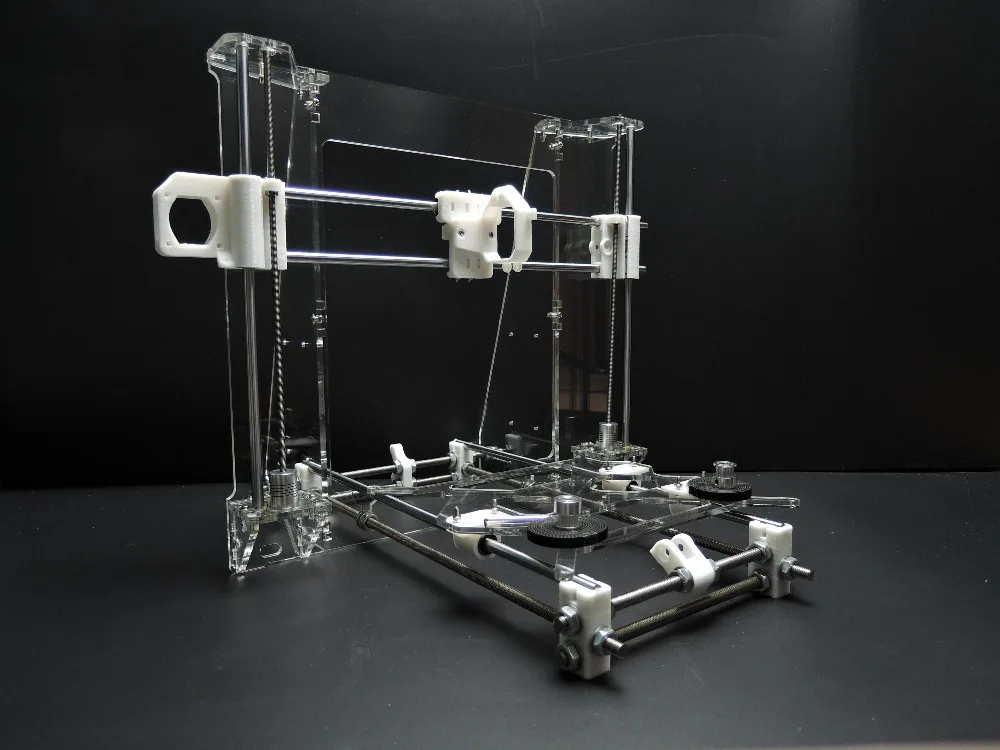
Shuty-MP1
Shuty AP-9
The Shuty AP-9 still uses a pistol barrel, but the trigger and return spring are taken from the civilian version of the M16. This improved the reliability of the rifle.
Ethical use
Despite the negative examples of application, 3D printing is actively used in many areas, helping to save time and create products that cannot be produced by other methods.
Medicine
Implants
Metal-printing 3D printers are actively used in medicine for the manufacture of titanium implants. For example, a patient needs to have a hip joint implant made. According to the results of CT, the necessary area of bone tissue replacement is agreed with the doctors and a prosthesis model is created that is ideal for this patient. After all approvals, the finished model is sent for printing.
3D model of implant
The main areas of 3D printing of implants in medicine are maxillofacial surgery, traumatology, orthopedics, oncology and veterinary medicine.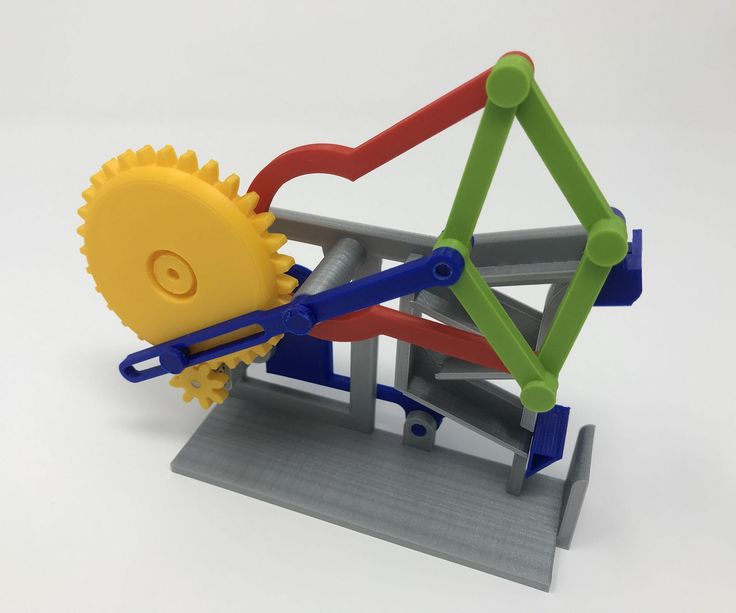 A big advantage over classical methods of manufacturing implants is the ability to create a cellular or porous structure. This allows for better integration of the prosthesis into the bone tissue.
Samples of printed implants and pins
Dentures
The manufacture of even a relatively simple traction prosthesis is a rather laborious and lengthy process. 3D printing has reduced costs and accelerated the production of prostheses. In addition, it became possible to customize the prosthesis.
Customized child prostheses
Some enthusiasts are modeling and posting models and detailed instructions for assembling traction prosthetic hands and fingers in the public domain so that any user can print and make a prosthesis at home.
Simple Traction Hand Model
Production
Building custom drones
Aerialtronics is a small Dutch company that specializes in building unique, customized drones. Aerialtronics manufactures and develops unique drones, the characteristics of which can vary depending on the needs of the customer.
Initially, a basic concept model was designed, which consists of a platform and a set of elements that can be changed at the request of the customer. Changes can affect almost any part of the drone. The customer can choose the number of motors and their power, payload, flight time, supported software and much more.
Aerialtronics base model
But any, even minor changes in the characteristics and design of the drone required the manufacture of new elements and design changes. Classical manufacturing methods turned out to be quite laborious and long. To save time and money, a Stratasys uPrint SE Plus 3D printer was purchased.
Drone Assembly
Thanks to 3D printing, it was possible not only to speed up production, but also to devote more time to improving individual components, because the finished model is ready the next morning. Rapid manufacturing allows you to print a part, test it, make the necessary changes to the 3D model and make a new sample. Aerialtronics engineers manage to manufacture and test 8-10 variants of a part in a few days in order to achieve maximum quality.
Prototyping
Gas turbine prototyping.
Prototyping by traditional methods is often time consuming and expensive. Because of this, the price of an error in calculations and 3D modeling can be very expensive.
For example, the production of turbine engine parts is usually based on careful preparatory calculations, but even this does not always prevent errors in the production of a test prototype. After all, even the most modern software methods cannot replace physical tests. But due to the high cost (over $20,000), it becomes impossible to produce multiple prototypes for testing.
Turbine Technologies (Wisconsin, USA) and its subsidiary Kutrieb Research have found a way out - 3D printing. Thanks to the 3D Systems ProJet 3D printer, it was possible to reduce the cost of prototyping by about 10 times to $2,000.
3D model and printed part of turbine
A turbine model is printed on a wax 3D printer, tested and then cast from metal. In addition to the cost, it was possible to significantly speed up production. After all, the production of traditional stencils with filling in molds took up to 5 weeks, and the 3D printed model is ready by the morning.
Totals
Despite the unethical side of 3D printing, there are still more positive use cases. 3D printers have become indispensable assistants in various industries - from home hobbies to serious industries. With the help of 3D printers, unique products are made that could not be obtained using other machines.
Popularization of 3D printers is a matter of time. But do not forget that 3D printing is just a tool, just like a drill or a hammer. It depends only on the user how it will be used.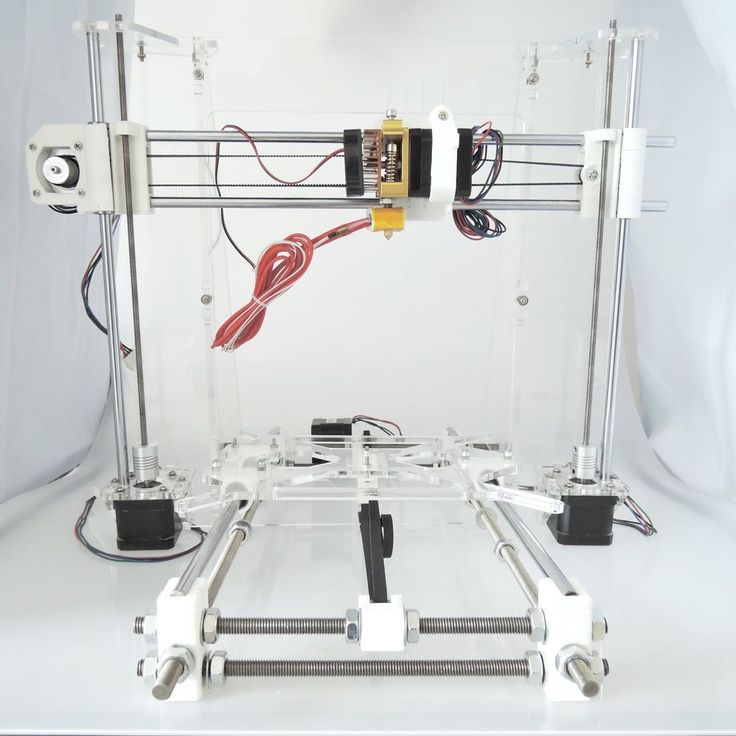
3D printing for dummies or "what is a 3D printer?"
- 1 3D printing term
- 2 3D printing methods
- 2.1 Extrusion printing
- 2.2 Melting, sintering or gluing
- 2.3 Stereolithography
- 2.4 Lamination
- 3 Fused Deposition Printing (FDM)
- 3.1 Consumables
- 3.2 Extruder
- 3.3 Working platform
- 3.4 Positioners
- 3.5 Control
- 3.6 Varieties of FDM printers
- 4 Laser Stereolithography (SLA)
- 4.1 Lasers and projectors
- 4.2 Cuvette and resin
- 4.3 Varieties of Stereolithography Printers
3D printing term
The term 3D printing has several synonyms, one of which quite briefly and accurately characterizes the essence of the process - "additive manufacturing", that is, production by adding material. The term was not coined by chance, because this is the main difference between multiple 3D printing technologies and the usual methods of industrial production, which in turn received the name "subtractive technologies", that is, "subtractive". If during milling, grinding, cutting and other similar procedures, excess material is removed from the workpiece, then in the case of additive manufacturing, material is gradually added until a solid model is obtained.
Soon 3D printing will even be tested on the International Space Station
Strictly speaking, many traditional methods could be classified as "additive" in the broad sense of the word - for example, casting or riveting. However, it should be borne in mind that in these cases, either the consumption of materials is required for the manufacture of specific tools used in the production of specific parts (as in the case of casting), or the whole process is reduced to joining ready-made parts (welding, riveting, etc. ). In order for the technology to be classified as “3D printing”, the final product must be built from raw materials, not blanks, and the formation of objects must be arbitrary - that is, without the use of forms. The latter means that additive manufacturing requires a software component. Roughly speaking, additive manufacturing requires computer control so that the shape of final products can be determined by building digital models. It was this factor that delayed the widespread adoption of 3D printing until the moment when numerical control and 3D design became widely available and highly productive.
3D printing methods
3D printing technologies are numerous, and there are even more names for them due to patent restrictions. However, you can try to divide technologies into main areas:
Extrusion printing
This includes methods such as deposition fusion (FDM) and multi-jet printing (MJM). This method is based on the extrusion (extrusion) of consumables with the sequential formation of the finished product. As a rule, consumables consist of thermoplastics or composite materials based on them.
Melting, sintering or bonding
This approach is based on bonding powdered material together. Formation is done in different ways. The simplest is gluing, as is the case with 3D inkjet printing (3DP). Such printers deposit thin layers of powder onto the build platform, which are then selectively bonded with a binder. Powders can be made up of virtually any material that can be ground to a powder—plastic, wood, metal.
This model of James Bond's Aston Martin was successfully printed on a Voxeljet SLS printer and blown up just as successfully during the filming of Skyfall instead of the expensive original
sintering (SLS and DMLS) and smelting (SLM), which allow you to create all-metal parts. As with 3D inkjet printing, these devices apply thin layers of powder, but the material is not glued together, but sintered or melted using a laser. Laser sintering (SLS) is used to work with both plastic and metal powders, although metal pellets usually have a more fusible shell, and after printing they are additionally sintered in special ovens. DMLS is a variant of SLS installations with more powerful lasers that allow sintering metal powders directly without additives. SLM printers provide not just sintering of particles, but their complete melting, which allows you to create monolithic models that do not suffer from the relative fragility caused by the porosity of the structure. As a rule, printers for working with metal powders are equipped with vacuum working chambers, or they replace air with inert gases. Such a complication of the design is caused by the need to work with metals and alloys subject to oxidation - for example, with titanium.
Stereolithography
How an SLA printer works
Stereolithography printers use special liquid materials called "photopolymer resins".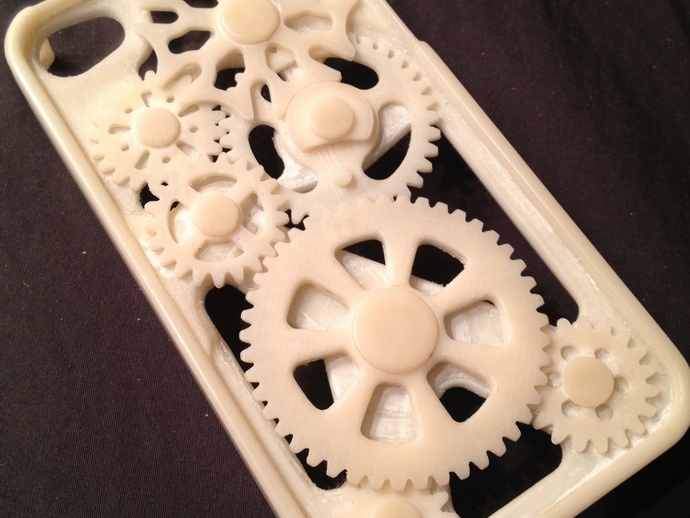 The term "photopolymerization" refers to the ability of a material to harden when exposed to light. As a rule, such materials react to ultraviolet irradiation.
Resin is poured into a special container with a movable platform, which is installed in a position near the surface of the liquid. The layer of resin covering the platform corresponds to one layer of the digital model. Then a thin layer of resin is processed by a laser beam, hardening at the points of contact. At the end of illumination, the platform together with the finished layer is immersed to the thickness of the next layer, and illumination is performed again.
Lamination
3D printers using lamination technology (LOM)
Some 3D printers build models using sheet materials - paper, foil, plastic film.
Layers of material are glued on top of each other and cut along the contours of the digital model using a laser or a blade.
These machines are well suited for prototyping and can use very cheap consumables, including regular office paper. However, the complexity and noise of these printers, coupled with the limitations of the models they produce, limit their popularity.
Fused deposition modeling (FDM) and laser stereolithography (SLA) have become the most popular 3D printing methods used in the home and office.
Let's take a closer look at these technologies.
Fused Deposition Printing (FDM)
FDM is perhaps the simplest and most affordable 3D construction method, which is the reason for its high popularity.
High demand for FDM printers is driving the price of devices and consumables rapidly down, along with technology advances towards ease of use and improved reliability.
Consumables
ABS filament spool and finished model
FDM printers are designed for printing with thermoplastics, which are usually supplied as thin filaments wound on spools. The range of "clean" plastics is very wide. One of the most popular materials is polylactide or "PLA plastic". This material is made from corn or sugar cane, which makes it non-toxic and environmentally friendly, but makes it relatively short-lived. ABS plastic, on the other hand, is very durable and wear-resistant, although it is susceptible to direct sunlight and can release small amounts of harmful fumes when heated. Many plastic items that we use on a daily basis are made from this material: housings for household appliances, plumbing fixtures, plastic cards, toys, etc.
In addition to PLA and ABS, printing is possible with nylon, polycarbonate, polyethylene and many other thermoplastics that are widely used in modern industry. More exotic materials are also possible, such as polyvinyl alcohol, known as "PVA plastic". This material dissolves in water, which makes it very useful for printing complex geometric patterns. But more on that below.
Model made from Laywoo-D3. Changing the extrusion temperature allows you to achieve different shades and simulate annual rings
It is not necessary to print with homogeneous plastics.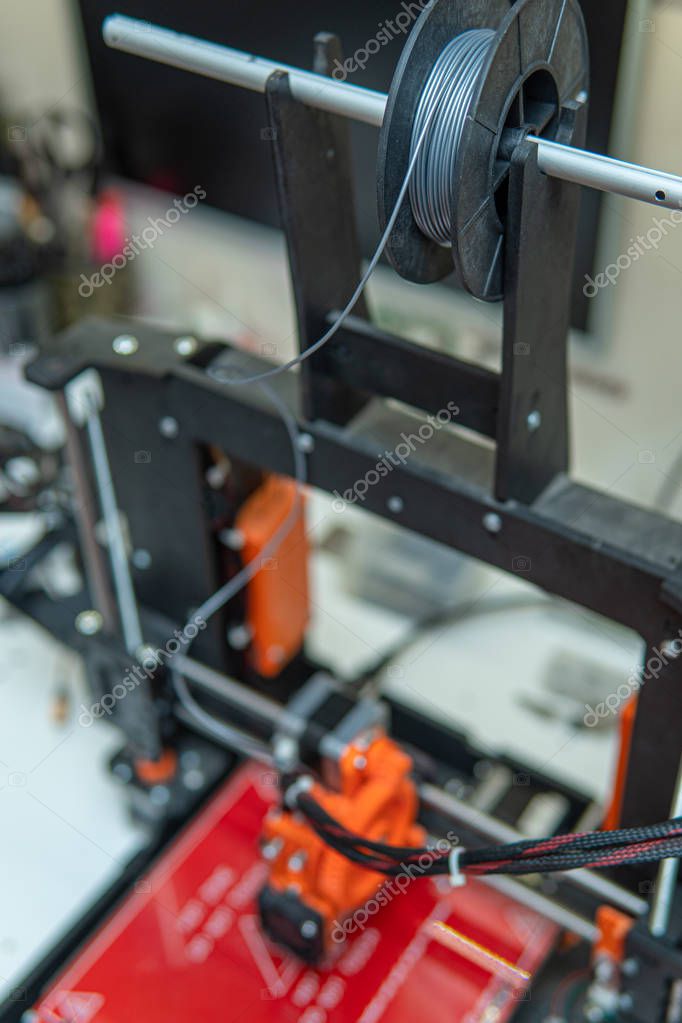 It is also possible to use composite materials imitating wood, metals, stone. Such materials use all the same thermoplastics, but with impurities of non-plastic materials.
So, Laywoo-D3 consists partly of natural wood dust, which allows you to print "wooden" products, including furniture.
The material called BronzeFill is filled with real bronze, and models made from it can be ground and polished, achieving a high similarity to products made from pure bronze.
One has only to remember that thermoplastics serve as a binding element in composite materials - they determine the thresholds of strength, thermal stability and other physical and chemical properties of finished models.
Extruder
Extruder - FDM print head. Strictly speaking, this is not entirely true, because the head consists of several parts, of which only the feed mechanism is directly "extruder". However, by tradition, the term "extruder" is commonly used as a synonym for the entire print assembly.
FDM extruder general design
The extruder is designed for melting and applying thermoplastic thread. The first component is the thread feed mechanism, which consists of rollers and gears driven by an electric motor. The mechanism feeds the thread into a special heated metal tube with a small diameter nozzle, called a "hot end" or simply a "nozzle". The same mechanism is used to remove the thread if a change of material is needed.
The hot end is used to heat and melt the thread fed by the puller. As a rule, nozzles are made from brass or aluminum, although more heat-resistant, but also more expensive materials can be used. For printing with the most popular plastics, a brass nozzle is quite enough. The “nozzle” itself is attached to the end of the tube with a threaded connection and can be replaced with a new one in case of wear or if a change in diameter is necessary. The nozzle diameter determines the thickness of the molten filament and, as a result, affects the print resolution. The heating of the hot end is controlled by a thermistor. Temperature control is very important, because when the material is overheated, pyrolysis can occur, that is, the decomposition of plastic, which contributes both to the loss of the properties of the material itself and to clogging of the nozzle.
PrintBox3D One FDM Printer Extruder
In order to prevent the filament from melting too early, the top of the hot end is cooled by heatsinks and fans. This point is of great importance, since thermoplastics that pass the glass transition temperature significantly expand in volume and increase the friction of the material with the walls of the hot end. If the length of such a section is too long, the pulling mechanism may not have enough strength to push the thread.
The number of extruders may vary depending on the purpose of the 3D printer. The simplest options use a single printhead. The dual extruder greatly expands the capabilities of the device, allowing you to print one model in two different colors, as well as using different materials. The last point is important when building complex models with overhanging structural elements: FDM printers cannot print “over the air”, since the applied layers require support. In the case of hinged elements, temporary support structures have to be printed, which are removed after printing is completed. The removal process is fraught with damage to the model itself and requires accuracy. In addition, if the model has a complex structure with internal cavities that are difficult to access, building conventional supports may not be practical due to the difficulty in removing excess material.
Finished model with PVA supports (white) before and after washing
In such cases, the same water-soluble polyvinyl alcohol (PVA) comes in handy. Using a dual extruder, you can build a model from waterproof thermoplastic using PVA to create supports.
After printing, PVA can simply be dissolved in water and a complex product of perfect quality can be obtained.
Some FDM printers can use three or even four extruders.
Working platform
Heated platform covered with removable glass work table
Models are built on a special platform, often equipped with heating elements. Preheating is required for a wide range of plastics, including the popular ABS, which are subject to a high degree of shrinkage when cooled. The rapid loss of volume by cold coats compared to freshly applied material can lead to model distortion or delamination. The heating of the platform makes it possible to significantly equalize the temperature gradient between the upper and lower layers.
Heating is not recommended for some materials. A typical example is PLA plastic, which requires a fairly long time to harden. Heating PLA can lead to deformation of the lower layers under the weight of the upper ones. When working with PLA, measures are usually taken not to heat up, but to cool the model. Such printers have characteristic open cases and additional fans blowing fresh layers of the model.
Calibration screw for work platform covered with blue masking tape
The platform needs to be calibrated before printing to ensure that the nozzle does not hit the deposited layers and move too far causing air-to-air printing resulting in plastic vermicelli. The calibration process can be either manual or automatic. In manual mode, calibration is performed by positioning the nozzle at different points on the platform and adjusting the platform inclination using the support screws to achieve the optimal distance between the surface and the nozzle.
As a rule, platforms are equipped with an additional element - a removable table. This design simplifies the cleaning of the working surface and facilitates the removal of the finished model. Stages are made from various materials, including aluminum, acrylic, glass, etc. The choice of material for the manufacture of the stage depends on the presence of heating and consumables for which the printer is optimized.
For a better adhesion of the first layer of the model to the surface of the table, additional tools are often used, including polyimide film, glue and even hairspray! But the most popular tool is inexpensive, but effective masking tape. Some manufacturers make perforated tables that hold the model well but are difficult to clean. In general, the expediency of applying additional funds to the table depends on the consumable material and the material of the table itself.
Positioning mechanisms
Scheme of operation of positioning mechanisms
Of course, the print head must move relative to the working platform, and unlike conventional office printers, positioning must be carried out not in two, but in three planes, including height adjustment.
Positioning pattern may vary. The simplest and most common option involves mounting the print head on perpendicular guides driven by stepper motors and providing positioning along the X and Y axes.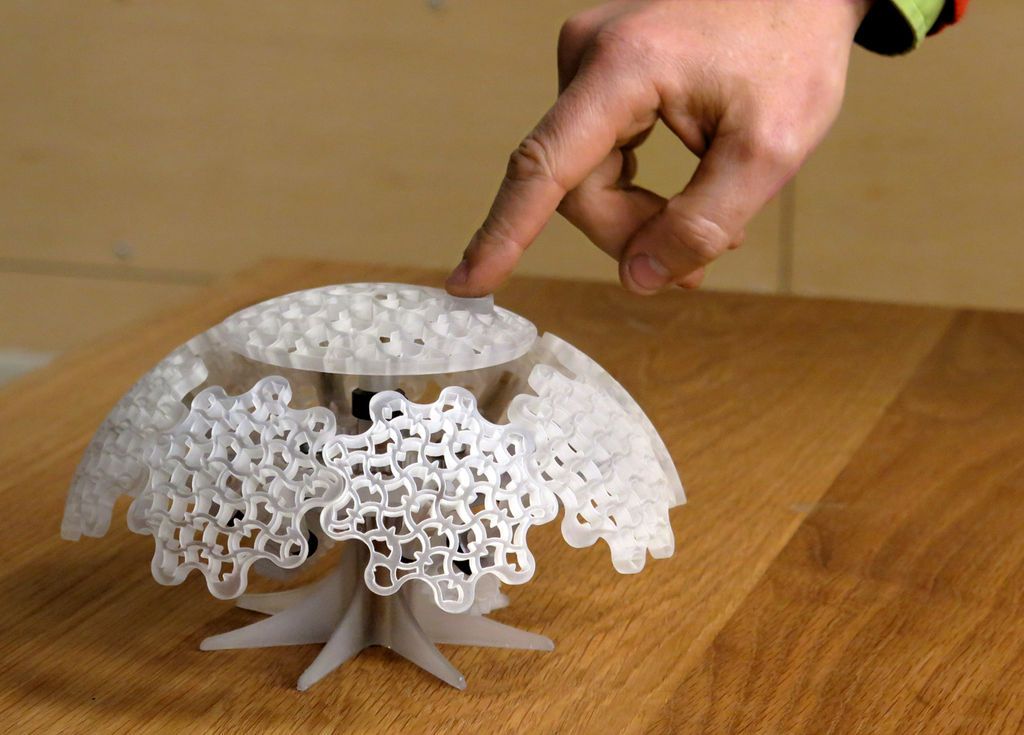
Vertical positioning is carried out by moving the working platform.
On the other hand, it is possible to move the extruder in one plane and the platforms in two.
SeemeCNC ORION Delta Printer
One option that is gaining popularity is the use of a delta coordinate system.
Such devices are called "delta robots" in the industry.
In delta printers, the print head is suspended on three manipulators, each of which moves along a vertical rail.
The synchronous symmetrical movement of the manipulators allows you to change the height of the extruder above the platform, and the asymmetric movement causes the head to move in the horizontal plane.
A variant of this system is the reverse delta design, where the extruder is fixed to the ceiling of the working chamber, and the platform moves on three support arms.
Delta printers have a cylindrical build area, and their design makes it easy to increase the height of the working area with minimal design changes by lengthening the rails.
In the end, everything depends on the decision of the designers, but the fundamental principle does not change.
Control
Typical Arduino-based controller with add-on modules
FDM printer operation, including nozzle and platform temperature, filament feed rate, and stepper motors for positioning the extruder, is controlled by fairly simple electronic controllers. Most controllers are based on the Arduino platform, which has an open architecture.
The programming language used by printers is called G-code (G-Code) and consists of a list of commands executed in turn by the 3D printer systems. G-code is compiled by programs called "slicers" - standard 3D printer software that combines some of the features of graphics editors with the ability to set print options through a graphical interface. The choice of slicer depends on the printer model. RepRap printers use open source slicers such as Skeinforge, Replicator G and Repetier-Host. Some companies make printers that require proprietary software.
Program code for printing is generated using slicers
As an example, we can mention Cube printers from 3D Systems. There are companies that offer proprietary software but allow third-party software, as is the case with the latest generation of MakerBot 3D printers.
Slicers are not designed for 3D design per se. This task is done with CAD editors and requires some 3D design skills. Although beginners should not despair: digital models of a wide variety of designs are offered on many sites, often even for free. Finally, some companies and individuals offer 3D design services for custom printing.
Finally, 3D printers can be used in conjunction with 3D scanners to automate the process of digitizing objects. Many of these devices are designed specifically to work with 3D printers. Notable examples include the 3D Systems Sense handheld scanner and the MakerBot Digitizer handheld desktop scanner.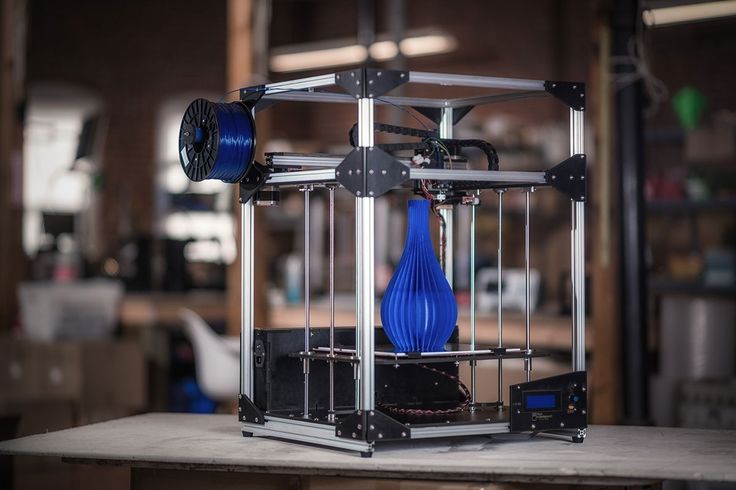
MakerBot Replicator 5th Generation FDM Printer with built-in control module on the top of the frame
The user interface of a 3D printer can consist of a simple USB port for connecting to a personal computer. In such cases, the device is actually controlled by the slicer.
The disadvantage of this simplification is a rather high probability of printing failure when the computer freezes or slows down.
A more advanced option includes an internal memory or memory card interface to make the process standalone.
These models are equipped with control modules that allow you to adjust many print parameters (such as print speed or extrusion temperature). The module may include a small LCD display or even a mini-tablet.
Varieties of FDM printers
Stratasys Fortus 360mc professional FDM printer that allows printing with nylon
FDM printers are very, very diverse, ranging from the simplest homemade RepRap printers to industrial installations capable of printing large-sized objects.
Stratasys, founded by FDM inventor Scott Crump, is a leader in industrial plant manufacturing.
You can build the simplest FDM printers yourself. Such devices are called RepRap, where "Rep" indicates the possibility of "replication", that is, self-reproduction.
RepRap printers can be used to print custom built plastic parts.
Controller, rails, belts, motors and other components can be easily purchased separately.
Of course, assembling such a device on your own requires serious technical and even engineering skills.
Some manufacturers make it easy by selling DIY kits, but these kits still require a good understanding of the technology. RepRap Printers
And, despite their "homemade nature", RepRap printers are quite capable of producing models with quality at the level of expensive branded counterparts.
Ordinary users who do not want to delve into the intricacies of the process, but require only a convenient device for household use, can purchase a ready-made FDM printer.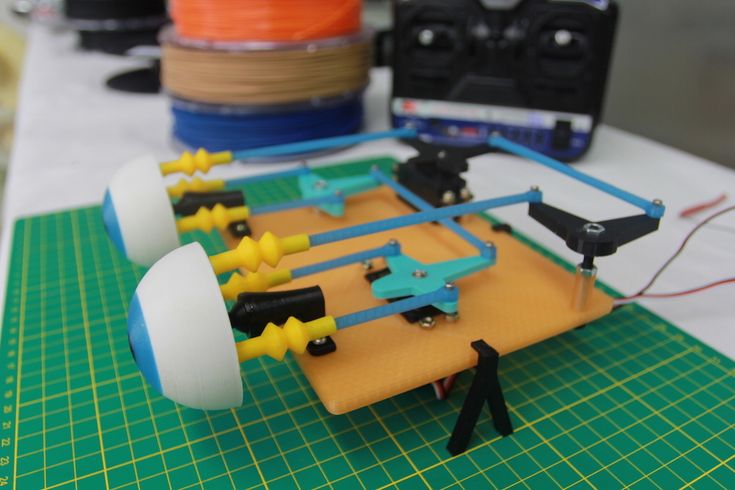
Many companies are focusing on the development of the consumer market segment, offering 3D printers for sale that are ready to print “straight out of the box” and do not require serious computer skills.
3D Systems Cube consumer 3D printer
The most famous example of a consumer 3D printer is the 3D Systems Cube.
While it doesn't boast a huge build area, ultra-fast print speed, or superb model build quality, it's easy to use, affordable, and safe: This printer has received the necessary certification to be used even by children.
Mankati FDM printer demonstration: http://youtu.be/51rypJIK4y0
Laser Stereolithography (SLA)
Stereolithographic 3D printers are widely used in dental prosthetics
Stereolithographic printers are the second most popular and widespread after FDM printers.
These units deliver exceptional print quality.
The resolution of some SLA printers is measured in a matter of microns - it is not surprising that these devices quickly won the love of jewelers and dentists.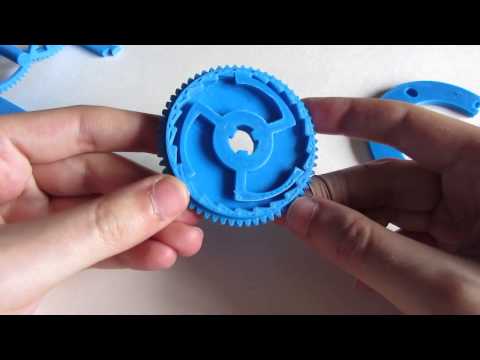
The software side of laser stereolithography is almost identical to FDM printing, so we will not repeat ourselves and will only touch on the distinctive features of the technology.
Lasers and projectors
Projector illumination of a photopolymer model using Kudo3D Titan DLP printer as an example
The cost of stereolithographic printers is rapidly declining, due to growing competition due to high demand and the use of new technologies that reduce the cost of construction.
Although the technology is collectively referred to as "laser" stereolithography, most recent developments use UV LED projectors for the most part.
Projectors are cheaper and more reliable than lasers, do not require the use of delicate mirrors to deflect the laser beam, and have higher performance. The latter is explained by the fact that the contour of the whole layer is illuminated as a whole, and not sequentially, point by point, as is the case with laser options.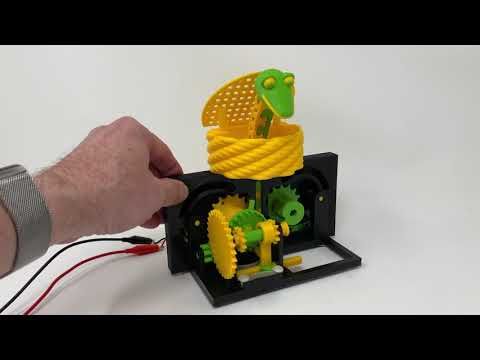 This variant of the technology is called projection stereolithography, "DLP-SLA" or simply "DLP". However, both options are currently common - both laser and projector versions.
Cuvette and resin
Photopolymer resin is poured into a cuvette
A photopolymer resin that looks like epoxy is used as consumables for stereolithographic printers. Resins can have a variety of characteristics, but they all share one key feature for 3D printing applications: these materials harden when exposed to ultraviolet light. Hence, in fact, the name "photopolymer".
When polymerized, resins can have a wide variety of physical characteristics. Some resins are like rubber, others are hard plastics like ABS. You can choose different colors and degrees of transparency. The main disadvantage of resins and SLA printing in general is the cost of consumables, which significantly exceeds the cost of thermoplastics.
On the other hand, stereolithographic printers are mainly used by jewelers and dentists who do not need to build large parts but appreciate the savings from fast and accurate prototyping. Thus, SLA printers and consumables pay for themselves very quickly.
An example of a model printed on a laser stereolithographic 3D printer
Resin is poured into a cuvette, which can be equipped with a lowering platform. In this case, the printer uses a leveling device to flatten the thin layer of resin covering the platform just prior to irradiation. As the model is being made, the platform, together with the finished layers, is “embedded” in the resin. Upon completion of printing, the model is removed from the cuvette, treated with a special solution to remove liquid resin residues and placed in an ultraviolet oven, where the final illumination of the model is performed.
Some SLA and DLP printers work in an "inverted" scheme: the model is not immersed in the consumable, but "pulled" out of it, while the laser or projector is placed under the cuvette, and not above it. This approach eliminates the need to level the surface after each exposure, but requires the use of a cuvette made of a material transparent to ultraviolet light, such as quartz glass.
The accuracy of stereolithographic printers is extremely high. For comparison, the standard for vertical resolution for FDM printers is considered to be 100 microns, and some variants of SLA printers allow you to apply layers as thin as 15 microns. But this is not the limit. The problem, rather, is not so much in the accuracy of lasers, but in the speed of the process: the higher the resolution, the lower the print speed. The use of digital projectors allows you to significantly speed up the process, because each layer is illuminated entirely. As a result, some DLP printer manufacturers claim to be able to print with a vertical resolution of one micron!
Video from CES 2013 showing Formlabs Form1 stereolithography 3D printer in action: http://youtu.be/IjaUasw64VE
SLA Printer Options
Formlabs Form1 Desktop Stereolithography Printer
As with FDM printers, SLA printers come in a wide range in terms of size, features and cost.