How to clean 3d printer hot end
How to Clean Your 3D Printer Nozzle & Hotend Properly – 3D Printerly
The nozzle and hotend on your 3D printer go through plenty when it comes to 3D printing, so properly cleaning them is essential. If you don’t properly clean them, you can run into quality issues and inconsistent extrusion.
The best way to clean your 3D printer nozzle and hotend are to take apart the hotend and use a nozzle cleaning kit to clear out the nozzle. Then clean off any stuck filament around the nozzle with a brass wire brush. You can also use a cleaning filament to push through the nozzle.
There are more details and other methods that you can use to clean your 3d printer nozzle and hotend properly, so keep on reading to find out how to get this done.
Symptoms of Clogged Nozzle on Your 3D Printer
Now, there are clear symptoms that the nozzles are clogged or jammed because they are not clean.
Continuous Adjustment of Feed Rate
You would have to adjust the feed rate or the flow settings again and again, which you never did before this time. This shows that your nozzle has started to clog, and the particles are accumulating there.
The Problem in Extrusion
The extrusion, the very first layer of the printing, will start to look uneven and would not stay consistent throughout the whole printing process.
Motor Thumping
Another symptom is the motor that is driving the extruder starts thumping means you would see it jumping backward because it can’t keep up with the other parts that make it turn.
Dust
You would see more dust than usual around the extruder and motor part, which is a clear sign that you need to clean everything starting from your nozzle.
The Odd Scraping Sound
One thing you can notice in terms of noises is an odd scraping sound which the extruder is making because it is grinding the plastic and it cannot push the gear fast enough now.
Other Symptoms
The printer would start showing print blobs, uneven or rough printing, and a poor layer adhesion feature.
How to Clean Your Nozzle
There are a few methods that people use to clean their nozzles, but generally, it comes down to heated up the nozzle to a fairly high temperature and manually pushing through filament.
It’s usually done with a needle from a good nozzle cleaning kit.
A good nozzle cleaning kit that you can get from Amazon for a great price is the MIKA3D Nozzle Cleaning Tool Kit. It’s a 27-piece kit with plenty of needles, and two type of precise tweezers for your nozzle cleaning worries.
When a product has great ratings on Amazon, it’s always good news, so I would definitely go with it. You have a 100% satisfaction guarantee and quick response times if ever needed.
After heating up your material, using a high-quality needle works wonders.
What this does it heat up any built-up material, dust and dirt within the nozzle then push it out straight through the nozzle.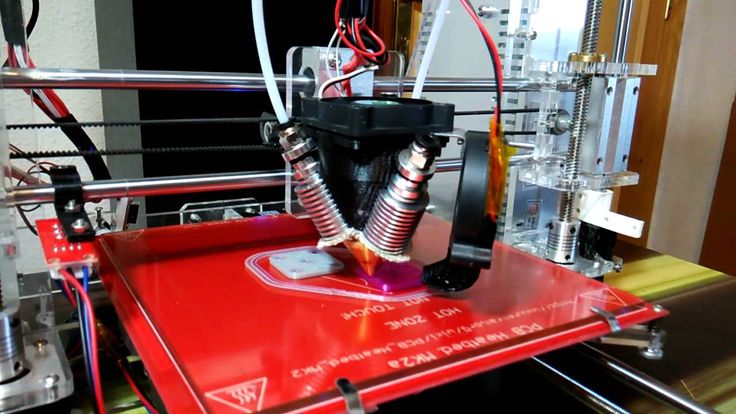 You are likely to get a build up of dirt if you are printing with many materials which have different printing temperatures.
If you print with ABS and some filament gets left inside the nozzle then you switch to PLA, that leftover filament is going to have a hard time being pushed out at lower temperatures.
How to Clean Outside of 3D Printer Nozzle
Method 1
You can simply use a paper towel or napkin to clean the nozzle when it has cooled down. This should usually do the trick to clean the outside of your nozzle.
Method 2
If you have larger, stubborn residue on the outside of your 3D printer nozzle, I would recommend heating your nozzle up to around 200°C, then using needle nose pliers to pick the plastic off.
3D Printer Nozzle Cleaning Brush
For rigorous cleaning of your nozzle, I would suggest you buy a good quality cooper wire toothbrush, which will help you get all the dust particles and other residues from the nozzle.
But remember, always heat the nozzle before using the brush to get it to the temperature where it was in its last printing session.
A solid nozzle cleaning brush from Amazon is the BCZAMD Copper Wire Toothbrush, specially made for 3D printer nozzles.
You can use the tool even if the wires get deformed. The best thing about this tool is that it is very handy, and you can easily hold the brush while cleaning the surface and sides of the nozzles.
Best 3D Printer Cleaning Filament
NovaMaker Cleaning Filament
One of the better cleaning filaments out there is the NovaMaker 3D Printer Cleaning Filament, which comes vacuum-sealed with desiccant to keep it in optimal conditions. It does an amazing job cleaning out your 3D printer.
You get 0.1KG (0.22lbs) of cleaning filament. It has excellent heat stability, allowing it to have a wide range of cleaning abilities. It goes anywhere from 150-260°C without giving you issues.
The slight viscosity of this cleaning filament means you can take easily take residual material out of the nozzle without it jamming inside.
Using cleaning needles alongside this is a great solution to prevent your nozzle clogging while transitioning between lower and higher temperature materials.
It is recommended to use the cleaning filament at least every 3 months for regular maintenance and unclogging procedures.
eSun Cleaning Filament
You can use the eSUN 3D 2.85mm Printer Cleaning Filament, which has a size of 3mm and gets easily inside the nozzle.
The good thing about it is that it possesses a certain level of adhesive quality, which clears out everything and will not clog the extruder during cleaning. You can use it for cleaning the nozzle and extruder both before and after the printing.
It has a wide cleaning range of almost 150 to 260 degrees Celsius that allows you to take up the temperature to a good level to let the particles inside the printer soften up for the removal.
How to Use 3D Printer Cleaning Filament
Cleaning filament can be used in your 3D printer to do cold and hot pulls which are popular methods widely used by 3D printer users.
A hot pull is perfect for getting those large carbonized materials out of your nozzle when there is a serious blockage. A cold pull is where you remove the remaining smaller residue so that your nozzle is completely cleaned up.
To use your 3D printer cleaning filament, load the filament as you usually would into your 3D printer until it has replaced your old filament and actually extrudes from the nozzle.
Change the extruder temperature to make sure it stays hot, for a temperature between 200-230°C. Then extrude a few centimeters of filament, wait, then extrude more a few times.
After this, you can remove the cleaning filament, load up the filament you want to print with, then make sure the cleaning filament is completely displaced after starting your next print.
This filament can be used to clean the printers print core by applying hot and cold pulls. Hot pulls are used to get the biggest parts of carbonized material out of the print core and are highly recommended when the print core is clogged.
With a cold pull, the remaining small particles will be removed, ensuring the print core is completely clean.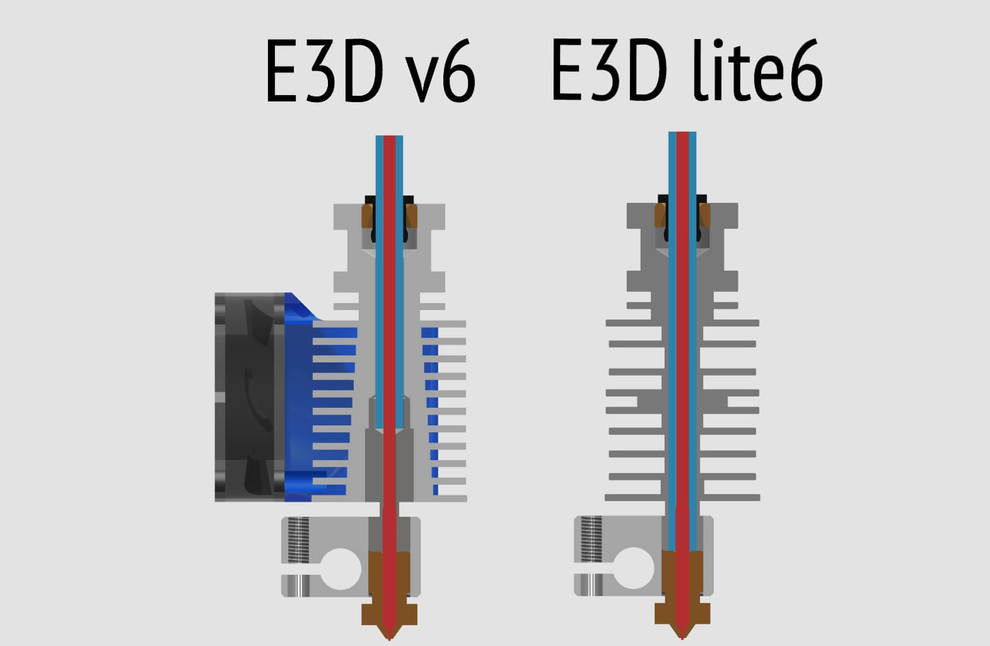
How to Clean a Hotend Tip Covered in PLA or ABS?
You can use a failed ABS print, push it onto the tip and push it straight up. But first, you have to heat the hotend to almost 240°C, and then when you have applied the failed ABS print, let the hotend cool down for a minute.
After this, pull or twist off the piece of ABS, and you will get a clean hotend.
If you are having trouble with cleaning the hotend covered in PLA, you can follow this procedure, which I am going to explain.
You have to first heat the hotend to a temperature of 70°C, and then you need to grab the PLA from any side with a pair of tweezers, or you can use pliers but carefully.
The best thing about PLA is that it gets soft on high temperature and makes it easy to be pulled off, leaving the hotend clean.
Cleaning an Ender 3 Nozzle Properly
Method 1
Cleaning Ender 3 nozzle would require you to open up its fan shroud and remove it from its place to get a more clear view of the nozzle. Then, you can use an acupuncture needle to break the particles which are stuck in the nozzle.
This would help you to make the particle break into small pieces. Then you can use a filament from the top size of the nozzle from the extruder part and enter it from there until it comes out with all those particles.
Method 2
You can also remove the nozzle completely from the printer and then clean it by heating it at a high temperature with a hotgun to let the particles soften up and then use a filament, let it stay inside for a while and then do a cold pull.
Keep doing this cold pull until the filament starts coming out clean.
How Often Should I Clean My 3D Printer Nozzle?
You should clean your nozzle as and when it gets fairly dirty or at least every 3 months for regular maintenance. If you don’t clean your nozzle too often, it’s not the end of the world, but it does help to give your nozzle more life and durability.
I’m sure there are plenty of people who rarely clean their nozzles and things are still working fine.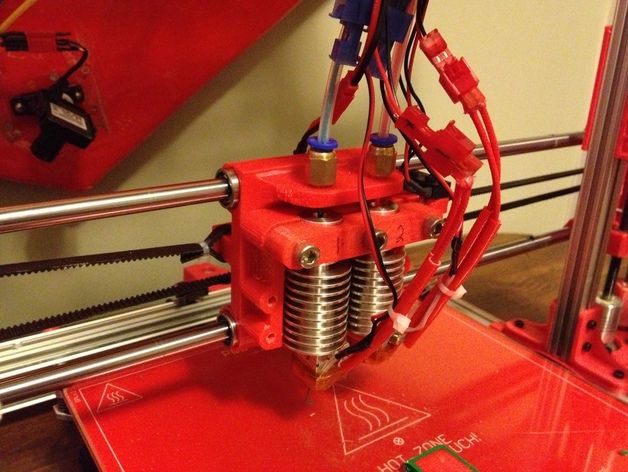
It depends on how often you print with your 3D printer, what nozzle material you have, what 3D printer materials you are printing with, and your other maintenance.
Brass nozzles can last a very long time if you exclusively print with PLA at low temperatures and have your bed leveling methods perfect.
[Guide] Clean up the Hot End after a cosmic disaster - 3D Print
Post Views: 1,925
There are same days, in 3D printing as well as in any other activity where all go wrong, and when we have to clean up the Hot End after a disaster is one of those. One example is getting up in the morning, and when we go to our beloved printer to see what was produced in the night, we find this:
Moreover, to make things worse, which may already be unpleasant enough, we also put the filament, since it is not just PLA, but Nylon. I foresee an intense morning!
But you must not be discouraged, even in the worst of situations and you must always try to catch that minimum of good that apart from borderline situations (I’m always talking only about 3D printing) there is on every occasion!
So I take advantage of this trouble to write a small guide to the deep cleaning of the hotend, after these situations, which in technical jargon are called: “A mess!”.
A small digression about the filament
Specifically, this is Nylon from the company Tecnology Outlet. Those who follow this blog know very well that I am hardly critical of the filaments. I understand that in any case they are people who do their best to bring a product with a spectrum of uses as wide as possible. So that it works with all the machines on the market (which are now really many) and with the custom settings of the users. In cases where I have encountered a few problems I have limited myself to giving feedback with some advice, and in some cases I have also been ascribed.
This time, it’s different. Unfortunately I didn’t find any points that could be saved. I did a lot of tests, with different temperatures, insulating the printer, increasing the flow. I also dried the roll with a special dryer for 48 hours. Nothing, the filament was always printed inconsistently.
Don’t think it’s a material change problem. I have already successfully printed nylon many times before, but not this one.
I sincerely hope I’ve been very unlucky. To date, in all sincerity, I don’t feel like recommending it.
But back to us and our little guide!
The guide is divided into 3 steps, each of which is done with materials and ideally in a different place!
Clean up the Hot End – Step 1: Save the saveable
Where: Near the Printer
Danger: Burns, beware of the temperatures!
Equipment:
- Tin Welder
- Long pliers
- Cardboard protection (any card)
- Lots of patience (not for sale)
First, heat the hotend cube to the highest possible temperature and grab it with the clamp. At the same time, when heating the welder too, you should start to remove as much material as possible, trying not to be too close to the cables of the heater and the probe so as not to damage them.
It’s a long and tedious job! Once most of the material has been removed, try to dismantle the hotend piece by piece.
It is advisable to remove the heater as a last resort and while it is always in operation rub it with a paper towel folded many times to form a very thick layer, at least about 1 cm, so as not to burn. At this point the cartridge will be at about 300°, so be careful!
Ideally at this stage you will have probe and cartridge clean, or otherwise no longer encrusted. Should test cartridge and probe, they are delicate, and could break. In case you notice some malfunctioning it is better to replace them directly, since they are very cheap
In this phase it is always advisable to cut a few millimetres of the PTFE pipe that certainly does not benefit from all the heating/cooling. Take advantage of this to give new life to the tube! Usually just 1/2 mm is enough and we would have the equivalent of the new tube!
To Step 2!
Clean up the Hot End: Step 2: The Cleaning continues
Where: Kitchen (to the delight of your mother, wife, girlfriend, or the male equivalent)
Danger: burns by temperature/flame
Equipment:
- Iron tongs
- Kitchen Glove
- Chisels
- Cleaning nozzles of the right size
- Recycled cardboard to be used so as not to dirty
It is important to use the blue flame of the kitchen and not the yellow flame of the lighter as it is more caloric and has less residue. So your nozzle (for example) will return bright and not black smoke! This part is also feasible with a cooking torch, if, rightly, you want to continue working in your space.
Light the kitchen fire, put the glove in the supporting hand, grab the pliers. Grab one of the 3 objects you brought, then cupboard, nozzle or throat and start putting them on the fire. When you see that the plastic material starts to skim, place them on the cardboard and with the chisel start cleaning them until you have removed the plastic. Repeat these steps a few times. For the nozzle, once you have cleaned it from the outside, start using the cleaner as well, to try to remove the material from the inside. I recommend using the correct size on the tip side and the largest size you have (alternatively also a drill bit of the correct size, to remove the material on the other side! As before, help yourself with a handkerchief folded several times and you can make the pieces shine!
Clean up the Hot End: Step 3: Inner Cleaning
Where: Garage, a non-domestic place
Danger: Chemical abrasion – highest attention –
Equipment:
- Caustic soda in flakes or pure acetone (depending on wich material you are cleaning)
- Safety glasses
- Mask
- Work gloves, better if leather
- A nail or similar piece of metal
- A glass or ceramic container, even a glass
However much you worked well in the previous step, there was certainly some residue left in the threads, so you have to take it out!
As you already know, caustic soda removes all types of residue, while pure acetone is specific to ABS.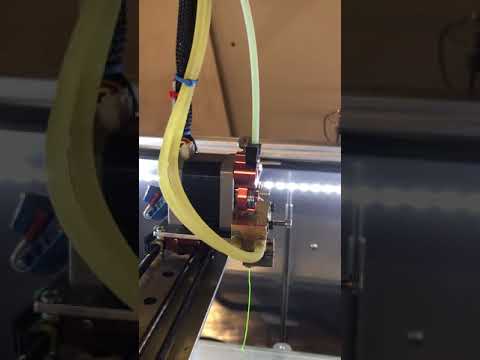
Wear all protective equipment, including a long-sleeved sweatshirt * DO NOT PLAY WITH CAUSTIC SODA*.
Place about 1 or 2 cm of soda flakes inside the glass, and our 3 objects to clean. Now fill the glass almost to the brim with water and start mixing with a metal object. You will see that slowly the temperature inside the glass will rise and the liquid will start to fry.
Continue stirring gently until you feel the 3 objects inside the glass. I say you will hear because at this point the loiquid will be opaque and you will not be able to see inside. Now leave the glass in a safe place, not within reach of children or animals for 3/5 hours.
On your return, slowly pour the soda down from a sink and rinse the objects with water. It is possible that they have a patina that should be removed with a rub. In some cases you can also have the desired brilliance regained with sandpaper.
FINISH!
All you have to do is reassemble everything and you’ll have a brand new hotend again! You weren’t hoping for that, were you?
While you are at this stage, and if you have to buy some equipment I highly recommend the silicone socks for the cubes. They definitely improve your life! First of all the cube will feel much less of the fan layer, keeping the temperature more easily! Secondly, if you recapitulate something like this, the silocone will protect your hotend and make cleaning much easier! There are many sizes available! Check that we are suitable for your hotend!
If you have found this post useful, please LIKE on Easy 3D Home Facebook’s page to receive updates on all the news of the Blog! You can find other guides about 3D in our Guides section!
Like this:
Like Loading...
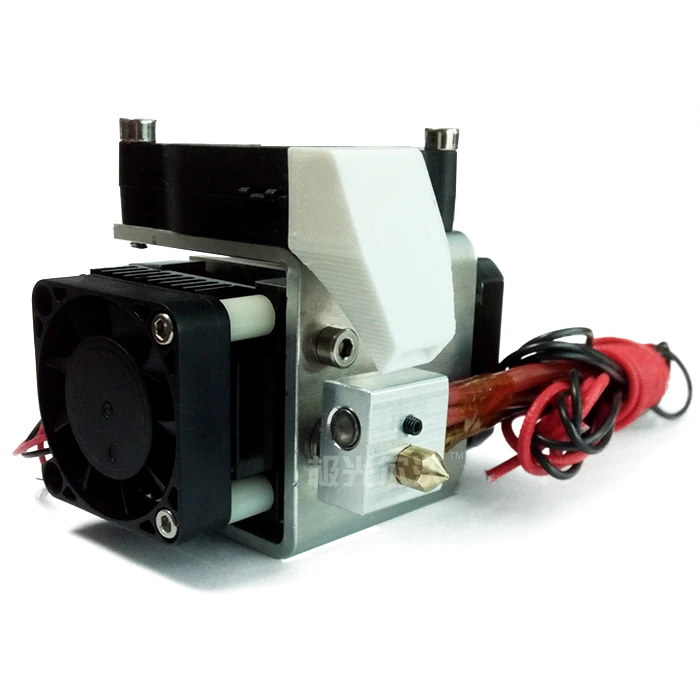
Extruder cleaning with all the nuances
Dear 3D lovers, I greet you!
In this post we will touch on the topic of disassembly, cleaning and assembly of the extruder, taking into account all the nuances. The sequence of operations is described for the bowden plastic supply system (long-range)
P.S.
For those who do not have the desire / time to read the entire post, I have prepared a video for your attention below at the link.
Before disassembling the extruder, it is recommended to have spare parts on hand. Namely: thermal barrier, nozzle and thermistor. This is the minimum set of those elements that can be easily damaged.
Also, if you are disassembling the extruder for the first time, it is recommended that you carefully analyze each step before doing anything. Prepare all the necessary tools, find out exactly what your extruder is called, what model the thermistor costs, what power the heating element costs, where you can quickly purchase them in case of unforeseen circumstances. It is also better to allocate yourself an empty window for a couple of days without printing. All these actions are necessary so that you do not have a situation with a disassembled and disabled extruder, and at the same time, tomorrow you already need to put the printer on a new print.
Let's start. First of all, you need to warm up the extruder to operating temperature. The temperature should correspond to the plastic that was last printed. You can heat the extruder using a command either through the display or by connecting the printer to a computer and giving the appropriate command.
Warm up the extruder, remove the plastic from the supply system, then remove the retaining ring from the fitting on the extruder (if any) and pressing on the fitting cap, remove the Teflon tube.
Here, a situation may arise that the Teflon tube cannot be removed from the extruder (it will jam). The reason for this lies in the fact that the tube is held by the fitting using harpoon-shaped metal teeth, which, during the operation of the printer, slowly bite into the tube itself. This is due to the fact that during the supply of plastic, pressure appears in the tube and the tube tends to be released, but at the same time it is held by the fitting, then the plastic retracts, which relieves the pressure in the tube, then the plastic is again supplied, which again increases the pressure in the tube. system and this cycle is repeated many times. This creates an imperceptible reciprocating movement of the tube, which is why the fitting bites into it. And traces appear on the tube itself - a specific circular incision. This is an inherent disadvantage of any system that has fittings. So that after assembling the extruder there is no play in the area of the gnawed area, you should cut the tube a little so that the place of contact with the fitting falls on a fresh area. Cut the tube with a sharp blade. It is not recommended to cut the tube with scissors, because. they work to crush the material and the end will turn out to be deformed, and the cut should be even. After repeatedly overhauling the extruder, the tube may become too short and will need to be replaced.
Now, if the Teflon tube is not accessible, you can unscrew the fitting and take it out with the fitting, but this will leave spiral marks on it. The second method is also possible - because. the fitting blocks movement in only one direction, you can get to the point where you need to unscrew the nozzle and after that, pass the entire tube from the side where the nozzle was. Do not forget to disconnect the tube from the side of the plastic supply system.
And so at the moment we got the phone. After that, if you do not have a silicone cover / sock on your extruder, then you can unscrew the nozzle. To do this, you need to hold the aluminum block with one hand (for the E3D V6 Volcano extruder, it is convenient to use a 13 wrench) and use a ring wrench or a 7 head to unscrew the nozzle. You need to unscrew carefully, because. extruder is hot.
If you have a silicone sleeve/sock, you won't be able to unscrew the nozzle now. In any case, at this stage, with the nozzle unscrewed or not, the extruder should be removed from the printer. The only thing before this is to reduce the temperature of the extruder to room temperature. Also, before removing the extruder, you need to make sure that all possible wires with connectors are disconnected. When the extruder is in our hands, we will have the opportunity to remove the silicone cover / sock, which we do. After it is removed, you need to warm up the extruder again and unscrew the nozzle. While the extruder is warm, all actions must be done carefully so as not to burn yourself. Now we unscrew the thermal barrier with an aluminum radiator. After that, again reduce the temperature of the extruder to room temperature.
Now it's time to inspect all parts of the extruder. If you see sticky plastic anywhere, it should be removed. You should also make sure that there is no plastic inside the thermal barrier. If it is, it must be removed, but first unscrewing it from the aluminum radiator. It must be unscrewed carefully so as not to damage the thread, and also not to deform the thin-walled groove, otherwise the Teflon tube will not be able to completely pass through it (it may get stuck in the thermal barrier if you have it through) already during assembly of the assembly. A plastic plug in the thermal barrier appears mainly due to the fact that the Teflon tube, biting into the fitting, slightly moves away from the end of the nozzle and a gap slowly appears between the nozzle and the tube, which is filled with plastic. The more the tube bites into the fitting, the larger this gap becomes. The plastic plug formed at this place is just one of the factors that makes it difficult for the filament to move through the extruder. After all the plastic inside the thermal barrier is removed, remove the plastic (if any) from the outer thread of the thermal barrier using an M6 die.
Having dealt with the thermal barrier, now you need to make sure that there are no traces of plastic on the internal threads of the aluminum block and the external threads of the nozzle. If dirt is visible, you can clean the internal thread of the aluminum block with an M6 tap, and the external thread of the nozzle, as in the case of a thermal barrier, with an M6 die. By the way, at the expense of the latter - this is true for the E3D V6 and E3D V6 Volcano extruder. If you have another extruder, then check it out for yourself and determine what threads it has and what tools you will need.
When working with an aluminum block, be extremely careful with the wires leading to the thermistor.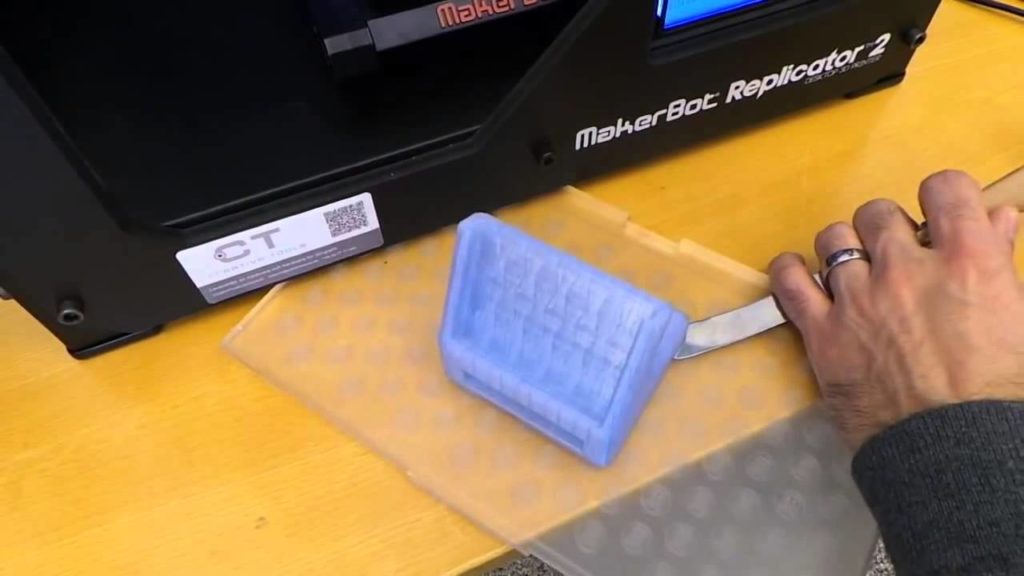 Both the thermistor itself and the wires are very easy to damage. If, however, the thermistor or its wires are damaged, it will not be able to read the temperature from the extruder. In this case, the display will show a temperature error. (TEMP ERROR). The error is displayed both on the display and when the printer is connected to the computer (M999).
Now let's move on to the nozzle. The nozzle can be replaced with a new one, or the old one can be cleaned. When replacing with a new one, you should make sure that there are no inclusions inside the nozzle, and you can also check with a drill of the appropriate diameter (if any) whether the diameter of the hole corresponds to that declared by the manufacturer (I had experience when a new nozzle turned out to be not completely drilled). When cleaning the old one, it is necessary to remove the plastic from the thread, from the end and inside the nozzle. After you need to make sure that the hole is visible through. If you do not remove the remaining plastic inside the nozzle, and there will be some inclusions in it, for example, larger than the diameter of the nozzle, then the plastic will not be able to extrude immediately after assembling the extruder and all the work will be done in vain.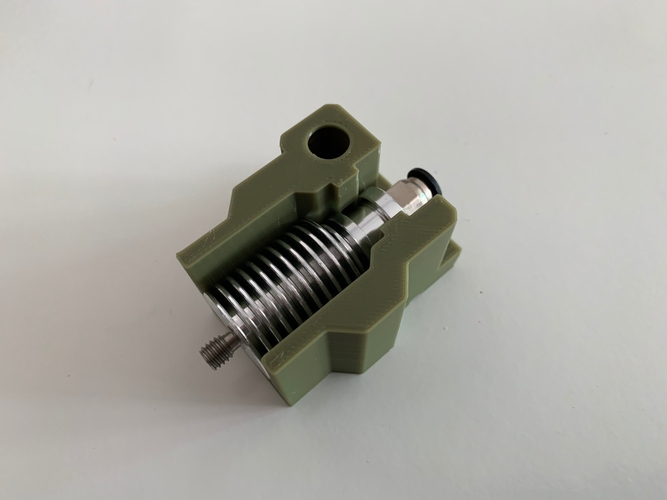 By the way, the ingress of foreign inclusions into the extruder is larger than the diameter of the nozzle, this is one of the reasons that the extruder clogs sharply.
Now comes the critical tightening torque. We screw the thermal barrier into the cooling radiator. Next, we screw the nozzle into the aluminum block until it stops, after which, ATTENTION, unscrew the nozzle a third of a turn. Now we screw the thermal barrier from the back until it stops. After that, you need to lock the nozzle and thermal barrier together to prevent the plastic from flowing out from under the thread. It was for this that it was necessary to unscrew the nozzle a third of a turn. The tightening force, if possible, is better to find out from the manufacturer of your extruder. But here I would like to note that if you overdo it with effort, you can both strip the thread in the aluminum block and break off the nozzle. But if you do not tighten it, then the plastic can seep out from under the thread. Because of this, you will again have to disassemble the extruder and clean everything where the plastic has got. Now we wind the aluminum radiator onto the thermal barrier. Then, on one side, holding the aluminum block with a 13 wrench, and on the fitting with a 10 wrench on the other, ATTENTION with a slight effort tighten the threads of the fitting and the aluminum radiator. Effort here cannot be applied much, because. it is easy to damage the thermal barrier in its thin-walled zone (in the place of its groove).
After tightening the extruder, put on the silicone cover, if available, and install the extruder in its place. The next step is to insert the Teflon tube. It must be inserted tightly and until it stops. If the tube is not fully inserted, the empty area will fill with melted plastic, which in turn will prevent the filament from moving through the extruder. Next, you need to fix all the wires in their original state and make sure that the solder wires (if any) are not in the bend area.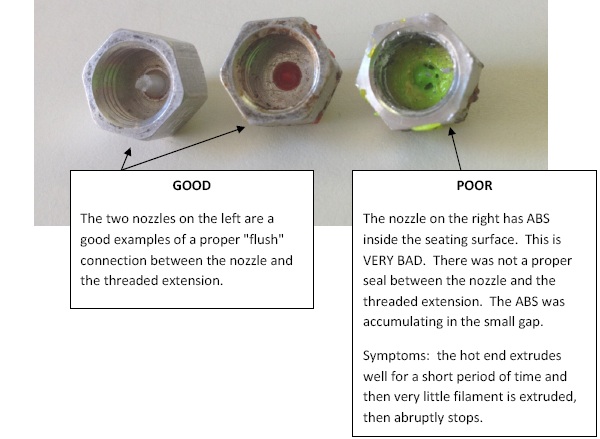 Due to the fact that the loop of wires is constantly bent during printing, soldering points are not allowed in the bend area, because. otherwise, this will inevitably lead to a breakdown of the soldering site. Also, do not forget to insert a Teflon tube into the plastic supply system, if it was removed. We connect all previously disconnected connectors.
As a result, the extruder is assembled and installed in place. After that, it is also recommended to calibrate the table.
Before finishing, I would like to repeat the main nuances: 1) After assembly / disassembly, the assembly must be clean and without any plastic inclusions 2) Do not forget to lock the nozzle and thermal barrier between each other. 3) You can cut the Teflon tube a little so that the place of contact between the Teflon tube and the fitting is “fresh” 4) Perform all work very carefully and with an understanding of what you are doing. 5) Plan everything you need to do in your head so that you have a clear understanding of the sequence of all actions 6) Think about what spare parts you need to buy in addition 7) Prepare the tool that you will need during the work 8) schedule the cleaning of the extruder so that on the eve of you did not need to set the printer to print.
Thank you for your attention. I hope the material was useful for you, I wish you all the best.
How to clean a 3D printer nozzle: clean the extruder from plastic
The extruder nozzle is one of the most problematic parts in a 3D printer. It can easily get clogged or clogged. Poor plastic feed will affect the quality of the finished model. Print defects will occur. Sometimes the job is completely stuck as the printer needs a nozzle cleaning.
Main Causes of Clogged Extruder
Regardless of the type of print head, it can become clogged. The reason for this is the filament or dirt that accumulates inside the knot. Most often, the nozzle becomes clogged when the printer is not used correctly under conditions of:
- Increased load, when the device works for a long time without stopping.
- In dusty areas. Sometimes the printing device is placed in a non-residential room or workshop, where cleaning is very rarely carried out.

- Incorrect print settings. In particular, the use of an inappropriate filament or an erroneously set melting point.
In some cases, the design of the nozzle itself can cause frequent clogging. For example, when the printer comes with an initially defective extruder. The geometry of the nozzle is broken. The device should be returned under warranty or the nozzle should be replaced separately.
Information! The filament itself can be the cause of litter. A common factory defect or a burr on the plastic can cause a cork.
Sintered filament pieces
In any case, it is worthwhile to carefully study the problem of blockage and only then proceed with prevention. If you are afraid to damage the device, it is better to take the printer to a service center.
Dust and debris trapped in the nozzle
The first cause is dirt or dust that has entered from outside. Most often, the nozzle becomes clogged with debris for a long time.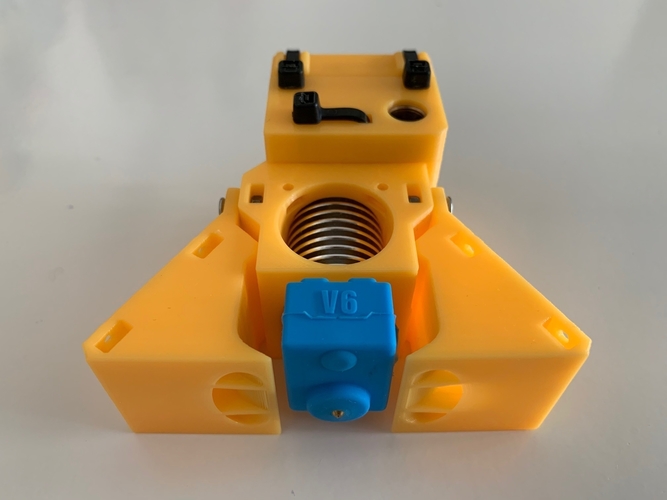 Dirt can accumulate for months and even years. It sinters on the walls of the nozzle, plaque is formed. Over time, it can cause the filament to get stuck.
Extruder temperature too high
Beginner 3D makers find that an excessively high melt temperature will help avoid clogging problems. This is an incorrect judgment. When working at an elevated temperature, the plastic is instantly sintered right inside the assembly. Filament jamming occurs. A bottleneck is formed.
Therefore, it is important to follow the temperature regime recommended by the filament manufacturer. Sometimes this figure may differ slightly. Somewhere at +/- 5 ° С. It all depends on the printer model, as well as the extruder itself. The optimum melting point is found experimentally.
How to clean the 3D printer extruder: step-by-step instructions
You can clean the printer yourself, without going to a specialized workshop.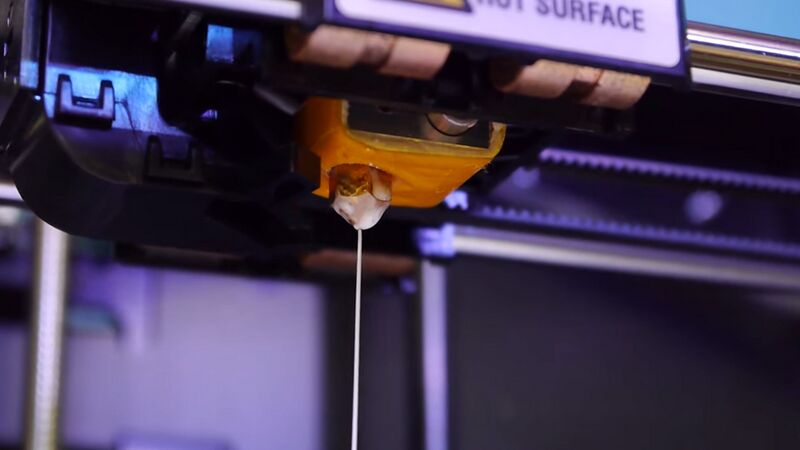 There are several working methods by which you can clean the nozzle. Let's consider each of them step by step.
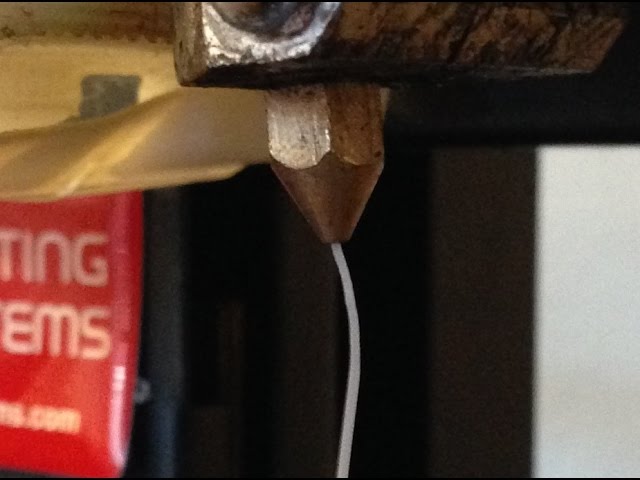
Clogged extruder nozzle
Manual
The roughest way to clean out the extruder. Thin objects are used for it:
- drill with a diameter of up to 0.35 mm;
- guitar string up to 0.33 mm in diameter;
- leg from a diode or transistor.
Special nozzle cleaning tool for different diameters
Cleaning algorithm:
- Shut off the 3D printer. Wait until the nozzle cools down a bit.
- Remove filament residue from nozzle tip.
- Drill or chisel the hole slowly with the tools indicated. Be careful not to make a hole too deep.
- Turn on the printer, feed the plastic to print.
- Repeat the procedure several times until the filament comes out in an even layer.
Some experts advise you to clean the nozzle while the printer is on. This can be done if the primary rubbish has been eliminated.
Attention! Do not use a screwdriver or drill! So you can miscalculate the force and go through the extruder, damaging the plastic capture mechanism. It is better to use a thin drill clamped in pliers.
Cleaning with a thin tool
Thinner
Sometimes mechanical cleaning is only partially helpful. With a drill, you can remove the cause of the blockage, but there are still plaques or influxes of plastic inside the nozzle. This situation is often encountered when working with ABS. To remove the filament completely, you will need to clean the nozzle in an aggressive environment. For example, in acetone or dichloroethane.
Cleaning algorithm:
- Turn off the printer, let the extruder cool down a bit.
- Unscrew the nozzle, put it in a container with acetone or dichloroethane.
- Leave the part for 2-3 hours, then remove and clean the nozzle with a needle.
Screw the nozzle onto the print head. Throw out the plastic.
Important! Spare nozzles can be stored in a jar of acetone. In this way, they will always be ready for use without pre-cleaning.
Filament
Filament cleaning is one of the safest methods that does not involve intervention in the design of the extruder or partial disassembly of this unit. Two types of plastic are used to clean the nozzle:
- Filament with higher melting point. A reel with refractory plastic is placed in the printer. It literally pushes the cork out of the extruder.
- Cleaning plastic. It is usually sold in the form of short sticks or small coils. Its structure resembles nylon. Cleaning filament is the safest way to remove plugs in an extruder.
We recommend using the latter method as an alternative to manual or dry cleaning.
Carbon deposits on the filament
Clogging prevention - expert advice
To keep the extruder and nozzle in good condition, it is worth following a number of rules:
- Use the filament melting temperature specified by the manufacturer.
Learn more