How to make a 3d printer out of old printers
How to Make a 3D Printer Out of Old Printers?
This site contains affiliate links to products. We may receive a commission for purchases made through these links.
0 shares
- Share
- Tweet
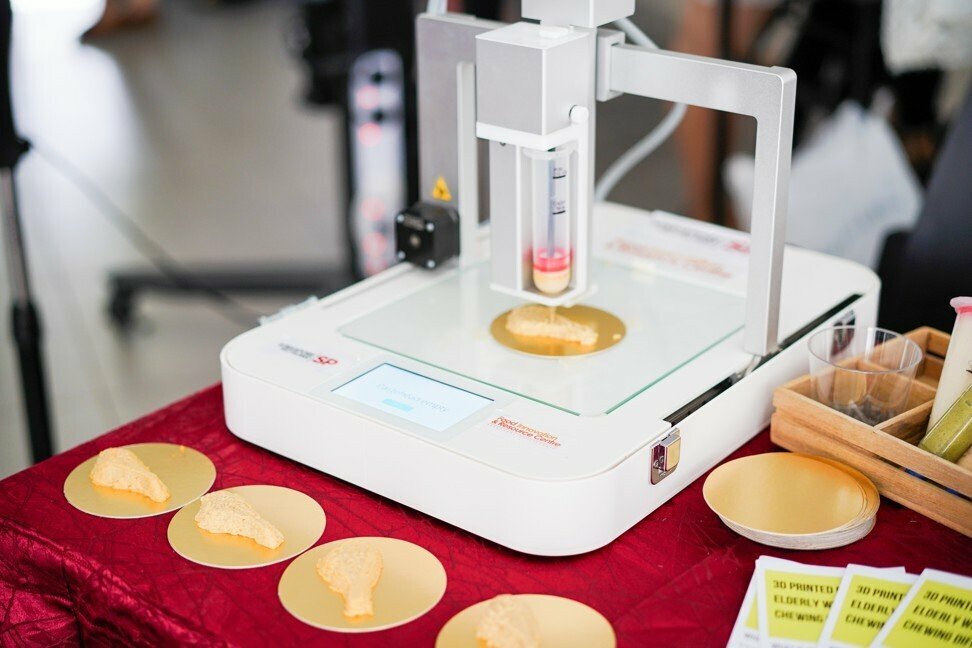
Buying a 3D printer, even with the prices falling in recent years, is an expensive endeavor. Therefore, you might be tempted by the thought of building your 3D printer, but is this possible?
Well, luckily, this is something you can do using old printers, thereby saving your hard-earned money for other purchases.
Table of Contents:
- Steps To Turn A Printer Into A 3D Printer.
- How to Get Started
- Delta-based Printers
- Cartesian-Based Printers
- Benefits of The DIY 3D Printer
- Conclusion
However, the process to follow when making a 3D printer is something that many people find complicated. For this reason, in this article, we’ve sought to explain the steps you need to follow when making a 3D printer using old printers.
Steps To Turn A Printer Into A 3D Printer.
Using an inkjet printer, you can embark on the process of making a 3D printer. This is an excellent option instead of discarding it once it can’t print several pages of your novel or flight boarding passes. Furthermore, most people buy another one once a newer model is launched.
This is what an 18-year old Italian student Michele Lizzit did instead of throwing away the parts of the now destroyed inkjet printer. He also got an old scanner, Amazon cardboard boxes, and several hand-soldered electronics in addition to the printer. Whereas the outcome wasn’t attractive to the eye, it did work well as a 3D printer, and all this is at a mere price of €10.
Other items that Lizzit used are some electronics, a hotend extruder, a motor driver, an ATmega328 processing brain, a high-current transistor, and three driver boards.
Once everything that’s needed has been assembled, other things required for the 3D printing include working to repurpose old parts and 3D printing an extruder housing.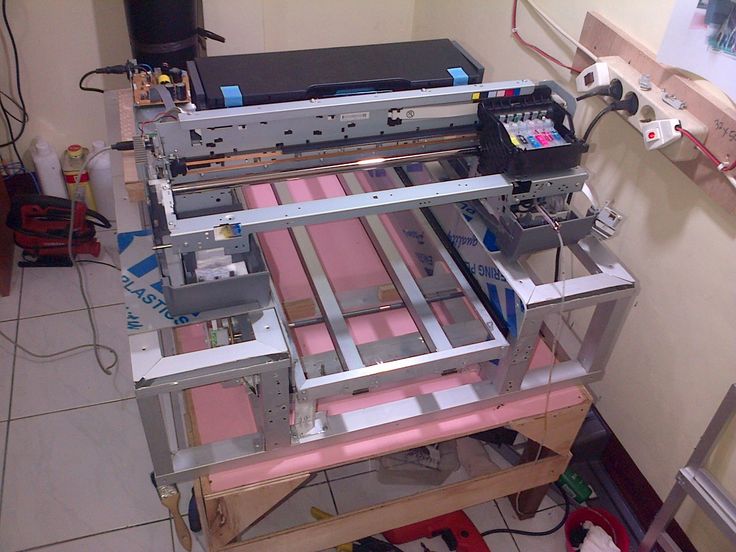 All that’s required are two cardboard boxes to be used as the printer frame, which should later be attached to an axis on them. It would be best to use an inkjet printer paper loading mechanism instead of buying a new hobbed bolt.
Consequently, place the plastic plate from the scanner on top of Amazon’s cardboard packaging as this provides excellent adhesion for prints. At the moment, cardboard biscuit boxes offer the structure with support but using a robust metal frame is ideal.
The reason for this is that the cardboard frame affects the accuracy of the cardboard frame negatively. After doing this, create a system firmware that’s open-source just as Lizzit did.
Although the print resolution on both axes is 33 microns, this DIY 3D printer doesn’t boast an appealing look. The integrated upcoming software enables the system to clean a blocked nozzle, compensate for filament shipping, and choose the correct temperature for the filament independently.
This project aims to make a 3D printer using an old printer to show that you can still achieve relatively accurate prints using home-build linear encoders found in inkjet printers.
It shows the ingenuity to make good use of old hardware, plus it is very cheap. Moreover, these 3D printers use up less power than models bought in shops as it features DC motors instead of stepper motors.
All these instructions are also made available on Lizzit’s website.
How to Get Started
After deciding to build a 3D printer, the first thing to do is determine what type of printer you’re hoping to construct. In this guide, you’ll be taken through the steps to follow when making a plastic deposition or FDM printer with three-axis. With that in mind, there are still lots of configurations and frames you have to pick from.
The two different coordinate systems incorporated in 3D printers are Delta and Cartesian.
Delta-based Printers
These printers consist of three parallel axes linked to the extruder, which prints onto the stationary, circular print areas. It’s a less popular choice compared to the Cartesian option, and some of its features include:
- It has a cylindrical build volume.

- It’s a lot harder to program and construct.
- Best suited for bigger parts.
- Its resolution varies across the parts, with lower resolutions towards the center, whereas higher resolutions are further out.
- Needs at least three motors.
Cartesian-Based Printers
These printers are a more popular choice than the Delta-based counterparts. It comprises three perpendicular axes which print on the rectangular print regions. Typical setups have a bed controlled by the third axis while the other two axes control the extruder. Nevertheless, there exist some minor variations across different models.
The features of Cartesian-based printers include:
- Incorporate the most common coordinate system.
- Simplest to program and build.
- Needs a minimum of three motors.
- It can be scaled up or down with ease.
- A popular coordinate system.
If you want a desktop printer, the Cartesian is an ideal choice since they have a bigger build volume than the deltas of the same size and are more compact. However, the delta printers are preferred as they’re cheaper to use as it gets bigger.
In addition to this, bigger-sized printers are, in most cases, delta printers as they need less framework in comparison to the construction of building-sized Cartesian.
Benefits of The DIY 3D Printer
Educate Your Children
If you want to educate your children by teaching them how to carry out certain tasks practically, then this DIY 3D printer will be a handy appliance. Using this machine, your kids get to stimulate their creative sides, and this is very important in sharpening their education skills. Furthermore, it helps them develop problem-solving skills, which further boosts the creativity of your kids.
Save Time And Money
The price of 3D printers bought online or in shops is quite steep even if the prices have recently started to fall. Therefore, why suffer this stiff investment if you could instead set aside only a small percentage of this money and spend it on making your DIY 3D printer.
You also get to save time you would have otherwise spent waiting for your 3D printer to become available after placing an order for one.
Conclusion
The hype around 3D printers won’t die down any time soon. However, if you’re on a tight budget, using an old printer to make a 3D printer is a viable solution. By doing this, you can be sure to start using this equipment to carry out your 3D printing tasks.
Student builds €10 3D printer from old inkjet printers
3D Printing
View 4 Images
View gallery - 4 imagesInkjet printers may be a fairly inexpensive way to print out your holiday snaps, but they can be fragile machines and end up at the city dump well before they hit kindergarten age. Italian maker Michele Lizzit has designed a way to make use of spent printers to build an operational 3D printer for just €10.
The 18 year-old student at Liceo Scientifico Copernico in Udine, Italy, broke apart three old inkjet printers and a flatbed scanner and used their parts for the project's mechanical components. Not everything could be salvaged from scrap though, and he had to buy a hotend extruder, an ATmega328 processing brain, a motor driver, three driver boards and a high-current transistor.
The extruder housing was 3D-printed using a standard desktop machine, but rather than source a hobbed bolt, he made use of the paper loading mechanism from an inkjet printer. A plastic plate from a scanner was topped by cardboard packaging from Amazon, and is reported to offer "great adhesion for prints." Cardboard biscuit boxes currently support the structure, but Lizzit is looking to build a solid metal frame in the future as the cardboard frame adversely affects print precision.
Finally, Lizzit created some system firmware, which he's made open source.
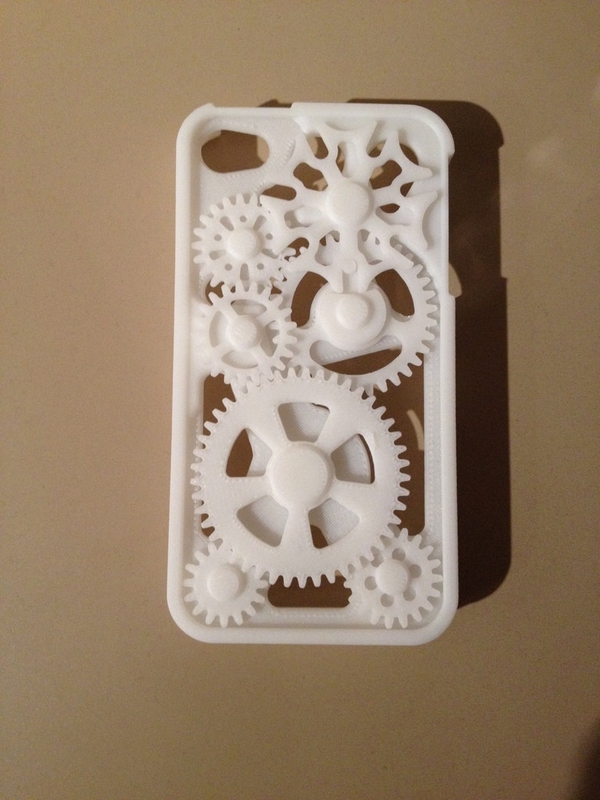
A test print from the €10 3D printer built from old inkjet printers and a flatbed scannerMichele Izzit
The end result is not going to win any beauty pageants, but is said to achieve a print resolution of 33 microns on both axes. Upcoming firmware will allow the system to compensate for filament slipping, auto clean a clogged nozzle and select the correct temperature for a filament on its own.
The aim of the project was to prove that fairly precise prints can be had from a home-build that makes use of linear encoders from inkjet printers, but it also has the potential to put spent hardware to good use and is impressively cheap. And because the system uses DC motors instead of stepper motors, it should consume significantly less power than a shop-bought model, too.
Lizzit has build instructions on his website, along with a parts list and links to firmware downloads – should you wish to build your own.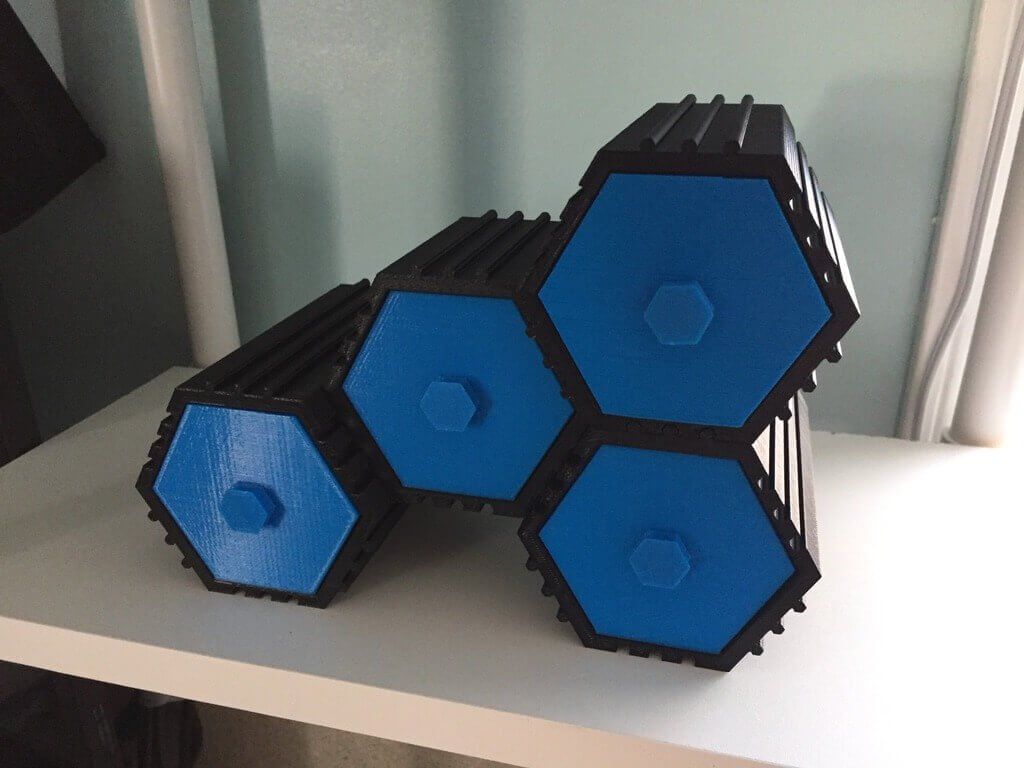 The video below shows the machine making a test print.
Source: Michele Lizzit
3D printer from recycled inkjet printers - Test print
View gallery - 4 imagesPaul Ridden
While Paul is loath to reveal his age, he will admit to cutting his IT teeth on a TRS-80 (although he won't say which version). An obsessive fascination with computer technology blossomed from hobby into career before hopping over to France for 10 years, where he started work for New Atlas in 2009. Now back in his native Blighty, he serves as Managing Editor in Europe.
DIY 3D printer from inkjet printer
How to assemble a 3D printer from parts from an inkjet printer?
3D printer is a high-tech and expensive device. If you buy a cheap device, you may encounter poor-quality assembly, fragile components and a short uptime. Having in stock unnecessary, decommissioned, failed inkjet printers and scanners, you can assemble a printing device from their parts to create three-dimensional models.
Do-it-yourself 3D printer from an inkjet printer
If the cost of the device is the leading factor in choosing a device for printing 3D objects, it is worth assembling a 3D printer yourself. According to user reviews, cheap models of 3D printed devices made in China have the main drawback - the low quality of components. In particular, guides are the weak point of Chinese devices. These elements are subjected to significant stress, and if they are of poor quality, they can be deformed under the action of tension belts.
Important! In older document printers, the rails are made of hardened steel. They do not bend even with considerable effort. Such details will be an ideal alternative to regular Chinese ones.
By dismantling unnecessary office devices, you can get a set of spare parts necessary for assembling a 3D printer and save a lot on the purchase of components. These are:
- printer head slide assembly;
- timing belts;
- mechanical or optical limit switches;
- power supply;
- stepper motors and drivers with controllers and other parts.
Attention! Inexpensive inkjet printers were mostly equipped not with stepper motors, but with DC motors with an encoder. Theoretically, they can be used in the assembly of a 3D apparatus by redesigning the latter. Stepper motors are usually extracted from scanners.
But the advantage of DC-motors should be noted: they consume electricity only during movement, while stepper motors are constantly supplied with power.
Accessories such as hot end, extruder and control board will have to be purchased. The frame is assembled from improvised materials - plywood, steel corners or parts of the cases of disassembled copiers.
A self-assembled printer will be much cheaper than factory counterparts, but at the same time, it will be of higher quality than budget models presented on the market by Chinese manufacturers.
How to make a 3D printer from an inkjet printer: step-by-step instructions
To work on assembling a printer from donor components, you will need a set of tools and materials:
- hacksaw, drill - to make the case;
- soldering iron and solder - for mounting electrical cables;
- screwdrivers and hex set - for assembling components;
- pliers;
- multimeter tester - for checking the electrical circuit;
- screws and nuts;
- cable ties;
- electrical tape.
Attention! Knowledge of electronics and engineering is a plus.
Accessories:
- steel rails;
- timing belts;
- micro stepper motors;
- stepper motor drivers;
- extruder and hotend;
- optical sensors - limit switches-microswitches;
- power supply;
- connection cables;
- electronic control board and microcontroller based on Arduino;
- LCD display;
- desktop glass;
- parts for the frame.

Next, you will need to stock up on a fair amount of patience and pedantry - assembly requires careful observance of all instructions.
Assembly process
- Fabrication and painting of the frame.
- Mounting the X and Y frame axes and fixing stepper motors to them. The extruder will move along the X axis, the Y axis is needed to move the platform.
- Installing the Z axis support rod.
- Attaching the extruder.
- Connection of heating elements, cables, power supply.
- Assembly of electronic elements: boards, microcontroller, LCD display.
After assembling and testing the electrical circuits, install the software. At the last stage, the working table, the X, Y, Z axes, the temperature of the heating elements and the filament pulling speed are calibrated.
Important! After starting the printer, print a test model. It will show all the flaws in the assembly and settings.

Mistakes and how to avoid them
Printer performance depends on the quality of the installation. But it is not always possible to eliminate errors when assembling the device.
- One of the serious mistakes that is often made when assembling the printer with your own hands is the incorrect installation of the frame elements. Even a slight misalignment of the corners will cause jamming when the carriages move. The geometry of the mating parts must be maintained as accurately as possible.
If the body is made of plywood, it is recommended to cut its elements on a CNC laser machine. When assembling a frame from metal corners, it is necessary to control the mating angles of the parts at each stage. - The second common problem is the backlash of the frame elements. In this situation, print quality cannot be achieved. There should be no gaps between the parts. They occur either when the fasteners are loosely tightened, or if the frame elements are poorly prepared, that is, the dimensions are incorrectly maintained.
- If the electrical wiring connectors are not of good quality, there will be constant power outages. And the installation of short wires will cause them to break. The length of the wiring must match the dimensions of the frame, taking into account moving parts. It is necessary to check the tightness of the connection of the connectors, thereby minimizing the risk of disconnecting individual components and mechanisms from the power supply.
Quality control of the assembly at each stage, checking all connections and geometry of structural elements will help to avoid problems.
That's interesting! The article discussed how to assemble an FDM printer from improvised materials and parts left after dismantling office equipment. And an engineer from the Netherlands assembled a powder-type 3D printer based on an inkjet printer. As a filament, he used gypsum, sand, metal powder, and filled the cartridge with a binder. Otherwise, the technology is similar to laser layer-by-layer sintering.

Assembling a 3D printer with your own hands is not at all as simple an action as it seems at first glance. But lower financial costs and higher quality components compared to budget models from China make it expedient to manufacture a printing apparatus on your own. And given that a significant part of the parts will be recovered from the old inkjet printer and copier, this will further reduce the cost of producing a homemade 3D printer.
- May 17, 2021
- 2849
Get expert advice
Homemade 3D printer made from plywood and parts from old printers, DVD drives.
Article for the contest 'My 3D printer', in the nomination '3D printer assembled by my own hands'
Hello everyone.
My name is Nikita, I'm a schoolboy, I'm building my own 3d printer for my project.
I study at 9class, at labor lessons we mainly make crafts made of wood:
Cutting boards, caskets, using wood carvings.
A few months ago, a technology teacher from a nearby school got me interested in 3D modeling in Compass 3D. I was very attracted by the fact that you can quite easily create 3-dimensional objects. Working in Compass 3D, the idea arose to create a new working tool for the technology cabinet: a 3D printer. The main goal: to create a 3D printer as cheaply as possible, while using spare parts from old technology. When looking for old printers, one school teacher helped a lot - he helped me find the head of a large company, which donated to me its old decommissioned equipment.
I divided the work on the 3D printer into several stages:
1. Choice of kinematics.
2. Selection of the necessary electronics and ordering components from China.
3. Search for necessary spare parts from old printers, scanners, CD/DVD drives.
4. Development of 3D models and drawings of a new printer.
5. Assembling the printer.
Since there was not much money, it was decided to use furniture rails with dimensions of 35*400 mm (X-Axis), 35*300 mm (Y-Axis). They provide a smooth motion of the kinematics and are inexpensive: about 70-80 r for a pair of pieces (depending on size). For the Z axis, I use part of the disassembled mechanism from the DVD drive. In this regard, the print height will be only 4.5 cm, but this will be enough to print nylon plain bearings (I will use a trimmer line). In the future, we will remake the Z axis to use such bearings and increase the print height.
Furniture rails 35*300 mm.
I chose plywood as the material for making the main parts of the device, as there is good experience in using it. All drawings in Compass 3D were made based on the use of plywood. In order to accurately transfer the drawings to plywood, the LUT method (Laser ironing technology) was used, which is used mainly for etching boards. For practice, I even tried to pickle such a board. I was very pleased with the quality, so it was decided to translate the image using this method.
In the photo, a controller for controlling an asynchronous motor (from HDD):
The process of transferring the image to plywood
One of the stepper motors had to be redone, according to the instructions on the Internet: plywood printer:
Engine preparation for bowden. First, I ground the gear with a drill:
Then they made grooves on the gear with the same drill:
Well, there is a little video:
Moving Kinematika
Checking the engine and carriage of the axis x:
Check the engine of the axis Y:
A axis of the axis Z:
Now the printer now looks like this:
Cynemics of all lies.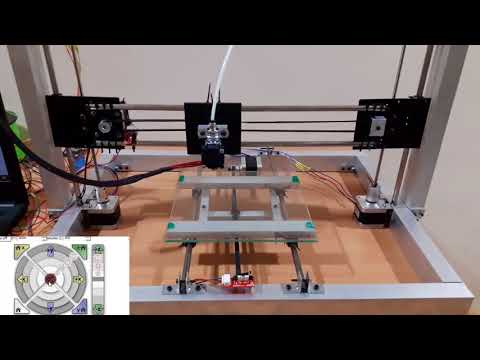 made. Now I'm making a temporary bowden to feed the plastic. But there was a problem with the Arduino, so far I can’t figure out what the reason is: something with the firmware or the screen.
When turned on, the screen lights up and two test strips appear and that's it, it stops. New Ramps and Arduino Mega were urgently purchased, but this did not solve the problem.
Firmware Marlin 1.1.X, latest version on the site. Flashed with Arduino IDE 1.8.7.
At the time of this writing, I tried to fill in both Arduinos with the usual sketch with Blink, both worked, which means there is a problem with the display itself (2004A).
November 23 was the city Olympiad, I took 2nd place with my unfinished 3D printer, thus I move on to the next stage - the regional level Olympiad, in Ufa.
Photos after the Olympiad:
Now I have to finish the 3D printer before the start of the Republican Olympiad before the beginning of January.