Lightning 3d printer
Lightning best 3D printer models・Cults
Star 36-190
€2.75
Claws 3
€3
Claws 2
€3
Claws 1
€3
iPhone Lightning cable connector case
Free
Ultimaker Ledberg bracket 45°
Free
Apple Cable Pull
Free
Lightning claw
€0.59
F-35
€2.50
cable jive attachment for (Name redacted)
Free
Personalized Cars Bookmark
€1.20
Space Heroes Pack
€34. 28
Zeo Heroes Pack
€34.28
Lightning McQueen Remote Control Wheel
€1.22
MK1 - Terminators
Free
Lord Zedd's throne room for 6" scale figures
€20
2D Silhouette/Stencil Lightning
€0.64
2D Silhouette/Stencil Lightning
€0.64
2D Silhouette/Stencil Lightning
€0.64
2D Silhouette/Stencil Lightning
€0.64
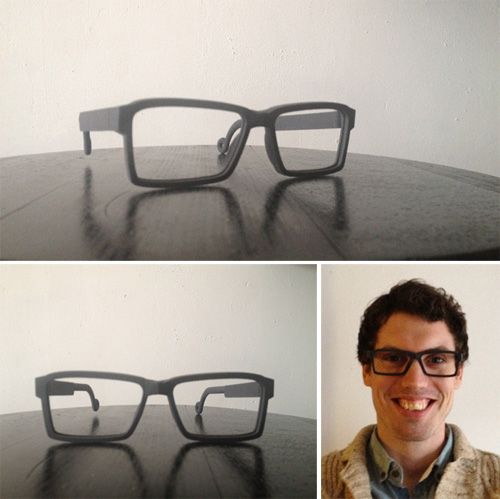
Black Lightning — Goggles and Armor
€12
F-35 LIGHTNING II WALL ART
€0.64
P38 For Wings of Glory
Free
Custom 4.
 76 inch Raven Guard Veteran Sgt
Free
Hero of Ages (Destiny 2)
€4.99
Lightning polymer clay or cookie cutter
Free
ARTUR’EKH – SHARD OF THE ANCIENT GODS
€9.99
Cars lamp
€3
Cars Lamp v2
€3
Cars V2 lamp
€3
Cars lamp
€3
Cars V2 Logo Lamp
€3
Cars Logo Lamp
€3
Coasters
€1
Hei's dagger
€1
Lightning McQueen
Free
Micro USB to Lightning adapter pendant
Free
30-pin Dock connector to Lightning adapter pendant
Free
Hobby Table Light Clamp
€3. 43
43
Lt. Dan - HQ Command Space Man! - MAGNETIZED
€3.82
Zeus Thunderbolt and Display Stand
€1.43
Lichdragon Fortissax
€12.83
Prime Crusader Boi Thunder Talons
€4.90
Lightning Chest in Clash Royale
€5.90
Lockheed P-38 Lightning
€22
Apple cable holder
Free
LIGHTNING MCQUEEN - Cars Toy
€0.64
CARS CUTTER AND STAMP
€0.90
Learn how to print in a flash
Arun Chapman4 February 2022
Guide
Lightning infill is one of the most exciting recent additions to Ultimaker Cura and for the right applications, it can help you print faster while using drastically less material.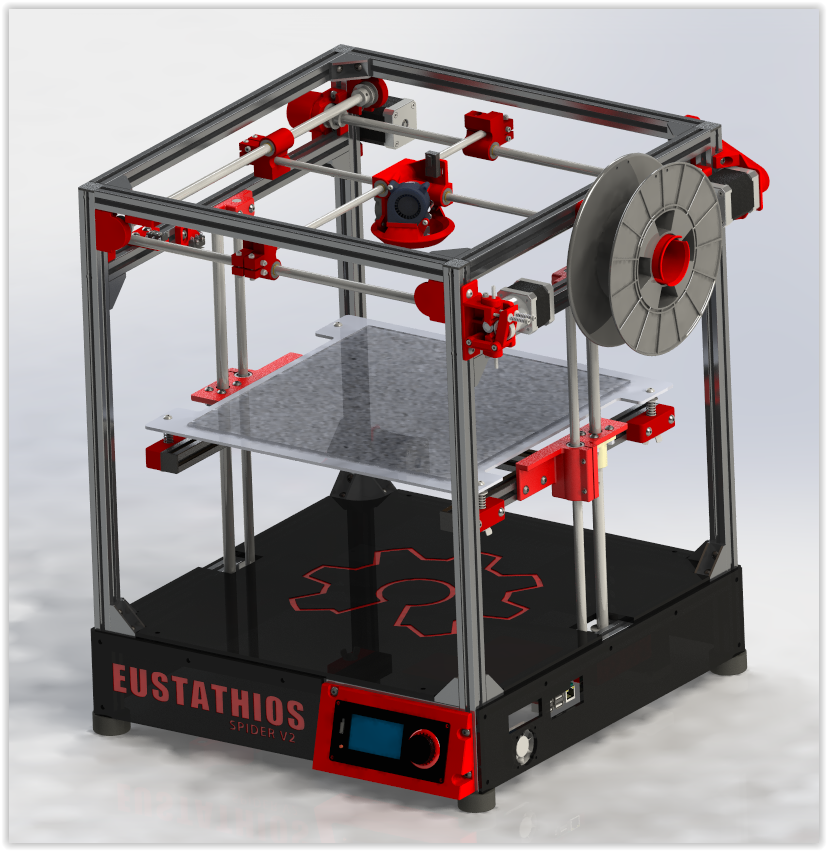 In this article, we will talk through exactly what lightning infill is and how to get the most out of it.
Table of contents
1. What is lightning infill?
2. How does lightning infill work?
3 Lightning infill applications
What is lightning infill?
Lightning is a new infill setting available in Ultimaker Cura version 4.12 and beyond. You can find it in the infill dropdown menu when selecting an infill pattern.
However, lightning is unlike any other infill that Ultimaker Cura has previously offered. To understand why, we need to talk about what infill is and why it exists.
Infill and supports: two sides of the same coin
When designing and printing an object for an FFF printer, it’s important to be aware that each layer must print on top of the layer below it. That means that if a part of your object is at the wrong angle, the printer will try to print in midair causing a failed print. This is called an overhang. It’s also possible that when a perfectly horizontal gap between two structurally sound areas of your print is too large, then your print may sag down causing an uneven surface on your final print.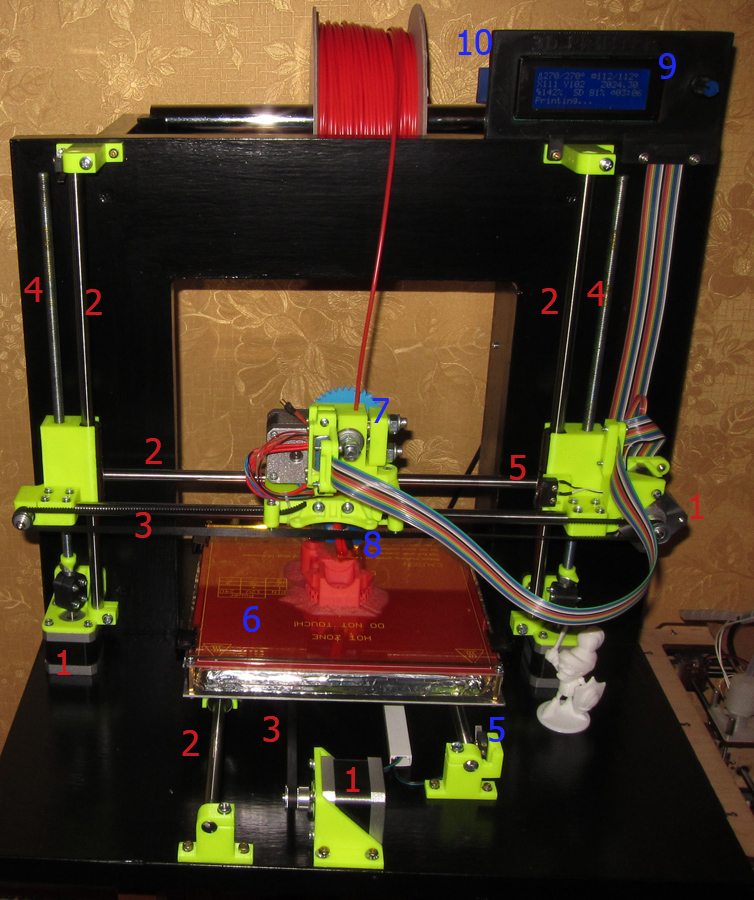 This is called bridging.
The red section in the middle is an overhang
The long flat section at the bottom is an example of bridging
When enabling supports in your slicer, structures are generated under your object to support the areas that would normally be impossible to print. These supports can then be removed after a print is finished.
When printing a solid object, you only need to pay attention to the external geometry of that object. However, solid prints use a lot of material and take a long time to print. To save time and material it’s possible to change your print settings so your object is printed hollow. But, then you have to worry about bridging and overhangs on the inside of your print.
The solution up until now has been to use infill. Infill generates a uniform internal structure inside your print based on the infill settings chosen. It’s possible to choose different patterns of infill. For example, choosing grid creates a grid-like pattern inside of your print.
Cubic infill
It’s also possible to modify the density of the infill by changing the infill percentage. The higher the percentage, the denser the pattern and the more material used. A higher infill percentage generally results in a stronger part, and a lower percentage a weaker one. However, reducing the infill at the cost of strength has a limit, because at very low infill percentages it’s possible for parts of the object not to be supported properly which can cause sagging or even holes in those areas.
For parts that do not need to be structurally robust, it’s possible to successfully complete a print using just 20% infill. However, even at such low percentages, infill still uses a lot of material because the infill pattern is generated uniformly irrespective of the internal geometry of the part. Not all of that material is necessary.
Enter, lighting. Lightning infill, instead, acts more like external supports in that it generates an internal structure that is specifically formed to support the parts of the object that are harder to print, and little or no support is given in areas where a successful print can be completed without it.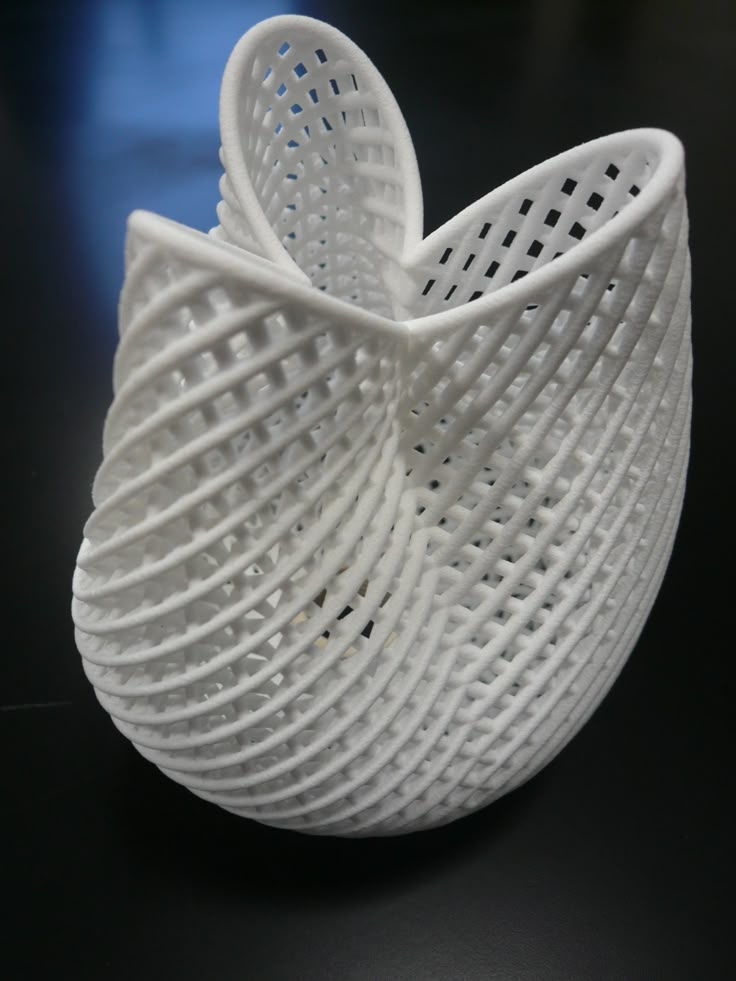 The result is faster prints that use less material.
How does lightning infill work?
Lightning infill is not an evolution of previous infill techniques but instead a completely new approach to creating internal support structures. Lightning infill works by identifying and supporting the internal areas of a model that need assistance to print successfully.
The resulting infill ends up having a branching tree-like structure that resembles a lightning bolt. That and the fact that they can help you get lightning-fast prints is the reason it’s called lighting infill.
A preview of lightning infill
One of the reasons lightning infill is so effective is that, unlike external supports that need to start on the build plate, lightning support structures can start and end anywhere on the internal walls of the model. This means less material is used and a large section of the printed object can remain completely hollow.
The result is that a model printed using lightning infill can use up to 90% less material than a solid model and often results in a reduction of 50% or more when compared to using another infill option at the same infill percentage.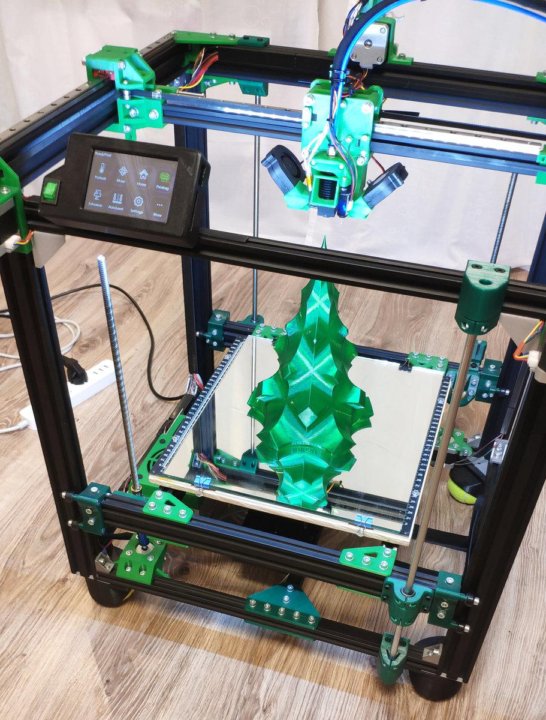
Lightning infill gets denser as you get closer to the top of the model
The added complexity that comes with generating lightning infill does lead to a slight increase in slicing time but it’s pretty negligible and usually only results in a few seconds being added.
To enable lightning infill, you need to select it using the infill dropdown menu in Ultimaker Cura. If you don’t see the infill option, make sure you are using custom settings as opposed to the recommended intent profiles. If you still can’t find it, make sure that the infill pattern setting is enabled in your preference settings by going to Preferences > Configure Cura > Settings > Infill pattern. And then making sure that there is a tick in the box next to infill pattern.
Which settings to use?
The main setting that you would usually modify when using infill is infill percentage. However, unlike other infill types, the relationship between infill percentage and material used is not linear with lightning infill. Instead, the amount of infill generated depends on the geometry of the object. You should not have any issues completing your print as long as you are using 30% infill or more.
If you are increasing the infill to a high percentage in an effort to make your print stronger, it may make more sense to use a different infill setting instead.
It is possible to also access some extra settings that are not available when using other infill methods. They are: lightning infill support angle, overhang angle, prune angle, and straightening angle. If you want to access them, they can be revealed or hidden in the configure Cura settings menu.
These settings allow you finer control over how lightning infill is generated. For most uses, you are fine leaving these on default. But, in case you want to experiment, you can find more detailed descriptions of the above settings in the Ultimaker Cura Settings Guide plugin.
Lightning infill applications
Lightning infill allows for faster prints that use less material. The only tradeoff is the resulting prints are not as strong. These factors allow for a wide range of applications, some of which include:
Rapid Prototyping
The reduced print time that lightning infill affords gives you an opportunity to create iterations more quickly and at a reduced cost. Parts printed with lightning infill are most suited to be used as proof-of-concept prototypes and visual prototypes. Depending on the part being prototyped, you could save hours on each print which could mean multiple extra iterations per day, guaranteeing your product will be thoroughly tested before it gets to market.
3D printed product prototypes
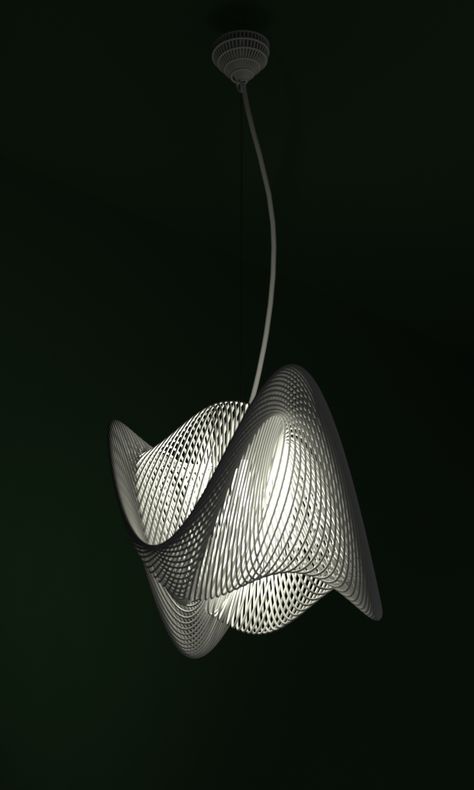
Ornamental prints
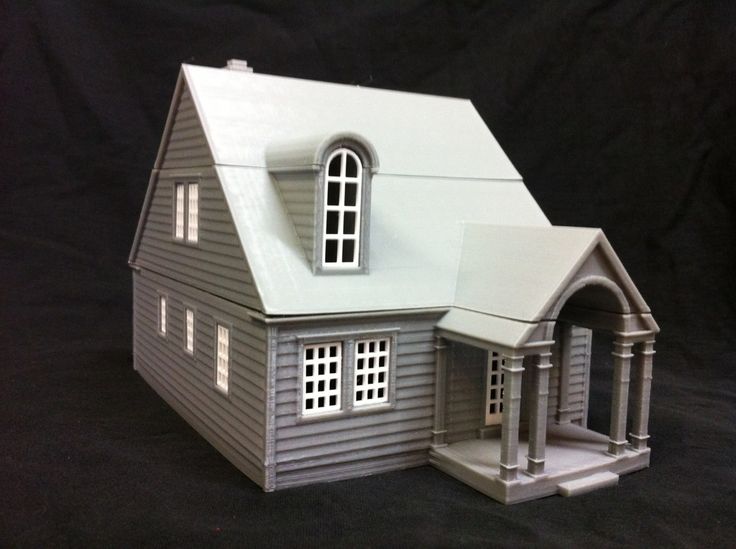
Display models and non-functional prints are ideal for lightning infill. In particular, big prints with a large internal area such as a bust or a statue can save many hours of print time, making lightning infill perfect for people who want to decorate their home with 3D printed art. Objects printed with lightning infill can still be handled as long as you print with at least 2-3 wall layers. That means that tabletop and wargaming terrain, as well as boardgame components, are also ideal use cases for lightning infill.
Environmentally conscious prints
Anyone who is worried about the environmental impact of 3D printing will be happy to know that lightning infill reduces material waste. When using traditional infill settings, a large amount of unneeded internal infill material is printed. Meaning more plastic is used and the resulting parts are harder to recycle or compost. Lightning infill only uses the infill material that’s needed for a print to complete and no more. Plus, faster prints also mean less electricity used on each print.
Budget prints
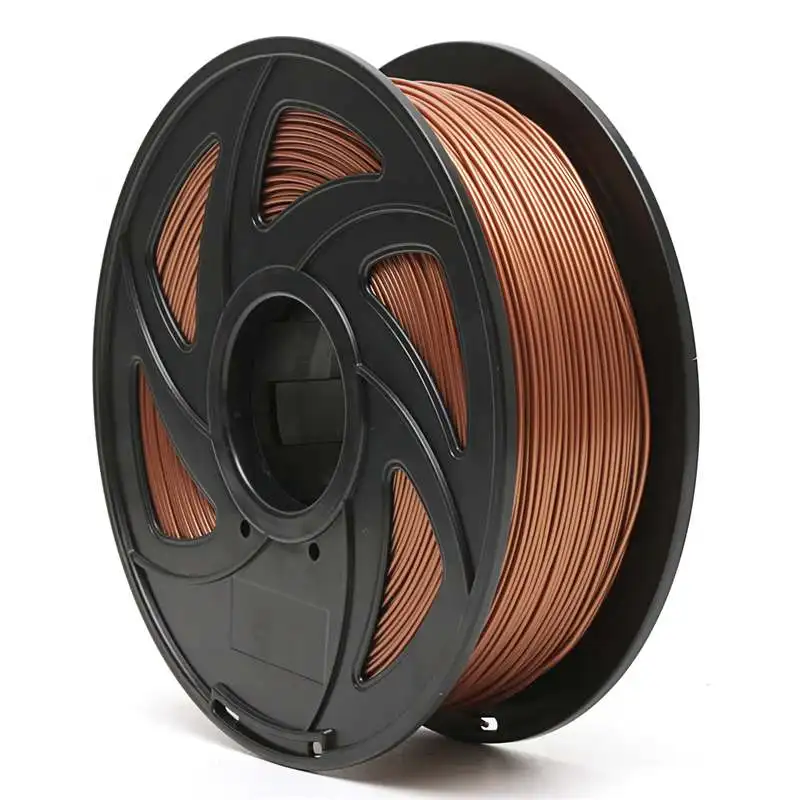
Anyone who wants to 3D print on a tight budget can see significant savings when using lightning infill. The reduced material usage that is enabled by lightning means that each spool of material will last longer and each print will cost less. Plus, as an added bonus, a faster print means your printer will be in operation less, saving you a little extra in electricity and printer maintenance.
We hope we’ve encouraged you to try out lightning infill so that you can experience quicker prints that use less material! Download Ultimaker Cura to start printing lightning fast today!
Download now
13 notes about 3D printing, after 3 years of owning a 3D printer / Habr
This article will be, first of all, of interest both to those who have directly dealt with 3D printing, that is, who owns a 3D printer, but also to those who are just about to join the ranks of 3D printers and are thinking about buying their own printer.
In the framework of this article, I want to present my observations, as a direct owner of a 3D printer, for more than 3 years.
Despite the fact that 3D printers have been known for a long time and, in my memory, have become widely used, judging by the information on various resources, starting around 2010 (I may be wrong, these are my subjective observations), for a long time I ignored this area, it’s hard to say why…
Probably thought it was some kind of "childish pampering", another hype topic for which there is simply not enough time.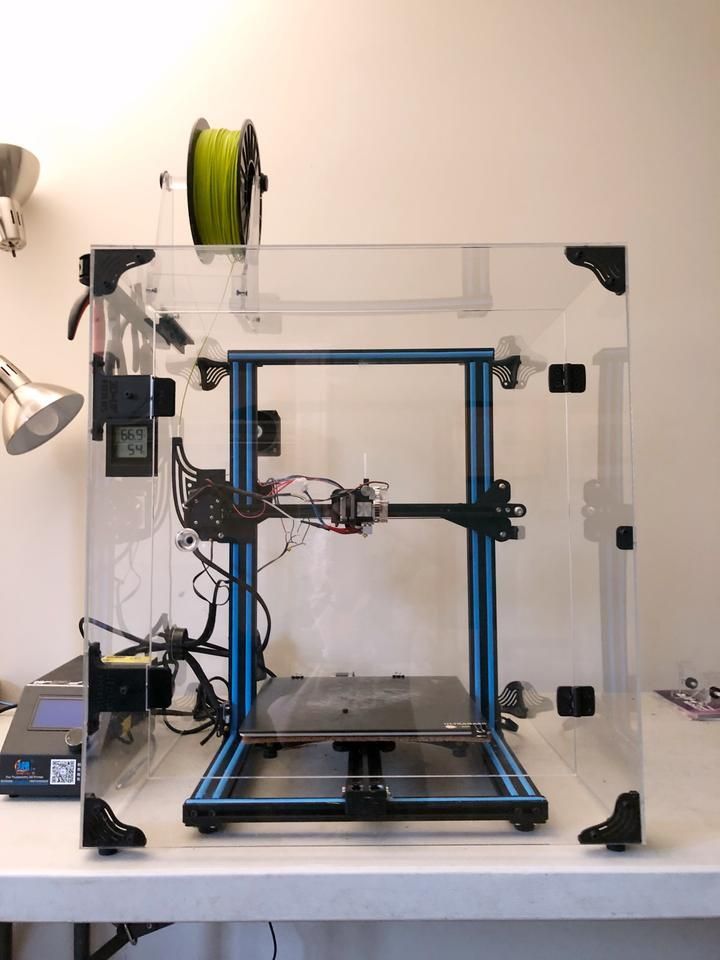 ..
..
The turning point happened when one of the wheels on my travel suitcase wore out. You know, a big plastic suitcase, with four spinning wheels on the bottom. Unfortunately, it is a “rather disposable thing”, due to the lack of bearings on the wheels, which is why the wear of the friction point of the axle and wheel allows the suitcase to last no more than one or two seasons.
And it’s like “lightning flashed in the middle of the day: 3D printer!” It is with his help that I can fix this problem! Looking ahead, I’ll say that I didn’t succeed in fixing the suitcase in this way, so I had to use a different approach ...
As a result, I “upped” it - installing wheels from unnecessary roller skates. Thanks to this “up”, the suitcase has become a real all-terrain vehicle and, even being very loaded, it rides easily - pushed forward even with “one finger”. And even in the snow, 5-6 cm thick. A tank, not a suitcase turned out! By the way - I took spinning wheeled "units" in Leroy.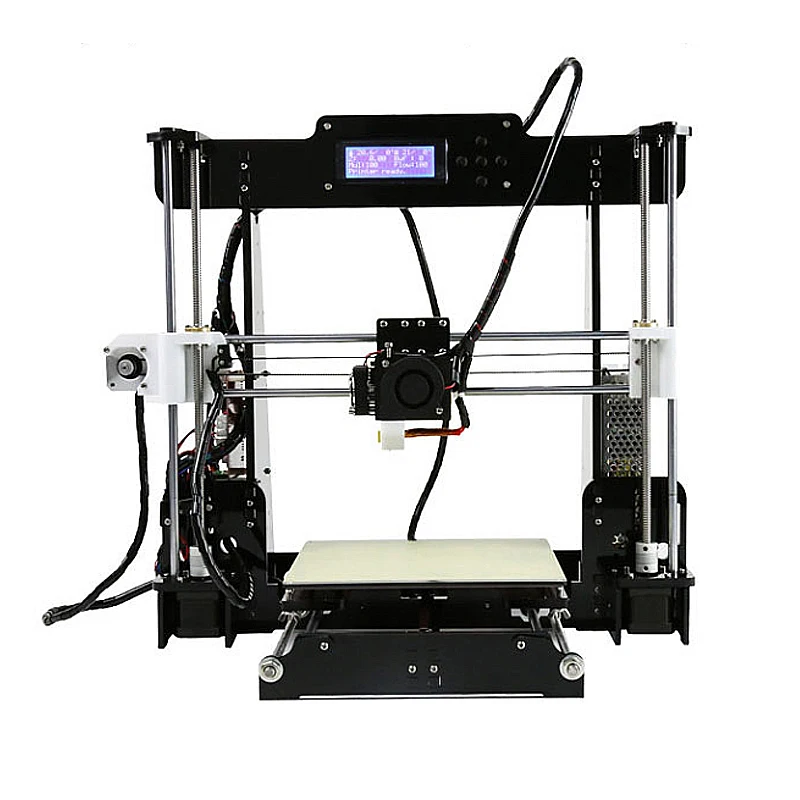 Then he took off and threw out his native plastic wheels from there, inserting from roller skates:
But this thought itself became a kind of trigger that allowed me to finally join the world of printers and buy my first 3D printer.
Like many, before buying it, I studied various forums and sites for a long time, delving into all the subtleties. And for some reason, I immediately liked the type of printer called the delta printer. Probably because during operation it looks like some kind of "alien device".
If at your leisure you like to sit “looking into the carpet”, then with the advent of such a printer you will have a much more interesting activity, even hypnotizing, one might say :-))
And this, in fact, is my delta (if anyone is interested), which went through, let's say, the "ultimate up": all the electronics are placed upstairs, on a self-made welded frame, covered with polyethylene and a magnetic door is made.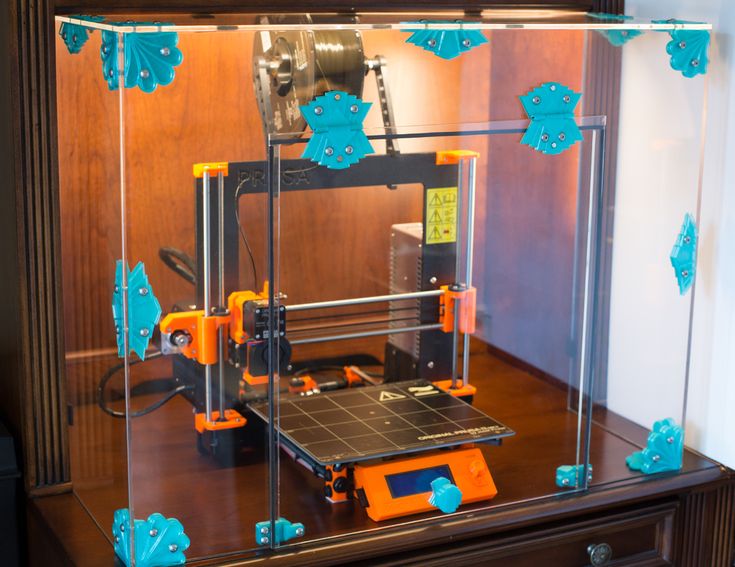 The coil with a bar is installed at the top, on the frame. The axis on which the coil is put on is machined on a lathe from aluminum and a bearing from the VAZ timing is inserted into it. As a result, the coil - "rotates even from the passage of a fly nearby":
Well, yes, I won’t argue for a long time, let’s start reviewing the main facts that I have accumulated as a result of owning this car ... The facts are purely subjective and may differ from your vision. In any case, I will be glad to comments, clarifications, etc.
▍ NOTE 1. Delta is good, but...
Here I should give a number of my observations regarding the delta printer:
- It contains a completely finished frame of the future box, which makes it easy to form a heat chamber. I understand that many printers are made in the form factor of a “certain box” (but this point cannot be ignored), which greatly facilitates the process of wrapping this box with heat-insulating material.
 In my case, as such a material, I used a plastic film.
 - Already thanks to its design, delta allows you to work at much higher speeds than XY printers. By the way, it is on the delta principle that many modern high-speed industrial robots are built to sort various parts directly on the conveyor belt:
However, this plus does not allow to fully realize the occurrence of parasitic vibrations, even despite their suppressors:
Thus, accurate printing is possible, only at speeds (at least that was the case for me), no more than 60 mm per second. A complex procedure for aligning the movement of the head parallel to the table, which is why, for many, the so-called "lens" appears. People struggle with it with varying degrees of success, but I have not encountered this on my printer and for me, therefore, the “lens” has never been a problem. At the same point, it is worth noting the calibration of the table, which was initially absent on the first deltas, and I had to use an external third-party solution from one American do-it-yourselfer called EZBED. This solution was a hardware-software complex that allows you to quickly and easily calibrate the printing table, that is, to let the printer understand its geometry. Modern printers do not have this issue as they come with a built-in calibration solution. It is worth noting that I solved this problem by attaching a limit switch to the print head, and using the Marlin-1.1.9 firmware.
▍ NOTE 2. "Size doesn't matter..." :-)
When I got the printer, I was impressed by the possibility of huge printouts, a la the handguards of some futuristic rifles, huge body parts, etc.
However, if you try to analyze the results of your many years of practice, it turns out that in most cases, rather small objects were printed that easily fit in the palm of your hand, a maximum of two palms. Despite such a seemingly small size, the printing of these details took a significant amount of time. Of course, this very much depends on which nozzle you print with. But, despite this, it is difficult to disagree with the fact that most of the printed parts will be quite utilitarian and small in size.
Therefore, to be honest, the need for a printer that allows you to print "Venus de Milo in life size" is not obvious.
Of course, you can object to me that “I’m going to buy a printer, I’ll get used to it a little and I’ll get started!!!”
One simple point must be taken into account here: there are no universal things. And in order to understand how much 3D printing in general and your printer, in particular, you will need to solve your problems, and how much it will be able to solve such problems, you just need to first try the 3D printing method personally and then a lot will become clear to you .
Therefore, for a beginner, I recommend taking a small printer that allows you to print extremely small items that fit in the palm of two. With such a device, you will definitely never lose, as it will always be needed. In addition, with its help you will be able to get used to the printing process and, if necessary, purchase a larger device, already clearly understanding its capabilities and ability to solve your set of tasks.
▍ NOTE 3. "What type of printer to get."
Based on the foregoing, I do not recommend taking a delta printer and this can be said right away.
Not because it is bad, in fact, it prints quite accurately, its main problem (in my opinion) is the inability to print rectangular flat, fairly large case components, as well as the inability to fully realize high-speed work, since the quality drops critically. Here it turns out to be a rather offensive situation - the printer can work quickly, but this cannot be done, since the quality will be “nothing”.
And then what kind to take? Depending on the budget and capabilities, I recommend taking any cube printer, for example, the same Core XY (the head moves, and the table goes down as the model “grows”, from top to bottom):
Image source: thingiverse.com
Such a printer allows you to easily print fairly large flat parts of cases, has good speed and accuracy. In addition, the presence of a rigid box-shaped frame allows it to be easily covered with polyethylene to create a sealed heat chamber. In addition, the very fact that the table does not move while working reduces the number of problems with model peeling.
However, the advantages of this printer will not be fully revealed if it has a direct extruder. On the one hand, it will allow printing with rubber-like materials, on the other -
large inertia and head weight. And these are parasitic vibrations, wear of the fur. parts, etc. (like everything in life, “we treat one thing and cripple another” :-))
At the initial stages, this may not be necessary, but in the future it may be necessary to print, for example, tires for your homemade car. And with this, the Bowden extruder has obvious problems. Although, in fairness, printing with such a rubber-like material is far from a daily need. However, whoever seeks will always find: over time, I found a way to “upgrade” my printer with a Bowden extruder to print with flexible materials. "Crutches" of course. But even so.
By the way, there are printers of a cheaper type, the so-called "drygostol", printing by moving the table and head:
They are inexpensive, moderately accurate, but they require a sufficiently high-quality gluing of the printed model to the table, because the table moves, and the model can come off when the table is jerked sharply. When printing large models, this can be a problem.
▍ NOTE 4. What to print with?
It's only a matter of taste and purpose. That is, if your printout will only stand on a shelf and should differ in some kind of aesthetic appearance, these are some requirements, if the printout is an engineering part that will be operated under conditions of increased mechanical load, these are different requirements. That is, in the first case, you can use any PLA, SBS plastics, and others with similar properties.
For engineering parts, for example, I only use ABS. It combines high hardness, strength and low price. Although I understand that now this last statement will cause a storm of comments in the style of “no! - there is even stronger, even better, the same PETG, etc. ":-)
Just here I wanted to say that thanks to the low price and the practical experiments that I conducted with ABS plastic, I realized that it is completely meets all my requirements.
However, the fact that ABS plastic releases carcinogenic substances when heated is quite annoying and forces you to take measures to prevent poisoning. For this, my printer prints completely closed and on an open balcony. After printing, the printer chamber opens, and it remains open in this form until it is completely ventilated and cools down.
▍ NOTE 5. "ABS is difficult to type on, it flakes, peels off the table, etc..."
With a properly configured printer (in my case, at a print temperature of 205 degrees, a thermal chamber and a desktop temperature of 100 degrees), the use of auxiliary techniques, for example, among which, one can name the so-called ABS juice (which is ABS- plastic dissolved in acetone), you can create wear-resistant and durable things, without any hypothetical problems.
For example, my printer has been printing for many hours at temperatures well below freezing. And this happened more than once, not twice, not three! And the print quality was excellent:
12-hour ABS printing at -4 C
▍ NOTE 6. Acetone for post-processing and ABS juicing
At one time, I wrote a fairly detailed article on this topic and I will try to give the main excerpts from it. The essence of the issue here is as follows: due to the fact that different GOSTs are used for the production of acetone, acetone differs in quality. Despite the fact that it would seem that “acetone is also acetone in Africa,” nevertheless, one type of acetone can differ significantly from each other. For example, ordinary acetone, which can be bought at any hardware store, such as "1000 little things", "store near the house" and the like, is very low quality acetone, smells disgusting (although someone like it, maybe someone likes its pleasant building aroma and "aftertaste" :-))).
In contrast to it, there is a much higher quality acetone, which, however, is not found at all in any household stores, even large chain stores, such as Auchan or Leroy Merlin.
This type of acetone is found exclusively in shops that sell varnishes and paints for automotive work, i.e. these are highly specialized shops for car workshops:
Acetone, which can be purchased there, is of excellent quality, smells almost like alcohol, quickly disappears,
:-) - this is a joke, of course, don't even try it.
However, its main advantage, compared to household type acetone, is that it perfectly dissolves ABS plastic and does not allow it to precipitate. For me personally, it was a very surprising observation when the same ABS plastic was perfectly dissolved with acetone from an auto shop, and completely precipitated when I tried to use household acetone (I just ran out of good acetone, and I had to use "what is ").
Therefore, if you want your results to always be excellent, then here is the right acetone. It should be labeled "for professional use":
▍ NOTE 7. What about ABS juice?
"ABS juice" is what printers call a mixture of acetone and pieces of ABS plastic dissolved in it. This mixture is smeared on the surface of the desktop before printing and allowed to dry. Thanks to this spread, the model easily sticks to the desktop and does not peel off during the printing process. After printing is completed and the platen has cooled down, the model can be easily separated.
All that needs to be said here is that, after trying different approaches over time, I settled on using flexible metal spatulas, also called "Japanese type spatulas":
According to the results of many tests, this method of spreading turned out to be one of the most convenient options, such spatulas can be cleaned very quickly and easily after work. In other words, highly recommended!
▍ NOTE 8. "Yes, nothing sensible can be done on it, I indulged a little and decided to sell it - you can't use it for anything good anyway"
I absolutely disagree with the statement above, which is periodically heard from newcomers to 3D printing. You can even say more: at the moment I can’t even imagine how I used to live without a 3D printer! Since it is he who makes it possible for any do-it-yourselfer to significantly expand their capabilities and make piece products, almost of factory quality! Of course, for this, appropriate hands must be applied to the 3D printer, but that’s another question… and take on things that I would never have thought to take on before!
For example, among my homemade products, the following can be listed:
- Heated sole for boots, which is a hose integrated into the insole (and filled with household silicone from a household store), through which water flows, heated with a catalytic type hand warmer.
 Water is pumped using a small peristaltic pump. The engine with a metal gearbox, which is used in the creation of this pump, allows you to develop a force of 3 kg, which is even redundant for this homemade product. The engine is powered by Peltier elements mounted next to the catalytic heater. The project is currently in progress.
- Centrifugal water pump mounted on the shaft of an internal combustion engine that drives a high pressure wearable air compressor with a pressure of 500 bar. The pump pumps coolant through the casing of the high pressure pump, or rather its second stage. Despite the fact that the pump is 3D printed and runs at over 6000 rpm, nothing “fell apart, fell apart, didn’t break.” As you can see in the photo, the pump is installed instead of the “starter”, that is, the armstarter. The compressor scheme as a whole is as follows: 2 engines. Connected by clutch. One is heavy duty. The second is modified and turned into a high pressure compressor:
Yes, before assembling this, I also did not believe that this was possible.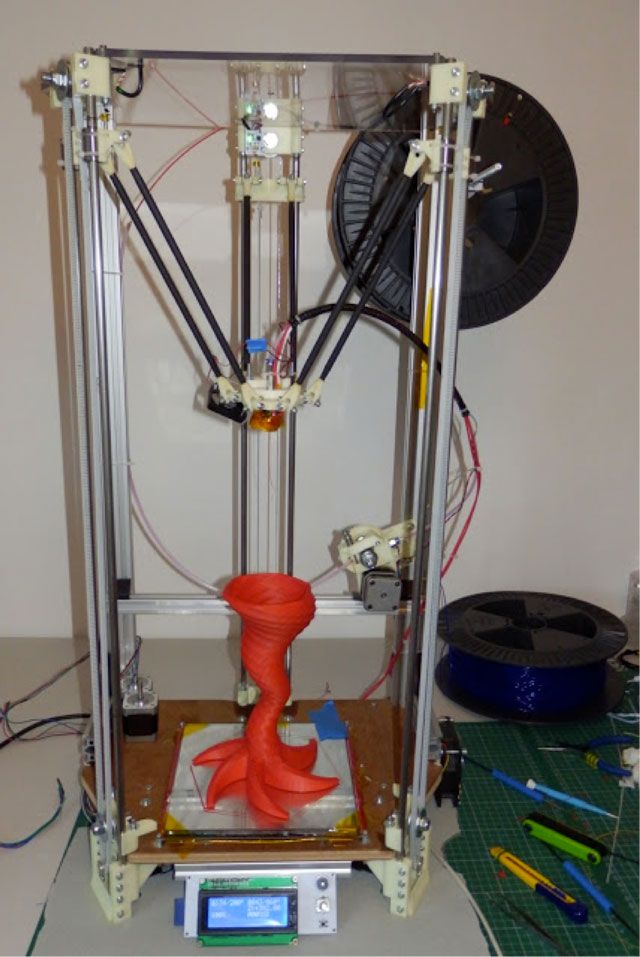 Moreover, even when I collected it, I did not believe my eyes :-))). However, it is a fact…
- I printed a number of Rank-Hilsch test tubes, the essence of which I have described in detail in this article.
- Printed mass of parts, more than 100 pieces, to create 10 web-controlled robots. There was also a detailed article about this here.
Well, and a bunch of all sorts of useful and not very crafts. As you can see from my crafts above, I have a special passion for creating some useful things, a utilitarian direction. That is, so that the printout is useful, and does not belong to the type “yyy breathe, Mikola, what am I doing here” :-), and then put it on the shelf and that's it. Although, engineers are also not alien to beauties, and this will be my next fact below.
▍ NOTE 9 Proper placement of the model when printing is half the battle
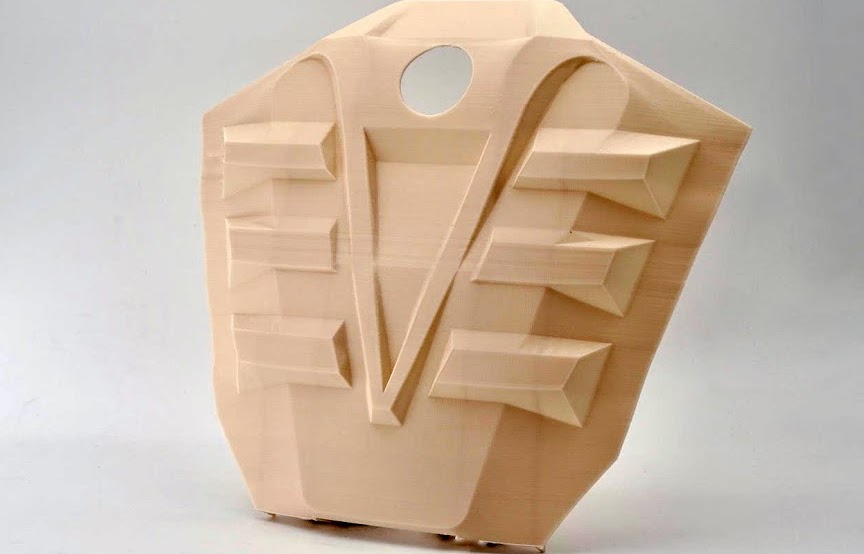
It would seem an obvious fact, but many underestimate it.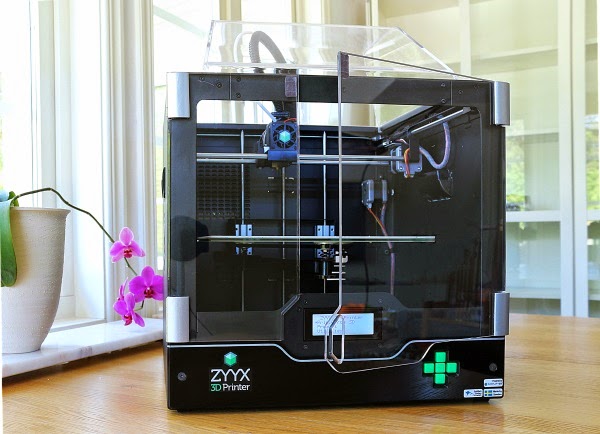 Here I mean the following: by experience, I accidentally discovered that when printing various statues (in which I, completely unexpectedly for myself, discovered another passion of mine), it is advisable to place the statues at an angle to the printing table.
This allows the layers in the printout to run at an angle of approximately 45-50 degrees to the model. The result of this is that the printed model is almost completely invisible layers and the model looks like it has been post-processed, but at the same time retains a deep matte color, which, to my personal taste, is more like a marble than a glossy result of processing in an acetone bath :
An additional advantage of this method is that the layers going at an angle of 45-50 ° to the model give it additional strength. This is especially true for printing statues, which contain many thin elements that are easily chipped when the statue is accidentally dropped from a table or shelf (learned from bitter experience, this happened to me many times, and ruined some fairly decent prints).
That is, the layers going across the model, if the model has a large length in height, does not allow it to maintain sufficient strength. For better understanding, I tried to illustrate this point in the figures below:
▍ NOTE 10. Bleeding must be taken into account when printing, especially if the model is composed of separate parts and must be assembled by joining these parts to each other, entering into each other, etc.
I tried to illustrate this point in the figures below. The implication here is that if you're printing a composite model, you need to correct for the amount of bleed on the plastic (I'm not sure what it's called, but at least I tried to convey what I mean). If this is not taken into account, then the model will not fit.
For example, in my case this correction is 0.2 mm per diameter - if I want the model to fit more tightly; if I need a free joint, without excessive density, then 0.3 mm per diameter:
That is, suppose that the blue part has a size of 10x10mm. So it must be modeled in a CAD program as 9.8x9.8 mm (if we want it to sit tight) or 9.7x9.7 mm (to sit freely). Well, or expand the hole in the green part, and leave the blue one as it is.
This is often a problem when you download a prefabricated model from the Internet - but it is not going to, even if you crack! And because no amendments have been made…
For your particular case, the amendments may be different.
▍ NOTE 11. What if...
In fact, this note complements note number 8. Using a 3D printer allows you to create metal parts using a printed 3D model. For this, the casting method is used according to the lost wax or burnt model. In our case, we will deal mainly with metal casting on a burnt model.
Briefly, it looks like this: printing a 3D model (using PLA plastic) → pouring it with plaster → burning PLA plastic, simultaneously with burning the mold, in a conventional stove oven → pouring the resulting mold with molten metal (melted in a conventional microwave) .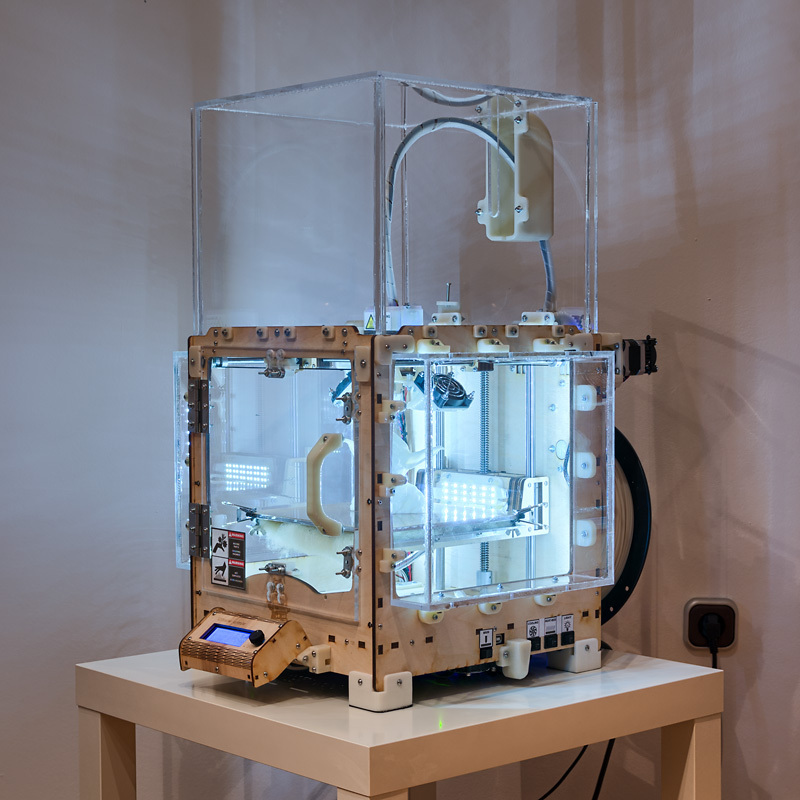
Image source: 3dtopo.com
I told about a simple method of melting metals in a home microwave oven here.
There was even a good article about casting on Habré.
▍ NOTE 12. Durability?
Despite the fact that ABS plastic is called exposed to ultraviolet radiation and, accordingly, burns out, losing its strength in the sun, in my practice, even printouts that are constantly exposed to the sun have not lost their strength and color at all, continuing to be successfully used and Currently.
It should also be added here that printouts are constantly exposed not only to the rays of the sun, but also work continuously in damp conditions!
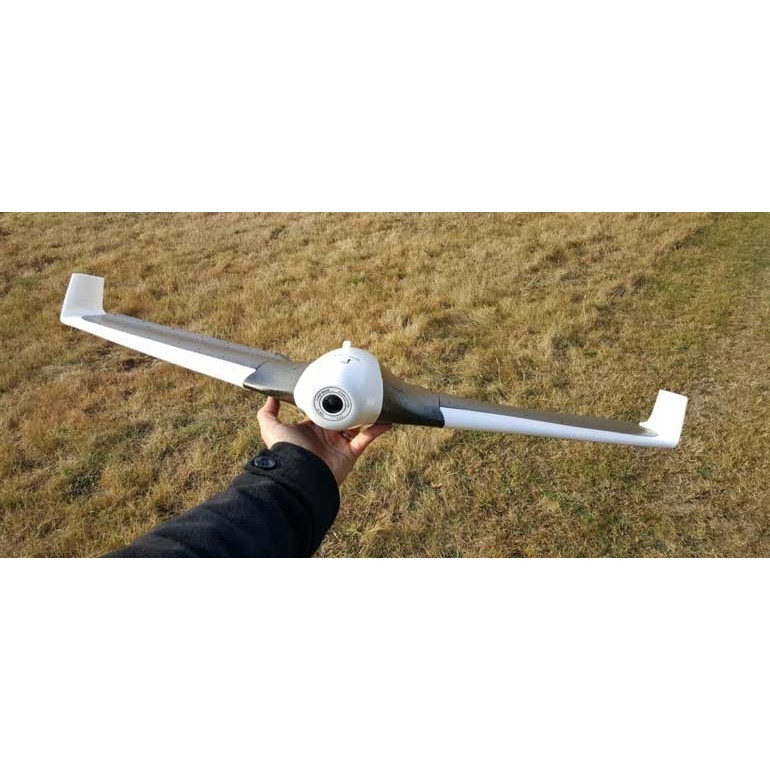
As such printouts, I can give an example of winglets for technical cranes, which I printed out, but, unfortunately, did not photograph this process; as well as fasteners on shoes that I use “both in the snow, and in the heat and in the pouring rain, and in general are always with me”:
▍ NOTE 13.
 And what about the thread?
 Periodically, there is a need to print parts containing a particular thread. Modeling such products requires a good understanding of what a thread is in general, as well as what corrections need to be made in your particular case, which I have already described above.
But since I've owned a metal lathe for a long time, I'm not at all happy with the 3D printed carving that looks like "something very carving-like".
I am satisfied with an exceptionally perfect carving. Therefore, I keep in stock a large set of various taps and dies, with which I cut all my threads in plastic printouts:
I posted a photo of dies and taps not to brag, but to make the reader understand that serious carving requires a serious approach (unfortunately). And considerable costs for all this thread-cutting iron ...
To create your own threads (both threaded channels and threaded pins), I recommend the following reference materials: for holes, for pins.
Well, that's where I want to end my story and note that he does not claim to be exceptionally accurate and exhaustive. Nevertheless, I tried to state a number of my observations. It will be interesting to read yours, in the comments!
The first Russian space-based 3D printer was developed in Tomsk
https://ria.ru/20220505/tpu-1786916688.html
The first Russian 3D printer to work in space has been developed in Tomsk
The first Russian 3D printer to work in space has been developed in Tomsk - RIA Novosti, 05.05 .2022
The first Russian 3D printer for working in space was developed in Tomsk. Queen" completed the development of the first ... RIA Novosti, 05.05.2022
2022-05-05T09: 28
2022-05-05T09: 28
2022-05-05T09: 28
Science
University science
Cosmos-RIA science
9000 Energy"Tomsk State University
International Space Station (ISS)
/html/head/meta[@name='og:title']/@content
/html/head/meta[@name='og :description']/@content
https://cdnn21. img.ria.ru/images/07e6/05/05/17869
NOVOSIBIRSK, May 5 - RIA Novosti. Engineers of the Tomsk Polytechnic University (TPU) commissioned by the Rocket and Space Corporation Energia named after S.P. Korolev" have completed the development of the first Russian 3D printer for printing in weightless conditions, the press service of the university reports. The work was carried out jointly with specialists from RSC Energia (part of Roscosmos) and Tomsk State University, who created a software and hardware The university noted that the development of the printer with all the necessary stages took a little more than three years. The specialists of the Tomsk Polytechnic University were faced with the task of making a device that would allow quickly and directly at the station to create the small parts needed by astronauts so that they would not have to be delivered from Earth." The main scientific and engineering challenge was that 3D printing in zero gravity is different from terrestrial conditions.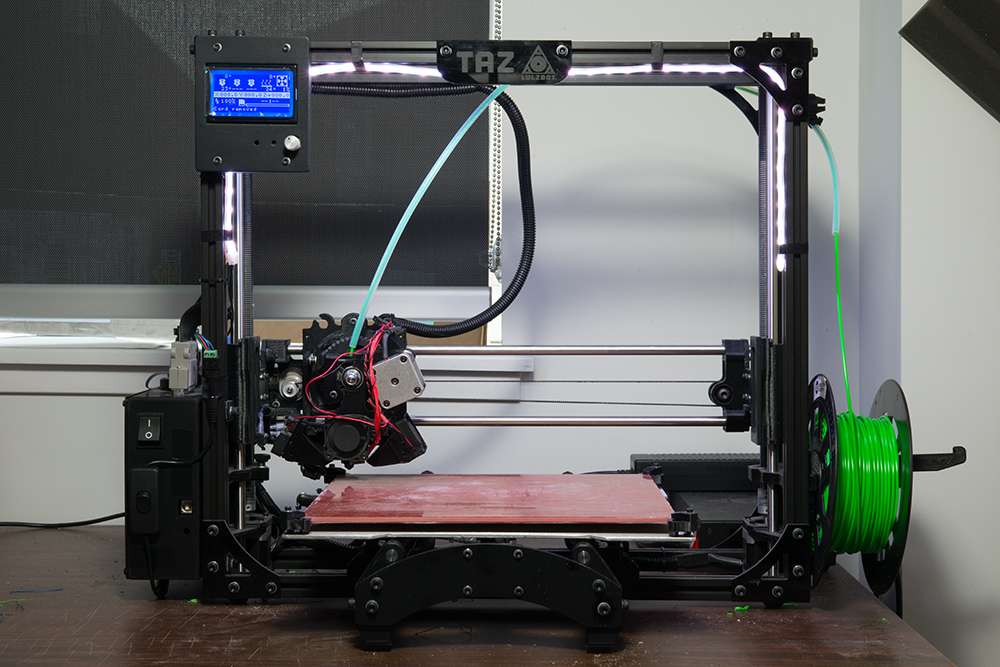 When printing on Earth, gravity makes a significant contribution to the "gluing" of the layers during the layer-by-layer formation of the part. The absence of gravity requires changes both in technology and in the design of the printer,” TPU said. , are very durable, but at the same time light. The working chamber of the printer, in which the printing process takes place, is completely sealed. It is equipped with thermal control, ventilation, air circulation and air purification systems. Such elements are not provided for in conventional printers. "In the future, we plan to participate in teaching astronauts 3D printing, working with the device. And when the experiment takes place directly on board the ISS, it is planned that the polytechnics will participate in processing the results," Acting Rector Dmitry Sednev was quoted at the university as saying.0003
https://ria.ru/20220428/kosmos-1785868212.html
https://ria.ru/20220412/kuzgtu-1783096256.html
Earth
Tomsk
9000 9000 15
4. 7
7
9000
7 495 645-6601
FSUE MIA today
https: //xn--c1acbl2abdlkab1og.xn--p1ai/AWAWARDS /
2022
RIA Novosti
1
5
4.7
9000
7 495 645-6601
FSUE MIA today
https: //xn--c1acbl2abdlkab1og.xn--p1ai/AWAWARDS /
News
en-RU
https://ria.ru/docs/about/copyright.html
https://xn--c1acbl2abdlkab1og.xn--p1ai/
RIA Novosti
1
5
4.7
96
96
7 495 645-6601
Rossiya Segodnya
https://xn--c1acbl2abdlkab1og.xn--p1ai/awards/03
1
5
4.7
9000
7 495 645-6601
FSUE MIA MIA today /awards/
university science, space - ria science, earth, roscosmos, rkk "energy", tomsk state university, international space station (ISS), tomsk polytechnic university, applicant's navigator, tomsk, russia
Science, University Science, Space - RIA Nauka, Earth, Roscosmos, RSC Energia, Tomsk State University, International Space Station (ISS), Tomsk Polytechnic University, Applicant's Navigator, Tomsk, Russia
NOVOSIBIRSK, May 5 — RIA News. Engineers of the Tomsk Polytechnic University (TPU) commissioned by the Energia Rocket and Space Corporation named after S.P. Koroleva" have completed the development of the first Russian 3D printer for printing in weightless conditions, the press service of the university reports.
The work was carried out jointly with specialists from RSC Energia (part of Roskosmos) and Tomsk State University, who created a software and hardware system to control the printer.
"Two flight models of the printer were handed over to the customer. According to Roscosmos, one of them will be sent to the International Space Station in June 2022. With its help, Russian cosmonauts will be able to make parts necessary to work with the station equipment. The second sample will remain on Earth," the statement said.
The university noted that the development of the printer with all the necessary steps took a little over three years. The specialists of the Tomsk Polytechnic University were faced with the task of making an apparatus that would allow them to quickly and directly at the station create the small parts needed by astronauts so that they would not have to be delivered from Earth.
© Photo : TPU press service Tomsk engineers developed the first Russian 3D printer to work in space
© Photo : TPU press service
Tomsk engineers developed the first Russian 3D printer to work in space
"The main scientific and engineering challenge was that 3D printing in zero gravity is different from Earth conditions. When printing on Earth, gravity makes a significant contribution to the "gluing" of layers when forming a part layer by layer. The absence of gravity requires changes in both technology and in the design of the printer," TPU said.
April 28, 09:18 Science
Samara scientists want to send "descendants" of astronaut plants into space
A 3D printer is a device the size of a small analog TV. According to a given 3D model, the printer prints the desired object layer by layer from thermoplastic polymers. Parts made in this way are very strong, but at the same time light. The working chamber of the printer, in which the printing process takes place, is completely sealed.