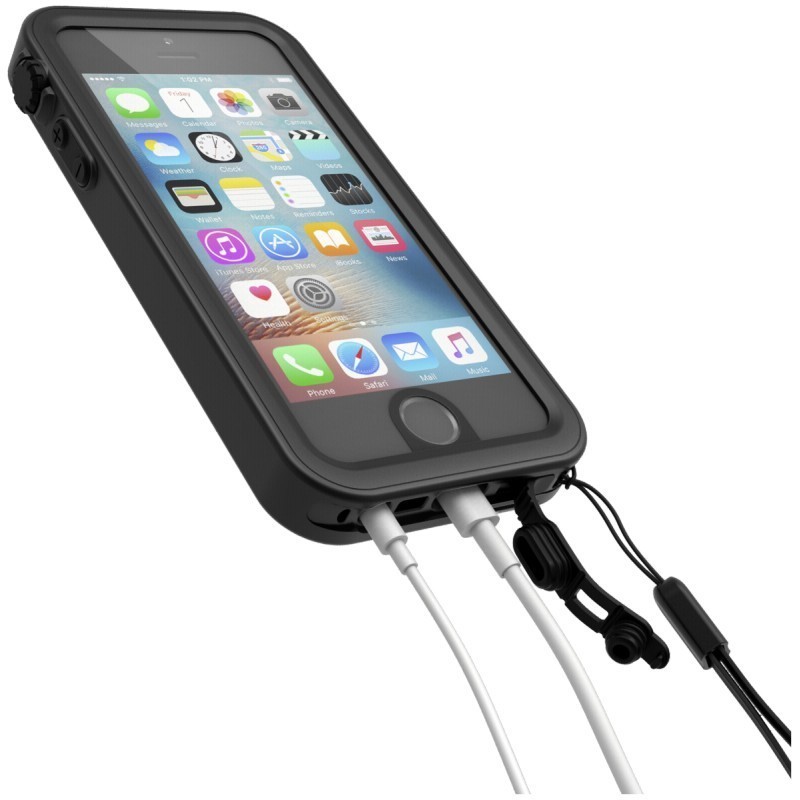
3D print waterproof case
How to 3D print waterproof parts
Arun Chapman1 March 2022
Guide
3D printers promise endless applications. However, sometimes reality gets in the way of that promise. One example of where that can happen is when trying to print something that needs to hold water, only to watch it leak like a sieve. Read on to find out to avoid such a tragic waste of liquid.
Is it possible to print waterproof and watertight parts?
Yes, it can be done but it’s not always easy. To get the best results, you need to pay special attention to both the material and the settings you use. And even then, some post-processing may also be needed to get a part that is truly and reliably waterproof.
It is also worth talking about what we mean when we say waterproof. When talking about clothing or electronics, the word waterproof is usually used to indicate that an object is capable of keeping water out. For anything that needs to keep water in such as a vase, a more appropriate description would be watertight. Some industries like electronics also use the term water-resistant to describe something that can water out, up to a limit. Such as a phone which is only waterproof up to a certain depth.
In this article, we will use waterproof as an umbrella term to include all the above. The steps you take to make a print waterproof will also help it to be watertight and water-resistant. Although, most parts will not meet the same criteria that your waterproof phone is held to so it’s probably best not to go deep-water diving while relying on a printed part to protect anything sensitive.
How do you print waterproof parts?
To get waterproof parts, there are three areas that are important. The material used, your slicer settings, and post-processing.
It is possible to print waterproof parts with a variety of different 3D printing technologies. Some industrial printers with six-figure price tags are even capable of making extremely reliable waterproof parts with robust materials like metal. However, most people don’t have access to those printers so for this article, we will be focusing on the most common and accessible 3D printing technology, FFF printing.
Materials for printing waterproof parts
Most FFF filaments are thermoplastics. Plastics are generally good at being waterproof which is why most water bottles are made of plastic. Plastics are also not normally degraded or damaged by water which is also why so many of those plastic bottles end up in the ocean and are likely to stay for a long time to come. However, there are a lot of different types of thermoplastics and all of them have different properties which are worth knowing before you try to print your waterproof parts.
A note on swelling: Many 3D printing materials are hygroscopic, meaning they absorb water. Some are worse than others (PETG, Nylon, PLA) and some are better (ABS, PP) but most absorb water to some extent. The result is, if you leave a part in contact with water for a long time it may start to swell. The amount of swelling is usually small, but it can deform your part and even cause it to split or break in a way that stops it from being waterproof or watertight. The swelling will not continue indefinitely or cause the part to degrade completely like it would with untreated wood. Instead, the part will likely swell up to a certain point (depending on the material) and then stop. If you have ever printed a part that was initially waterproof but started leaking over time, this was probably why. It should be possible to dry your part to remove the swelling but allowing a part to swell and then drying it repeatedly may cause increasingly more damage.
PLA
PLA is one of the cheapest and most common FFF printing materials. PLA can be used to create waterproof parts, but it does have some disadvantages. As mentioned above PLA can be prone to absorbing water and swelling.
PLA is also biodegradable. Meaning that (under the right circumstances) it can be composted. This is not an issue if it’s only exposed to perfectly clean water, but if you were to leave a PLA printed part submerged for an extended period in a body of water that contains microorganisms, like a pond, there is a chance that your part could start to degrade.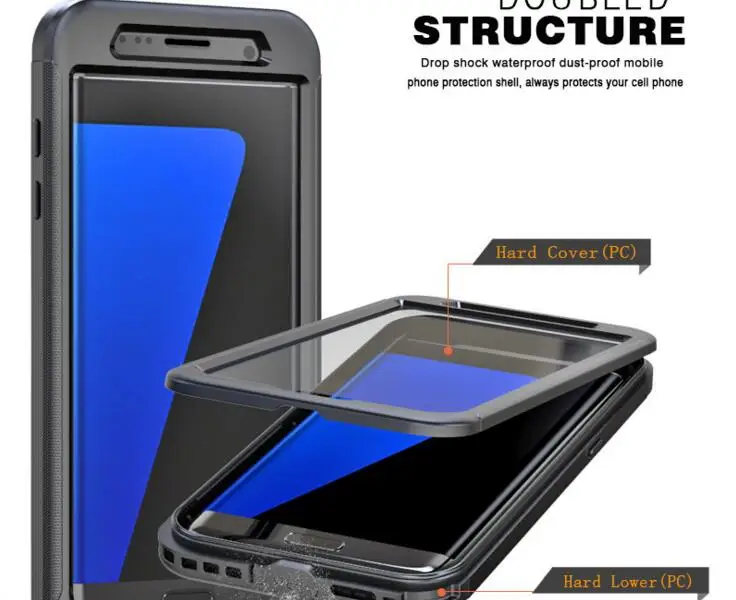 Albeit slowly.
Lastly, PLA has low heat resistance. Meaning that if you wanted to use a printed part to hold hot water, it would likely deform. This can be solved by heat treating your part after printing. Heat treating is explained more later in this article.
PETG
PETG is another common and affordable FFF material. PETG is particularly hygroscopic meaning it’s prone to swelling. On the flipside, PETG has a high heat resistance so printed parts can be kept outside in direct sunlight without issue, and they can stand up to hot (although not boiling) water.
PP
PP is one of the better options for printing waterproof parts. It is less prone to swelling than PLA or PETG and it is chemical resistant. PP can also be used to print flexible parts that hold their shape and do not break after repeated bending.
ABS
ABS is a decent option for printing waterproof parts. It has a high heat resistance and is not as hygroscopic as many other materials. The best reason to use ABS, though, is that you can use Acetone to vapor-smooth parts printed in ABS. Vapor-smoothing will be talked about more in the post-processing section.
PVB
PolySmooth is a PVB-based material made by PolyMaker that is easy to print and has mechanical properties similar to PETG. The big advantage of PolySmooth for printing waterproof parts is that it can be vapor smoothed using isopropyl alcohol. The process is similar to how ABS is smoothed using acetone but isopropyl alcohol is much safer and easier to handle than acetone.
Which settings to use for printing waterproof parts?
Just as important as the material you choose, is the settings you use. FFF printing works by stacking layers of material on top of each other, one at a time. The problem with that is that each layer has a chance of leaving a small gap between itself and the layer below. The following settings are mostly aimed at avoiding those gaps or mitigating their effect:
Wall line count
Wall line count is the setting that determined how many layers thick the outer wall of your print is.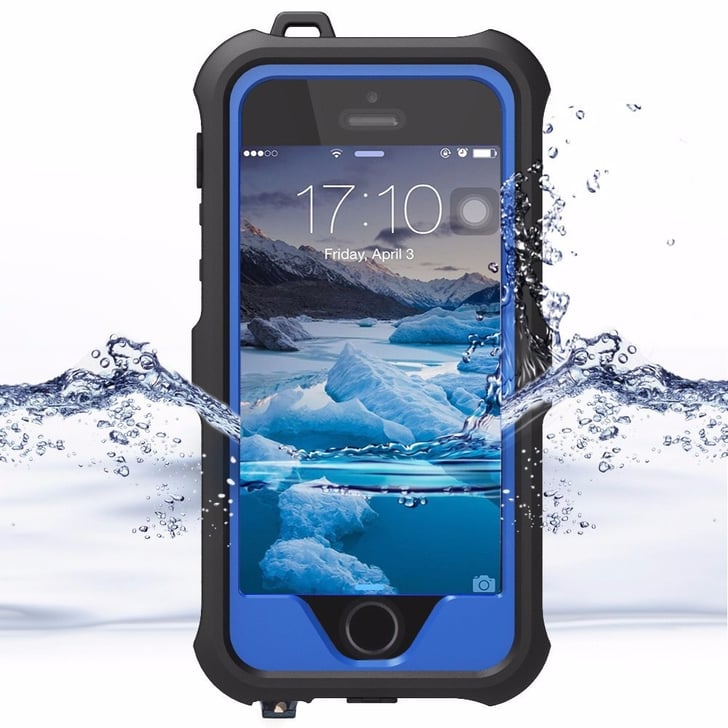 Generally, more wall lines will increase the chance of your part being waterproof. The reason is that they reduced the chance of water having a direct path through all the walls present. If under extrusion or some other issue has caused a small gap in one wall, the next wall acts as a backup to plug that gap.
A wall line count of 3 is normally a good place to start. It’s worth noting that increasing the wall line count for thin parts will have no effect. There is also one situation where a single wall is the best option, and that’s when using vase mode.
Spiralize outer contour (vase mode)
Spiralize outer contour (also known as vase mode) is a setting that enables smooth printing of objects with a single wall thickness. It turns the print into one continuous print path which means there are no retractions between layers and therefore no Z seam.
That is the biggest benefit of vase mode. The Z seam is one of the most common areas for gaps in your printed part to occur.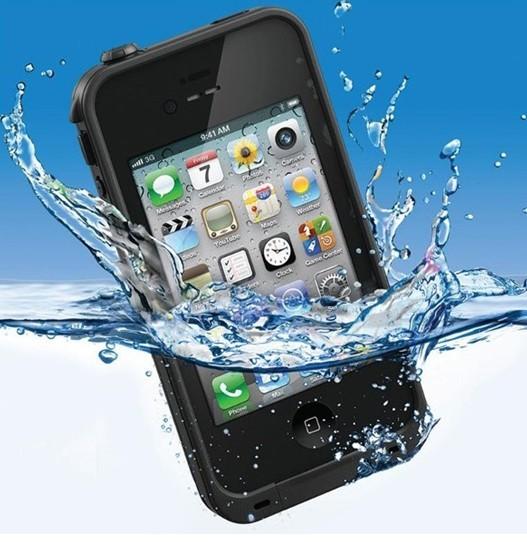 Removing that seam makes parts with even a single wall capable of being waterproof. However, this setting is not suitable for most parts as it requires a very specific geometry. Vases, cups, and bowls are the kinds of prints that can be printed using vase mode.
Temperature
Gaps can appear when one layer is not properly bonded to the layer below. A higher printing temp is one way to increase layer adhesion. It’s generally best to print at as high a temp as your material will allow. Beware that when you print at too high a temp, the material can boil as it comes out of the nozzle, leading to more issues and potential gaps.
Flow rate
Under-extrusion is a major cause of gaps in your part. Even well-tuned print profiles can suffer from under-extrusion at times as they normally prioritize high dimensional accuracy, structural strength, or visual fidelit over other considerations. A slight increase to flow rate should be enough to see an improvement. Start with 105% and increase until you see diminishing returns.
How to post-process a part to make it waterproof
Ideally, you should be able to pull a printed part off the build plate and have it be completely waterproof. However, sometimes a bit of post-processing is needed to shore up an almost waterproof part. Here are some of the main methods you can use:
Apply a waterproof coating
This is the easiest and most straightforward way to waterproof an otherwise leaky part. Applying a waterproofing spray, a clear coat, or even just water-resistant paint can help plug up any tiny gaps in your part. Multiple coats may be needed depending on the part and the coating used.
Vapor smoothing
Vapor smoothing using acetone for ABS or isopropanol for PVB is a great way to make a part more waterproof. Vapor smoothing is the process of using a chemical to melt the outer surface of a printed part just enough that it smooths out the part and removes the layer lines that are synonymous with FFF printed parts. Vapor smoothing is normally done to make a part look better but since it fuses the layers of a printed part together, it’s also a great way to fill gaps and make a part more waterproof.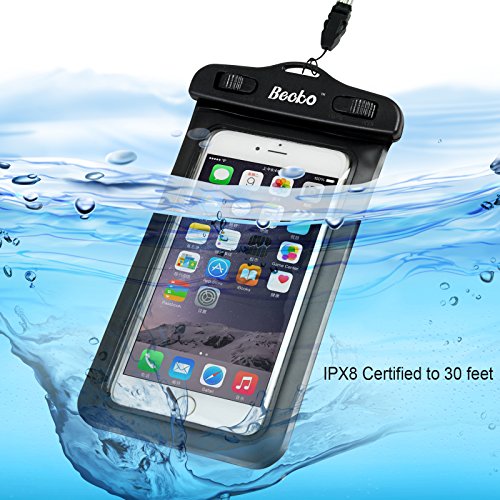
Temperature treatment
Temperature treatment can be done in two ways and for two very different goals. The first is to apply heat to the outside of a print (usually with a heat gun) so that the outer surface melts just enough to fuse the layers together in order to remove the layer lines. This works in the same way as vapor smoothing and it helps remove gaps in the surface of a part and therefore makes it more waterproof.
The second is to heat soak a part over an extended period in an oven or other heated chamber. This process is called annealing. Annealing a part allows the layers of the entire part (even the interior) to bond together more strongly. This increases the strength of the part and makes it more temperature resistant in the future. This can result in PLA parts that have equal or higher temperature resistance to that of ABS or PETG parts.
What are the applications for waterproof parts?
Once you have perfected printing waterproof parts, there is a whole world of possible applications. One obvious area is food and drinks related prints like bowls, cups, or water bottles. While all these prints are possible, we would advise against it as FFF prints are often not food safe and the process for assuring they are is beyond the scope of this article.
However, there are plenty of other applications for waterproof parts. Some examples are:
Scientific research
3D printed parts can be perfect for helping in scientific research related to fluid dynamics and microfluidics. An example of this in practice are the researchers at Cardiff University using 3D printed parts to study microfluidics in a way that is cheaper and more flexible than traditional alternatives.
Watch the videoGardening
Plant pots, composting containers, and hydroponics are just a few areas that are ripe for 3D printing to help with gardening. Beware that if you are using a printed part outside then you should make sure the material you use is suitable to the climate and environmental conditions. More robust materials like PETG and ABS might be a better choice than PLA, for example.
Water features
3D printed water features can be perfect for your pond or fish tank. And with the complete creative freedom that 3D printing provides, there’s no reason you can’t create an epic rube Goldberg-style water feature that fills your whole house with the soothing sound of gently flowing water.
We hope you enjoyed learning about how to print waterproof parts. If you found these tips valuable, you might be interested to know that a lot of the same techniques apply when trying to print transparent parts. To learn more, check out the blog post we did on the topic.
Read blog
Watertight 3D printing part 2: Airtight closable models
In the first part of the watertightness series, we’ve shown you how to print waterproof vases, bowls, flowerpots, cups, etc. Today, we will go one step further and try to make truly watertight (airtight) models – and we’ll go, ahem, really deep today. So brace yourselves! We have a long journey full of prototyping and testing ahead. After all, printing a truly watertight model takes much more than just pushing a button on the machine. But, on the other hand, if you’re willing to undertake this adventure with us, you’ll learn plenty of helpful information. So let’s dive right in!
First, we need to define all properties our watertight model should have. For example, do we need only a simple hollow model (box) that remains permanently closed? While these may be useful for specific applications, you’ll probably want to have something that can be repeatedly opened and closed. But there’s more: do you need a container that can withstand higher water pressure? Or is mere splash protection enough? How about some transparent parts?
This already sounds like a lot of questions. And that’s not all – there are more of them. Because every question comes with its own set of additional challenges to solve: What slicer settings should be used? Is post-processing necessary? And if so, what methods should you choose? What mechanisms should you choose to make a container that can be closed and opened? And how to deal with rubber sealings? Don’t worry, though! While it may look a bit daunting, to say the least, we went through all these situations ourselves and summarized our findings in this article to save you valuable time!
If you’re not that much interested in the theory and principles of construction of watertight models, you can skip this part and have fun with the “When the reality kicks in” section. But if you plan to work on your own amazing project involving 3D prints submerged in water, we suggest going through the entire article.
Our Research
When you start a more extensive project (and this one definitely is), you should begin with proper research. The good news is that we spent quite a lot of time looking for people dealing with similar projects and sharing their results online. The bad news is that not many people try to use their 3D printers to make something watertight. One thing somewhat fitting into this area are RC submarine projects. The main catch here is that there are only several small parts inside 3D printed submarines that really require being watertight – and these are usually made with other methods rather than with 3D printing.
We found a couple of projects that use 3D printed parts, yet they are still very uncommon and often highly specific. Main components are usually made using other methods, such as injection molded plastics, etc. 3D printed watertight models are scarce in the community. Therefore we had to study different ways that don’t include using a 3D printer. We tried to use and slightly adjust these methods to see if we can replicate them using 3D printing. Probably the most resourceful was this article covering watertight sealing in general.
Choosing a proper model
First, we would like to remind you that 3D printing watertight models requires a certain amount of skill, and you probably won’t get far without post-processing. The main problem is that 3D printed models requiring perfect watertightness are usually special and tailored for a specific use since you can buy a Lock&Lock box at any supermarket.
The real benefit of using 3D printing comes from the possibility to create custom electronic housing for divers, custom parts of RC submarines, boxes for various measuring equipment, etc. This means, above anything else, that you will have to do more than download a random G-code, print it and use it immediately.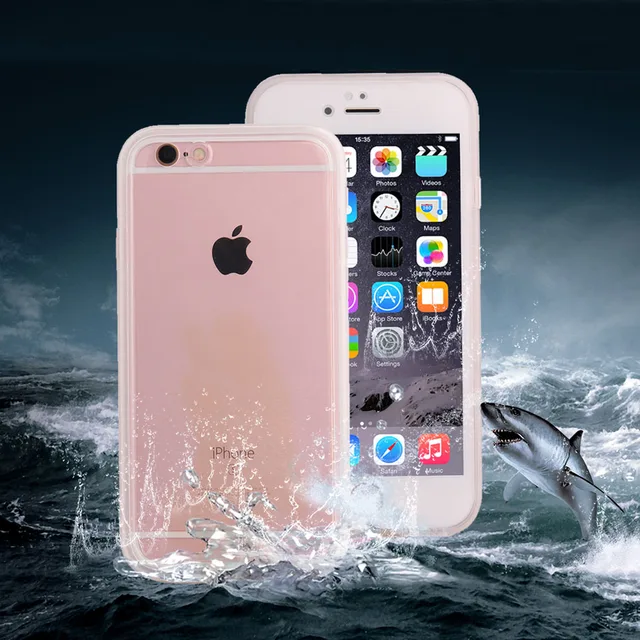 Therefore, although we prepared a few parts for our experiments, we’d like to encourage you to design something for yourselves! But before you do, let us give you several useful tips.
Generally speaking, the best watertight model will be a hollow round container with no openings or moving parts, printed in one piece – you can imagine some sort of a balloon or bubble. However, as you probably guessed, such a model won’t be very practical. So most of us will instead be interested in a sealable container. In this case, you should keep in mind two rules when designing your model:
- Make the walls thick enough. 2-3 mm is usually a good start. However, you want to make sure that the water will not leak inside under higher pressure. For instance: If you submerge a closed model (inside pressure = air pressure at the water surface) to 20 m depth / 65 feet, which is a usual diving depth, its walls will need to resist the pressure of 2kg/cm2 (28 psi).
And this pressure will increase by 1 kg (14 psi) every 10 meters (32 feet).
- Design the model as simple as possible. If you plan to make a box with eight openings with various plugs and parts screwed in or clipped on, we wish you good luck. Every opening, every moving part, and every printing error can cause leakage! Even professional camera housings have warnings about leakage caused by grains of sand or human hair – just imagine what can be caused by a bad print.
Material choice
Here, we’d like to highlight one of our previous articles about 3D printed vases and other simple open models – the choice of material is actually less important than the print settings. Plus, if you plan to make a model that should resist high pressure (2 bar and more), you will probably use some form of post-processing anyway – for example, sealing the model using an epoxy resin. But if you need to make things resisting lower pressure (less than 2 bar), the basic 3D print might be good enough too.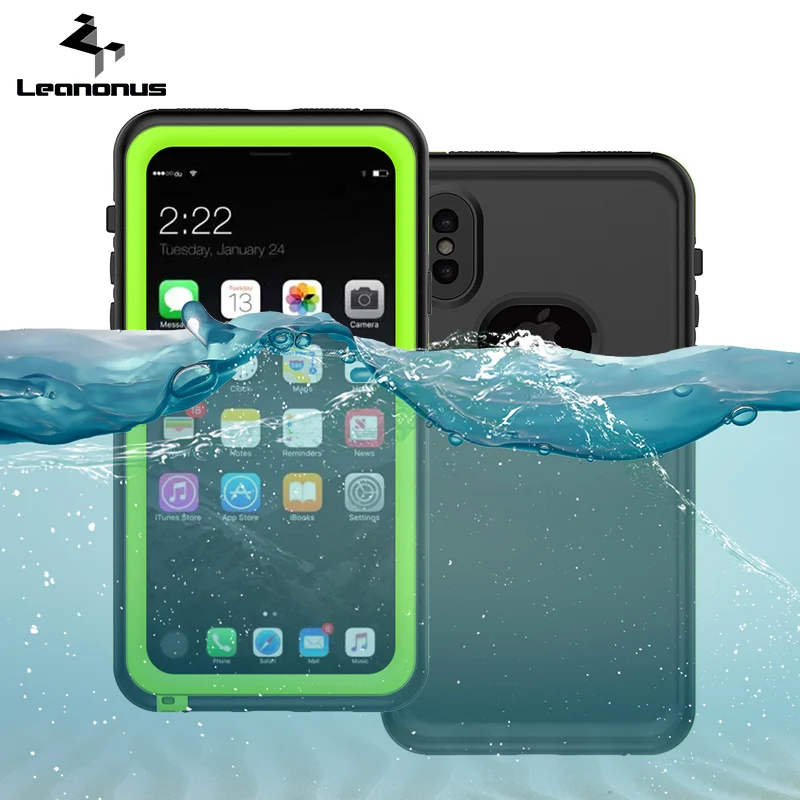 You can find a more detailed material comparison in the article mentioned above. In short, the best results can usually be achieved with filaments that have the best layer-to-layer adhesion properties, such as PolyPropylene. Interestingly, we also had great results in 20m depth with Prusament PLA and SLA resins.
Print settings and infill
Suppose you need to create models that resist only a small amount of pressure in shallow waters (for snorkeling or similar activities). In that case, there is no need to bother with different print settings and post-processing. Here, you should simply follow our advice from the previous article (in layman’s terms: more perimeters = better waterproofness). The only extra thing we can recommend: pay attention to how smooth the surface is. Those parts that get in direct contact with rubber sealing should be as smooth as possible. The best way to achieve this is to print these parts facing down on the smooth sheet or use the ironing function in PrusaSlicer.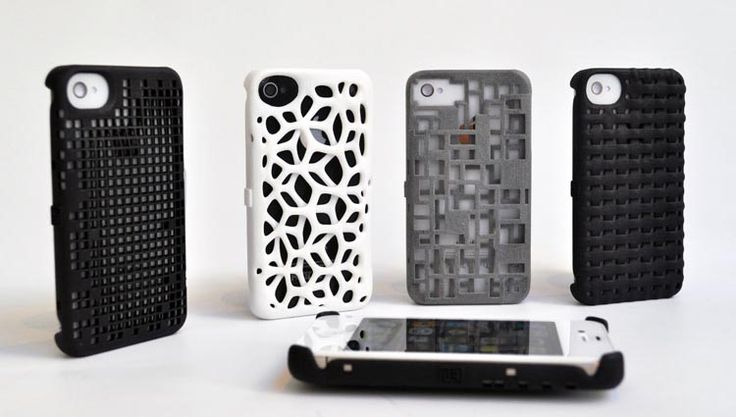
It gets slightly more complicated with greater depths (pressure). To withstand high pressure, the models need to have walls as solid and compact as possible. If you are confident that your model is watertight at 1-meter (3 feet) depth with three perimeters and 15% infill, it will most likely be different in a 30m (99 feet) depth. Due to the higher pressure, small crevices and other imperfections might cause a lot of trouble. Plus, some deformations might occur with compressing air pockets inside the model.
To protect against deformation that would cause leakage, we offer a simple method: increasing the number of perimeters and infill. The ideal state is when the model wall is 100% filled with material or has a high number of perimeters. Unfortunately, it’s pretty much impossible to give an exact number due to a high number of variables. We recommend starting testing with four perimeters and 60% infill.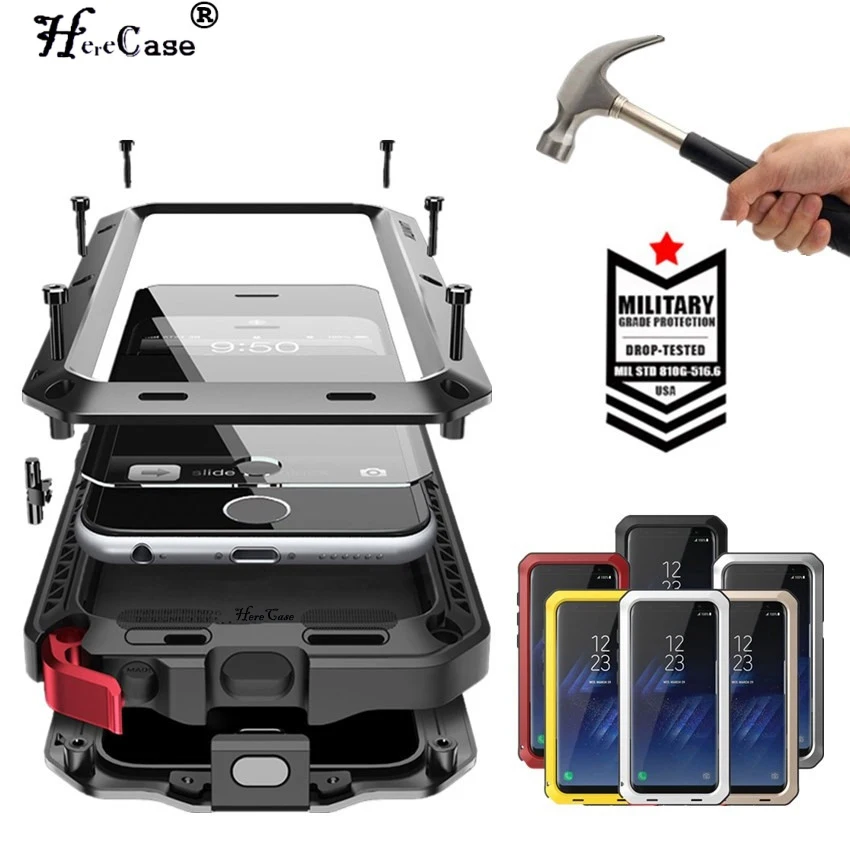 Still, keep in mind that there might be numerous air pockets and crevices allowing the water to leak inside the model. Just have a look at this untreated PETG print:
Treating models with epoxy resin
The second way to achieve watertightness is by sealing the model with epoxy resin. Of course, the best way to do this is a vacuum impregnation, but you probably won’t be able to do it at home. Luckily, using a brush or sinking a model inside the resin works just as well. The result is a model that resists water leakage and comes with better mechanical resistance and dimensional stability. Just don’t forget that it’s useless to apply epoxy resin on a hollow model. To be specific: The walls must keep their shape. If they’re too thin (1-2 perimeters), the epoxy coating will most likely crack under higher pressure, and the walls will deform anyway. So it’s best to treat walls with four perimeters and 60% infill or higher.
Working with epoxy resin may be a bit messy process. Plus, it is accompanied by an unpleasant odor. Don’t forget to use respiratory protection, such as a half-mask (respirator) and gloves!
Sealing
Sealing is undoubtedly the most challenging part of any watertight model. In other words: printing watertight models that don’t need to be opened is relatively simple. But when it comes to lids, covers and moving parts, there is a high chance of failure. This is because every closable box usually comes with plenty of imperfections that cause leakage.
This great article explains sealing functionality in detail. We went through several designs and then came up with three basic variants that we tested with 3D printed parts. We definitely recommend reading the entire article to find out more about making things watertight in general.
Gaskets
Do you have flexible filaments at home? If so, the idea of 3D-printed gaskets might have crossed your mind. And if you have actually tried it, you probably know that it’s a dead end. It’s much better to print a two-piece mold, fill it with silicone caulk and carefully remove it after drying. Some sources claim that it’s best to use Ooogoo (or modified proto-putty) made from mixed silicone caulk, water, and cornstarch.
Atypical shapes
If you’ve ever used a GoPro camera, you probably noticed that the back door sealing has an atypical trapezoid cross-section. It’s quite an unusual shape, but it provides perfect waterproofness up to 40m depth. The question is: where can you buy such sealing? The short and honest answer is: we don’t know. Probably some specialized stores might help. However, if you need such an atypical sealing, it’s perhaps easier to craft it yourself, again, with mold and silicone caulk.
O-Rings
No doubt, the best, easiest, and most proven method is using simple O-rings. After all, there is no point in making it complicated. The only thing to take care of is the correct dimensions of used O-rings and modeled parts. In addition, we recommend treating the O-ring (or any other sealing) surface with silicone grease before every use. Detailed information about the correct usage of O-rings can be found in this article again.
Transparent parts
Let’s assume that most of the watertight parts will require at least one transparent part. Is it wise to print it or to use another method? Now it’s an excellent opportunity to revisit our older article about printing transparent models. And yes, you can use it for watertight prints, as long as you don’t need it to be crystal clear. All you have to do is stick to our directions and polish them properly.
Moving parts (switches etc.)
Sometimes you may need to print some moving parts, for example, to use various buttons and switches when printing electronics covers. The easiest way to do it is using a flexible filament (at least for a part of the model) – this way, you can press the buttons through the wall with no need to open the model or design anything complicated. But it might be problematic in greater depths, where the flexible part is compressed and constantly applies pressure onto the button.
Another option is to use a stainless steel pin with an O-ring, the same way GoPro cases do it. However, this method might end as a disaster because any minor imperfection will cause water leakage. So instead, it’s much better to use a magnetic switch that is commonly implemented into diving lights. We suggest these two ways:
- A magnet attracts a small metal part (a spring, for example) that will touch the other end of the circuit.
- Two magnets are placed on opposite sides of the wall. As they are moved from one side to another, they work as a mechanical switch (even a simple copper wire glued to the magnet might work).
Ok, that was the theory. But how does it all work in reality? And does it even work? As always, we prepared several testing models to try everything mentioned above. The results are sometimes good, sometimes bad. So let’s have a look:
Choosing the model
In the beginning, we chose four basic models: A simple variant of a Lock&Lock box with a gasket, a threaded flashlight housing, a custom external light for underwater macro photography, and a camera housing.
We present the camera housing as possible use of a complex 3D printed part. But keep in mind that it might be uneconomical or even useless due to the time consumption and high failure rate.
Material and print settings
We’ve pretty much summed up most of the print and material settings in our previous article. However, we still think it’s good to pinpoint some of the essential aspects, especially when you’re planning to use such an object in a high-pressure environment.
The first and the most important thing you may notice during the printing process (with more perimeters) is the unattractive appearance of some materials. Bad aesthetics might not be such a big deal for functional models, but if you need it to be as precise as possible to fit electronics inside, you might struggle with doing so due to the excess material on the surface. This means that you should double-check what material you plan to use and what print settings you choose. To be more specific: when we printed PCCF (or PETG) with 100% infill and no extra settings, excess material prevented us from putting any electronics inside.
The second problem that appeared even under low pressure (in a bucket with water) was the permeability of visually compact prints. Specifically, we tested five materials we thought might be suitable for watertightness, and they should still be easy to print: PLA, PETG, PCCF, ASA, and SLA resin (Prusa tough).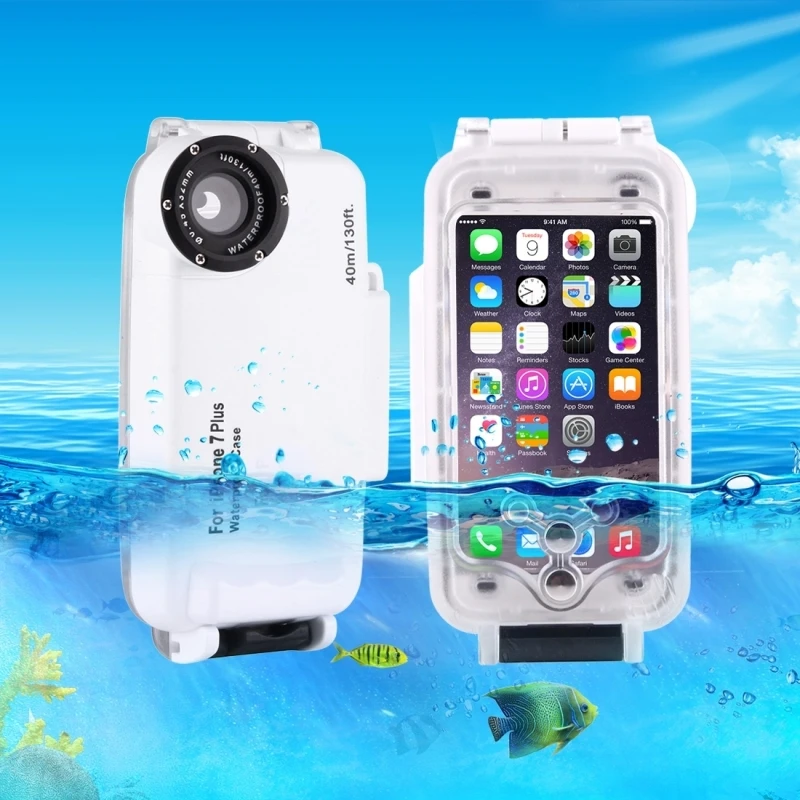 Surprisingly, the worst results came with untreated PETG and acetone smoothed ASA. PETG leaked really quickly through the seams and contact points between perimeters and solid infill. Smoothed ASA leaked slowly, probably through the surface imperfections around sealing or bubbles inside material since it slightly expanded during the smoothing process. Surprisingly, PLA, PCCF, and SLA prints worked great without post-processing – even 20 meters (66 feet) underwater.
We used various materials to print this model – This model is a flashlight housing with threaded closing and middle part printed with flexible filament/resin. We attempted to print it with various materials.
Our first thought was to give PETG one more chance. This time, we treated it with epoxy resin. Why? Well, it’s pretty simple: carbon fiber filled filaments are usually expensive, and printing it with 100% infill might cost you a lot. The print area size may limit SLA prints, and PLA is prone to heat deformation. See the yellow PLA print above that got deformed in a car on a summer day.
On the other hand, PETG is a cheap material suitable for mechanical use and has a good temperature resistance. By treating it with an epoxy resin, we achieved perfect watertightness and even improved its mechanical properties. The main downside is that liquid two-part epoxy resin is a toxic material that requires respiratory and skin protection. Working with it is messy and time-consuming, but the result is satisfactory.
Printing transparent parts
You won’t go far without making a flashlight or camera housing without using any transparent parts. We’ve already shown you that it’s possible to print glass-like transparent models. This works especially well with transparent SLA resins. However, it is essential to spend enough time sanding and polishing the surface. Every scratch, fog, or bubble will affect transparency and can cause unwanted refraction.
And of course, we also came up with a slightly wild idea: Can you print and polish a protective see-through glass that goes in front of a camera lens? We tried to do it, just for fun. We used the Original Prusa SL1S 3D printer with 3DM tough clear resin. However, we encountered two main issues. The first problem: there are bubbles inside the print, which are caused by platform movement and resin stirring. The other problem is the internal structure of the solidified material. Although the print might look clear at first, you will soon notice that the print structure creates a refraction effect that looks like a blurred cross. Therefore it’s useless as a glass-like see-through print. While this may be ok for things like a semi-transparent LED indicator, it’s simply not suitable as a camera cover. Instead, we suggest cutting a plexiglass sheet with a laser plotter.
Sealing
The most difficult part that in all our test objects is sealing.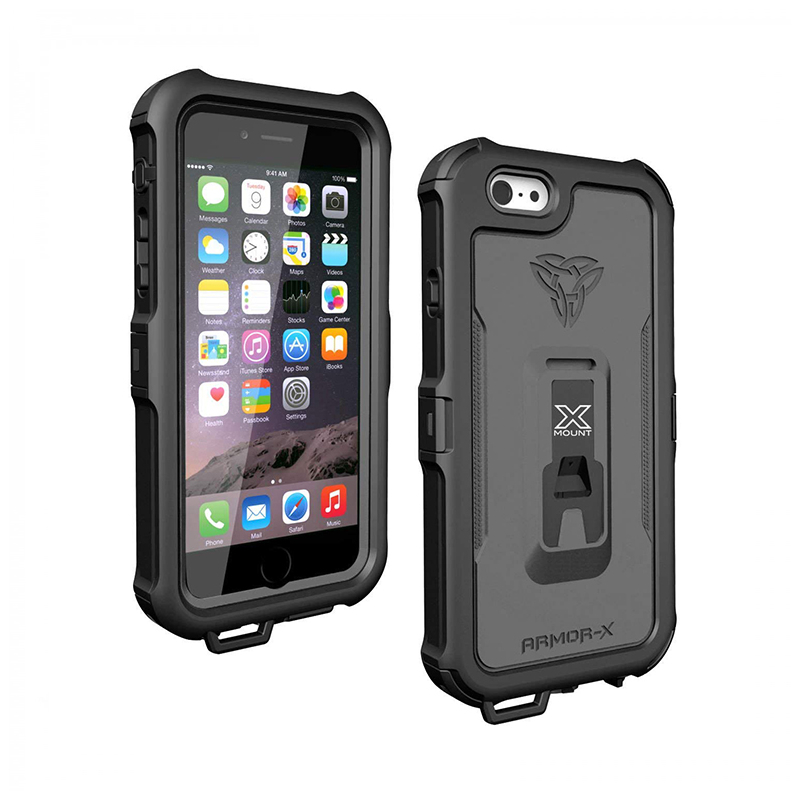 We’ve tested 3D-printed variants, sealing made from a mold, and simple O-rings.
First, we printed gaskets with Flexfill 98a, then with Flexfill 92a, FilaFlex40 and flexible SLA resin. The first FFF batch was printed without ironing (maximum number of perimeters, random seam position), the second batch with ironing turned on.
Second, we printed molds for silicone sealing in two variants: the first was a simple gasket, the second was an atypical sealing similar to the one used at GoPro cameras. The molds in the first batch were filled with silicone caulk, while in the second batch, we used a proto-putty. We can safely say that making this sealing gets quite messy and requires a certain amount of skill. Especially mixing silicone with cornstarch (proto-putty) may end up pretty badly – most of the material sticks everywhere except the places where it should go in the first place. Plus, proto-putty is much softer, porous, and prone to break rather than pure silicone caulk.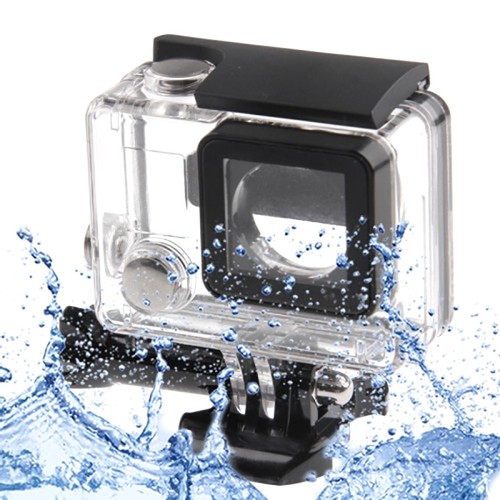
Finally, we also tested O-rings from scuba diving hoses. However, many more O-rings can be used in the same way. Using O-rings with correctly modeled printed parts is, without a doubt, the best and most reliable method.
Testing under normal (low) pressure
Let’s start with the bad news: 3D-printed gaskets don’t work. None of our printed creations held water, not even when we tried to seal the gaskets between two parts using screws. And we even tightened them with a force that damaged the threads. We did not manage to find a material printable on standard FDM/FFF 3D printers that would be soft enough to work as a proper seal between two 3D-printed surfaces. In theory, 3D-printed gaskets might work for some heavy machinery made of steel parts, which can be pressed together with a considerable amount of force.
The good news is that other variants worked pretty well under normal pressure.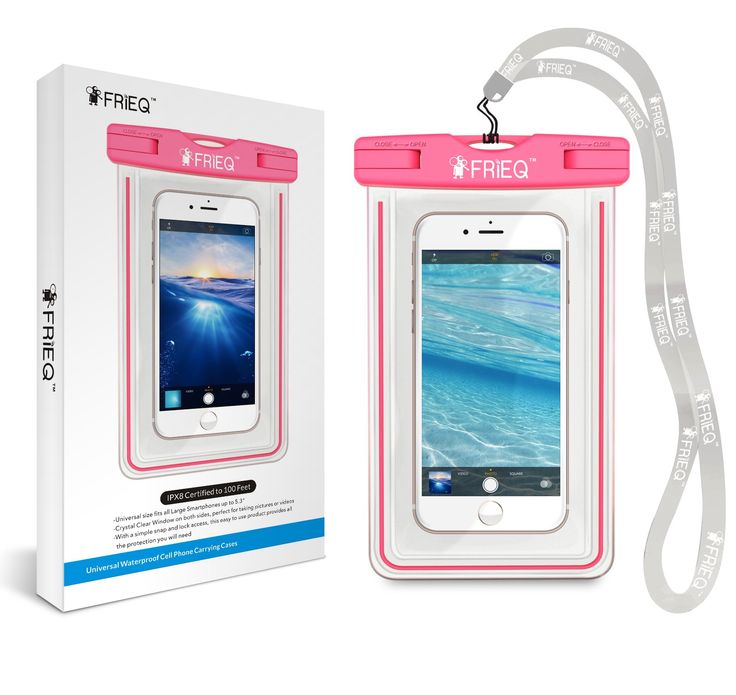 After several attempts, we made every type of sealing watertight enough to keep the insides of tested models dry overnight when sunk in the bucket with water.
Testing under high pressure (deep underwater)
It always gets more complicated deeper underwater. Here, we stumbled across problems with chosen types of locking devices (door, lids, etc.) and various sealing types. The Lock&Lock box had the worst results: it started leaking just a few meters under the surface. This was caused by insufficient pressure between the lid and body and by generally problematic gaskets. They didn’t do their job here – and neither did they with the camera housing glass and door.
Sometimes it helped to squeeze the gaskets between the two parts with a bit more force. But, unfortunately, it’s not possible to increase the pressure on the gaskets forever. For example, the silicone gasket at the camera housing always leaked no matter how much it was squeezed. At one point, it eventually gave in as it didn’t withstand the pressure. The damage was done, and the gasket started leaking even more.
As it turned out, proper atypical sealing and simple O-rings are by far the most reliable options if you manage to design the model correctly.
Interestingly, a flashlight housing with a threaded lock worked perfectly even in 30m depth with both types of silicone gaskets, O-rings, and even with a simple rubber band!
Tip: We applied silicone grease to every type of sealing before every use, and we suggest you do the same.
Moving parts
Most of the watertight housings don’t make much sense without buttons, switches, and other moving parts. For example, a camera housing needs some kind of element to control the device. At first, we tested a part made from a flexible filament (and resin) – this way, you can produce soft walls, through which you can press a button. A great advantage is that flexible materials are waterproof even at 30 m (99 feet) depth.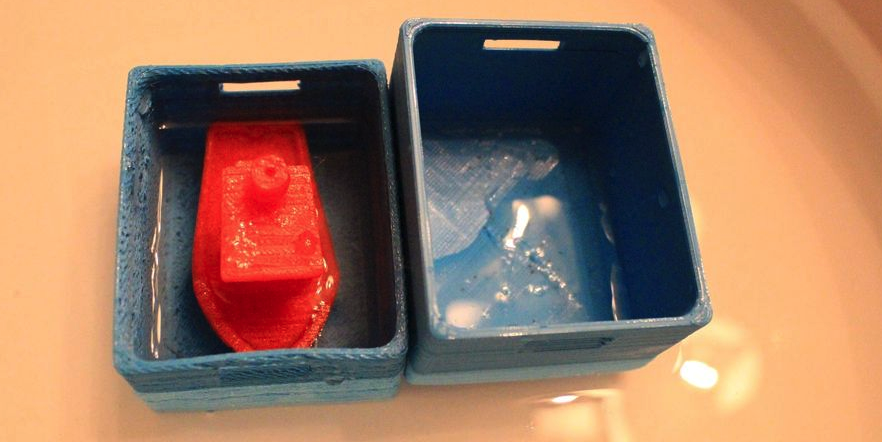 However, flexible materials shrink a lot under pressure, so even in mere 10 meters (33 feet), the pressure causes the button to be constantly pressed – rendering such a solution rather useless. Rubber housings are therefore suitable for shallow waters (snorkeling) only.
A more reliable method is using magnetic switches that you can find in various diving flashlights. We have tested two variants: the first is attracting a metal wire (or spring) to a magnet, the second is using two magnets as a mechanical lever that moves the switch. Attracting the wire to the magnet didn’t work well since it caused unwanted flashing and occasional turning off and on. On the other hand, using two magnets attracted across the wall worked almost at 100%, even with a simple tweak – we glued the wire to the magnet.
Do you feel that there’s too much information? Well – there is. 🙂 So let’s try to sum it all up.
As we previously mentioned, it’s best to make watertight models as simple as possible. Even a simple box with a threaded lid and an O-ring may withstand great pressure. Together with magnetic switches, it’s possible to make various external lights for underwater photography. This is probably the best and most reliable 3D printed watertight gadget.
Simple Lock&Lock boxes can be printed, too. However, compared to the injection-molded ones, they’re desperately unreliable, too expensive, and producing them is rather time-consuming.
Complex models such as camera housing aren’t worth it too. They are challenging to design, and then there is the time consumption and material cost. They’re just too much hassle to make. Plus, it’s necessary to make several moving parts, which increases the chances of leaking.
Rubber parts printed with flexible filaments and resins work only in shallow waters, making them pretty suitable for snorkeling, but if you plan to use them in greater depths, you will find out that the material compresses under pressure and prevents any buttons from working correctly.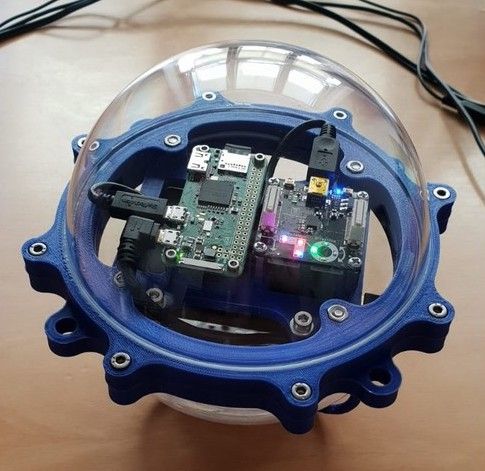 It is better to make moving parts with magnets, alternatively with metal pins and O-rings (just like GoPro does it).
Transparent parts can be made with FFF or SLA methods, but we recommend using thick plexiglass (4 mm or thicker). Achieving a perfectly transparent and clear 3D printed component as a part of a watertight model is no easy task.
The most reliable type of sealing is the O-ring. O-rings can be bought in various specialized stores with diving gear, car shops, potentially even in hobby markets. Just don’t forget to treat the seals with silicone grease every time you use it.
Finally, we’d like to mention that even though we do our best to cover most of the problems around this topic, this article should only give you advice on how to do it yourself and not serve as a step-by-step guide. If you try to print something watertight yourself, keep in mind that you will have to go through a lot of prototyping, testing in shallow waters and greater depths, etc. Don’t forget to test everything properly before putting electronics inside! It’s good to test everything several times in various depths before using it for the purpose it was designed. This is pretty much everything from us – now it’s up to you! Good luck with your projects!
Happy printing!
Best 3D Printer Files Waterproof・Cults
Waterproof case for iPod Shuffle 4G
Free
Vase with butterflies
Free
Waterproof pillbox with hidden compartment
1 €
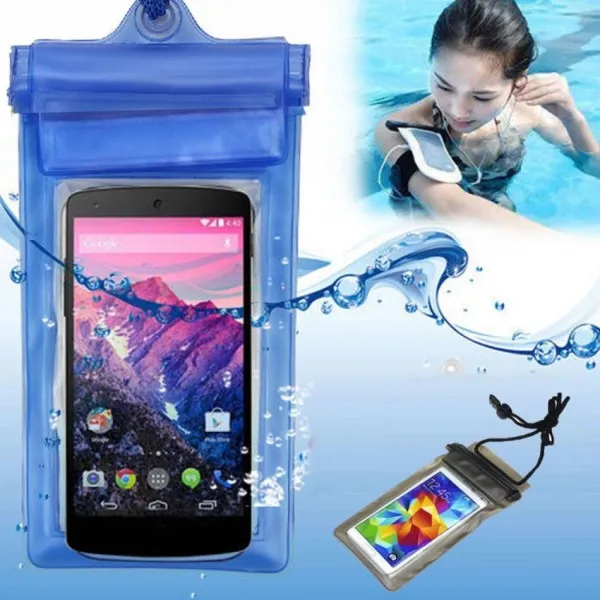
Smartphone Waterproof Case
Free
Micro SD waterproof capsule
0.71 €
Waterproof junction box, cover and connector for electronic projects
Free
# 6 Laser box
2. 50 €
50 €
Waterproof electronics unit
0.90 €
screen protector for gopro hero 8 waterproof case
free
FLEXIBLE CONTAINER (TPU)
1.17 €
3D blocking handle Weatherproof parametric storage box
3,68 €
Receiving box Losi hammer rey
2.21 €
Watering can - shark 🦈
1.65 €
submarine 3D printing
Free
Vase 'Raindrop'
0,50 €
waterproof capsule
1 €
support led strip waterproof
Free
Renfri´s Brooch The Witcher Netflix
Free
Losi SBR 2.
 0 - Receiver box
 Free
Waterproof Vaccine Card Case
Free
match container.
1 €
Ultimate Weed Jar - Waterproof / Smellproof Container
Free
Rotho Box EVO TOTAL 44l - lid clip
Free
Frog Box v2.0 (Rugged Waterproof Box Remix)
Free
Micro Geocache during
Free
waterproof box
1,27 €
GoPro Hero7 Black Side Door Splashproof Waterproof Charging
Free
Waterproof Box!
1.96 €
Receiver Box
Free
Showergel webplatform
Free
Led Ramp for 3d Printer
Free
Voronoi style horse-2mm version
Free
Floation Cube for GoPro (NinjaFlex)
Free
Cycloid Vase
1 €
Universal cigar lighter cap
Free
Water Resistant Box 100x150x60mm
Free
Waterproof shower phone holder
0. 62 €
62 €
KTM - NGK LKAR8A-9 spark plug waterproof case
0.54 €
waterproof water pump upgrade version
free
Multiples of 5 cup [vase mode]
Free
Waterproof hand grenade stash
Free
a beautiful waterproof box for your electronic assemblies
0,50 €
Weed - Cookie Cutter / Cannabis Pack - Style Marijuana
1.07 €
Coaster / Weed Coasters - Pack x4
1,55 €
Coaster / Weed Coasters - Cannabis
0.66 €
Coaster / Weed Coasters - THC
0.66 €
Coaster / Weed Coasters - CBD
0. 66 €
66 €
Coaster / Weed Coasters - 420
0.66 €
Phone case on a 3D printer: how to print
Many accessories are available for smartphones, but how to find something exclusive for sale, something that no one else has? For example, an unusual case? A truly original thing will have to be created by yourself. And additive technology and devices for creating three-dimensional objects will help in this.
- Printing phone cases on a 3D printer
- Printing mistakes and how to avoid them
Printing phone cases on a 3D printer
The choice of material for printing depends on what kind of protective accessory for the phone will be. Next, you need to consider whether the 3D printer is capable of working with the required filament. And then you can start designing the case.
Which model do you prefer?
Three different accessories are available to protect your smartphone case:
- the case itself, which is a “shell” that hides the back cover and all four sides;
- escutcheon that hides the rear area and two sides - left and right;
- Bumper that only encloses the edges and leaves the back cover open.
All three models are suitable for printing on a 3D printer, but there are a few nuances. The bumper is a kind of frame, and it is not easy to make it exclusive. But it was precisely for the sake of obtaining a unique result that it was decided to create a product with our own hands.
Cover and bumper remain. For both of them, you can come up with an unusual design - the area covering the back cover of the phone will become a canvas for fantasies.
Which material should I choose?
The case fits snugly around the body of the smartphone, but it takes little effort to insert and remove the phone from the case. Such requirements are met by flexible materials - thermoplastic polyurethane, copolyester and other copolymers. For printing stretchy phone cases, filaments such as TPU, TPE and TPC, as well as PVA and Flex are suitable.
Important. Before making the final choice of material, you need to check the capabilities of the printing device.
Working with elastic filament requires special modes: temperature, blowing, speed. You need to make sure that the printer is able to support them.
The pad snaps onto the ends of the smartphone case, which means that its folded edges must be both elastic and strong. Undoubtedly, the leader in strength is Nylon, but the shrinkage of the material is enormous. To guess with the size of the overlay, you will need to print several test copies. The second disadvantage is high hygroscopicity, the material must be dried before printing. And thirdly, the temperature of the extruder must be at least 250 ° C.
PETG is the best choice. It is a strong, resilient material with minimal shrinkage and average printer setup requirements of 235°C print temperature.
How to 3D print a phone case?
The finished 3D model can be found in the printer user community banks. But in order to become the owner of an exclusive case, you need to build its digital prototype yourself. The process of creating an accessory includes several stages:
- Smartphone measurement.
Attention! For the elastomer case, the dimensions are taken without amendments, the hard plastic will require adjustment of the scale so that there is a small gap between the case and the protection.
- Making a digital 3D prototype in the appropriate program. The most difficult stage requiring modeling skills.
- Change the 3D model in accordance with the invented design - making curly cuts, applying patterns, inscriptions, monograms and other distinctive details.
- Convert object to STL file and send to slicer to prepare for printing.
Recommendation. To check if the dimensions match, you need to print a test product without design frills. If errors are noticed, it will be easier to correct them in the prototype, where there are no drawings, cutouts and other artistic details.
Printing errors and how to avoid them
The most common mistake is choosing the wrong media. For example, a PLA plastic overlay will lose its shape when the phone case gets very hot during active use. A PETG case can break off the sidewalls if they are too thin. Thin-walled models should be printed from elastic materials, and elastic plastic should be selected taking into account the maximum temperature of the smartphone.
The second error is incorrect modeling. When design details were included, the interfaces of individual elements were not taken into account, the dimensions were not maintained, the correction for the type of filament was not made (whether there is shrinkage, what is its value). If you don’t have the skills to create digital spatial objects, it’s worth downloading a ready-made cover model.
And the third problem is incorrect slicer settings. If you choose the wrong thickness of the layers, the temperature of the extruder and table, make a mistake in the settings for the infill percentage and print speed, the product may turn out to be brittle.