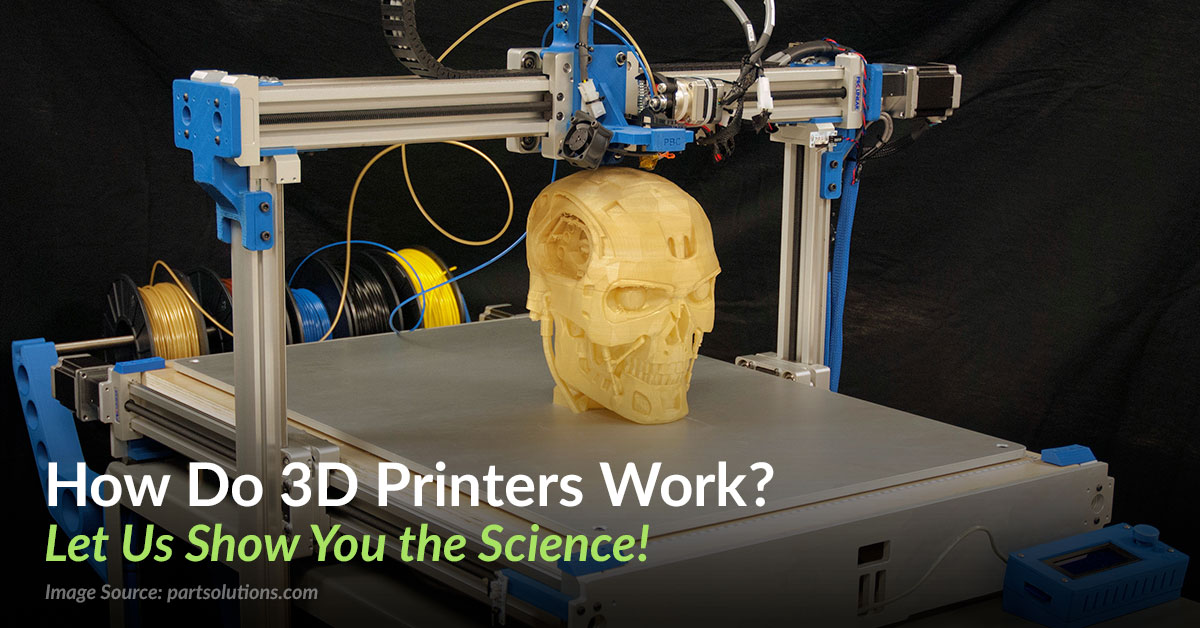
How much to charge for 3d printing
How Much Should You Charge For A 3D Print? Calculator. – My3DLife
This is a guide for at-home 3D printers that are making parts for individual sales. This basically means that I will not be taking rent/lease/mortgage, internet, or machine cost into the calculation. This is purely cost per hour to run the 3D printer plus materials cost to give a fair evaluation of how much to charge for 3D prints and is not scaled for industrial factors or business expenses.
The simplest calculation to charge for a 3D print is (Filament Cost + Electricity Cost) times 3 plus the cost of programming, machine time, post-processing time, and adhesion materials. You should also have a predetermined minimum charge, $5.00 is a customary minimum charge.
The most expensive cost associated with 3D printing is time for setup, programming, and post-processing. You need to determine for yourself what a fair and reasonable hourly charge is for your own labor.
I have broken down the cost of 3D printing below.
Large 3D Print Cost Analysis.
Let’s assume we are printing out a 300% Benchy that is 144mm tall (5.669in). The print will take $6.24 in filament, $0.63 in electricity, 10 minutes in setup time ($1.66), 34.5 hours of machine time ($34.50), 0 hours post-processing time, and $0.50 in adhesion materials.
300% 3DBenchy = (($6.24 + $0.63) x 3) + $1.66 + $34.50 + $0.50 = $57.27
$57.27 probably sounds like a lot of money but I think you will find that this is actually a pretty good deal considering what other companies are charging for similar prints.
If you are wanting to do the friends and family discount and only charge for cost then only charge for filament, electricity, and adhesion materials.
300% 3DBenchy F&F discount. = $6.24 + $0.63 + $0.50 = $7.37
Small 3D print Cost Analysis.
Now let’s look at a much smaller %50 3DBenchy that is only 24mm tall. The print will take $0.05 in filament, $0.02 in electricity, 10 minutes setup time ($1. 66), 0.66 hours machine time ($0.66), 0 hours post-processing time, and $0.50 in adhesion materials.
50% 3DBenchy = (($0.05 + $0.02) x 3) + $1.66 + $0.66 + $0.50 = $3.03 (Or your $5.00 minimum).
50% 3DBenchy F&F Discount = $0.05 + $0.02 + $0.50 = $0.57
How Much Does 3D Printing Cost Per Gram?
3D printing typically costs $0.02 to $0.05 per gram for FDM printers and $0.03 to $0.06 per gram for SLA printers. The difference per gram doesn’t seem to make a large difference but for a larger print, it builds quickly.
For example, a 3DBenchy at 20% infill is 13g of filament which means it would cost $0.26 to $0.65 for FDM and 0.39 to 0.78 for an SLA printer.
What Costs Should Be Considered When 3D Printing?
The main costs that should be considered when 3D printing is Filament Cost, Electricity, Machine Time, Programming Time, Post-Processing, and Adhesion Materials. If you are selling your prints just at cost then only calculate Filament Cost, Electricity, and Adhesion Materials.
How Much Filament Does A 3D Printer Use?
The easiest way to calculate how much filament you are using is by inputting the variables into your slicer settings. Most slicers have the ability to calculate the cost of the filament by using the cost of a spool of filament divided by the grams of filament on the spool times the material density times the grams of filament used.
For example, if a spool of filament costs $24.00 for a 1kg spool of PLA filament (1000g) and you are printing a 3DBenchy that is 13g of filament. (24.00/1000)*1.24*13 = $0.38
Cura
In Cura go to Settings > Extruder 1 > Material > Manage Material (or click Ctrl + K). From this window in the General tab, you can change the currency by simply erasing the currently inputted value with your desired currency. In the Materials tab, select your material type, input the cost of your filament spool as well as the amount of material on the spool. (In Cura, the slicer automatically calculates the material density for you when you select your material type.)
When you slice your model the grams of filament used, length of material used, and cost of material will be in the same window where the slice button was.
Slic3r
In Slic3r go to Settings > Filament Settings (or click Ctrl+2) here you can input your filament diameter (typically 1.75mm), the cost per kg, or your filament, as well as your material density which you can find here.
After you export your G-Code Slic3r will create a Print summary in the lower right-hand side of the software that will show you the length of filament used, the grams of filament used, and below that the cost of the print.
PrusaSlicer
In PrusaSlicer go to the Filament Settings tab. Here you can input your filament cost per spool as well as the amount of material on the spool. You will also need the filament density which can be found here.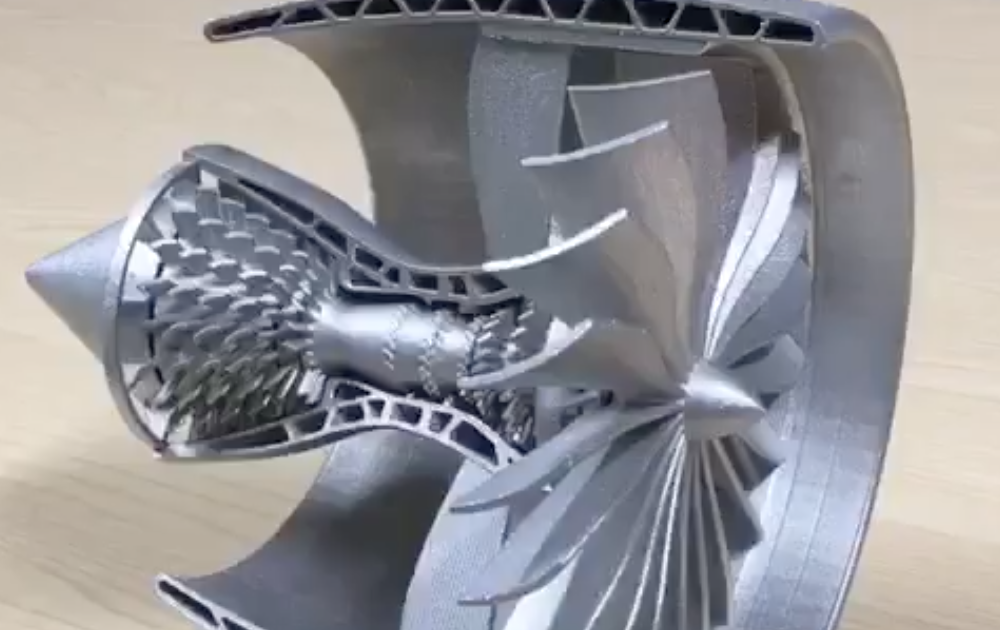
When you slice your model the length of filament used, grams of filament used, and cost of filament will show in the lower right corner.
As you can see from all 3 of these slicers the numbers are not exactly the same for all of them. This is because the infill pattern is slightly different. The most user-friendly and probably the most popular is Cura. My least favorite of these 3 is Slic3r, it feels very outdated and not very user-friendly.
How Much Electricity Does A 3D Printer Use?
Electricity doesn’t play a massive role in the cost of 3D printing but I believe that the cost should still be considered especially on larger prints or on 3D printers that use more electricity. I have already created a calculator just for figuring the cost of electricity for your 3D prints which can be found here.
What Is A Good Hourly Rate For 3D Printing?
A good fixed rate for machine time is $0.50 to $1.00 per hour depending on the complexity of the print. I also think it is wise to have a $5.00 minimum on all 3D prints. There is no real exact number for how much you should charge per hour so you might have to gauge your market to see what is acceptable.
How Much Time Does It Take To Program A 3D Printer?
Typically programming and starting a 3D printer will take less than 10 minutes. If there are special requirements or modifications that need to be made that cost for time and resources can be passed down to your customer and you should charge them your hourly rate.
How Much Should I Charge For Post-Processing 3D Prints?
For Post-Processing a 3D print you should charge an hourly rate that you will determine yourself. If this hourly rate is projected to be too high for your customer then you can always recommend they take care of the post-processing themself.
How Much Should I Charge For Adhesion Materials For 3D Prints?
The cost of adhesion materials for 3D printing are painters tape and stick glue which is usually a very cheap item.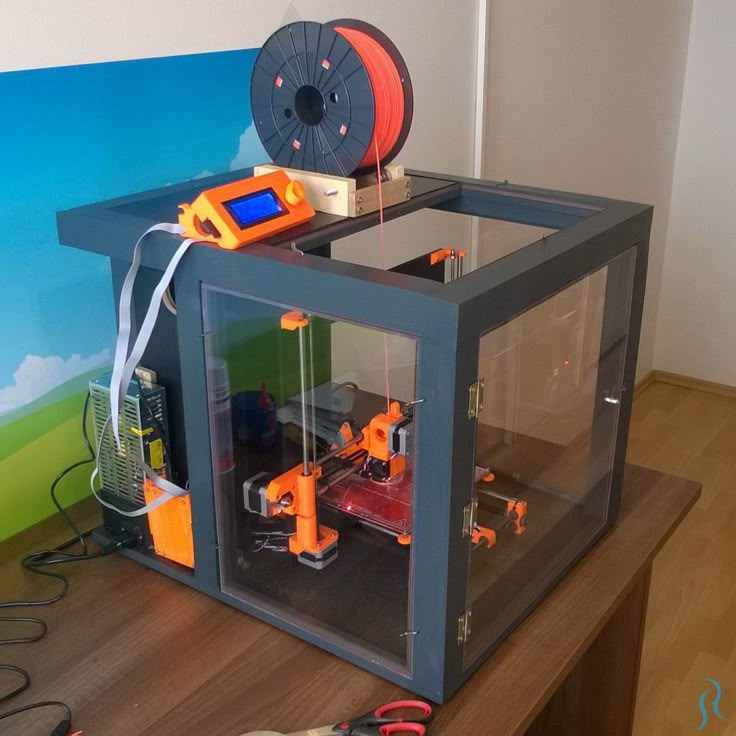 You can get a stick of glue for about $1.00 and a roll of painter’s tape for about $5.00. The easiest way to charge for these items is a flat rate of $0.50 per print.
How to Price 3D Printing Service Fees – ACRL TechConnect
Many libraries today provide 3D printing service. But not all of them can afford to do so for free. While free 3D printing may be ideal, it can jeopardize the sustainability of the service over time. Nevertheless, many libraries tend to worry about charging service fees.
In this post, I will outline how I determined the pricing schema for our library’s new 3D Printing service in the hope that more libraries will consider offering 3D printing service if having to charge the fee is a factor stopping them. But let me begin with libraries’ general aversion to fees.
A 3D printer in action at the Health Sciences and Human Services Library (HS/HSL), Univ. of Maryland, BaltimoreService Fees Are Not Your Enemy
Charging fees for the library’s service is not something librarians should regard as a taboo.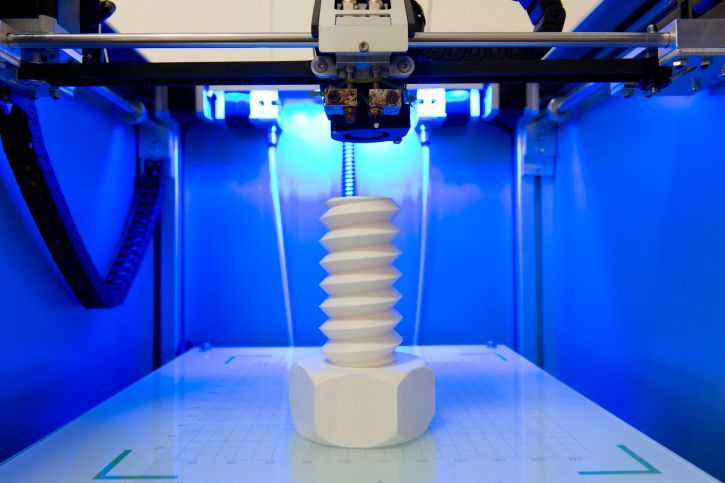 We live in the times in which a library is being asked to create and provide more and more new and innovative services to help users successfully navigate the fast-changing information landscape. A makerspace and 3D printing are certainly one of those new and innovative services. But at many libraries, the operating budget is shrinking rather than increasing. So, the most obvious choice in this situation is to aim for cost-recovery.
It is to be remembered that even when a library aims for cost-recovery, it will be only partial cost-recovery because there is a lot of staff time and expertise that is spent on planning and operating such new services. Libraries should not be afraid to introduce new services requiring service fees because users will still benefit from those services often much more greatly than a commercial equivalent (if any). Think of service fees as your friend. Without them, you won’t be able to introduce and continue to provide a service that your users need. It is a business cost to be expected, and libraries will not make profit out of it (even if they try).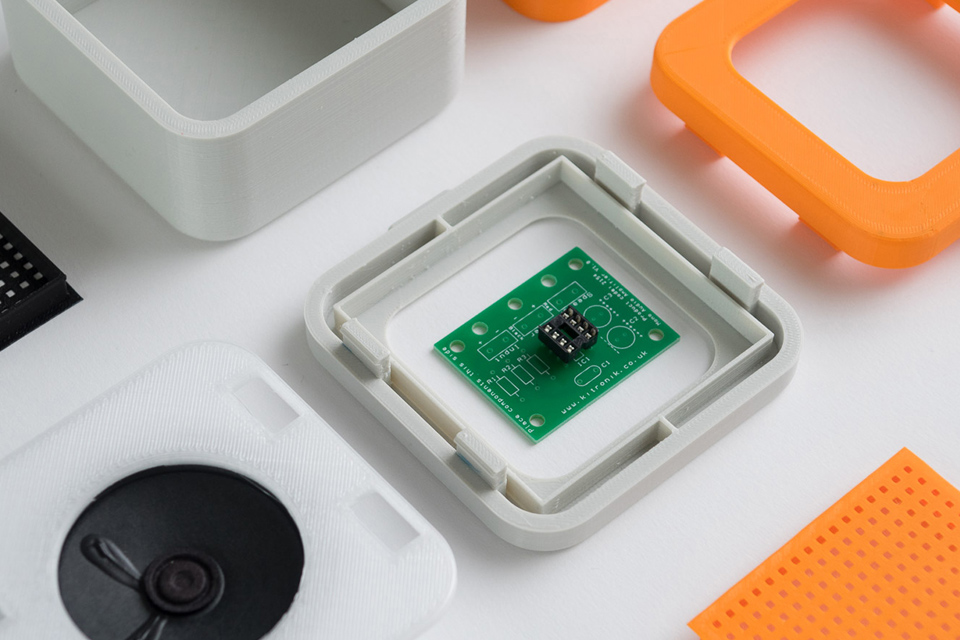
Still bothered? Almost every library charges for regular (paper) printing. Should a library rather not provide printing service because it cannot be offered for free? Library users certainly wouldn’t want that.
Determining Your Service Fees
What do you need in order to create a pricing scheme for your library’s 3D printing service?
(a) First, you need to list all cost-incurring factors. Those include (i) the equipment cost and wear and tear, (ii) electricity, (iii) staff time & expertise for support and maintenance, and (iv) any consumables such as 3d print filament, painter’s tape. Remember that your new 3D printer will not last forever and will need to be replaced by a new one in 3-5 years.
Also, some of these cost-incurring factors such as staff time and expertise for support is fixed per 3D print job. On the other hand, another cost-incurring factor, 3D print filament, for example, is a cost factor that increases in proportion to the size/density of a 3d model that is printed.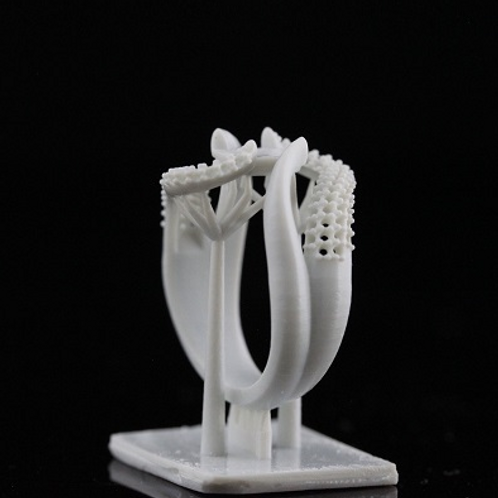 That is, the larger and denser a 3d print model is, the more filament will be used incurring more cost.
(b) Second, make sure that your pricing scheme is readily understood by users. Does it quickly give users a rough idea of the cost before their 3D print job begins? An obscure pricing scheme can confuse users and may deter them from trying out a new service. That would be bad user experience.
Also in 3D printing, consider if you will also charge for a failed print. Perhaps you do. Perhaps you don’t. Maybe you want to charge a fee that is lower than a successful print. Whichever one you decide on, have that covered since failed prints will certainly happen.
(c) Lastly, the pricing scheme should be easily handled by the library staff. The more library staff will be involved in the entire process of a library patron using the 3D printing service from the beginning to the end, the more important this becomes. If the pricing scheme is difficult for the staff to work with when they need charge for and process each 3D print job, the new 3D printing service will increase their workload significantly.
Which staff will be responsible for which step of the new service? What would be the exact tasks that the staff will need to do? For example, it may be that several staff at the circulation desk need to learn and handle new tasks involving the 3D printing service, such as labeling and putting away completed 3D models, processing the payment transaction, delivering the model, and marking the job status for the paid 3D print job as ‘completed’ in the 3D Printing Staff Admin Portal if there is such a system in place. Below is the screenshot of the HS/HSL 3D Printing Staff Admin Portal developed in-house by the library IT team.
The HS/HSL 3D Printing Staff Admin Portal, University of Maryland, BaltimoreExamples – 3D Printing Service Fees
It’s always helpful to see how other libraries are doing when you need to determine your own pricing scheme. Here are some examples that shows ten libraries’ 3D printing pricing scheme changed over the recent three years.
- UNR DeLaMare Library
- https://guides.
 library.unr.edu/3dprinting
 - 2014 – $7.20 per cubic inch of modeling material (raised to $8.45 starting July, 2014).
- 2017 – uPrint – Model Material: $4.95 per cubic inch (=16.38 gm=0.036 lb)
- 2017 – uPrint – Support Materials: $7.75 per cubic inch
- https://guides.
- NCSU Hunt Library
- https://www.lib.ncsu.edu/do/3d-printing
- 2014- uPrint 3D Printer: $10 per cubic inch of material (ABS), with a $5 minimum
- 2014 – MakerBot 3D Printer: $0.35 per gram of material (PLA), with a $5 minimum
- 2017 – uPrint – $10 per cubic inch of material, $5 minimum
- 2017 – F306 – $0.35 per gram of material, $5 minimum
- Southern Illinois University Library
- http://libguides.siue.edu/3D/request
- 2014 – Originally $2 per hour of printing time; Reduced to $1 as the demand grew.
- 2017 – Lulzbot Taz 5, Luzbot mini – $2.00 per hour of printing time.
- BYU Library
- http://guides.lib.byu.edu/c.
 php?g=216600&p=1429612
 - 2014 – 2017 – Makerbot Replicator 2/ Ultimaker 2 Extended
- $0.20 per gram for standard (0.2mm) resolution; $0.30 per gram for high (0.1mm) resolution.
- http://guides.lib.byu.edu/c.
- University of Michigan Library
- The Cube 3D printer checkout is no longer offered.
- 2017 – Cost for professional 3d printing service; Open access 3d printing is free.
- GVSU Library
- https://www.gvsu.edu/techshowcase/makerspace-18.htm
- 2014 – $0.35 per gram with a $6.00 minimum
- 2017 – Free (Ultimaker 2+, Makerbot Replicator 2, 7, 2x)
- University of Tennessee, Chattanooga Library
- http://www.utc.edu/library/services/studio/3d-printing/index.php
- 2014 – 2017 – Makerbot 1th, 5th – $0.10 per gram
- Port Washington Public library
- http://www.pwpl.org/3d-printing/3d-printing-guidelines/
- 2017 – Makerbot 5 – $1 per hour of printing time
- Miami University
- 2014 – $0.
 20 per gram of the finished print; 2017 – ?
- 2014 – $0.
- UCLA Library, Dalhousie University Library (2014)
- Free
Types of 3D Printing Service Fees
From the examples above, you will notice that many 3d printing service fee schemes are based upon the weight of a 3D-print model. This is because these libraries are trying recover the cost of the 3d filament, and the amount of filament used is most accurately reflected in the weight of the resulting 3D-printed model.
However, there are a few problems with the weight-based 3D printing pricing scheme. First, it is not readily calculable by a user before the print job, because to do so, the user will have to weigh a model that s/he won’t have until it is 3D-printed. Also, once 3D-printed, the staff will have to weigh each model and calculate the cost. This is time-consuming and not very efficient.
For this reason, my library considered an alternative pricing scheme based on the size of a 3D model.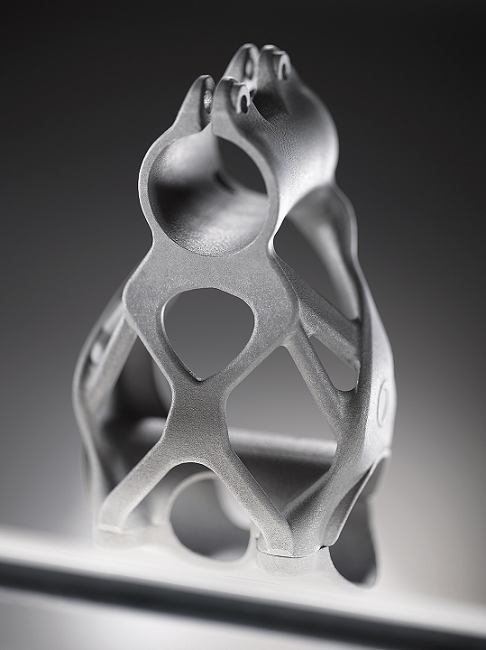 The idea was that we will have roughly three different sizes of an empty box – small, medium, and large – with three different prices assigned. Whichever box into which a user’s 3d printed object fits will determine how much the user will pay for her/his 3D-printed model. This seemed like a great idea because it is easy to determine how much a model will cost to 3d-print to both users and the library staff in comparison to the weight-based pricing scheme.
Unfortunately, this size-based pricing scheme has a few significant flaws. A smaller model may use more filament than a larger model if it is denser (meaning the higher infill ratio). Second, depending on the shape of a model, a model that fits in a large box may use much less filament than the one that fits in a small box. Think about a large tree model with think branches. Then compare that with a 100% filled compact baseball model that fits into a smaller box than the tree model does. Thirdly, the resolution that determines a layer height may change the amount of filament used even if what is 3D-printed is a same model.
Charging Based upon the 3D Printing Time
So we couldn’t go with the size-based pricing scheme. But we did not like the problems of the weight-based pricing scheme, either. As an alternative, we decided to go with the time-based pricing scheme because printing time is proportionate to how much filament is used, but it does not require that the staff weigh the model each time. A 3D-printing software gives an estimate of the printing time, and most 3D printers also display actual printing time for each model printed.
First, we wanted to confirm the hypothesis that 3D printing time and the weight of the resulting model are proportionate to each other. I tested this by translating the weight-based cost to the time-based cost based upon the estimated printing time and the estimated weight of several cube models. Here is the result I got using the Makerbot Replicator 2X.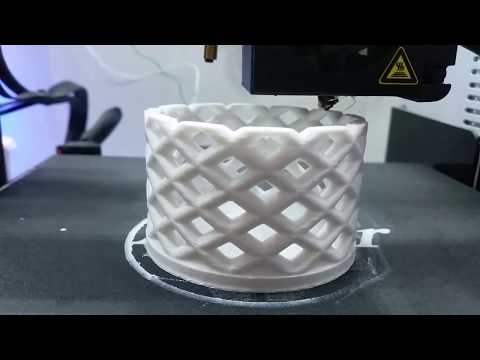
- 9.10 gm/36 min= 0.25 gm per min.
- 17.48 gm/67 min= 0.26 gm per min.
- 30.80 gm/117 min= 0.26 gm per min.
- 50.75 gm/186 min=0.27 gm per min.
- 87.53 gm/316 min= 0.28 gm per min.
- 194.18 gm/674 min= 0.29 gm per min.
There is some variance, but the hypothesis holds up. Based upon this, now let’s calculate the 3d printing cost by time.
3D plastic filament is $48 for ABS/PLA and $65 for the dissolvable per 0.90 kg (=2.00 lb) from Makerbot. That means that filament cost is $0.05 per gram for ABS/PLA and $0.07 per gram for the dissolvable. So, 3D filament cost is 6 cents per gram on average.
Finalizing the Service Fee for 3D Printing
For an hour of 3D printing time, the amount of filament used would be 15.6 gm (=0.26 x 60 min). This gives us the filament cost of 94 cents per hour of 3D printing (=15.6 gm x 6 cents). So, for the cost-recovery of filament only, I get roughly $1 per hour of 3D printing time.
Earlier, I mentioned that filament is only one of the cost-incurring factors for the 3D printing service. It’s time to bring in those other factors, such as hardware wear/tear, staff time, electricity, maintenance, etc., plus “no-charge-for-failed-print-policy,” which was adopted at our library. Those other factors will add an additional amount per 3D print job. And at my library, this came out to be about $2. (I will not go into details about how these have been determined because those will differ at each library.) So, the final service fee for our new 3D printing service was set to be $3 up to 1 hour of 3D printing + $1 per additional hour of 3D printing. The $3 is broken down to $1 per hour of 3D printing that accounts for the filament cost and $2 fixed cost for every 3D print job.
To help our users to quickly get an idea of how much their 3D print job will cost, we have added a feature to the HS/HSL 3D Print Job Submission Form online. This feature automatically calculates and displays the final cost based upon the printing time estimate that a user enters.
The HS/HSL 3D Print Job Submission form, University of Maryland, Baltimore
Don’t Be Afraid of Service Fees
I would like to emphasize that libraries should not be afraid to set service fees for new services. As long as they are easy to understand and the staff can explain the reasons behind those service fees, they should not be a deterrent to a library trying to introduce and provide a new innovative service.
There is a clear benefit in running through all cost-incurring factors and communicating how the final pricing scheme was determined (including the verification of the hypothesis that 3D printing time and the weight of the resulting model are proportionate to each other) to all library staff who will be involved in the new 3D printing service. If any library user inquire about or challenges the service fee, the staff will be able to provide a reasonable explanation on the spot.
I implemented this pricing scheme at the same time as the launch of my library’s makerspace (the HS/HSL Innovation Space at the University of Maryland, Baltimore – http://www.hshsl.umaryland.edu/services/ispace/) back in April 2015. We have been providing 3D printing service and charging for it for more than two years.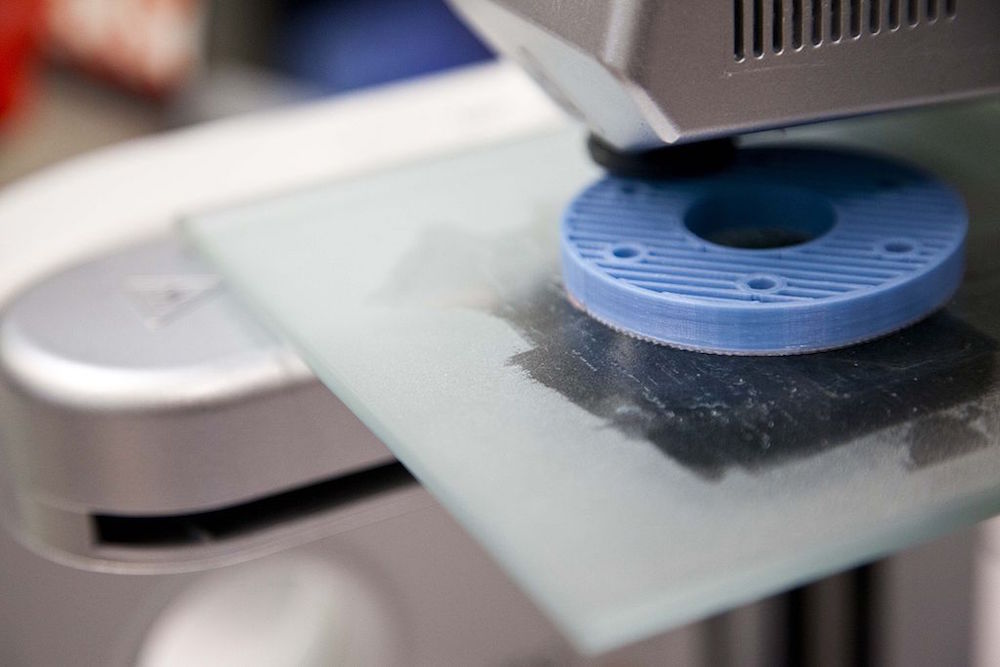 I am happy to report that during that entire duration, we have not received any complaint about the service fee. No library user expected our new 3D printing service to be free, and all comments that we received regarding the service fee were positive. Many expressed a surprise at how cheap our 3D printing service is and thanked us for it.
To summarize, libraries should be willing to explore and offer new innovating services even when they require charging service fees. And if you do so, make sure that the resulting pricing scheme for the new service is (a) sustainable and accountable, (b) readily graspable by users, and (c) easily handled by the library staff who will handle the payment transaction. Good luck and happy 3D printing at your library!
An example model with the 3D printing cost and the filament info displayed at the HS/HSL, University of Maryland, BaltimoreHow to calculate the cost of printing on a 3D printer
Home / Blog / Useful / The cost of 3D printing. Examples of models with prices
06/21/2021
Content
-
- Available Technologies and the main differences
- FDM 3D
- Photopolymer printing
- Industrial printers
- Availability 3D-print
- 999 Printing examples
- Available Technologies and the main differences
- Custom 3D printing
- The cost of commercial 3D printing
- What is not profitable to print
- Examples of commercial printing
- Totals
For some ideas, 3D printing is the fastest and easiest solution. In some situations, purchasing your own 3D printer can be a good solution, but sometimes it is much more profitable and faster to order the necessary product from a company specializing in 3D printing. Yes, and many owners of a 3D printer are thinking about how to “monetize” their hobby, but how to correctly calculate their costs?
Despite the fact that it is customary to indicate the price per gram of working material, simply multiplying the weight of the model by the cost of 1 gram will be wrong. In addition to the cost of consumables, many more, at first glance, non-obvious costs are added to the price of the product.
Each 3D printing technology uses its own consumables. Let's analyze the most popular and affordable of them.
Available technologies and key differences
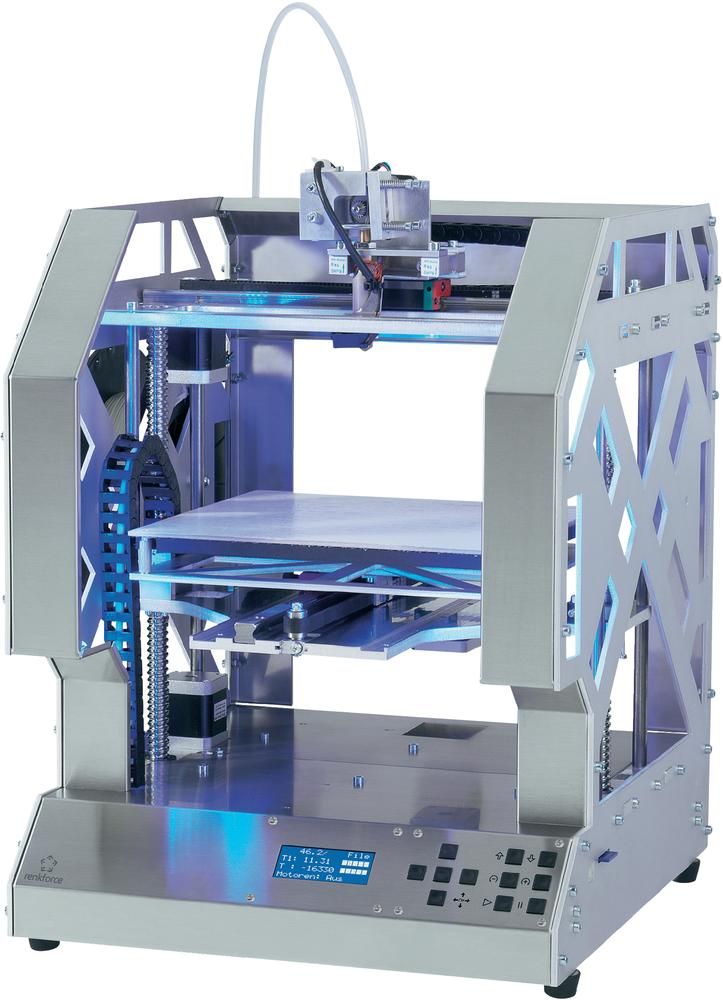
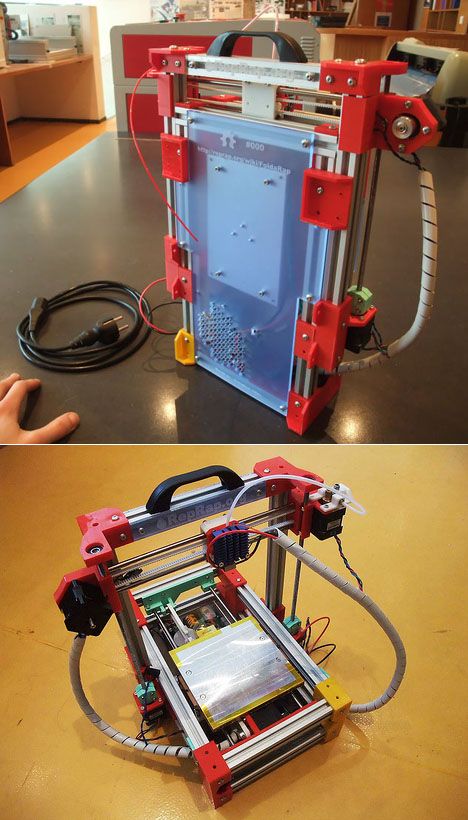
Currently, a huge number of 3D devices have appeared, from small desktop ones that fit on the desktop to huge industrial machines. Among the most affordable, 2 technologies can be distinguished - FDM and photopolymer printers (LCD / DLP / SLA).
FDM 3D printing
Today, the most affordable 3D printing technology is FDM. A variety of materials and 3D printers allow FDM to be applied to a wide range of applications.
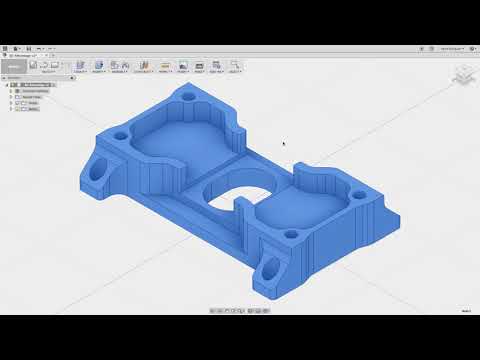
Schematic operation of FDM printer
A large selection makes it easy to choose a 3D printer for a specific task or find a universal device.
The material for printing is a plastic thread - filament. On the market you can find filament for various tasks, for every “taste” and budget. These can be very inexpensive ABS and PLA plastics or specific ones - conductive, burnable, etc.
Pros:
Cons:
Despite the fact that FDM allows you to print a wide range of plastics with different properties, the technology has some limitations. For example, it is impossible to obtain a perfectly smooth surface, to produce miniature and very thin elements, or to produce parts with very complex internal geometry with high accuracy.
Photopolymer printing
Photopolymer printers can work on one of 3 technologies - SLA, DLP or LCD. These devices will come to the rescue if you need to make a small but very detailed model with many small details.
How photopolymer printers work
As a consumable material, a photopolymer resin hardened by UV radiation is used. Now there is a wide variety of photopolymer resins for every taste. From particularly strong and precise engineering or jewelry resins to soft flexes.
Pros:
-
High print precision
-
Good surface quality
-
A wide variety of printers and consumables
Minuses:
Photopolymer printers have shown themselves well in a variety of industries that require a perfectly smooth surface and high accuracy. They are used in dentistry, the jewelry industry, for making miniature master models for casting, and much more.
Industrial printers
These are already industrial machines, which require a separate room and sometimes certain requirements for ventilation, etc. In this article, we will not analyze these devices in detail, but briefly consider the most popular technologies.
FDM
In addition to desktop devices using FDM technology, industrial printers that work on the same principle are common.
This category includes devices with a large print area (from 30x30x30 cm and more). For example, Raise Pro2 with a print area of 30x30x30 cm.
Raise Pro2
Or machines designed for printing with refractory materials (eg PEEK). Such 3D printers usually have an active thermal chamber, and the extruder can be heated above 400 degrees.
CreatBot F160-PEEK for use with refractory plastics
Photopolymer printers
Industrial photopolymer devices usually have a much larger working area, compared to their "home" brothers. In addition, many processes have been optimized and automated for faster operation. On such printers, you can quickly and accurately produce a small batch of models, a large prototype or a master model.
Prismlab Large Area Industrial Resin Printer Family
Free Shipping
Add to compare
Product added to compare Go
| Manufacturer | CreatBot |
Free Shipping
Add to compare
Product added to compare Go
| Manufacturer | Raise3D |
Free Shipping
Add to compare
Product added to compare Go
| Manufacturer | Prismlab |
Free Shipping
Add to compare
Product added to compare Go
| Manufacturer | Prismlab |
3DP
3DP - Three-Dimensional Printing (translated as three-dimensional printing) is a logical continuation of conventional two-dimensional printers. Printing is done using nozzles that selectively apply a binder to the material (usually gypsum). A dye can be added to the binder and the model will be colored.
Colored plaster model
Since the plaster model is fragile, a similar principle is used for printing with metals. Only the finished product needs to be treated in an oven to remove the binder and improve strength. But despite the processing, such metal prints will still be inferior in strength to cast products.
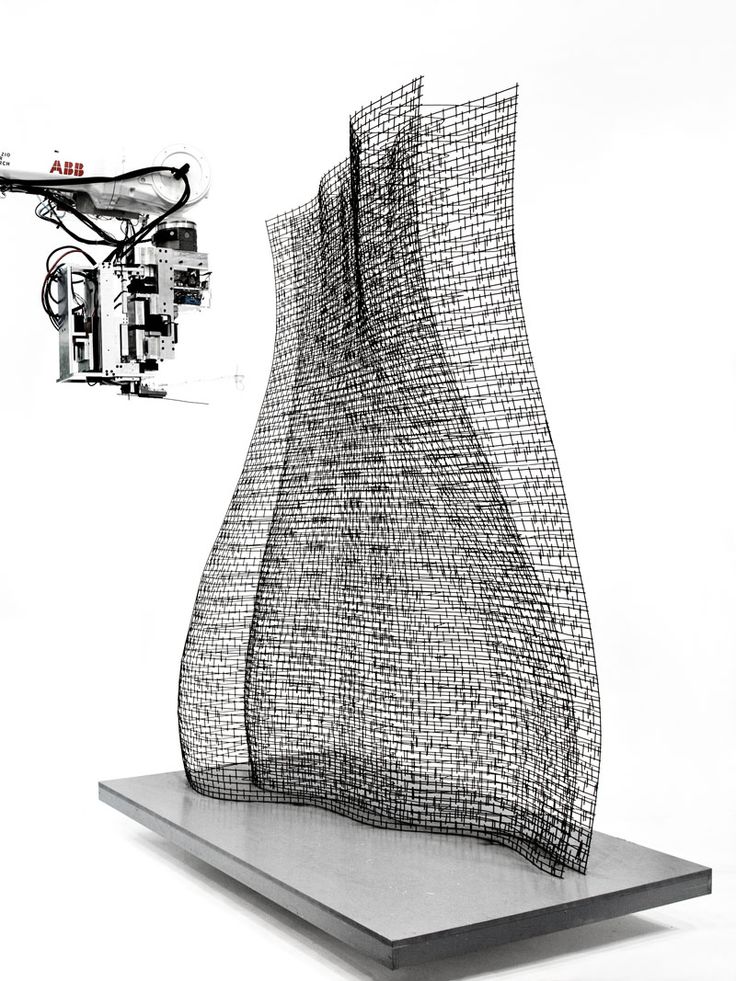
MJM
This is a proprietary technology of 3D Systems. MJM is a mix of FDM, 3DP and sometimes SLA (depending on material chosen). Printing is done using a variety of small nozzles (from 96 to 488) located on the head of the machine. The accuracy and quality of the surface of models made in this way is in no way inferior to photopolymer printers.
Models made with MJM technology
Such devices can work with photopolymer resins, wax or thermoplastics. You can combine several materials at once - for example, for complex models, you can use wax as a support.
SLM
SLM is the layer-by-layer sintering of metal powder using a powerful laser. There are several similar technologies - SHS/SLS. The principle of operation is the same, only a thermal print head is used instead of a laser beam.
SLM Turbine
As a material for printing, you can use powders of various metals - gold, stainless steel, aluminum, various alloys, etc.
During printing, the working chamber is filled with an inert gas to prevent oxidation of metals. This allows printing even with titanium powder.
Models made by this method are in no way inferior, and sometimes even superior, to cast products. SLM allows you to produce models with complex internal geometry that cannot be produced by another method (casting or milling).
Cost of 3D printing
The cost of a model usually consists of several factors.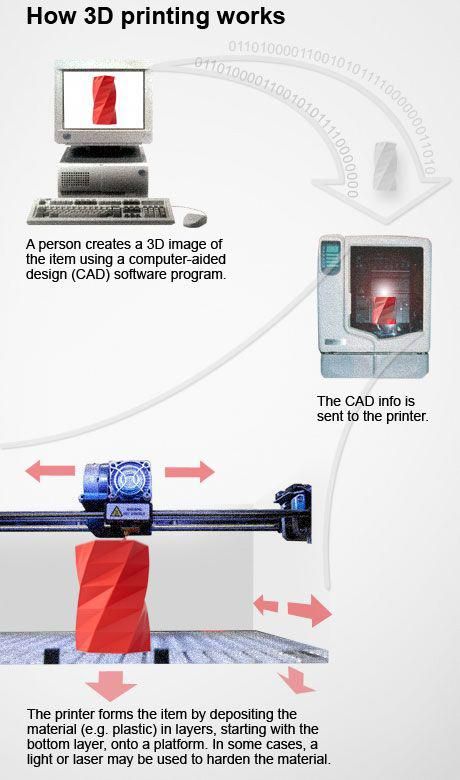
-
Equipment depreciation. The printer, like any machine, requires maintenance and periodic replacement of some parts. During operation, belts gradually stretch, bushings or linear bearings wear out. For example, when bushings or linear bearings are worn; shafts may wear out and need to be replaced.
Cost of materials
The main cost item for a 3D printer is, of course, the printed material.;
FDM (plastic filament)
Since FDM technology is by far the most common, the choice of filaments is very diverse.
-
Engineering plastics are usually nylon with various fillers added to improve the physical characteristics of the finished model. Special cost. plastics starts from 2000r per coil and above. It all depends on the manufacturer and filler (carbon fiber, fiberglass, etc.).
-
Decorative plastics are used to imitate various materials. Plastic can simply be unusually colored (luminous, transparent plastics) or a special filler is added to it (plastics with metal powder).
 The cost of decorative plastics starts from 1500 rubles per coil and more, depending on the filler.
A big advantage of FDM is the diverse choice of materials to work with. This allows, having one printer, to produce almost any product - from a child's toy to a complex engineering prototype.
Photopolymers (resin)
Photopolymer resin printing technology is becoming more and more accessible. There are many different resins.
-
The cost of ordinary colored resin starts from 2500 rubles per 0.5 kg (volume +/- 0.5 l). You can find a smaller volume of resin (250 gr) on sale. You can buy several different resins in small containers and find out in practice which one is best for a particular model.
-
Engineering resins are resins with increased strength. They can be used not only for printing decorative items, but also for making functional prototypes and models. The cost for 0.5 kg starts from 5900r and above.
-
Special resins - burnable, dental, soft flexes, etc. Depending on the resin, the price for 0.5 kg can start from 4800 rubles and more. It all depends on the characteristics of the resin.
Photopolymer resins have not yet reached such a variety as FDM filaments, but they are surely catching up. Although due to the fact that a liter of resin costs significantly more than a spool of filament, the cost of the product is much higher.
Print examples
FDM
Mag Pull for G3 magazines.
The model was downloaded for free from an open source (the file can be downloaded here). Printing with engineering carbon-filled plastic (price per spool from 4700 rubles). The weight of the model with support is about 25 grams. Post-processing was not needed. The cost of the finished model is 250 rubles.
Plastic fastener
The file was downloaded from an open source (can be downloaded here).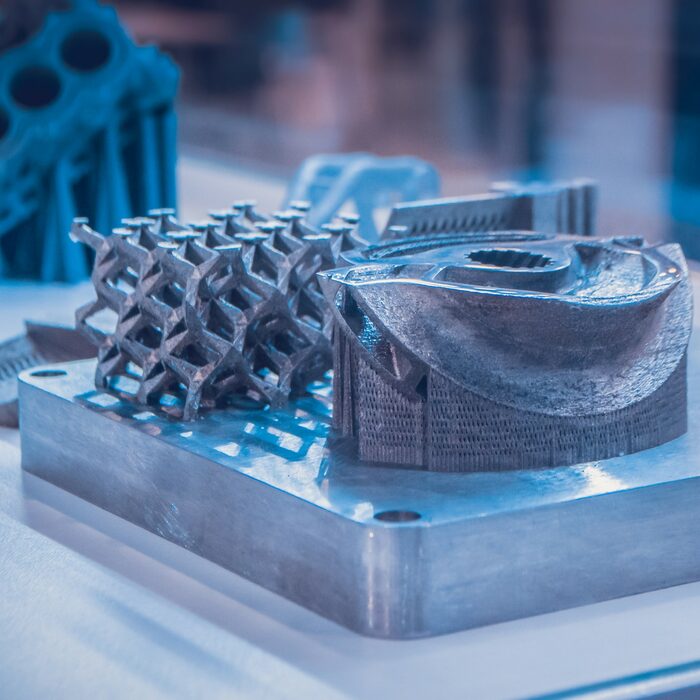 Plastic - carbon-filled nylon (price per coil from 4700r). The weight of the finished product is about 20 grams. Print without post-processing. The total cost is 200 rubles.
Model watch
The model is modeled to order (the cost of modeling is from 1000 rubles). The product is printed on an industrial printer using soluble support. Print without post-processing. The cost of the finished product - from 700 rubles per piece (depends on the number of required products).
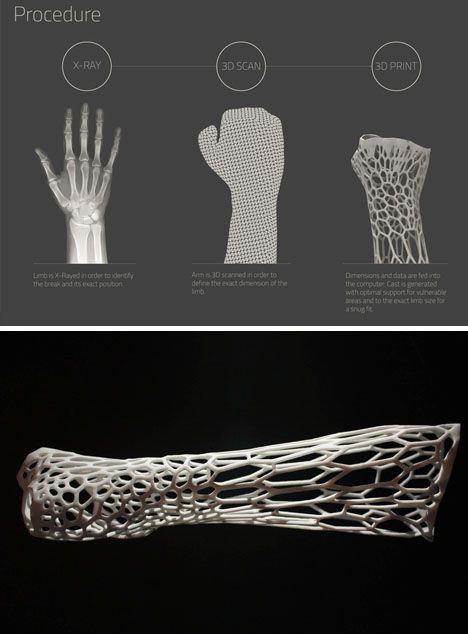
Traction prosthesis
The model is taken from an open source (you can download the modified version of the prosthesis here). The weight of the used material is about 600 gr, printed with ABS plastic (the cost of the coil is from 800 r). After printing, post-processing and assembly took place. The total cost of the product - from 3000 r (depends on the print material, support material, filling, etc.).
Pedal layout
Production of a 3D model according to the drawing (from 1000 r). The weight of the finished model is about 200 gr. The product was printed with engineering carbon-filled plastic (the cost of the coil is from 4700 r). Post-processing was not needed. The cost of the finished product is about 3000 rubles.
Photopolymer printers
Model jaws for crowns
Files for printing were obtained using a 3D scanner and finalized in a 3D editor (the cost of scanning is from 3000 r, the cost of manual revision is from 1000 r). Printing on an industrial photopolymer printer. Post-processing is not needed. The cost of the finished product is from 80 r per gram.
Burnout resin rings
The model is made to order. Printing on a desktop SLA printer with a burnable polymer. Post-processing is not needed. The cost of the finished product is 200 rubles per product.
Miniatures
The models were bought on the myminifactory website (the cost of the model is from $2). Made with a desktop DLP printer. Post-processing was not required. The cost of the finished figurine is from 70 r per gram.
Custom 3D printing
Many owners of 3D printers are thinking about monetizing their hobby. But you should understand that the price of 3D printing “for yourself” and the price of commercial printing are very different.
When starting to print to order, it is better to have several printers working on different technologies.
Cost of commercial 3D printing
In addition to the cost of the model, to the commercial production of products, you can add:
-
Modeling. Often the client needs not only to make a part, but to pre-model it. It can be a simple cogwheel that doesn't take long to model, or it can be a complex sculpture that takes more time to model than it does to make.
-
Model post-processing. This can be simply the removal of supports, with cleaning of the place of their contact with the product, or a complete processing cycle (puttying, surface grinding, painting, etc.
 ).
).
It should be borne in mind that it is not always possible to print the model the first time. Sometimes it may take several attempts. And these are additional costs.
What is unprofitable to print
Despite the wide possibilities of 3D printing, there are models that are unprofitable to make on a 3D printer. For such models, it is better to use other manufacturing methods.
Commercial print examples
Jewelry for further casting
Manufacture of promotional items and souvenirs
Piece miniatures or master model for further casting
3D printed model
Profitable to print on a 3D printer:
-
If the item is only sold as an assembly. For example, a small gear broke in the mechanism, but the mechanism is sold only “assembly”.
 It is much cheaper to make the desired gear on a 3D printer than to buy the entire mechanism.
-
A small batch of parts. Small batches, especially models with complex geometry, are more profitable to produce on a 3D printer than by casting or other methods.
Totals
If you need several models or a small project, sometimes it will be more expedient to outsource manufacturing. After all, in addition to buying equipment and materials, you will have to understand the nuances of the settings and the characteristics of various materials.
Buying a 3D printer for commercial use is justified if you can fully load it with work or then it can be used for other purposes.
To print to order, you need to have several printers working on different technologies. It is better to get several devices with a smaller print area than to buy just one printer, albeit with a large working area.
#Useful
Expert in additive technologies and 3D printing with over 5 years of experience.
Share
all materials
Do you have any questions?
Our specialists will help you with the choice of 3D equipment or accessories, consult on any questions.
Custom ABS (ABS) FDM Printing
Custom FDM ABS PrintingPrinting ABS (ABS) with plastic using FDM technology to order
Technology: 3D PRINT
Loading...
Loading...
Loading...
Loading...
Loading...
Loading... ...
Loading ...
Loading ...
Price
no more than 20 o/cm 3
Cost per treatment
+ fifty o for processing 1 item
Printing time
from 1 to 3 days
Calculate the cost
Price
no more than 50 o/cm 3
Processing cost
+ fifty o for processing 1 item
Printing time
from 1 to 3 days
Calculate the cost
+ fifty o for processing 1 item
Printing time
We print on the day of order*
Calculate the cost
Price
no more than 70 o/cm 3
Processing cost
+ 500 o for processing 1 item
Printing time
from 5 to 7 days
Calculate the cost
Price
no more than 50 o/cm 3
Cost per treatment
+ fifty o for processing 1 item
Printing time
from 1 to 3 days
Calculate the cost
Price
max 20 o/cm 3
Processing cost
+ fifty o for processing 1 item
Printing time
from 1 to 3 days
Calculate the cost
Price
no more than 70 o/cm 3
Cost per treatment
+ 500 o for processing 1 item
Printing time
from 5 to 7 days
Calculate cost
Price
max 30 o/cm 3
Cost per treatment
+ fifty o for processing 1 item
Printing time
We print on the day of the order*
Calculate the cost
Need an alternative?
More accurate
Photopolymer
Higher quality
Polyamide
Beneficial for series production
Molding plastic into silicone
Feedback form for calculating the cost of 3D printing
If you have a finished 3D model, upload it to the online form to calculate the cost of 3D printing.