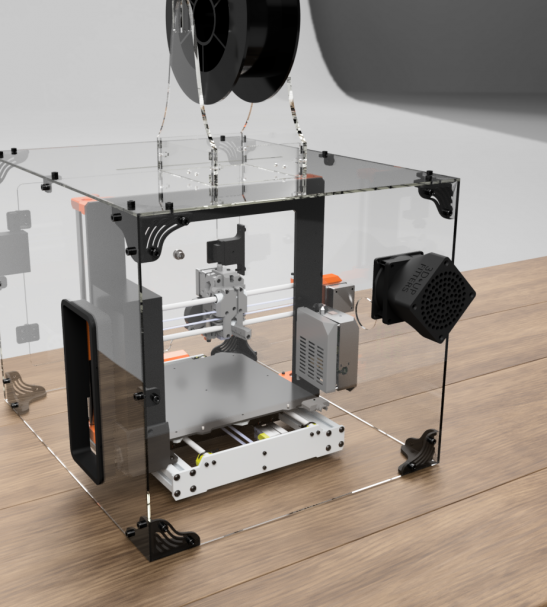
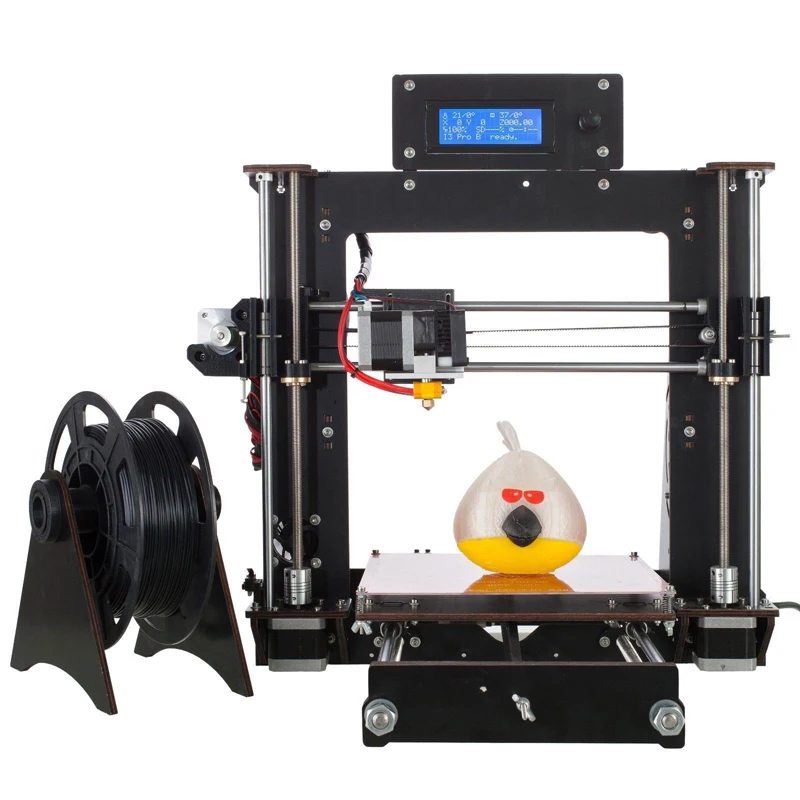
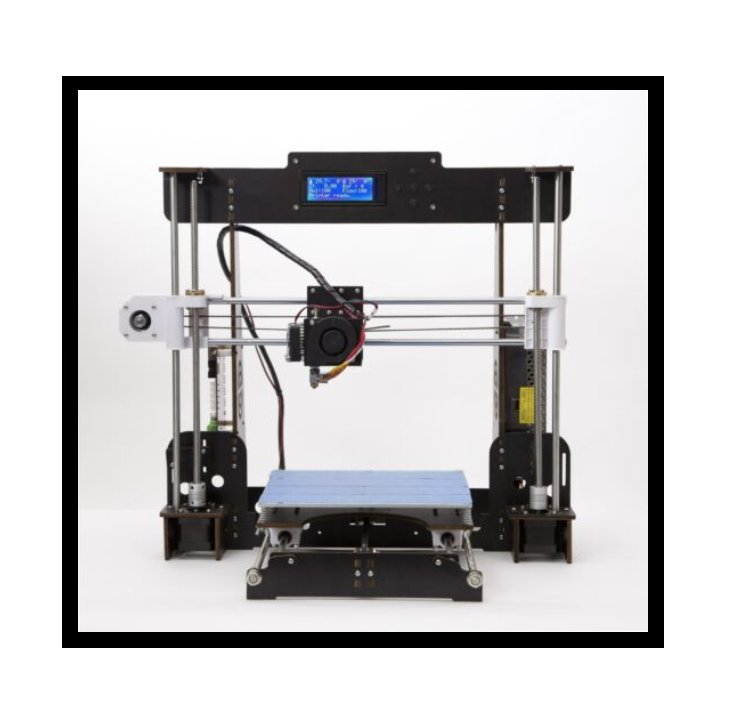
I3 mk3 3d printer
Original Prusa i3 MK3S+ | Original Prusa 3D printers directly from Josef Prusa
See the Original Prusa i3 MK3S+ in action!
Assembled Printer & Kit Comparison
Assembled 3D Printer |
3D Printer Kit |
|
| Warranty | 2 Years in EU, 1 Year ROW - Built, calibrated, tested, and with a full warranty | 2 Years in EU, 1 Year ROW - Warranty on parts only |
| Owner Discount | 10% discount on subsequent orders of assembled i3 printer and selected filaments | 5% discount on subsequent orders of selected filament |
| Support | Premium 24/7 support via chat and e-mail + forum | Premium 24/7 support via chat and e-mail + forum |
| Consulting and Documentation | Printed version of 3D Printing Handbook and Free Access to the Prusa Academy - Online Course of 3D Printing and Modeling. |
The best assembly instructions proved by thousands of builders, printed version of 3D Printing Handbook |
| Assembly | Ready to print | Full Assembly Experience (6-8 hours), which teaches you how the printer works |
Main Features
SuperPinda Probe
SuperPINDA probe features a hiqh-quality sensor for a fully-automatic Mesh Bed Leveling process. Before every print, the MK3S+ probes the bed in several places and creates a virtual heightmap of the print area. This process ensures that the first layer will always be spot on!
Misumi Bearings & more
The MK3S+ features a new set of metal clips for the genuine MISUMI bearings on the Y-axis. The belt tensioning mechanism on the X-axis was reworked and the X-end plastic parts reinforced. The filament path in the extruder was altered for better support of flexible filaments.
Removable Print Sheets
Spring steel sheets are easy to maintain and make removing the printed object from the print surface a breeze. We offer three types of print surface: smooth, textured and satin to cover all your needs when printing from a wide range of different materials - most of which do not require any special separation layers or surface preparation.
High-Quality Parts
The MK3S+ features an aluminum extrusion Y-axis assembly. Thanks to the milled dural frame, the MK3S+ is stable, rigid, and easy to assemble. Combined with our internally developed extruder featuring Bondtech gears and the E3D V6 hotend, the MK3S+ can print high-quality objects up to 210 mm in height.
Power Loss Recovery
Are you afraid of a blackout ruining your 48-hour print? Worry no more - the MK3S+ can deal with that! The printer can fully recover from the loss of power and continue printing exactly where it left off. It detects power interruptions and shuts down the heatbed and extruder heating, and saves the last known location.
Filament Sensor
The MK3S+ further enhances the reworked extruder from the MK3S. The built-in filament sensor uses a reliable trigger system, which detects whether a strand of filament is inserted into the extruder. It can detect any type and color of filament and is not susceptible to mechanical wear.
Mesh Bed Leveling
Thanks to the SuperPINDA probe, the MK3S+ can use the Mesh Bed Leveling process to compensate for microscopic imperfections of the print sheet, and inconsistencies caused by the assembly and stacking of the manufacturing tolerances of various parts. Achieving a great-looking first layer is quick and easy.
Slice with PrusaSlicer
Our internally developed multiplatform slicer comes with in-house made and fully tested profiles for all of our 3D printers and a wide range of filaments. With built-in tools, such as advanced support generation, cutting, automated object distribution, ironing and many others, you will turn your 3D models into print files in no time!
Support for a wide range of Materials
The MK3S+ is fully compatible with a wide range of various types of materials. No matter whether you want to print something for fun from PLA and flexible materials, or you need to produce durable prototypes from PETG, ASA, Polycarbonate and Polypropylene - the MK3S+ can handle them with ease.
Open-source Hardware & Firmware
We develop firmware for all of our 3D printers and test every new version thoroughly before release. Ongoing development and regular updates ensure that our machines are packed with useful features, such as print sheet profiles, automated calibration, Mesh bed leveling, advanced diagnostics, remaining print time estimation, Octoprint support and more!
Original Prusa MMU2S Upgrade
Multi Material Upgrade 2S (MMU2S) is the second generation of our unique multi-material addon, which enables your 3d printer to print with up to 5 colors at the same time.
More details
Awards
Our printers continue to collect great reviews and awards all around the world. Original Prusa i3 MK3/S is the best 3D Printer in the Ultimate Guide to Digital Fabrication by MAKE: Magazine and our printers also received several editor's choices and awards from respected media outlets like All3DP, PC Mag, Tom's Hardware, TechRadar, Forbes, WireCutter, Windows Central and many more!
Reviews
6 reasons to buy the MK3S+
1
Great User Support
We offer 24/7 tech support via live chat and email in seven languages. Our printers come with detailed instructions and guides for easy assembly and maintenance. You can also visit our knowledge base, community forum, Facebook groups and official Blog, where we publish useful 3D printing tips and tricks, contests and more!
2
FUN TO ASSEMBLE
The MK3S+ assembly kit is an excellent first step into the world of 3D printing. You will get to know your 3D printer inside out and find out how it works! The assembly is quite easy, requires no soldering, all cables are cut to length and ready to be plugged in. The assembly instructions are easy to follow and all texts are translated into 8 languages. All of this makes the kit very friendly to younger builders, too!
3
Built-in Safety Features
Original Prusa 3D printers are well-known for their reliability and safe operation. Every part of our printers is thoroughly tested in-house. The MK3S+ is equipped with three thermistors and comes with a custom-built high-quality Delta power supply. The printer can recognize issues with heating and stop operation to prevent damage.
4
Open-source and Community Friendly
All parts of our printer are open-source, which means we publish all source codes and blueprints online.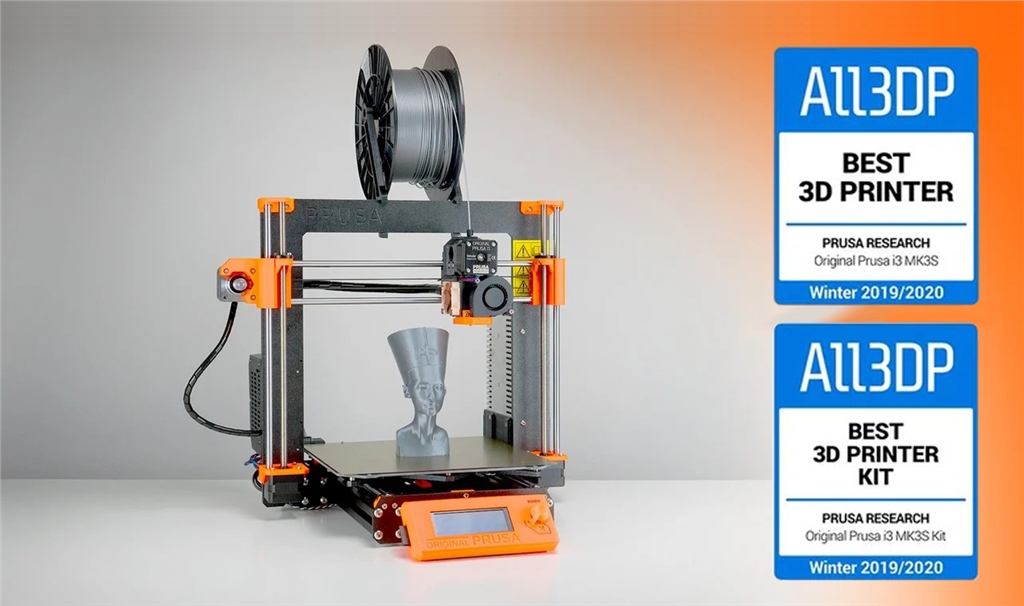 The community around our products is huge and the feedback is overwhelmingly positive - don't believe us? Check out Facebook groups and YouTube videos! There's so much to do with your 3D printer - buying it is just the beginning!
5
Ready for the Multi-Material Upgrade 2S
Multi Material Upgrade 2S is our unique add-on option for printing with up to 5 different filaments simultaneously. Multi-material could be your next step in the 3D printing world and the MK3S and MK3S+ are completely ready for the upgrade! MMU2S also allows you to print a soluble support interface - check out the video!
6
Upgradability
One of the most popular features of the Original Prusa i3 concept is upgradability. When you buy our 3D printer, you can upgrade it later to a newer version, so you don't need to buy a whole new model every two years like, for example, your phone or laptop. We also keep supporting our 3D printers with regular firmware updates that bring new features!
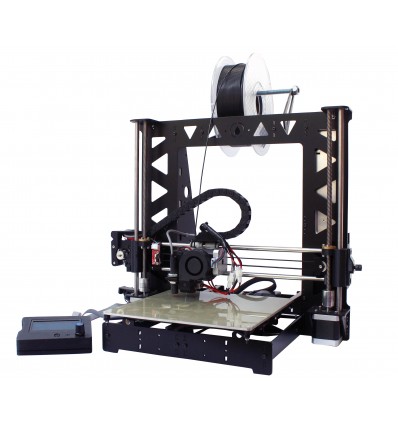
Get the Original Prusa i3 MK3S+ now
Original Prusa i3 MK3S+ 3D printer
The Original Prusa i3 MK3S+ is the latest version of our award-winning 3D printers.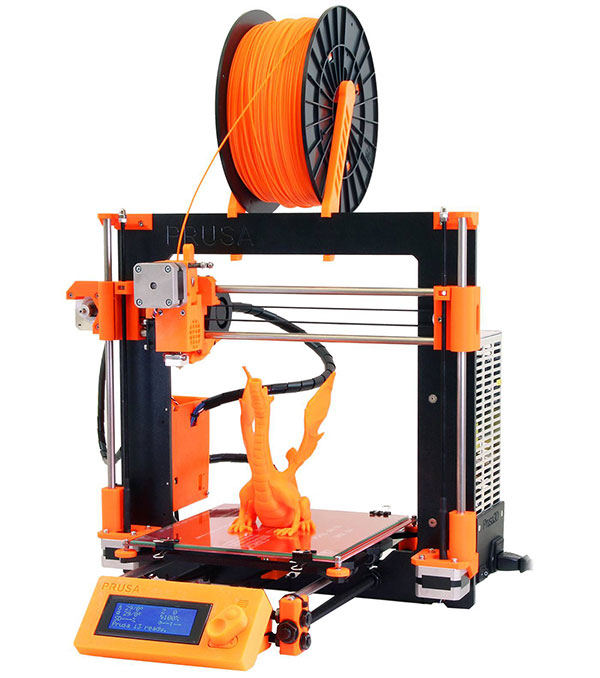 We have upgraded the MK3S with a brand new SuperPINDA probe for improved first layer calibration, added high-quality bearings and various useful design tweaks to make the printer easier to assemble and maintain. The MK3S+ includes all the proven features of the previous models, including the heatbed with removable PEI spring steel print sheets, automatic Mesh Bed Leveling, filament sensor, power loss recovery (power panic) and safety features. And it is still as silent as ever!
The functionality of the MK3S+ can be further enhanced by our unique Multi-Material Upgrade 2S for printing with up to 5 filaments simultaneously.
Main Features
SuperPinda Probe
SuperPINDA probe features a hiqh-quality sensor for a fully-automatic Mesh Bed Leveling process. Before every print, the printer probes the bed in several places and creates a virtual heightmap of the print area.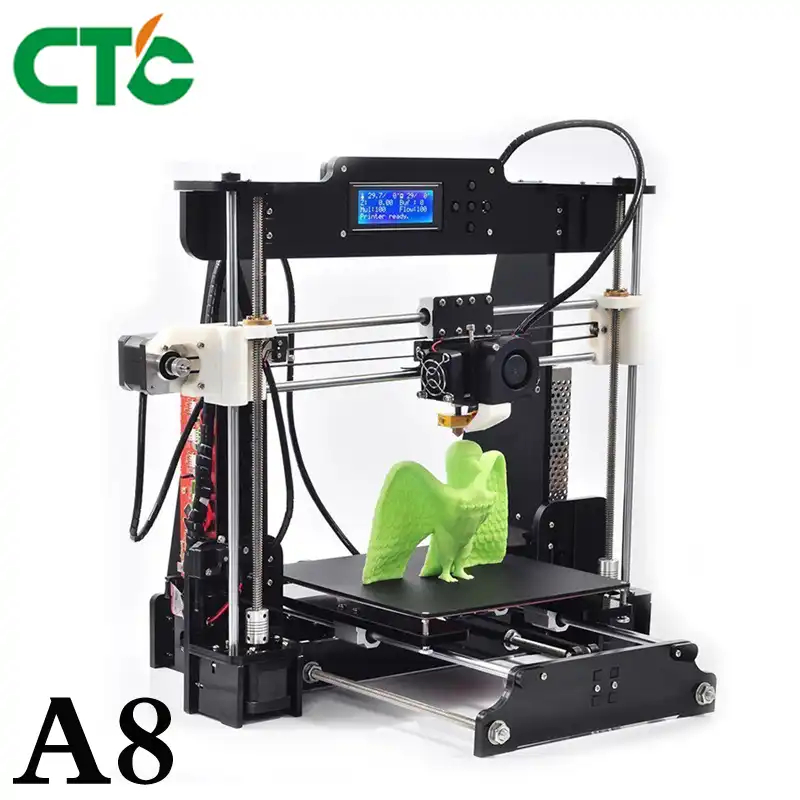 This process ensures that the first layer will always be spot on!
Quality Bearings & more
The MK3S+ features a new set of metal clips for the high-quality bearings on the Y-axis. The belt tensioning mechanism on the X-axis was reworked and the X-end plastic parts reinforced. The filament path in the extruder was altered for better support of flexible filaments.
Removable Print Sheets
Spring steel sheets are easy to maintain and make removing the printed object from the print surface a breeze. We offer three types of print surface: smooth, textured and satin to cover all your needs when printing from a wide range of different materials - most of which do not require any special separation layers or surface preparation.
High-Quality Parts
The MK3S+ features an aluminum extrusion Y-axis assembly. Thanks to the milled dural frame, the MK3S+ is stable, rigid, and easy to assemble.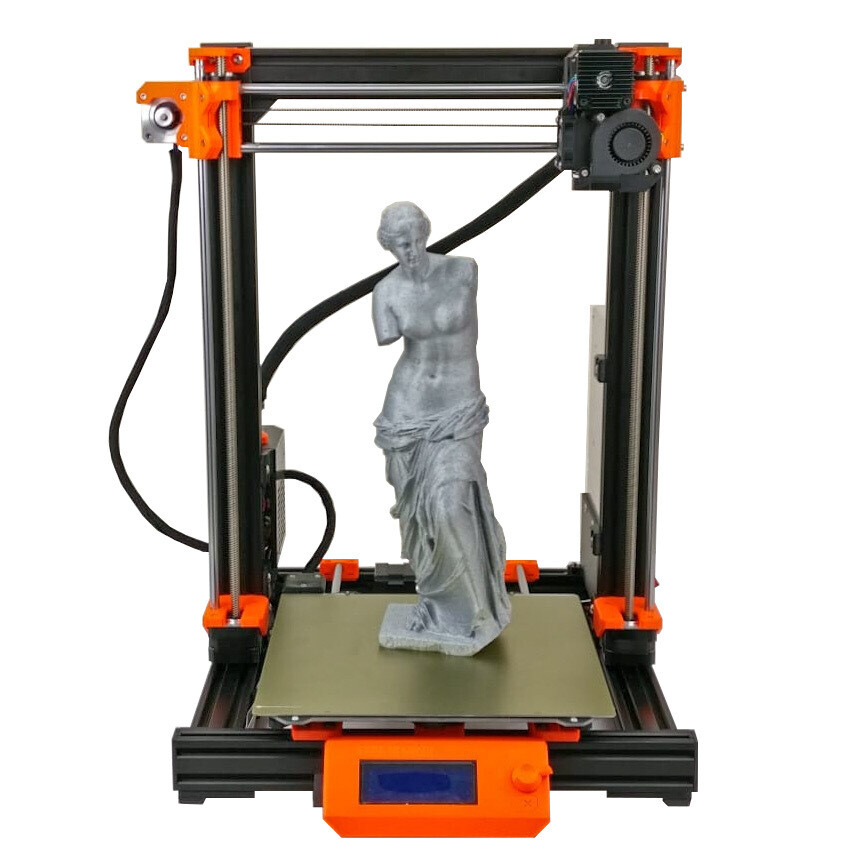 Combined with our internally developed extruder featuring Bondtech gears and the E3D V6 hotend, the MK3S+ can print high-quality objects up to 210 mm in height.
Power Loss Recovery
Are you afraid of a blackout ruining your 48-hour print? Worry no more - the MK3S+ can deal with that! The printer can fully recover from the loss of power and continue printing exactly where it left off. It detects power interruptions and shuts down the heatbed and extruder heating, and saves the last known location.
Filament Sensor
The MK3S+ further enhances the reworked extruder from the MK3S. The built-in filament sensor uses a reliable trigger system, which detects whether a strand of filament is inserted into the extruder. It can detect any type and color of filament and is not susceptible to mechanical wear.
Mesh Bed Leveling
Thanks to the SuperPINDA probe, the MK3S+ can use the Mesh Bed Leveling process to compensate for microscopic imperfections of the print sheet, and inconsistencies caused by the assembly and stacking of the manufacturing tolerances of various parts. Achieving a great-looking first layer is quick and easy.
Slice with PrusaSlicer
Our internally developed multiplatform slicer comes with in-house made and fully tested profiles for all of our 3D printers and a wide range of filaments. With built-in tools, such as advanced support generation, cutting, automated object distribution, ironing and many others, you will turn your 3D models into print files in no time!
Support for a wide range of Materials
The MK3S+ is fully compatible with a wide range of various types of materials. No matter whether you want to print something for fun from PLA and flexible materials, or you need to produce durable prototypes from PETG, ASA, Polycarbonate and Polypropylene - the MK3S+ can handle them with ease.
Open-source Hardware & Firmware
We develop firmware for all of our 3D printers and test every new version thoroughly before release.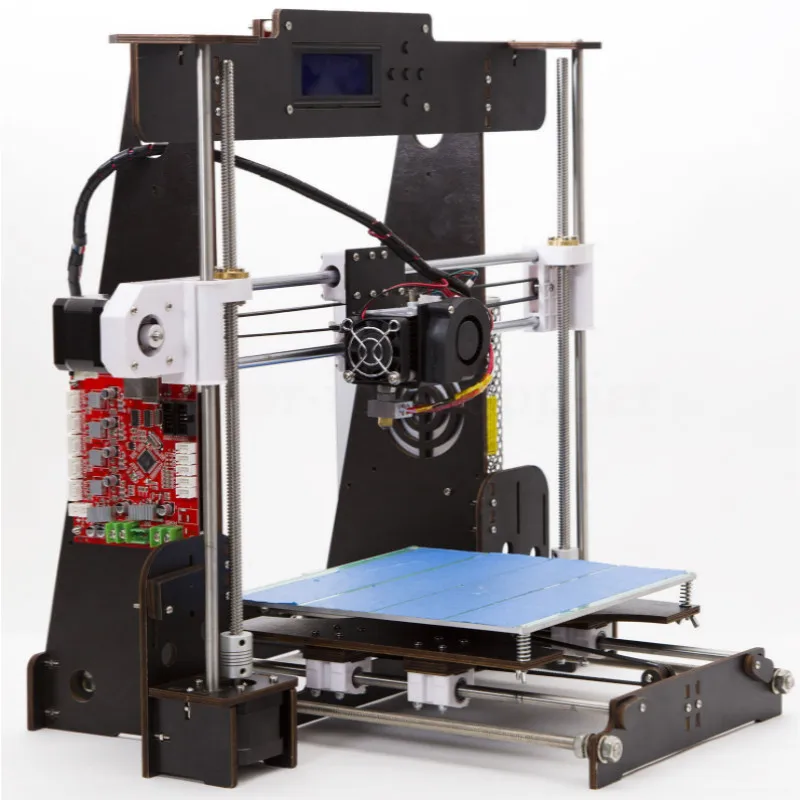 Ongoing development and regular updates ensure that our machines are packed with useful features, such as print sheet profiles, automated calibration, Mesh bed leveling, advanced diagnostics, remaining print time estimation, Octoprint support and more!
Technical Parameters
| Build Volume | 25×21×21 cm (9.84"×8.3"×8.3") |
| Layer height | 0.05 - 0.35 mm |
| Nozzle | 0.4mm default, wide range of other diameters/nozzles supported |
| Filament diameter | 1.75 mm |
| Supported materials | Wide range of thermoplastics, including PLA, PETG, ASA, ABS, PC (Polycarbonate), CPE, PVA/BVOH, PVB, HIPS, PP (Polypropylene), Flex, nGen, Nylon, Carbon filled, Woodfill and other filled materials. |
| Max travel speed | 200+ mm/s |
| Max nozzle temperature | 300 °C / 572 °F |
| Max heatbed temperature | 120 °C / 248 °F |
| Extruder | Direct Drive, Bondtech gears, E3D V6 hotend |
| Print surface | Removable magnetic steel sheets(*) with different surface finishes, heatbed with cold corners compensation |
| Printer dimensions (without spool) | 7 kg, 50×55×40 cm; 19.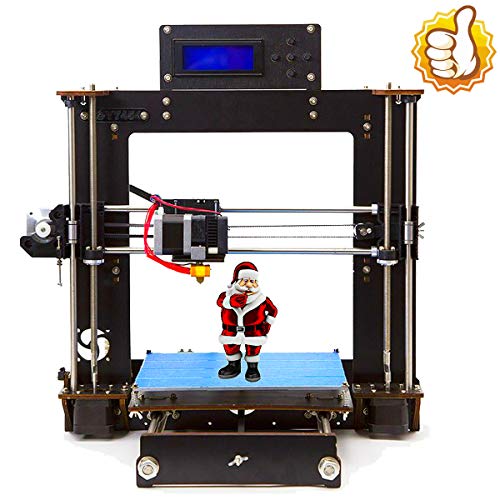 6×21.6×15.7 in (X×Y×Z) 6×21.6×15.7 in (X×Y×Z) |
| Power consumption | PLA settings: 80W / ABS settings: 120W |
* Consumable parts, such as PEI sheets (smooth, textured, etc.) are not covered by warranty as the coatings are designed to diminish over time unless failure has occurred due to a defect in materials or workmanship. Cosmetic damage, including but not limited to scratches, dents, cracks, or other cosmetic damage is also not covered by the warranty. Only defective sheets on arrival are covered by warranty.
Sample Prints
Full Features List (July 2022 Edition)
- Controller: EINSY RAMBo 8-bit board with Trinamic 2130 drivers (256 microstepping), co-developed with Ultimachine, sensorless homing for X and Y axes
- Mesh Bed Leveling: Advanced high-quality SuperPINDA sensor (Super Prusa INDuction Autoleveling sensor)
- Print sheet profiles: Firmware supports print sheet profiles to store Live Z calibration data to enable quick switching between different print sheets.

- Filament sensor: IR sensor built-in, supports filament auto-loading. Print pauses when filament runs out.
- Power Panic: Hardware-based, single G-code line accuracy
- Ethernet connection: via Raspberry Pi (optional)
- Wi-Fi connection: via Raspberry Pi (optional)
- Advanced sensors: 3 thermistors, fans RPM monitoring, SuperPINDA
- Calibration: Automatic, Mesh Bed Leveling, SelfTest
- Print medium: SD card (16 GB card included)
- Firmware update: via PC (USB cable)
- PSU: Custom-made Delta PSU with hardware-based power panic
- Advanced features: Automatic filament loading, steel sheet profiles, Octoprint compatibility and more
- New features introduced through firmware upgrades
Awards & Press Reviews
Thanks to all of these (and many other) features, the MK3S became the “Best 3D Printer” according to ALL3DP. The MK3S is also the highest-rated 3D printer, and the “Editor’s Choice”, in the prestigious MAKE:MAGAZINE’s Digital Fabrication Guide 2019. The MK3S is also featured in TechRadar's Best 3D printers of 2021 as The best all-around 3D printer. NY Times wrote that "...of the 11 printers we’ve tested over the past five years, the Prusa i3 MK3S printer has produced the largest and best-looking prints." According to ZDNet, the MK3S is "The best pro-sumer 3D printer under 1000 USD."
6 reasons to buy the MK3S+
1
Great User Support
We offer 24/7 tech support via live chat and email in seven languages. Our printers come with detailed instructions and guides for easy assembly and maintenance. You can also visit our knowledge base, community forum, Facebook groups and official Blog, where we publish useful 3D printing tips and tricks, contests and more!
2
Advantages of an Assembled 3d Printer
Compared to the assembly kit, the assembled printer differs only in the form in which you receive it.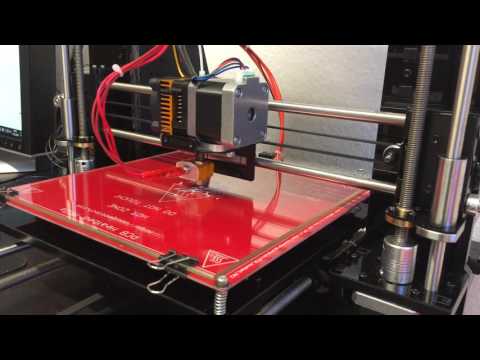 The printer comes pre-assembled and tested right out of the box. To start your first print, simply plug it in, run the initial calibration, and you are good to go. It is an ideal choice for businesses where there is a need to start printing as soon as possible.
3
Built-in Safety Features
Original Prusa 3D printers are well-known for their reliability and safe operation. Every part of our printers is thoroughly tested in-house. The MK3S+ is equipped with three thermistors and comes with a custom-built high-quality Delta power supply. The printer can recognize issues with heating and stop operation to prevent damage.
4
Open-source and Community Friendly
All parts of our printer are open-source, which means we publish all source codes and blueprints online. The community around our products is huge and the feedback is overwhelmingly positive - don't believe us? Check out Facebook groups and YouTube videos! There's so much to do with your 3D printer - buying it is just the beginning!
5
Ready for the Multi-Material Upgrade 2S
Multi Material Upgrade 2S is our unique add-on option for printing with up to 5 different filaments simultaneously. Multi-material could be your next step in the 3D printing world and the MK3S and MK3S+ are completely ready for the upgrade! MMU2S also allows you to print a soluble support interface - check out the video!
6
Upgradability
One of the most popular features of the Original Prusa i3 concept is upgradability. When you buy our 3D printer, you can upgrade it later to a newer version, so you don't need to buy a whole new model every two years like, for example, your phone or laptop. We also keep supporting our 3D printers with regular firmware updates that bring new features!
Ready to print settings
We provide high print settings with the printer, so you don't have to dive into complex new programs the second you finish the build. You can start printing right away, and this gives you a great head start!
These settings are great for all kinds of objects, not just for a couple of prepared showpieces. After a while, when you're familiar with the printer, you can, of course, dive into tinkering ;-)
We are developing our own slicing software. PrusaSlicer is a feature-rich, frequently updated tool that contains everything you need to export the perfect print files for your Original Prusa 3D printer. But of course, we also have the settings for the third party slicers like Simplify3D, Cura, etc.
Discount program for Original Prusa i3 assembled printer owners
Our discount program for the Original Prusa i3 assembled printer owners gives you a 10% discount on subsequent orders of the Original Prusa i3 assembled printers and selected filaments.
How does it work?
To enter the discount program, you only need to purchase your first Original Prusa i3 assembled printer for the full price. After the assembled printer is delivered to you, your Prusa account automatically applies the 10% discount on the assembled i3 printers. So your next assembled i3 printer will be discounted by 10% :-). Make sure to be always logged into your Prusa account, to have the discount applied.
Along, with the discount on the assembled i3 printers, the discount does apply to selected filaments too. Most importantly including our high-precision filament, the Prusament!
MK3S+ vs MINI+ Comparison
| Original Prusa i3 MK3S+ | Original Prusa MINI+ | |
Build volume |
250 x 210 x 210 mm | 9.84 x 8.3 x 8.3 in | 180 x 180 x 180 mm | 7 x 7 x 7 in |
Layer height |
0.05 – 0.35 mm | 0.05 – 0.25 mm with 0.4 mm nozzle |
Max travel speed |
200+ mm/s | 200+ mm/s |
Max hotend/heatbed temp. |
300 °C / 120 °C (572 °F / 248 °F) |
280 °C / 100 °C (536 °F / 212 °F) |
Mainboard |
Einsy RAMBo 8-bit board with Trinamic 2130 drivers co-developed with Ultimachine |
Custom 32-bit Buddy electronics with STM32 and latest Trinamic 2209 silent stepper drivers |
MMU2S support |
Yes |
No |
Extruder |
Direct drive |
Bowden system with 3:1 gearing |
LCD screen |
Monochromatic LCD |
2. |
Print surface |
magnetic heatbed with removable PEI spring steel sheets |
magnetic heatbed with removable PEI spring steel sheets |
Filament diameter |
1.75mm |
1.75mm |
Number of materials (simultaneously) |
1 | 1 |
Nozzle diameter |
0.4mm (default) / other nozzle diameters supported |
0.4mm (default) / other nozzle diameters supported |
Supported materials |
Any thermoplastic including Nylon and Polycarbonate |
Most thermoplastics except Carbon filled |
Filament sensor |
Yes (IR) |
Optional upgrade |
Power panic |
Hardware-based, single G-code line accuracy |
Future software upgrade, single layer accuracy |
Ethernet connection |
Via Raspberry Pi |
Yes |
Wi-Fi connection |
Via Raspberry Pi |
Separate future upgrade (ESP Wi-Fi module) |
Advanced sensors |
3 thermistors + SuperPINDA, fan RPM sensors |
3 thermistors + SuperPINDA, fan RPM sensors |
Farm mode |
No |
Yes (upcoming feature) |
Calibration |
Automatic, Mesh Bed Leveling |
Automatic, Mesh Bed Leveling |
Print medium |
SD card |
USB drive / LAN |
Firmware update interface |
USB port |
USB drive / LAN |
Power supply |
240W, custom made by Delta with Power Panic HW |
160W, external adapter by Mean Well or Delta depending on the region |
Kit price |
799 USD / 849 EUR (VAT incl. ) ) |
429 USD / 459 EUR (VAT incl.) |
Assembled printer price |
1099 USD / 1159 EUR (VAT incl.) |
459 USD / 489 EUR (VAT incl.) |
 8″ graphic 65k color screen
Original or copy Prusa i3. What to choose?
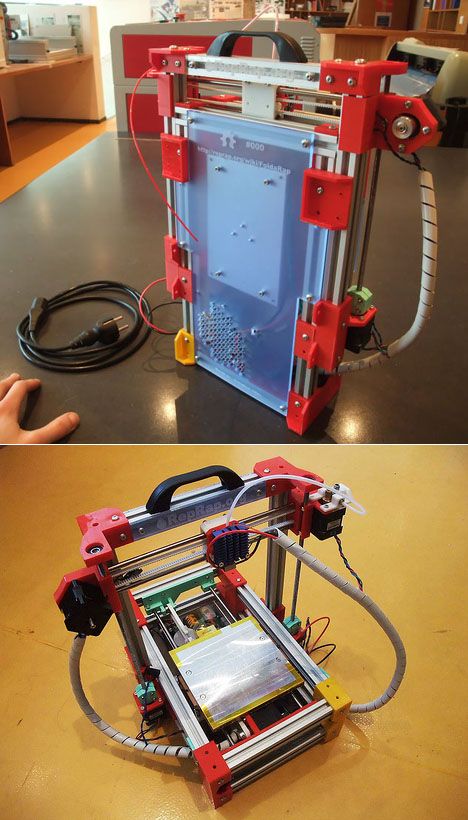
ThePrusa i3 is not only a Josef Prusa branded 3D printer, it is also the standard layout for many budget 3D printers. The original Prusa i3 evolved from the RepRap project, which eventually led to the creation of Prusa Research, a popular manufacturer of high quality open source 3D printers.
Since the release of the original i3 in 2012, Prusa Research has released several updated versions of the 3D printer, including the Prusa i3 MK2, MK3, MK3S and finally MK3S+. Meanwhile, apart from the official Prusa i3 releases, many other companies have been making clones of the original Prusa i3.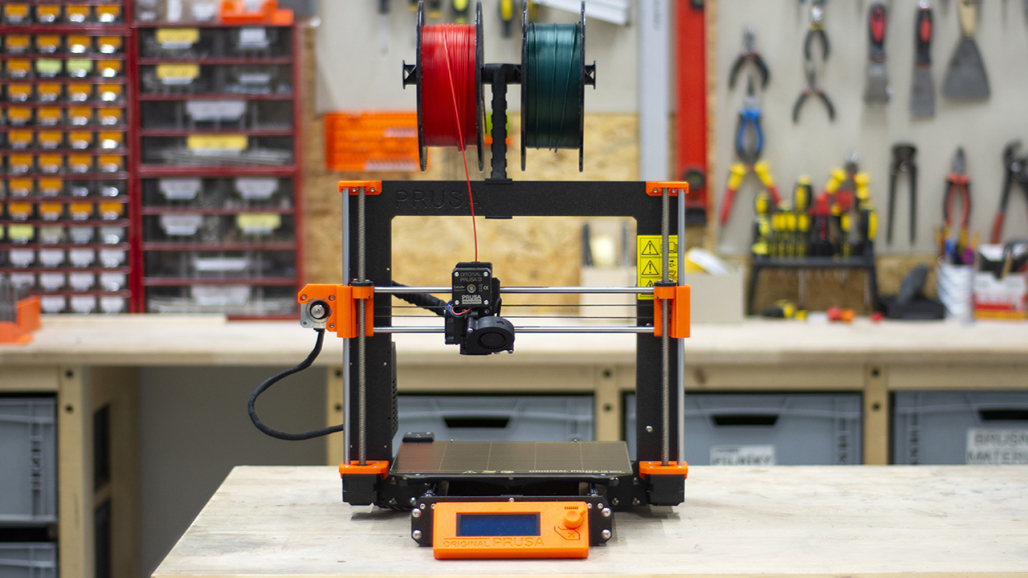
These clones follow the Prusa i3 design and even use the term "Prusa i3" to describe the layout. i3 clones usually look like the original Prusa i3 but use cheaper parts to lower the overall price and attract more buyers. Clone manufacturers make 3D printers as cheap as possible, which is why they are often sold under open source licenses.
It's worth noting that while 3D printers like the Ender 3 or Anet A8 were inspired by the original Prusa i3 design and are technically i3 clones, they now essentially exist in their own categories. Many of them now have their own development history and are not related to Prusa printers. What this all means is that when we use the word "clone" we are referring to the similar Prusa i3 styling that some 3D printers use, including the Ender 3 and Anet A8.
Although the original and clones may seem similar, there are significant differences between them. So which is better? The main differences are quality and cost, but there are other factors as well. In this article, we will try to understand these differences.
Original Prusa i3
Original Prusa i3 is one of the most famous open source 3D printers. Its widespread success has led Prusa Research and other manufacturers to create many official and unofficial versions. For this reason, we will be using the official Prusa i3 MK3S+ as our reference Prusa i3 printer.
Currently, when the MK3S is being retired, only the MK3S+ is available for purchase. While the ~$1,200 price tag for a pre-assembled MK3S+ (~$900 per kit) might seem intimidating, you get what you pay for. The MK3S+ is a great deal thanks to the attention to detail and quality assurance.
The main factors that determine the benefits of MK3S + can be divided into three groups: the 3D printer itself, the firmware and the ecosystem.
Original Prusa i3: mechanics and construction
The MK3S+ is assembled from high quality parts and assemblies that you can rely on for your 3D printing work day in and day out.
To begin with, it comes with the official E3D V6 all-metal hot end, a high quality and branded hot end. The MK3S+ also uses a 32-bit motherboard with dynamic stepper motor drivers, making this 3D printer both quiet and powerful. In addition, in the electronics, the MK3S+ uses multiple sensors to improve print reliability.
Unlike the alternate Bowden style many printers use, the MK3S+ has a direct drive system that allows printing on flexible plastics. There are even dual motors in the Z-axis, allowing for higher quality 3D printing. The printer is equipped with a full color display and a quiet Noctua fan, unlike many other copies that use a single color LCD display and noisier fans. And one of the most important advantages of the original Prusa i3 is the PEI spring steel desktop and automatic table leveling features not found in comparable desktop 3D printers.
Overall, the MK3S+ uses higher quality parts that together deliver consistently high quality 3D prints.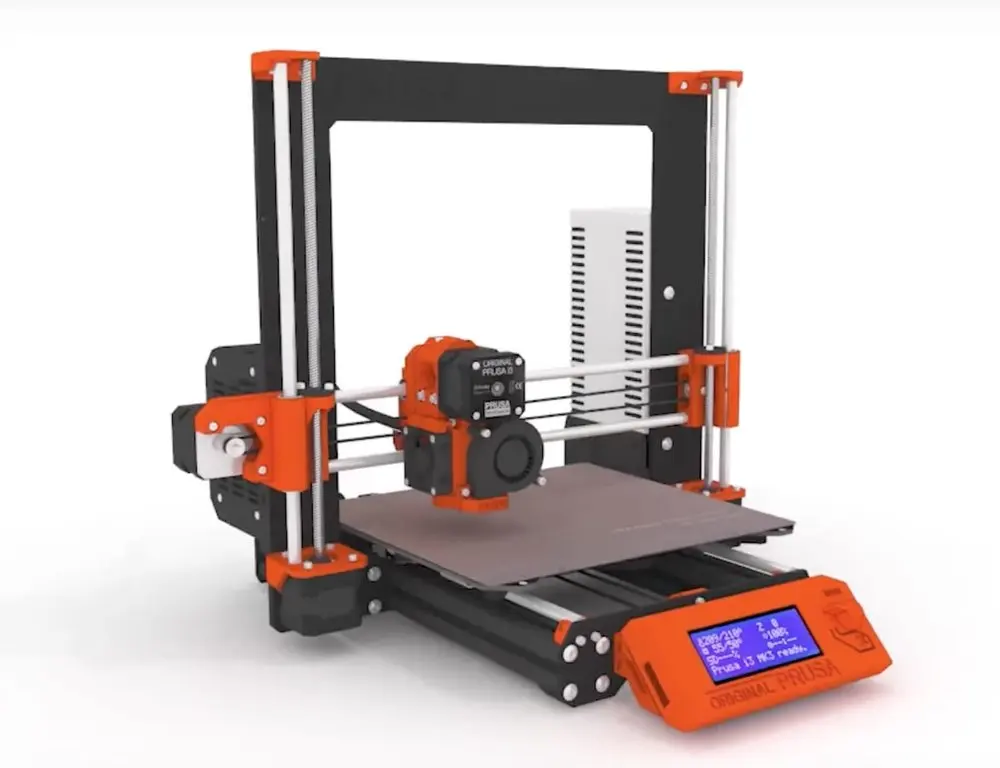
Original Prusa i3: Firmware
Firmware is another key aspect of the MK3S+. First, you can easily change the firmware using the PrusaSlicer (attached to the printer's Rambo motherboard). This is partly because Prusa Research uses Marlin-based firmware for all of its FDM printers, including the MK3S+.
In terms of firmware, what sets the MK3S+ apart from other printers in its class is the frequent firmware updates that Prusa releases. Unlike many other 3D printer manufacturers, Prusa has released very stable firmware without sacrificing some of the latest and greatest features such as linear advancement that improves 3D print quality.
Original Prusa i3 User Support
When you purchase a 3D printer from Prusa Research, you get guaranteed company support, documentation, product support and more. You know that you can count on Prusa to help you if you run into problems with your 3D printer.
Since the Prusa MK3S+ is the main printer for Prusa, they also offer a number of upgrades. For example, MMU2S will give you access to multi-color printing. You can also purchase spare parts and assemblies without worrying about their compatibility.
In addition to this, Prusa offers its own 3D file repository known as PrusaPrinters. There you can find 3D models and specific suggestions for setting up 3D printing. Prusa is also very active in the maker community, with a great blog where you can ask questions and learn how to fix, upgrade and set up your 3D printer.
Prusa i3 copies
After the success of the Prusa i3, other manufacturers also looked into 3D printing and created i3 clones. Generally speaking, such manufacturers try to keep the cost of a 3D printer as low as possible while retaining key features.
Below we will use Creality Ender 3 and Anet A8 as examples of Prusa i3 clones. Anet A8 can be considered a "closer" clone as the frame and some features are very similar. On the other hand, Ender 3 is not so much a clone as it is the result of development that was originally inspired by the Prusa i3.
As in the previous section, the important factors influencing the decision to buy a Prusa i3 clone can be divided into three groups: the 3D printer itself, the firmware, and the ecosystem.
Prusa i3 replicas: mechanics and construction
Most of the clones are missing many small features that make all the difference when it comes to 3D print quality and usability. For example, the Anet A8 usually comes with unbranded parts and even important parts like the hot end are often less reliable. The Ender 3, for example, uses a Bowden 3D printing plastic feed system because it's a simpler design than the direct drive system on the MK3S+.
Virtually all clones lack automatic table leveling. This means that you will have to manually calibrate the 3D printer bed.
Prusa i3 clones usually use lower quality electronics. For example, using a more budget-friendly motherboard results in fewer features and noisy drive drivers. Both the Ender 3 and the Anet A8 use poor quality fans, and although they are not the most important part of the design, they affect the noise level of the 3D printer.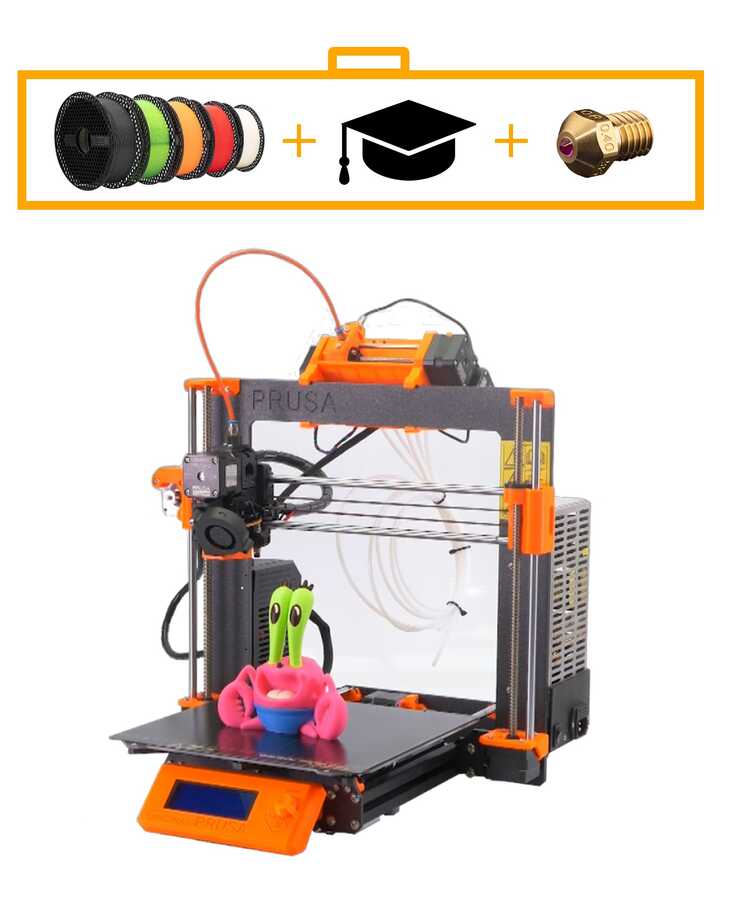 The Anet A8 uses two z-drives, but this is more of an exception to the rule and most copies only use one, resulting in more 3D print quality issues.
Prusa i3 copies: firmware
Prusa i3 clones are usually open source, but changing firmware can cause problems. For example, both the original Ender 3 and Anet A8 require a bootloader (which is often used as an Arduino Uno) to update the firmware. However, most clones can run several different types of firmware such as regular Marlin, Vanilla Marlin and Th4D Marlin.
No matter how similar the clone is to the original Prusa i3, most of them use similar outdated Marlin-based firmware. Unlike Prusa, clone makers rarely release updates to their firmware, and even updates don't include the latest features. Cloned software is known to lack security features and disable many of Marlin's great features, such as "Linear Advance" (a setting that stabilizes filament pressure in the nozzle), because motherboards cannot provide the necessary processing power.
Prusa i3 Copies: User Support
Finally, don't count on good user support, as clone makers usually don't provide good documentation. In the case of copies of Prusa i3 3D printers, there may be problems with the return of goods. Manufacturers usually don't provide model-specific updates like Prusa Research does for their 3D printers.
However, successful copies sometimes form a strong DIY community and you can find a lot of information about modifications and improvements to your 3D printer. Good examples of 3D printers with a large community and a wealth of information on the internet are the Ender 3 and Anet A8. However, it should be borne in mind that it is worth being able to filter information, and you will make all modifications at your own risk.
So what to buy - original or clone Prusa i3?
The original Prusa i3 is a great 3D printer, but the clones have an attractive lower price. However, quality matters a lot. The small individual parts of a 3D printer, such as fans, motherboard, and sensors, may seem unimportant, but they all contribute to a better 3D print.
Although real Prusa i3 printers are much more expensive than clones, they provide more useful features and quality. Copies include only the necessary basis for 3D printing and it is the price that reflects this fact. Prusa i3 clones contain unbranded parts, usually of lower quality. On the one hand, this is a minus, but on the other hand, replacing them will also be cheaper.
Perhaps the biggest difference between an original transaction and a clone is quality control. A genuine Prusa i3 printer with its high quality parts makes 3D printing easy, while a clone will require you to fiddle around to get a good 3D print result. An original Prusa i3 printer like the MK3S+ will likely last longer than a clone and be less likely to break.
Buying an original Prusa i3 3D printer is probably the best choice if you are looking for a higher end printer that you will use for a long time. On the other hand, if you're new to 3D printing, want to give it a try, like repairing and modifying 3D printers, or on a tight budget, you should consider purchasing a clone.
causes and solutions - qbed
| What should I do if the printer fails to calibrate? How to test the correct operation of the P.I.N.D.A. and reflash the Prusa printer? |
|---|
Prusa i3 MK3 first layer calibration failed
Successful 3D printer calibration is an integral part of creating good printouts. If your printout is loose and loose on the platform, or the edges and layers of the printout are uneven, there is a good chance your printer needs to be recalibrated. Calibration will also be needed for any freshly assembled printer: if you are going to purchase Prusa i3 MK3 kit (disassembled printer), then keep in mind that assembling it is still half the trouble (well, or half the fun :)), - the real struggle can unfold during its calibration after assembly.
In this article I will tell you what problems I encountered when calibrating Prusa and share ways to solve them. But each case is, of course, individual, and this list of recommendations is not exhaustive.
Article content:
Calibration process
History
Typical XYZ Calibration Problems and Troubleshooting
P.I.N.D.A Sensor Test.
Does P.I.N.D.A. work?
Testing the cable P.I.N.D.A.
Testing P.I.N.D.A. in Pronterface
Flashing the Prusa printer
Resetting the printer to factory settings
Flashing the printer
Prusa technical support
How I solved the calibration problem
Calibration process
. When starting Prusa for the first time, users are prompted to follow instructions Calibration Wizard which will guide you through several calibration steps.
The first step in calibrating will be Selftest , which will check the printer for basic user assembly errors and verify that the printer electronics are properly connected.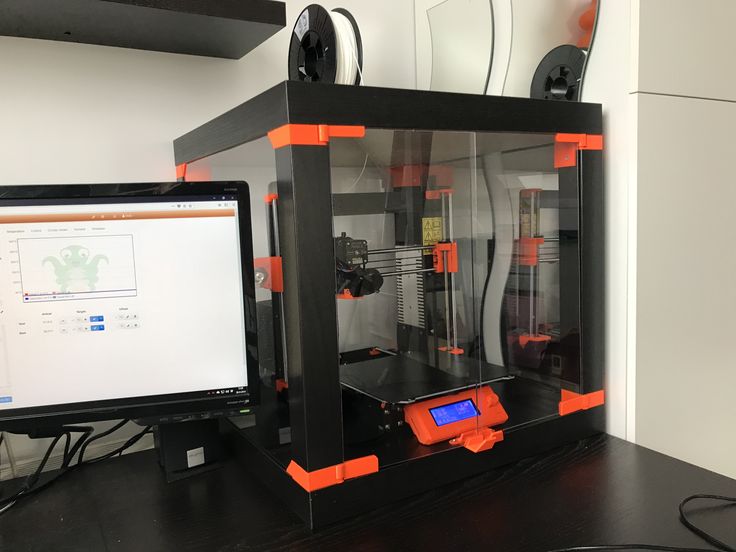 This step checks the extruder, coolers, platform and hot end wires, XYZ wires and motor function, XY axes length, XY belt tension, proper operation of pulleys and filament sensor.
The second step will be XYZ calibration , the purpose of which is to detect XYZ misalignment and find the location of the four calibration points on the print platform to align it correctly. This step consists of 3 parts: first, you need to remove the steel sheet (which is being printed on) from the platform, then the printer will search for the location of 4 touch points on the platform to avoid the nozzle and platform from touching during subsequent printing. The printer then determines the position of these points even more carefully. During the third phase of the XYZ calibration called Mesh bed leveling you will return the steel sheet to the platform and the printer will measure the height above the 9 sensor points and store this information in non-volatile memory for future reference.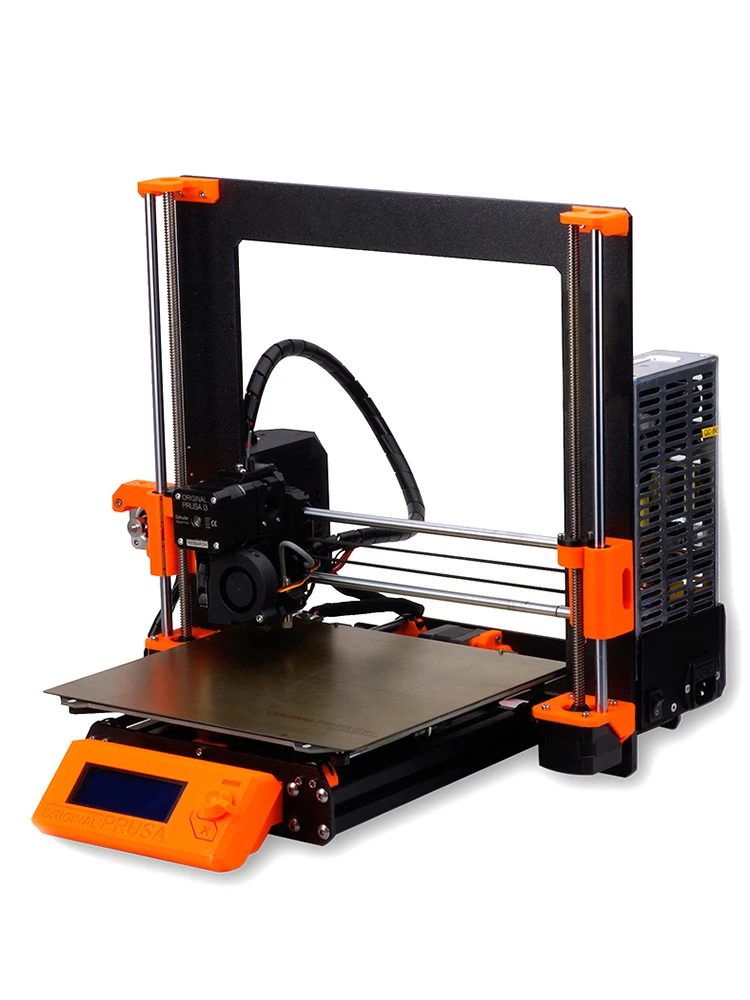
In the third step of calibrating the printer, you load the filament into it, and then calibrate the first layer of , or measure and adjust the distance between the P.I.N.D.A. and nozzle tip. At this stage, you will be able to fine-tune the nozzle height to ensure that the material is delivered to the platform correctly.
At each of the above calibration steps, the printer may generate several error messages . Tips for their elimination are contained in 3D PRINTING HANDBOOK , which can always be downloaded from the official Prusa website. But, to be honest, in 2018 these instructions look rather minimalistic and not very informative, for me personally they did not help to fix the calibration problem, which will be discussed later.
Back to content
History
Actually, what went wrong with the calibration of my Prusa i3 MK3? The story is like this. Initially, I successfully assembled the kit (assembly takes about 1-2 days), launched the printer, then followed the instructions of the Calibration Wizard and went through all the calibration steps without any problems. On the same day, I created one single printout, the Prusa logo, which can be found on the SD card that came with the printer. Then my printer stood idle for about a month. No one touched it, no one printed on it. He stood absolutely motionless and covered himself with a rag.
A month later, I decided to add a little, but my printouts mercilessly came off the platform. I tried to print different models, but each time the layers came out uneven, the filament fell out of the extruder in unnecessary places, in general, it was not very good. I decided to re-calibrate the printer. I started the calibration of the first layer in the printer menu Calibration > First layer calibration through the LCD display, the result was adequate, the filament lay flat and kept on the platform, however, the line thickness varied. Then I decided to run Calibration > Selftest , the test passed successfully. By the way, if you have problems at the Selftest stage, sometimes they can be solved by sending the extruder to the home position Auto home . Go to menu Calibration > Auto home , the extruder will drive home, after that go through Selftest again, everything should be fine.
Next, I decided to check the XYZ calibration in Calibration > Calibrate XYZ , and then the printer gave me an error "XYZ calibration failed. Please consult the manual." This message means that the printer could not find the touch points on the platform, which is a bit strange, because a month ago it found them, then it was idle, and now for some reason it is blind. Of course, I turned to the instructions, but there I did not find a solution to the problem.
Back to content
Common XYZ Calibration Problems and Troubleshooting
Then I began my search of forums and websites looking for possible XYZ calibration problems with the Prusa i3 MK3.
Prusa's official knowledge base has a list of recommendations for troubleshooting XYZ calibration problems. Below I provide a translation of the list, supplemented by a couple of points of problems that happened to my printer and interfered with normal calibration.
-
First, make sure the printer is on a level and stable surface;
-
Next, check that the Y-axis of the printer is assembled correctly: remove the anti-vibration feet with LCD display from the printer and see if the front and rear support plates are firmly attached to the surface on which the printer is standing. Try to move the printer by hand (as shown in the picture below), make sure that none of the corners of the plates are lifted off the surface. If the plates do not fit snugly or wobble, unscrew the screws from the plates, press the printer frame firmly against a flat surface so that the bottom edges of the plates adhere to it as best as possible, and tighten the screws again;
Move the printer by hand and make sure the base plates are firmly on the surface on which the printer is standing. Original picture here
Proper assembly of the Y axis: press the printer frame firmly against a flat surface so that the bottom edges of the base plates fit as best as possible, and tighten the screws. Original picture here
-
Check that the bundle of wires leading from the extruder does not fall on the cover of the box with the EINSY RAMBo board when moving from the beginning to the end of the X axis;
-
Check the correct assembly of the E axis. Make sure the hot end is inserted into the extruder correctly;
Correct position of the hot end in the extruder. Original picture here
-
Make sure that nothing blocks the movement of the X, Y and Z axes. To do this, go to menu Settings > Move axis and move all the axes one by one from one side to the other, seeing if something is preventing their movement;
-
Look for cracks in the plastic parts of the printer.
 It is possible that during assembly you tightened the screw too much, and some part cracked - this can lead to the failure of the printer mechanisms;
-
Next, check the location of the P.I.N.D.A. in the Auto home position. Go to printer menu Calibration > Auto home and run the command. P.I.N.D.A. sensor should stop at the center of the first (lower left) calibration point. If the sensor is misaligned, then your axes are not quite straight, or the sensor itself is faulty (see "Testing the P.I.N.D.A." Sensor). Also check if the printer is assembled correctly: if the sensor is not in the center of the lower left calibration point, your U-mounts may have misaligned with the center of the Y-axis bearings under the print platform;
Position P.I.N.D.A. in Auto home mode
Offset U-fastener. U-fasteners must be centered on bearings
P. I.N.D.A. should be approximately 1 mm above the tip of the
-
Check that all wires are connected correctly. Also look to see if any of the wires are interfering with the movement of the print head. In the photo below, for example, the wire from the front cooler is located incorrectly;
The wire from the front cooler came out on the wrong side of the print head, was not correctly routed along with the rest of the extruder wires and prevented the printer print head from moving along the X axis
-
Just in case, check the tension of the X and Y belts. As a rule, a successful Selftest means that the belts are tensioned correctly, but you can additionally verify this by going to the printer menu Support > Belt Status (after passing Selftest). Normal values are in the range 240 +/- 40;
-
Check that the teeth on the belts are pointing up and not slanting to the left or right;
-
If the printer has been idle for a long time, be sure to clean the metal rods and lubricate them with machine oil.
If these steps do not work, check that your P.I.N.D.A. sensor is working properly. using the three tests that I describe below.
Back to content
P.I.N.D.A sensor test.
P.I.N.D.A. is an essential component in the calibration of the Prusa i3 MK3. If you are having problems with calibration, one possible solution is to check that the P.I.N.D.A. is working properly. To do this, perform 3 sensor tests according to the instructions in the Prusa Knowledge Base.
Does P.I.N.D.A. work?
First you need to find out if the sensor is working. Go to printer menu Calibration > Show end stops or if you have a newer firmware version, then Calibration > Show PINDA state . We take a small metal object (for example, scissors or pliers supplied with the printer) and bring it under the sensor. The Z value should change from 0 to 1. You can also use the red light above the sensor for control: the red light should turn off when you put a metal object under the sensor.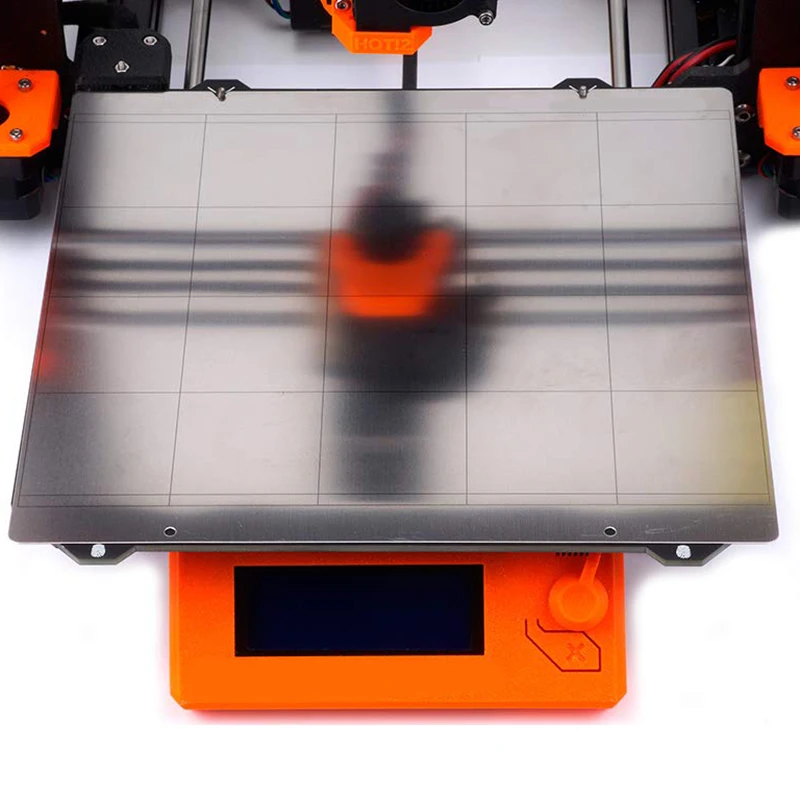
If the sensor reacts to metal objects, then it is working properly, and we can proceed to the second test. If not, then you need to check the correct connection of the P.I.N.D.A. to EINSY miniRAMBo or replace the sensor.
Testing the cable P.I.N.D.A.
Check if the sensor cable is damaged. Go to the menu Settings > Move axis > Move Z (or just hold down the handle of the LCD panel) and raise the nozzle at least 10 cm from the platform.
Go to Calibration > Show end stops or in new firmware versions go to Calibration > Show PINDA state . Move the extruder from one end of the x-axis to the other (if you can't move the extruder, let the printer sit for a couple of minutes until it's in idle mode). The Z value should remain at 0 (or see if the red light above the sensor is flashing: the red indicator should be on throughout the entire movement). If the value changes (red light flashes), then the P. I.N.D.A. out of order. Check if you have tied the cable with a plastic tie during assembly.
Testing P.I.N.D.A. in PronterFace
In the last test, we will check the P.I.N.D.A.
Download drivers for your printer model on the Prusa website, install. Among them will be the 3D printer control program Pronterface . We open it. Connect the printer to the computer using the supplied USB cable.
Connecting Prusa to a computer via USB port
When connecting, do not forget to use the correct printer port (you can see it in the program menu Slic3r from the same driver package by connecting the printer to the computer: go to the menu Configuration> Flash printer firmware and see the port in the Serial port line) and baud rate 115200.
In the Configuration > Flash printer firmware menu of the Slic3r program, you can view printer port
Set correct port and baud rate 115200 in Pronterface
Make sure nozzle and platform are clean.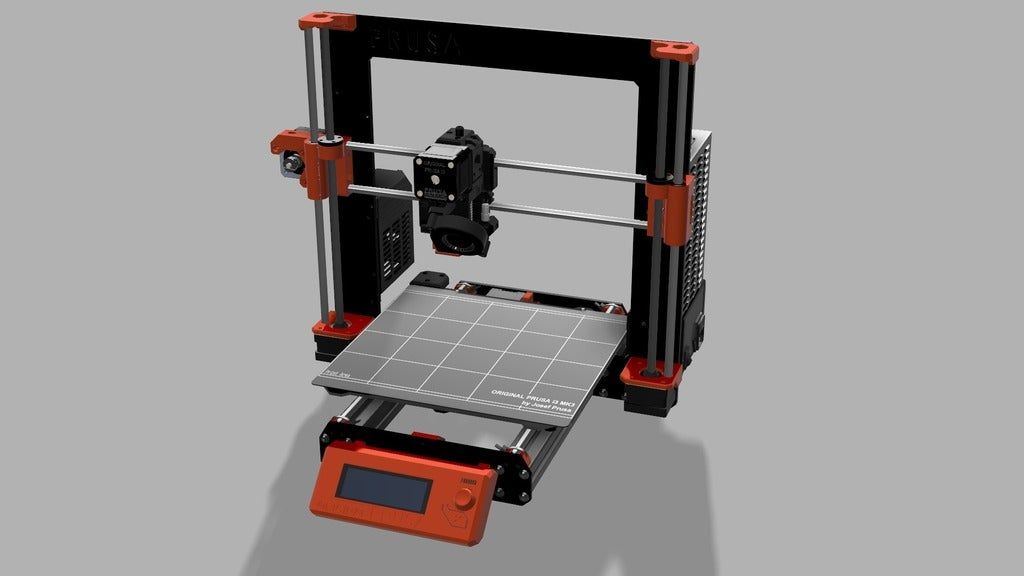 We type the command G80 in the bottom right line of Pronterface and click Send - this will start the process of leveling the platform according to the values of the Mesh bed leveling virtual grid. Once the process is complete, send the command G81 - you will get the interpolated Z values for the platform grid 7 x 7.
Repeat this process at least 3 times (try to keep the test conditions the same). Compare the data obtained for each 7 x 7 grid. Verify that there are no significant deviations between measurements (> 0.2). Note that the numbers in the matrix have their own predetermined positions, so always compare the numbers in the same positions.
It was at this stage of the test that possible problems with my calibration were revealed: I did 2 runs of the G80 and G81 commands and saw that the values in the grid differ enormously. At first I thought the P.I.N.D.A. out of order. I contacted tech support, described the situation to them, sent the test results, and they agreed that P. I.N.D.A. not working properly and sent me a new sensor. However, it was not about him. I describe the cause of the problems with my calibration at the very end of the article.
My values from two runs of the G80 and G81 commands differed significantly. P.I.N.D.A. sensor was faulty
Back to content
Flashing the Prusa printer
If none of the above points help, you can try updating the printer firmware to the latest version (the latest firmware can be downloaded from the Prusa website under the Firmware heading) - for some users this helps to resolve calibration problems. In passing, if you contact technical support with your calibration problem, one of the recommendations will just be a flashing. One of the important nuances: before flashing, you need to reset your printer and return it to factory settings. This recommendation was given to me directly in technical support. Let's start with the reset.
Download new firmware
Resetting the printer to factory settings
Before flashing, it is recommended to erase the configuration data from the printer's memory by resetting all settings. For firmware 3.0.11 and later (you can find out the firmware version in the printer menu Support > Firmware ) the procedure is as follows (see the original version of the article here): )
When the text "Original Prusa i3 Prusa Research" appears, quickly press and hold the control knob until a beep sounds
Release the control knob
If everything is done correctly, the menu with 4 - parameters:
-
Language resets the language preferences and allows you to select a new language;
-
Statistics clears printer memory of total print time and media usage statistics;
-
Shipping prep only resets the language selection.
 All calibration data, including Live adjust Z , remains in the printer's memory, but note that the printer will still ask you to run the Calibrate Z function. This type of factory reset is used before freshly assembled Prusa printers are sent to the customer, so that he himself chooses the language and calibrates Z after unpacking;
 -
All data resets everything, including calibration data, completely resetting the EEPROM. After such a reset, you will need to go through the full calibration procedure described above again;
-
Bowden length - This option is only available to owners of Multimaterial printers and is used when you want to replace Bowden cables and the length of the new cables is different from the factory ones. After the reset, you can set the new cable length in this menu.
Those who are going to reflash the printer should select the All data option.
Some users reset the printer to factory settings via the Pronterface mentioned above by sending command 9 to the printer0107 M502 to reset settings and M500 to save settings (see full list of commands for Pronterface here).
Flashing the printer
Download the latest printer driver package according to the instructions in "Testing P.I.N.D.A. in Pronterface" here. From the same page, download the new firmware under the Firmware heading and remember the folder in which we save it.
Among the downloaded drivers will be Slic3r. Run Slic3r, go to program menu Configuration > Flash Printer Firmware , connect the printer to the computer (see the pictures in the section "Testing P.I.N.D.A. in Pronterface") and select it in the Serial Port line. If your printer is not there, click Rescan. Click Browse, then find and select the downloaded firmware (*.hex). Press Flash! If the flashing was successful, you will see the message Flashing succedded! in the status line.
Flashing window in Slic3r
After flashing, you will need to go through the calibration process again.
If none of the above steps resolve your XYZ calibration problems, you can contact Technical Support.
Back to content
Prusa Technical Support
If during the above tests you find that the sensor or other electronic component of the printer is faulty, you can contact Prusa support at [email protected] or write to the technical support chat in the online store. You will be asked to provide Pronterface test scores, a video and/or photo of your problem, your original order number, and Prusa will send you a new part (assuming you purchased your printer from them and not through a reseller).
If you still can't figure out why the calibration doesn't work, you can also write to [email protected], support chat or the forum (to do this, you need to log in using the data you provided when placing an order).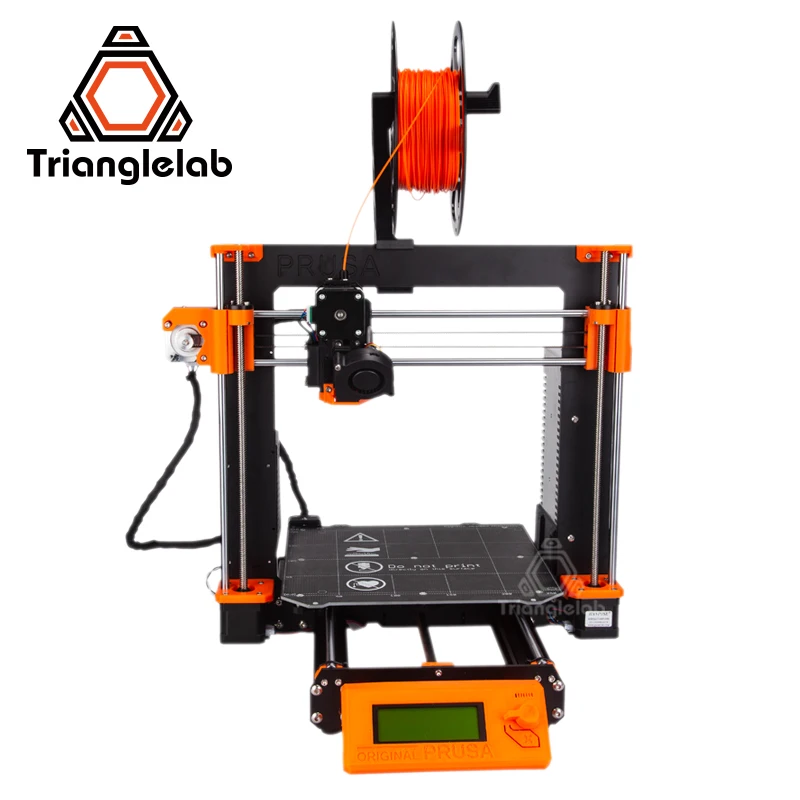 As my experience shows, chat works faster, because there you will discuss all the details and questions in real time, while you can wait for a response to letters for several days. The people on the forum are also quite knowledgeable and willing to help, you should definitely try to write there.
The support chat is quite crowded on weekends
Back to content
How I Solved the Calibration Problem
When I ran into the XYZ calibration problem, I first did some of the checks in this article, but was unable to test the P.I.N.D.A. in Pronterface, because the printer did not respond to the commands of this program. Then I contacted the support chat, where they told me that before flashing, I need to reset the printer (which I did not do). I reset and reflashed the printer, it began to respond to Pronterface, I ran the G80 and G81 commands several times, compared the data and saw that they are quite different. I communicated with technical support in real time via chat, so I was able to immediately send them the grid readings, a photo of the sensor and a video with the calibration process. Support agreed that most likely P.I.N.D.A. out of order. They sent me a new sensor, which I received within 3 working days.
I replaced the sensor, but I still couldn't successfully calibrate. I returned to the idea that the printer had been idle for a whole month and it was unlikely that something could break in it. Taking into account the readings of the mesh during Mesh bed leveling and the P.I.N.D.A.’s serviceability, most likely it was the surface on which the printer was standing (I ruled out all other assembly problems): the table could well have been moved, or the printer could have been moved along it, or, maybe, the table was wobbly. I moved the printer to a level and very stable surface, tightened the X and Y straps, reset the printer again, ran the calibration, and - wow! - he passed it.