3D printer octoprint
OctoPrint.org - Download & Setup OctoPrint
Guy Sheffer maintains “OctoPi”, a Raspbian (and thus Debian) based SD card image for the Raspberry Pi that already includes OctoPrint plus everything you need to run it:
- OctoPrint plus its dependencies
- MJPG-Streamer for live viewing of prints and timelapse video creation, compatible with various USB webcams and the Raspberry Pi camera
Recommended hardware: Raspberry Pi 3B, 3B+, 4B or Zero 2. Expect print artifacts and long loading times with other options, especially when adding a webcam or installing third party plugins. Setups not using recommended hardware are not officially supported.
Please note that the Raspberry Pi Zero and Zero W are not recommended explicitly since severe performance issues were observed, caused by the WiFi interface when bandwidth is utilized (e. g. the webcam is streamed), negatively impacting printing quality. See also here. The Zero 2 however is recommended.
Installing OctoPi
OctoPi is available through the Raspberry Pi Imager, which you can use to download and setup OctoPi. You can install it yourself, or alternatively simply buy one of the available
All-in-one OctoPrint Kits
Installing OctoPi using the Raspberry Pi Imager
🤚 Before you begin
Read and follow these instructions precisely. Most importantly, leave the system username as “pi”, do not change it to anything else or OctoPrint won’t work!
-
If you haven’t already, download and install Raspberry Pi Imager on your computer
-
Find the OctoPi image under “Choose OS”, by selecting “Other Specific Purpose OS” > “3D printing” > “OctoPi” and then the “stable” version.

-
Open advanced options by clicking on the button with the gear, or by using the keyboard shortcut
ctrl+shift+xand then:-
Configure your wifi options: Set your SSID, password and WiFi country:
-
Change the system password in “Set username and password” by entering a new password to use for the system user “pi”. This is not the password you’ll use for logging into OctoPrint but one that you’ll have to use to log into your Pi via SSH should you ever need to. Leave the username as “pi”, do not change it to anything else!
-
Optionally: Change the configured timezone in “Set locale settings”
-
Optionally: Change the hostname in “Set hostname”
-
-
Install the image to your SD card, then plug everything in to your Raspberry Pi and boot it up.
 Do not format the SD card after installing, even if prompted to do so. This will break the installation and you will have to start over!
 -
Access OctoPrint from your browser via
http://octopi.localor the hostname you chose (if your computer supports bonjour) orhttp://<your pi's ip address>.httpsis available too, with a self-signed certificate (which means your browser will warn you about it being invalid - it isn’t, it’s just not recognized by your browser).
Please also refer to OctoPi’s README, especially the “How to use it” section.
Alternative Initial Setup
If you decide against using the Raspberry Pi Imager, here are some alternative steps to get started:
-
Flash the image to your SD card through whatever alternative means you’ve chosen.
-
With the SD card still attached to your computer, set up the Wifi connection using the
octopi-wpa-supplicant.file on the root of the installed card when using it like a thumb drive. Important: Do not use WordPad (Windows) or TextEdit (MacOS X) for this, those editors are known to mangle the file, making configuration fail. Use something like Notepad++, Atom or VSCode instead or at the very least heed the warnings in the file. If your computer doesn’t see the card right away after flashing, try ejecting and inserting it again. Do not format the SD card after installing, even if prompted to do so. This will break the installation and you will have to start over! txt
txtPlease also refer take a look at the full WiFi setup guide in the FAQ that also includes troubleshooting tips.
-
Plug everything into your Raspberry Pi and boot it up
-
Log into your Pi via SSH (it is located at
octopi.localif your computer supports bonjour or the IP address assigned by your router), default username ispi, default password israspberry. Run
Run sudo raspi-config. Once that is open:- Change the password via “Change User Password”
- Optionally: Change the configured timezone via “Localization Options” > “Timezone”.
- Optionally: Change the hostname via “Network Options” > “Hostname”. Your OctoPi instance will then no longer be reachable under
octopi.localbut rather the hostname you chose postfixed with.local, so keep that in mind.
You can navigate in the menus using the arrow keys and Enter. To switch to selecting the buttons at the bottom use Tab.
You do not need to expand the filesystem, current versions of OctoPi do this automatically.
You also do not need to manually enable the RaspiCam if you have one, that is already taken care of on the image as well.
-
Access OctoPrint through
http://octopi.local(if your computer supports bonjour) orhttp://<your pi's ip address>.
httpsis available too, with a self-signed certificate (which means your browser will warn you about it being invalid - it isn’t, it’s just not recognized by your browser).
Please also refer to OctoPi’s README, especially the “How to use it” section.
Image Downloads
Raspberry Pi Imager will download the latest version of OctoPi for you, but if you want to download the images yourself you can do so here.
Stable OctoPi
OctoPi 0.18.0 & OctoPrint 1.8.6 SHA256: 851573629147ec5385b9168a78377b8ed51af0a1d76c2174fe0e4ccb4f637a9d
Raspberry Pi 3B, 3B+, 4B or Zero 2 strongly recommended, Raspberry Pi Zero/Zero W not officially supported!
Image compatible with Raspberry Pi A, B, A+, B+, 2B, 3A+, 3B, 3B+, 4B 1/2/4/8GB, 400, Zero, Zero W and Zero 2.
OctoPi Release Candidate
The current OctoPi Release Candidate 1. 0.0rc2 can be found here:
OctoPi 1.0.0rc2 & OctoPrint 1.8.1 Raspberry Pi 3B, 3B+, 4B or Zero 2 strongly recommended, Raspberry Pi Zero/Zero W not officially supported!
Image compatible with Raspberry Pi A, B, A+, B+, 2B, 3A+, 3B, 3B+, 4B 1/2/4/8GB, 400, Zero, Zero W and Zero 2.
OctoPi Nightlies
You can also get the 32bit nightlies here or the highly experimental 64bit nightlies here.
Further resources
- For customizing OctoPi, take a look at CustoPiZer.
- Scripts to build the image yourself can be found in OctoPi’s Github repository.
Filip Grzywok maintains “Octo4a”, an Android app that allows you to use an Android based smart phone as an OctoPrint host. Root is not required!
Check out the Octo4a README for information on how to obtain the app, install and run it.
Video
There’s also a video guide on how to get Octo4a up and running by Thomas Sanladerer.
There’s also an official OctoPrint Docker image, octoprint/octoprint. It is maintained by Brian Vanderbush and team on GitHub.
Please refer to its entry on dockerhub for more details on usage and configuration.
octoprint_deploy is a guided script for creating multiple OctoPrint instances. This enables control of multiple printers on a single piece of hardware. It is compatible with OctoPi and also functions as a general Linux installer for OctoPrint, video streamers, haproxy, etc.
The related octoprint_install serves as a single instance Linux installer.
Both are maintained by Paul Paukstelis.
The generic setup instructions boil down to
- Installing Python 3, including pip.
- Creating a virtual environment somewhere:
python -m venv OctoPrint - Installing OctoPrint into that virtual environment:
OctoPrint/bin/pip install OctoPrint - OctoPrint may then be started through
.or with an absolute path /OctoPrint/bin/octoprint serve
/path/to/OctoPrint/bin/octoprint serve
More specific setup instructions for the most common runtime environments can be found below.
Linux
For installing OctoPrint on Linux, please take a look at the setup instructions for Raspbian on the forum. They should be pretty much identical on other Linux distributions.
Windows
For installing the OctoPrint server on a Windows system, please take a look at the setup instructions for Windows on the forum.
Mac
For installing the OctoPrint server on a Mac, please take a look at the setup instructions for MacOS on the forum.
OctoPrint Plugin Repository
Most recently added plugins
RSS Feed
-
Octoprint Nexus AI
29 Sep 2022 AGPLv3 303 16 15 Oct 2022 0.
 1.0 (02 Oct 2022)
 Nexus AI was oriniall developed for Sentry Pro to detect print failure. Fiberpunk make it free and accessible to as many 3D printer users as possible.
emailfreemonitoring
-
OctoPrint-HeaderAnnouncements
12 Sep 2022 MIT 32 1 17 Sep 2022 v0.0.1 (12 Sep 2022)
Add an announcement to the header of your octoprint install for use in a shared environment
alertnavbarnotificationnotificationsui
-
Karmen Connector
15 Aug 2022 MIT 126 2 30 Sep 2022 0.
 2.2 (15 Aug 2022)
 Securely integrate your OctoPrint with Karmen Cloud in just a few clicks and start managing your prints from anywhere around the globe.
alertcloud printingcontrolfreelive streamingmonitormonitoringnotificationsphoneplugin supportprint statusprogressremoteremote accessremote appremote cameraremote printingsafesecuresharingsnapshotsstatusstreamingtwitterwebcam
-
Prusa MMU
01 Aug 2022 AGPLv3 595 5 22 Aug 2022 2022.8.22 (22 Aug 2022)
This plugin adds Prusa MMU2 support to OctoPrint. The active filament will be displayed in the navbar and you will be prompted to select which filament to use when slicing in "MMU2S Single" mode.
 Other settings are available to name each tool and set defaults. This plugin only works for a Prusa printer with an MMU2.
 mmummu2prusa
-
OctoPrint-mkswifisdcard
01 Aug 2022 AGPLv3 67 1 16 Aug 2022 1.0.0 (01 Aug 2022)
Octoprint plugin for fast upload file to SD-card over MKS WiFi module
filefile uploadmkstransferuploadwifi
-
OctoPrint-Sdwire
24 Jul 2022 AGPLv3 35 3 03 Oct 2022 0.
 1.0 (23 Jul 2022)
 Fast file upload to SD card using sdwire hardware
filefile uploadsdwiretransferupload
-
OctoPrint-Autoprint
21 Jul 2022 AGPLv3 95 1 08 Oct 2022 0.9.0 (22 Jul 2022)
Tool to automatically start the printer and prints remotely
gpiolightspowerpsupsucontrolscheduletimer
-
OctoPrint-PersistTerminalCommandHistory
17 Jul 2022 AGPLv3 226 1 20 Jul 2022 release (17 Jul 2022)
Persist terminal command history across reloads
commandcommandshistorypersistpersistentreloadstorageterminal
-
Octoprint-PSUControl-ESPurna
21 Jun 2022 AGPLv3 14 1 22 Jun 2022 v0.
 1.3 (22 Jun 2022)
 Plugin to control devices with ESPurna firmware
controlespurnapowerpsupsucontrolpsucontrol subplugin
-
Creatbot Util
14 Jun 2022 AGPLv3 24 2 29 Aug 2022 1.0.0 (09 Jun 2022)
Various utility functions to make OctoPrint work better with Creatbot printers.
buildchambercommandcontrolcreabotheatedprinterserialstartstoptemperaturevolume
-
OctoPrint-Queue
06 Jun 2022 AGPLv3 123 8 06 Jun 2022 v1.
 0.0 (06 Jun 2022)
 A simple queue setup designed for use by staff at a public library.
queueui
-
PSU Control - Jeedom
24 May 2022 AGPLv3 25 1 21 May 2022 v1.0.0 (14 May 2022)
Adds Jeedom support to OctoPrint-PSUControl as a sub-plugin
controljeedompowerpsupsucontrolpsucontrol subplugin
-
OctoPrint-PreheatHelper
07 May 2022 AGPLv3 547 1 13 May 2022 0.
 1.0 (13 May 2022)
 A little helper to automate your printer pre-heating!
helperparserpreheat
-
ExtraFileInfo
05 May 2022 AGPLv3 775 8 11 Aug 2022 0.1.0 (30 Apr 2022)
Adds a file's slicer settings to its additional data column.
infoslicer settingsslicersettingsparser
-
OctoPrint-BedReady
29 Apr 2022 AGPLv3 399 7 23 Sep 2022 0.
 1.0 (10 Apr 2022)
 Plugin that uses the camera and opencv to determine if the bed matches a reference image indicating that the bed is clear and ready to start a print.
automationbedclearcollision avoidanceobject detectionopencvsafety
-
PSU Control - FRITZ!Box
28 Apr 2022 AGPLv3 47 0 27 Apr 2022 1.0.2 (27 Apr 2022)
Adds FRITZ!Dect Smart Plug support to OctoPrint-PSUControl as a sub-plugin
controlfritzfritz dectpowerpsupsucontrolpsucontrol subplugin
-
PSUControl - OPi.GPIO
27 Apr 2022 AGPLv3 19 1 27 Apr 2022 1.
 0.4 (27 Apr 2022)
 Adds OPi.GPIO to OctoPrint-PSUControl as a sub-plugin for OrangePi Zero and other SBCs supported by OPi.GPIO.
controlgpioorangepipowerpsupsucontrolpsucontrol subplugin
-
OctoPrint-Detector2
15 Apr 2022 AGPLv3 439 22 26 Jul 2022 0.1.0 (16 Apr 2022)
Detects errors directly in your browser and sends email with detected error
aialertsautomationdefect detectionemailfailurelocalmonitoringnotifications
-
PSU Control - Tapo
14 Apr 2022 AGPLv3 237 3 30 Apr 2022 0.
 1.0 (12 Apr 2022)
 Adds Tapo Smart Plug support to OctoPrint-PSUControl as a sub-plugin
controlpowerpsupsucontrolpsucontrol subplugintapo
-
OctoPrint-CrealityCloud
14 Apr 2022 AGPLv3 659 15 26 Jul 2022 0.5.5 (10 Feb 2022)
A OctoPrint-Plugin that connect the Octoprint to Creality Could
file managementmodels downloadonline sliceremote controlremote webcam
More...
Search
Help
You are a user of OctoPrint and want to to know how to install any of the plugins listed here? Take a look at this guide.
You are a plugin author and want to register your new plugin to be listed here? Take a look at this guide.
You are interested in writing your own plugin and don't know how to start? Take a look at the plugin tutorial.
Something is wrong with this repository? If something appears to be broken, please report it or send a PR to fix it =). Thanks!
Stats
There are currently 364 plugins listed in this repository of which 304 (83%) are marked as Python 3 compatible.
12 plugins have been marked as abandoned and are looking for a new maintainer.
All in all 265 plugin authors have spent time and effort to bring you these plugins.
Top 10 of the month
- Bed Level Visualizer
over 35.51k instances - OctoPrint-PrintTimeGenius
over 33.37k instances - OctoEverywhere - Free Remote Monitoring, Notifications, And Control!
over 26.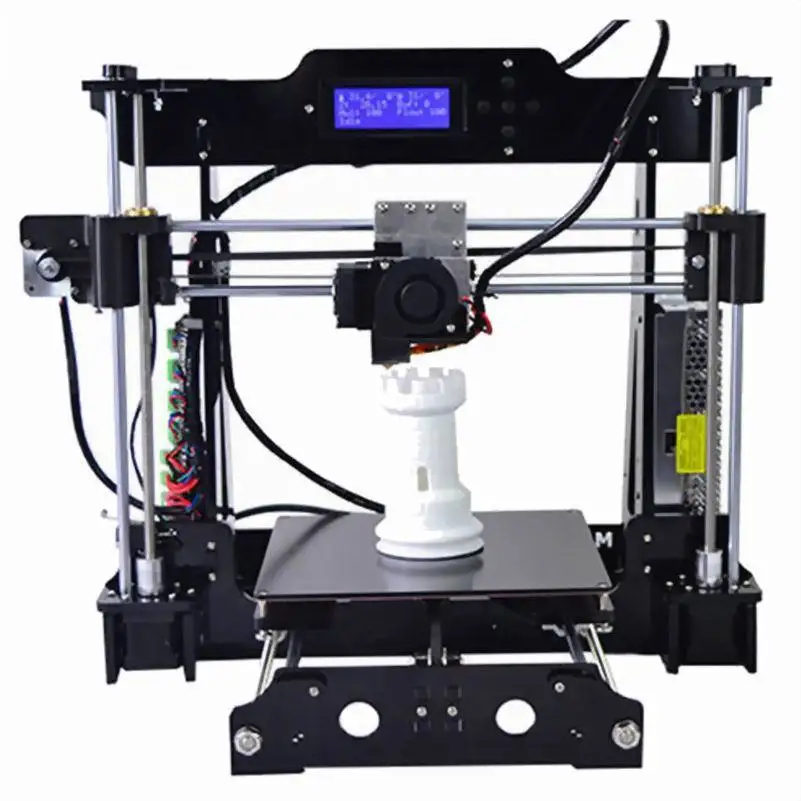 73k instances
 - Octolapse
over 25.53k instances - Firmware Updater
over 21.91k instances - DisplayLayerProgress
over 21.01k instances - Themeify
over 20.67k instances - OctoPrint-Dashboard
over 19.79k instances - Creality 2x temperature reporting fix
over 16.62k instances - Navbar Temp
over 14.9k instances
Trending this week
- Bed Level Visualizer
over 858 new installs - OctoEverywhere - Free Remote Monitoring, Notifications, And Control!
over 676 new installs - Octolapse
over 583 new installs - OctoPrint-PrintTimeGenius
over 582 new installs - OctoPrint-Dashboard
over 495 new installs
Based on anonymous usage data.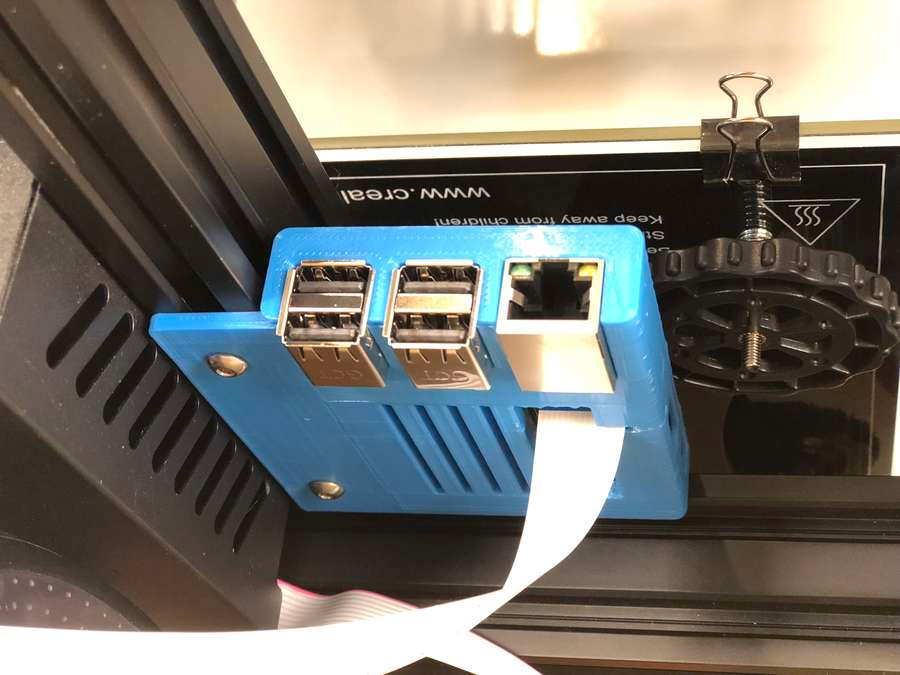
Smart printer. Improving Octoprint / Sudo Null IT News
While developing an open project for a 4-extruder Z-Bolt printer, we faced the problem of choosing a screen to control the printer. Of the available screens, only the Duet Wifi solution can control more than 2 extruders. The solution, to put it mildly, is not a budget one, and the interface is not for everybody. So we decided to look for an alternative with preference and courtesans. This story is about him…
On the Internet, there is a lot of information about the use of Octoprint. A little more than half a year ago, we became users of this solution, immediately appreciating its advantages. The ability to manage the printer through a web face is really hard to overestimate. Octoprint has a lot of plugins, and the main thing for us is that Octoprint handles well with more than 2 extruders. But there was one more issue to solve.
Many fans of Octoprint confidently assert that they no longer need the screen from the word “absolutely”, that this is an absolutely superfluous part of the printer, which only interferes with them.
However, I am convinced that there is another part of OctoPrint users. Everyone has their own habits and requirements for everyday use of a 3D printer, and there are operations that are more convenient to perform with a screen:
- Filament replacement
- Table level calibration
- Start printing a file that has already been printed before
- Printer preheating on
- Ability to see print status
- …
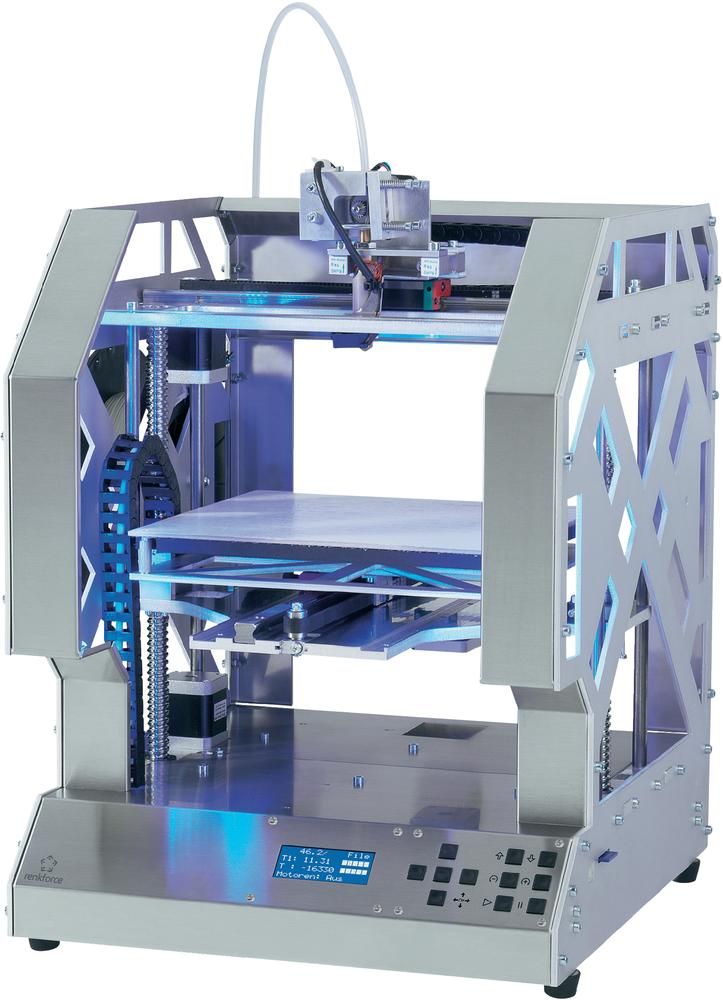
Now the default screen in Z-Bolt printers is MKS TFT. You can put TFT24, TFT32 or TFT35. These are good screens, but they can't integrate with Octoprint. If Octoprint has started printing, the screen will not know anything about it. They use different file repositories, etc. And the MKS TFT screens don't want to work with 3 or more heads 3D printers.
My goal was to find/make/configure a screen for Octoprint capable of controlling more than 2 extruders.
Googling a bit, I came across the TouchUI plugin.
The first impression was: this is the solution!!!
I immediately installed the plugin and opened Octoprint from my phone. The TouchUI interface was dumb :/. Sometimes the buttons were pressed normally, sometimes they slowed down, and sometimes they didn’t press at all the first time. From the connected screen, TouchUI behaved just as badly as from the phone.
Another solution was found in parallel.
The description was encouraging, unlike TouchUI, this is an independent application that runs without a browser, which means it requires much less computing resources.
Installation and configuration did not cause problems. The interface really worked much more predictably and more responsively.
But even here, not everything turned out smoothly. The application regularly crashed when printing started. There was an issue on github for this error, created almost a year ago and actively discussed, but not closed.
The main problem turned out to be that the author of the application, apparently, has lost interest in it and is no longer developing it at the moment.
Since, in my opinion, the application is written quite well and has potential, it was decided to make a “hard-fork” and take on the project thoroughly.
Here's what we got:
- Optimal screens for project were selected
- Made “hard-fork” from Octoprint-TFT
- Revised view of printer hardware and software architecture
- Created own theme for Octoprint interface
But first things first…
Screen selections
We started with the TFT 3.5 screen, which, to put it mildly, did not stand up to scrutiny. No viewing angles, the picture is faded. Therefore, it was decided to choose a better solution.
The main criteria were:
- IPS matrix
- size 4 - 5"
- capacitive screen (preferred)
- reasonable price
As a result, we settled on two options:
1. The option is simpler. 4'' IPS Resistive Touchscreen
2. Richer option. 4.3” IPS Capacitive Touchscreen
Both screens have a resolution of 800x400. Both have a great picture, color reproduction and viewing angle. Their main difference is the capacitive touchscreen. You get used to it (like everything good) very quickly and it is much more pleasant to use it than resistive ones. However, a resistive touchscreen is also viable.
It's Hard-Fork, baby!
The application has been seriously improved. And almost ceased to resemble his parent. Therefore (and also because the creator of Octoprint-TFT officially froze the development of his offspring), it was decided to make a hard-fork and call the new project Octoscreen.
- First of all, the screen freeze problem that plagued Octoprint-TFT was completely eliminated.
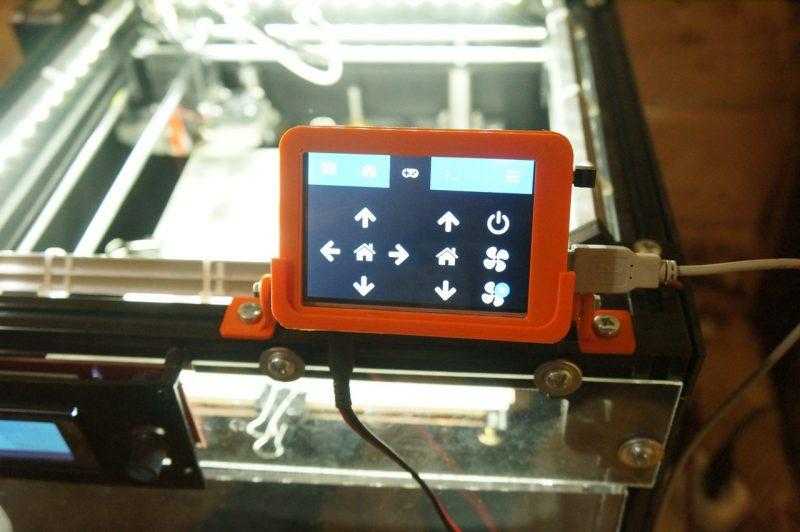
- - Significantly changed design and layout:
- The screen has learned to understand printer states (waiting/printing):
- Added the function of fast preheating / heating off by pressing the icon of the extruder or table, while the screen highlights the status:
- Manual table calibration screen added:
- Item “Menu” moved to a separate screen:
- Added WiFi management function:
- The application itself now supports up to 4 extruders, which is exactly what it was created for:
You can download the application and find a brief installation guide from our GitHub.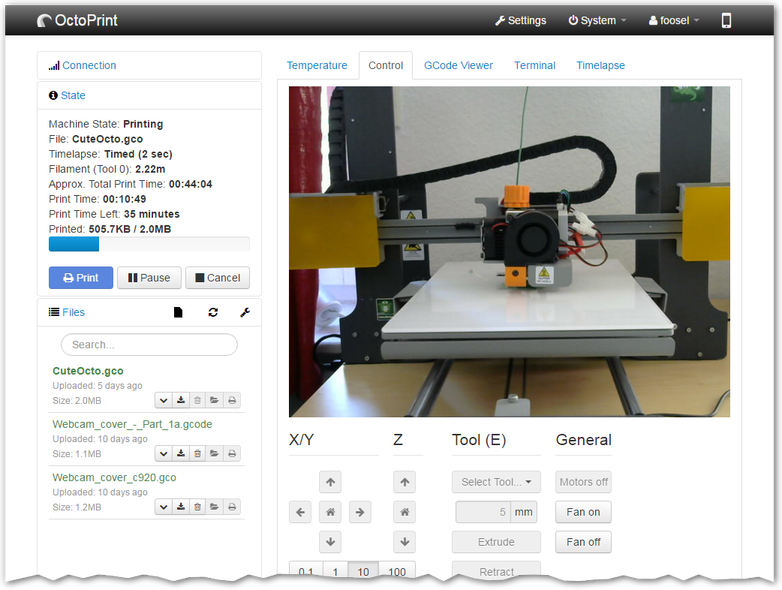
There is also a detailed instruction for screen 3.5, for which special thanks to our colleague Denis (@negativ72rus).
Rethinking printer hardware architecture or changing shoes on the go
Initially, we planned to use Marlin in our multi-extruder printer, but in the end the choice fell on Klipper. There are several reasons:
1. One of the main reasons for us as developers is its flexibility. Marlin and his "pasta" code make it a real challenge to make improvements to it, and even more so to maintain them further.
Klipper is the opposite of Marlin in this respect. Firstly, all Klipper configuration is taken out of the program code. The code itself is well structured. But most importantly, Klipper is modular!!! You can add your own logic to the firmware without making changes to its core, and thus greatly simplify the further support of your code.
2. All firmware settings can be done directly through the OctoPrint web interface. And at the same time, the tuning capabilities are much more powerful than those of Marlin or Smootheiware.
3. How can we not say about beats, which everyone is chasing lately)). The Klipper architecture itself assumes that the computational load falls on the Raspberry PI. The function of the MKS Gen L control board (in the case of Z-Bolt printers) remains to transmit signals to/from peripherals (motors, sensors, heaters, controls).
But the Raspberry Pi 3 Model B+ is equipped with a 64-bit, 4-core Broadcom BCM2837B0 A53 1.4GHz chip.
Essentially Octoprint + Klipper running on Raspberry Pi + the same MKS Gen L -
an order of magnitude more functional and progressive solution than Marlin running on some 32-bit chip.
Configuration files for Klipper for Z-Bolt printers can also be found here.
A small bonus in the end!
We also made our own theme for the Octoprint interface:
The header can be customized with a native color picker in the Appearance section:
You can find instructions on how to install the theme on our GitHub.
Write in the comments what features of the screen you consider the most useful and necessary to be added.
All the best, positive and good blowing of overhanging elements!
what is it and how to install it
3DPrintStory 3D printing process Connecting OctoPrint and Cura: what is it and how to install it
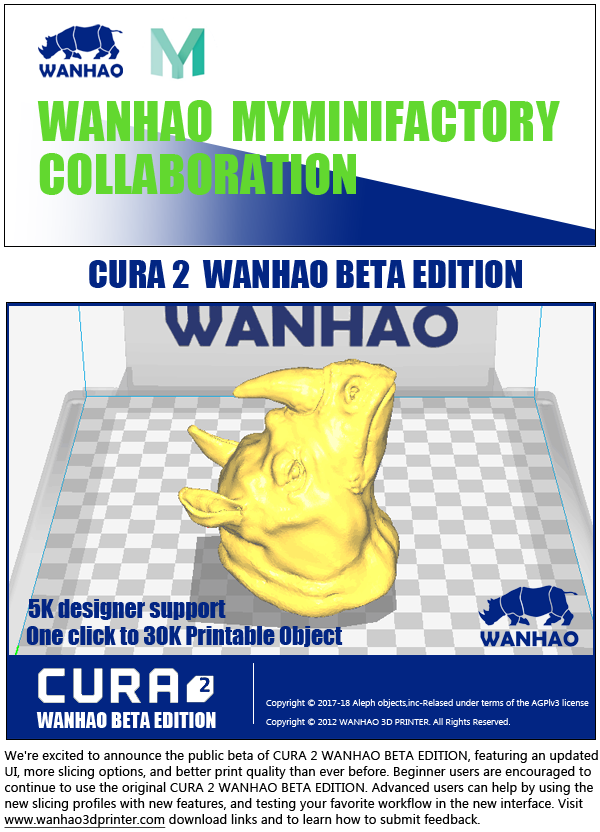
Cura is a slicer used to convert 3D model files (STL, OBJ, etc.) into G-code which instructs your 3D printer to properly print the 3D model. Cura, developed by Ultimaker, is one of the most popular free 3D printing slicing software today.
OctoPrint is a free program that allows you to remotely run a 3D printer by connecting it to a controller board (such as Raspberry Pi or Arduino).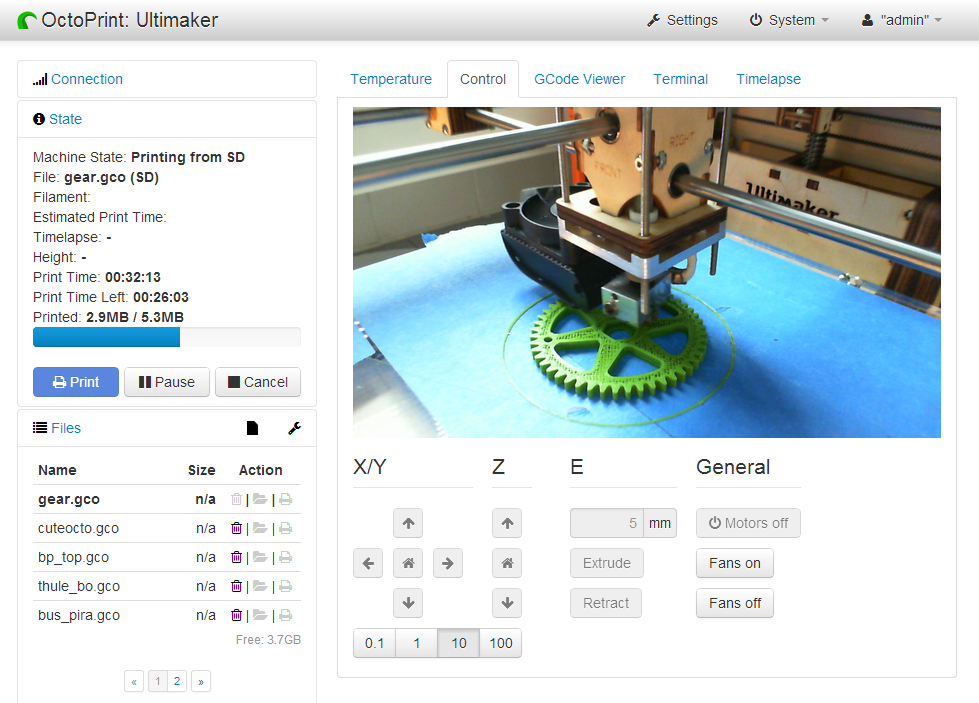 Most importantly, you can monitor and control the printing process from a web browser without being near the printer.
Optimize your 3D printing
Previously, to remotely 3D print a file using OctoPrint, you first had to upload and slice the file in Cura, then upload it to the OctoPrint user interface, and finally send it to your 3D printer for printing. However, with the introduction of the Cura plugin in 2018, this process can be shortened, saving you time and computer space.
In this article, we'll walk you through how to install and configure the OctoPrint Connection plug-in with a simple three-step guide. We'll also provide some tips for troubleshooting some common setup and 3D printing issues.
Before you begin
Setting up the OctoPrint Connection plug-in on Cura is a fairly simple process. Before starting, make sure OctoPrint is already connected to your 3D printer. Instructions for installing and connecting OctoPrint using Raspberry Pi.
Please note that if you have a version of Cura prior to 3.2, you do not need to install this plugin and can skip directly to the second step. However, not everyone has the latest version, so installation instructions are also included as the first step.
Installing the plugin
In this first step, you will find and install the OctoPrint Connection plugin into your Cura software. To do this, follow these steps:
- Open the Cura app and select "Marketplace" in the top right corner. A list of plugins will appear.
- If you don't see it right away, look for "OctoPrint Connection".
- Select the "OctoPrint Connection" plugin and click "Add to Cura" as shown above.
- Restart Cura.
Get the API key
Now that you have installed the plugin, you need to find and copy the API key for your OctoPrint server, which can be found in the OctoPrint user interface. If you don't know your OctoPrint UI web address, it's just the IP address of the OctoPrint host.