Home 3d body scanner
Best 3D body scanners in 2022
What is a 3D body scanner?
3D body scanners are designed to capture your full body in 3D. The result is a 3D model (also called 3D avatar) of your exact body shape with accurate data such as body measurements, posture analysis, textures, …
Originally developed for the fashion industry as fast and accurate 3D measurement solutions, 3D body scanners are now used in various other fields such as healthcare, 3D figurines and 3D photos, fitness, and entertainment.
We’ve selected some of the best body 3D scanners available and listed them here in this guide. Our selection focuses on full-body 3D scanning systems that are exclusively designed for 3D body scanning. We list a few handheld 3D scanner options further down the article.
A Texel 3D body scanner being used to attract customers to an event. Source: TexelBest 3D body scanners 2022: our selection
The table below recaps our selection of some of the best full-body 3D scanning options. The goal is to provide a quick, visual overview of the market; there are of course numerous other factors to take into account (software, customer service, …) to get the full picture for each solution and eventually make the right choice.
| Brand | Product | Country | Price Approximate starting prices based on supplier-provided information and public data. Prices may vary by region, over time and do not include additional products or services (taxes, shipping, accessories, training, installation, …). | |
|---|---|---|---|---|
| Fit3D | Proscanner | United States | $ 10,00010 000 €8,896 £1,477,010 ¥ | Quote |
| Size Stream | SS20 3D Body Scanner | United States | $ 15,00015 000 €13,344 £2,215,515 ¥ | Quote |
| TG3D Studio | Scanatic™ 360 Body Scanner | Taiwan | $ 15,00015 000 €13,344 £2,215,515 ¥ | Quote |
| Texel | Portal MX | United Kingdom | $ 34,90030 000 €31,047 £5,154,765 ¥ | Quote |
| Texel | Portal BX | United Kingdom | $ 45,65040 000 €40,610 £6,742,551 ¥ | Quote |
| botspot | BOTSCAN NEO | Germany | $ 200,000179 000 €177,920 £29,540,200 ¥ | Quote |
Expand to see more specs
The products in the table are ranked by price (low to high).
| Brand | Product | Technology | Max resolution | Country | Price Approximate starting prices based on supplier-provided information and public data. Prices may vary by region, over time and do not include additional products or services (taxes, shipping, accessories, training, installation, …). | |
|---|---|---|---|---|---|---|
| Fit3D | Proscanner | Structured light | – | United States | $ 10,00010 000 €8,896 £1,477,010 ¥ | Get a quote |
| Size Stream | SS20 3D Body Scanner | Photogrammetry | – | United States | $ 15,00015 000 €13,344 £2,215,515 ¥ | Get a quote |
| TG3D Studio | Scanatic™ 360 Body Scanner | Laser triangulation | – | Taiwan | $ 15,00015 000 €13,344 £2,215,515 ¥ | Get a quote |
| Texel | Portal MX | Structured light | 1 mm0.039 in | United Kingdom | $ 34,90030 000 €31,047 £5,154,765 ¥ | Get a quote |
| Texel | Portal BX | Structured light | 1 mm0. 039 in 039 in | United Kingdom | $ 45,65040 000 €40,610 £6,742,551 ¥ | Get a quote |
| botspot | BOTSCAN NEO | Photogrammetry | 0.1 mm0.003937 in | Germany | $ 200,000179 000 €177,920 £29,540,200 ¥ | Get a quote |
Overview of the best full body 3D scanners
In this section, we give some more context and information about each 3D scanner from our selection.
The Fit3D Proscanner is a 3D body scanner for fitness and healthcare applications. It’s designed to provide a comprehensive wellness assessment based on a detailed 3D body capture.
This body scanning system is mainly used in gyms, health clubs, and fitness studios. The Fit3D Proscanner is able to accurately 3D scan a person in 40 seconds and to provide a posture analysis as well as a body shape wellness score.
Contact manufacturer Get a quote Add to comparison
The Size Stream SS20 3D body scanner is a versatile full body measurement system, designed to capture thousands of data points to create a 3D model of a person’s body.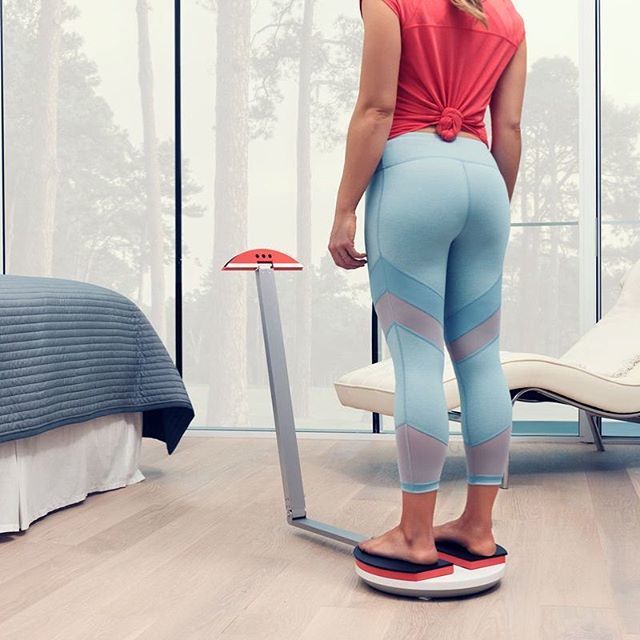 This 3D body scanning booth is primarily designed for 3D measurement to create custom clothing.
The Size Stream body scanner can also be used for 3D printing, measurement tracking, size surveys, and healthcare and fitness applications.
Contact manufacturer Get a quote Add to comparison
The Scanatic 360 Body Scanner by TG3D is designed for the fashion industry. It is lightweight and easy to move, and can be fully integrated within a fitting room. Scans take 3 seconds, and measurement points are available in 30 seconds.
TG3D develops software and applications that are tailored for the clothing industry.
Contact manufacturer Get a quote Add to comparison
The Texel MX can be used for the entertainment and advertising industry, for medical applications, and even as a digital fitting room.
It takes the Texel MX 30 seconds to perform a full 3D body scan, and just 60 seconds to create a digital 3D model with automatic rigging. As with the BX version, results can be directly used for 3D printing or 3D animation.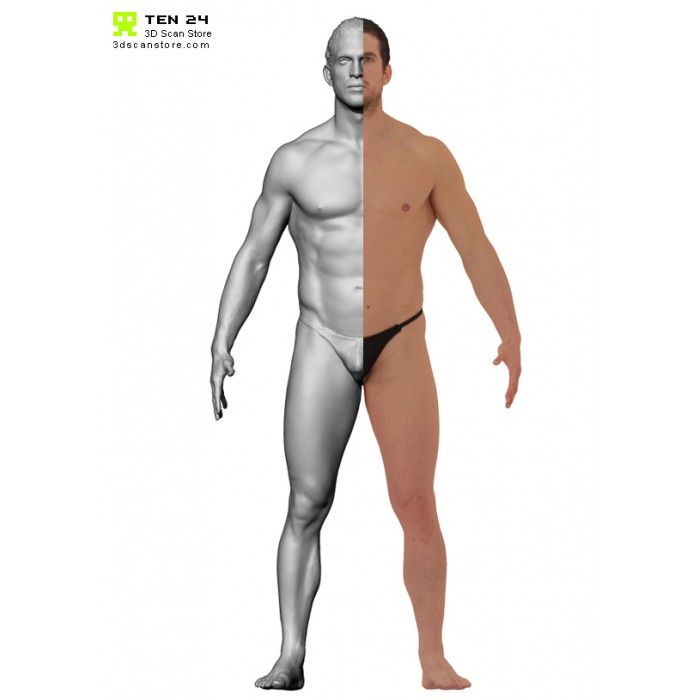
Contact manufacturer Get a quote Add to comparison
Texel (or Texel Graphics) is one of the leading manufacturers of 3D body scanners. Their solutions are suitable for a wide range of applications and can be customized for specific events, stores, or environments.
The BX is able to scan up to 40 people per hour and comes with a registration tablet for users to input their names and email address. 3D avatars are directly sent to their inbox and can be shared via social media.
Contact manufacturer Get a quote Add to comparison
The botscan NEO by German manufacturer botspot features a modular design and is customizable. This system uses a combination of structured light and photogrammetry to provide accurate and colored meshes.
For an easy user experience, the NEO comes with an intuitive mobile app. Its maximum scanning volume capacity is 1000 x 1000 x 2000mm.
Contact manufacturer Get a quote Add to comparison
Handheld 3D body scanning options
Some handheld color 3D scanners are suitable for 3D scanning faces, hands, arms, … They can also perform full-body scans, though the process takes a while and requires the customer or patient to stay still during that time. The portable color 3D scanners listed below can therefore be good options to scan specific body parts (e.g. head and chest for 3D avatars, an arm or leg for prosthetics) or for infrequent full-body scans.
The iReal 2E is a versatile 3D scanning option in the entry-level price range. It uses VCEL structured light to capture medium- to large-sized objects. Like infrared light, VCEL light is invisible to the human eye and is therefore also particularly adapted to face and body 3D scanning.
Scantech has reported diverse use cases for the iReal 2E 3D scanner, namely in forensic investigations, healthcare, and even culture preservation. In the latter, Scantech’s customer 3D scanned a woman performing different Tai Chi movements– an interesting and uncommon application!
Contact manufacturer Get a quote Add to comparison
The EinScan H was launched alongside the EinScan HX in September 2020. It uses a combination of structured LED light and infrared light, with a built-in color camera for texture acquisition.
This 3D scanner can therefore serve a range of applications involving color capture, with uses in retail, art preservation, healthcare, and more. Furthermore, its infrared light is eye-safe and won’t blind users during a face or body scan.
Shining 3D’s versatile EinScan H is a great entry-level deal for most basic use cases, and its software is getting more intuitive by the update.
Contact manufacturer Get a quote Add to comparison
3D body scanning applications
Fitness and personal health
Fitness body scanners
Body scanners can be used in fitness clubs, gyms, and healthcare facilities. Fitness body scanners allow you to track the evolution of a person’s body through various 3D measurements such as body shape and posture.
Visualizing these evolutions on a 3D avatar is a strong motivational boost that can help increase gym members’ engagement and improve patient recovery processes.
Home body scanners
These 3D body scanners are consumer appliances made to monitor personal health and body shape as well as posture evolution, among other data points. Homebody scanners usually have a 360° rotating platform on which the user stands.
These 3D body scanners typically work with a smartphone app acting as a personal trainer, so users can easily track all their data and reach their fitness goals.
Fashion and apparel: made-to-measure clothing
The fashion and apparel industry was among the first to embrace 3D body scanning for several applications:
- Fast and accurate 3D measurements
- Made-to-measure clothing (custom clothing)
- Highly personalized recommendations
- Measurement surveys and anthropometric characterization
- Virtual fitting rooms
Users can obtain their own 3D avatar on their smartphone and use it to see how clothes fit without physically trying them on.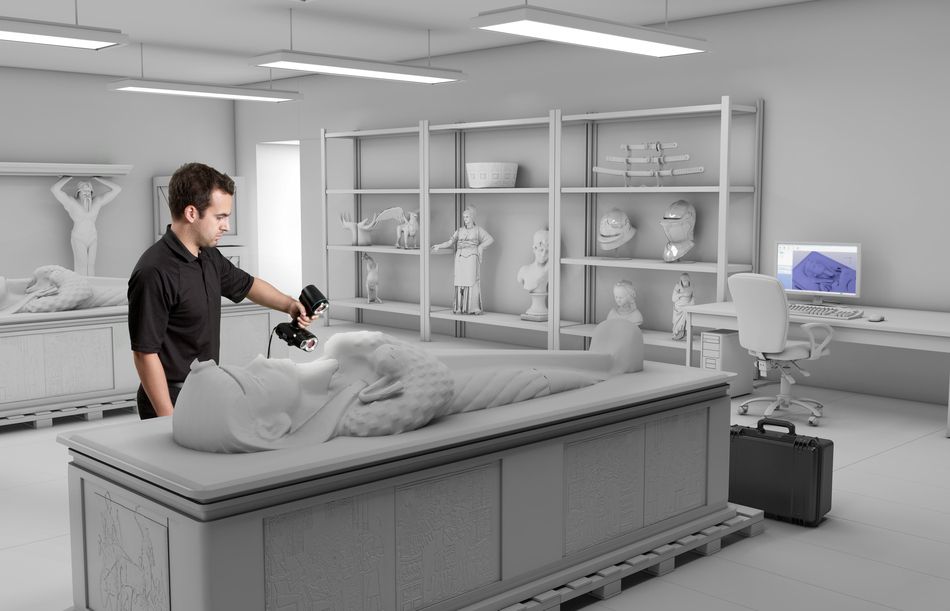
This is as useful for luxury, tailored clothing as it is for retail and e-commerce.
3D printed figurines and 3D photo
Also known as 3D selfies or 3D portraits, these miniature figurines of people are typically 3D printed from a 3D body scan. If you want to learn more about this application, you can visit our article dedicated to 3D printed figurines.
Here are a few 3D body scanner options that are designed for 3D figurines:
- Artec Shapify Booth
- Doob Dooblicator
- KODAK Full Body 3D Scanner
- Picanova 3D.me
- Pics3D Cobra
- Scanologics ScanLounge v2.5
- Twindom Twinstant Mobile
Healthcare
Healthcare and medical sectors are filled with opportunities for 3D body scanning. From monitoring body shape and posture during pregnancy to making custom 3D printed prosthetics and more, body scanners are increasingly used for use in the medical field.
Body scanning can also be used to accurately monitor skin recovery in the case of burns or to detect skin diseases at an early stage, thanks to specific 3D imaging systems.
How do 3D body scanners work?
To obtain a full body scan, the person holds a pose for a few seconds, which is the time it takes for the 3D scanner to capture images from all angles. The 3D software then reconstructs the final 3D model of the body by “stitching” all of the images together, generating a highly detailed 3D model. Models can have colors and textures depending on the type of body scanner that’s used.
During the 3D capture process, the subject can either stand on a rotating turntable facing a fixed 3D body scanner, or stand still while the sensors located all around the body scanning booth capture images from all angles.
Closed 3D body scanning booth (or body scanning cabin)
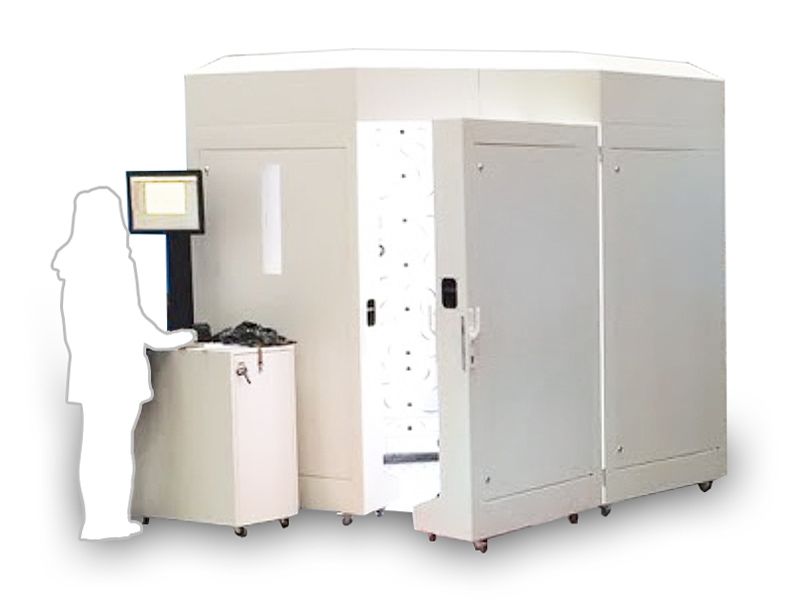
A body scanning booth is a closed cabin that is rigged with cameras or 3D scanners. These full-body 3D scanners look a bit like regular fitting rooms.
Full body scanner with rotating platform or turntable
To use these body scanners, the person stands on a rotating table facing a 3D body scanner, typically a vertical unit.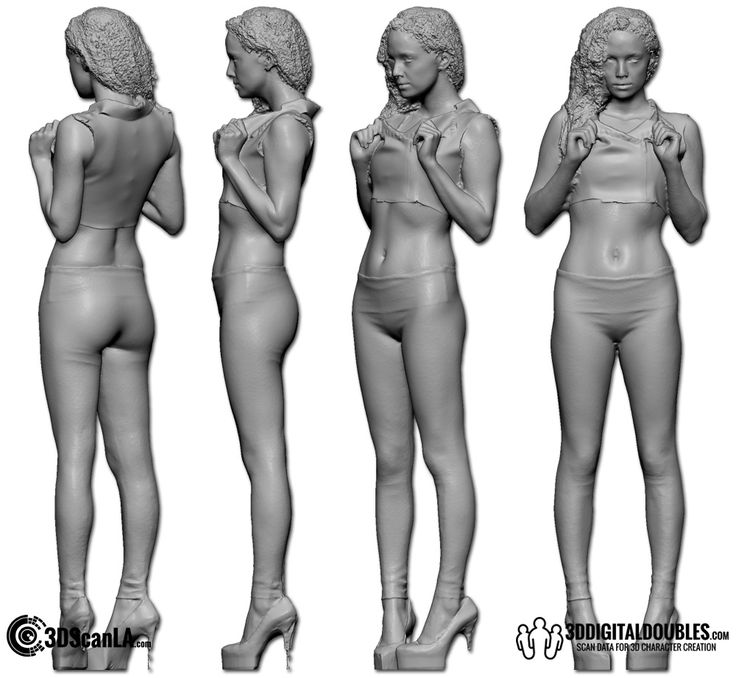 During the scanning process, the turntable rotates 360°, allowing the subject to be captured from all angles. The 3D model is generated once the full rotation is complete.
Body Scanner for Fitness — Fit 3D Body Scanners
Scroll
Beautiful Hardware
Attract new clients to your club with this machine.
· Self-service* scan capability
(great for customers concerned about COVID)
· Handles for accuracy & safety
· Non-invasive
· Integrated scale
· Setup in 15-minutes
Accurate & Trusted Reporting
Members LOVE seeing themselves in 3D. Results emailed to clients within minutes!
· Body fat, lean mass, & posture reports.
· Simple reports online of via our app.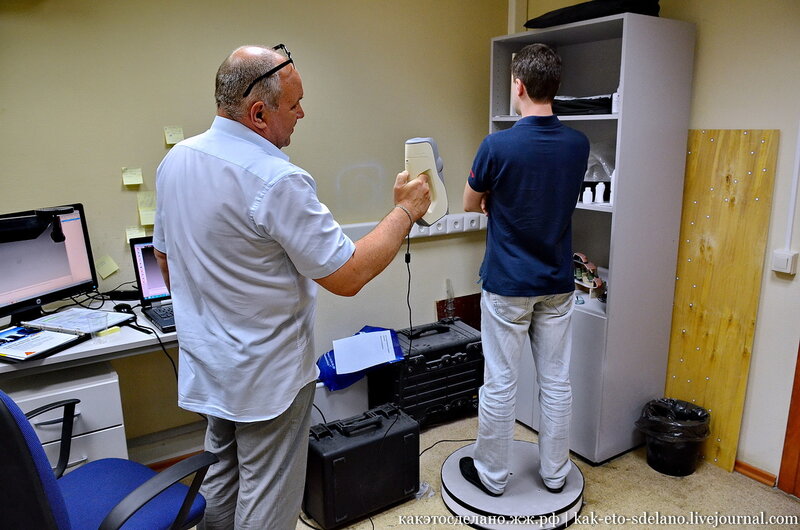
· Full body circumference measurements.
· Stop the hassle of paper printouts & empty ink cartridges.
We have the ONLY official partnership with Dexa to provide the most accurate body fat algorithm.
Watch a Video Overview
Client App
Clients expect an app - we have one.
Just tell them to “download the Fit3D app.”
Our app allows for express account set up & access to their scan data 24/7.
Coach App
(Admin Dashboard)
More than just a report.
Have access to all your clients reports from anywhere, anytime. Set permissions for your staff as well.
Including:
· Scan Totals
· New Clients
· Trainer Conversion Rates
More consistent than BIA Assessments
FIT3D | Bioimpedance | |
|---|---|---|
| Technology | Cameras | Impediance |
| Circumference measurements | ✔ | |
| 3D Avatars | ✔ | |
| Self-service capabilities | ✔ | |
| Requires special dieting | ✔ | |
| Speed | ✔ | ✔ |
| Track changes over time | ✔ | ✔ |
BIA tests are not “true body scans” – they measure hydration.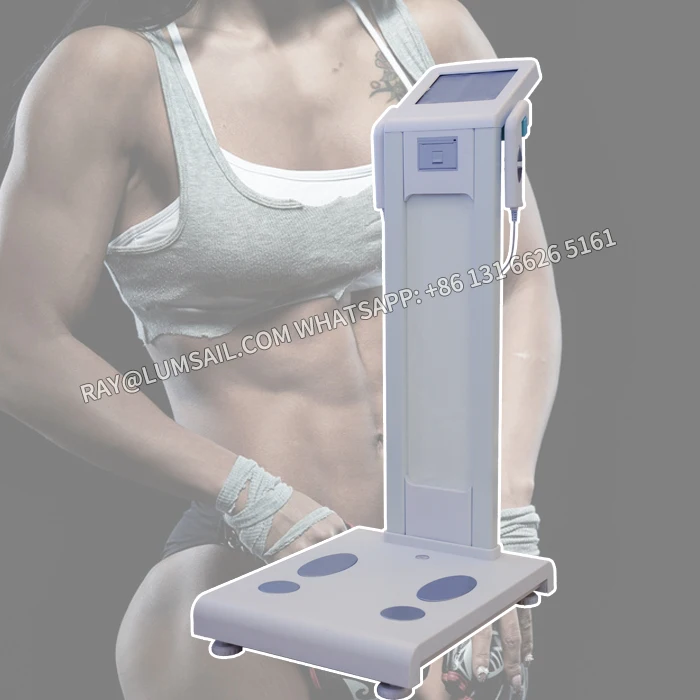 The methodology of BIA has a huge amount of inconsistency due to one’s hydration which can change from visit to visit. You simply can’t control when your members drink water or eat on a regular basis.
Additionally, most brands choose 3d body scans over BIA due to the imaging. Showing both data & body imaging is a powerful client experience.
Read about how Fit3D outperformed BIA in an internal test.
More accurate than ‘other’ 3D Body Scanners| FIT3D | Other Professional | |
|---|---|---|
| Handles for Accuracy | ✔ | |
| Self-Service Capability | ✔ | |
| Coach App | ✔ | |
| 3D Avatars | ✔ | ✔ |
| 1-Minute Scan Time | ✔ | ✔ |
| Circumference Measurements | ✔ | ✔ |
| Official Dexa Partnership | ✔ | |
| Privacy Controls | ✔ | |
| Cloud-based solution | ✔ | |
| No monthly Fees | ✔ |
In the fitness space, there are a few other scanners in the market.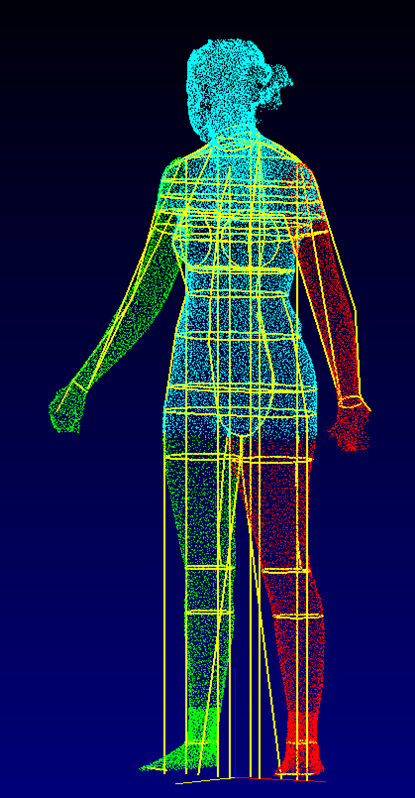 Brand’s like Crunch & F45 choose us for a few reasons. Accuracy being the main one. The handles on our machine help with accurate capture, and our official partnership with Dexa continually updates our algorithms for the most accurate body fat predictions.
The second big reason is that we have better software. We have a web portal that allows for access & control of your data. This allows owners & coaches to better work with their clients for a better overall member experience.
schedule a Demo
Get Your Quote
We use the data to show the achievements of our members in our online marketing and improved new client recruitment by 30% this quarter.— Randy, Revolutionize Fitness, NJ
View this post on Instagram
A post shared by F45 Training Diamond Bar (@f45_training_diamondbar) on
View this post on Instagram
A post shared by Fit3d New Zealand (@fit3d_newzealand) on
View this post on Instagram
A post shared by Fit3D (@fit3d) on
View this post on Instagram
A post shared by 🔶Nº1 Nutrición y Salud®🔶 (@n1nutricionysalud) on
View this post on Instagram
A post shared by F45 Training Deerwood (@f45_training_deerwood) on
View this post on Instagram
A post shared by Fit3D (@fit3d) on
how to quickly create prostheses and other unique products
Reverse engineering
Implementation stories
Medicine
Author: Aleksey Chekhovich
Author: Aleksey Chekhovich
Video: Real-time 3D Face Scan | Order a free test scan | 3D scanner helps victims | 3D scanning of the human body in great detail
Creating prostheses using 3D technologies: the era of new possibilities
As technology improves and becomes more accessible, there are new opportunities to solve the most complex medical problems.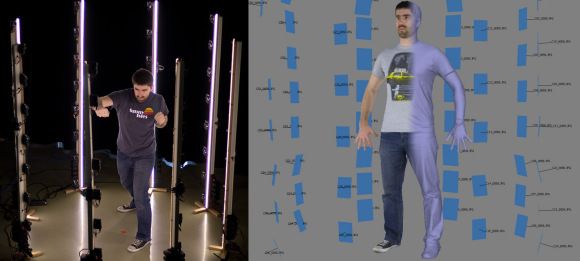 A team of researchers from the company Chabloz Orthopedie (France) managed to create a unique and truly revolutionary prosthesis.
Chabloz Orthopédie worked with Denis Gauthier, who had his forearm amputated. First, the experts performed a 3D scan of the patient's healthy arm using a peel 3d scanner to obtain its mirror image. This was done so that the designed product ideally repeated the proportions of a healthy limb. The rest of the amputated arm was also scanned to achieve a comfortable and ergonomic fit for the prosthesis.
Denis Gaultier with finished prosthesis
The team then proceeded to design a CAD model and develop a myoelectric prosthesis. Batteries, sensor cables and an artificial hand were integrated with the fabricated forearm. The prosthesis itself was designed in CAD and printed on a 3D printer. HP Jet Fusion technology was used to print various components of the forearm. After manufacturing, all parts were finished and painted.
The use of 3D scanning and 3D printing guarantees not only the correct fit of the fixture, but also gives complete freedom of movement. A new approach to prosthesis design allows professionals to develop solutions that are lightweight and highly customizable. Did you know that 3D printed parts are 20% lighter than their carbon or fiberglass counterparts? Such products also have the necessary rigidity, hardness and durability.
Later, this innovative prosthesis was combined with the BeBionic hand, one of the most advanced bionic limbs, and a state-of-the-art myoelectric forearm and hand was custom-made. Gauthier's case is a great example of the innovative use of 3D measurement and 3D printing technologies.
The video shows the complete process of digitizing the face and ears using the Creaform Go!SCAN 20 portable 3D scanner (its analogue in white peel 2 is now being produced).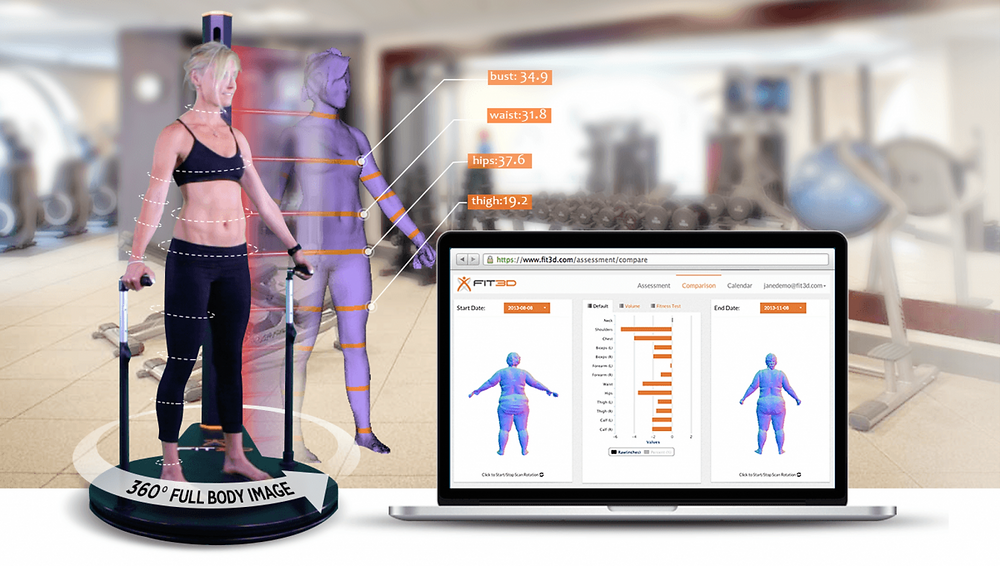 This solution provides a detailed digital model for use in areas such as plastic and reconstructive surgery, in particular, facial prosthetics.
Order a 3D test scan for free!
3D scanner helps victims
Unfortunately, tragedies inevitably occur around the world, and those affected need help. But, fortunately, there are organizations such as Médecins Sans Frontières (Doctors Without Borders) that do their best to provide them with the necessary treatment and care. Since 2016, the organization has been working tirelessly to solve the problem of providing prostheses to those in need around the world. The goal is to help amputees regain independence. The solutions that are used in this case are 3D technologies.
Upon completion of the medical examination of the patient, doctors determine his needs and expectations. Using the peel 3d scanner, with minimal discomfort for the victim, a high-precision digital model of the injured limb is created.![]() Compared to traditional impression making, 3D scanning is significantly faster and does not require contact. The result of the 3D scan is then transferred to the virtual sleeve and prosthesis design software. The developed component is made on a 3D printer and installed on the patient's limb. If necessary, during the installation process, the prosthesis and sleeve are finalized. After three months of use, the patient is invited to evaluate the comfort of the prosthesis.
Compared to traditional impression making, 3D scanning is significantly faster and does not require contact. The result of the 3D scan is then transferred to the virtual sleeve and prosthesis design software. The developed component is made on a 3D printer and installed on the patient's limb. If necessary, during the installation process, the prosthesis and sleeve are finalized. After three months of use, the patient is invited to evaluate the comfort of the prosthesis.
MSF has also developed a similar procedure to create compression masks for burn patients. Here, the use of non-contact technology also provides significant advantages over traditional plaster bandages, not only making the procedure less painful for the patient, but also speeding it up, allowing for a much larger number of people in needy countries to be treated.
Physiotherapist Pierre Moreau scans a patient with head burns. Then, based on the scan, a transparent pressure therapy mask is created / Photo: Elisa Oddone, Al Jazeera
Physiotherapist Pierre Moreau of Médecins Sans Frontières says: “The purpose of the 3D project is to help patients who need special rehabilitation care.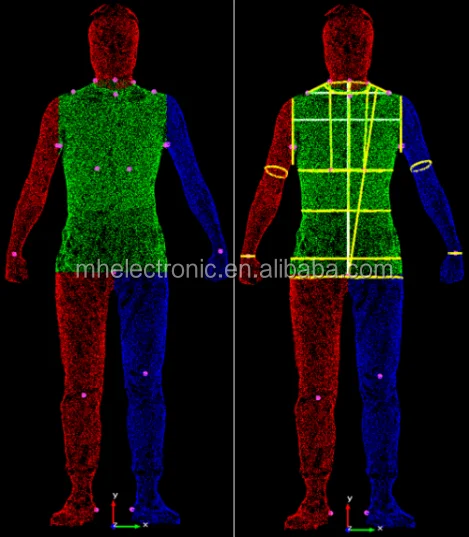 We launched this project in Amman in 2017, where we started providing upper limb amputees with 3D printed prostheses. But simply printing a prosthesis is not enough - we try to understand the needs of the victims, find individual solutions and keep them in their new position for as long as possible. We are assisted by an interdisciplinary team of rehabilitation workers and engineers. Then our specialists helped more than 30 patients in Jordan.
In 2018, we began to use the technology in another direction - for patients with burns, especially on the face and neck. Skin complications are a very serious problem for burn victims. Hypertrophic scars may form, and pressotherapy is needed. This requires transparent masks, but they are quite difficult to produce on site. So we started to explore 3D scanning, 3D printing and computer modeling in an attempt to help our team produce these devices for the patients who desperately need them. Now we provide more than 50 transparent facial orthoses.
When I think about this project, I always remember one story that demonstrates its development. In 2017 in Jordan, we had a small patient with burns and an amputation - she had no arm, and the condition of her remaining part was too complex to develop a prosthesis. Then we couldn't help her. But she came back the following year and we were finally able to make a prosthesis for her. For the first time, she was able to use her hand. This is one of our best memories of the project and a measure of its success.”
3D scanning of the human body in great detail
There are already more than 7.5 billion people on Earth, and although some are very similar to each other, there are no completely identical people. With such a variety of faces, it is not at all surprising that in the process of evolution the human brain became masterfully recognizing the smallest details that help to distinguish them. To get as close as possible to the original, the 3D scan of the statue must be extremely accurate and have a high geometric resolution.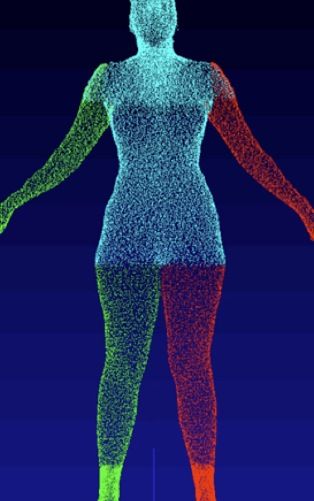
3D copies: 2013 Kinect scan (left figure) and peel 3d (right figure)
To improve the quality of scanning, the Canadian company USIMM has begun using peel 3d. The company specializes in the machining of non-metallic materials and is constantly involved in artistic projects. The main goal was to show the evolution of CNC machining by comparing the results of a 3D version of one employee made a few years ago with current results.
According to USIMM's Leia Lepage, scanning a living person is not an easy task: “Scanners are usually quite sensitive to the smallest movements, even if it's just breathing. Scanning a person is very difficult.” In order to accomplish such an extraordinary task, the USIMM team needed a 3D scanner that was immune to certain movements - but at the same time had high resolution and accuracy. Peel 3d possesses such qualities: a resolution of up to 0.5 mm and a volumetric accuracy of 0.5 mm/m.
The team scanned the same employee in the same pose as they did a few years ago. The resulting 3D scan data was sent to a five-axis CNC machine, and then a full-size replica of a person was created from polystyrene. The results were incredible.
The scan results obtained earlier by the Skanect device did not stand next to the peel 3d results. “The difference between the past and current results of the project is enormous,” commented Lea Lepage. The new copy turned out to be much more realistic and more accurately conveyed the original.
Materials provided by Creaform. Screensaver photo © Elisa Oddone, Al Jazeera
Article published on 12/08/2020, updated on 03/03/2022
Almost DIY 3d scanner for home / Sudo Null IT News scanning is out of the question.
But the main plus that I took out from the article is the David-3D scanning program, which really has a good manual in Russian and, importantly, buying a license is the last thing required, since the free version is limited only to saving the scan result.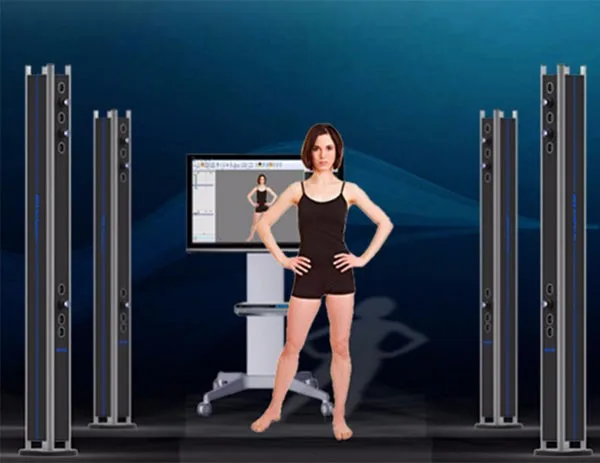 Everything else works in full, which means that it is quite possible to test the program, settings and your hardware as much as you like. And if you don’t need the result with high accuracy, then you can do without buying a license at all.
I needed accuracy, since the main thing I wanted to scan was miniatures from the Warhammer board game (so that later I could change them as I wanted and print them :)). The height of these "soldiers" is only 3 cm, but this does not prevent them from being very detailed.
If you do not need to shoot such small objects, then your equipment requirements will be lower, which means that it will be much easier to assemble a similar scanner for yourself.
The principle of the program, and accordingly scanning, is well described in the article, which was linked above (I think it is not necessary to duplicate this). It is advisable to read that article first, as this one will be in some way its logical continuation.
But let's start in order. What you need to try 3D scanning at home:
1 - projector.
2 - webcam.
That's all, the short list turned out surprisingly well. However, if you want to get very accurate and high-quality scans, then you will have to modify some things with pens. Of course, you can’t do without additional costs, but in the end it will still cost less than buying any of the commercially available 3D scanners, and the quality of the result can be obtained much better.
Now, in order and in detail.
PROJECTOR.
I, like the author of the previous article, started my first experiments on scanning with a laser pointer, but they immediately showed how inconvenient this method is. There are several disadvantages here at once:
- the impossibility of obtaining a beam with a sufficiently thin line. Moreover, when you turn the pointer, the distance from the lens to the object changes, which means the focus is lost.
- if you need to scan regularly, turn the laser pointer with sufficient accuracy and smoothness by hand is very difficult, and tiringly easy - the hands are not such a stable tool when it comes to a long time.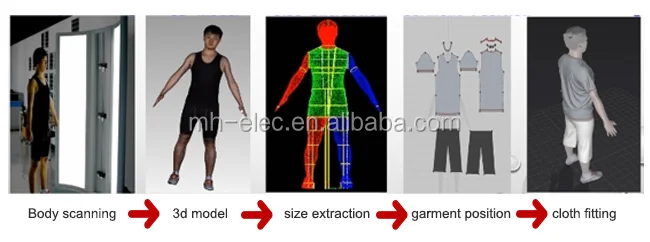
- you have to scan in the dark so that only the laser line is visible and nothing more.
And if the second drawback can still be dealt with by creating a special rotary mechanism (although this is already not such an easy task, in any case, this cannot be done in 5 minutes on the knee), then getting rid of the first drawback is more expensive.
When I realized all this, I decided to try scanning with a projector, for which I borrowed some simple model from a friend.
A small clarification should be made here - in the last article, the author mentioned the possibility of scanning using a projector, although the proposal was, in my opinion, very strange -
A projector with a powerful lamp will do, the light of which must be directed through a narrow slit to the object being scanned
This may have been the only option in earlier versions of the program, but in version 3 that I experimented with, the projector was used much better, because there's a feature called Structured Light Scanning (SLS).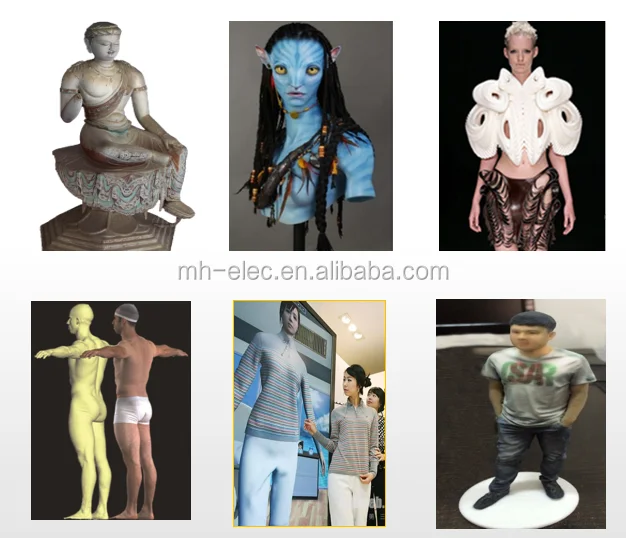 Unlike laser scanning, the projector immediately projects a grid of vertical and horizontal lines of various thicknesses onto the object, which reduces the scanning time by an order of magnitude and allows you to automatically shoot the color texture of the object. Well, with good focus, a 1 pixel wide line is much thinner than you can get from an inexpensive laser pointer.
Unfortunately, I didn’t take photos from those first experiments, and there wasn’t much to take pictures of - a projector on the table, a webcam next to it, all this looks in one direction :) However, even such a simple design showed that this option much better both in terms of scanning speed and quality. Then I decided to buy myself a projector for these purposes.
The criteria for choosing a projector were simple - higher resolution, lower price and dimensions :)
The choice settled on IconBit Tbright x100 - an ultra-compact DLP LED projector, 1080 resolution - at that time it seemed to me that you couldn’t imagine better, but as it turned out later, I was wrong, although working with it, I got a lot of interesting experience.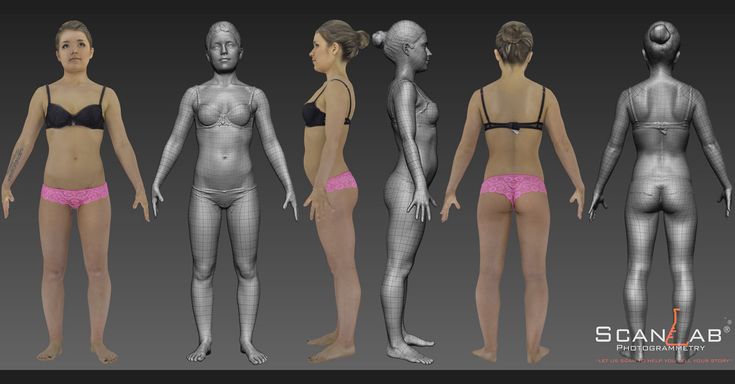
The first problem that occurs when scanning a small object with a projector is that for best results, the size of the projected grid should roughly match the size of the scanned object. This projector made it possible to obtain the smallest screen diagonal at the closest focus - about 22 cm. Agree that against such a background, a miniature 3 cm high is far from the concept of "approximately equal sizes." The answer was found on the official forum - people in such cases install camera lenses on the projector for macro photography. Given the small size of the projector lens, I opted for marumi lenses with a thread diameter of 34mm.
Using two of these kits, I managed to get a projector screen with a diagonal of only about 3 cm. Which turned out to be quite enough to make my first microscan -
This is a single scan, therefore there are “holes” on the model, torn edges and etc. By turning the coin and scanning from different angles, you can get several of these scans, which are subsequently combined into one object (the scanning program itself allows you to correctly combine different scans, stitch them together and save them as a single object).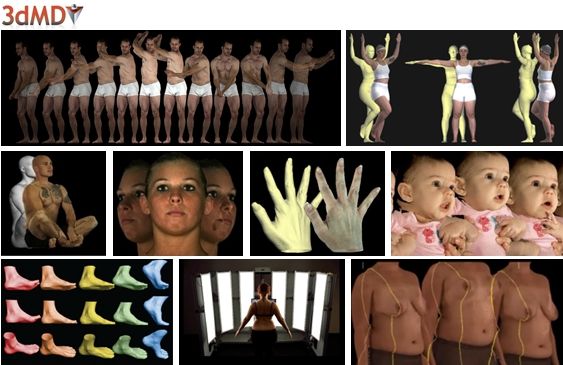 In the process of stitching, the shape of the object is also specified. But saving the results of such stitching is possible only after purchasing a license.
And now the moment has come for the first thing that is not necessary for scanning, but with it the process is much more convenient - this is a stand for a projector with a camera. The calibration process itself is needed not only for the program to recognize the parameters of the equipment - the software must also calculate the relative position of the camera and the projector. In the course of work, their change is not allowed (as well as changing the focus of the camera), which means that it is necessary to firmly fix all this, because the number of scans can be large even for one object.
David's main page shows a similar system - it is nothing complicated. Yes, and looking through the forum and seeing how different people organize it for themselves, I realized that nothing complicated is required here.
For these purposes, a stand was taken from a burned-out LCD monitor, and plexiglass from it, cut and glued like this design, as it looked in the first version , which allowed changing the screen diagonal and scanning objects of different sizes.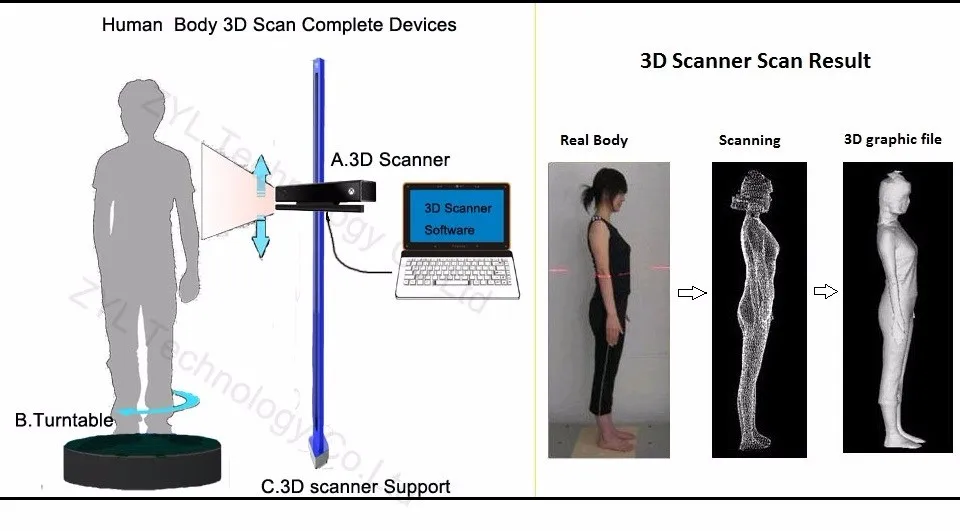
It should also be mentioned that scanning with a projector does not require the constant presence of calibration panels in the field of view. After the calibration is done, they can be removed. This allows, having calibrated the installation, to easily transfer it, move it, etc.
That is, you can use a large calibration template to calibrate at home on the walls, and then go outside with this stand and laptop and scan your car, for example. We took a smaller template, put a couple of lenses - and you can scan jewelry.
Recently, the company has released an improved scanning kit, here the stand looks much more serious and interesting -
2000 euros is not entirely justified, it is not difficult to assemble something like this yourself and much cheaper.
Let's go back to the projector. As it turned out, this projector had one major disadvantage for being used in a scanner, namely its native resolution (854*480). And everything would be fine if it produced the same output, but alas, the picture was converted to standard resolutions (such as 1024 * 768), and as a result, a line one pixel wide was somewhere brighter in different parts of the screen, where - something dimmer, somewhere already and somewhere wider .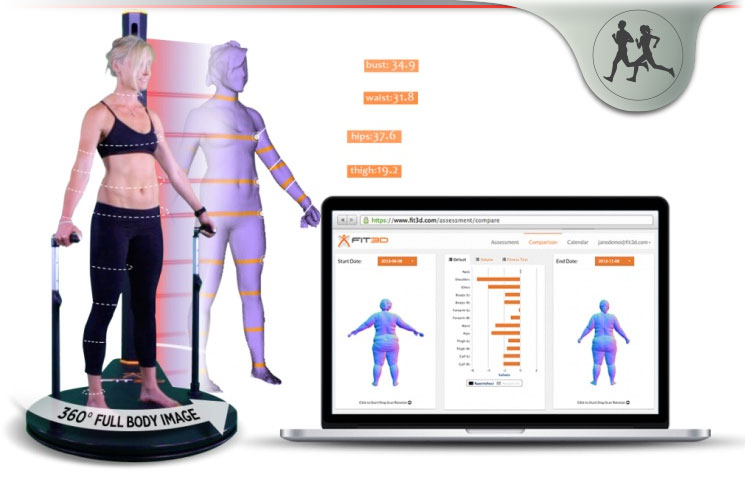 .. All this had a negative effect on the quality of scanning, expressed in the form of ripples and stripes on the resulting model.
By that time, I was already thinking about buying a projector for a stereolithographic 3D printer (http://geektimes.ru/post/245590/). After considering several options, I settled on the Acer P1500 model, because. it does not need any modifications to be used in a printer (this projector, without any lenses, is able to give a focused image on a screen of about 4 * 7 cm). So, for the scanner, it will fit perfectly. At the same time, the resolution of 1920 * 1080 is real. And so it happened, I still use this projector and am completely satisfied with the results.
CAMERA.
The criteria for choosing a camera were the same as when choosing a projector. Having gone shopping, I stopped at the Logitech C615. The scan of the coin was made from it, without any modifications. But when I tried to scan the figurine, I ran into a problem called "depth of field".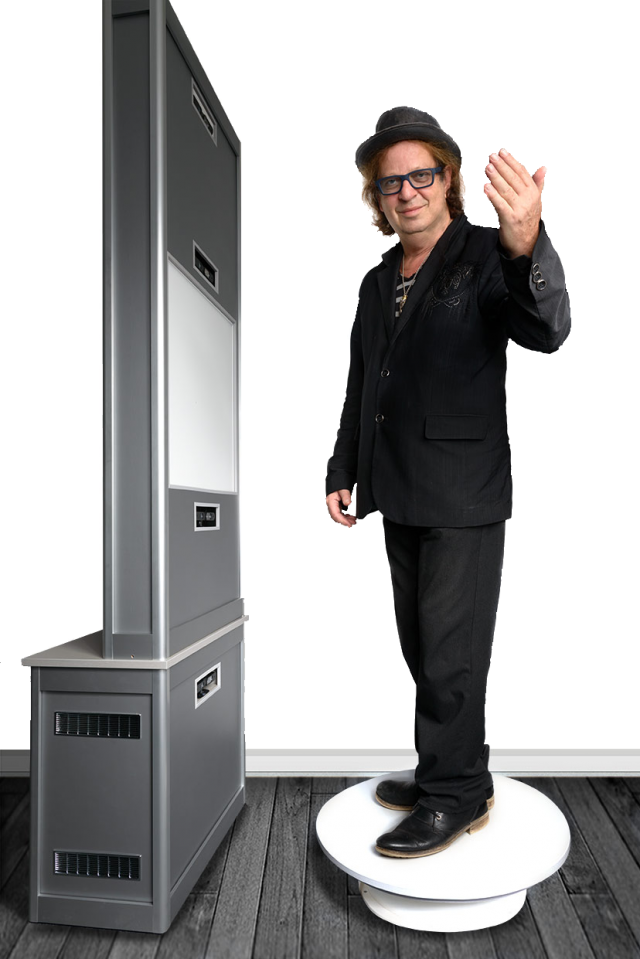 When the object is so small, then in fact we get macro photography, and sharpness with such shooting is achieved only in a small segment, literally just a couple of millimeters (which is why the coin was scanned well - the relief fit perfectly into the sharpness area). It was decided to remake the camera for a different lens. Several different lenses were ordered on Ebay for testing, and a new case was cut out for the camera board. The plan was like this0003
The final result was slightly different
The main idea, I think, is clear. And now, both on Thingiverse and on the forum of the program, you can download stl for printing cases for different types of webcams.
I had to remove the standard lens from the camera board, and as it turned out later, the IR filter was removed along with it, so be careful in this matter. The filter will then come in handy for use with other lenses, although you can buy them separately - the price is cheap.
Thus, I have formed such a collection of lenses.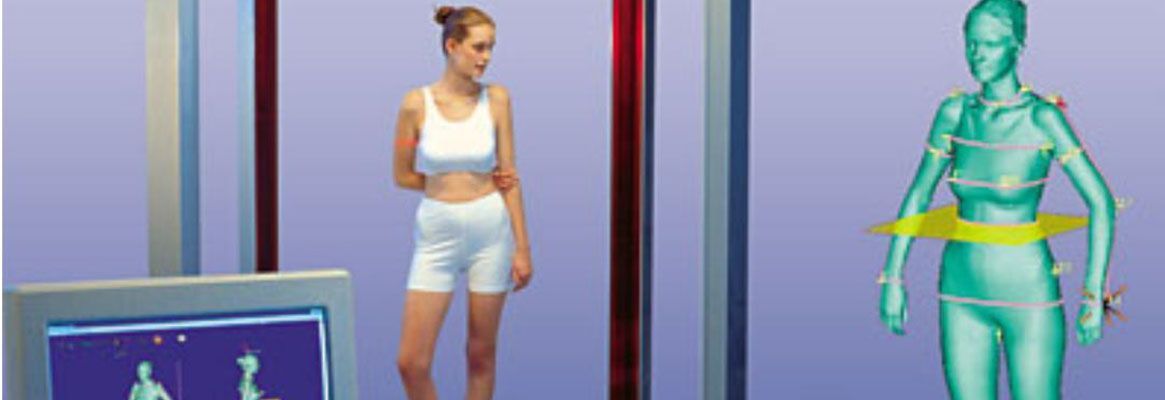
While I was waiting for the lenses to arrive, I was reading various photography forums. Studying the issue with depth of field, I found out that you can increase it by closing the lens aperture more. This means that the lens was required one in which it was possible to adjust the aperture (alas, among those ordered, not everyone had such an opportunity, but luckily I got a couple of them). In general, to improve the camera, it is desirable to have a varifocal lens with a zoom and an adjustable aperture. In practice, everything turned out the way it was in theory - closing the aperture, an increase in the depth of field was immediately visible, which made it possible to scan three-dimensional, but small objects.
The main lens I use is mounted on the camera in the photo above. The second, with an adjustable aperture, is the largest, in the center. I use it for very very small objects. The rest are without a diaphragm, so I don’t use them - it turned out that these two were quite enough.
Now I plan to either find a webcam with a higher resolution (the quality and detail of the scans directly depends on the resolution of the camera), or try to use some digital camera for this purpose with the ability to shoot video - usually you can get a lot more resolution in them, and lenses are better.
Actually, this could be the end - it seems that he told about everything. I also thought that this was the end of my scanner assembly, but the farther into the forest ... While studying the forum of this program, I often came across various schemes of turntables - fortunately, the software allows you to automate the scanning process. After one scan, a command is sent to the com port, the turntable rotates, turning the object by a given number of degrees, and gives a command to the next scan. As a result, with one click of the mouse, we have circular scans of the object - it would seem, what more could you want? I tried this system with interest, but alas, I absolutely did not like this approach, and there are a couple of reasons for this.
1 – if the object has a complex shape, then simply rotating it will not be enough – you also need to tilt it in different directions so that the camera with the projector reaches all the depressions and other hard-to-reach places.
2 - even if there are no such places, and considering all the scans that were made, there are no parts left on the object that did not fall into the scan, the question of the accuracy of the scan remains.
Let's say that some part of the model on one of the scans came out perfectly. But this does not mean that on all the scans in which this part fell, it also looks perfect, and when stitching scans from different angles, the result will be averaged, which cannot please. The program allows you to slightly edit the received scans (you can cut out the unnecessary part). If we rotate the model by 20 degrees, then after a full rotation we will have 18 scans, the part we need may well be present on half of them, therefore, in order to leave the best result, we will need to remove this piece from 8 scans . .. And such pieces with a complex There can be many models, as a result, almost half will be cut off from each scan, which is very laborious and time consuming.
Instead, it is better to immediately scan the adjacent areas after the first scan and check the result. As soon as a piece is ready, we move on to scanning the next one, and so on, until the entire model is in perfect shape. This approach gives the best results in less time.
But the question of convenience arises. Agree, it is inconvenient to manually try to rotate an object, looking not at it, but at the monitor - in order to control the hit on the lens without changing the distance to the camera and the projector at the same time (so as not to lose focus). With another similar balancing act, I accidentally touched the camera, which accordingly knocked down the entire calibration, and the whole process had to be started anew. I categorically did not like this alignment, and after some thought I came up with a plan for such a design (which, as you understand, I subsequently assembled).
This is not a turntable in the usual sense of the term. Thanks to this design, I can not only rotate the model, but also tilt it as I need. In this case, the center of the model remains in the plane of focus, but even if not, you can move the mount with the model back and forth.
All this was assembled on arduino, a small control program was written, and as a result, now I don’t have to get up from the computer when scanning - using the program, I change the position of the object being scanned, and at the same time, right there, in the window cameras I choose the best angle for scanning.
Insides
I put the possibility of automatic scanning into the program, as well as scanning not only in a circle, but with inclinations of 45 degrees in one direction and the other, which gives three times more scans. Nevertheless, in the end, I still never use this opportunity - it's too inconvenient to sort through the resulting pile of scans and clean them from unsuccessful pieces.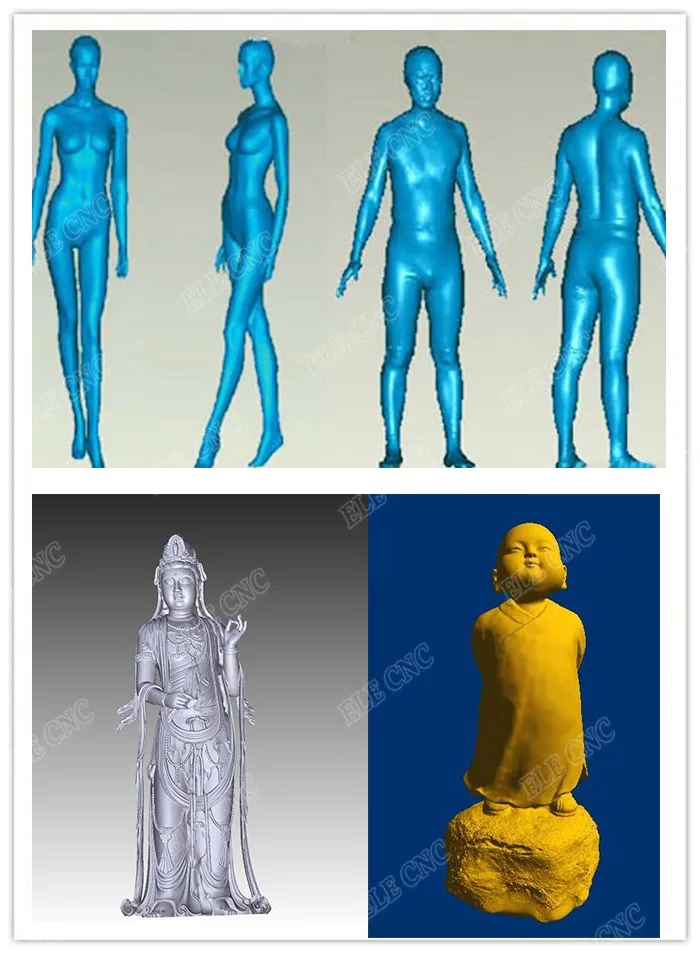
We should also mention some nuances of scanning.
1 - it is impossible to scan shiny and mirror surfaces. The light from them is reflected, or gives such a glare that the program cannot correctly recognize the line. If there is a need to scan such an object, then such parts will have to be masked with something (washable paint, paper tape, etc.).
2 - it is more convenient to scan monotonous objects, since when the camera is set to a light color, the projector's brightness is not so high, the exposure is low, etc. And a dark-colored object needs more brightness, so if you have a multi-colored object, then different parts of it require different settings to get the best result. Here, too, it is more convenient to use scanning the object in parts.
3 - if you want to immediately get a color texture, then please note that the settings of the camera and the projector for scanning do not affect the settings for removing the texture (the scan is generally done in black and white mode), so play around with the settings in the texture mode just as you would do in scan mode.
My scanning process now looks like this:
- Focusing the projector and camera
The projector's light is too bright and the projected grid is not visible in the photo, but here is the view from the camera in the program
- scanner calibration
printed on magnetic paper - so you can very quickly adjust to different sizes of scanned objects.
Software View
It is recommended that the combined angle between the beam of the projector and the camera be around 20 degrees. Therefore, such a stand is used - when scanning large objects (for example, a person), the camera should be set aside much further from the projector, but here they are close to me. The location of the camera relative to the projector can be only vertical, or only horizontal, depending on the geometry of the object. In this case, the arrangement is diagonal (13 degrees vertically and 36 degrees horizontally).
Scan results from different angles. These are already cleaned up scans, i.e. all unsuccessful and unnecessary (figure stand, mount that got into the frame) parts have been removed.
Combining scans for subsequent merging into one object
Due to the fact that each scan has its own color, it is convenient to control the correct alignment.
Well, after combining scans from different angles, we get such models
Miniature of Boromir from Lord of the Rings.
When scanning a multi-colored object, the result is slightly worse if you do not bother much. But then you can get an object immediately with a texture :)
Original models
In the gallery of user works on the developer's website (http://www.david-3d.com/en/news&community/usergallery) you can find many more interesting scans , even fingerprints people scan. And there are even scans of the same miniatures from Warhammer
In conclusion, I would like to say that no matter what hardware you use, no matter what expensive 3D scanner you buy, this is not a panacea for printing anything.