Cocoon create 3d printer review
Cocoon Create 3D Printer Touch review - an affordable 3D printer that's ideal for beginners
Many people interested in purchasing a 3D printer have been put off by the high prices but now there’s an affordable product available from Aldi priced at under $500 that can open up a whole new world of creation.
The Cocoon Create 3D Printer Touch is priced at $499 (we’ve seen it’s been reduced even further to $449) and Tech Guide put it through its paces.
We’ve never used a 3D printer before and we imagine the more expensive models can print larger objects.
When 3D printers were brand-new, like any new technology, they were quite expensive.
But now, years later, there are a lot more affordable as we can see from the Cocoon Create 3D Printer Touch.
What’s the use of having a 3D printer, a lot of people ask.
For a start, it’s a lot of fun making objects.
You can create all kinds of things including desk organisers, decorative objects and even jewellery.
It won’t be long before instead of buying parts for our household products and appliances, will be able to print them out ourselves.
The Cocoon Create 3D Printer Touch is priced like a beginner’s machine but can a beginner use it? We decided to find out.
But before we get into our review you have to understand how 3D printing works.
A 3D printer produces three-dimensional objects unlike your regular printer that can put writing or pictures on a piece of paper.
To do this it requires plastic filament which is fed into an extruder.
Like a regular printer, a 3D printer also requires a file.
In this case that file is a three-dimensional construction of an object which the printer can follow and create layer by layer.
Each layer is about a millimetre high with some objects taking several hours to produce.
The 3D printer creates these layers by heating up the plastic filaments and depositing that melted material to lay them in a certain order until the object is complete.
Have a guess what we’re printing with the Cocoon Create 3D Printer Touch from @aldiaustralia. Find out in our review at techguide.com.au #3dprinter #filament #aldi #tech #review
A post shared by TechGuide (@techguideau) on
OK, now you know the basics of 3D printing, let’s turn our attention to the Cocoon Create 3D Printer Touch.
The device comes in a pretty large box and after you unpack all the pieces, you need to put it together.
The 3D printer needs a bit of room and has about the same footprint as a multifunction printer.
The difference here is it also needs a fair bit of height, so you can fit the filament roll and give it space to produce objects.
To get started we had to place the printer’s base through the tower frame and screw it all together.
Part of the base is the print bed where the object is printed layer by layer. On the front is a touchscreen to control the device.
The tower frame includes the extruder and the belt drive.
And plugging all the parts together was really simple thanks to the clear labelling – A plugs into A etc.
The filament rollIt wasn’t long before we were all set up, all plugged in and ready to go.
Included with the printer are some filament samples in various colours so you can print out a few small objects.
For serious printing, you will need to purchase larger filament rolls which cost about $40 each and are available in various colours.
But there was enough filament to get started printing small objects.
Setting up Cocoon Create 3D Printer Touch serves two purposes. It gets the printer ready for your first print but also teaches you the basics of 3D printing.
First thing we had to do, was make sure the print bed was level. Each corner of the bed has an adjustment screw as the extruder moves to each corner.
A small card that comes with the printer is used to test the gap between the extruder and the print bed.
To increase or reduce the gap between the bed and the extruder, you adjust the screw to raise or lower the bed.
After levelling the bed, the next step is to feed in the filament.
The filament rests on the spool holder at the top of the frame and can be fed in to the top of the extruder through a small hole.
A small lever allows access to pass the filament down into this gap. It was here where the instructions weren’t too clear.
We had to look up a video on YouTube to give us a better direction on how to set it up.
Another thing we learned was that a 3D printer needs to operate at high temperatures.
The printer bed is heated to a certain level – usually about 70 degrees – while the extruder, so It can draw down the filament and melted to mould into the object, can be as hot as 240 degrees.
So a tip for young players, keep your hand away from the bed and the extruder while the printer is working.
The Cocoon Create 3D Printer Touch uses gcode files to print objects.
There are some examples on the included SD card which slots into the side of the machine.
There is a cable to connect it directly to your computer, but that isn’t necessary. You can print directly from the SD card if you prefer.
Also included on the SD card is the Cura software which is a free open source slicer, available for Windows and Mac computers which allows users to convert 3D files into the gcode format.
The touchscreen makes it easy to navigate the menus with the main tasks being adding filament and choosing the object you want to print.
The printer is bed level and the filament has been fed into the extruder and is starting to feed out of the bottom.
This is when you know you’re ready to go.
First up we chose something simple to print – a seven-pointed star. This only took about 20 minutes and we were surprised with the quality.
And the fact that we created something from nothing – three-dimensional object we could hold our hands – was fascinating.
We got braver and more confident and started printing other objects including a unicorn, a dice, more stars, a moon and an NFL ball.
We were really impressed with the level of detail the printer can produce right down to the finest points and sharpest corners.
The smoothness and consistency of the surfaces was also surprisingly high quality.
But this process also had some hiccups. There were times when the object we were printing wouldn’t stick to the print bed and we had to stop everything and start again.
There were also other issues we had where we needed to call technical support to help us through.
The issue we had was while we were trying to change the filament and it just wasn’t going through.
We were advised to take apart the extruder cooling fan and assembly – there were only two screws involved – and we found a piece of filament had broken off inside the extruder which explains why the new filament wasn’t passing through.
We removed the excess filament with a pair of tweezers and put everything back together again and we were good to go.
We added a full roll of filament so we can print out some larger objects.
One was a rocket that had to be printed in three separate pieces before fitting neatly together.
As we are writing this review, we are halfway through printing a small replica of the Eiffel Tower.
Users have to understand, some prints can take quite a long time, were talking up to ten hours in some cases.
But it is fascinating to watch as the object is being built and how, layer by layer, we eventually see the finished product.
The Cocoon Create 3D Printer Touch certainly punches above its weight in terms of ease of use and the quality it can produce for the price.
The documentation and setup instructions could have been a bit more detailed and without the assumption the user knows anything about 3D printing to begin with.
This is important as a first time 3D printer buyer would naturally choose a product like this to get started rather than spending thousands of dollars on a more advanced unit.
As beginners ourselves we were a great example of that, and now we’re hooked.
Cocoon Create 3D Printer Touch
Price: $499 (seen for $449) available now from Aldi.
VERDICT
The Cocoon Create 3D Printer Touch is an affordable device that can produce surprisingly good results. It is a fine introduction to the amazing world of 3D printing.
ALDI Cocoon Creator 3D Printer
ALDI Cocoon Creator 3D Printer has been discontinued. See all ALDI Products.
1 photo
3.5 from
4
reviews · View Statistics
Write a reviewAsk a question
‹ See all Products- Reviews (4)
- Q&A (3)
- Details
- Compare
Write a reviewAsk a question
See the Best Products in 2022 as rated by Australians on ProductReview.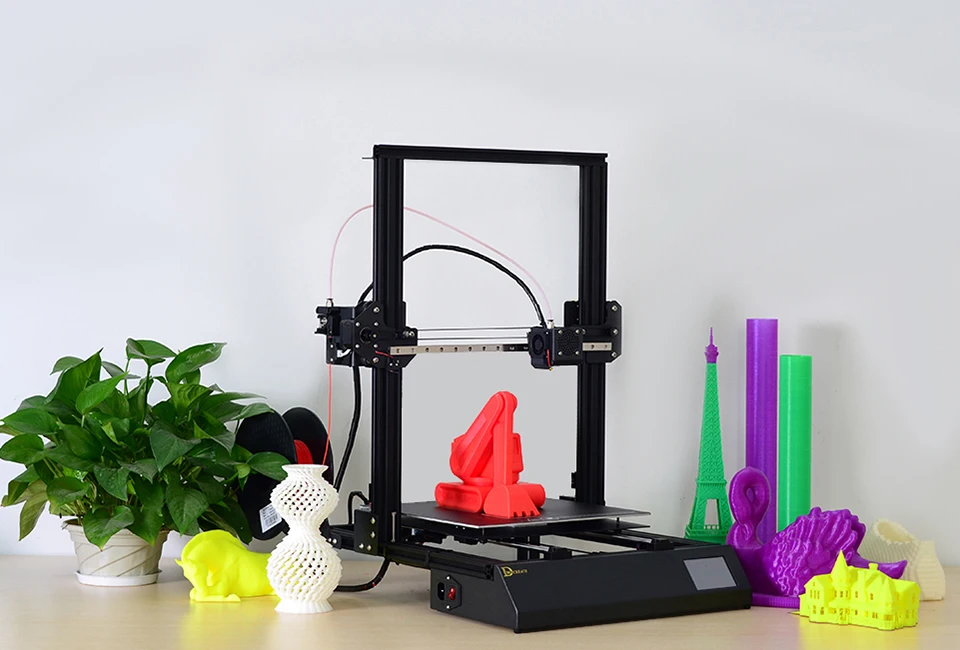 com.au.
Listing monitored by ALDI
Reviewer Photos & Videos
Your trust is our top concern. Companies can't alter or remove reviews from ProductReview.com.au.
Craig T.Perth, WA
Awesome little printer
published
It works well but takes a bit of effort like any 3d printer. Small build size though but a very good cheap reliable starter printer. See the photo for an example print.
Purchased in at ALDI for $399.
- Incentivised Review No
Share
More
Similar opinion? Write a review on ProductReview.com.au!
Kevin K.
You get what you pay for.
published
This is a pretty cheap printer and as a result the prints you get won't be the best going around. Having said that, if you manage to find a use for it, (I did but it took a while) it is very handy and gives good results. However, if you are wanting to go with a "wow" factor to your mates, be prepared for the "wow" to be muted.
Share
More
Similar opinion? Write a review on ProductReview.com.au!
Darren GPerth, WA
- 3 reviews
Extremely disappointing.
published
Four 1 kg rolls of filament and no successful prints, endless adhesion problems, manual was from another printer, although the same machine. Thermistor wire failure and the machine was a paper for two weeks, even with $8 for shipping. Could not find settings in slicer program.Turns out its under another name, not noted in the manual. Although cocoon were contactable, best wishes ans sadness for my disappointment didn't fix anything. If it wasn't for a Facebook group, whom had battled with the same issues, it would have been returned inside the six week period. Now its mine for keeps.
Share
More
Similar opinion? Write a review on ProductReview.com.au!
Mark KuzmaSouth East Queensland, QLD
- 10 reviews
- 6 likes
- Verified
Manufacture cares more for the Customer than Aldi
published
As an Aldi promotional special the Cocoon Creator ModelMaker 3D printer is a top buy at a top price. It is very rare that a problem will arise with this great starter to learn more about 3D printing. I did however run into a mechanical error 1 week and 1 day after purchase with a part failing. I contacted Aldi with regard to the problem and was informed that it was the manufacturer I needed to speak to, although, my understanding with consumer law makes Aldi just as responsible, but Aldi did put me through to the manufacturer on the Friday morn. ..
..
Read moreing who was able to offer some assistance and suggested that I contact Aldi and exchange the machine. I did contact Aldi back and they informed me that they were all sold out except for stores a minimum of 3 hours each way drive away from me and again informed me that it was not their responsibility. I called the manufacturer, Winplus, back and they asked me to email photos of the part in question to them and that they would send me a replacement part. Photos were sent by mid afternoon Friday, and the part was delivered to me on the Gold Coast from Melbourne at 8:00am Monday morning. Fantastic customer service.
The machine is for the best part unbreakable and idiot proof, and at the Aldi price is a product that I would recommend to anyone - a superb 3d printer for a superb price.
Aldi on the other hand, I have since found multiple units in each of the 5 closest to me stores, so Aldi, you need a little more honesty in your customer service area, and a little more understanding of Australian consumer law. All that aside, anyone looking for a 3d printer, this is a great unit to get
Share
More
Similar opinion? Write a review on ProductReview.com.au!
Find out how ALDI Cocoon Creator 3D Printer compares to other Products
Know better, choose better.
Compare all
Questions & Answers
Mark W.asked
Why doesn’t the cocoon 3D printed use the whole bed for printing
Share
More
3
answers
Darren G
It’s a setting in the slicer program. If the printer is listed on the slicer’s settings you can generally change the print area,but, as I found out at the time, it wasn’t, I used another printer setting
Report
Mark W.
Thank you
Report
Craig T.
It's a limitation of the printer and a lot of earlier printers the axis belts can only move so far. It's a bit misleading of the manufacturer to make such a big bed on a small build volume. Possibly it is due to the type of bed it uses.
Report
rap attackasked
Has anyone changed a nozzle with this printer as mine is clogged. I tried to unclog but unsuccessful
Share
More
6
answers
Mark Kuzma
Search Wanhao Mini i3 on youtube to learn how to do most with your Cocoon creator. When it comes to unclogging your nozzle it is generally best to un-assemble your complete hot end with the exception ...
Read moreof removing your heater and thermistor from the block. Once you have the unit apart and your hot end nozzle in your hand, using a pair of pliers and a small gas torch (refillable ones are available at Bunnings quite cheap), and a toothpick, hold your brass nozzle with the pliers whilst heating it with the torch, once hot push the toothpick in carefully to push the blockage out and clean some of the excess filament from the nozzle. DO NOT attempt to push the toothpick through the small hole. To do the final clearing of the hole, and I do this on both my printers (my other is an ender3) I visited a local acupuncturist and purchase a few needles from him as they seem to be the right size for final clearing. Remember to heat the nozzle the same as before prior to using the needle to finally clean the tip. I always double-check that I can see light through the nozzle before re-assembly. Make sure also that you have removed all filament from the surface around where it enters the nozzle. Re-assembly needs to be done carefully also. While the block has only the heater and thermistor connected to it screw the nozzle back into the block all the way (don't tighten yet) and once it is all the way in, back it off 1/4 of a turn.
 Now screw the throat back into the other side by hand until it is tight against the nozzle. Making sure now that you are holding the block firmly from the 2 sides adjacent to the thermistor and heater, (I use vice grips) tighten the nozzle, not too tight as you can snap them, but quite tight as this will form the joint between the throat and the nozzle and prevent seepage from the joint which can make a real mess. This is why it is important to ensure that you have also cleaned filament from all external surfaces of your nozzle. This connection is very important and in the event of buying a new hot-end at any time always check this before installation. Take good care of your M12 nozzle as this type seems to be the most expensive of all the nozzle types to purchase. Also, check out Facebook groups for 3d printing as many of them have very experienced members and generally they are more than happy to help out with little problems like this.
Report
rap attack
oh thanks I have no experience with the heated thing so would rather replace the nozzle. I am too anxious to do things like that especially because I haven't before. Will check out what you said thoug...
Read moreh and read this again when I get home. appreciate your help
Report
Mark Kuzma
To replace your nozzle, or even your whole hot-end you will still have to follow the same process with the only missing part being the cleaning, which is not a hard thing to do
Report
Amanda Ngasked
How long does it take to print a basic item eg.5cm (L)x5cmx(B)3cm (thickness)? Thanks!
Share
More
3
answers
Mark Kuzma
As with all 3d printers the time taken will depend on your settings.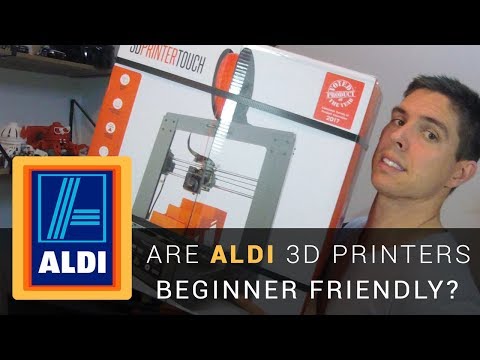 For example if your fill setting is 20% it will print much quicker than it your setting is 30% or even higher. If your layer height...
Read more is 0.2 it will print faster than if your layer height is at 0.1, likewise 70mm per second print speed will take less time than 50mm per second. Every setting change alters the time taken to print your item and the quality of your print, although for the most part the quality difference is not always that noticeable. The instruction book with this printer is very informative and will guide you through the learning process. The manufacturer/supply company (winplus) whose contact you will also find within the book are also very helpful. You might like to check their website (winplus.com.au) for more information with regard to your new, or proposed new printer. Once you place your design into the software to recode it for printing, the software will give you a print time estimate. Sorry I am not prepared to offer you even an estimate of time for this print as there are far too many variables
Report
Amanda Ng
Hi
I understand it varies with size and structure. Thus I gave an example of say 50mm x 50mm x 3mm (height).. and maybe on an average setting of say maybe 50mm per second? If someone can give an esti...
Read moremate of if this was the size, how long would it roughly take to print. Am not asking for 'guaranteed' numbers. Just so to know what to expect.
Report
Priscilla
My first try and the item being printed slid off the magnet mat… would you please advise as to reason and remedy. I just don’t wish to waste any filament. Thank you
Report
Get an answer from our members and ALDI representatives
Ask your question
Details
| Category | Products |
|---|---|
| Release date | |
| Discontinuation date |
Extra Information
ProductReview.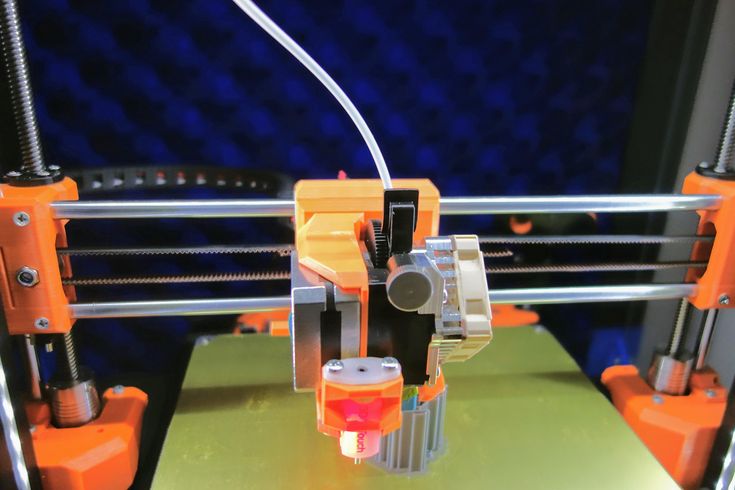 com.au has affiliate partnerships. These do not influence our content moderation policies in any way, though ProductReview.com.au may earn commissions for products/services purchased via affiliate links.
Snapmaker 3in1 all-in-one MFPs for beginners at a glance. What can a 3D printer, a milling machine and a laser engraver do in one bottle?
Hello, friends! 3DTool is with you!
We never get tired of telling you about Snapmaker, not only because they are really cool guys, but also because we really like this brand ourselves. The vibrant start-up from China quickly gained popularity among makers and garage enthusiasts around the world, and this is not at all surprising, given the uniqueness of the offer and the quality of their products. In this material, we have collected videos and articles dedicated to this manufacturer, so that it would be more convenient for you to get to know the brand's products in one reading.
The Snapmaker Philosophy
The guys at Snapmaker believe that there is a spirit of creativity and invention within each of us that just needs an outlet. Thinking about their product, they expected to create a convenient universal tool that allows you to quickly achieve even the most ambitious goals and solve complex problems using a single device.
Looking ahead, we can say that they certainly achieved this goal!
Assemble yourself!
The Snapmaker 3in1 is a modular building kit that must be assembled by hand before use. Of course, the guys could supply already assembled Snapmaker , but what could be more exciting for a person charged with technical creativity than building a 3D printer or CNC machine for himself? However, the threshold of knowledge required to create from scratch is sometimes too high, and in order to learn something, you must first look at how serial products are arranged, right? 😉 Therefore, modular, partially reassembled Snapmaker are perfect for this case.
Upgrade!
Rotator
Enclosed housing
Anyone who has ever upgraded his personal car, or did repairs in the apartment, or maybe is engaged in large-scale modeling, knows perfectly well, there is no limit to perfection! Even in a solid device, tool, design, there is always something to refine. Snapmaker gives its users the same opportunity. By purchasing a basic set, you can always expand its functionality in the future, for example, by adding a rotary axis for radial processing of workpieces, or a closed housing with a filtration and smoke exhaust system. At the same time, full compatibility of add-ons from the manufacturer will guarantee the absence of annoying inconsistencies and breakdowns when using analogues not intended for such an MFP.
Learn!
milling with a rotary axis
Module of milling
Laser engraving module
Any of Snapmaker 3in1 is able to become a good practical example for the development of Azov CNC or laser, 3D printing and using different techniques in different techniques. these areas. Thanks to quick-change working modules, it takes just a few minutes to reconfigure a 3D printer that has just printed from plastic filament into a laser engraver. However, in order to get the result that you originally intended, you need to learn how to choose the right settings. Agree, this is difficult to do if you have to work in several software packages, separately for milling, laser and printing. Snapmaker offers a unique P.O. – Luban . A unified environment for the preparation of control programs and tasks for 3D printing. This approach greatly simplifies learning to work with any of these tools and allows you to gain experience in each of them individually almost seamlessly. And after a few actually prepared projects, you will already be able to understand the process much faster. Don't be afraid to experiment!
Choose yours!
Overview A250
The Snapmaker MFP line currently consists of 3 models in various sizes.
The smallest A150 (aka Snapmaker Original)
The mid-sized and fastest A250T
And the big and powerful A350T capable of solving even more ambitious tasks!
Before choosing the model that is right for you, decide on the location and frequency of planned use of the device. The larger workpieces you plan to process, the more space you need and the larger the working area your Snapmaker . Based on our personal experience, the A250T model seems to be the most balanced at the moment, both in terms of the working field and dimensions, and considering the price of the device. It should also be noted that the frame rigidity of A250T is also at a better level than that of the starting model. For the rest of the functionality and options offered, the models do not differ. You can learn more about the line using the example of Snapmaker 3in1 A250T and A350T in our overview video above, or in THIS article.
Create amazing things!
Make something Wonderful! This is the main idea of our title promo video.
And we fully share this call. By creating something with your own hands, something that no one has done before you, or a thoughtful refinement of existing ideas, you fill the world with new meanings and bright colors, move forward and develop the space around you!
Do not limit your imagination, give free rein to skillful hands and a sharp mind and realize your idea “in kind”, and a reliable tool in the form of a small and hardworking MFP machine on the table will help you with this.
To buy Snapmaker 2.0 3in1 MFP, consumables for them, as well as other CNC and additive technology ask your question, or track the order, you can:
- mail: [email protected]
- Or on our website: https://3dtool.ru/
Watch us on Youtube, RuTube and in our VK group: VKontakte
We also post our materials on the Telegram channel and on Zen Yandex.
How a 3D printer works, what can be printed on a 3D printer
The 3D printer is a technology that allows you to create real objects from a digital model. It all started in the 80s under the name "rapid prototyping", which was the goal of the technology: to create a prototype faster and cheaper. A lot has changed since then, and today 3D printers allow you to create anything you can imagine.
Contents:
- What is 3D printing?
- How does a 3D printer work?
- What can be printed?
The 3D printer allows you to create objects that are almost identical to their virtual models. That is why the scope of these technologies is so wide.
What is 3D printing?
3D printing is an additive manufacturing process because, unlike traditional subtractive manufacturing, 3D printing does not remove material, but adds it, layer by layer - that is, builds or grows.
- In the first step of printing, the data from the drawing or 3D model is read by the printer.
- Next is the sequential overlay of layers.
- These layers, consisting of sheet material, liquid or powder, are combined with each other, turning into the final form.
With limited production of parts, 3D printing will be faster and cheaper. The world of 3D printing does not stand still and therefore there are more and more different technologies competing with each other on the market. The difference lies in the printing process itself. Some technologies create layers by softening or melting the material, then they provide layer-by-layer application of this same material.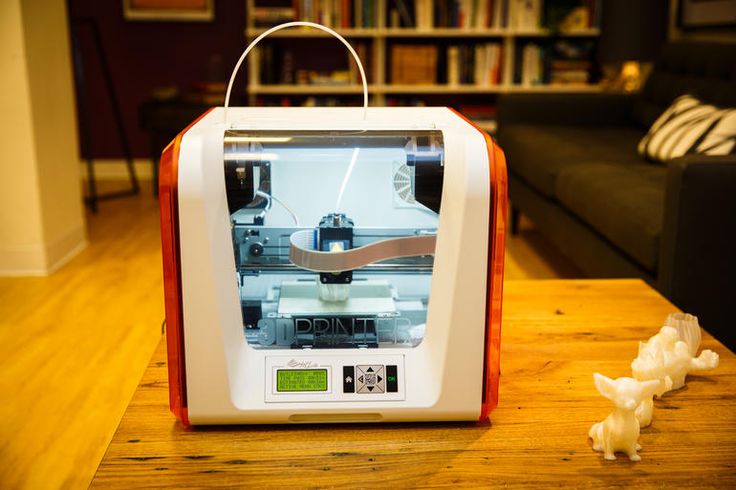 Other technologies involve the use of liquid materials, which acquire a solid form in the process under the influence of various factors.
In order to print something you first need a 3D model of the object, which you can create in a 3D modeling program (CAD - Computer Aided Design), or use a 3D scanner to scan the object you want print. There are also easier options, such as looking for models online that have been created and shared with other people.
Once your design is ready, all you have to do is import it into the Slicer, a program that adapts the model into codes and instructions for a 3D printer, most of the programs are open source and distributed free of charge. The slicer will convert your project into a gcode file, ready to be printed as a physical object. Simply save the file to the included SD card and insert it into your 3D printer and hit print.
The whole process can take several hours and sometimes even days. It all depends on the size, material and complexity of the model. Some 3D printers use two different materials. One of them is part of the model itself, the other acts as a prop that supports parts of the model hanging in the air. The second material is subsequently removed.
How does a 3D printer work?
Although there are several 3D printing technologies, most create an object by building up many successive thin layers of material. Typically desktop 3D printers use plastic filaments (1) which are fed into the printer by the feeder (2) . The filament melts into the print head (3) which extrudes the material onto the platform (4) creating the object layer by layer. Once the printer starts printing, all you have to do is wait - it's easy.
Of course, when you become an advanced user, playing with the settings and tweaking your printer can lead to even better results.
What can be 3D printed?
The possibilities of 3D printers are endless and they are now becoming a common tool in fields such as engineering, industrial design, manufacturing and architecture.