3D print cabinet
BCN3D Smart Cabinet - 3D Printing
The Smart Cabinet (SC) completes the Epsilon ecosystem, offering seamless integration with your BCN3D Epsilon printers and maximizing their uptime. Its filament humidity control boosts your printers’ performance, keeping your materials in optimal condition, and its uninterruptible power supply protects your work at all times, avoiding the risk of losing your print job due to power outages.
3.495€ *Excl. VAT
3.995 $
Delivery time: 2 weeks
Compatible with:
Already trusted by
15000+ engineers and designersSupported by our smart drying technology, the humidity-controlled environment has been designed to extend the service life of your materials, protecting the filament and reducing print failure due to moisture, significantly improving your prints’ quality.
Protection
Protect your equipment and your work against power outages thanks to the Uninterruptible Power Supply (UPS). In the event of a blackout of up to 10 minutes, this technology will enable the 3D printer to automatically resume the printing process once the power is back. In case of a longer outage, the UPS will save the printer’s last position, so that you can manually resume the printing process at any time.
Fit them all
Depending on the configuration chosen, the dehumidifier can fit up to 10 small spools (width up to 55mm), 4 big spools (weight up to 2,5kg), or 6 BCN3D Spool Cartridges -or a combination of them! Arrange your filaments in the most convenient way according to your needs, and reduce the need for loading and unloading processes.
Integration
Full 3D printing solution. The Smart Cabinet integrates with your 3D printers, materials, and software, streamlining your workflow thanks to its fast and easy loading of up to ten filament spools and its wheeled structure, which enables effortless transportation across your facilities.
+ 22% Tensile Strenght.
 + 57% Young's Modulus of rigidity.
 Our Smart Drying Technology
Within our humidity-controlled environment, an automatic drying cycle pushes the air through a compartment filled with alumina, a material that absorbs the moisture.
The desaturated air is pushed back towards the material compartment, free of any moisture that could damage your filaments. This cycle reduces significantly the environment’s relative humidity.
This technology effectively keeps the filament dry, ensuring that the materials maintain their mechanical properties throughout the whole 3D printing process.
BCN3D Spool Cartridge
The new BCN3D Spool Cartridges have been designed to give you greater control during the process of loading and unloading filaments, while significantly accelerating both workflows.
BCN3D Spool Cartridge
The new BCN3D Spool Cartridges have been designed to give you greater control during the process of loading and unloading filaments, while significantly accelerating both workflows. The magnets in their cover and the main body allow for easier loading of spools, as well as to quickly snap the cartridge in the loading or parking area of the Smart Cabinet. This system also prevents filament tangling: when unloading your material, the extra slack due to the long distance between the extruders and print heads is kept inside the cartridge.
Find out more
Download White Paper
Effect of environmental humidity on printability of hygroscopic filaments
Print quality was tested with our most hygroscopic filaments, after recreating an environment with constant humidity and storing each spool for 4 days. PVA ensured good print results for a wide range of conditions, while PA and especially TPU required a much more restrictive storage protocol.
Highly hygroscopic filaments: humidity limit of printability
The humidity limit of printability was obtained after storing the filaments for 4 days at 25 ºC and specific relative humidity (RH).
 We observed that PVA could be printed successfully when stored at up to 40% RH. PA started to show superficial imperfection when stored at a 30% RH. TPU proved much sensitive to moisture and did not give satisfactory results when stored above 12% RH.
Highly hygroscopic filaments: Shelf life
The three hygroscopic filaments under test underwent a kinetic absorption evaluation. When stored at typical humidity conditions (60% RH), each filament required a different amount of time to reach its printability limit. We calculated that PVA could be kept on an unprotected shelf for up to 12 hours before requiring a drying cycle. PA shelf life was estimated at 4 hours, which makes it unsuitable to very long prints. According to our calculation, TPU should be handled carefully, as its extrusion performances started decaying after only 1.5 hours.
Get the best finish
Hygroscopicity, the tendency to absorb moisture, is a great enemy of 3D printing, as it is a prominent characteristic of most thermoplastic materials. Even a small percentage of humidity can negatively affect most filaments and, therefore, the end result of the print job, not only through imperfections which appear on the print surface, but also damaging its mechanical properties. Correctly storing your filament will have, then, a significant effect in the overall quality of your printed parts.
Tested Sample: BCN3D PA (polyamide)
Spool stored 4 days in an environment with high levels of humidity. Over extrusion and poor accuracy. Rough surface, opaque appearance and much stringing are an indication of an irregular extrusion and poor interlayer adhesion.
Spool stored 4 days in a workspace environment with 40-60% relative humidity. Good extrusion and dimensional accuracy, but rougher surface, due to the formation of vapor micro-bubbles.
Spool correctly stored in the dehumidifier of the BCN3D Smart Cabinet. Continuous extrusion without interruptions or formation of vapour bubbles. Smooth surface and no stringing.
Key Features
Key Features
Print while in storage
The dehumidifier can fit up to 10 small spools (weight between 750 g - 1 kg and width up to 55mm) or 4 big spools (weight up to 2,5kg).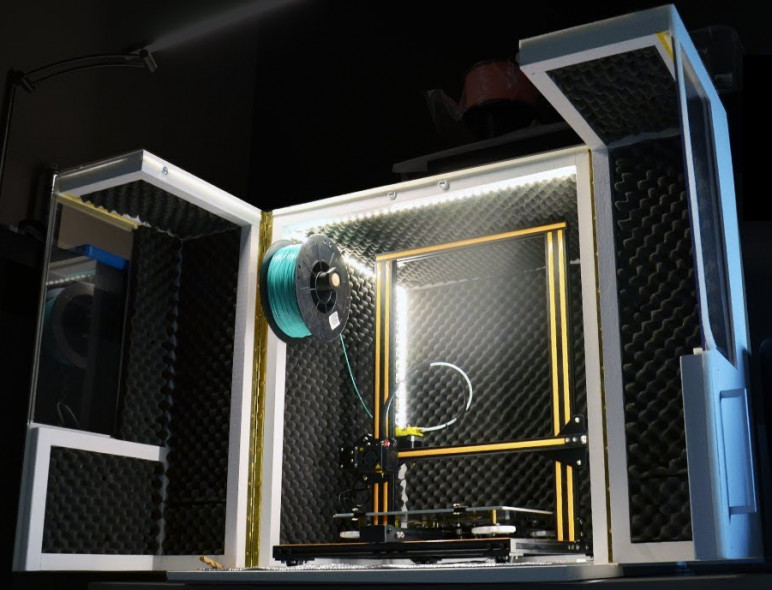 These can be loaded to your 3D printer directly from this humidity-controlled environment, therefore allowing it to print while keeping the materials in perfect condition.
BCN3D Smart Cabinet:
- Optimal for all materials
- Low Energy consumption: 12 W Avg / 100 W Max
- 10 storage slots for small filament spools (4 for big spools)
- Prints while in dry storage
- Humidity-controlled environment, dries without heat
- No consumable parts
Other systems:
Oven Baking:
High energy costs, decreases tensile strength, time-consuming, melts filament if too hot.
Desiccants:
No RH control, constant replacement, and maintenance.
AC & Dehumidifier:
High energy costs, unable to reach below 40% RH, ineffective in low temperature/winter conditions.
Other Filament Dryers:
Constant heat baking with high energy consumption, unable to dry for extended periods, only able to dry a few spools at a time.
Questions? Check out our FAQ document and find every answer you'll need!
FAQ
Take a closer look
BCN3D professional 3D printers
Maximize the use of your 3D printing equipment
Get the most out of your BCN3D machinery thanks to our Knowledge Base, an ever-expanding repository of tips and tricks sourcing directly from our 3D printing experts in order to help you boost your equipment’s performance.
Knowledge Base
9 Amazing DIY 3D Printer Enclosure Ideas – Clever Creations
Open-frame 3D printers, like the Ender 3, have become a common sight amongst consumer printers. Open frames help to keep the manufacturing costs low but make it difficult to 3D print with high-temperature filaments such as ABS and Nylon.
A 3D printer enclosure is an ideal solution for this issue. It increases the safety of your printer and isolates it from the external environment. 3D printer enclosures can be bought off-the-shelf, but there are also plenty of DIY enclosures made of cardboard, plastic, or metal.
Let’s take a look at some of the best DIY 3D printer enclosures that you can build for your printer that do not cost a fortune!
Why Use a 3D Printer Enclosure?
Open-frame hobbyist 3D printers offer limited material compatibility and safety. They expose components to dust and dirt and have no air-filtration system. There is also a risk of pets and children interfering with the 3D printing process or touching the hot elements of the printer.
An enclosure minimizes these drawbacks by isolating the 3D printer in an enclosed space. It helps to maintain a constant temperature which comes in handy when 3D printing with high-temperature filaments like ABS and Nylon. It further aids in noise reduction, making 3D printing at home or in offices more convenient.
You can also add an air filtration system to the enclosure to filter out any 3D printer fumes, thus increasing the safety of your 3D printing area. Not to mention, enclosures also make 3D printers more aesthetically pleasing and easier to integrate into your workspace.
To summarize, a 3D printer enclosure increases the material compatibility, print quality, and usability of your printer.
Which Enclosure to Get?
There are a few options when it comes to 3D printer enclosures. You can buy an enclosure off-the-shelf or make your own from scratch.
DIY 3D printer enclosures can be cheap if you want them to be, but they do require a bit of effort and time to put together. The best enclosures are made from materials that are both sturdy and have good thermal insulation properties.
If you’re looking for an enclosure that is easy to set up and does not require any DIY skills, then we suggest buying an off-the-shelf 3D printer enclosure. These are typically made out of plastic or aluminum and come with all the necessary fixtures and fittings.
Another alternative is to simply buy an enclosed 3D printer, but those come at a significantly higher cost.
Recommended:
The 9 Best Enclosed 3D Printers
Whichever direction you choose to go in, make sure to measure if you have enough space on your 3D printer table or workbench.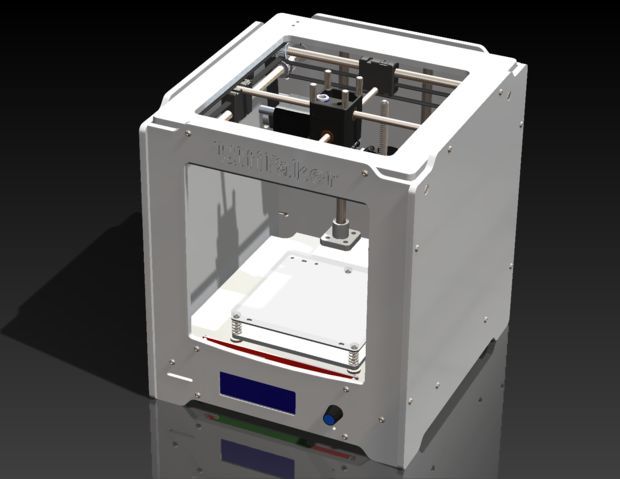
If you want a 3D printer enclosure that is fully customized to your 3D printer model and specific needs, then you will have to make your own. Now let’s look at some cheap and creative DIY 3D printing enclosures!
Cheap 3D Printer Enclosure Ideas
DIY Enclosures
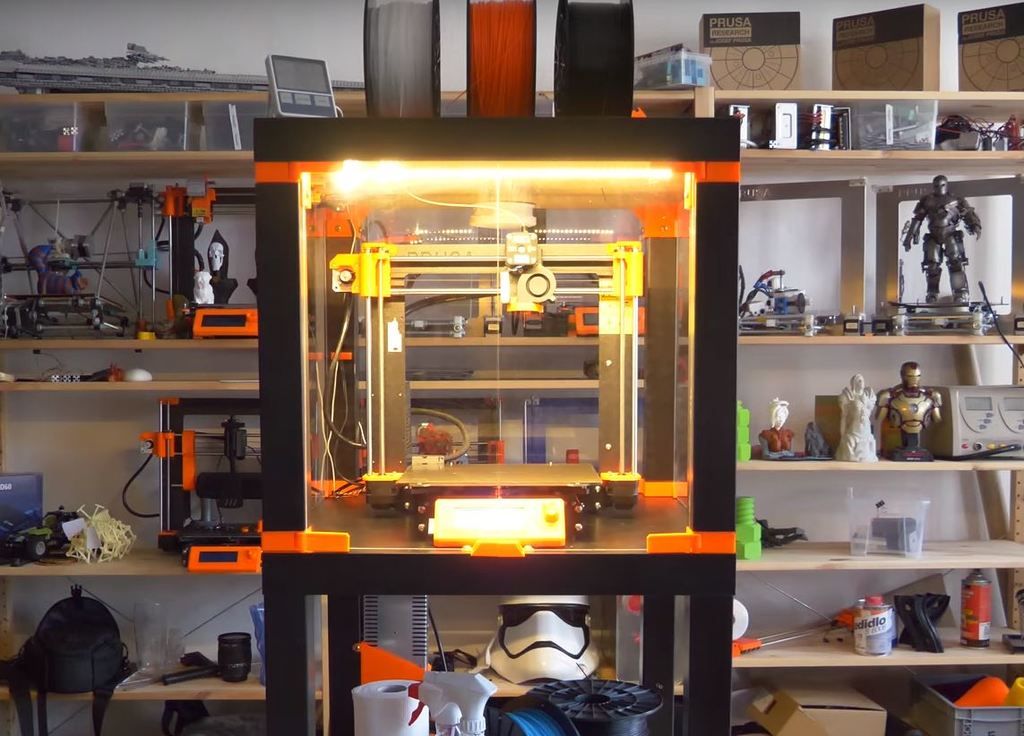
IKEA LACK 3D Printer Enclosure
Image: Mikolas Zuza via Prusa3D
The IKEA Lack enclosure is a recognizable and robust DIY 3D printer enclosure. It is cheap, easy to build and customize, and is modular enough to accommodate any future changes in the enclosure design.
This enclosure uses a couple of IKEA Lack tables stacked on top of one another. You can use these tables as per your preferences. Usually, though, the top one is used as a 3D printer bay, with the bottom one for storing tools. The design allows you to move your power supply outside and protects the electronics from high temperatures.
There are a variety of designs available for free with detailed guides, and you can build them within a day.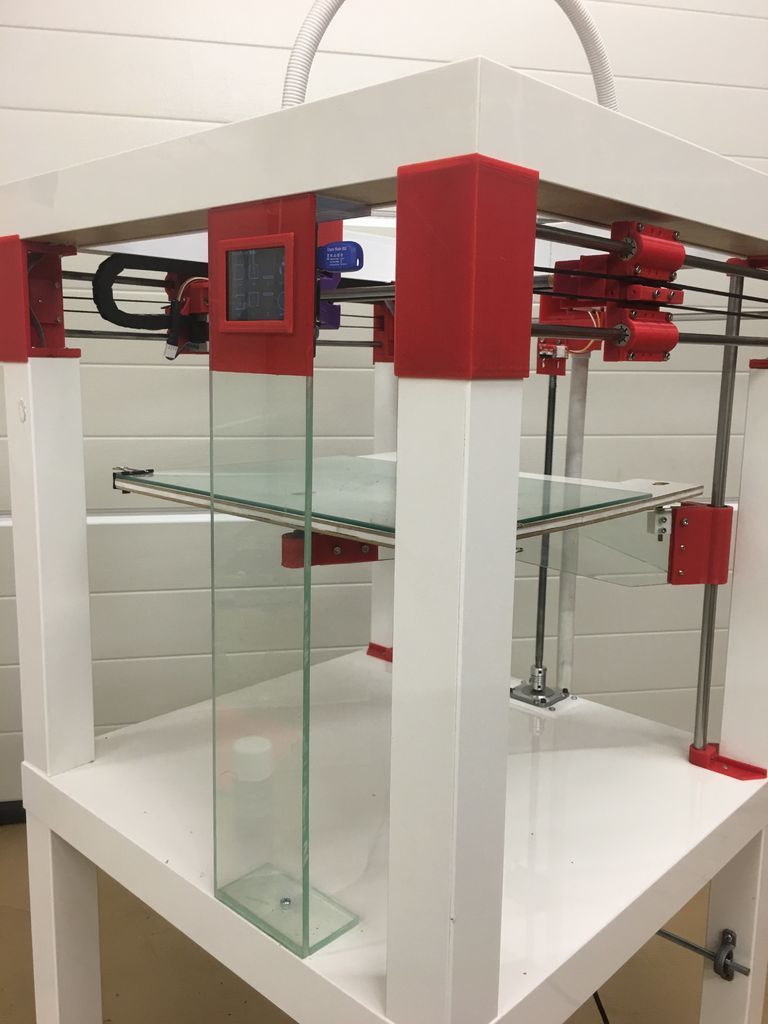 The IKEA Lack table enclosure is great for small to medium-sized 3D printers like the Prusa i3 MK3S+ and Creality Ender 3 as it is. And with some 3D printed leg extensions, you can even fit taller printers like the Creality CR-10 Smart Pro.
If you want to make things as easy as possible, you can even buy the required plexiglass panels as a pre-made kit.
DIYE Pack of 5 Plexiglass V1 1/8 Acrylic Sheet for IKEA Lack 3D...
102 Reviews
Check PriceAluminum Extrusion Enclosure
Image: Namsted via Imgur
Aluminum extrusions are a great and easy way of building a structural frame. These are lightweight, strong, and easy to machine, making them ideal for building a 3D printer enclosure.
This aluminum extrusion enclosure gives better stability and durability than the IKEA Lack design. The maker has used custom-sized aluminum extrusions to accommodate a Prusa i3 MK3S+ 3D printer in the middle. The top is used for filament spools, and you can store your tools in the bottom section.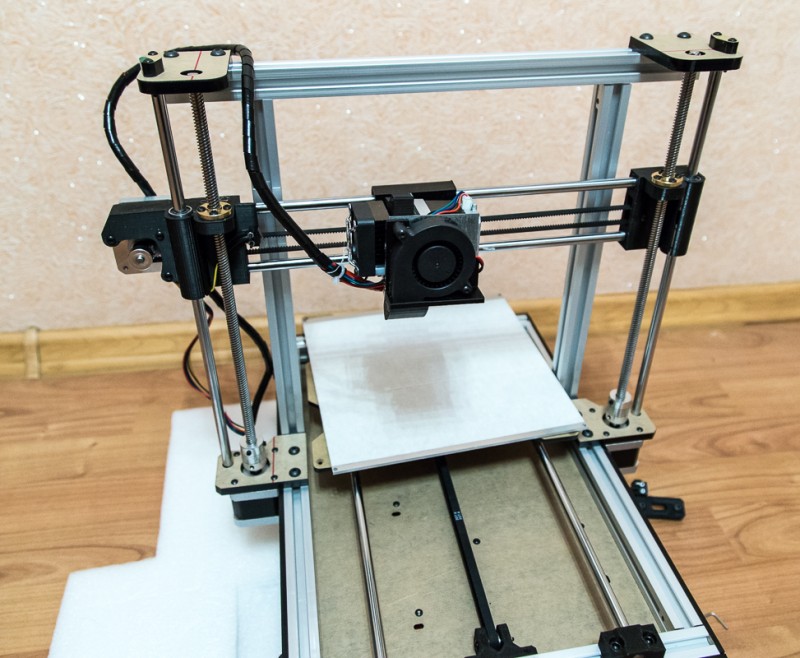
The enclosure is covered up with acrylic panels on all four sides, giving the print chamber good visibility. You can adjust the height of all four feet to get a leveled horizontal plane.
The project is not for beginners, as you will need to have some experience with machining and building things. But, if you’re up for it, it will prove to be an excellent learning project for you. An aluminum enclosure is very customizable, lasts longer, and acts as a perfect house for your 3D printer.
DIY Smart 3D Printer Enclosure
Image: Jure Korber
This smart 3D printer enclosure comes with a suite of electronics and sensors. It has a 3.5 inch LCD screen, a smoke detector, door sensors, air filtration, temperature, humidity sensor, and controllable LED lighting.
The 3D printer enclosure is divided into two compartments. The bottom one is explicitly designed to fit a Prusa printer and the top one to store eight spools of 1 kg filaments at a time. The enclosure has a custom PCB board that lets you easily wire up and control its various features.
You can get the STL files of certain 3D printed parts for free on Thingiverse. But if you want a detailed guide, along with BOM, build photos, and other aids, you will have to pay a fee to the designer. If you have the time and money, a smart 3D printer enclosure like this is an excellent DIY 3D printer enclosure for most popular open-frame 3D printers
Sound-Insulated Enclosure
Image: Spare Time Shop via YouTube
Open-frame 3D printers can get noisy, and the constant buzzing and the whirring of stepper motors can get irritating after a while. This issue is most relevant if you 3D print in a living space or an office environment. This is where this sound-insulated enclosure steps in.
As far as traditional enclosures go, they reduce noise up to a certain extent; yet, a sheet of acrylic can only do so much in terms of noise reduction. This sound-insulated enclosure, on the other hand, is made of wood, which has an acoustic foam lining to absorb the 3D printer noises.
This enclosure is big enough to accommodate a Creality CR-10 with filament spool and has dual doors and a transparent window to easily view your 3D printer. You can place the electronics of the CR-10 on the outside of the box, letting you control your 3D printer without opening the build chamber.
The enclosure is relatively easy to build and reduces noise considerably. The sound-insulated enclosure is a great option to get rid of any noises and 3D print in your living areas.
IKEA Pax 3D Printer Enclosure
Image: DollaSign via Reddit
This IKEA Pax enclosure is a wardrobe for your 3D printers. It is cost-effective and saves a lot of floor space when you want to enclose many 3D printers. Compared to the Lack enclosure from above, it offers similar functionality, albeit in a smaller footprint and relatively budget pricing.
You can stack up to three 3D printers in the PAX enclosure and still have some room left for filament spools, tools, and other electronics. All power supplies can sit outside the enclosure, thus protecting them from high temperatures. To add to its functionality, you can include some Neopixel LED lights.
Adafruit NeoPixel Digital RGB LED Strip - Black 30 LED [ADA1460]
70 Reviews
Check PriceBecause the shelves are modular, you can easily move them around to fit 3D printers of varying heights. The major drawback of the PAX design, however, is its lack of transparent panels. Other than that, the IKEA PAX enclosure is an easy, quick and cheap solution for enclosing many 3D printers at once.
Resin 3D Printer Enclosure
Image: majorbrogains via Reddit
Even though resin 3D printers come with an enclosure, you need a separate space to store the printers, resin bottles, and prints like your 3D printed miniatures. This enclosure is an IKEA BRIMNES cabinet with ample space to store and display all your resin 3D printing equipment and minis.
The entire cabinet is divided vertically into two separate parts, giving you the ability to efficiently sort out your goodies. You can store the 3D printer itself in one half, while the other half can take in a washing station. And with a bit of DIY, you can vary the shelves’ heights and customize them to perfectly fit your minis’ collection, resin bottles, and other resin 3D printer accessories.
There is air ventilation within the enclosure with the exhaust on the top. It helps to throw out harmful 3D printer fumes and keep away the foul smell. You have enough space to accommodate popular resin printers like the Elegoo Saturn S and Phrozen Sonic Mighty 4K.
Considering the price, ease of use, and accessibility, using an IKEA BRIMNES as DIY 3D printer enclosure is an excellent solution for clearing up your resin workplace.
Repurposed Dishwasher Enclosure
Image: antialiasedpixel via Reddit
Repurposing things is an excellent avenue in the DIY area, and what better way than to use an old dishwasher as a 3D printer enclosure. This one easily fits an Prusa i3 3D printer and still has room at the top to mount a filament spool.
The Prusa’s footprint is 16.5×16.5×15 inches, while the area within the dishwasher is 21x23x25 inches. This dishwasher has enough room to fit in the Creality Ender 3 (Pro/V2) and others of similar sizes. And the spare room that’s left can be utilized to fit in some LEDs, a Raspberry Pi, and a webcam for remote monitoring and control of the 3D printer.
The main disadvantage is that there is not much room for further customization. You will need to change the dish washer to accommodate any future updates to the 3D printer, not very practical!
Otherwise, the enclosure is one of the best ways to repurpose an old machine into something useful and save some money.
Ready-to-Buy Enclosures
Official Creality Enclosure
The official Creality enclosure is one of the best ready-to-use designs to cover up your 3D printer. While it is designed for Creality 3D printers, you should have no issues using it for other 3D printers of similar sizes.
The enclosure uses aluminum rods for its structural strength and an aluminum-lined fabric to enclose the 3D printer on all its sides. The internal aluminum lining is made up of flame-retardant material.
The Creality enclosure does a good job at keeping hot air inside and maintains stable temperatures well. It also comes with a single window on the front of the box to view your 3D prints in progress.
With a little bit of wiring, you can move out the LCD controller and power supply to the outside of the enclosure to work with even higher temperatures. For just under $70.00, the Creality’s Enclosure is an effective solution to print with warping filaments while keeping fumes in and dust out.
Creality Ender Enclosure for 3D Printer, Fireproof Dustproof 3D...
146 Reviews
Check PricePhotography Lightbox
Image: Make360
While a photo lightbox is not designed for 3D printers, it does a great job as a 3D printer enclosure. It doubles as both a photo studio tent and an enclosure and gives you great lighting for pictures of your 3D prints.
This lightbox has two adjustable LED bars that cumulatively house 126 LED lights giving you a bright and well-lit inside area.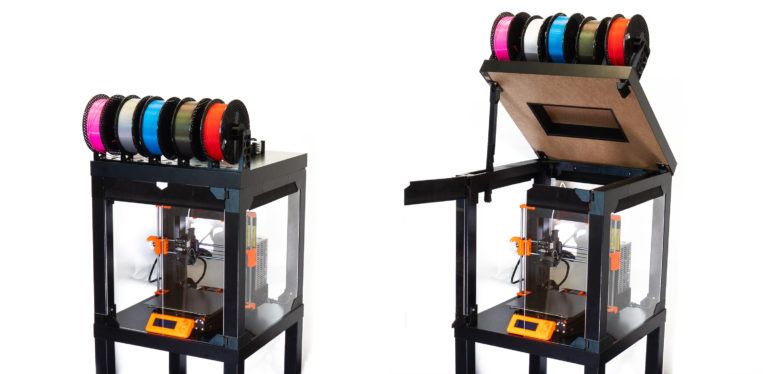 It also gives you four PVC backgrounds for shooting various scenes and highlighting different shades of your 3D prints. And you can adjust the front cover to either fully cover up the 3D printer, or keep it open for ventilation.
It is a decent step up over the Creality enclosure and aids in photographing and taking videos of your 3D prints. The enclosure is easy to assemble and use, while also being convenient to store when necessary.
This enclosure is an ideal choice for enclosing your 3D printer and still having the flexibility to use it as a photo lightbox when you need it.
Photo Box, SAMTIAN Photo Light Box 32x32x32 Inches 126 LED Light...
839 Reviews
Check PriceBuying or making a DIY 3D Printer enclosure: What to consider
Size
The size of the DIY enclosure should be just enough to fit your 3D printer. It should not be too big, as this makes it more difficult to heat the print area and makes it harder to move around if you need to.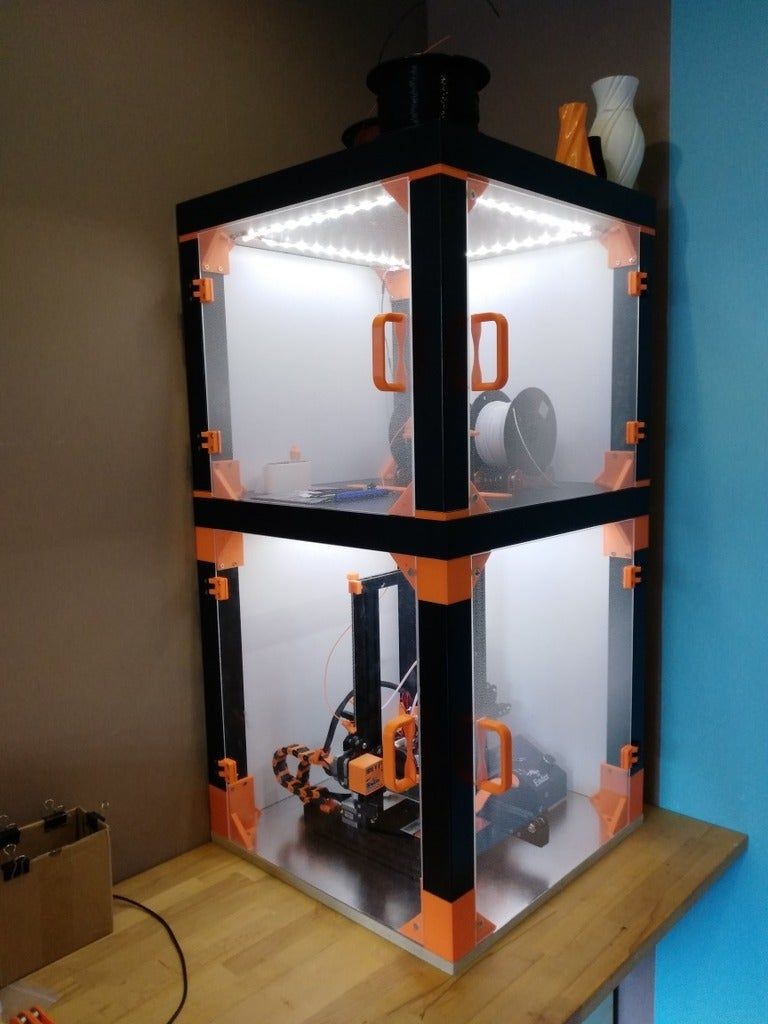
Ease of Access
You should be able to easily access your 3D printer when it is in the DIY enclosure. Locking latches are a great addition that lets you lock and open the enclosure at will
Material
A DIY 3D printer enclosure should be made of a durable and heat-resistant material. The material should also be easy to clean. Plexiglass is a good option for 3D printer enclosures as it is durable, easy to clean, and heat resistant.
Smoke Alarm
Installing a reliable smoke alarm at the top of the enclosure can alert you in time if your 3D printer catches fire. It is a worthwhile investment that can help keep you safe.
First Alert SCO501CN-3ST Wireless Interconnected Combination Smoke...
Check PriceFire Suppression
If you want to be extra safe, you can install a fire suppression system that kicks in when the 3D printer enclosure gets too hot. A popular choice is the Blazecut T-series.
Soundproofing
One of the main disadvantages of 3D printing is the noise it produces.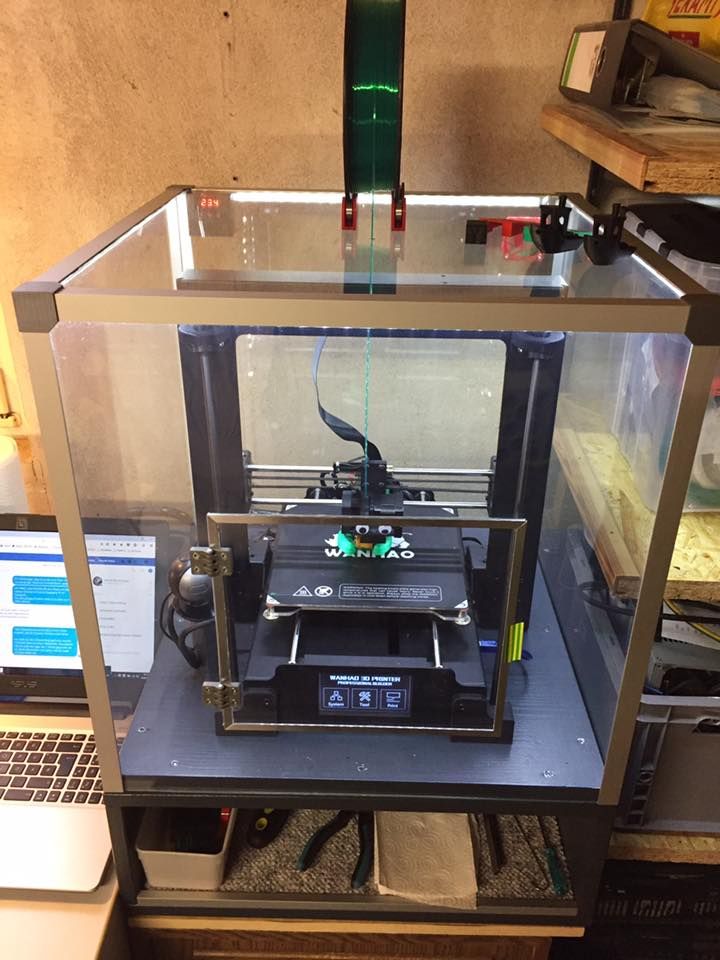 This can be a problem if you are trying to print in a shared space or if you just want to keep the noise down.
3D printer enclosures can help with this by soundproofing the area around the printer. Adding acoustic foam panels to your enclosure will help reduce sound levels significantly. Always make sure you get fire resistant ones, however.
TroyStudio Acoustic Studio Absorption Foam Panel, 12 X 12 X 2 inches...
959 Reviews
Check PriceWindows
Adding a window to the 3D printer enclosure can help you monitor the progress of your 3D prints.
Lighting
You might want to consider installing LED lights inside the 3D printer enclosure. This will help you see the 3D prints better and also aid in taking pictures or videos of them.
Price
The price of 3D printer enclosures can vary depending on the size and features. 3D printer enclosures can be bought or made. If you are making your own 3D printer enclosure, you will need to factor in the cost of all the materials as well as your time.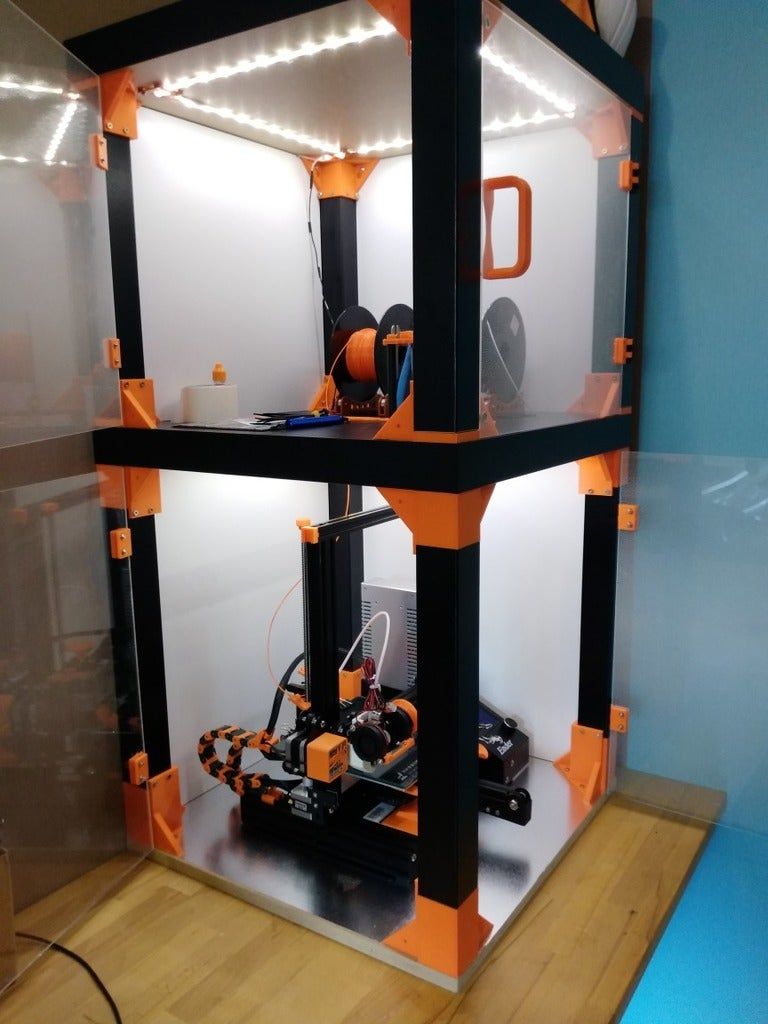
Frequently Asked Questions
Is a 3D printer enclosure necessary?
A 3D printer enclosure is not strictly necessary, but it can be beneficial in terms of safety and maintaining optimal printing conditions. Enclosures can help to minimize drafts and other external factors that can impact the print quality, and they also provide a barrier between the hot printer components and curious fingers (especially important if you have young children or pets in the home).
If you are interested in purchasing a 3D printer enclosure, there are many different options available on the market to suit a variety of budgets and needs.
How do 3D printer enclosures work?
3D printer enclosures work by creating a controlled environment for the 3D printer. This helps to protect the 3D printer from dust, debris, and fumes. It also helps to maintain a constant temperature around the 3D printer, which is important for preventing warping of high-temperature filaments.
How do you enclose a 3D printer?
A 3D printer can be enclosed in a variety of ways.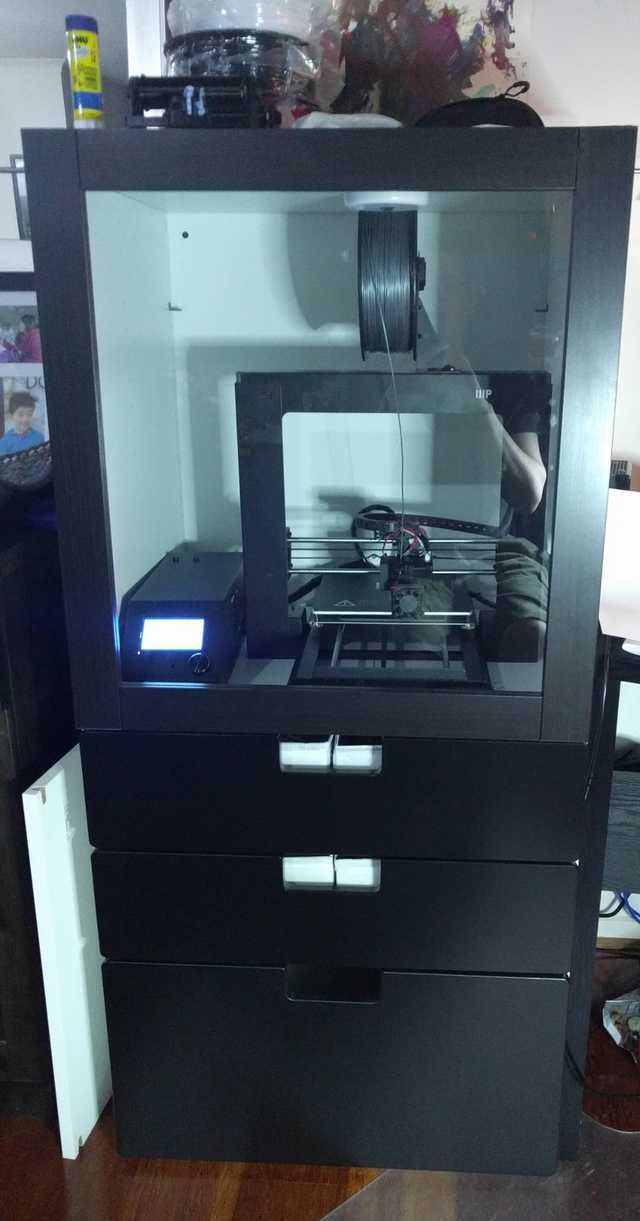 Some printers come with an enclosure that is already built in, while others use the addition of an enclosure for safety reasons.
One common way to enclose a 3D printer is by using a box made out of cardboard or plastic. The box should be large enough to fit the printer and the printing material, and it should have openings for the print head, filament feeder, and other cables. The box can be sealed shut with tape or clamps to keep fumes and heat from escaping.
Another option is to build an enclosure out of plywood or acrylic sheeting. This type of enclosure is more permanent and can be customized to fit the specific needs of the user and 3D printer.
Do 3D printer enclosures need ventilation?
3D printer enclosures do not need ventilation if the material being printed is not fumes-emitting. If you are printing with PLA, for example, there should be no issue with keeping your enclosure sealed. However, if you are printing with ABS, it is recommended that you provide some form of ventilation to deal with the build-up of fumes.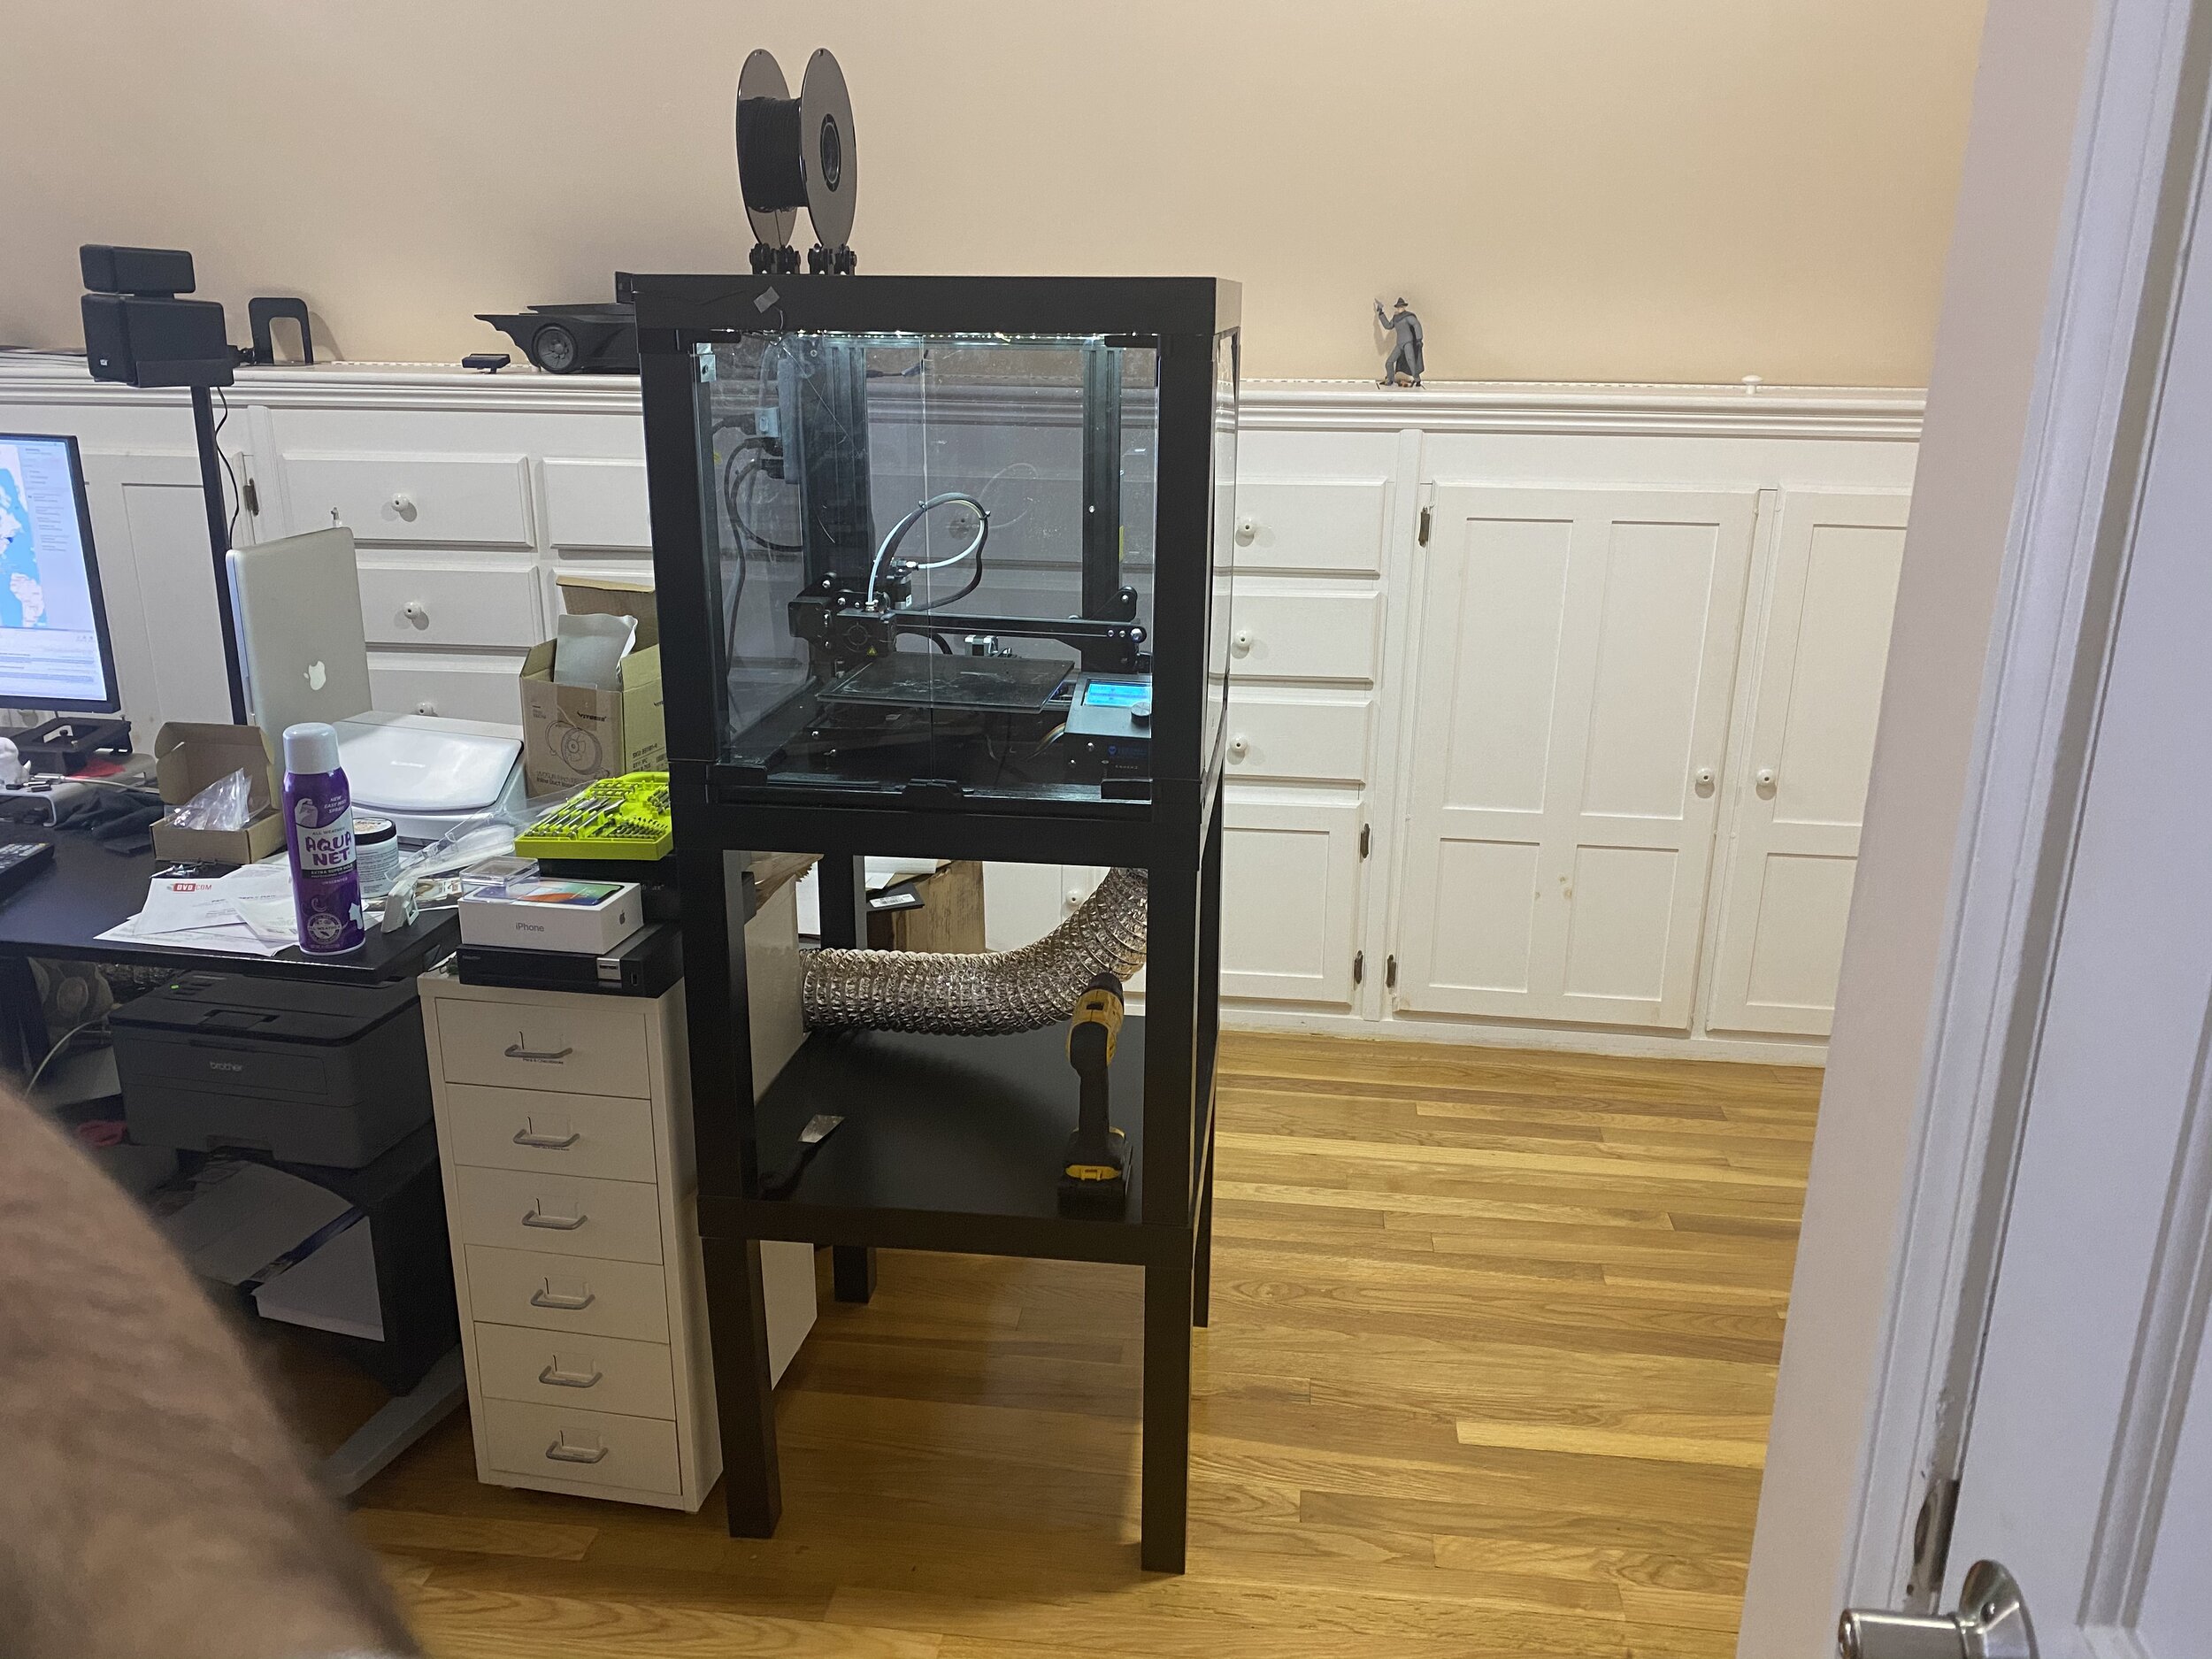
Do I need an enclosure for PLA printing?
PLA prints very well without an enclosure, so you likely don’t need one unless you’re printing in extremely cold temperatures. If you do want to use an enclosure, make sure it’s well-ventilated so your print doesn’t overheat.
How hot should a 3D printer enclosure get?
There is no definitive answer to this question as it depends on the specific 3D printer and filament being used. As a ballpark range, a temperature somewhere between 30 and 60 degrees Celcius is the right range for FDM 3D printer enclosures.
Should I enclose my Ender 3?
You should enclose your Ender 3 if you want to protect it from dust, dirt, and other debris. Additionally, enclosing your printer will help to maintain a consistent temperature and protect against accidental contact.
An enclosure is one of the top Ender 3 upgrades we recommend people to start with when modding their printer.
Recommended:
The Best Ender 3 (V2 / Pro) Upgrades
Should a 3D printer enclosure be airtight?
There is no single answer to this question as it depends on the specific printer and application.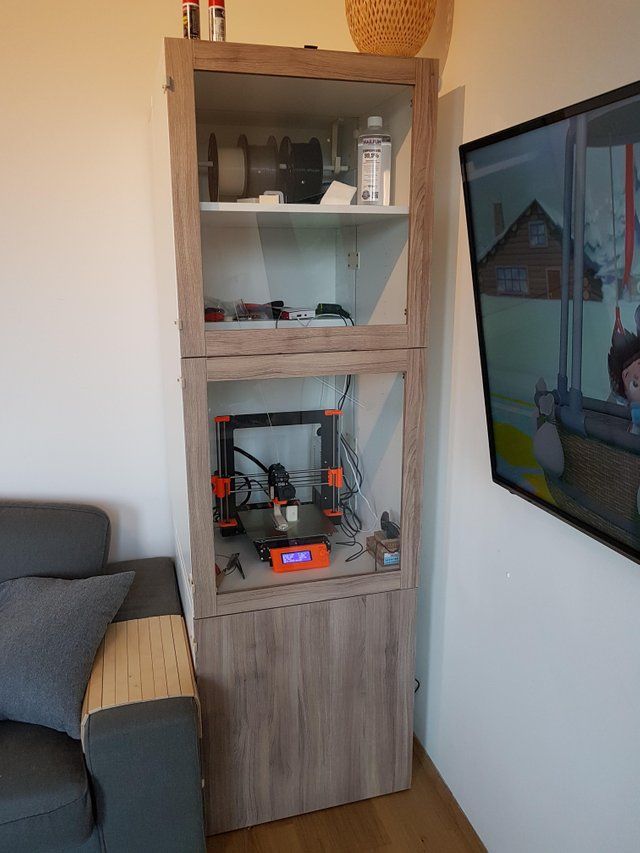 In general, though, airtight enclosures can be helpful in preventing fumes and particles from escaping the printer and contaminating the environment. They can also help protect the printer from dust and other debris.
However, if the enclosure is too tight, it can create problems with heat retention and airflow, which could lead to a decrease in printing quality or even damage to the printer. It’s important to find a balance between creating an effective enclosure and maintaining optimal printing conditions.
Conclusion
A 3D printer enclosure is an effective way to increase your 3D printer’s material compatibility. It further aids in printing with warping filaments like ABS and Nylon by maintaining a constant temperature. It saves the printer from external dirt and dust and improves the print quality.
With DIY 3D printer enclosure designs, you have the flexibility to customize the enclosure to your specific needs and install as many features as you’d like in it.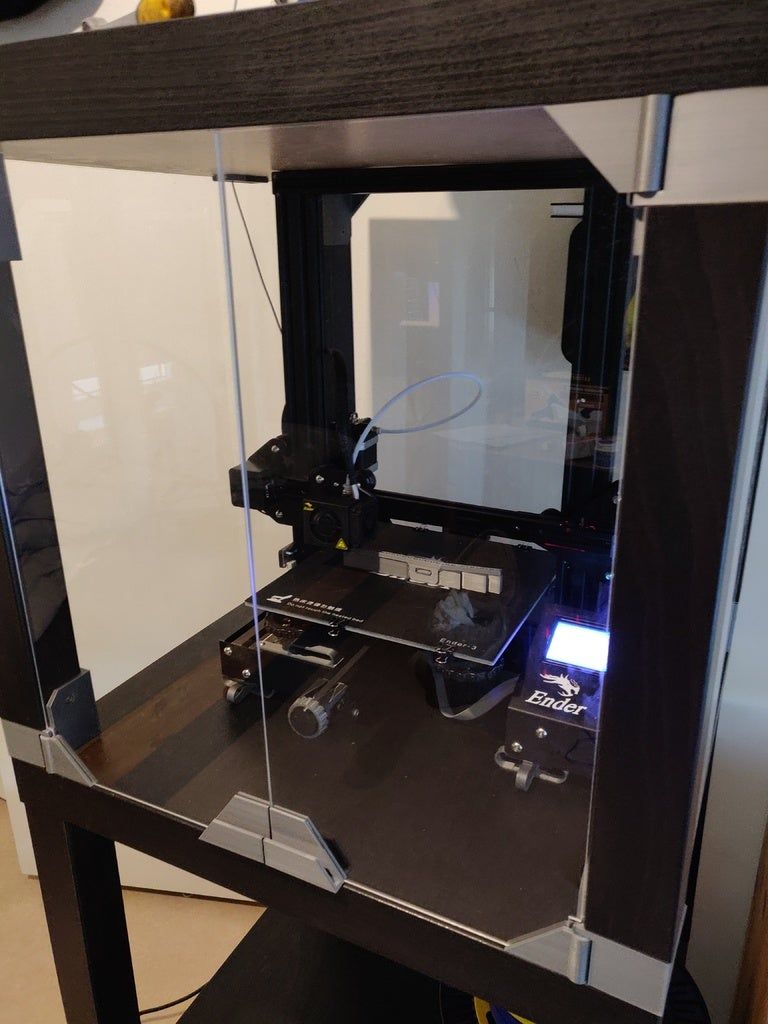 It is also relatively easy to build a cheap, low-cost solution, for example with a simple cardboard box.
But, it can be tedious for many users, requiring lots of time, effort, and money. Whereas the ready-to-buy designs lack customizability but offer an easy, quick, and cheap solution.
Let us know your thoughts on the list, and if you have anything else to add, feel free to comment below.
Do-it-yourself cabinet for a 3D printer
Do-it-yourself cabinet for a 3D printer - just a screwdriver, a head and Leroy to help your hands.
Hello everyone! Good day to all and happy reading. I share a positive experience in the manufacture and use of a printer cabinet.
I want to say right away that to make this cabinet, from a tool, you only need a screwdriver or a screwdriver.
Relatively compact cabinet on wheels with dimensions of 600 x 600 x 1600 mm
contains:
1. Ender 3 pro 3D printer and 10 spools of plastic on rotating axes of holders in quick access next to the printer.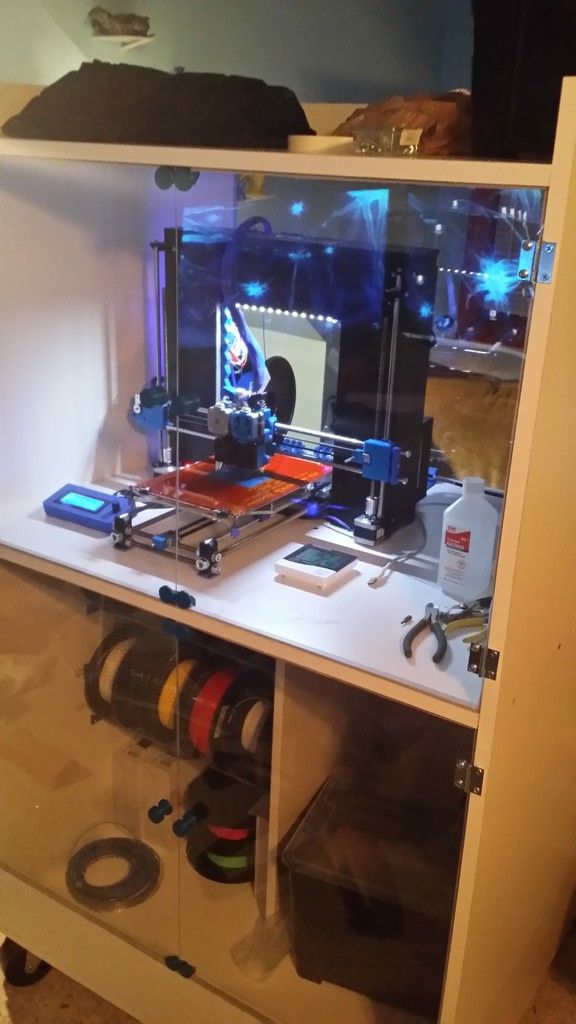
2. 28 rolls of plastic on 2 shelves with easy access to each.
3. All available tools, consumables and other small things.
Initial and boundary conditions:
1. Even before purchasing the printer, I learned that there is a very useful addition to the printer - a thermal camera. However, due to the high price, buying a printer with a thermal camera was not part of my plans. But it was decided to make a thermal chamber or just a chamber without drafts in advance - it was implemented.
2. I really wanted all the items related to 3D printing to be in one place (cabinet / pedestal) - implemented, although spare parts for the printer are stored elsewhere, but fortunately they are rarely required.
3. Possibility of easy access to any part of the printer for its maintenance - implemented. The shelf with the printer extends almost completely, giving access to it from all sides.
4. Convenient arrangement of coils with plastic for its quick replacement - implemented.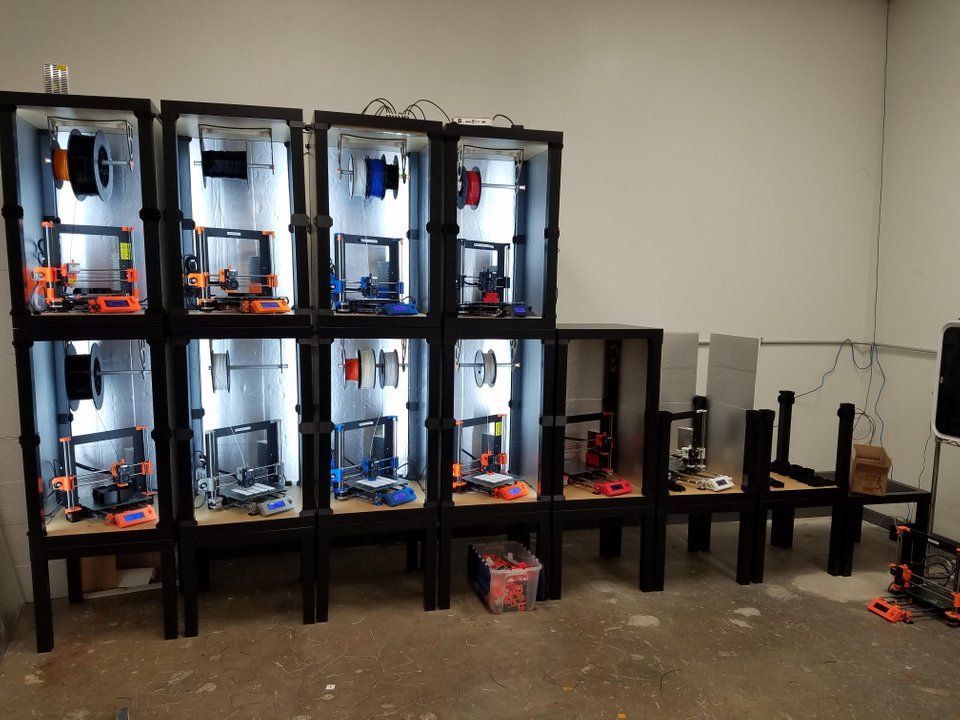 From any spool placed on the holders near the printer, you can thread the bar into the printer by passing it through the rotary blocks and guides (printed parts).
5. Due to my circumstances, the mobility of this closet within the apartment was required - implemented. Wheel supports and a wire reel from a vacuum cleaner with a wire about 6 meters long are installed. The vacuum cleaner reel is protected by a chipboard case and is fixed inside the cabinet to the right of the printer, next to two electrical circuit breakers it can be seen in many photos.
6. The cabinet should be budget-friendly, attractive, with a minimum amount of labor and dust in the apartment during its manufacture.
7. Material and accessories should be easily accessible and preferably in one place.
8. Possibility of developing and modifying an already finished cabinet.
Since there is experience in making furniture, almost all the furniture in the apartment is made on our own.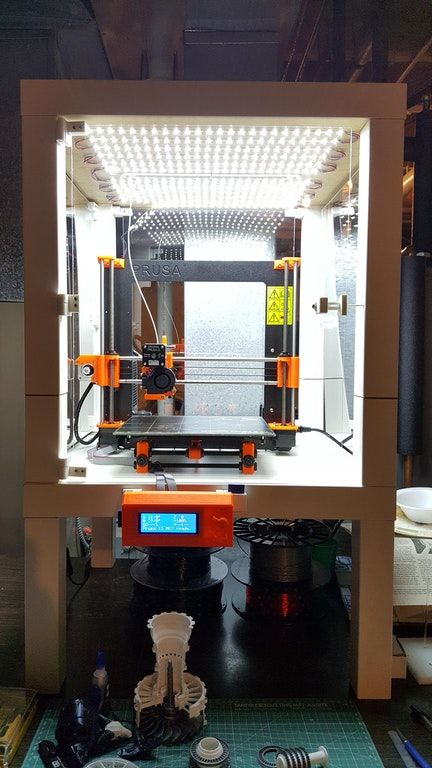 It only remained to move the brain gyrus and come up with the device and layout of this cabinet. I decided to take sliding shelves on ball guides (on ball linear bearings) as the basis for easy access.
From the available stores and companies for the purchase of materials and components, Leroy Merlin was chosen, Laminated chipboard (LDSP) is always available there, ball guides, wheel supports, mounting angles and self-tapping screws. In addition to the availability of material, Leroy provides a wonderful service in our business - this is cutting chipboard to your size, almost without chips, charging a small fee for this in relation to the cost of tools and cleaning mountains of sawdust and dust in the apartment accompanying independent cutting of chipboard. By the way, I have this experience too - I have a tool, and some of the furniture was made in this way. Even with a vacuum cleaner connected to the tool, a lot of dust and sawdust flies past the vacuum cleaner. And after all, this is not just wood dust, but dust containing phenol-formaldehyde compositions used in the manufacture of laminated chipboard, although I may be wrong here, it is possible that laminated chipboard manufacturers have already switched to environmentally friendly binders for its manufacture.
Initially, two drawers were made for plastic reels.
And printed bearings
but due to the curvature of the edges of the coils themselves, they kept flying off the supports, so this option for placing the coils had to be abandoned in favor of the next option, which still works.
The hardest part was deciding how to fix the transparent front panel? On hinges? On magnets? Somehow else? Since the place where the printer stands does not indulge in space, the options with hinges disappeared immediately. I installed the magnets by screwing them with self-tapping screws into the drilled holes in the ends of the sidewalls and the roof of the cabinet,
I fixed a U-shaped profile on the printer shelf, “legs” up. Stationery clips were put on the transparent panel itself so that they would not fidget around the panel, I glued them with adhesive tape, having previously removed the “unclamps” from them.
Printer power supply, system unit, control panel are removed from the printer and fixed at the bottom of the shelf on which the printer is located or on a fixed shelf below it. All switches are displayed on the right edge of the printer shelf (in the photo below on the right): printer, weak lighting, more powerful lighting, turning on the exhaust fan and switching its operating modes. Initially, a flexible air duct was connected to the fan with access to the street. I did not use this exhaust system for a long time, having heard a lot about the stench and harmful fumes of ABS plastic. For the convenience of checking coolers and other 24-volt households arriving from China, I installed wags and brought 24 V to them from the printer power supply. The lighting is powered by 12 V, lying in the corner of the computer power supply. Because the body of the brain turned out to be recessed, which made it inconvenient to insert and remove the micro-SD card, to facilitate the process, an extension cord for the SD card was used in the center of the photo below in the green holder. This extension cable would still be used in order not to "stagger" the regular SD card socket soldered into the motherboard, replacing the extension cable seems to be an easier task than resoldering the regular socket on the motherboard.
If it is required to remove the printer completely from the shelf, then in order not to disconnect the wires from the brains, a slot is made in the shelf,
into which the box with "brains" freely passes. For the same purpose, you can run the wires to the printer behind the shelf, but then the wires will need to be lengthened, the slotted option allows you to get by with regular wires - here who is more suitable.
There is an idea to make mezzanines in two or three tiers, each with 8-10 spools of plastic with each thread passing into the printer chamber from above, but I don’t do it until there is a need for it.
Some remarks for those who are going to repeat this design.
In the file is an Excel book https://yadi.sk/i/xLZoXu-91Qku0A with dimensions and cutting of laminated chipboard sheets All sheets are taken 600 mm wide, 2700 mm long - 3 pcs and 800 mm - 1 pc. Please note that the first column on the “panel cut” sheet is cutting across the sheet (along its short side 600 mm), the second column is cutting along the sheet of already cut parts, it is advisable not to confuse this, otherwise the front ends of the shelves will be without laminate and will have to or put up with this, or buy and glue the edge on the ends of the chipboard.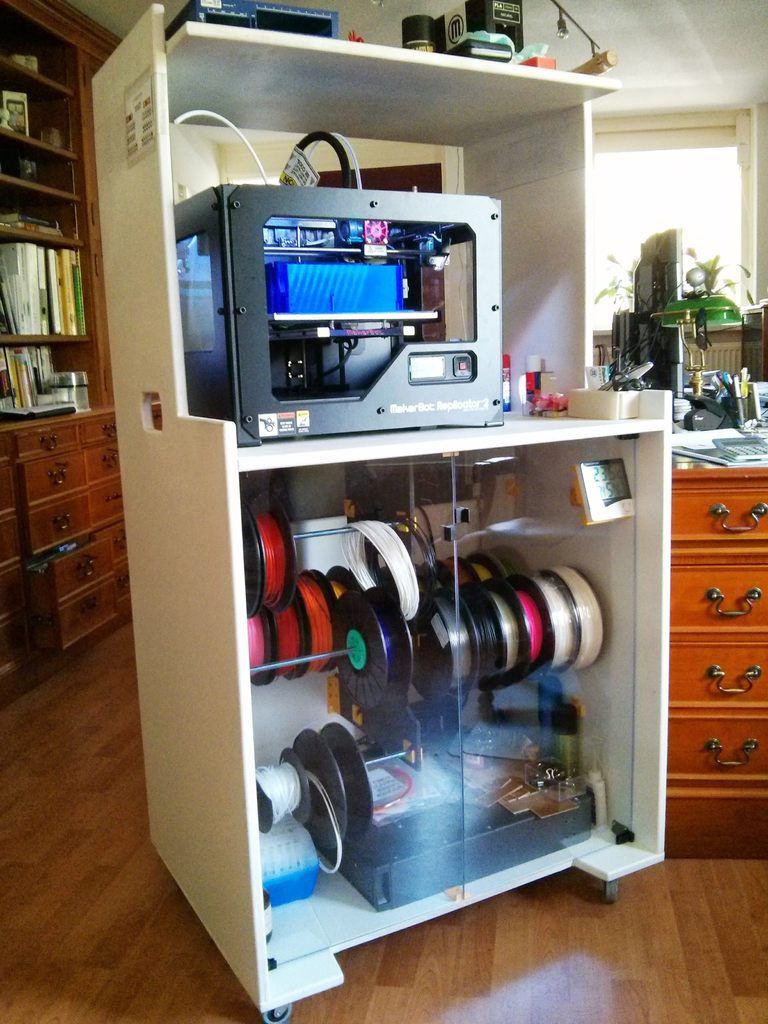 Also, the width of the shelves of 544 mm is designed for the installation of ball guides with a thickness of 12 mm, if your guides are of a different thickness, then this value will need to be changed to double the difference mm. If, for example, your guide is 16 mm thick, then the width of the shelf must be reduced by 8 mm = (16-12) * 2, i.e. shelf width will be 536 mm.
You will also need 4 sets of ball guides from 450 to 550 mm long, for 100% (full) extension, i.e. each guide should consist of three supporting elements and two retractable sections. Otherwise, the shelves will lose some of their functionality.
If you decide to make the printer control panel also retractable, you will need another set of rails.
Optionally, for convenience when moving, it is desirable, but not necessary, to install a wire reel from the vacuum cleaner.
If I remember anything else, I will update this post.
Ask questions, I will answer. If I'm going to shoot a review, then I'll add a link to the video.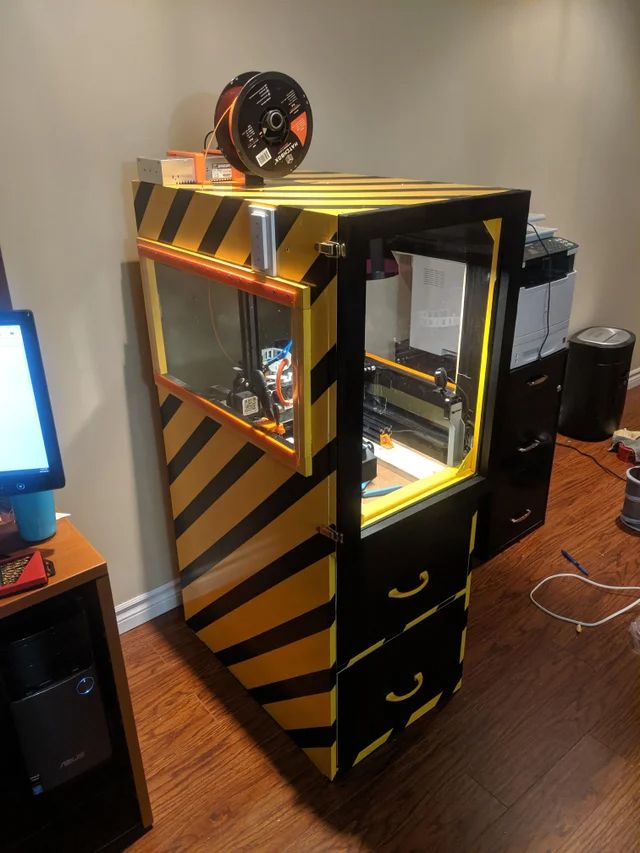
Best regards,
Alexander Safonov
REC Wiki » The Best Professional Storage Solutions for 3D Printing Plastics
In this article, we will cover some dryers and dry cabinets, the equipment you need to properly store FDM/FFF 3D printer filaments and get optimal 3D printing results .
Contents:
1. Introduction
2. Why dry cabinets are needed
3. Specialized solutions:
- BigRep Shield
- Essentium DryBox
- Smart3D
- Apium F300
- X-Treme Series
- Filaments.ca PolyDry
4. Borrowed solutions
- Totech SuperDry HSD
- Mancorp Ultra-Dry
It only takes a few printouts to ruin the need for filament dryers. Many professional and industrial grade FDM 3D printers come with these devices out of the box, either built-in or optional. If your 3D printer does not have a dry bay, you should consider purchasing a suitable device to protect the filament from light, dust and moisture.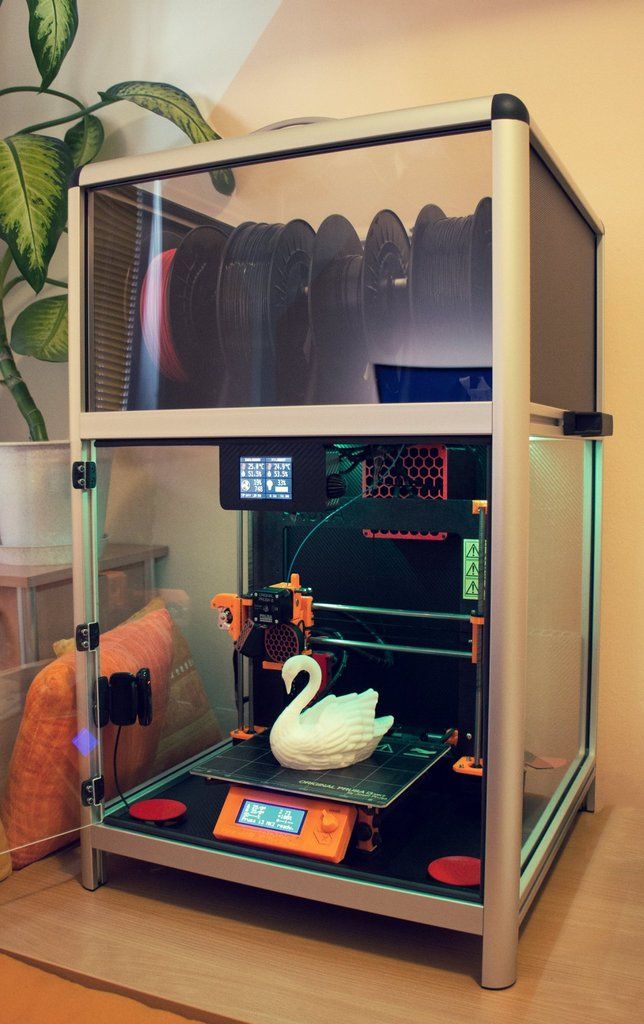
Some dry cabinets/compartments treat the filament with hot air heated to 60ºC or more. After drying, the filament remains in a space isolated from the external environment with low relative humidity (usually less than one percent) under the constant supervision of sensors that monitor humidity and, if necessary, start additional drying cycles.
Other options can keep the filament dry with a sealed chamber with warm air circulation, but are unable to remove significant amounts of accumulated moisture from the filament. Such cabinets or compartments work best in conjunction with specialized dryers.
There are quite a few compact single or double spool dryers on the market, usually based on conventional fruit dryers, but if you work in industrial scale or change materials frequently, you will need larger equipment capable of accepting ten to twenty spools at a time. The choice of such systems is relatively small, which is explained by the presence of integrated dry bays on many industrial 3D printers. Fortunately, ovens are used in other applications as well, but are well suited to the needs of the additive industry. We will also consider some of them in this article.
Why dry cabinets are needed
The effect of moisture on the quality of 3D printing with the same material Illustration: Matterhackers
Wet filament can not only ruin the printout, but also potentially damage the 3D printer itself, for example by clogging the nozzle.
All filaments are hygroscopic to some extent and must be kept dry, but this is not the only problem. Dust, light, and extreme temperature changes can also cause problems, although different materials have different resistance to various environmental factors.
Proper filament storage is worth thinking about before you open the spool bag. Dry cabinets help not only to protect the filaments, but also to return materials that have absorbed moisture to an optimal state, which makes such devices an indisputable help in enterprises with high employment.
Professional dryer equipment can cost thousands of dollars, but it's worth it when there's a lot of work at stake with tight deadlines. Despite the often high cost, dry cabinets pay for themselves quite quickly due to the saved time, materials and nerves.
If you usually only have a few spools of filament on hand, it's more economical to get a fruit dryer, a homemade device, or even just sealed containers of silica gel. If you work as part of a whole team that operates a 3D printer farm and changes consumables several times a day, it makes more sense to purchase a specialized dry cabinet.
Specialized Solutions
BigRep Shield
Industrial dry cabinet BigRep Shield. Illustration: BigRep
These cabinets are manufactured by BigRep, a German company known for large-format FDM 3D printers. BigRep Shield does without heating: the humidity inside the sealed chamber is regulated by a recirculation system that forces air through the hydrophilic sorbent.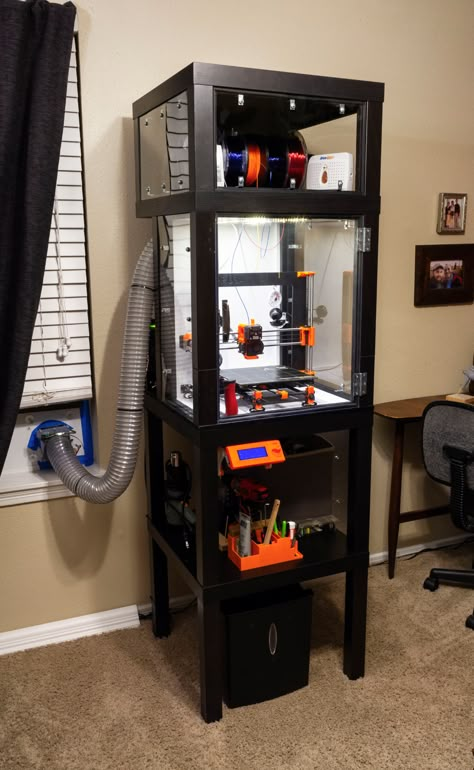 The device absorbs up to 99.99% moisture and keeps the relative humidity at 0.01% without heating the filament, which in some cases can damage the material during prolonged exposure. One of the reasons for not using heat is that BigRep 3D printers are often used to 3D print casting master patterns and other low-melting polylactide (PLA) products.
Coils with a total weight of up to 60 kg can be accommodated in the cabinet. According to BigRep's calculations, this is enough to provide one FDM 3D printer with consumables for a month of continuous operation. The cabinet is controlled by a Siemens control system that monitors the condition of the silica gel for timely replacement.
Essentium DryBox
Dry boxes DB90-SB (left) and DB270 (right). Illustration: Essentium
Essentium, a Texas-based 3D printer brand, has teamed up with drying equipment manufacturer Electronic Controls Design Inc. to create its own SmartDry dry cabinet shaped for filament storage.
The DB90 cabinet maintains relative humidity below one percent and restores optimal storage conditions in less than three minutes after closing the door. The DB90-SB option includes a Smartbake system that maintains temperatures between 40-60°C. The system allows you to program the temperature, humidity and drying time.
The larger version is designated DB270. This cabinet has the same functionality as the basic DB90 cabinet, but with more than double the capacity: up to 72 spools weighing 750 g, or 24 spools weighing 2.5 kg, or 18 spools weighing 15 kg. The Smartbake system is not provided in this variant.
Optional indicator lights indicate filament readiness.
Smart3D
Smart3D multimaterial dryer. Illustration: Smart3D
Smart3D dryers are manufactured by the American company of the same name, which also produces 3D printers. This equipment provides drying and storage of the filament in optimal conditions before 3D printing.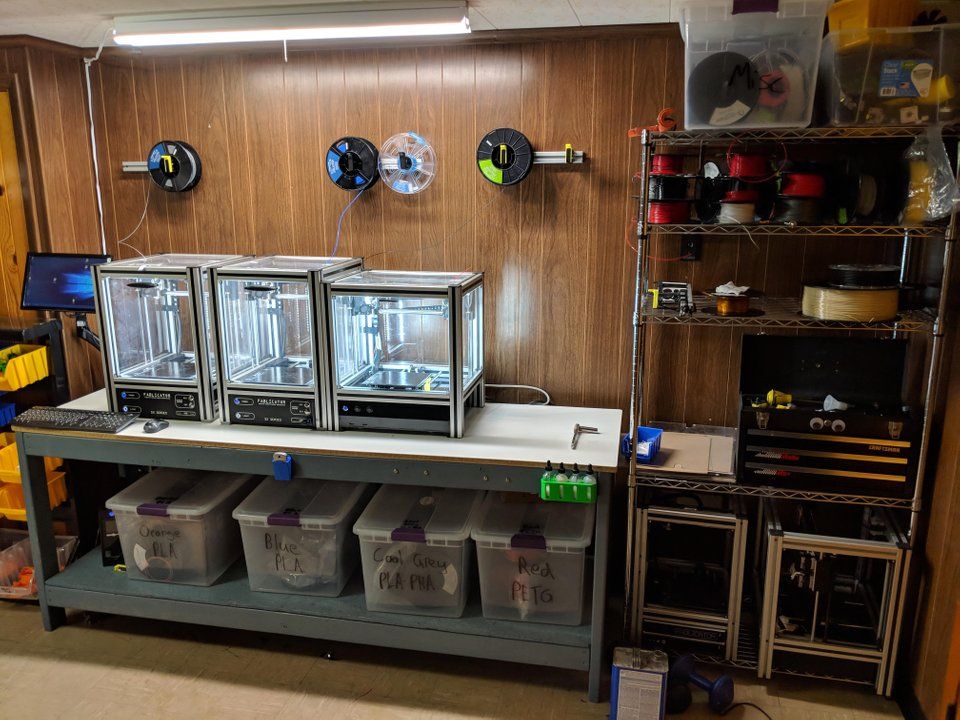
Most dryers only work with one or two coils at a time because different materials require different heat conditions. For example, drying polyetheretherketone (PEEK, PEEK) takes longer and requires higher temperatures than polyamide (PA, PA). The peculiarity of this "multi-material" system is that it performs alternating vacuum and heating cycles, allowing filaments from several materials to be dried simultaneously without the risk of damage to the polymers.
The dryer is equipped with a seven-inch touch screen that allows you to set the operating mode depending on the types of filaments and the number of spools, as well as displaying information about temperature, humidity and current modes. Typically, one complete drying cycle takes two to three hours. The system accepts coils up to 300 mm in diameter.
Apium F300
Apium F300 dryer. Illustration: Apium
The F300 systems are offered by German additives and consumables supplier Apium.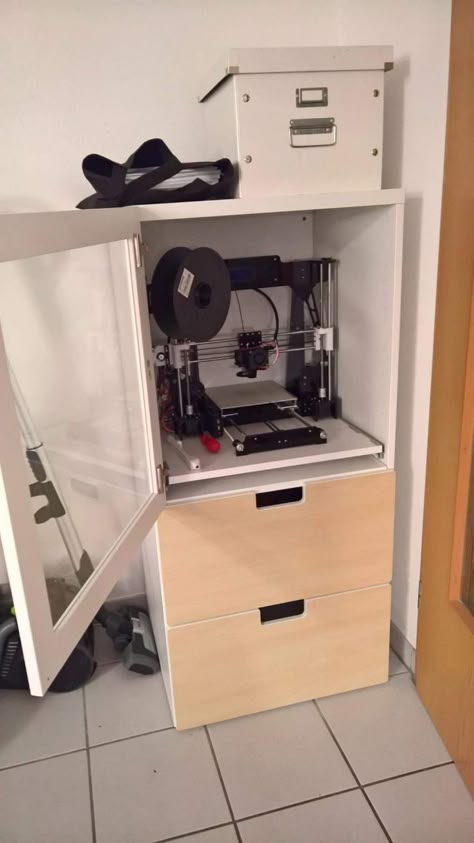 These dryers are optimized for engineering thermoplastics such as polycarbonate and polyether ether ketone (PEEK). For the most common types of polymers, profiles with temperature settings are provided, but if necessary, the values \u200b\u200bare set manually. The working chamber is insulated to reduce heat loss and save energy. Operating temperatures can reach 150ºC.
One of the important features of this system is the ability to supply consumables to the hot ends of 3D printers directly from the dryer via a Teflon tube - up to three filaments at the same time.
X-Treme Series
Dry cabinets from X-Treme Series. Illustration: X-Treme Series
The Turkish company X-Treme Series has been manufacturing drying ovens since 1987 and offers a line of devices that provide relative humidity below 1% and are excellent for storing filaments.
The principle of operation of such cabinets is based on forced air circulation through filters with silica gel that absorbs moisture. The capacity of silica gel is not unlimited, but the designers have provided for the possibility of automatic drying of the absorbent saturated with moisture for reuse.
Additionally cabinets can be equipped with active dryers with heating elements maintaining temperatures up to 60°C or 100°C, depending on the option chosen. Operating modes are adjusted and monitored using the on-board touch screen.
Especially for the needs of the additive industry, the company offers cabinets with the possibility of inflating with a protective gas, specifically nitrogen, and expelling humid air. This option is more likely to work with metal consumables - wire and fine powders from active metals and alloys. Such systems can reduce the relative humidity level in the chamber from 50% to 1% in less than seven minutes.
Filaments.ca PolyDry
PolyDry dry cabinet. Illustration: Filaments.ca
Canadian company Filaments.ca offers PolyDry, a fully automated, high-capacity, long-term storage system for filaments.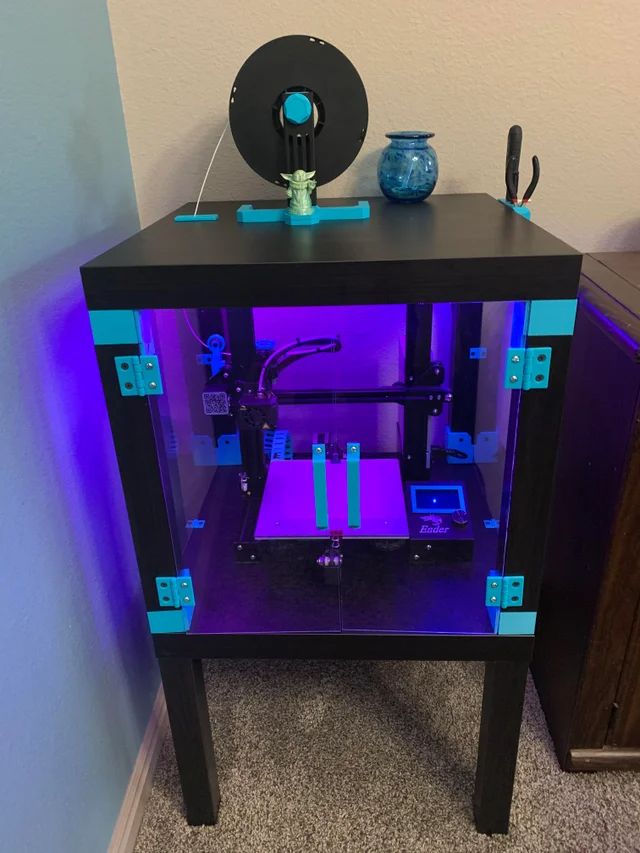 These cabinets, equipped with moisture and dust filtration systems, allow dozens of opened filaments to be stored in a clean and dry environment with a relative humidity of less than 3%.
The modular design of the internal racks allows you to choose a convenient configuration depending on the number and size of coils. Using the built-in touch display, you can select the operating mode, as well as enable or disable notifications for exceeding the permissible levels of humidity and doors not tightly closed. The system automatically regenerates the absorbent saturated with moisture.
Borrowed solutions
Drying cabinets are used in many areas and are not always used for their original purpose. For example, professional photographers often store expensive equipment in dry cabinets; in the electronics industry, such equipment is used to store circuit boards and chips, but this does not mean at all that it cannot be used to store filaments.
In such cases, you should not expect the functionality inherent in specially designed systems, for example, the same possibility of feeding the filament directly from the cabinet to the extruder of a 3D printer - it is hardly provided by the designers. However, you can find devices that keep the humidity below 10% and are therefore well suited for long-term storage of 3D printing plastics. When choosing such equipment, be careful about the declared characteristics: for example, some cabinets are only able to reduce relative humidity up to 30%. This may be enough for storing photographic equipment, but not enough for storing filaments.
Some examples:
Totech SuperDry HSD
Totech SuperDry HSD. Illustration: Totech
These cabinets are designed from the ground up for storing electronic components and are available in several configurations. The devices can be equipped with optional heaters with air temperature inside the chamber up to 40°С and humidity less than 1-2%. Humidity and temperature levels can be adjusted using the on-board display. It takes about fifteen minutes to restore a dry atmosphere after opening and closing the cabinet.
Mancorp Ultra-Dry
Mancorp Ultra-Dry 1490H (left) and 490H (right).
Learn more


