Closed loop 3d printer
Closed-loop stepper motors - 3D Printing Stack Exchange
Asked
Modified 7 months ago
Viewed 2k times
$\begingroup$
I am thinking to use closed-loop stepper motors to prevent step loss and make the machine more accurate. What options (preferably low cost) are there for:
stepper motor + driver + encoder + microcontoller
Is building it from scratch worth it? E.g. Arduino Mega 2560 + RAMPS 1.4/1.5/1.6 + stepper motors (e.g. NEMA17) + drivers (e.g. A4988, DRV8825) + encoders (e.g. AS5047P, AS5047D, AS5048A, TLE5012B) + microcontrollers (e.g. STM32).
- stepper
- stepper-driver
- motor
- arduino
- ramps
$\endgroup$
1
$\begingroup$
A number of options exist, but keep in mind that cost will be a limiting factor.
(Small sidenote: cost depends on persective, financial cost does not equal mental cost. The tradeoff between buy or make depends also on your willingness to persist when things don't work right away.)
Before you start: make sure that your printer has enough space to accomodate bigger motors.
So, what options are there?
Change your current configuration. If you are losing steps, it could very well be that it can be fixed in firmware.
- Pro: No budget and nothing to lose.
- Con: No shiny closed loop system. (Is that bad though?) Possibly need to configure and compile your own firmware.
MacGyver / DIY solution based on low lever components
- Pro: Probably as cheap as you'll get depending on how you choose your components. Might be an interesting learning experience, not to mention the satisfaction afterwards. This could be the smallest build size you'll see in all the options.

- Con: You'll need a decent amount of engineering and debugging. Might be tricky to mount the encoders.
- Pro: Probably as cheap as you'll get depending on how you choose your components. Might be an interesting learning experience, not to mention the satisfaction afterwards. This could be the smallest build size you'll see in all the options.
Same as 1, but now consider using of the shelf stepper motors with integrated encoders.
- Pro: Most robust option on a budget in my opinion due to the single mechanical piece (motor + encoder).
- Con: Integrated encoders have a considerable cost and are large compared to their vanila versions.
Go for off the shelf motor+encoder and drivers.
- Pro: No need to worry about driver configurations too much. Just plug in the numbers or set the dip switches. Very conveinient solution. Pretty much plug and play.
- Con: This will already be challenging on a budget. Making a wrong mix and match might lead to unpredictable results such as drives going in overcurrent. (Which, believe me, is very frustrating for your application!)
If we are allowed to consider servo motors: ClearPath-SD series (Or any alternative for that matter!) I'm just including this for completeness.

- Pro: Performance wise a clear winner on pretty much any relevant level.
- Con: You'll need a big budget!
Bottomline: You'll probably want to give the first option a go before spending money. Next stop, you might want to take the second option (you already did research on different specific low level components), and if you have time to spare I'd go with that as well. If you are also on a budget timewise, I'd definively suggest to take the third option with existing driver boards.
The other options are more cost heavy and become real options in produciton environments, where downtime is also costsing money.
As to the microcontroller, take whatever you have available. Just know that more computational power will allow you to output steps faster and will allow for smoother movements. Lot's to talk about there as well!
$\endgroup$
$\begingroup$
So, I am one of those who has implemented this on my big scale heavily modified cr-10 S5.
Why?
Well with bigger prints, the risk of crashing into itself because of a small blob is very real. Possibly ruining a 100$ worth of filament and missing deadlines. (We are using this professionally.) Blobs will happen, especially if you run low cost filaments and PETG, which is the only sane option for functional bigger prints from a cost perspective. We are using the BTT system S42B on all axis and it works well. A blob is now just a small distraction which can be polished away but the remaining print is still dimensionally correct.
However, it is not a trivial task to actually implement. To make this work one needs a printer main board allowing for external stepper drivers, like SKR E3 DIP,SKR V1.4,SKR V1.4 Turbo and so on. Also there one needs to tune the PID:s for the system in use which is not super simple.
If you are truly an expert and do big prints, I really think this is a must have upgrade. On the other hand if one are only printing smaller parts on a hobby scale this will not be a worth while upgrade.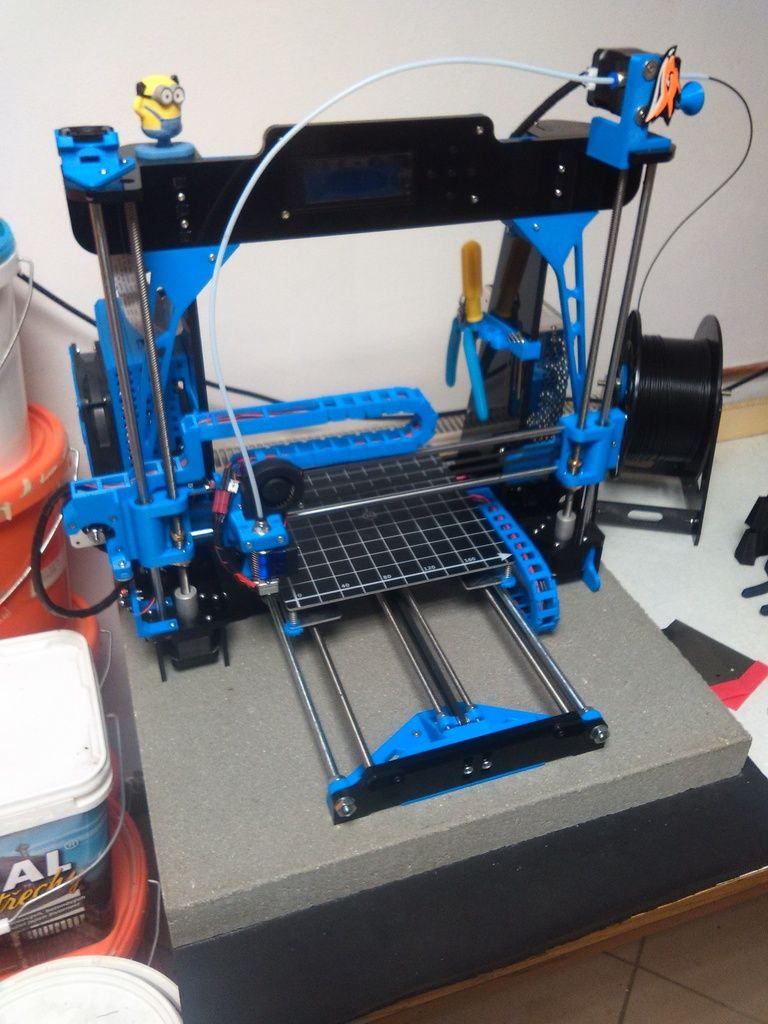 I am not talking about the money involved, the pcbs are just 14$/pcs but the work needed with new cabling pid-tuning marlin-digging and so on. For us it is just amazing to not have 30% failures any more, du to the inevitable blobs sometimes appearing in bigger prints.
$\endgroup$
2
$\begingroup$
I've implemented a closed-loop system about 25 years ago on an 8 x 32 erosion table scanning it at one cm resolution using laser triangulation. It took 120 hours to scan the surface. Most of the time was spent waiting seven seconds for the system to stop shaking. I put shaft encoders on the X, Y, & Z shafts, not the stepper motors. I wanted to sure I got the movement of the camera.
In the end, I settled on moving to a goal with a 1/10 mm tolerance and added any error into the move to the next goal. There was a sphere of confusion of the location of the camera of more than 2/10 mm. Moving back and forth to make up for a missed step at the cost of nearly 10 seconds a move could add days to a run. We were well past the end of the table's life.
$\endgroup$
1
$\begingroup$
It has been 25 or 30 years since I did my first closed-loop system. I was driving a syringe pump from a printer port on a MS-Dos PC that ran hot had to disable the timer interrupts to make the deadlines amount moving the plunger, updating the floppy drive reading and computing the new position, getting the time, and fixing up the timer.
I found moving to a goal with a tolerance of 1 or 2 stepper motor steps was on the money over 95% of the time and I made deadlines over 90% of the time. Any error was made up in the next move. I used the same scheme on an 8 x 32 foot structured light scanning table. I am pretty sure I saw memory errors from cosmic rays on this one. It took 500 hours to scan that with no parity check on the RAM. It had some wooden structures that changed size over time. I could track the movement with the error files from the shaft encoders.
On the x y scanning table, the wait time was7 seconds after a move before the camera stopped asking enough to capture an image. We elected to fix up the position in software and accumulate the errors in the next move in order to be able to finish the project.
$\endgroup$
1
About | Closed Loop Plastics
OUR MISSION
To provide a pathway to more sustainable and accessible uses of post-consumer plastic waste. We accomplish this by bridging the gap between material recycling and plastic manufacturing facilities, taking post-consumer plastic waste and turning it into engineering grade recycled plastic feedstock through our patent pending, 100% clean Closed Loop Plastic Recycling Process.
WHAT WE DO
Closed Loop Plastics aims to solve our plastic pollution problem from several vectors, enabling us to service customers on all fronts from the end-user to the manufacturer.
Through commercial service agreements with both municipal waste facilities and manufacturers, we provide a valuable market for material leaving waste facilities. Our patent-pending recycling technology processes the material into a commodity feedstock - already in demand by plastic manufacturers.
We cannot solve the plastic pollution problem alone, so we want to license our patent-pending recycling process to enable recyclers and municipalities across the country and even the world to utilize the process we’ve developed to up-cycle their local waste. Creating this Closed Loop Plastics ecosystem will not only reduce plastic waste but the carbon footprint left behind from transporting waste across the globe.
In addition to supplying plastic manufacturers, we provide 3D printing filament, leveraging partnerships with regional resellers for distribution to supply our 100% up-cycled plastic monofilament to the market. Each spool is made and tested with care for both your printing experience and the environment. As we continue to onboard additional resellers, we will reach customers from across the country.
THE CLOSED LOOP PLASTICS
RECYCLING PROCESS
OUR TEAM
Will Amos
Co-Chief Executive Officer
Will is a recent graduate of UC Irvine’s Environmental Engineering program, Recipient of the Brower Youth Award for Environmental Leadership, Eagle Scout, and a co-founder of Closed Loop Plastics. He knows that designing our sustainable future requires the integration of new technology, policy, activism and education. To achieve this goal he believes we need to foster a spirit of cooperation and innovation across all disciplines.
Aldrin Lupisan
Co-Chief Executive Officer
Aldrin recently graduated from UC Irvine with a B.S. degree in environmental engineering and is a co-founder of Closed Loop Plastics. Aldrin is a steward of the ocean and envisions a world with less waste ever since his days of volunteering at the Aquarium of the Pacific and actively participating in beach clean ups. With over 3 years of experience and 1000+ hours of 3D printing experience, Aldrinʼs comprehensive knowledge in both areas of environmentalism and engineering bring many ideas to Closed Loop Plastics.
Sharon To
Chief Technology Officer
Sharon is an alumna from the University of California, Irvine with a B.S. degree in Computer Engineering. She seeks to utilize technology to provide the rest of society with more convenient and sustainable tools as well as to satisfy and nurture human curiosity and innovation.
InVESTMENT Opportunity
Closed Loop Plastics is actively seeking Seed Funding.
Please click the button below to request information about this investment opportunity.
REQUEST INFO
OUR KEY SUPPORTERS
MATTERHACKERS
We are so grateful to have the privilege of working with MatterHackers, one of the largest retail operations in the 3D printing space! Since our inception, we’ve been able to work closely with the wonderful people at MatterHackers through mentorship, marketing, and sales.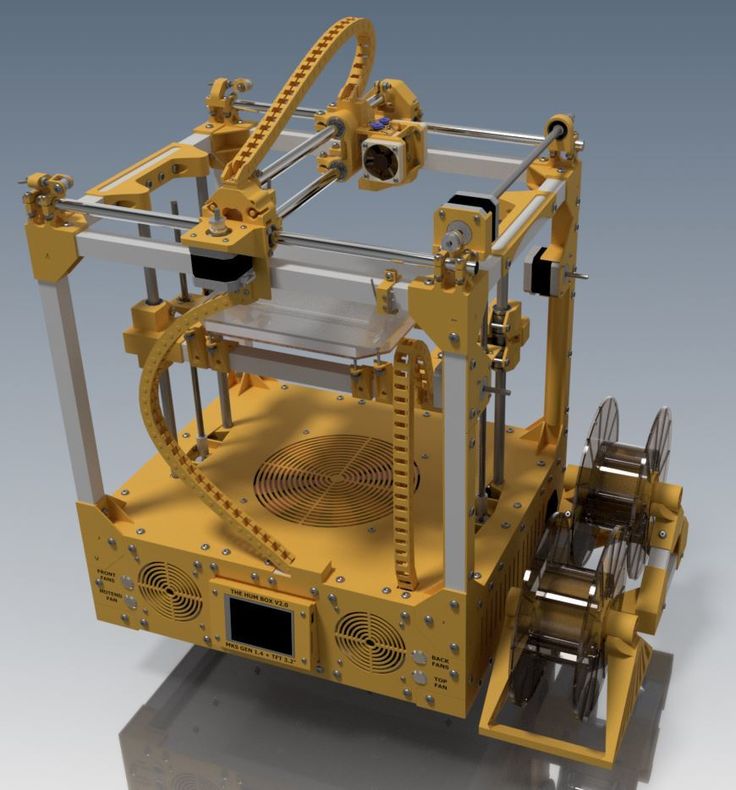 At every turn, they’ve offered us their support whether it’s collecting cups for our feedstock, hosting awesome meetups that have enabled us to broaden our network, or sharing and celebrating our progress! The people at MatterHackers are key thought leaders in the 3D printing space and are determined to help every maker explore their craft. Fun fact: they also serve good tacos.
Visit MatterHackers
WASTE CONNECTIONS: Cold Canyon Landfill
When CLP first began, we knew we wanted to help clean up our plastic waste problem. But where were we going to get all our plastic from? We knew the waste was definitely out there, but not in a concentrated form. At a business competition for college students that we attended in Fort Worth, Texas, we met the CEO of Waste Connections, Ron, who was intrigued by our business and wanted to help. By connecting us with a Waste Connections facility in San Luis Obispo, we were then able to source thousands of pounds of sorted single-use party cups directly to our new facility in Long Beach.
Visit Cold Canyon Landfill
Series one Consulting
After joining and being more involved in the Plastics Industry Association, we met Mark Richardson from Series One Consulting. Mark is a long-time plastics engineer, educator, and photographer. With all his years of experience in plastic manufacturing, recycling, and the plastics industry as a whole, Mark has proven pivotal to our progress as we hone our processes to create the best products we can.
Visit Series One
8 Best Enclosed 3D Printers of 2022 (All Price Ranges)
Enclosed 3D Printers prevent cold air from entering the print, causing warping or other problems. For basic materials like PLA, 3D printer cases don't matter much, but for more complex materials like ABS and Nylon, they will save you time and time again.
Most cheap 3D printers are open 3D printers - they don't have a frame or casing (sometimes you can buy them separately) and print outdoors. Almost all 3D printer kits like the Ender 3 and CR-10 are open source 3D printers.
However, this can cause problems. ABS, a widely used material for 3D printers, warps if it is not cooled slowly. In addition, closed 3D printers allow you to keep hot and dangerous parts of the 3D printer away from your hands and others. This is especially important for kids, which is why indoor 3D printers are some of the best 3D printers for kids.
Contents
- Best Closed 3D Printers Under $1,000
- Flashforge Adventurer 3 Lite - cheapest indoor 3D printer
- Monoprice Voxel - budget indoor 3D printer
- QIDI Tech X-Pro - great 3D printer with 0 case
- Flashforge Creator Pro 2 - best inexpensive IDEX printer
- BIBO 2
- Best Enclosed 3D Printers for Consumers
- Dremel 3D45
- Raise3D E2
- Best High End 3D Printers with Housings
- Raise3D Pro2
- Ultimaker S5 (with housing kit)
- Buyer's Guide - What to look for
- Benefits of Enclosed 3D Printers
- Frequently Asked Questions
Best Enclosed 3D Printers Under $1,000
Flashforge Adventurer 3 - Cheapest indoor 3D printer
- Price: about $339
- Assembly volume: 150 x 150 x 150 mm
Flashforge Adventurer 3 Lite is a compact and quiet, fully enclosed beginner printer that provides friction-free printing. Printer setup is minimal other than a well-managed five-point calibration process, making it the best choice for beginners or students looking to start printing without the hassle.
It is almost identical to the Adventurer 3, except for the built-in camera and thread runout sensor. These minor features do not detract from the simple typing experience.
In addition to a sleek, closed design, the Flashforge Adventurer 3 Lite has everything you need to handle tough materials like ABS: a flexible heated bed with a maximum temperature of 100°C and a maximum nozzle temperature of 240°C. With these features, you can also work with more exotic heat-sensitive materials such as metal, wood, and more.
It also has a wide range of connectivity options, including Wi-Fi and remote print monitoring thanks to FlashForge's 3D Cloud Print technology. The build volume of 150 x 150 x 150mm results in a narrow printable area, which is one of the few gripes I had when evaluating the Flashforge Adventurer 3 Lite. You won't have much luck printing bulky and tall parts, but this is easy to fix by printing in batches.
It is also worth noting that the filament compartment located on the side of the printer, although practical, is not intended for all types and brands of filament. You may need an external holder if your chosen third party filament is not suitable.
Key points:
- Closed chamber
- Rugged, beginner-friendly printer
- Wi-Fi connectivity
- Materials: PLA, ABS, Heavy Duty PLA, PLA Color Change, Metal Filled, Wood and High Speed PLA
Monoprice Voxel - Budget Enclosed 3D Printer
- Price: $449
- Assembly volume: 150 x 150 x 150 mm
The cheapest indoor 3D printer we recommend, the Monoprice Voxel is one of the best 3D printers for beginners. It's very easy to set up (within 10 minutes!), easy to operate with a touch screen, can print over WiFi, and comes with 8GB of onboard storage for 3D printer files. It comes with several 3D models in files, as well as some materials to get you started, so you can go from unboxing to printing in minutes.
If you're new to 3D printing and aren't too tech-savvy, the assisted leveling system reduces the experience to a simple click. It also comes fully assembled, so you won't need any DIY skills, which is surprising considering most printers in this price range are 3D printing kits. It can also connect to Polar Cloud, allowing you to manage and control your printer remotely, and even do so for multiple printers at the same time.
Key Points:
- Cheap Indoor 3D Printer
- Beginner Friendly
- WiFi Printing and Touch Screen on an Inexpensive Device
- Materials: ABS, PLA, PETG, Flexibles
QIDI Tech X-Pro is a great 3D printer with a $500 case
- Price: $500
- Assembly volume: 230 x 150 x 150 mm
One of last year's most popular low-cost 3D printers, the Qidi Tech X-Pro offers reliability, precision, dual extrusion and an efficient closed area print, all for $500.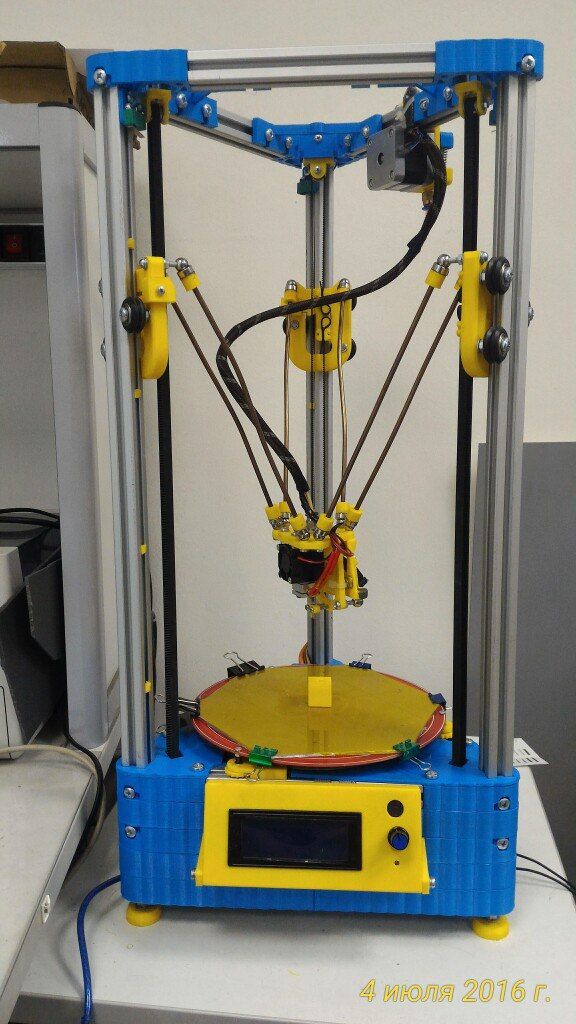
The layer thickness starts from 0.05 mm, the printer can print at speeds from 30 to 150 mm/s - although at such high speeds the print quality deteriorates noticeably. The printer is Mac and Windows compatible and can print over WiFi, USB or Ethernet.
Flexible, removable plate allows for easy removal of prints with minimal damage, and comes with Qidi Tech's own QidiPrint 3D Slicer. Overall, this is one of the best indoor 3D printers under $500.
Highlights:
- Large 4.5" touchscreen for ergonomic printing
- Flexible assembly plate
- WiFi printing and dual extrusion for $500
- Materials: ABS, PLA and PETG
Flashforge Creator Pro 2 - Best value IDEX printer
- Build volume: 200 x 148 x 150mm
A well-equipped update to the classic Creator Pro, the Flashforge Creator Pro 2 offers all the benefits of a case with features you don't expect to see in the $600-$700 range. We see it as an ideal second printer for manufacturers who have already completed their initial training on a budget FDM kit and are now looking for something more versatile and feature rich.
While the Flashforge Creator Pro 2 has a solid, well-made enclosed print chamber suitable for both ABS and PLA thanks to its removable acrylic top cover, it's the independent dual extruder system that sets it apart from other best enclosed 3D printers.
The IDEX system is almost unheard of at this price point, giving manufacturers the flexibility to work with specular prints, duplicate prints, dissolvable support structures, and even print multiple materials or colors at the same time. It is suitable for complex prints with vertical overhangs or is the perfect tool to help the teacher to release as many student-designed prints as quickly as possible.
These two centerpieces aside, Flashforge Creator Pro 2 completes the offering with a touch interface, 200 x 148 x 150mm volume and compatibility with PLA, Pearl PLA, ABS, ABS Pro, PVA and HIPS materials.
It's worth noting that Flashforge made the wrong choice by tying the Creator Pro 2 to its own FlashPrint slicer. It does its job well enough, but doesn't have the versatility of an open source software suite like Cura. This isn't necessarily the deciding factor, especially for those new to 3D printing or educators who want simple software and pre-loaded settings specifically tuned to work with the Creator Pro 2 right from the start.
Highlights:
- Inexpensive independent system with two extruders
- Fully enclosed print chamber
- Materials: PLA, Pearl PLA, ABS, ABS Pro, PVA and HIPS
BIBO 2
- Price: $679
- Assembly volume: 216 x 187 x 160 mm
The Bibo 2 printer, with character and affordable for hobbyists, offers 50 micron accuracy, dual extrusion and WiFi printing, all for less than $1,000.
Although this closed 3D printer is not an IDEX printer, it still offers copy printing modes for printing two identical objects at the same time. It features an easy-to-use touch screen - which isn't a given in this price range - and has a low-filament detection feature to avoid spoiling prints.
In addition to the ABS and Nylon efficient 3D printing 3D printer body, Bibo is built in a stable and durable aluminum frame, minimizing unwanted vibrations that can slightly affect print performance and quality. Overall, this is a great indoor 3D printer for the price, and it can also come with a laser engraver kit.
Highlights:
- WiFi printing, dual extrusion and touch screen, all for just over $500.
- Minimum layer height 50 microns
- Claims it can print polycarbonate but also says max temperature is 270C
- Materials: PLA, ABS, HIPS, flexible filaments, PETG, nylon, PC, carbon fiber
- Best Indoor 3D Printers for Consumers
Best Indoor 3D Printers for Consumers
Dremel 3D45
- Price: $1,599
- Assembly volume: 254 x 152 x 170 mm
Accurate, versatile and ideal for teaching 3D printing in schools, the Dremel 3D45 builds on nearly a century of Dremel manufacturing experience. Accuracy down to 50 microns, WiFi, USB or Ethernet cable connectivity, Mac and Windows compatibility, and iPad compatibility make the Dremel Digilab 3D45 the perfect addition to any school or business prototyping environment.
The heated plate allows you to print on nylon and Eco-ABS, while the built-in HD camera provides convenient remote control of the print progress, which is easily done using cloud-based 3D printing software.
If you have any problems, the Dremel Customer Service in the USA is here to help you. Overall, this is a solid and accurate indoor 3D printer that offers good volume and results for the price.
Highlights:
- Powerful automatic leveling system
- Highly rated customer support
- Universal
- Materials: PLA, PETG, Eco-ABS, Nylon
- Price: $3,499
- Assembly volume: 330 x 240 x 240 mm
Raise3D Large Enclosed 3D Printer adds to IDEX's already impressive range of dual extruder 3D printers. The extruders of IDEX 3D printers can move independently of each other, which greatly increases the speed and efficiency of printing, especially when printing multiple identical or identical parts.
Raise3D E2
The E2 printer has two basic modes:
Mirror mode: 3D printing simultaneously prints inverted mirror versions of your model, such as the sole of a shoe for the left and right foot.
Duplicating mode: uses both extruders synchronously, printing two identical objects at the same time and doubling the printing efficiency.
The E2 3D printer case keeps heat inside and everything else outside. If the door is opened during printing, the process is immediately suspended so that no one is burned or injured by the extruder or the heated layer. The E2 is also equipped with an efficient air filtration system that removes melted plastic particles and odors, as well as filament end sensors and power-off recovery functions.
Highlights:
- Build volume is reduced to 295 x 240 x 240mm when using the dual extruder
- Useful "Mirror" and "Duplicate" modes
- Built-in security measures
- Materials: PLA, ABS, HIPS, PC, TPU and TPE, PETG, nylon, PP, ASA, PVA, glass-filled filaments, metal-filled, carbon-fiber and wood-filled.
- Price: $3,999 / $5,999
Build Volume: 305 x 305 x 300 (605) mm
Top of the line 3D printers in the upper price range with housings
Raise3D Pro2
A true workhorse full body 3D printer, the Raise3D Pro2 series offers incredible precision, material compatibility, great workflow and many other key features.
The standard Pro2 already has a very large build area, while the Pro2 Plus extends the z-axis range to parts up to 605mm high. The extruders can reach temperatures of 300C for even the toughest materials such as PC, and the dual extruders enable efficient printing with support for soluble materials as well as multi-color 3D printing.
With a minimum layer height of 0.01mm, Pro2 3D printers can print incredibly sharp and finely detailed details. Swap out the nozzle for a smaller nozzle and focus on the small details to get a fantastic finish. The built-in camera makes it easy to control prints, while the 7-inch touch screen provides data and an easy-to-use overall workflow.
Highlights:
- Dual extruder build volume: 280 x 305 x 300 mm
- A complete printer: accurate, reliable, closed, versatile.
- Materials: PLA, ABS, HIPS, PC, TPU, nylon, ASA, PETG, PVA, glass, carbon fiber, wood.
Ultimaker S5 (with housing kit)
- Price: $5,995
- Assembly volume: 330 x 240 x 300 mm
The Ultimaker S5 is capable of printing industrial grade parts with layer resolution down to 20 microns. An enclosed 3D printer that becomes even more efficient and safer with the S5 Pro kit, the S5 delivers reliable and repeatable dual extrusion with amazing precision, even with abrasive filaments such as glass and carbon fiber.
Although Ultimaker manufactures its own filaments, the S5 is open and can be used with any 2.85mm filament. It prints over WiFi as well as other methods and can be monitored remotely using the built-in camera.
When you purchase the S5 Pro Bundle, you get access to 24/7 automated material handling, air filtration and heat control for 6 filaments, as well as an Air Manager that further encloses the 3D printer.
Highlights:
- Excellent accuracy and print quality
- Reliable and efficient in many materials
- Pro Bundle makes it even more efficient indoor 3D printer
- Materials: PLA, CPE, NYLON, ABS, glass, carbon fiber, PC, PVA, PP, TPU
Ultimaker s5 with optional pro kit including housing, air filter and filament storage
Buyer's guide - what to look for
Fully or partially enclosed chamber
Partially enclosed chamber printers are a bit of an oddity because they don't provide ideal printing conditions with either of the two main filament types, ABS and PLA. However, they provide an extra layer of security, which is useful for educational institutions or those with children. We recommend a fully enclosed chamber if you plan to print with ABS, and an open chamber if you choose PLA as your media. If you are going to print with ABS and PLA, choose an enclosed printer with removable covers.
Stock Volume
Build Volume is the printable area available to you on a closed printer. In other words, it is a measure of the size and type of prints you can make. If you are planning on making large prints or multiple copies, we recommend high volume printers such as the Ultimaker S5.
Material Compatibility
By design, the enclosed 3D printer is designed to be compatible with a wider range of media types due to the ability to maintain higher temperatures around prints and keep cold air out. ABS is the most common type of material for sealed chambers, but you will also find printers that can work with nylon, PC, and other heat-sensitive materials.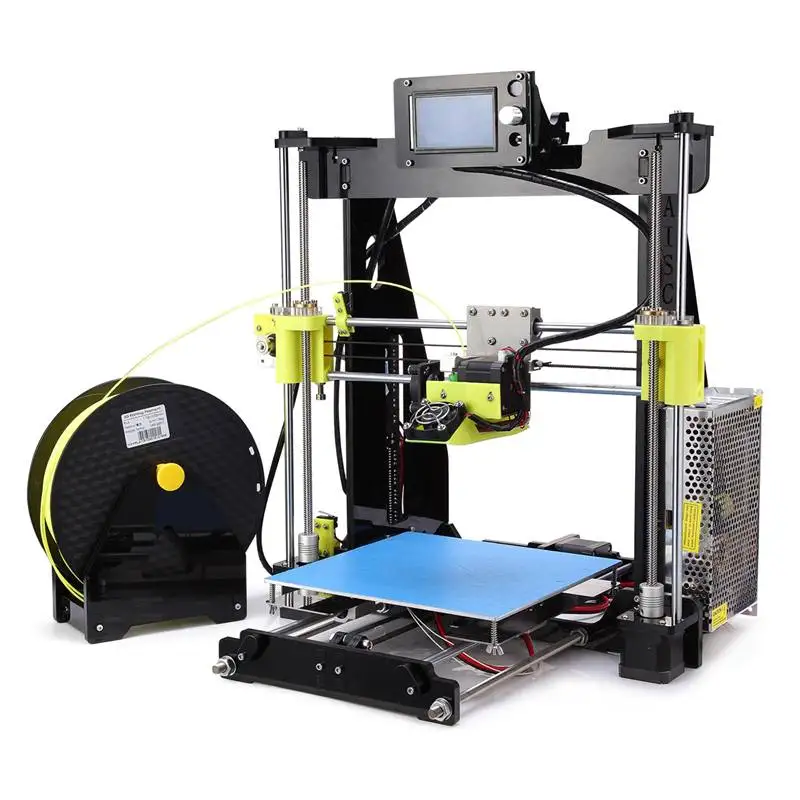 PLA can also be used if the printer covers are removable as this material requires cooler ambient temperatures for best results.
Heated bed
Given that the purpose of the closed chamber is to provide a stable thermal environment for printing with more complex materials such as ABS, a heated bed is a must. It helps provide an additional source of heat directly below the print, which promotes layer adhesion and slows down the cooling rate, thus avoiding unwanted defects such as warping and curling.
Connectivity
Connectivity determines how you interact with the printer, whether it's sending cut prints or fine-tuning settings. An SD card reader is more or less standard, as is USB in many cases, but for ease of use, there's nothing better than a Wi-Fi connection and thus cloud printing and monitoring.
Layer Resolution
Layer Resolution indicates the smallest layer height that can be printed. Choose a printer with a lower layer resolution for parts with more detail, such as 20 microns on the Ultimaker S5. On a closed FDM printer, 100 micron layer resolution is relatively standard and allows for a wide range of detail.
Filters
If you're buying a sealed chamber, your plan is most likely to include ABS printing. ABS not only has an unpleasant odor, but also emits potentially harmful fumes. A printer equipped with filters, carbon or HEPA, helps to extract the most toxic elements from the fumes. In addition, we also recommend working with ABS in a well-ventilated area.
Touch Screen
For convenience, we recommend an enclosed touch screen 3D printer. After all, we're all used to scrolling and swiping on our phones, so it makes sense to want the same functionality and familiar interface when working with a 3D printer. Most modern printers come with a touch screen as standard.
Price
Closed printers tend to increase in price as you pay for additional production and design. But thanks to the ever-increasing popularity of the budget category, enclosed camera printers are more affordable than ever before. You can easily buy a reliable indoor 3D printer for less than $400. Naturally, if you have the budget, new professional-grade printers that cost thousands of dollars also hit store shelves every year.
Benefits of Enclosed 3D Printers
Better ABS and Nylon 3D Printing
Housings can cool parts more slowly and maintain a more stable and higher temperature in the working chamber. This reduces buckling and splitting during the printing process.
Much safer
3D printer housings keep hot parts such as the nozzle and heated bed away from children if you have a family at home or if 3D printing is done in schools.
Quieter
The closed area keeps noise out, making them ideal quiet 3D printers. The enclosures keep out the buzz and hum of the printing process, which is a real boon if you're typing at home or in confined spaces with poor acoustics that can amplify noise levels.
Stronger and more durable
Enclosed 3D printers typically feature a sturdy four-walled cubic design that keeps vibrations and other factors from degrading print quality.
Noise Reduction
Enclosures help reduce noise by reducing hum and hum during printing, which is a real boon if you're printing at home or in confined spaces with poor acoustics that can amplify noise levels.
Drawbacks of Enclosed 3D Printers
More Expensive - 3D printers with enclosures are more expensive than open FDM printers. The logic here is obvious: manufacturers are forced to spend more money on raw materials and the assembly process, which invariably reflects on consumers.
Difficulty in maintenance and troubleshooting - Due to the enclosed design, maintenance of an enclosed 3D printer is much more difficult. Cleaning, replacing, troubleshooting or upgrading parts is much more of a hassle than an open design 3D printer.
FAQ
What is the 3D printer case for?
Enclosures help improve print performance by keeping hot air in and cold air/draughts out. For heat sensitive materials such as ABS, a stable higher temperature environment is critical for proper layer adhesion and reduced chance of warping, curling and other problems. Likewise, the shroud helps prevent dust and dirt from getting on printer parts and the print itself; this is essential for successful printing as contamination can affect adhesion and print quality.
Are closed 3D printers safer? Why?
Yes. The housing shields hot and moving parts from prying fingers and hands, reducing the chance of injury compared to open design printers where all parts are exposed and easily accessible. Whether you live with children or work in an educational setting with younger students, an enclosed 3D printer will give you peace of mind. In addition, filters, often installed in enclosed printers, remove toxic elements from the fumes.
How to maintain a closed 3D printer?
Maintaining a closed 3D printer is identical to maintaining an open design printer: regular cleaning of the bed and nozzle, updating the firmware, regularly inspecting parts for wear, leveling/calibrating the bed at regular intervals.
Are closed 3D printers better?
If you want to print on ABS, yes. The housing provides the correct, stable ambient temperature for ABS to thrive. On the other hand, if you are planning to print to PLA, an open design printer would be the best option. PLA needs plenty of cold air and ventilation to thrive.
How metal 3D printers work. Overview of SLM and DMLS technologies. additive manufacturing. 3D metal printing.
Metal 3D printing. Additive technologies.
SLM or DMLS: what's the difference?
Hello everyone, Friends! 3DTool is with you!
BLT metal 3D printer catalog
Selective laser melting ( SLM ) and direct metal laser sintering ( DMLS ) are two additive manufacturing processes that belong to the family of 3D printed using the powder layer method. The two technologies have much in common: they both use a laser to selectively melt (or melt) metal powder particles, bonding them together and creating a pattern layer by layer. In addition, the materials used in both processes are metals in granular form.
The differences between SLM and DMLS come down to the basics of the particle bonding process: SLM uses metal powders with a single melting point and completely melts the particles, while in DMLS the powder consists of materials with variable melting points.
Specifically:
SLM produces single metal parts while DMLS produces metal alloy parts.
Both SLM and DMLS technologies are used in industry to create final engineering products. In this article, we will use the term "metal 3D printing" to summarize the 2 technologies. We will also describe the main mechanisms of the manufacturing process that are necessary for engineers to understand the advantages and disadvantages of these technologies.
There are other manufacturing processes for producing dense metal parts, such as electron beam melting (EBM) and ultrasonic additive manufacturing (UAM). Their availability and distribution is rather limited, so they will not be presented in this article.
How metal 3D printing SLM or DMLS works.
How does metal 3D printing work? The basic manufacturing process for SLM and DMLS is very similar.
1. The printing chamber is first filled with an inert gas (such as argon) to minimize the oxidation of the metal powder. It then heats up to the optimum operating temperature.
2. A layer of powder is spread over the platform, a powerful laser makes passes along a predetermined trajectory in the program, fusing the metal particles together and creating the next layer.
3. When the sintering process is completed, the platform moves down 1 layer. Next, another thin layer of metal powder is applied. The process is repeated until the entire model is printed.
When the printing process is completed, the metal powder already has strong bonds in the structure. Unlike the SLS process, parts are attached to the platform via support structures. The support in metal 3D printing is created from the same material as the base part. This condition is necessary to reduce deformations that may occur due to high processing temperatures.
When the 3D printer's chamber cools down to room temperature, excess powder is removed manually, such as with a brush. The parts are then typically heat treated while they are still attached to the platform. This is done to relieve any residual stresses. They can then be further processed. The removal of the part from the platform occurs by means of sawing.
The scheme of the 3D printer for metal.
In SLM and DMLS, almost all process parameters are set by the manufacturer. The layer height used in metal 3D printing varies from 20 to 50 microns and depends on the properties of the metal powder (fluidity, particle size distribution, shape, etc.).
The basic size of the print area on metal 3D printers is 200 x 150 x 150 mm, but there are also larger sizes of the working area. Printing accuracy is from 50 - 100 microns. As of 2020, metal 3D printers start at $150,000. For example, our company offers 3D metal printers from BLT.
metal 3D printers can be used for small batch production, but the 3D printing capabilities of such systems are more like those of mass production on FDM or SLA machines.
The metal powder in SLM and DMLS is recyclable: typically less than 5% is consumed. After each impression, the unused powder is collected and sieved, and then topped up with fresh material to the level required for the next production.
Waste in metal printing, are supports (support structures, without which it will not be possible to achieve a successful result). With too much support on the manufactured parts, the cost of the entire production will increase accordingly.
Adhesion between coats.
3D metal printing on BLT 3D printers
SLM and DMLS metal parts have almost isotropic mechanical and thermal properties. They are hard and have very little internal porosity (less than 0.2% in 3D printed condition and virtually non-existent after processing).
Metal printed parts have higher strength and hardness and are often more flexible than traditionally made parts. However, such metal becomes “tired” faster.
3D model support structure and part orientation on the work platform.

Support structures are always required when printing with metal, due to the very high processing temperatures. They are usually built using a lattice pattern.
Supports in metal 3D printing perform 3 functions:
• They form the basis for creating the first layer of the part.
• They secure the part to the platform and prevent it from deforming.
• They act as a heat sink, removing heat from the model.
Parts are often oriented at an angle. However, this will increase the amount of support required, the printing time, and ultimately the overall cost.
Deformation can also be minimized with laser sintering templates. This strategy prevents the accumulation of residual stresses in any particular direction and adds a characteristic surface texture to the part.
Since the cost of metal printing is very high, software simulations are often used to predict how a part will behave during processing.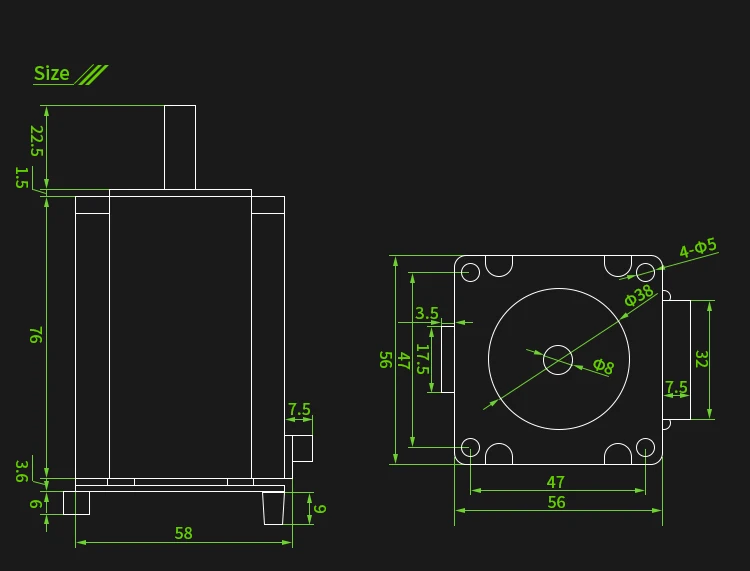 These topology optimization algorithms are otherwise used not only to increase mechanical performance and create lightweight parts, but also to minimize the need for supports and the likelihood of part distortion.
Hollow sections and lightweight structures.
An example of printing on a BLT 3D printer
Unlike polymer powder melt processes such as SLS, large hollow sections are not typically used in metal printing as the support would be very difficult to remove, if at all possible.
For internal channels larger than Ø 8 mm, it is recommended to use diamond or teardrop cross-sections instead of round ones, as they do not require the construction of supports. More detailed recommendations on the design of SLM and DMLS can be found in other articles on this topic.
As an alternative to hollow sections, parts can be made with sheath and cores, which in turn are machined using different laser power and pass speeds, resulting in different material properties. The use of sheath and cores is very useful when making parts with a large solid section, as it greatly reduces printing time and reduces the chance of warping.
The use of a lattice structure is a common strategy in metal 3D printing to reduce part weight. Topology optimization algorithms can also help design organic lightweight shapes.
Consumables for 3D metal printing.
SLM and DMLS technologies can produce parts from a wide range of metals and metal alloys, including aluminum, stainless steel, titanium, cobalt, chromium and inconel. These materials meet the needs of most industrial applications, from aerospace to medical applications. Precious metals such as gold, platinum, palladium and silver can also be processed, but their use is of a minor nature and is mainly limited to jewelry making.
The cost of metal powder is very high. For example, a kilogram of 316 stainless steel powder costs approximately $350-$450. For this reason, minimizing part volume and the need for supports is key to maintaining optimal manufacturing cost.
The main advantage of metal 3D printing is its compatibility with high-strength materials such as nickel or cobalt-chromium superalloys, which are very difficult to machine with traditional methods. Significant cost and time savings can be achieved by using metal 3D printing to create a near-clean shape part. Subsequently, such a part can be processed to a very high surface quality.
Metal post-processing.
Various post methods. treatments are used to improve the mechanical properties, accuracy and appearance of metal printed products.
Mandatory post-processing steps include the removal of loose powder and support structures, while heat treatment (heat annealing) is typically used to relieve residual stresses and improve the mechanical properties of the part.
CNC machining can be used for critical features (such as holes or threads). Sandblasting, plating, polishing, and micro-machining can improve the surface quality and fatigue strength of a metal printed part.
Advantages and disadvantages of metal 3D printing.
Pros:
1. Metal 3D printing can be used to make complex custom parts, with geometries that traditional manufacturing methods cannot provide.
2. Metal 3D printed parts can be optimized to increase their performance with minimal weight.
3. Metal 3D printed parts have excellent physical properties, metal 3D printers can print a wide range of metals and alloys. Includes difficult-to-machine materials and metal superalloys.
Cons:
1. Manufacturing costs associated with metal 3D printing are high. The cost of consumables is from $ 500 per 1 kg.
2. The size of the working area in metal 3D printers is limited.
Conclusions.
• Metal 3D printing is most suitable for complex, one-piece parts that are difficult or very expensive to manufacture using traditional methods, such as CNC.