Acetone for 3d printing
How To Easily Cold Acetone Vapor Smooth & Finish 3D Prints [Step by Step]
Acetone Polishing (Smoothing) of ABS and ASA – a step-by-step guide
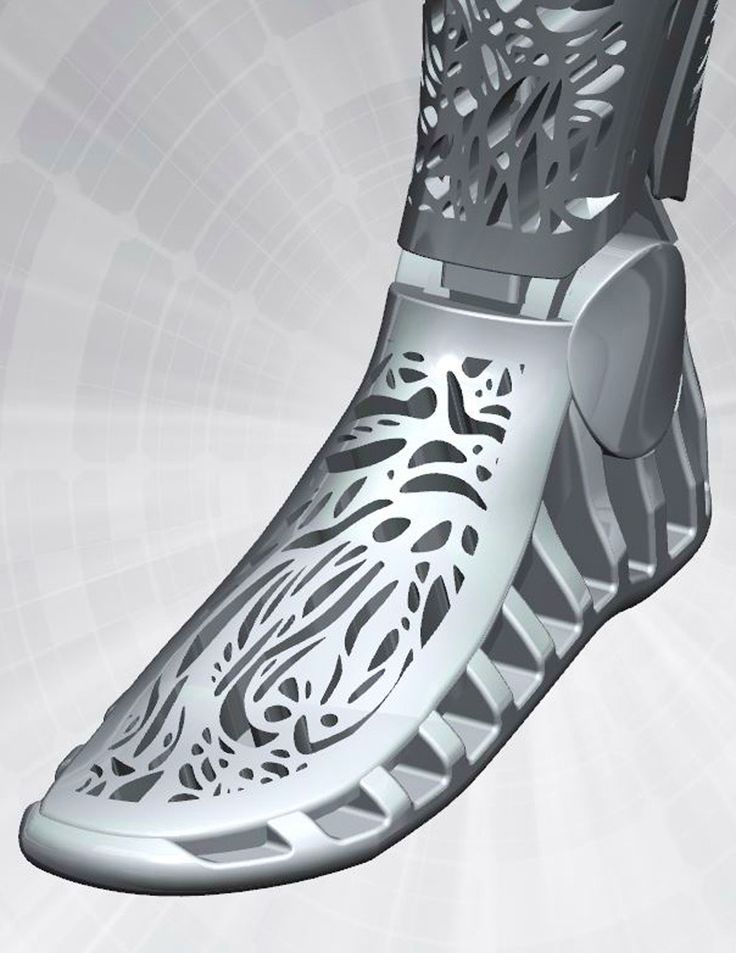
FDM (FFF) 3D printers often produce a final object that while being mechanically sound, tends not to have that ‘professional look’ that you or a customer want to see. You need a reliable, easy method of 3D print finishing.
That’s where the Cold Acetone Vapor Bath process steps in. Finishing 3D printed parts the easy (safe) way. Yes, this was actually 3D printed…
Can I acetone vapor bath my 3D prints?
All ABS 3D prints can be acetone smoothed. Filaments that can be polished using this process are: ABS, ASA, PMMA, HIPS and Polycarbonate.
Other filament types are either unaffected by acetone or are damaged by it. If you’re looking for other 3D printing post-processing techniques, check out our PLA polishing article for details on smoothing out 3D prints that can’t be acetone smoothed.
The following photograph is of a shower tray system consisting of a frame and different color removable trays before ABS Acetone Vapour Smoothing. The frame is made of Black ABS, and all trays are made in ABS of varying colors.
The following photograph show the same system after the ABS Vapour smoothing process.
Not only do the finished parts look better, they now have a higher resistance to water ingress, and they can often be stronger than their non-polished earlier selves once fully hardened.
This is definitely our preferred method when we’re asked how to finish 3D prints – there’s just no better way to easily smooth ABS prints.
SAFETY WARNING!
Before continuing further, please make sure you acquaint yourself with the safety regulations pertaining to acetone (propan-2-one) and its use. It is your responsibility to use this solvent safely.
Obvious things to note for safety are:
- Only use in a well-ventilated area
- NO NAKED IGNITION SOURCES – acetone is extremely volatile and the vapors are Highly Flammable
- *NEVER EVER* heat the acetone!! [See above]
- Avoid breathing the fumes
- Avoid skin contact
- Keep away from animals and children
- Be careful that you do not spill any liquid onto surfaces that might be damaged by acetone – most common household plastics are susceptible to some kind of damage from liquid acetone
The principle behind Vapor Polishing
You can acetone smooth ABS filament & ASA filament, both with acetone liquid or as vapor.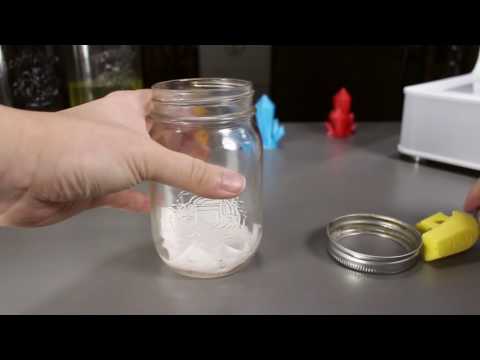
They dissolve readily in the liquid, and a concentrated atmosphere of the vapor will eventually have the same effect. It’s that ‘eventually’ part we are interested in (and not the acetone 3D print mess you’ll be left with if you leave it too long).
We want to melt the surface of the object just enough that the surface tension of the molten plastic smooths out any surface inconsistencies and then halt the process at that point before any structural damage occurs.
In some cases, it is possible to quickly dip an object into acetone liquid to get a polished surface, but this can be very messy and gives inconsistent results.
If you use the vapors instead you have much more control over the ABS smoothing and the final results. As the vapors can get to all exposed surfaces equally, there are fewer areas of uneven melting. There are also no run-off channels or drip marks induced into the surface of the object that direct exposure to acetone liquid may cause.This is our clear ABS filament, acetone smoothed.
What you will need –
- A well-ventilated area to work that has no exposed ignition sources.
- Wear the appropriate PPE – Safety glasses/goggles, mask, gloves, etc…
- An acetone-proof container (a large glass vase or a tin) big enough to hold the parts you wish to polish – preferably with at least 30mm clearance in ALL directions around the object to be polished – top, bottom, and sides.
- A loose-fitting lid, also acetone-proof. If your lower container is not transparent, you may wish to use a sheet of glass as a lid – this removes the need to keep removing the lid in order to see how the polishing is progressing (and not letting the vapours escape or dust get in).
- A flat, non-porous plate such as glass or metal, to raise the object being polished above any liquid acetone in the bottom of the container – This really needs to be at least 10mm above the surface of any liquid acetone in the container and much larger than the object to be polished as this reduces the chances of liquid acetone creeping up the sides and onto the object itself.
- Some sheets of plastic-free kitchen roll to use as a ‘wick’ for the liquid acetone.
- Somewhere dust-free to allow the surface of the polished object(s) to harden.
- A TIMER! Seriously.
You will walk away, forget it, only to return later to find that amazing print that you were once so proud of has now turned into a hideous misshapen lump of plastic, or at worst some kind of acetone ABS mess.
It might not happen this time or the next, but it will.
Getting started
Make sure your container is free from contaminants (this will be your acetone bath), then place a few sheets of the kitchen roll up the side and along the bottom of the container. This will allow the liquid acetone to wick up the kitchen roll, helping to produce a strong concentration of vapor at all levels within the container.
Find somewhere to work that has surfaces and materials that will not be damaged by acetone or the fumes.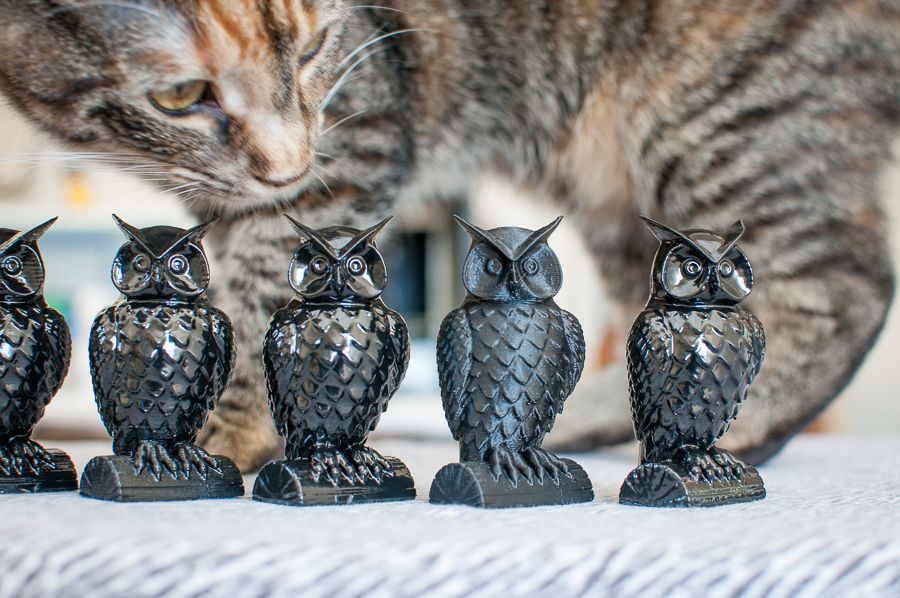 Acetone is a superbly-powerful solvent – you don’t want it dissolving things that you’d rather keep. It is a low-density liquid that has very little surface tension, so it splashes and ‘wets’ surfaces very easily.
To hold the kitchen roll sheets in position, place your metal support (plinth) onto them. Make sure that you arrange the kitchen roll in such a way that when it gets wet with liquid acetone it cannot fall down onto your printed objects, as that will destroy any chances of achieving an acceptable finish.
The following photograph shows the setup used in the acetone bath ABS of the soap trays seen above.
The soap dish is sitting on top of a plinth made from a small piece of glass stood on three 22mm diameter copper plumbing joints – an arrangement that stops any chance of liquid acetone reaching the dish via capillary action (or surface-wetting).
Things to consider about the process of 3D printing acetone finishing itself
Not all filaments are the same, even from the same supplier. For instance, due to secondary effects from the pigments that go to make up the colors of ABS filaments, different colors polish at different rates. This means you will need to monitor the polishing of different colored objects so that you can remove them at the correct time.
The polishing process not only softens the surface of the object, the fumes also penetrate into the body of the object. Depending on the period of exposure, you will need to ‘air’ the object for a period of time that is commensurate with the time that the object was exposed to acetone vapour.
Usually, this takes a few days. However, in some cases, the full mechanical strength of the object may not be realized until a significant time has passed – for high-density objects, this can take weeks, or even longer!
The polishing process continues for a while after you remove the object from the container – usually for about ten minutes. So don’t be tempted to leave it in too long.
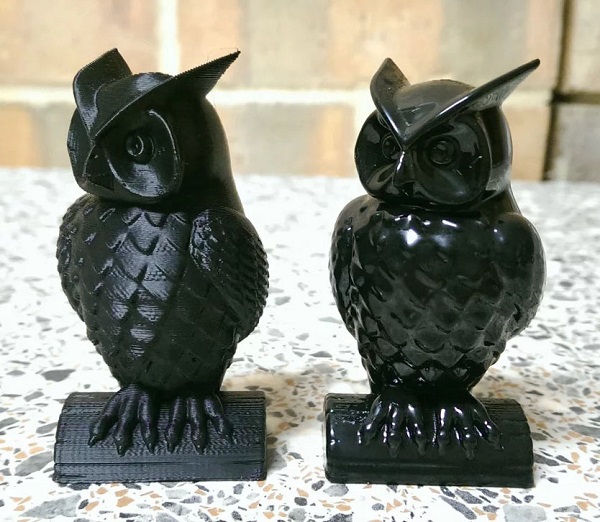
The following photograph shows what happens to a part when exposed to the fumes for an extended period.
The hole in the center at the bottom is supposed to be round, and the lower edges are all supposed to be straight.
The ambient temperature affects the speed of the process – you are evaporating a volatile liquid after all.
- Too cold and it can take ages.
- Too warm, and the process goes too fast.
- Too hot, and you may be looking for a new place to work/eyebrows, so NEVER apply heat.
Finally – you need to have somewhere totally dust-free to place the polished object while the surface hardens. If you don’t, any dust that falls onto the surface will become embedded in it. Permanently.
Polishing
This is the really easy part.
- Without getting any on your plinth, pour the acetone over the kitchen roll sheets you placed up the side of the container. You need to have enough acetone to cover the bottom of the polishing container to a depth of a millimeter or two.
- Ensure that there is no liquid acetone present on your plinth.
- Make sure that you have a fool-proof way of removing the object from the container after polishing without the need to touch it, or you will leave marks all over the surface where you make contact.
- Quickly place the object in the center of the plinth – try not to touch it again – you have just a few seconds to adjust the final position. The polishing process has already started – it is that quick! You don’t really want to leave fingerprint impressions on your work, do you?
- Place the lid on the container and start your countdown timer. I personally set the timer to 15-minute intervals for finely-detailed objects, and 30 for large solid objects.
Depending on how rough the surfaces of the object are, and how polished you want the object to be, the process can take from around 15 minutes to several hours.
There is ALWAYS a trade-off between the required surface finish and the loss of fine details. Only you can decide what is acceptable.
Once you are satisfied that the polishing is almost complete, carefully remove the object to a totally dust-free environment that has good ventilation.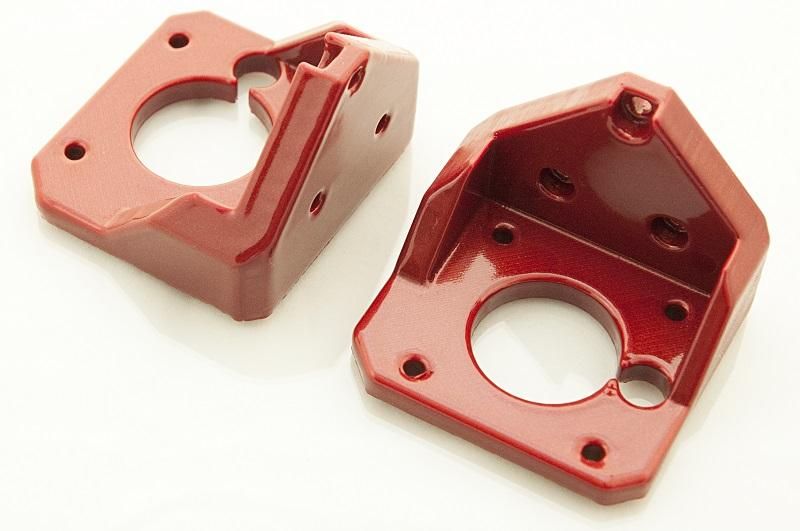 This stops most of the ever-present dust particles that are suspended in the air from falling onto the semi-molten surface of the object.
Note: The reason you remove the object from the container at the point just before you get the surface finish you require as the polishing process continues for a short while even after the object has been exposed to fresh air.
You can always put it back in the chamber later if you are not satisfied, but once the process has gone too far, the damage is irreversible.
After about 30 minutes, a ‘skin’ will have formed on the polished object that will stop dust particles from becoming embedded in the surface of the object.
Remove the object from your dust-free chamber without touching it, and put it somewhere that has good ventilation to allow the acetone to further leach out of the object. The object at this point has little to no structural integrity so be careful how you do this.
Depending on the solidity and size of the object, the process of removing the acetone can take from a few hours to many weeks before the full strength of the object has been regained.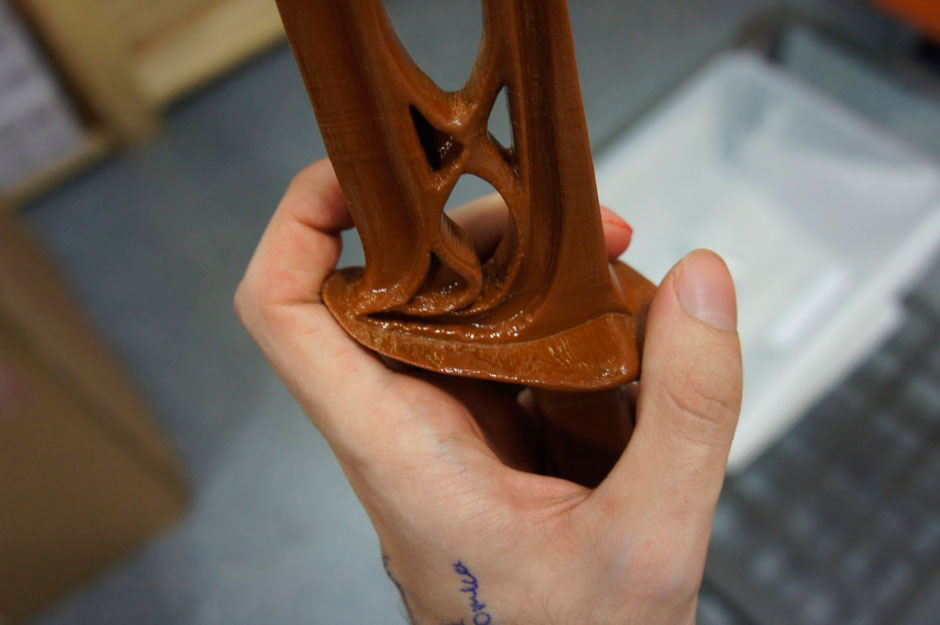
Once you are certain that a good skin has formed on the object, you can speed up this process of solvent evaporation considerably by using a fan continuously blow air across the surface of the object – smoothing 3D printed parts effortlessly.
Summary
To recap, the filaments that can be polished using this process are: ABS, ASA, PMMA, HIPS and Polycarbonate.
Other filament types are either unaffected by acetone or are damaged by it.
Improve your 3D prints with chemical smoothing
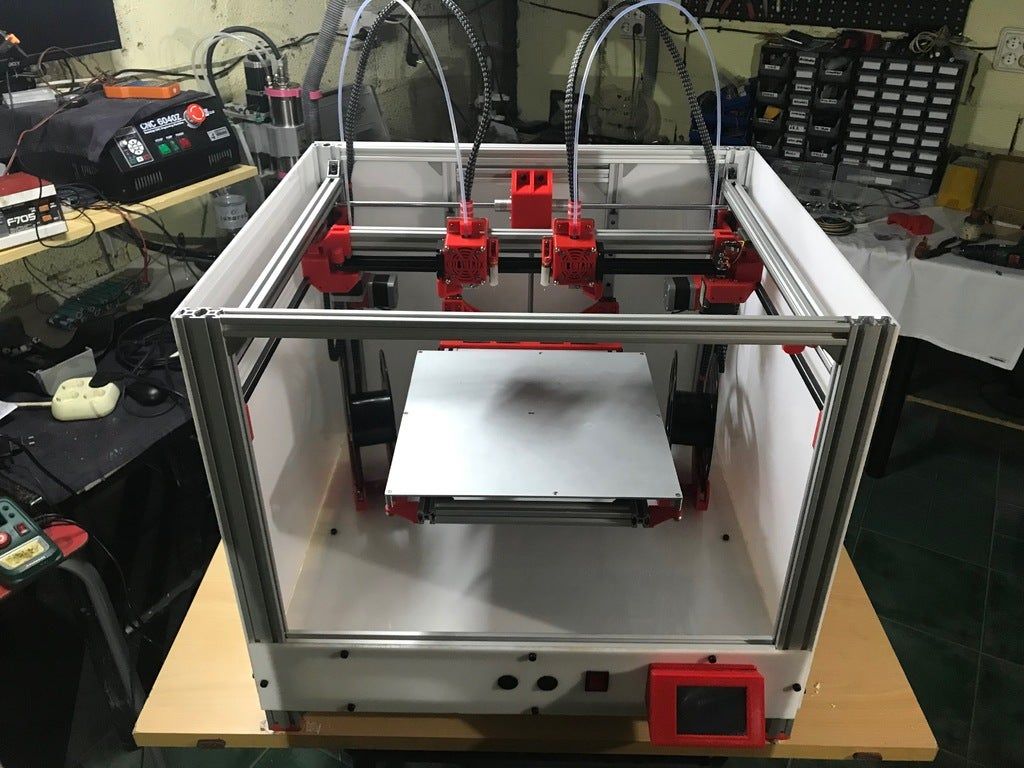
FFF 3D printers like the Original Prusa i3 MK3S enable you to print fascinating models with a very good level of accuracy. Yet sometimes it’s not enough. There are things that require a perfectly smooth and shiny surface – either for aesthetic or functional reasons. With SLA 3D printers, it’s no difficult job. But what about FFF 3D prints? Layer lines are usually quite prominent. Smoothing them out can be accomplished only by proper postprocessing. You might have heard of it, or tried it on your own already – like smoothing ASA/ABS 3D prints with acetone vapors. We still receive a lot of questions about how to make various materials smooth, though. So let us walk you through our instructions on how to make your model perfectly smooth and glossy.
First, we need to remind you that in all cases of chemical smoothing we’ll work with flammable organic dissolvents and/or their fumes. Please follow the recommended safety precautions to protect yourselves and the people around you. Remember that you work with these chemicals at your own risk. Do everything necessary to avoid direct contact with and inhalation of chemicals. Always work in well-ventilated areas, as far as possible from flammable objects and use protective equipment such as gloves and face protection (protective shield or protective glasses). Acetone vapors tend to be very prominent and may cause respiratory issues.
When chemical smoothing is mentioned, many users will probably remember ABS or ASA filaments as materials that can be smoothed easily. This is why we will pay attention mostly to these materials. However, these types of filament are not the only ones which can be smoothed to a certain level. Every material has its own dissolvent (you can find it in chemistry tables) that will smoothen the material sooner or later. However, not every process is recommended, because many dissolvents are usually hazardous materials that are unavailable to a vast majority of people (e.g. chloroform, dichloromethane, etc.). Moreover, dissolving some filaments takes way too long, which makes them impractical for this type of postprocessing. Let’s evaluate several basic combinations of filaments and dissolvents that are often recommended among makers and see what are their advantages and disadvantages.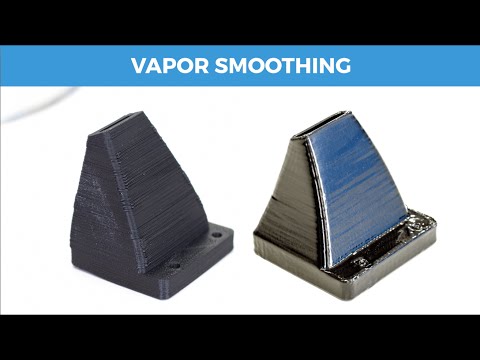
By far, the most suitable materials for smoothing are ABS and ASA in combination with acetone. You should be able to buy acetone at your local drugstore or hardware store and use it in your home workroom. Prusament ASA, in particular, can be smoothed out easily. And using the right method, you’ll get a nice smooth and shiny surface in no time. We will pay more attention to ABS and ASA in the following chapters.
PVBAnother very popular material is PVB (PolyVinyl Butyral), because it’s also easy to use (like PLA), it’s not prone to warping and it can be smoothed with isopropyl alcohol (IPA). However, if you use IPA vapors for smoothing (as you would with ABS/acetone), the process might take up to several hours. To speed it up, IPA should be applied directly onto the surface of your 3D prints. It’s better to disperse it just like the Polymaker Polysher and Zortrax Apoller do it.
HIPS
HIPS, aka high-impact polystyrene is generally used as a support material for ABS and ASA prints.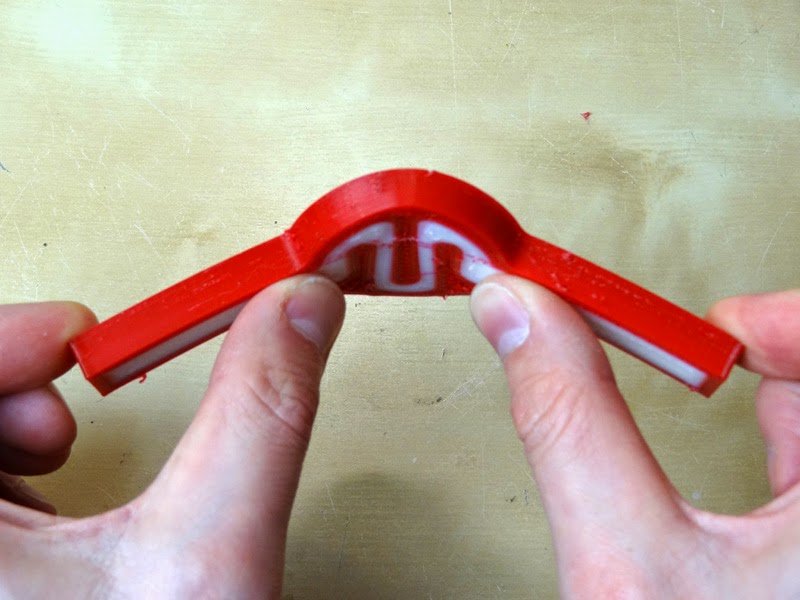 It can be dissolved with d-lemonene. The best way is to wash the model for 10-20s in lemonene and let it dry (it might take several hours or even days). Curiously, the model will always smell like orange peels as a result of being washed in d-lemonene. We’ve tested that some HIPS can also be smoothed with acetone (the best way is to use acetone fumes).
HIPS smoothed with acetone (left) and D-lemonene (right)
PLASmoothing PLA is a little bit more challenging. Various internet discussions offer many tips and tricks on how to do it. And apparently, there is quite a lot of people who did it successfully with some of the following methods. The most frequent piece of advice is to use chloroform. However, it is a dangerous chemical that can be obtained only with special permission that most people won’t get. Even we were unable to get our hands on this chemical, so at this point, we can’t confirm whether it works or not.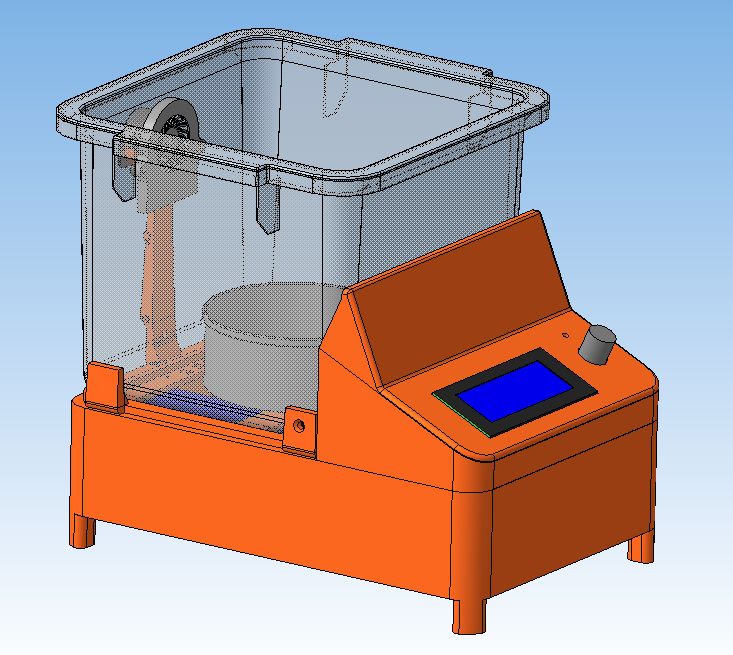
Another option is to use NaOH (Sodium hydroxide aka lye). We can’t recommend this method either, especially if you intend to do it at home. It’s a dangerous substance and usually, instead of smoothing your print, it will most likely disintegrate the object into small fragments. There is a small chance of getting a better result with various concentrations but we cannot confirm that. More testing in laboratory conditions would be required.
The third piece of advice is using acetone. Our tests confirmed that all colors of Prusament PLA can be glued together perfectly with acetone – it works as a superglue. However, our attempts at dissolving PLA with acetone can be hardly called successful. We printed samples of almost every Prusament PLA and exposed them to acetone vapors. After several hours of exposition, they got a little bit softer, but not even close to being smooth. Then, we’ve tried to apply acetone onto the model’s surface directly using a brush, again with no noteworthy result. Finally, we’ve submerged the models in an acetone bath, which caused partial bleaching of several filaments and total destruction of all models. A short bath won’t cause any particular damage, but after a few hours (or even days), the model will crack not only between layers but also in other directions (it’s caused probably by an effect called “solvent crazing”). It’s interesting that the layers remained visible in every case, no matter what happened to the rest of the mode.
PLA treefrog bathed in acetone for 3 hours and 48 hours
PETGYou can smooth out PETG, too. The best way is to use dichloromethane. The main advantage of PETG smoothing is the fact that the chemical can be applied with a brush easily – it does not leave marks on the surface and the prints won’t twist afterward (like ABS or ASA). But there’s a catch: dichloromethane is a dangerous dissolvent just as chloroform and can be bought only with special permission.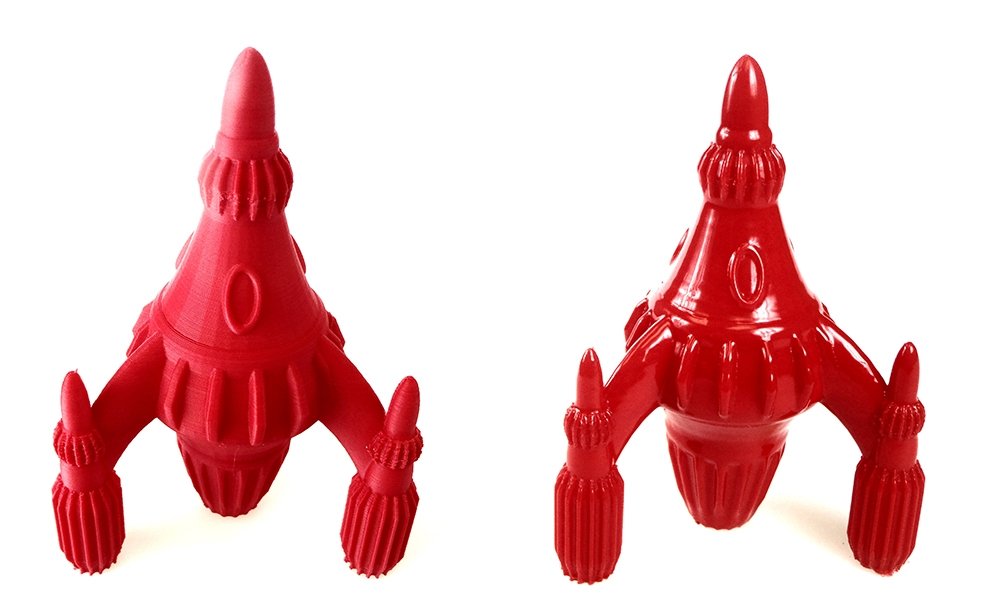 These chemicals should be used only by experienced users with proper protection.
Most of the dissolvents can be applied in several ways but we’ve tried them and confirmed that one solution stands above the rest: the best way to make your print smooth is to expose it to dissolvent fumes. Applying the dissolvent with a brush will most likely consume a lot of the chosen chemical and the surface will never be perfectly smooth and shiny. Plus you risk leaving white marks on the surface. The model could also start to twist and warp. Sinking a 3D print directly into, for example, an acetone bath is also not a good idea. It introduces various issues with the handling of the object – you will most likely touch it while removing it from the bath and damage the softened surface. Plus, the dissolvent can leak inside your model and cause even more damage. Not only that, but it’s usually difficult to estimate the correct submersion time, so in the end, you will more likely spoil the bath with dissolved plastic. ABS/ASA-based objects treated this way tend to twist a lot.
At this point, we have decided that we need to use dissolvent vapors to smooth out our prints. To do this, we’ll need to build a proper box to succeed. It should have several basic parameters:
First, let’s decide which chemicals we plan to use and choose a suitable material for the box. You shouldn’t use a box made of ABS for acetone smoothing or PETG box for dichloromethane smoothing, because they would quickly dissolve. Since ASA/acetone is the most used combination, we chose a transparent PP (polypropylene) storage box available at IKEA. It’s good to have several boxes of different sizes for various models to save acetone and make the process a little bit faster.
Examples of smoothing boxes: An elevated platform (old and damaged spring sheet works fine) is necessary Electronics are optional and should be used by experienced users only!
The most common and the safest process is placing napkins or pieces of toilet paper soaked with acetone under and around the model. This works well for tiny models. However, with larger models, this becomes much more challenging, because the smoothing effect may not be consistent across the entire surface – e.g. the lower part may be smoother than the top part. Of course, there are some methods that can make this work even with larger models. First, the most recommended and the safest method is getting a professional smoothing station, such as Polymaker Polysher or Zortrax apoller. These machines work at low temperatures, disperse the dissolvent equally and create a nice glossy look. The downside of smoothing stations is their high price.
There is one more (and cheap) method how to make every model smooth evenly – and that is warming the acetone. But be aware that this method is dangerous and we cannot stress this more – if you decide to heat acetone, you are doing it at your own risk. Do it as far as possible from anything flamable, wear protective equipment (face shield, gloves etc.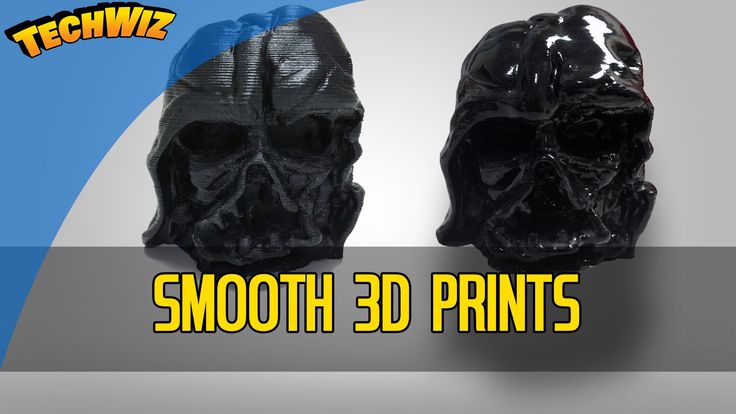 ) and always check the box (stay in a distance and always watch it). Working in a safe environment is absolutely essential – we can’t stress that enough. If you are not sure about it, use the cold method or buy a professional smoothing station. Better safe than sorry!
Now, if you aren’t discouraged by our safety warnings, let’s see the list of recommended hardware. As we said, we’re going to heat up the acetone bath. Its fumes will increase in volume and if there would be a source of ignition in the sealed box, it could cause an explosion. Please, keep in mind that the box must not be perfectly sealed to prevent pressure build-up inside. We recommend using a light plastic plate with no locks (just lying on top of the box) and making a couple of tiny holes in the lid to help acetone fumes escape. Under no circumstances a box with rubber isolation and any type of locks should be used!
Place a metal plate inside the box and make sure it’s at least a few centimeters (1-2 inches) above the bottom.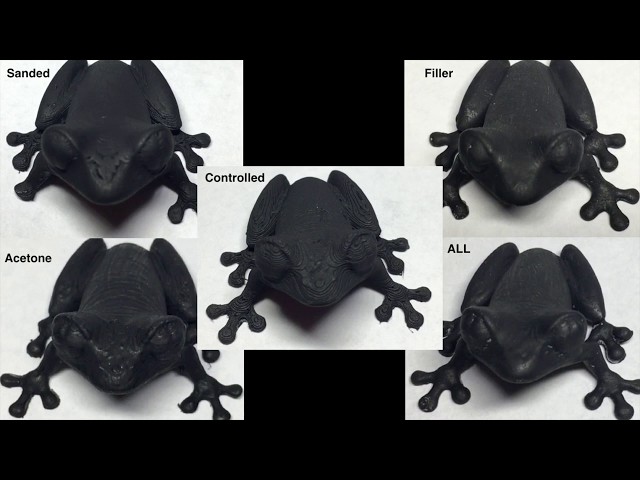 This will serve as a baseplate for smoothened models. The platform must be raised to prevent direct contact of models with acetone. We found an old printer steel sheet to be the best smoothing pad. We can work with it easily, without touching the models.
Another thing your box might need is a fan. It is an optional part, but it will truly improve the effectivity due to improved air circulation. Without a fan, your models might get too soft at the bottom, but visible layers on the top might remain. The ventilator should be placed at the underside of the lid, so the airflow is directed right onto the models. Again, safety first: The fan should be working perfectly if you decide to put it inside of the box. Damaged electronics can cause spark and ignite the fumes. If you are unsure about the quality of the fan, do not use it!
The second optional part is a heated pad. Heating will saturate the air inside with acetone fumes better and accelerate the whole process.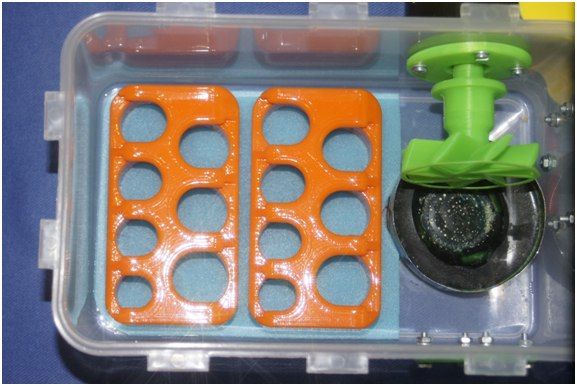 If you don’t feel like constructing a heated pad, you can also place the box onto a warm (not hot!) surface (a sun-heated pavement, printer heatbed, etc.). However, enthusiasts can build their own integrated heating. Before you try to add a heated element, remember that the heating must be placed outside of the box! It is not a good idea to insert a heater inside the acetone bath!
We are repeating ourselves, but a reminder doesn’t hurt: be careful with flammable organic dissolvents used in the smoothing process! Do not leave the box unattended when the process is running! We are using a smoothing box with a Noctua fan and a heatbed from the MK3S regularly for many months and we experienced no issues. However, we still recommend to exercise appropriate caution!
Amount of acetone, time and temperature
It’s time to test the smoothing box! It might take some time before you find the perfect balance of exposure time, temperature, and amount of acetone. For our setup, the best temperature of heatbed is approx. 80°C, with approximately 5 mm of acetone at the bottom and 20 minutes of exposure. However, keep in mind that you need to check your print regularly: If you expose it for too long, it can deform irreversibly.
The model can stay quite soft for several hours after smoothing. Remember that before removing it from the box. You can easily damage the softened surface merely by touching it. It might feel solid if you touch it gently, but don’t be mistaken. It’s better to leave the model on the pad and remove it from the box with it. Take the pad with your models and place it into a dry clean box and leave the models to recover for at least several hours (or even a whole day). This way, you will ensure that no fingerprints are visible on the surface and no dust particles are caught on it.
Don’t be surprised if you find out that the model smells like acetone a few days after. It takes some time for the chemical to evaporate completely.
Not every model is suitable for acetone smoothing. Tiny and complex structures are usually not good since they usually lose their details and/or start to deform. This also applies to large and flat models: for example, this medkit will sooner or later deform after being smoothed in acetone vapors. Plus, ASA and ABS tend to warp during the printing process if you don’t have your printer inside an enclosure.
Tip: If you don’t have any enclosure, set the skirt in PrusaSlicer (Print settings/skirt and brim) to the highest possible number of layers (9999). This will help to create a microclimate and reduce warping a lot. The layer height is also a huge factor. The lower your layer height is, the better the smoothing process gets. Try to experiment with variable layer height to achieve the best results.
It’s good to use an enclosure for ASA prints to reduce warping.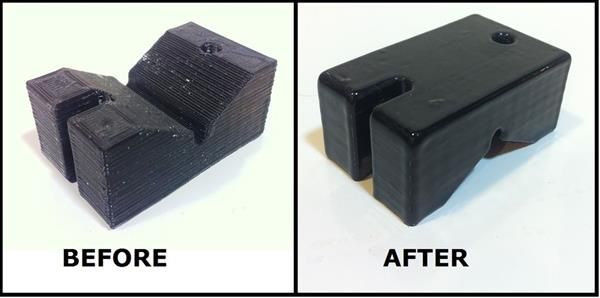
Thin parts tend to twist after smoothing and can become unusable.
Functional (mechanical) parts are not suitable for acetone smoothing. The process can change their dimensions and shapes (especially sharp edges) and it will not improve their mechanical properties – it’s only aesthetical.
A little bit of testing
We thought that you might be interested in the comparison of various ABS and ASA filaments. We printed two sample objects (3Dbenchy and a sheep) with 10 different filaments and smoothed them out with acetone vapors. And the results differ – a lot.
Here’s our list of tested brands and materials: Fiberology ABS, Filament PM ASA, ABS, ABS-T, Gembird ABS, Hatchbox ABS, Nebula ABS 702, Prusament ASA, Spectrum ASA 275
The easiest (fastest) to smooth was our Prusament ASA Prusa Orange. For this filament, 15-20 minutes of exposure was more than enough and the result was a nice glossy surface.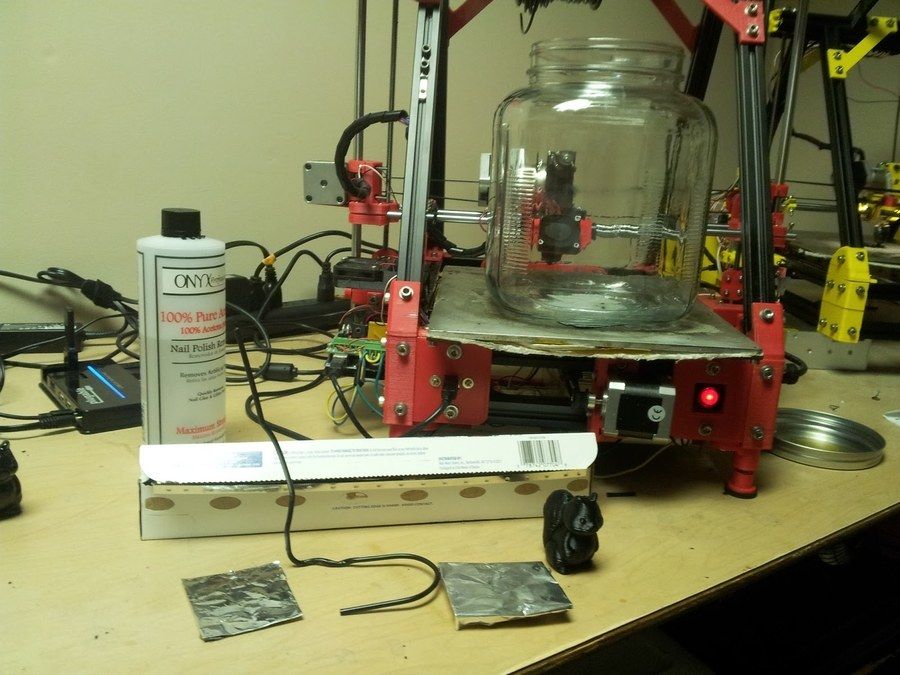 Most of the other filaments could be smoothed after a little longer time (20-40 minutes) with a few exceptions: ABS-T by Filament PM (green) and Spectrum ABS 275 (blue) had clearly visible layers even after one hour of exposure. With a longer time these models started to deform, but the layers remained visible. Similarly, the layers were visible on grey ASA by Filament PM (fourth from the right). However, what was interesting, was the fact that the perceived layer visibility was caused only by the pigment – the surface was in fact as clear as a mirror.
Finally, we tested a few physical properties of our Prusament ASA Orange. We were interested in the difference between untreated and smoothed objects. We printed 60 test objects for the Charpy pendulum test, 30 sample objects for traction test, and 15 objects for layer adhesion test. Two-thirds of all models were treated with acetone for 30 minutes. The smoothened models were split into two batches, one was dried for one day and second for five days.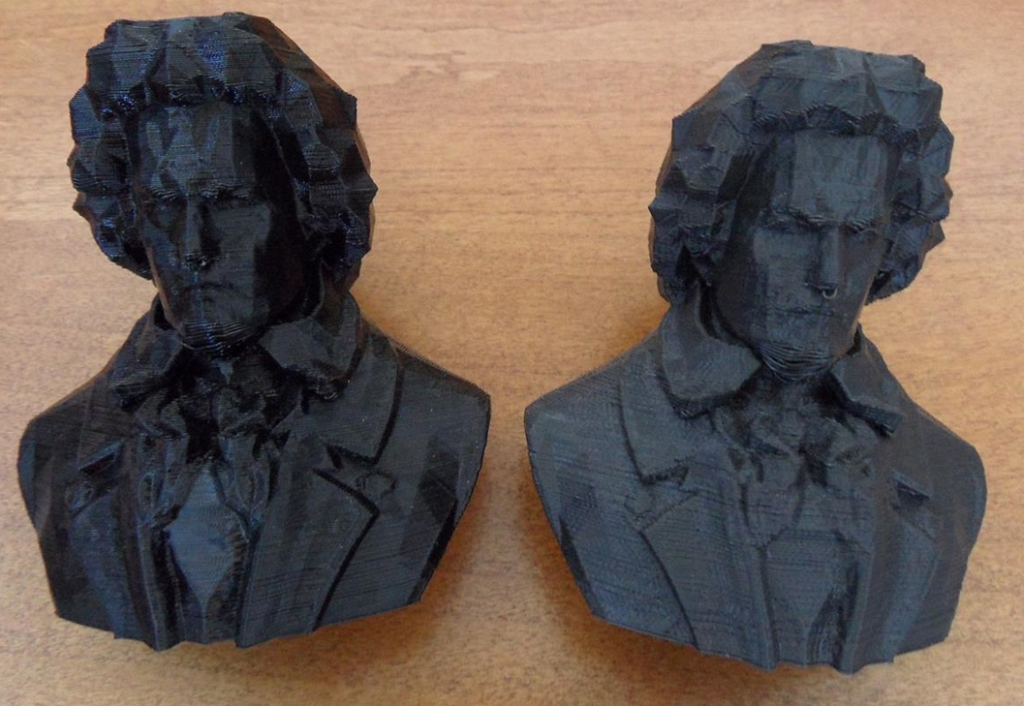 Then we tested it the same way we did it in our annealing article.
The results showed us that smoothened models have slightly better tenacity than the untreated ones, plus they have more than twice better layer adhesion. On the other hand when testing tensile strength, the force at which material tears were a little bit lower for smoothened parts.
As you can see, acetone smoothing is not rocket science. With several simple gadgets, you can make it work even in your garage or workshop without any difficulties. So go ahead and give your models the professional look they deserve 🙂 Just don’t forget about safety! Always use protective equipment, work in well-ventilated spaces, and don’t leave the smoothing box unattended. We’re really curious to see your creations, so don’t forget to share the photos and your own tips and tricks on smoothing. And as always – Happy printing!
Processing of 3D printed models
One of the problems that all fans of FDM 3D printing, without exception, encounter is the ribbing of external surfaces. Since the technology itself is based on the sequential application of layers of plastic, this effect cannot be avoided. You can, of course, make it less noticeable by increasing the vertical resolution of the printer (i.e. applying thinner layers), but you won’t be able to completely get rid of the ribbing.
PLA 3D model before and after torch treatment. The internal structure is visible under the sagging outer layer
Almost from the very first days of the RepRap project, the search began for methods of processing finished models in order to smooth surfaces. Emphasis was placed on two features of thermoplastics: the ability to melt when exposed to high temperatures and soften on contact with the appropriate chemicals.
As a rule, heat treatment does not give good results - it is difficult to control the heating of the surface, and this eventually leads to plastic boiling, sagging or simply releasing toxic fumes. However, this method can be tried on solid PLA models.
Chemical treatment is more promising, but it also comes with its own set of challenges. In addition to technological problems, the problem of reagents is relevant - different plastics react with different solvents. If acetone perfectly dissolves ABS plastic, then it has almost no effect on PLA plastic. With limonene, everything is exactly the opposite.
The main chemical smoothing techniques still revolve around ABS plastic due to its high popularity and low cost of suitable solvents.
A typical ABS solvent is acetone. Its good dissolving power allows it to be used as an adhesive for component parts of ABS models, although a homemade mixture is usually used for this, produced by dissolving ABS chips in acetone. The same glue (only a thicker consistency) is often used to repair delaminations or cracks.
Along with increased aesthetics, an important factor in the development of smoothing methods is increased strength. The monolithic outer shell reinforces the models, preventing delamination and ensuring their tightness.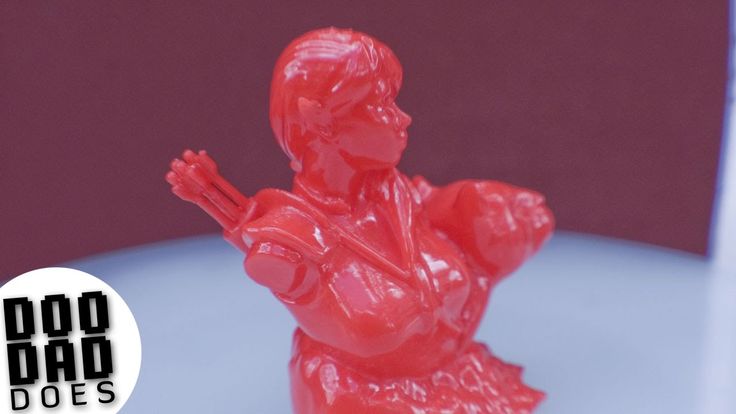
Hand shaping
Makeraser - a combination tool designed to also work on the outside of models models. However, processing with a brush is a laborious task, and even requiring a certain skill. After all, already softened plastic is easy to deform with the brush itself, that is, the hairs will leave a mark on the plastic, which may not even out before the acetone evaporates. It is possible to equalize pronounced irregularities with this method, but it is quite difficult to achieve a smooth surface.
The advantage of this treatment is the selective application of acetone, which avoids smoothing sharp corners. After all, a pyramid was built for Cheops, not a cone, right?
An attempt to create a special tool for manual processing was a device called Makeraser. Basically, it's a simple felt-tip pen with a reservoir filled with acetone or acetone glue and a built-in scraper to remove models from the platform. From a practical point of view, this tool is best suited for gluing parts of a model or applying ABS/Acetone glue to the build bed just before printing to combat underlayer curl.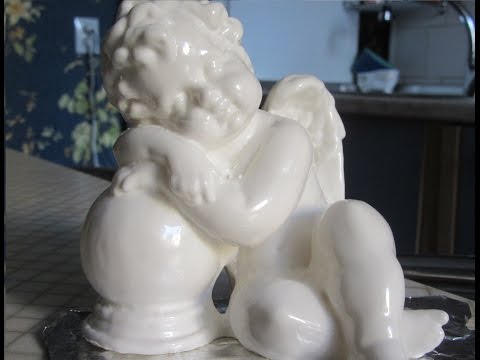
Acetone dip
Failed surface leveling by dip
A more promising and simpler method is acetone dip. Exposure of the ABS model in undiluted acetone for about 10 seconds is sufficient to dissolve the outer layer of the model. The specific exposure time may vary depending on the quality of the original model and the concentration of acetone. Since the sale of pure acetone is regulated, a technical solvent can be used.
After exposure, the model must be exposed to air until the acetone has evaporated. The process may take about half an hour.
Although this method is quite fast, it is difficult to control the process. With excessive exposure, the model will simply begin to dissolve, quickly losing small features. In addition, contamination of acetone with plastic of the same color can lead to streaks on subsequent models dipped in the same solution. A more controlled process is acetone vapor treatment.
Probably the most efficient way to get glossy ABS models. This method requires placing the model in a container with a small amount of acetone at the bottom. The model itself should not come into contact with acetone, so the model should be placed on a platform or hung above the surface of the solvent. When installing on a platform, the material properties of the stand should be taken into account. Wood is not suitable for this task due to its porosity: the bottom surface of the model will stick to the wood, and it will be quite difficult to separate it. The best option is to use a metal stand.
It is advisable not to use wood as a platform
After placing the model, the container must be heated to increase the temperature of the acetone. Acetone also evaporates at room temperature, but too slowly. Please note that boiling acetone is not recommended, as this will cause condensation to accumulate on the model, which in turn can cause streaks. Thus, for best results, do not exceed the temperature threshold of 56°C.
A safe, homemade steamer that uses boiling water in an external pot to heat the acetone in an internal one.
Holding time varies greatly with the temperature of the acetone. So, when boiling, only a few seconds can suffice, while experiments at room temperature required up to 40 minutes of exposure. Fortunately, using a transparent container, you can determine the readiness of the model "by eye".
As with dipping, the completed model should be aired out before the outer surface hardens, avoiding unnecessary physical contact.
Both when immersing models in acetone and when working with steam, the wall thickness of the models must be taken into account. The shell must be thick enough to withstand the inevitable loss of the outer layer. In addition, especially subtle features may simply dissolve, and sharp corners will be smoothed out.
Safety Instructions
Successful Acetone Vaporization of an ABS Model
Acetone is not considered to be highly toxic, but care must be taken nonetheless.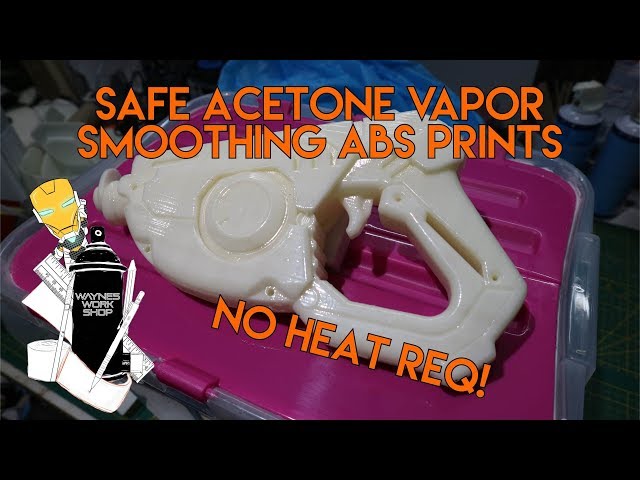 Inhalation of vapors can lead to pulmonary edema and pneumonia. A sign of poisoning is a feeling of intoxication, accompanied by dizziness. In addition, acetone causes irritation of the mucous membranes. When working with acetone, do not neglect personal protective equipment - goggles and gloves.
Particular attention should be paid to the flammability of acetone. Air mixtures with an acetone concentration of up to 13% by volume are explosive - when processing with acetone vapors, it is strongly recommended to work in a well-ventilated room and, if possible, use an exhaust hood. Do not use an open fire to heat acetone: since solvent vapors are heavier than air, they will displace air from the vessel, and once outside, they will cool and come into direct contact with the fire with all the ensuing consequences. It is also not recommended to tightly close the vessel, especially with strong heating, in order to avoid destruction under pressure.
Commercial options
Stratasys Finishing Touch Smoothing Station
In addition to the Makeraser described above, there are commercially produced units for steaming both acetone and other solvents - dichloromethane, butanone, etc.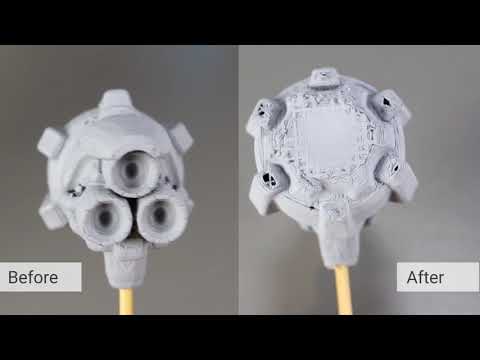
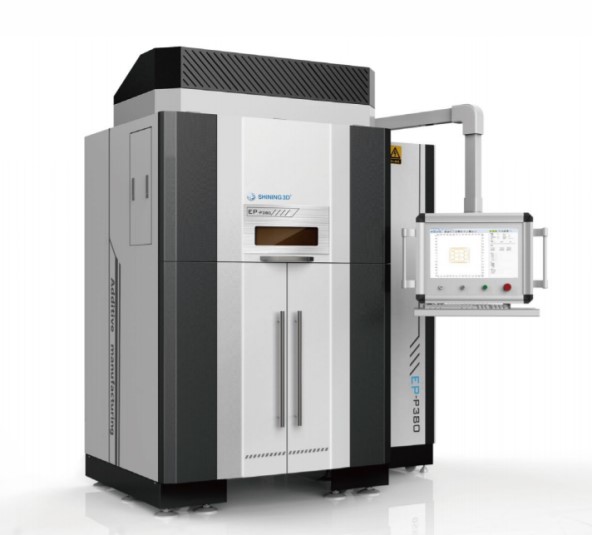
Stratasys manufactures a little-known but successful Finishing Touch that can process any variation of ABS to a quality virtually indistinguishable from injection molded models. The process is facilitated by the presence of a recirculation system, which saves on solvent and prevents air pollution by potentially dangerous fumes.
Future installation Sky Tech MagicBox
The developers of the new Sky Tech MagicBox device promise compatibility of their device not only with ABS plastic, but also with PLA. True, they intend to achieve this using the same acetone, despite the low solubility of polylactide (PLA) in this solvent. However, even with the ability to work only with ABS, the new device will be a good tool, especially for companies using FDM 3D printing for small-scale production.
Go to the main page of the Encyclopedia of 3D Printing
Post-processing of PLA and ABS prints with acetone and dichloromethane
06/03/2015
Reviews
Interesting
Comments: 0
In an ideal world, 3D prints always turn out the way we intended them to. But every owner of a 3D printer knows that this does not happen and often you have to remove imperceptible supports from the resulting object and make the surface look smoother. We have a few tricks to help with this fight against props and excess material when post-processing 3D prints from PLA and ABS plastics.
Objects treated with acetone vapor.
The very first thing to consider when working with print supports is your slicer software. When you set it up for a specific printout, you should pay attention to the predominant direction of the props and try to avoid such a direction . Your goal is to minimize the number of props and therefore the work that will be required when post-processing PLA and ABS printouts.
How you handle 3D prints depends on the material they are made from, so the next steps are determined by the material you choose. When planning 3D printing, it is very important to consider the characteristics of the material, because the methods of working with different materials are different, the processing time and tools depend on the material (PLA, ABS or something else).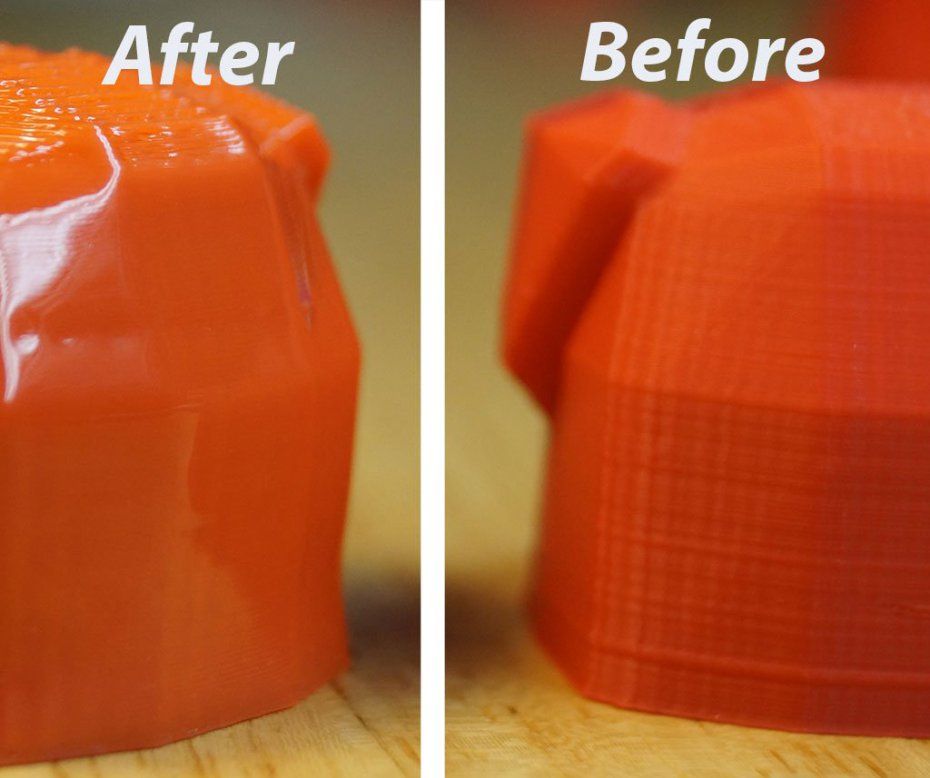
-
Safety measures
It is important to note that while both polishing chemicals can be used at home, they are relatively toxic. Therefore, care must be taken when handling these substances. We are talking about the fact that the room should be well ventilated , and on your hands - gloves . Moreover, gloves should not be made of latex (nitrile or neoprene are well suited.
It is also important to note that it is not expected that objects made of PLA and ABS post-processed by this method can later come into contact with food and can be picked up and in the mouth by small children: such objects, even very small ones, dangerous to swallow.
ABS Post-Treatment
The easiest and most effective way to smooth ABS plastic is to use acetone vapor.
You will need:
- Paper napkins
- Acetone
- Foil
- Sealed container
To smooth the printout:
- Remove as much excess material from the printout as possible.

- Line all four sides of a plastic container with paper towels.
- In a well-ventilated area, drop a small amount of acetone into the bottom of a container, covering the bottom with foil.
- Place your 3D print in a container and let it sit there for a few hours until it is smooth enough.
- Remove the printout and allow it to stand in air for a few minutes to allow any residual acetone to evaporate.
- The printout is now polished and ready!
PLA post-processing
For objects made of PLA - instead of acetone in the case of ABS - polishing with Dichloromethane (methylene chloride, DCM) is a good option. This solvent dissolves both ABS and PLA 9 equally well.0003
You will need:
- Non-latex gloves
- Lint-free and undyed cloth
- Dichloromethane (DCM)
To polish the printout
- Remove as much excess material from the printout as possible.
Learn more