3D printer thing
3D Print with Print a Thing by print_a_thing_team on Thingiverse
Print through a distributed network of 3D printing enthusiasts from across the US and Canada, at a fraction of the cost of the competitors. We want to change the world for the better through technology, and we see democratized 3D printing as one way to do it. When anyone can make completely unique physical objects at a reasonable price, without having the money or technical skills to own and operate a 3D printer of their own, a whole new creative energy will be released throughout the world. We built Print a Thing in the hopes that it would be a positive force for startups, do-it-yourselfers and creative spirits everywhere.
Platform: Thing
Requires at least one of these types of files: stl
Thing Settings
12 22
53 74
4 1
8 11
39 61
21 38
15 18
2 4
0 0
9 10
1 2
19 32
43 148
9 12
7 11
33 69
0 0
25 23
120 195
43 77
26 51
0 2
95 226
4 7
51 Cool Things to 3D Print (2022) – Clever Creations
Image: Marvin via PrusaPrinters
Our site is reader-supported. When you buy via the affiliate links on this site, we will receive a commission at no cost to you. All opinions remain our own. Learn more
One of the struggles of owning a 3D printer is deciding what cool prints to make next. With so many 3D model sharing websites, there are endless 3D print ideas to try.
In this article, we’ll give you our top picks for the coolest 3D printer projects and show you where you can find the models you need.
Top 3D Printing Projects and Ideas in 2022
Elastic Football
This two-player elastic football game uses rubber bands to make the player pieces flexible in order to manipulate the small ball across the printed field. The sides of the playing field have an abacus-style point counter for both players and a lever to control the goalie piece on the back.
- Designed by: Wilko_SLO
- Where to get: PrusaPrinters
Mechanical Wall Clock
Clocks are fairly complex and cool in general, but 3D printed clocks like this one by Hairald are especially interesting to look at.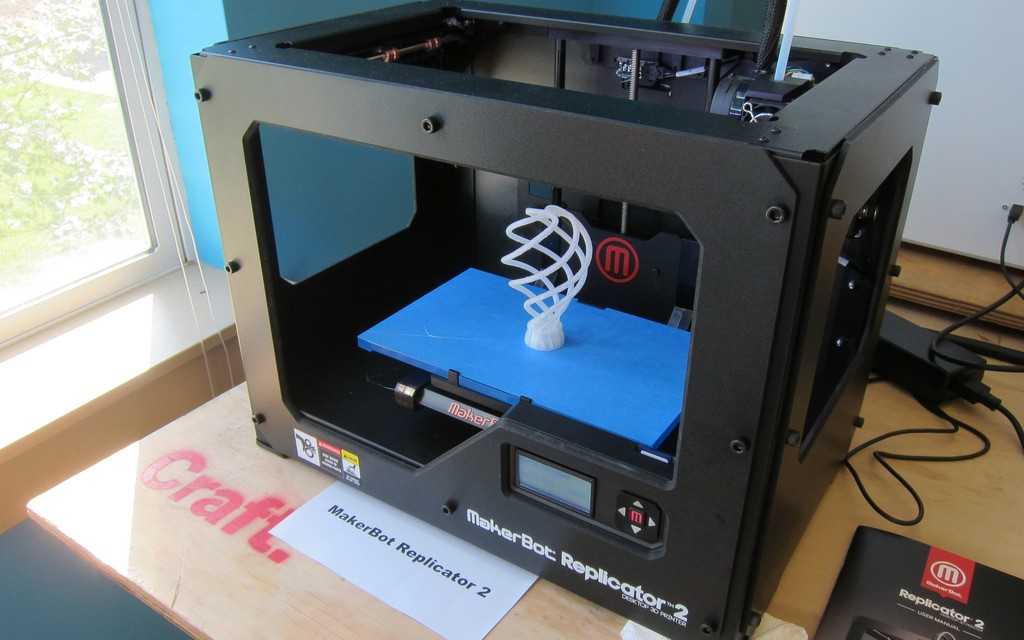 This design is fully printed and does not use any electronics or batteries.
The mechanism uses a wind-up method with a hand crank and a hanging weight to move the gears using the force of the falling weight. You can watch a video of this particular clock in action here.
- Designed by: Hairald
- Where to get: PrusaPrinters
Squid Game - Front Man Mask
Can’t get enough of Netflix’s Squid Game? Neither could the designer of this front man mask. Print this model for an interesting decor piece to hang on the wall or use it to finish off your best cosplay outfit.
- Designed by: r1nce
- Where to get: PrusaPrinters
Articulating Raspberry Pi Camera Mount
While the best 3D printers come with a built-in camera option for creating time lapse videos and remotely monitoring prints, you can also add this functionality to any 3D printer that does not natively have it.
This articulated camera mount uses a Raspberry Pi controller to bring a fully flexible camera option for remote viewing, time lapse recording, or taking stills of your prints as they are in progress.
- Designed by: Sneaks
- Where to get: PrusaPrinters
Original Simpsons TV
Keep a little ode to the Simpson’s on your shelf or desk with this miniature recreation of the original TV set from the show.
This design uses a Raspberry Pi and other inexpensive components to create a working miniature television screen that plays videos on loop.
- Designed by: buba447
- Where to get: Thingiverse
Charger Cable Organizer
The only thing more annoying than an unorganized wad of chargers and cables is a tangled unorganized wad of chargers and cables. These printable organizers store your chargers when not in use, keeping them tidy and protected from other cords.
They work like small spools, letting you unwind the charger only as far as you need. When you’re done using the cable, you just twist the lid to wind the cord back up.
- Designed by: DFV Tech
- Where to get: PrusaPrinters
Screw Measuring Tool
Nothing slows you down more than a container full of mixed-together mystery screws and bolts. This screw measure tool is easy to print and has all the most common bolt and screw sizes to help you quickly identify the size and type of errant bolts, screws, or nuts.
- Designed by: MattG
- Where to get: PrusaPrinters
Rugged Desktop Organizer
Keep your desk tidy and your office supplies close at hand with this multipurpose desktop organizer. It has built-in slots for your USB sticks, SD and micro SD cards, and compartments for your pens, scissors, and any other tools you use on the regular.
- Designed by: Byzantium3D
- Where to get: Cults
Giroid Vase
Both functional and beautiful, this giroid vase is a fast and easy print project that doesn’t require any supports or serious post-processing work.
If you don’t intend to use it with water (such as when using silk flowers), it’s ready to use right off the build plate. However, if you plan to use it as a traditional vase, it is best to spray it with some sort of sealant to keep the water from leaking through the print layers.
- Designed by: Area3D
- Where to get: Thingiverse
Marble Maze
You’ll need to move the zen garden on your office desk, because this printed marble maze is the clear cure for office boredom. Fully printable (aside from the marble, of course) and easy to assemble, this design uses snap-together ball and socket joints on the parts to avoid glue or other adhesives.
- Designed by: ericman314
- Where to get: PrusaPrinters
Cute Caravan Birdhouse
Camping enthusiasts rejoice: now the wildlife can also enjoy the charm of a vintage camper with these cute caravan birdhouses. You’ll need to 3D print the two colors separately before gluing the 3D prints together for a cute two-toned effect. This build fits on most print bed sizes.
- Designed by: PA1
- Where to get: Cults
Drippy Bucket
Add a little pop art to your work or living space with the drippy bucket.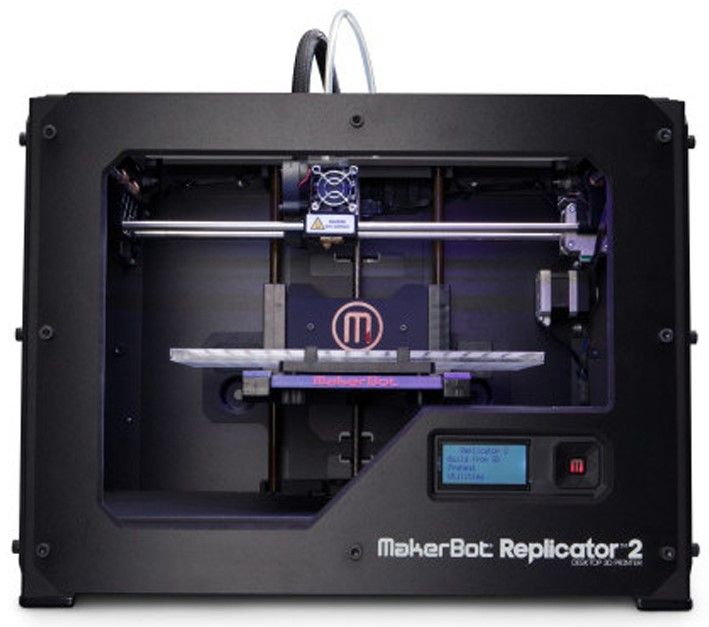 Printed as three separate pieces, the handle and paint drips both snap onto the main bucket without glue or screws required. It’s the perfect container for pens, dice, or even loose change.
- Designed by: davemoneysign
- Where to get: PrusaPrinters
Fractal Vise
Not only is this fractal vise model extremely cool-looking, it is also an incredibly useful tool once fully assembled.
This project requires quite a bit of hardware, including multiple sizes of bolts and screws, as well as lengths of both smooth and threaded rods. Assembling the vise is also quite time-consuming, but the designer thankfully has a video tutorial outlining the whole process.
- Designed by: TeachingTech
- Where to get: Thingiverse
Squeeze Fan
This hand-powered squeeze fan is as useful as it is fun. Using the handle pushes the inner gears and turns the propellers.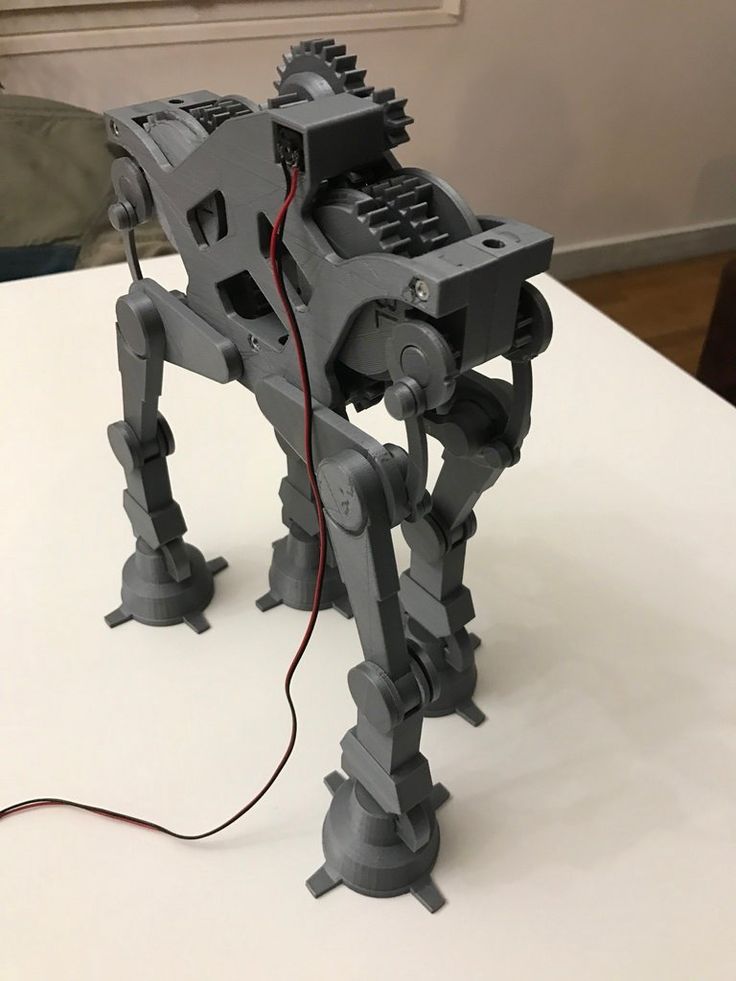 This design is perfect for camping trips, emergency kits, and other scenarios where power or batteries might be hard to come by.
- Designed by: GeorgeZSL
- Where to get: Thingiverse
Face Shield
With the pandemic still in full swing, personal protection equipment is as important as ever. This basic face shield was designed by the Prusa research team and gained EU certification as a viable personal protection tool.
Whether you are still looking for protective methods from COVID-19 or work in an industry that requires face shields, this model is fast and easy to print.
- Designed by: Prusa Research
- Where to get: PrusaPrinters
Lithophane Moon Lamp
This project uses a lithophane model that maps the actual surface topography of the moon to make a realistic miniature rendering of it. This version adds tripod legs and a hole on the bottom for a light to make it a functional, beautiful lamp.
- Designed by: Frank Deschner
- Where to get: PrusaPrinters
Landy Mini
If you think this is a basic miniature car model, think again. Assembled with only a handful of screws, the Landy Mini has a fully functioning suspension system.
Though it’s a bit time-consuming to print and assemble, the Landy Mini is a fun and well-designed project that would look great on a desk or shelf in your home or office.
- Designed by: 3D Sets
- Where to get: PrusaPrinters
Self-Watering Planter
Love plants but have a brown thumb? This self-watering planter slowly feeds in water from a reservoir as the soil dries. So even if you forget to water them for a few days (or weeks, let’s be honest), they’ll still get the care they need.
- Designed by: Mikolas Zuza
- Where to get: PrusaPrinters
Split-Flap Display
Based on the split-flap displays of the past, this model uses a handful of components and a wireless adapter to make a DIY digital split-flap display that connects to your network. You can program it to work as a clock, calendar, message board, or whatever else you can think of.
- Designed by: David Kingsman
- Where to get: PrusaPrinters
Cryptex
Inspired by the Da Vinci Code, this cryptex has a small compartment to hide things like candies, jewelry, or notes inside. You can program the cryptex to open for a specific series of letters, much like a combination lock.
While this is in no way a secure place to store anything valuable (it is printed from plastic, after all), it’s a funny way to keep coworkers out of your sweets, to give someone a gift, or to play a game with your kids.
Recommended:
The 8 Best 3D Printers for Kids
- Designed by: Cees
- Where to get: PrusaPrinters
Bag Clip
A stark improvement on the chip clips of old, this clip prints in place with minimal supports. It uses a three-hinge system, so it stays on the bag more securely without slipping off. If you want something that will be quick and easy to print, this is a great option.
- Designed by: Andrei
- Where to get: PrusaPrinters
Rotating Rings Toy
The mini gyroscope has remained one of the most popular fidget toys in the 3D printing community for several years, most likely due to its unique design. It prints in place and can be used right off the build plate.
- Designed by: Marvin
- Where to get: PrusaPrinters
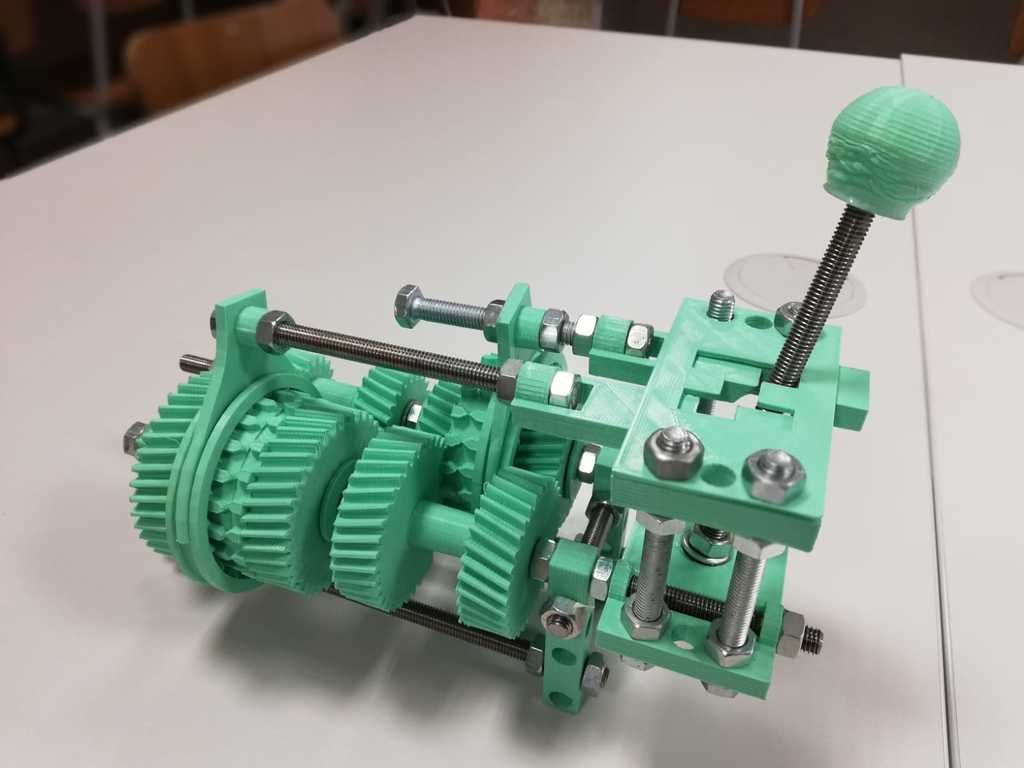
Mantis Clamp
The mantis clamp is an interesting take on a vise design, using a hand crank and gears to tighten and loosen the clamp. As illustrated in the photo below, that makes it a handy device for holding up small things like electronics components, painting miniatures, and so on.
- Designed by: zuberio
- Where to get: PrusaPrinters
Deadpool Bust
This fine-detailed Deadpool bust is a great novelty item for any Marvel fan. Printing this model in 3D printer resin on a resin 3D printer maintains the model’s high level of detail, whereas using a metallic filament like CopperFill or BronzeFill on a fused deposition modeling (FDM) 3D printer will give it the appearance of a metal cast statue.
- Designed by: Eastman
- Where to get: PrusaPrinters
Avocado Seed Floater
Sprouting avocado seeds is a little more delicate than just dropping them in some potting soil and hoping for the best. They need to be partially submerged in water for several days for the pits to start growing a sprout. Luckily, this is easy to control with this 3D printed seed floater.
- Designed by: Mikolas Zuza
- Where to get: PrusaPrinters
Drill Depth Stop
When you need a specific stopping point for your drill bit, these printable drill depth stops are an easy and economical way to keep your drill from going too deeply into your material.
The model offers a variety of sizes that correspond with popular drill bit dimensions, so you should be able to find one that suits your needs regardless of which drill bit size you use.
- Designed by: Highrise Workshop
- Where to get: PrusaPrinters
Sunflower Clock
Unlike the other clock we shared in this list, this beautiful design is a fully functional wall clock with added electronic components. This clock has a lot of different pieces to print, thanks to the thin bands of PETG used for the petals. It takes some time to assemble, but the final look is worth the effort.
- Designed by: Romano Rugeri
- Where to get: PrusaPrinters
Cute Skull Lamp
We’d say these skull lamps are a perfect addition to your Halloween decor, but they’re so adorable that you’ll probably want to keep them up year-round. They are easy to print and only take an inexpensive strand of LED lights and a few batteries to assemble them.
- Designed by: rayjizza
- Where to get: PrusaPrinters
Ancient Guardian from Zelda BOTW
Any Nintendo gamers reading this will automatically know what these deceptively innocent-looking articulated robots are, and probably started sweating and hearing dramatic piano music the moment they spotted them.
But if you haven’t been totally traumatized yet by the ancient guardians during your BOTW playthrough, these models are a must-print item. The legs are fully articulated and print in place, so you can just pop the entire figure off the build plate and immediately start your campaign to bring down Hyrule.
- Designed by: Crafty Sven
- Where to get: PrusaPrinters
Ornamental Bulbasaur
If you haven’t gotten enough Bulbasaur from Bulbasaur planters, low-poly figurines, or Pokemon chess sets, you’re in luck. This ornamental Bulbasaur model is one in a set of three decorative Pokemon models that you can print for free.
Since the model uses a lot of Victorian filigree elements, it looks fantastic with a metallic finish, especially with a patina. They acquired that look in the photo below using paint, but metal-filled filaments or cold casting the model in resin are two other possibilities for making this model look its best.
- Designed by: Psdwizzard
- Where to get: Thingiverse
3D Printable Drone
For a functional mini-drone, this design works well and is a lot of fun to use. Designed around a battery case for a single lithium battery, it is not going to be very powerful. However, it does work and it is a good beginner project for those wanting to learn how to 3D print and build more capable drones.
- Designed by: David Cledon
- Where to get: Thingiverse
Back Loaded Horn Speaker
This little printed speaker transforms into a powerful Bluetooth speaker with a little assembly and about $20 in components.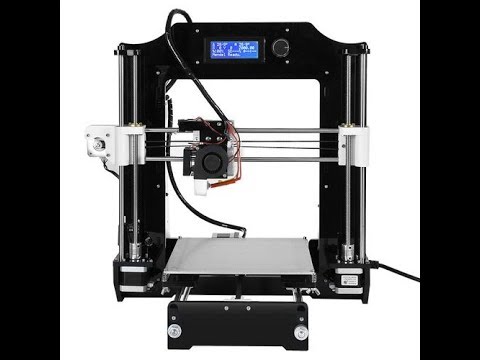 Even better, the designer includes a wiring diagram and full assembly instructions along with the free STL, so even if you are new to this type of project, you can easily follow along.
- Designed by: guppyk
- Where to get: Thingiverse
Among Us Crew/Body/Ghost/Imposter
This five-piece set of Among Us models is a fun project for fans of the game. With all of the character types in the game available, you can vary the colors of each model to account for any possible in-game combination.
- Designed by: WalRit
- Where to get: Thingiverse
Print-in-Place Bearings
If you need bearings for one of your projects or you just want to give your printer a nice torture test to check its calibration, these print-in-place bearings are the answer. Designed in five common sizes, these models should have all the options you need for most projects.
- Designed by: guppyk
- Where to get: Thingiverse
Helmet Hanger
Both functional and decorative, this 3D printing project is the perfect solution for storing your helmet while also showing it off. The model is easy to print and allows for printing the sphere whole with supports or in two pieces without supports (to glue together after).
- Designed by: Sergi Lorenzo
- Where to get: Thingiverse
Tensegrity Table
When regular furniture gets too boring, choose some that appears to defy physics instead. This small table ties the bottom and top parts together with string, and the tension keeps the table parts upright. While the designer used blue string, a clear string is ideal because it’s harder to see and makes the table really look like it’s floating.
- Designed by: Austin Steingrube
- Where to get: Thingiverse
Hydroponic Self-Watering Seeds Starter
Another model for the gardening-challenged, these cute self-watering planters will keep your plants watered and nourished even if you don’t. The planter comes in five different poses, with some sitting flat and others dangling their legs over a ledge, you can get really creative in staging your planter people on your desk, table, or shelf.
- Designed by: Studio Aditivo
- Where to get: PrusaPrinter
Print-in-Place Briefcase
Need a place to store your miniature work documents? What about your doll-sized stacks of money? This print-in-place briefcase does exactly what it says: it prints a miniature briefcase in one piece with fully functioning hinges and latches straight off the build plate.
This model (and other print-in-place projects) are a good way to test your printer’s calibration and to see where it’s having issues.
- Designed by: Dehapro
- Where to get: Cults
Bone Fingers
These articulated bone fingers bend with your fingers, making their movements look incredibly realistic. The project requires quite a bit of gluing and assembly after printing, but they are a stunning addition to cosplay outfits and Halloween costumes.
- Designed by: Littletup
- Where to get: Cults
Lazy Dogs
Yet another print-in-place project on the list.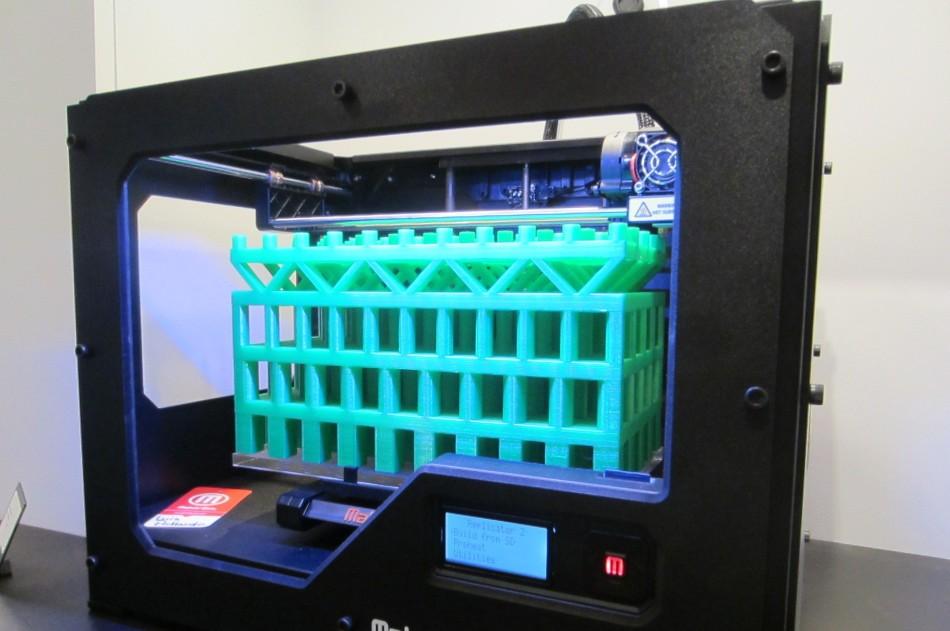 These adorable canines have articulated hinges in their body that gives them a wider range of flexibility. While they are mainly for decorative (or playful) purposes, these little dogs are quite popular with kids.
- Designed by: Mcgybeer
- Where to get: Cults
Hexagonal LED Panels
DIY printed light fixtures are one of the easiest ways to customize your decor, and these hexagonal LED panels are one of the best options we’ve seen.
Each hexagon light is printed and assembled separately before being fit together, which leaves plenty of room for creativity. Each light panel could have a different LED color, or work through a controller to loop through certain behaviors like blinking, twinkling, or transitioning through the RGB spectrum.
- Designed by: Jim Misel
- Where to get: Thingiverse
Mechanical Quick Grab/Release Phone Stand
This phone stand tightens around the phone when it’s placed in the cradle and loosens when the phone is lifted off. It also rotates the phone up, down, and side to side while it is in the holder for optimal viewing at any angle.
- Designed by: Arron Mollet
- Where to get: Thingiverse
Slim Credit Card Wallet
When you want the bare essentials to keep your pockets from being weighed down, a card wallet is an essential accessory. This particular one is fully printed and comes with the added bonus of an ejector button to help you easily remove your cards when you need them.
- Designed by: Aljaz Titoric
- Where to get: Thingiverse
Measuring Cube
A modern take on the old concept of measuring cups, these cubes are a fun way to incorporate the different measurement sizes into one piece. However, we don’t recommend using them for liquids in the kitchen since the small gaps between layers in 3D prints are not watertight.
- Designed by: Matt Stengler
- Where to get: Thingiverse
Thor Hammer
One of the more iconic Marvel props in the 3D printing community, Thor’s hammer is easy to print and looks great on display. While it has a lot of fine details that would be best captured with a resin 3D printer, it will be challenging to print it at full scale on most consumer resin printers.
- Designed by: Rob Pauza
- Where to get: MyMiniFactory
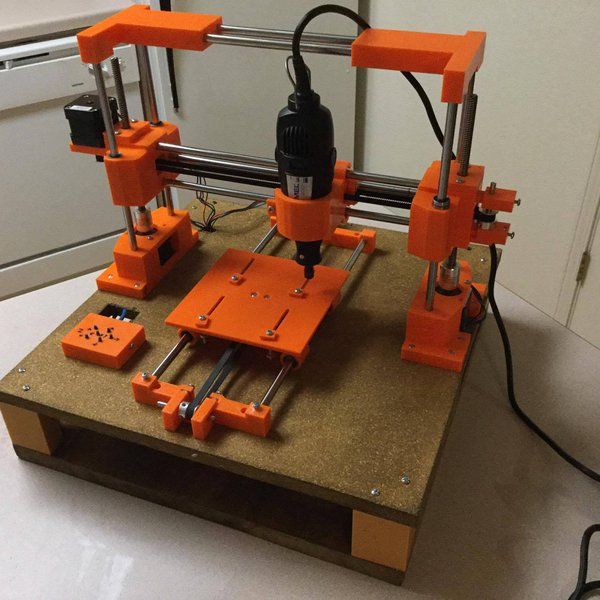
CNC Machine
One of the best things about having a 3D printer is the ability to use it to produce additional printers or machines. This CNC machine is a perfect example of that. It uses 3D printed joints to assemble the rails, motors, and carving tool into a fully functional CNC.
- Designed by: Creative Think
- Where to get: Thingiverse
Raspberry Pi 4 Case
In case you missed it, this list is full of projects and ideas that use Raspberry Pi boards as the controller. Being small, cheap, and surprisingly flexible in its capabilities, the Pi lends itself extremely well to 3D printing.
With that in mind, it’s no surprise that you can find dozens of models for Raspberry Pi cases on most of the project sharing websites. This one has one of the more attractive and functional designs available.
- Designed by: Carter
- Where to get: PrusaPrinters
Prusa Enclosure
Enclosures are often a necessity for printing ABS and other high-temperature filaments successfully, but DIY and budget printers rarely have them incorporated into their design. Fully enclosed 3D printers do exist, but they come at a price. Thankfully, enclosures are not overly difficult to make yourself, especially when upcycling existing furniture like this build.
This project gives you all the pieces needed to turn an IKEA Lack table into a functional 3D printing enclosure and filament station. While it is specifically designed for Prusa 3D printers, any printer that fits on a Lack table should work with this project.
Recommended:
9 Amazing DIY 3D Printer Enclosure Ideas
- Designed by: Ondřej Stříteský
- Where to get: PrusaPrinters
Fidget Infinity Cube
While fidget toys are always a popular category for 3D printing, these fidget cubes are especially interesting. Using a hinge design, you can fold and unfold the cubes in multiple directions.
This model prints flat and requires no assembly after printing. Since the hinges print in place, this project may take some experimentation with printer settings and calibration before it is printed successfully. The designer includes a test print with the model files so you can quickly try out different print settings without printing the full model.
- Designed by: Austin Vojta
- Where to get: PrusaPrinters
Addams Family Thing
Yet another spooky prop on the list, the Thing from the Addams Family is a great item to add to your Halloween decor. This is a model with a high level of detail (especially around the knuckles and nail beds) that would do well with resin printing.
Recommended:
Resin vs Filament 3D Printers: What’s the Difference?
- Designed by: Js-studio
- Where to get: PrusaPrinters
Collapsible Basket
Our final pick for print-in-place designs, the collapsible basket is fun to print, cool to use, and easy to put in storage when you don’t need it.
- Designed by: 3D Printing World
- Where to get: PrusaPrinters
Conclusion
Those were 51 of the coolest free 3D printing models! Did you like our picks? Have you printed any of these models before? Let us know in the comment section down below!
Scroll to Top
A small guide for choosing a 3D printer for beginners / Sudo Null IT News
The reason for writing this article was the article “ I wanted to buy an inexpensive 3D printer, but I looked at YouTube and got sick of ”, at the end of which the author asks to answer a few questions. I will try to answer from the point of view of my seven years of experience as a 3D modeler and 3D printer. First, a few caveats.
This article will not contain advice: “Buy a printer from manufacturer X - it is good, and manufacturer Y - do not take it in any case”, only general recommendations.
Informal classification of printers, adopted in the domestic segment of printers.
Everything written is based on the personal experience of the author and is his personal opinion.
If these warnings do not scare you - welcome under cat.
First, let me introduce myself: my name is Maxim and I bought the first printer back in 2013. It was a Chinese clone of Makerbot 2 with the hilarious name "Migce Cuble".
Photo from the personal archive There was almost no information on 3D printing on RuNet, only one topic on the “Roboforum” and several scattered articles about what a cool thing it is - 3D printing, so to master it, I had to google a lot in English, come up with their crutches and delve deeply into the physics and technology of the printer. We must pay tribute, in the English-speaking segment, then there was an active development of this technology and interesting articles such as “Selection of the type of notches of the extruder feed gear for a specific type of plastic” or “Determination of the optimal printing temperature using a strain gauge installed on the extruder” came across. Since then, 7 years have passed. I managed to master modeling, assemble a printer from scratch, be a moderator of “3D Today” for a while, work as a freelancer in the field of modeling and printing, organize a prototyping circle for children and bring it to the Russian level. Recent achievements: volunteered as a coordinator for the supply of plastic in the project “ Anti covid makers ”. A lot has changed during this time, including printers in my home zoo. One thing has remained unchanged - the question: "What should I buy as my first printer?".
Currently, two types of printers are mainly used at home: printing using FDM (FFF) technology - layer-by-layer plastic fusion, which is fed in the form of a rod and SLA (LCD) - printing with a photocuring polymer. FDM technology is more common, due to the lower cost of equipment and consumables, but in recent years, the prices of LCD printers and printing resins have decreased significantly and photopolymer printing has almost caught up with FDM printing in terms of cost and entry level.
To be honest, I almost never did SLA printing and I still don’t have an LCD printer in my home zoo (but it may appear soon), so I will mainly talk about FDM printers. They can be divided into 3 main categories according to the type of mechanics:
Dried tables - printers with a table that moves horizontally. Perhaps the most common printer model. It is distinguished by low cost of components, ease of assembly and adjustment, for which it is loved by the Chinese and printers. The disadvantages include the difficulty of creating a closed body and printing thin, tall parts that begin to wobble as the height increases, especially if the part is printed from flexible plastic such as TPU.
Typical drygosts Cubes - printers in which the table travels vertically. The cost of such printers is higher, as are the requirements for straightness of hands during assembly and setup. But a properly designed die delivers faster print speeds while maintaining print quality.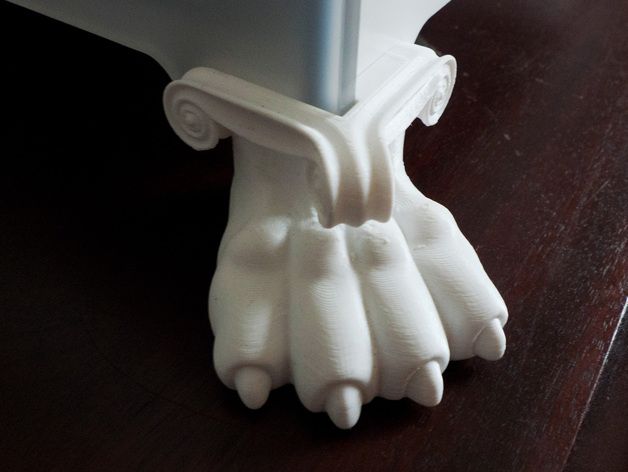 At the same time, the design of the printer is very easy to make closed, which allows printing with engineering plastics such as ABS and Nylon. This type of design is often used in semi-industrial and industrial grade printers. Some manufacturers manage to shove the drygost into the body of the cube, but this does not bring any special advantages for printers.
Delta - printers with the so-called delta kinematics, when the print head is attached to the carriages moving along vertical guides using a system of rods. The cost of the mechanics of such printers is comparable to the cost of dry-tables. Can print at very high speeds. But they are very demanding on the correctness of keeping the dimensions, the straightness of the hands during assembly and adjustment, and the speed of the “brains” due to the complex mathematical calculations of the trajectory of the head movement.
Strongly not recommended as a first printer, although the widespread use of the table level sensor somewhat reduces the requirements for straight hands during setup and operation.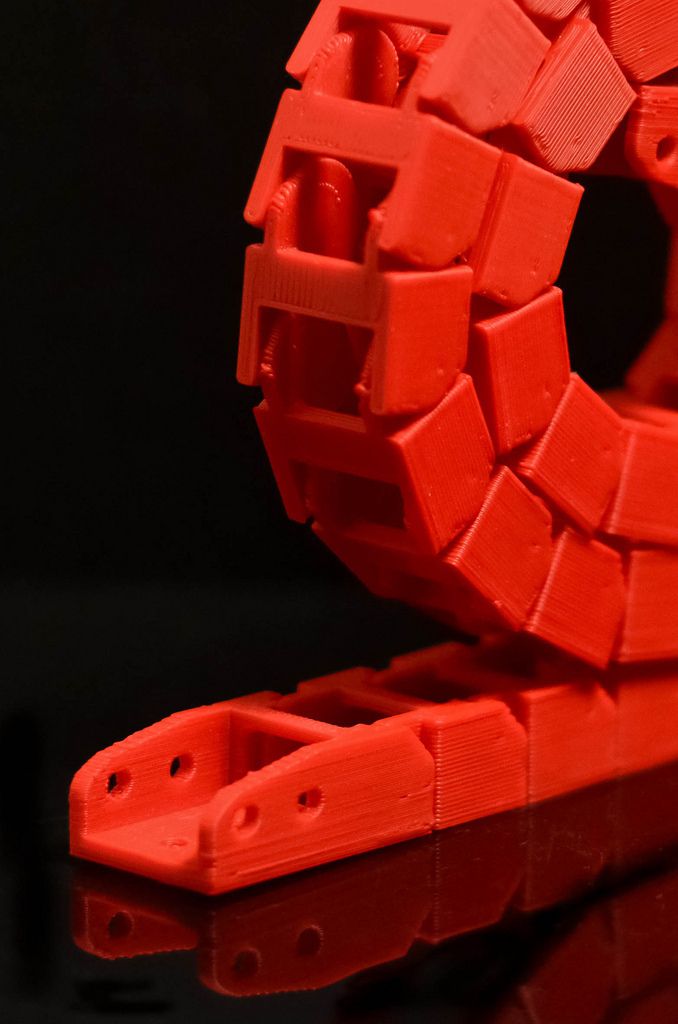
By availability on the market, 3 main categories can also be distinguished:
Chinese (cheap Chinese printers) are almost always designers, even if they come assembled.
-
The advantages include low cost, wide distribution and uniformity, which allows you to buy failed parts in the nearest radio shop or on well-known Chinese sites. Popular models gather around a relatively large number of users who actively share their experience in the field of self-repair and improvement of this type of printer. The most popular models will most likely be printed right out of the box, but will require improvements during more or less long-term operation.
-
The disadvantages include the quality of components / assembly and the need to refine these printers to obtain acceptable quality / print speed. It is recommended to take models that have already formed a large community around them. This means that most of the shortcomings have already been identified and there are standard inexpensive methods to solve them.
Kits (assembly kits, mainly domestic production) - google for the words “ ZAV ”, “ UlTi ”, “ UlTi ”, etc. Usually they are a set for assembling a plywood cube. Recently, options with metal cases have appeared. Supplied in different versions - from a kit for building a case with printed parts, ending with completely finished assembled products.
-
The pluses include a fairly good engineering study, the ability to choose the components for the mechanical and electronic parts and make the printer completely to your requirements. With good components, they provide fast, stable and high-quality printing. The price is somewhat more expensive than Chinese printers, but cheaper than semi-professional printers of domestic or European / American manufacturers.
-
The disadvantages include a decent amount of time spent on assembly and waiting for components if you decide to save money and order these components yourself from different sellers and assemble a printer from them.
 When assembling, direct hands are required.
Factory Printers (Semi-professional printers from domestic or American/European manufacturers). There are a lot of models, the designs are very different.
-
The advantage of this class of printers is printing with acceptable quality out of the box. In addition, you get operational reliability and warranty support from the manufacturer.
-
The main disadvantage is the price. It is often not clear what factors it depends on. You can buy a high-quality printer relatively inexpensively, or you can take something incomprehensible for a high price. The second disadvantage is the presence of specific solutions that are incompatible with popular solutions on the market: these can be nozzles with their own thread pitch, special fans, electronics, belts, and even slicers. Some are demanding on the quality of plastic, there are models that work only on chipped coils.
Now that we have decided on the classification of printers, we can proceed to the procedure for choosing a printer for yourself, your loved one. If you are on fire with the purchase of a 3D printer, first decide what you are going to take it for, the type and configuration of the printer depends on it. Let's analyze several typical situations:
I want to do something for myself and my family - if you don't plan to print products from engineering plastics that can withstand decent loads and temperatures, a Chinese drygostol or a cube will suffice. If you have a budget and want to figure out how the printer works before starting, and not during printing, you can look in the direction of domestic assembly kits - with them you can get the best quality and painlessly switch to engineering plastics.
I can't do anything with my hands, but I have to. Therefore, I want a printer that will do everything for me - in this case it is better to look at semi-professional printers. If the budget is not enough, you can look at used ones or order an assembly of a domestic set - usually manufacturers offer this service through intermediaries. When ordering an assembly - look for experience and positive reviews, there are nuances.
I want to print for sale - a farm of the same type of printers, depending on the budget. If there is no budget, but there are resources for regular tuning / repair - you can even from Chinese drygosts. Additionally - a printer with a large print area, a printer with a closed case and a heated table for printing engineering plastics, an SLA / LCD printer for printing products with a high degree of detail.
Whether at work or at home, the need arises to design and print enclosures and parts. If only small prototypes are planned - an LCD printer, if functional products - a closed cube with the ability to print with engineering plastics.
Kids are growing up and this is the technology of the future, I want you to master - see what printers are used in prototyping competitions in your area. Take the same one. May be used.
I want to make figurines for desktops, beautiful little things for home - LCD printer.
I want to figure out what kind of technology and how it works in general - a kit for assembling a domestic manufacturer. By the time you collect it, you will understand.
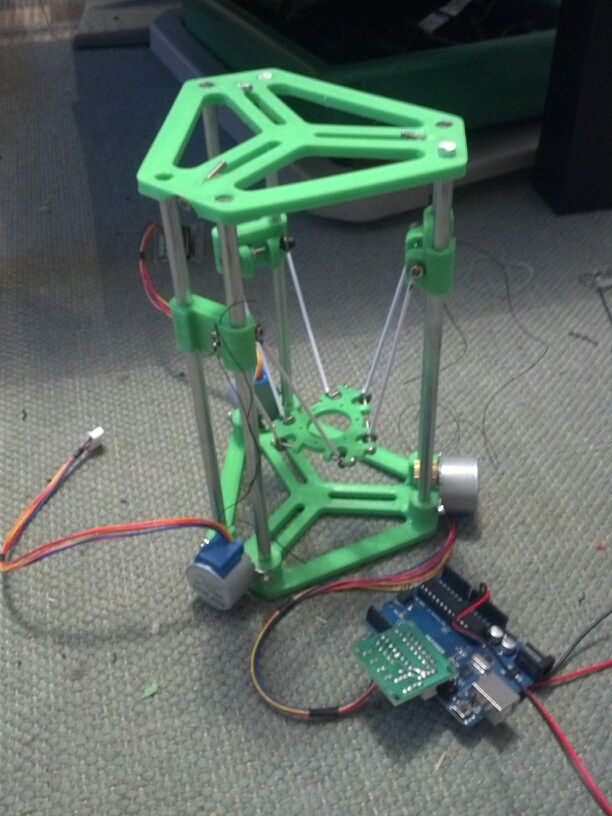
There is no money at all, but I want to print, I will collect it myself from scratch - it will turn out better and cheaper than the Chinese. Strange as it may seem, no. The cost of components with Ali will be more expensive than a printer with Ali. Of course, if there is a machine park, the ability to use it, a set of iron, shafts and electronics lying around in the corner of the workshop, it can burn out. There are options for building printers from boards and furniture rails, but their print quality is, to put it mildly, lame. For example, the construction of the printer shown below cost its author 80-9, according to him.0 dollars.
If you want to completely build your printer from scratch, then it's better to treat it as a separate hobby and accept that it will not turn out very cheap.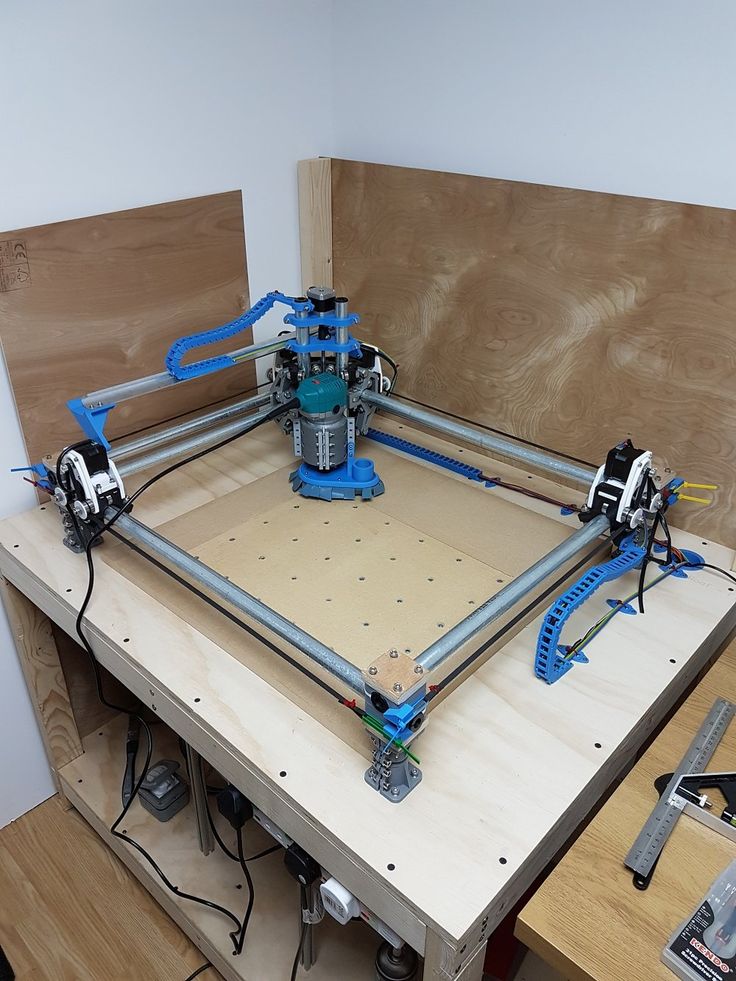 Well, or look in the direction of used printers.
I don’t know why I need a printer, but I want to try - a Chinese or a domestic assembly kit. Can be used. If it doesn't work, you can always resell.
Decided on the type of printer - what to look for first of all when buying ?
-
First of all - on the rigidity of the structure - the accuracy and speed of printing depend on it. It is in the direction of strengthening the rigidity that your first modifications of the Chinese printer will be directed, since the material “steel plasticine 3 (c)” is considered an unaffordable luxury for the Chinese. In the case of the purchase of domestic kits, the situation is slightly better.
-
Secondly - if the printer will be in the apartment - "silent" drivers for stepper motors. 3D printing is not a fast process, and having a constant loud enough buzzer under your ear is annoying.
-
Third - the presence of a heated table and ease of modification to a closed case.
 Over time, the desire (need) to print ABS will come, and it is problematic to do this on an open drygost.
 -
Fourthly, the presence of a good plastic blowing system is also important.
-
Fifthly, when choosing printers with CoreXY, H-Bot or Delta mechanics, it is highly desirable to have a 32-bit control board, or you will encounter fading (freezes) at high print speeds.
-
In the sixth, seventh, etc. - there are many nuances in the design of printers. If something is unclear, feel free to ask the community.
In any case, if you are going to buy or have already bought a 3D printer, start learning some 3D editor. The easiest, in my opinion - https://www.tinkercad.com . You can simulate a washer in it or the well-known plate changer without much effort.
Over time, its capabilities will no longer be enough - then you can switch to more serious CAD systems. In my opinion, a printer should own two types of editors - a solid state for modeling technical products (CAD) and a polygonal tool (Blender, etc.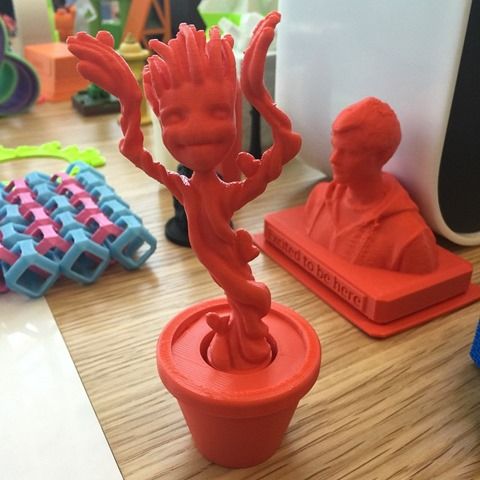 ) - for modeling artistic ones, but many printers consider this redundant and master only one.
On this, perhaps, I will round off - the article has already turned out to be quite voluminous, if you have questions, I will be happy to answer them in the comments or in a separate article. I’ll say right away - I won’t answer questions like: “ which is better: flying bear 5 or ender 3 ” - a lot of copies have already been broken on this topic on specialized resources, I don’t see the point in repeating.
Best regards, Maxim.
3D Printers / Peripherals
Author: Konstantin Afanasiev
Computer technology is increasingly merging with real life. However, the line between real reality and reality, so to speak, computer or virtual remains. Moving an object from one plane to another is not easy. Of course, if we are talking about text, pictures and other two-dimensional things, then printers and scanners have long made such an exchange a simple and completely ordinary thing. However, in the case of three-dimensional physical objects, everything is much more complicated.
Even technologies that allow you to see a three-dimensional computer model in real volume cannot be called very common (although they are already at the user level both in terms of price and availability). As for the possibility of touching such a model and interacting with it, then so far there is no question of home or amateur use.
And I think most of the readers didn't even think about technologies that allow reproducing the model in real material. At best, they heard something out of the corner of their ear. This article will be devoted to such technologies. So to speak, for the general development.
Let's start with the question, why is this needed? Why do you need to take a three-dimensional model of something and make a real object out of it? It turns out there are plenty of uses. The first, and most basic, in the industry - mainly for rapid prototyping - is to see how the model will look in the material.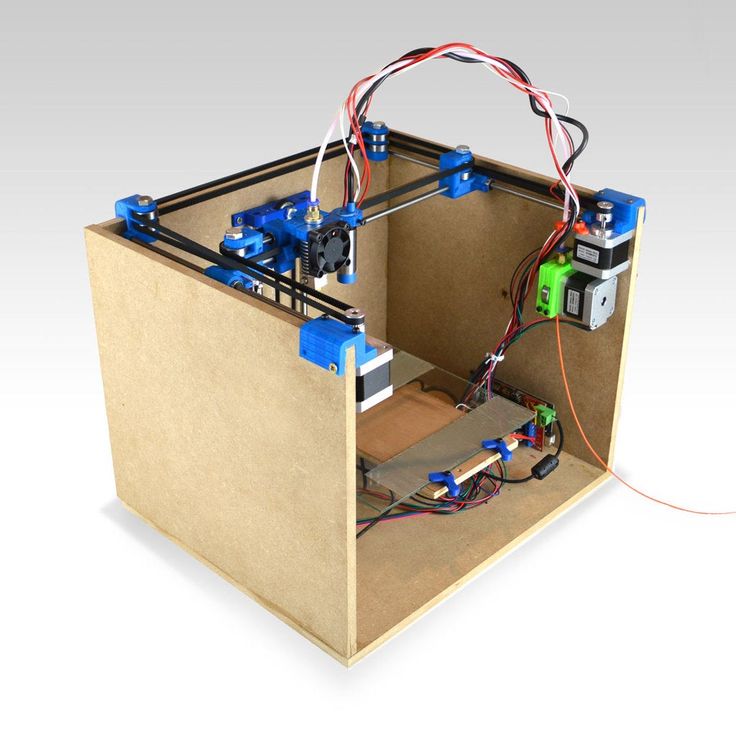 According to a spokesman for the aerospace company Pratt & Whitney, "the cost of developing a complex product can be greatly reduced if engineers are asked to look at a real part instead of dozens of drawings."
In addition, various tests can be carried out on the finished model even before the final version of the product is ready. What's more, prototypes allow you to perform tests that you can't do on a finished product. For example, Porsche used a transparent plastic model of the 911 GTI transmission to study oil flow during its development. However, the main thing is that such a model can be made very quickly - and in our time of high speeds this is very important. Actually, there is a whole industry of rapid prototyping (Rapid Prototyping - RP), which is precisely engaged in the development and use of volumetric printing technologies for these purposes.
However, prototypes are not everything. The next step is rapid production. Already, some RP technologies allow the manufacture of finished items from various materials.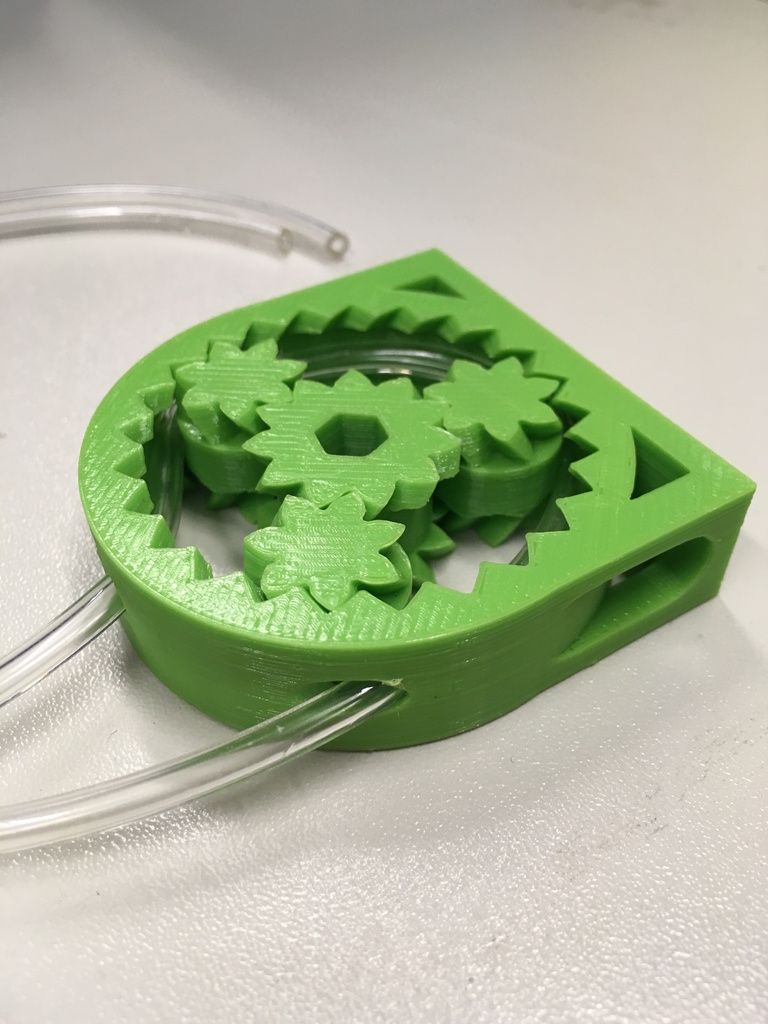 This is an ideal solution for small-scale production, since the standard manufacturing process makes it possible to do anything (within reasonable limits, of course) in a relatively short time. Again, some of the 3D printing technologies allow you to quickly produce molds - well, then the production process is already rolled out. True, prices and availability (as well as the choice of materials) still leave much to be desired.
But in the future, who would refuse the opportunity to quickly make some necessary trifle at home, instead of looking for it in stores or ordering a bottle from a familiar locksmith Uncle Vasya. Actually, here you can draw a direct analogy with systems based on FPGA (that is, on programmable logic), which have made a real revolution (although it may be imperceptible for non-specialists) in electronics. FPGA technology allows you to describe electronic circuits on a computer, and then quickly implement everything described in a standard chip. The same fast prototyping, but for electronics.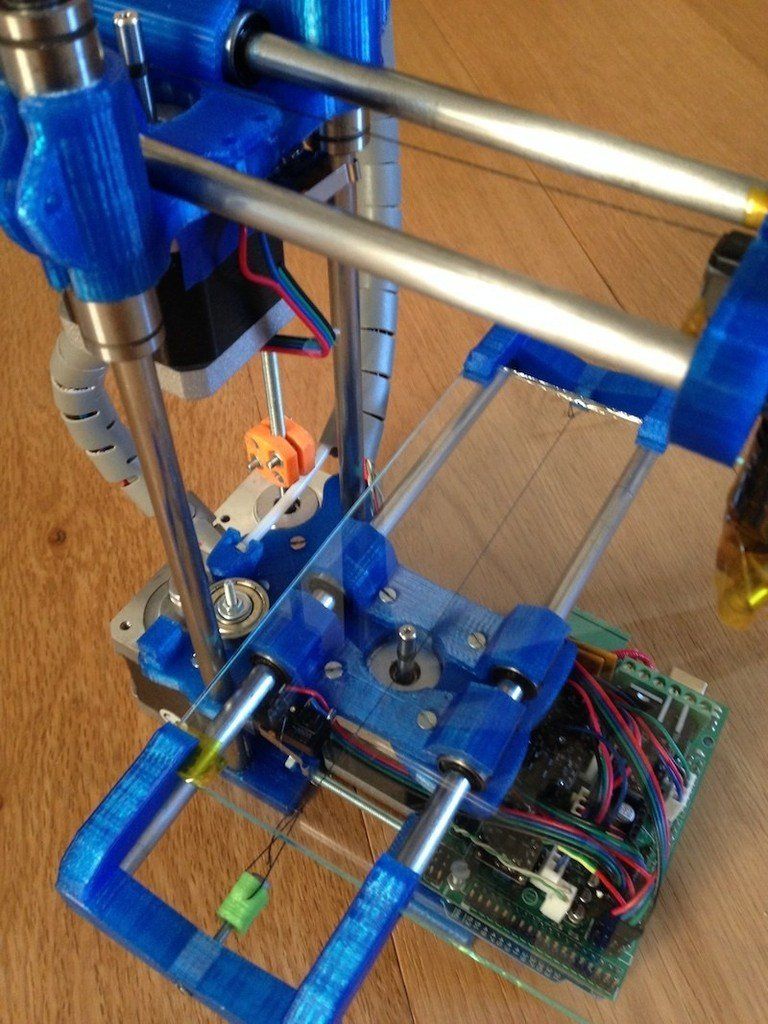 Moreover, if earlier all this was quite expensive and complicated, now, if desired, you can make anything - a microprocessor, DSP, microcontroller - practically at home. Volumetric printing will allow, in the future, to do the same with conventional production. However, it's time to move on from romantic dreams to the harsh truth of life and what 3D printing is now.
Micromachines
The simplest, cheapest and most affordable devices that claim to be a 3D printer actually have almost nothing to do with printers. We are talking about machine tools with program control. However, if you imagined some kind of screw-cutting monster the size of half a room (I immediately recall labor lessons or the Code of Criminal Procedure), then this is in vain. We are talking about very compact desktop machines, which are called desktop CNC machines (CNC means computer numerically controlled, or, in Russian, a machine with numerical control). These devices can be controlled directly from CAD programs and cut, cut and drill models in the material that are developed in these programs. Materials can be almost anything - from plastic or wood to soft metals (bronze, aluminum). For example, the MicroMill 2000 Desktop Machining System from MicroProto, shown in the picture (this is called a CNC milling machine), connects to a computer instead of a printer, can process a volume of 23x14x15 cm and is able to position the tool with an accuracy of hundredths of a millimeter. Machines aluminum and even mild steels. This wonderful thing costs a little less than $ 2,000.
Desktop multifunctional machine, connects instead of a printer
Part model and finished part made on a CNC machine
Another example of such devices is the MDX line of machines from Roland. The older models are designed for semi-industrial use and cost, respectively, around $20K. But the MDX-15 machine is estimated at about $ 3,000 and it can already be categorized as amateur and even home equipment. The MDX-15 also allows you to process various materials up to aluminum and bronze, has a working area of 15x10x6 cm and an accuracy of the order of hundredths of a millimeter. It connects to a computer via a serial port. By the way, Roland supplies a special piezoelectric scanning head to its machines, which allows you to do the reverse transformation - translate real objects into computer three-dimensional models.
Roland MDX 20
Machine at work
There are three main types of CNC machines: routers, mills and lathes. What a lathe is, I think everyone understands that. And what is the difference between router and mill is easiest to understand from the figure. Of the two devices described above, the first is mill, and the second is router. By the way, machines with four degrees of freedom are also produced - to a certain extent combining the capabilities of mill and lathe. All this technique can be used both for the direct manufacture of objects according to three-dimensional models, and for the preparation of molds for casting - this significantly expands the scope. Other possible uses are engraving, fast PCB fabrication (no photomasks or etching), modeling (anyone who has built a model airframe at least once must hate jigsaw sawing for the rest of their lives), and a host of others. Well, you can get more information on desktop CNC machines at www.desktopcnc.com.
What is the difference between CNC-Mill and CNC-Router
Computerized lathe Flashcut
They use several different technologies. Historically, the so-called stereolithography (StereoLithography or SLA) was developed first. The principle was invented and patented by Charles Hull back in 1986. Then Hull founded the company 3D Systems, which was engaged in the release of the corresponding equipment. Later, the German EOS GmbH, the Japanese Sony-DMEC and Mitsui Engineering, as well as several others, joined it. The essence of stereolithography is as follows - there is a liquid photopolymer in the working area of the printer.
 When illuminated with ultraviolet light, the photopolymer hardens and turns into a fairly durable plastic (photopolymers are actively used by dentists for fillings, so I think many of the readers are familiar with them). To illuminate the polymer, either an ultraviolet laser or an ordinary ultraviolet lamp is used (more on that later). The laser beam actually scans the work plane pixel by pixel and forms separate solid "pixels" until it draws a section of the model on the plastic. Then the level of the photopolymer rises (more precisely, the desktop falls along with the formed part of the model), and the next layer is drawn on top of it until the model is completely ready. Stereolithography makes it possible to obtain an accuracy of "imprint" of the order of tenths of a millimeter, reproduces small details well and provides a fairly even surface of the object. This technology is the best tested and the most widely used. However, it is not without its drawbacks - installations, as well as consumables, are quite expensive (the price of such a printer is about hundreds of thousands of dollars).
 In addition, the processed material is limited only to photopolymers.
 How the SLA machine works
This is what a stereolithography machine looks like from the inside.
CAD model is the same, but already made in plastic using SLA technology
A faster version of this technology was originally developed by Cubital Inc. (Now apparently deceased.) It was called Solid Ground Curing or SGC for short. It also used a photopolymer as a working material, but the illumination was carried out with an ultraviolet lamp immediately for the entire working layer. Illumination was carried out through a photomask, which for each layer was printed on glass using a technology reminiscent of laser printing. Processing the entire layer simultaneously instead of pixel-by-pixel scanning with a laser beam just made it possible to achieve a fairly high speed of building an object. Now a system based on a similar principle is offered, for example, by the German company Envisiontec. The device is called Prefactory (very telling name) and is a rapid prototyping system for the end user. The machine occupies only 0.3 square meters of space, so it can be installed even in a small office. Illumination is produced using DLP (Digital Light Processing) technology, similar to those used in computer projection systems. Resolution (for one working layer) is 1280x1024 pixels at a pixel size of 150 or 90 micron. The thickness of the layers varies from 150 to 50 microns. The Prefactory can make prototypes around 190x152x230mm and print speeds up to 15mm per hour (height). The printer is controlled by a built-in computer running Linux, and communication with the outside world is via Ehternet via a local network. In fact, you can send jobs to the Prefactory just like you would to a regular network printer.
Envisiontec Prefactory Compact 3D Printer
Laser Sintering
An alternative method of 3D printing is called laser sintering (Selective Laser Sintering - SLS).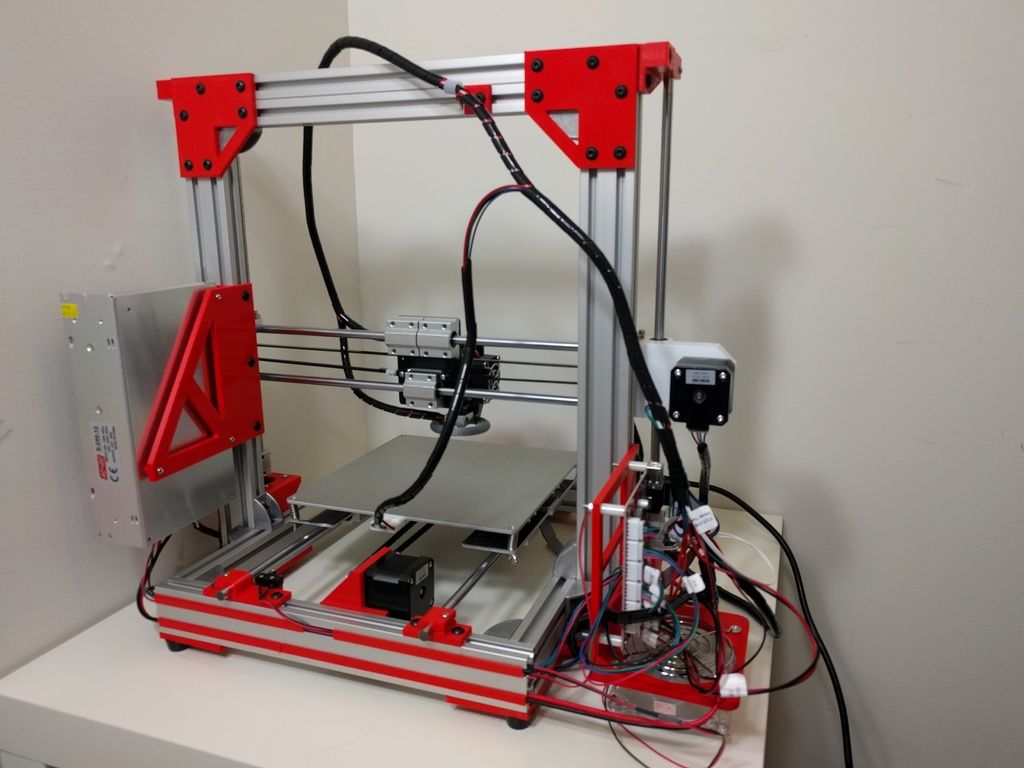 Here, as you might guess, a laser is also used, but the working material is no longer a photopolymer, but a powder of some relatively low-melting plastic. The plastic in the working volume of the SLS-machine is heated almost to the melting point, and so that it does not catch fire and does not begin to oxidize, nitrogen is supplied to the working zone. Then a powerful laser again draws a section of the part on the plastic powder, the plastic is heated above the melting point and sintered. The next layer is poured on top and the procedure is repeated. At the end of the work, the excess powder is simply shaken off the finished model. This process was developed in the late 80s at the University of Texas at Austin and patented in 1989 by university graduate Carl Deckard. The process was then commercialized by DTM Corp. Laser sintering also provides a fairly high quality parts, although their surface is porous. But the models obtained by the SLS method are the most durable and this technology, in principle, can be used for small-scale production.
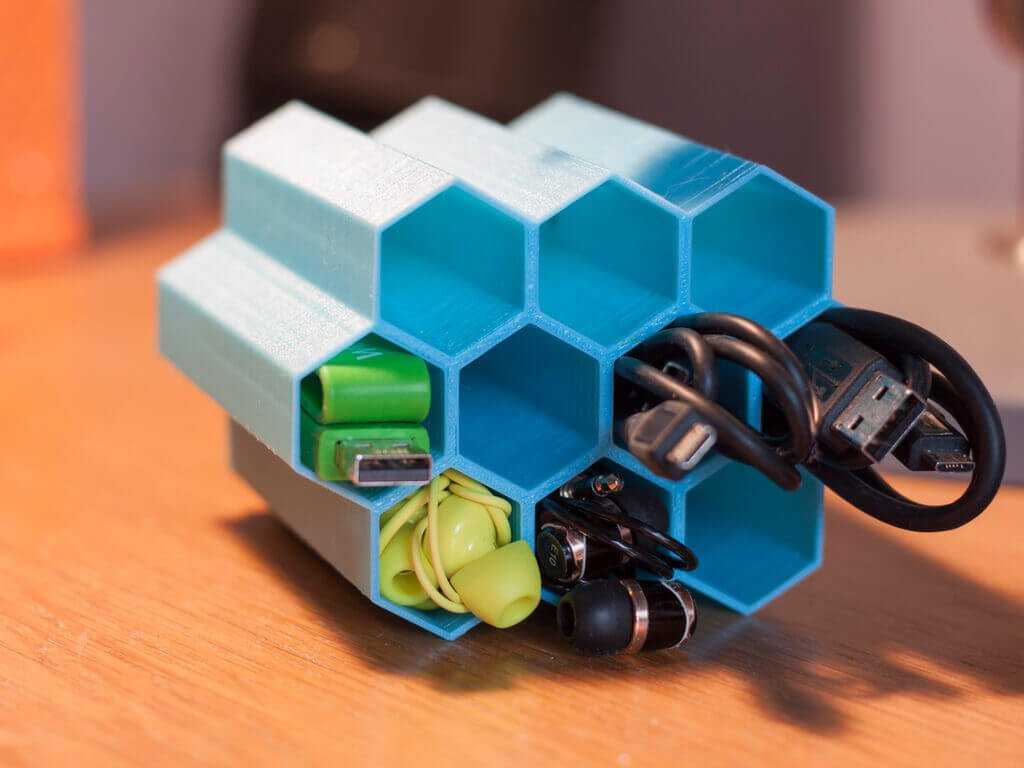 True, the SLS plant is quite complex and expensive, and the production rate is only a few centimeters (height) per hour (plus several hours to heat up and cool down the plant).
This is how the laser sintering machine works
This is how the SLS machine and parts made in it look like
In addition to good manufacturing accuracy and high strength of the "printouts" obtained, SLS has several other important advantages. First, laser sintering makes it possible to produce models with moving parts - for example, working hinges, push buttons, and so on. Secondly, special materials have been developed for the SLS process, allowing the direct production of metal parts. As a powder, steel microparticles are used here, coated on top with a layer of binding plastic. The sintering of the plastic takes place as usual, and then the "printed" part is fired in an oven. In this case, the plastic burns out, and the freed pores are filled with bronze. The result is an object consisting of 60% steel and the remaining 40% bronze. In terms of its mechanical characteristics, it surpasses aluminum and approaches classic stainless steel. In fact, SLS already now allows the production of full-fledged metal objects, and of arbitrary shape. In addition, there is a similar material with a ceramic or glass core - it can be used to make models that are resistant to high temperatures and aggressive chemicals. If only the process itself wasn't so expensive...
Laser sintering model and implementation
Lamination
Another laser 3D printing technology is lamination. It was developed by Helysis and sold under the brand name LOM (Laminated Object Manufacturing). Helysis itself ceased to exist in 2000, and several other manufacturers are now developing their equipment based on its technology. The essence of the technology is as follows - thin sheets of working material are loaded into the machine in turn, from which layers of the future model are then cut out by a laser.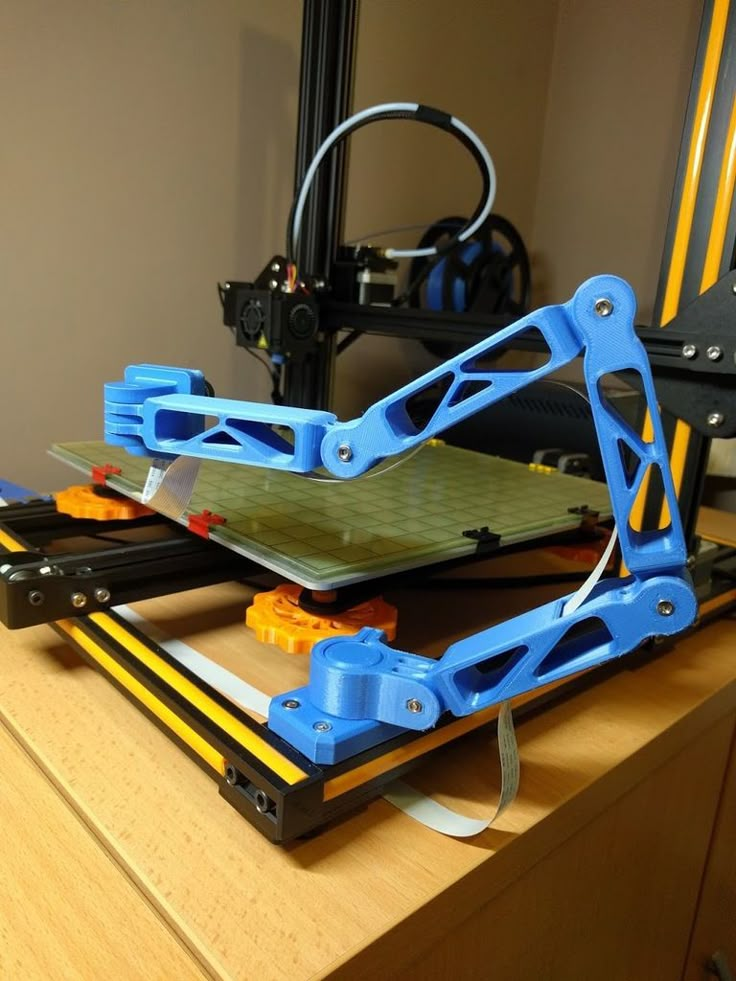 After cutting, the layers are glued together. Initially, special paper with a layer of adhesive was used as the material. However, thin plastics, ceramics and even metal foils can also be cut in this way.
The principle of operation of a three-dimensional printer on lamination
Inkjet printing
Above, so to speak, three-dimensional laser printing systems have been described. However, inkjet printers are not far behind laser printers in this area. The simplest of the "inkjet" 3D printing processes is the so-called Fused Deposition Modeling (FDM). The idea of FDM is very simple - the dispensing head squeezes drops of heated thermoplastic onto the cooled base platform (almost any industrial thermoplastic can be used as a material). Drops quickly harden and stick together, forming layers of the future object (printing here is also carried out in layers). The FDM process makes it possible to produce quite large ready-to-use parts (up to 600 x 600 x 500 mm) with sufficiently high accuracy (minimum layer thickness 0.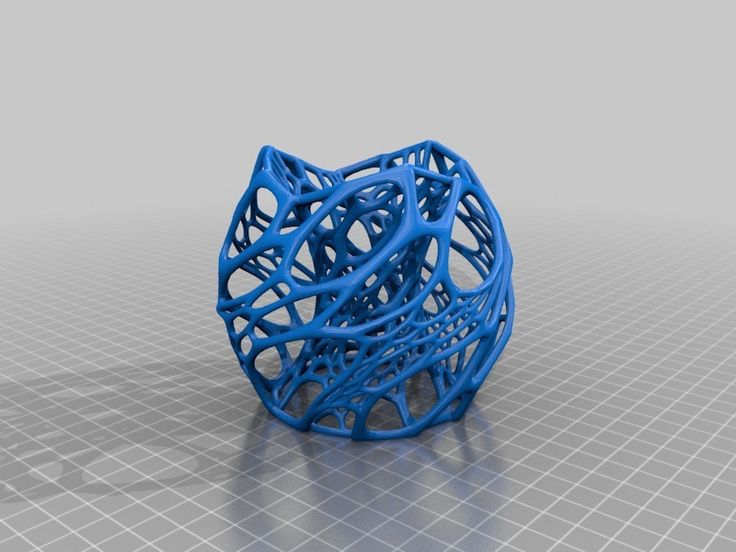 12 mm). The fundamentals of this technology were developed 19 more88 by Scott Crump. The main manufacturer of FDM equipment is Stratasys.
How the FDM machine works
By the way, NASA is considering FDM technology as a "space factory" candidate. After all, you cannot take an unlimited number of spare parts for all equipment on a space expedition. And it is unlikely that it will be possible to place a full-fledged mechanical workshop on a spaceship. But loading a couple of hundred kilograms of the original plastic and a compact machine that can make any part out of this plastic is easy.
FDM printer at work
Another technology that clearly traces back to inkjet printing is Objet Geometries' Polyjet. Here the inkjet head is used to print photopolymer plastic. The model, as usual, is printed layer by layer, and the resolution in the layer is 600 x 300 dpi, and the layer thickness can be reduced to as little as 16 microns. Each printed layer is polymerized into a hard plastic under the action of an ultraviolet lamp. In principle, all this is quite similar to SLA, but much faster, more accurate, simpler and more compact. At the same time, the price for Objet printers is at the level of $60K - several times less than for SLA installations. A similar system called InVison is also produced by 3D Systems, so the founding father of stereolithography also does not stand still. The price tag for this machine is about $40K - rapid prototyping systems have clearly become cheaper in recent years.
Objet Eden 260 rapid prototyping system
And the skull model printed on it
And another "inkjet printing" technology, but using powder materials. It was developed at the famous Massachusetts Institute of Technology, and the Z Corporation became the first and main manufacturer of equipment. Its 3D printers are relatively inexpensive (from $10K to $30K) and are significantly faster than the devices described above. The essence of the technology is as follows - a special inkjet head (by the way, adapted from Hewlett-Packard inkjet printers) sprays an adhesive onto the powder material. Ordinary gypsum or starch is used as a powder. In "splashed" places, the powder sticks together and forms a model. Printing, as in previous cases, goes in layers, and the excess powder is shaken off at the end. However, there is a significant difference - this printer can use an adhesive liquid with the addition of pigment dyes - which means it can print color models. The color printer from Z Corporation has 4 inkjet heads with ink-glue of primary colors, so that the resulting model can reproduce not only the shape, but also the color (that is, the texture) of its virtual prototype. True, plaster models are not very strong, but they can immediately be used as molds for casting. As for the detailing of the "imprint", it is enough to look at the given photographs to appreciate it.
It remains only to shake off the excess powder from the finished print of the model.
Head and spare parts for it, 3D color printing
Z Corporation serial 3D printer
By the way, ProMetal is developing an interesting version of the above powder inkjet printing. Its proprietary manufacturing process called the Direct Metal Process works exactly the same way. Only instead of gypsum powder, metal powder is used. Next, the molded product is fired in a furnace, so that the powder either melts itself or binds with a more fusible metal (as in laser sintering of metal powders). Here is another method of direct production using 3D printing.
A part made of metal using ProMetal technology
In general, the prospects for 3D printing are very bright - this technology already saves a lot of time and effort for designers and engineers. And what will happen when it becomes available at the household level. Or, at least, in the form of an inexpensive service. Imagine that you can make any object that you can think of and draw on a computer ... All you have to do is draw a model, determine the material and send an order over the Internet. This is called Distance Manufacturing on Demand. In general, such a technology is simply bound to become mass-produced sooner or later - and then everyone will have their own personal mechanical factory on the table, replacing ordinary production in small things. In the same way that printers have replaced printing houses and typewriting bureaus.
Meanwhile, further developments in this area are in full swing, so you can always expect something new and unexpected. For example, a group of scientists from the University of California at Berkeley is developing a 3D printing technology that would allow both form and content to be created simultaneously. The content here means neither more nor less - electronic stuffing. Let's say the printer prints the plastic case of a mobile phone and prints all the electronics inside at the same time. In principle, there are already ways to print plastic semiconductor devices and the wires connecting them. It remains only to combine them with existing 3D printer technologies and a revolutionary breakthrough in modern production is ready. No, of course, this is not an easy task, but it is quite possible to solve it.
Or, for example, the developments of the University of Missouri, which allow using an inkjet printer to print original blanks of biological organs. In this case, clumps of cells of a given type are used as ink. Instead of "paper" there is a special bio-gel that fixes the position of cell clumps in space. The printing is done in several layers, so that the result is a three-dimensional construction of cells, which, in principle, can imitate any organ (after the cells grow, the gel dissolves, so that hollow structures can be obtained). Of course, printing a full-fledged organ for transplantation seems too difficult for now, but work is underway.
Cellular ink printing system
For those who are interested in this topic, I can give some useful links. First, at this address is a collection of links to equipment manufacturers, technology developers and researchers. Moreover, the links are broken down by materials and production methods, so that a fairly clear picture of the state of affairs in this area immediately emerges. Secondly, at www.rpm-novation.com there is quite a good site dedicated to rapid prototyping technologies in Russian. And here you can find a good table with the characteristics of existing equipment.
And finally, a bit of high art combined with exact science. Look at the photo - in front of you is a model (or, rather, a map) of our metagalaxy. This glass rectangle 7x7x10 centimeters in size depicts a piece of space 100x100x100 megaparsec. Everything is done in full accordance with the exact astronomical data. And the picture itself is burned into the glass with a laser. Also, in general, a kind of 3D printer. Made this wonderful thing by the artist Bathsheba Grossman. See more of her work at www.bathsheba.