Thomas sanladerer 3d printing
Tom's 3D printing guides and reviews –
tomTips and Tricks
My “0.4mm nozzles are obsolete” video apparently left quite a few questions in need of answering, at least going by the comments on the video. So today, we’re going to look at whether you can maybe just stick with a 0.4mm nozzle and tell your slicer to pretend it’s a 0.6, how strength compares between nozzle sizes, and whether comparing 0.4 with an old slicer to 0.6 with a new one was even fair in the first place. I hope I didn’t hurt the nozzles’ feelings. So let’s start outContinue reading
tomTips and Tricks
The job of a Bowden tube is to guide the filament from the extruder into the hotend so that the extruder can drive the filament over here, but the actual pushing force happens at the hotend. If this printer didn’t have one, the filament would get pushed just the same, but the driving force wouldn’t be able to push it into the hotend. Makes sense, right? But not every 3D printer is a Bowden system, in fact, this guy isn’t, but I’m going to argue it’s still going to profitContinue reading
tomTips and Tricks
When you start a print, how do you decide what settings to use? Of course, parameters like the solid shell thickness or the infill percentage are something that needs to be decided on a print-by-print basis, but what I mean are the settings that, ideally you figure out once and then leave as a preset for future you. But what if those presets are wrong? What if you didn’t even tune those in yourself and use whatever the filament manufacturer suggests or stick with the presets that come with yourContinue reading
tomTips and Tricks
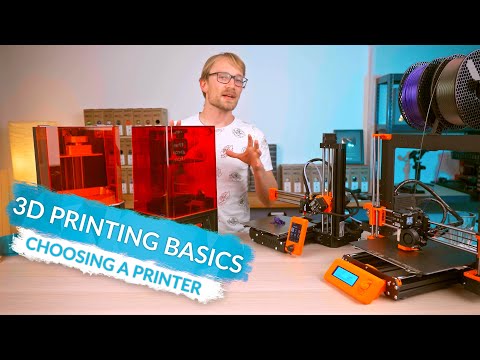
I´ve used dozens of different 3D printers over the years. They look like they’re machines that are made for vastly different jobs, based on how they’re built and what they’re capable of. But they all share one thing in common: A 0.4mm nozzle. And the nozzle is one of the core things that make a 3D printer work. But why is it always a 0.4mm bore? Surely with all the different applications these printers are made for, it can’t just be a one-size-fits-all choice. And you’re right, it’s not. Honestly,Continue reading
tomHardware Reviews
The eternal quest for that one bed surface that perfectly sticks while printing and completely releases when cold. Many have tried to find it, many have failed, but 3DQue have finally done it. Or at least that’s what they claim for the Quinly system, which promises to turn your humble 3D printer into a global-scale production unit by adding a network gateway that controls your printer and that you can use to queue up prints, a lift kit that angles your machine so that parts can slide off once they’reContinue reading
tomTips and Tricks
This is resonances, part 2. Last time we tried a bunch of approaches, from suspending the printer from the ceiling, bolting it to a concrete paver or sticking it onto some anti-vibration feet. And some of those worked, some didn’t, and my conclusion at the time was that you have to have some sort of dampening element in your setup for it to do anything – otherwise you’re just shifting around the excess energy that causes these vibrations instead of removing it from the system. So to test that theory,Continue reading
tomHardware Reviews
Resin printers, they’re pretty great, right? Well, they’re also mostly all the same, so I get that reviews of yet another Chitubox-based cookie cutter printer aren’t exactly interesting. So I tried to find one that was different – and that’s the Anycubic Photon M3 series. The Anycubic machines all use a custom ecosystem; this is the mid-size M3 Plus, they’ve also got the base M3, which uses a 4K masking LCD, this M3 Plus uses a 6K one and the M3 Max uses a 7K screen. The two larger machines,Continue reading
tomTips and Tricks
Getting rid of ringing artifacts is a bit more complex than it seems at first, but, good news, the solution that performed the best was also the simplest one. I tried four different setups, including bolting a concrete paver straight to the printer, and I want to share the results with you and I think I can even explain what’s happening in each one. For these tests, I thought I’d use one of the machines I don’t usually grab, so I got the Steality Ender-3 v2 out of storage. ThisContinue reading
tom3D Printer Reviews
Before we start, I feel like I should point out that the Formlabs Form 3+ is 4400€ just by itself, making it the most expensive printer I’ve reviewed on the channel. It’s also using the most expensive consumables of any printer I’ve tested so far, and all this can make the Form 3+ seem like it’s a really bad deal compared to simpler printers that literally cost 1/10th as much to buy and run. I’m going to keep making comparisons throughout the review to some of those, but the thingContinue reading
My gear – Tom's 3D printing guides and reviews
Here’s the gear I use for all the video work, as originally mentioned in Behind the scenes and why I got fired! That list constantly changes but I’ll keep this page updates as things get shuffled around. Most of these links are affiliate links to the international Amazon sites, so if you buy them through these links, I may receive a referral bonus at no cost to you.
Cameras, lenses, memory cards
Main camera
Sony A7S III with a Sigma 24-70mm F2.8. It’s overkill, but it’s soooo good!
Additional cameras
Panasonic GH5 <- current main “B” camera
Panasonic G7 / G70 <- permanently set up for recording The Meltzone Podcast. The newer G80 / G90 are great budget choices, too, but more expensive.
Blackmagic BMPCC4K <- “A” camera for livestreams
Additional lenses
Laowa 60mm F2.8 Macro <- impressive macro shots on the Sony
Panasonic 10-25mm F1.7 <- expensive, but so versatile
Panasonic 25mm F1.7 <- great budget choice!
Samyang/Rokinon 12mm F2.0
Lenses: Honorable mentions
These are lenses that I used to have and have since upgraded from, but was still very happy with. Some are still in use e.g. for recording The Meltzone Podcast!
“Always on” lens: Panasonic 12-35mm F2.8 II
Showfloor and travel lens: Panasonic 8-18mm F2.8-4
Panasonic 14-140mm F3.5
Samyang/Rokinon 16mm F2.0 (with Canon EF to Micro 4/3 adapter)
Panasonic 42.5mm F1.2 <- Best lens to make Micro 4/3 look like full-frame
Memory Cards
For the Sony A7S III: 128GB Sony E-Series (also works in the higher compression settings in the BMPCC4K)
For the Panasonic cameras: 128GB and 256GB Samsung EVO Plus (microSD + Adapter) <- Cheap and fast enough for 4K60 in the GH5 (unlike some more expensive cards). They are too slow for 4K60 on the A7SIII or BMPCC4K, though.
For the Blackmagic: Samsung T5 SSD (500GB)
Camera accessories/mounts
Smallrig cage for the A7S III
Main tripod head: Manfrotto MVH502A
Main tripod legs: Walimex FT-9901 (equiv CowboyStudio)
Slider: Openbuilds-Based (purchased from RatRig) with generic ballhead. Motorized using Arduino!
Quick release plates: 70mm Andoer arca-swiss compatible, I use them sideways for easier operation
Quick release clamps: Various Andoer/Mengs arca-swiss compatible clamps
Various Smallrig magic arms – you can get these cheaper, but the Smallrig ones are the most affordable ones I found that actually work reliably. And whey they do work, they are truly magical!
Gimbal: Zhiyun Weebill Lab (the Weebill S seems to have replaced it). I don’t use it that often, but it can come in handy.
Travel tripod: Three Legged Thing Punks Patti
Travel monopod: Manfrotto Xpro 5-section with a ballhead
DIY teleprompter using a Laptop screen and a controller like this one. I also made a video about the full build process of the exact setup I’m using!
Audio
Main microphone: Sennheiser MKE-600
Lavalier microphone, where needed: Rode Filmmaker kit
On-camera microphone: Rode VideoMicro
Showfloor microphone: Shure SM58-LC + Rode Newsshooter Kit (the standalone TX-XLR works with the same receivers as the Filmmaker Kit)
Podcast and voiceover microphone: Rode NT-USB
Editing headphones: Beyerdynamic DT 990 Pro
Livestreaming gear
Capture
For livestreaming, I use most of the same equipment as listed above, but all the cameras get connected into Blackmagic capture cards. I use one Blackmagic Quad HDMI Recorder and two additional Blackmagic Intensity Pro 4k.
Software / accessories
Unless you’re just doing a simple videogame stream, something like the Streamdeck is absolutely indispensable! They also make an app for your phone (which, unlike the physical Streamdeck, requires a subscription)
I use OBS Studio and can highly recommend it! Also, you can expand its functionality with plugins and scripts to whatever level you desire.
Livestreaming rig
CPU: AMD Ryzen Threadripper 1900X (8C/16T) <- 4K livestreaming needs tons of bandwidth (PCIe lanes), which no other platform can provide
CPU cooler: Noctua NH-U12S
RAM: 64GB DDR4
GPU: Gainward Nvidia 1070Ti Phoenix
Mainboard: Asus Prime X399-A
OS: Genuine Windows 10 Pro
Lights
Lighting in the studio is takes care of with three Godox SL-60W + various Godox softboxes.
I also use a Falcon Eyes F7 and some older LED panels for additional lighting where needed.
Editing
Workstation
CPU: AMD Threadripper 3960X 24-core
RAM: 64GB Corsair Vengeance RGB
GPU: Nvidia RTX 3090
Mainboard: ASRock TRX40 Creator
SSD: WD Blue 2TB NVMe
Case: Be Quiet! Dark Base 900
Power supply: Seasonic Prime Titanium 850W
OS: Genuine Windows 10 Pro
Screens: Two LG 4K 27″ 27UD69
Input
Programmable or editing-specific input devices are super important for efficient editing. I use:
Razer Tartarus v2 as a keyboard replacement for my left hand + jog control on the wheel
Madcatz R. A.T. 8+ with some commonly-used functions on the additional button and timeline zoom on the side scroll wheel
Microsoft Designer Compact Keyboard as a TKL keyboard for extra mouse space
Card reader: Transcend TS-RDF8K
Storage
Storage: Synology DS1817, filled with Toshiba 8TB drives and an SSD for cache
What is the most durable material for 3D printing?
3DPrintStory 3D printing process What is the most durable material for 3D printing?
While the 3D printing process seems like a great alternative to traditional manufacturing methods, the parts produced can be fragile and unusable. As a rule, this is the result of using standard materials that are not designed for strength and durability. But there is a solution: use durable materials! Durable 3D printing materials can greatly enhance your options, as you can print parts and assemblies for small projects without fear of breakage.
In this article, we'll take a look at the three most durable types of 3D printing materials. However, before that, we will take a closer look at what strength means in terms of filament materials.
What is strength and how do we evaluate it?
The strength of a material can be measured and evaluated in different ways. In this article, we will mainly use tensile strength (stress before something breaks). We will list the tensile strength of each 3D printing material in pounds or pounds per square inch (PSI).
Despite the obvious number of pounds the material can support, there is still a margin of error depending on how the part was printed. We've compiled research from a variety of sources to make sure these three materials are the strongest.
You must also understand that the material itself is not the only factor that affects the strength of the finished product. The design itself, post-processing and the 3D printing process also affect the strength of the part.
Polycarbonate
Polycarbonate (PC) is considered by many manufacturers and reviewers to be the strongest 3D printing filament available. In particular, it is possible to achieve high strength of polycarbonate products by 3D printing with an all-metal hot end and a 3D printer in a case that is isolated from the influence of the external environment.
Some Numbers
Airwolf 3D has come to the conclusion after many filament tests that polycarbonate is the best choice of durable filaments for desktop 3D printers. They were able to hang up to 685 pounds on a polycarbonate printed hook and found that this material had a tensile strength of 9800 psi. In contrast, the same part printed in PLA could only support 285 pounds.
Using a similar test, MatterHackers studied the tear strength of this type of thread, as well as a number of other materials. They were able to hang an average of 409 pounds on the polycarbonate hook, while the PLA parts had a significantly lighter average weight of just 154 pounds.
Finally, renowned 3D printing YouTuber Thomas Sunladerer reviewed several polycarbonate materials and gave very positive feedback on the strength of the material.
3D printing with polycarbonate
It is worth noting that the quality of 3D printing with polycarbonate is not very good. Compared to other materials, protrusions and small details may not turn out as well as using the same PLA.
According to Rigid.Ink, polycarbonate is mostly sold in clear. This 3D printing material has excellent heat resistance as well as impact resistance. But note that you will have to print at high temperatures. As mentioned above, it is better to use an enclosed 3D printer and a solid metal hotend.
Pros of polycarbonate : extra strong, excellent thermal and impact resistance.
Cons of polycarbonate : does not cope well with protrusions and small details of a 3D model, requires a body and an all-metal hot end, a limited number of colors.
Nylon
Next on our list of durable 3D printing materials is nylon. This material is considered by many to be the most reliable for desktop 3D printers. Nylon is inferior in strength to polycarbonate, but still clearly stronger than other competitors such as PLA and ABS.
Some numbers
A hook printed with nylon (910) thread had a breaking strength of 7,000 psi, while the same ABS hook only had a strength of 4,700 psi, according to Airwolf 3D. Airwolf 3D also noted that the nylon filament-printed clip holds 485 pounds.
MatterHackers posted similar results and noticed that a hook printed with their NylonX material can hold an average of 364 pounds before it breaks. Rigid.Ink also reviewed some nylon threads and gave them a four out of five rating for strength and a five for durability. For comparison: the strength and durability of PLA is three conventional units.
Nylon 3D printing
Nylon is slightly easier to print than polycarbonate, but it's still not PLA. Nylon filament is quite hygroscopic, so it must be kept dry and requires a high printing temperature of 220-270°C. This material is prone to slight warpage, but is also resistant to impact, fatigue, and high temperature.
Nylon pros: impact resistance, fatigue resistance, heat resistance, easier to print than polycarbonate.
Nylon 9 cons0042 : hygroscopic, warping, very high hot end temperature required.
Composites
Finally, composite threads, although not essentially a single material, can be extremely strong. Composites are threads with certain additives that affect the properties of the material, including to increase strength. The names of these threads usually have the words "pro", "reinforced" (reinforced) or "infused" (infused), since they are usually a mixture of different materials.
For this reason, it is impossible to assess where the composite fibers are compared to the two previous materials. Some composites, such as Carbonyte, can compete with nylon threads for strength, while some composites are less durable.
It all depends on what the composite thread consists of. Durable is usually a high strength material such as nylon impregnated with another high strength material such as carbon fiber or glass.
Speaking of carbon fiber, this is also a very strong filament that is sometimes used for 3D printed bicycles. However, some composite fibers are stronger than many pure carbon fibers, so they are not in the top three, but deserve special mention as composite fibers.
Some numbers
We will use carbon fiber nylon and glass fiber nylon threads as examples. MatterHackers has determined that hooks printed on these materials can hold an average of 349and 268 pounds respectively.
Rigid.Ink gave the fiberglass nylon filament four out of five ratings for strength and five for durability. They also gave the carbon fiber nylon a five out of five rating for both strength and durability. In comparison, PLA and ABS were in the top three for strength.
3D printing with composites
Composites vary in the way they are 3D printed, but they are generally relatively similar to their base material. Durable composite fibers are usually made from nylon, so you'll have to print at fairly high temperatures. These threads are also quite expensive.
Advantages of composites : This is a combination of several materials to achieve the best possible properties, durable.
Cons of composites: Expensive, requires high 3D printing temperatures.
5 Easy Tips for PETG 3D Printing and 3D Printer Setup
How to Succeed in PETG 3D Printing? Here are our five simple tips and best settings for PETG.
Overview
PETG, or polyethylene terephthalate glycol, is a tough, heat-resistant, impact-resistant plastic widely used in FDM 3D printing.
In this article, we'll show you how to successfully print PETG and help you solve the most common problems. PETG printing is definitely not as painful as ABS printing, but there are some nuances here.
Important note:
- Nozzle temperature
- Working platform temperature
- Sticking to the platform - adhesion
- Retraction settings
- Fan speed
- Support settings
- Moisture absorption
Fine-tuning print settings
Set the settings to optimal performance (Youtube Thomas Sanladerer)
To get to the print settings, start the slicer program. You must set it to the optimal mode for working with PETG.
Initial settings
If your slicer already has profiles for PETG, you're in luck. If not, you can take the original settings for PLA and change something in them:
- Increase the nozzle temperature to the manufacturer's recommended temperature (typically 220 to 260 ºC).
- Increase the build platen temperature to manufacturer's recommended temperature (typically 50 to 85 ºC).
- Reduce the fan speed to 20...50%.
Fine-tuning
Once everything is set up as described, you can start a test printout. You will notice that PETG tends to create filaments and excessive cooling can cause the layers to split.
Look at the test printout and correct the settings. If the layers do not stick together, reduce the fan speed or increase the print temperature. If the threads look menacing, increase the retraction speed or distance. If the object is deformed, twisted, lower the print temperature.
Continue tuning until you are satisfied with the result. If the problems do not want to be solved, then we will now give some tips that may come in handy.
Tip #1 Use glue stick or hairspray
PETG sticks too well to glass. (Youtube Thomas Sanladerer)
Usually a glue stick is used when the part doesn't adhere well to the print bed, so that it sticks better.
The opposite is true for PETG. It adheres so well itself that the part can sometimes be separated from the working platform only in parts.
It is therefore always recommended to have a glue stick or hairspray on hand to act as an intermediate release agent. Do not print PETG directly on Fixpads, PEI, or glass. If these agents are used, then the part will separate with them and neither it nor the precision printing platform will be affected.
Tip #2 Adjust Retraction
PETG loves to filament (Youtube Thomas Sanladerer)
As already mentioned, PETG loves to filament and run. And the strength of the material makes these threads strong, as a result of which cobwebs and thickets can form on the printout, which are difficult to get rid of.
But they can be nipped in the bud if you set the print settings correctly, as mentioned above. In particular, try to increase the retraction distance, the retraction speed, the movement speed - within reasonable limits, of course.
Finally, if nothing else saves, a hot air gun can provide some help in the fight against hairiness.
Tip #3: Avoid Cracking
Layers in PETG Prints Can Crack (Youtube Thomas Sanladerer)
If you switch to PETG from PLA, you will find that PETG cracks much more easily. PLA from abundant cooling only gets better, but PETG can suffer from this.
If print layers begin to separate or crack, reduce fan speed. PETG retains its shape at much higher temperatures than PLA, so overhangs and intricate shapes remain crisp. By reducing the cooling, the newly extruded plastic has more time to fully bond with the rest of the model.
Tip #4: Give space to the support structures
There needs to be more space for props in PETG (3DHubs)
As is often the case with FDM, some PETG models require support structures. However, if we set the bonding of the layers correctly, the PETG will adhere too well and will not let go of the props.
Here advanced slicer settings will help us, in which we need to increase the gaps between the support structures and the model itself (“Support Z Gap” or something like that).
Tip #5 Keep PETG dry
Store PETG in a dry place (Youtube Thomas Sanladerer)
began to deteriorate.
This is because PETG is hygroscopic, i.e. easily absorbs moisture from the air. Moisture destroys the material on the coil, which could be used for a long time.
Therefore, keep your filament in a dry place, you can put it in a sealed bag or box with desiccant. This should save him by not allowing too much moisture to be absorbed.