3D printer molds
Ultimate Guide to Silicone Molding for 3D Printing (Part 1)
Download the full Guide
as a PDF!
The simple post-processing techniques presented in this guide are an excellent way for professionals to create low-cost silicone molds, threaded inserts for enclosures, vacuum formed parts, and more.
Silicone molding is a powerful production method that, when combined with 3D printing, can allow you to make several copies of one product. You can also create a product in a material that is not supported by your 3D printer.
In this How To, we will show you some of the best practices associated with creating silicone molds around 3D printed parts.
Working time will vary depending on a number of factors. Creating a mold around our 3D printed part took us about 1.5 hours. Casting into our mold took about 15 minutes.
Supplies
3D printed mold box, hardware, vents & keys (read on for more info).
Master (the print you are molding)
Silicone
Resin and dye
Mixing cups
Mixing sticks
Mold release spray
Hot glue or cyanoacrylate glue
Funnel
Ex acto knife
Rubber bands, tape, or straps
Gloves
Respiratory mask
Eye protection
Need some of these products? We've curated an Amazon wish list for you.
Step 1: Choose a file to cast a mold around
Obtain a file that you would like to either make several of, or create in a material not supported by your printer.
We chose the cap to a perfume bottle to understand what the process would look like for a product development team attempting to produce several concept models of a prototype.
The next step is to create your mold box. This is the structure that will hold the silicone in place around your part when pouring. Your master will need to be suspended in this structure.
You can create mold boxes from:
Foam core board
Legos
3D printing
We chose to design and print ours as this method has a few benefits. Designing and 3D printing mold boxes allows you to:
Print in pour holes and vents
Easily calculate the volume of our mold
Create boxes that perfectly fit the parts you plan to create a mold of
Re-use mold boxes to create multiple molds
While 3D printing your mold box isn’t necessary, it provides you with a reusable customizable mold box that the other methods cannot produce.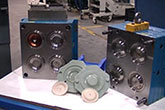
Step 3: Prepare and Print
Because the silicone molding process is not very demanding on the 3D printed mold box or master, you can select standard print settings.
The 2021 Guide to 3D Printing Materials
Learn about polymers, composites, and metals all available for 3D Printing!
Supplies Used:
3D printed mold box, 3D printed master, Cyanoacrylate glue, Mold release spray, Vents & Keys
A: Spray your mold box, master, vents, and keys with mold release.
B: Choose points across model to glue vents
C: With our 3D printed mold box we were able to glue our master directly onto the pour hole during preparation.
D: Spray again with mold release for good measure
You can suspend your master using popsicle sticks, skewers, or 3D printed rods glued to the surface of the master in an inconspicuous place. The holes left in their place after your mold has cured will aid in resin flow through the mold.
Step 5: Open Bottles of Silicone (Parts A and B) and Stir Thoroughly
Supplies Used: Silicone (Part A & B), Mixing Sticks
As silicone comes in two parts, it needs to be mixed both individually and once combined with its hardener.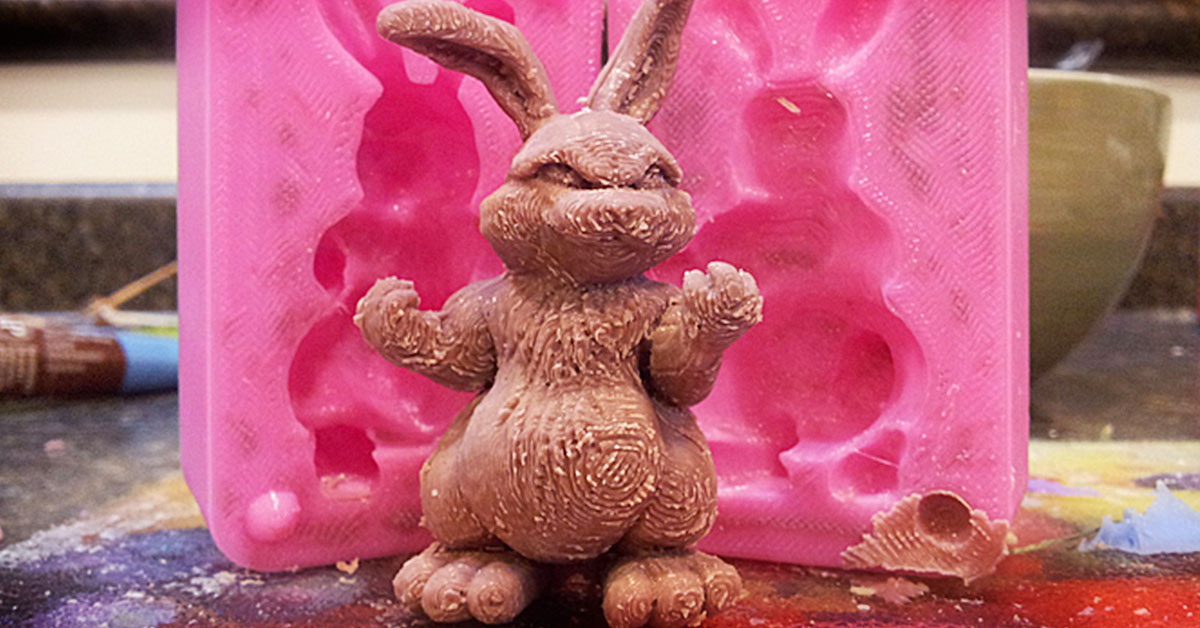
Mix slowly using separate mixing sticks.
Supplies Used: Measuring cups
A: Determine the volume of silicone needed to fill your mold
B: Measure desired amount of silicone and hardener separately in two measuring cups.
We calculated our mold volume by filling our 3D printed mold box with water and pouring the water into a measuring cup to find exact volume.
For two part molds like the one shown, you only need to mix enough silicone to fill half of the volume of your mold.
Once you have measured each part, combine the two parts into one mixing cup and stir slowly with a mixing tool.
Be cautious not to stir in air bubbles. Be sure to scrape the sides of the cup to mix in all material.
Once your parts are thoroughly mixed the curing process will begin.
TIP
Read instructions on your silicone for “pot-life”. This is how long you have to work with the silicone before it cures.
Supplies Used: Mixed silicone, prepared mold box and master
Pour silicone into the first half of your mold box.
When pouring, pour slowly into one corner of the mold box and allow the silicone to run to other parts of the mold box as it fills.
Stop when the silicone reaches the top of the first half of your mold box.
Once you have poured your silicone place small keys into the silicone. These will create negative spaces and allow the mold halves to fit together once poured. We will remove them before pouring the second half of our mold.
Depending on what type of silicone you are using it can take anywhere from 75 minutes to overnight to cure.
Temperature and humidity will affect curing times, so we recommend this process be done in a room temperature environment.
Step 10: Attach and Prepare Mold Part Two
Supplies Used: Mold box part two, hardware (nuts & bolts)
Once our mold has set, we will prepare to pour the second half of our mold.
A: Remove the keys you inserted in step 9.
B: Attach and secure second half of mold box.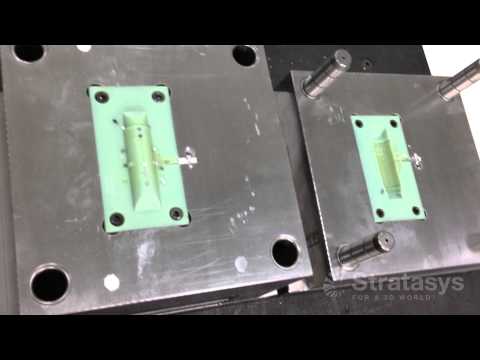
C: Spray with mold release
Next, repeat steps 5-9 and create the second half of your mold using the methods mentioned above.
Step 12: Let Cure
Supplies Used: Pliers or Ex-Acto knife
Once both halves of your mold have cured you are ready to remove them from the mold box and begin using them to recreate parts.
A. Remove the hardware
B: Remove the mold from the mold box and open.
C: Remove the master and vents.
Supplies Used: Cured mold, mold release spray, rubber bands
Next, you will need to reassemble your mold.
A: Ensure that all parts of your mold are correctly aligned, and plug any holes created by vents.
B: Secure mold pieces using rubber bands, straps, or tape.
Tip
Another great application for 3D printing would be to design and print a box to hold the mold together when pouring resin, or modify the mold box we used to serve the same purpose.
TIP:
If your vents leave holes in areas where resin can spill out during the pour, they will need to be plugged.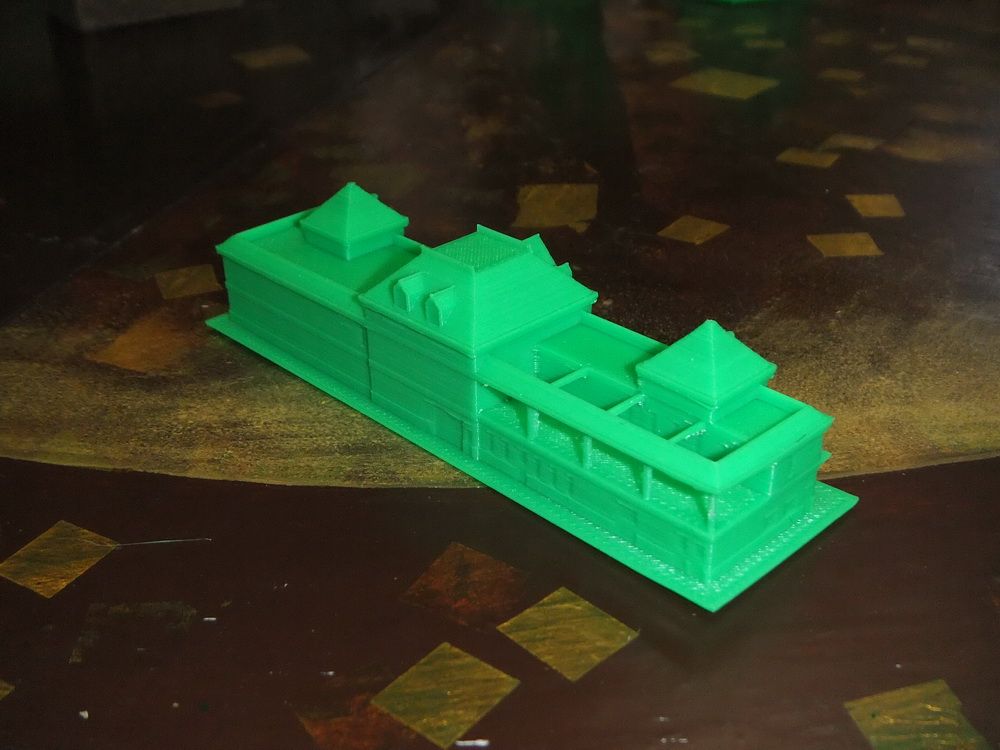
Supplies Used: Resin (Part A & B), measuring cups, measuring sticks, dye.
Just as with silicone you will need to measure each part of the mixture taking into account the volume needed to create a part.
If you have made several molds, you can mix a larger quantity of resin and pour several molds at once.
Add dye to the part of the resin mixture specified in the instructions.
Step 16: Mix Resin
Combine both parts of the resin mixture and mix thoroughly being sure not to stir in air bubbles.
TIP:
Resins typically have a shorter “pot-life” than silicone meaning they will cure faster.
Step 17: Pour Resin
Supplies: Funnel
Once mixed, pour immediately into the opening of your mold using a funnel.
Pour slowly as not to overfill and spill resin.
Any resin that remains in the mixing cup will harden, but can typically be removed afterwards.
Step 18: Let Cure
Once poured, allow the resin to cure for the appropriate amount of time.
Supplies Used: Pliers
Once your resin has cured, you can open the mold and remove your cast part.
Any resin that escaped through seams or voids and cured is called “flash”. Flash will need to be removed from the part through post processing.
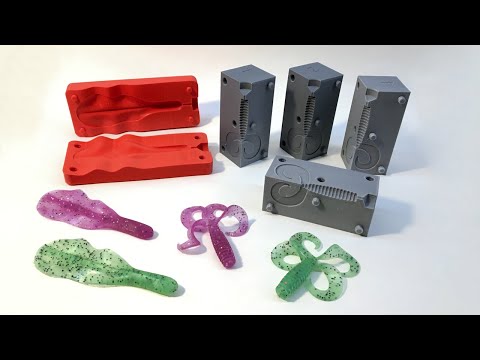
Below, you can see that we were able to recreate our perfume bottle cap in several different colors and opacities using silicone molding.
Visit one of our other applications pages for tips on how to take your print even further.
We recommend that you visit our pages on:
Silicone Molding Part II
Vacuum Forming
Sanding
Last but not least, remember to share your work with us on Thingiverse and social media @MakerBot.
We can’t wait to see what you make!
Powered by MakerBot Learning.
How to Use 3D Printing for Injection Molding
The majority of plastic products in the world today are manufactured by injection molding. However, fabricating molds can be prohibitively expensive and time-consuming.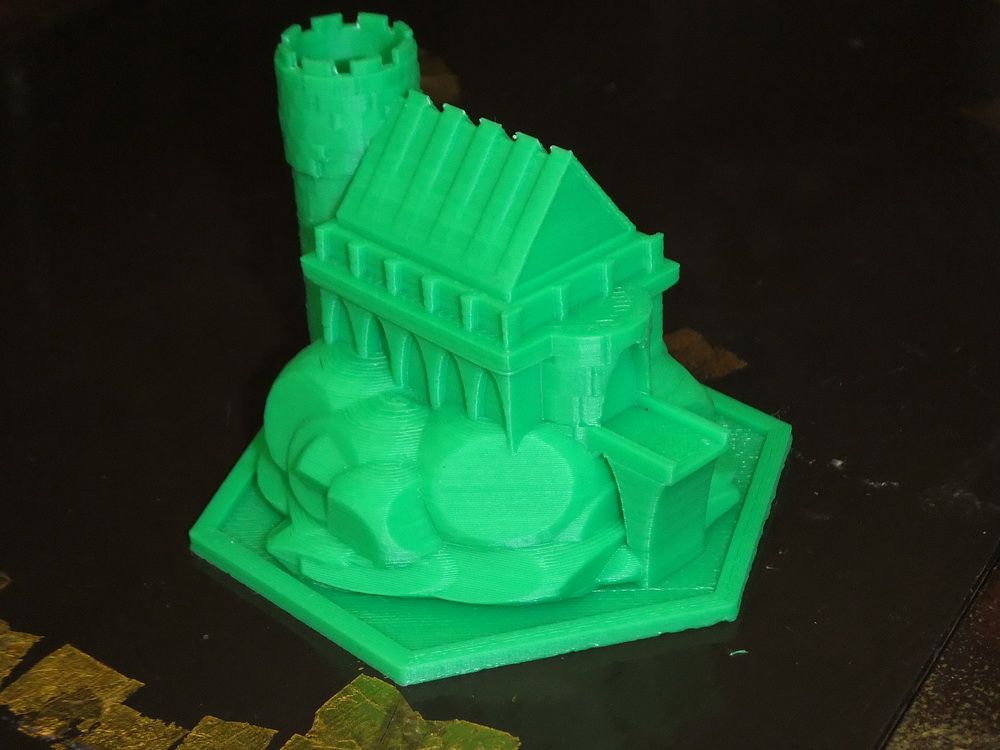 Fortunately, molds don’t always need to be machined out of metal—they can be 3D printed.
Stereolithography (SLA) 3D printing provides a cost-effective alternative to machining aluminum molds. SLA 3D printed parts are fully solid and isotropic, and materials are available with a heat deflection temperature of up to 238°C @ 0.45 MPa, meaning that they can withstand the heat and pressure of the injection molding process.
Download our free white paper to learn how to create 3D printed injection molds.
Download the White Paper
Webinar
In this webinar, we'll show you how to use stereolithography (SLA) 3D printed molds in the injection molding process to lower costs, reduce lead times, and bring better products to market.
Watch the Webinar Now
3D printed injection molds in an aluminum frame with the finished injection molded part.
With affordable desktop 3D printers, temperature resistant 3D printing materials, and injection molding machines, it is possible to create 3D printed injection molds in-house to produce functional prototypes and small, functional parts in production plastics. For low-volume production (approximately 10-1000 parts), 3D printed injection molds save time and money compared to expensive metal molds. They also enable a more agile manufacturing approach, allowing engineers and designers to prototype injection molds and test mold configurations or to easily modify molds and continue to iterate on their designs with low lead times and cost.
SLA 3D printing technology is a great choice for molding. It is characterized by a smooth surface finish and high precision that the mold will transfer to the final part and that also facilitates demolding. 3D prints produced by SLA are chemically bonded such that they are fully dense and isotropic, producing functional molds at a quality not possible with fused deposition modeling (FDM). Desktop and benchtop SLA printers, like those offered by Formlabs, simplify workflow as they are easy to implement, operate, and maintain.
Formlabs Rigid 10K Resin is an industrial-grade, highly glass-filled material that serves as an ideal molding material for a wide variety of geometries and injection molding process conditions. Rigid 10K Resin has an HDT of 218°C @ 0.45 MPa and a tensile modulus of 10,000 MPa, making it a strong, extremely stiff, and thermally stable molding material that will maintain its shape under pressure and temperature to produce accurate parts.
Rigid 10K Resin is Formlabs' go-to material for printing sophisticated molds for injection molding, which we showcase with three case studies in our white paper. French industrial technical center IPC ran a research study and printed thousands of parts, contract manufacturer Multiplus uses it for low-volume production, and product development company Novus Applications has injected hundreds of intricately threaded caps with a single Rigid 10K Resin mold.
High Temp Resin is an alternative material that can be considered when clamping and injection pressures are not too high and Rigid 10K Resin cannot meet the required injection temperatures. High Temp Resin has a heat deflection temperature (HDT) of 238°C @ 0.45 MPa, the highest among Formlabs resins and one of the highest among resins on the market, allowing it to withstand high molding temperatures and minimize cooling time. Our white paper goes through a case study with Braskem, a petrochemical company that ran 1,500 injection cycles with one mold insert printed with High Temp Resin to produce mask straps. The company printed the insert and placed it inside a generic metallic mold integrated in the injection system. This is a powerful solution to produce medium series quickly.
High Temp Resin, however, is quite brittle. In the case of more intricate shapes, it warps or cracks easily. For some models, reaching more than a dozen cycles can be challenging. To solve this challenge, French startup Holimaker turned to Grey Pro Resin. It has a lower thermal conductivity than High Temp Resin, which leads to a longer cooling time, but it is softer and can withstand hundreds of cycles.
Download our free white paper for the detailed case studies and to learn how to create 3D printed molds in-house for injection molding.
Download the White Paper
Injection molding with 3D printed molds can be used for a wide variety of applications.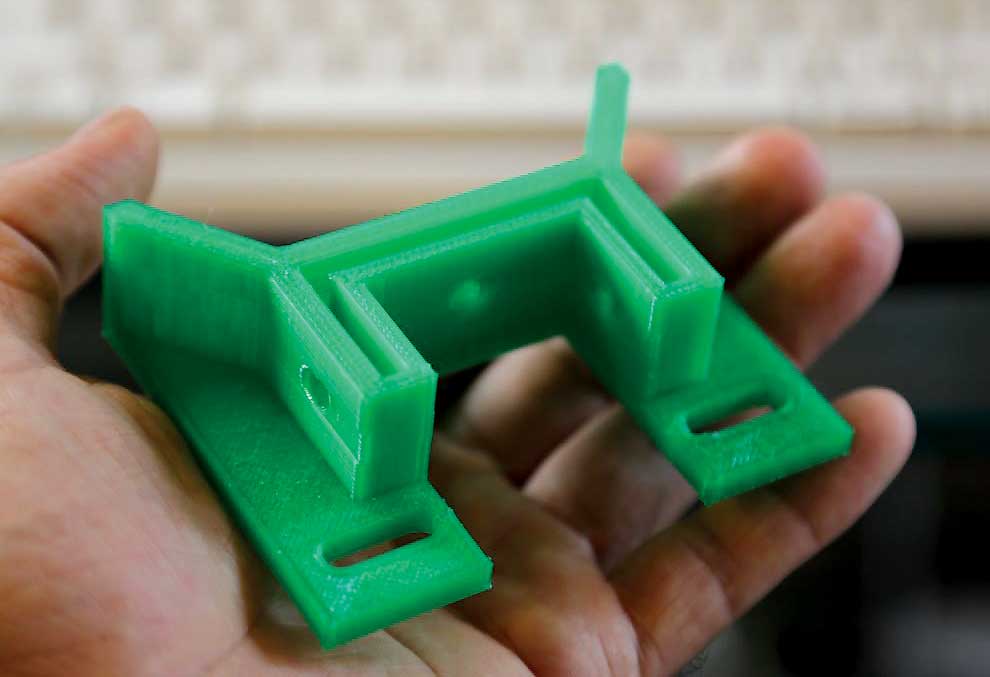 Download our white paper for five real-life case studies to learn how this hybrid manufacturing process enables on-demand mold fabrication to quickly produce small batches of thermoplastic parts:
- IPC conducted a technical study on injection molding with 3D printed molds
- Multiplus uses Rigid 10K Resin 3D printed molds for low-volume production
- Novus Applications injection molded hundreds of threaded caps with a Rigid 10K Resin three-parts mold
- Braskem fabricated 3000 mask straps in a week with a High Temp Resin mold insert
- Holimaker produces 100s of technical parts with Grey Pro Resin and Rigid 10K Resin molds
Textures on the Rigid 10K Resin 3D printed injection mold and the final molded part.
An injection mold 3D printed with Formlabs High Temp Resin.
Based on internal testing and case studies with our customers, we suggest to choose the 3D printing resin based on the criteria from the table below. Three stars means the resin is highly effective, one star is less effective.
| Criteria | High Temp Resin | Grey Pro Resin | Rigid 10K Resin | |
|---|---|---|---|---|
| High molding temperature | ★★★ | ★ | ★★ | |
| Shorter cooling time | ★★★ | ★ | ★★ | |
| High pressure | ★ | ★★ | ★★★ | |
| Increase cycle number for complex geometries | ★ | ★★ | ★★★ |
The complexity of the injection molding process is mostly driven by the complexity of the part and the mold structure. A broad range of thermoplastics can be injected with 3D printed molds such as PP, PE, TPE, TPU, POM, or PA. A low viscosity material will help reduce the pressure and extend the lifetime of the mold. Polypropylene and TPEs plastics are easy to process at a high amount of cycles. In contrast, more technical plastics like PA will allow a lower number of runs. The handling of a release agent helps to separate the part from the mold, in particular for flexible materials such as TPUs or TPEs.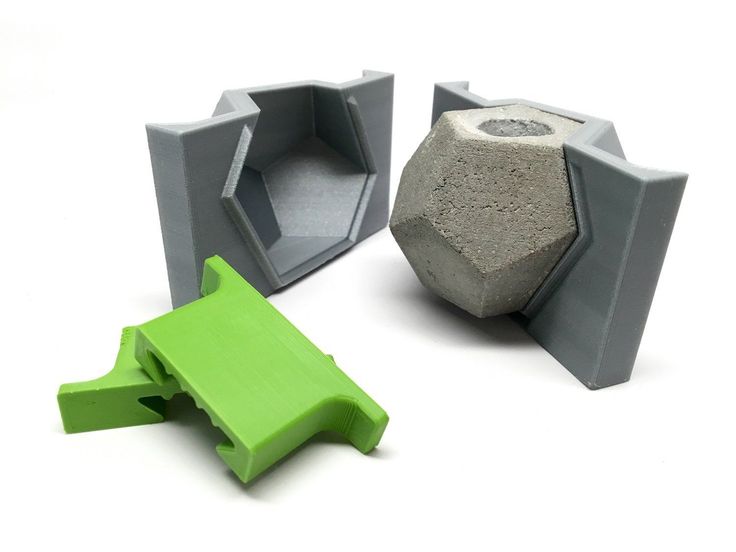
The type of injection press does not have a significant influence on the process. If you are new to injection molding and are looking into testing it with limited investment, using a benchtop injection molding machine such as the Holipress or the Galomb Model-B100 could be a good option. Automated small scale injection molding equipment such as the desktop machine Micromolder or the hydraulic machine Babyplast 10/12 are good alternatives for mass production of small parts.
White Paper
Download our white paper for guidelines for using 3D printed molds in the injection molding process to lower costs and lead time and see real-life case studies with Braskem, Holimaker, and Novus Applications.
Read the White Paper
We recommend respecting the rules of design for additive manufacturing as well as the general rules for injection mold design, such as including two or three degrees of draft angles, maintaining a uniform wall thickness across the part or rounding up the edges. Here are a few helpful advice from users and experts, specific to polymer printed molds:
To optimize dimensional accuracy:
- Plan stock allowance on the mold to post-process and adjust sizes.
- Print one set of mold to understand dimensional deviations and account for this in the CAD model of the mold.
To extend the lifetime of the mold:
-
Open up the gate to reduce the pressure inside the cavity.
-
When possible, design one side of the stack flat while the other side carries the design. This will lessen chances of blocks misalignment and risk of flashing.
-
Include large air vents from the edge of the cavity to the edge of the mold to allow the air to escape. This yields a better flow into the mold, minimizes pressure and alleviates flashing in the gate area to decrease cycle time.
-
Avoid thin cross-sections: surface thickness less than 1-2 mm may deform with heat.

To optimize the print:
-
Adjust the back of the mold to minimize material: reduce the cross section in areas that are not supporting the cavity. It will save costs in resin and diminish risks of print failure or warpage.
-
Add chamfer to help to remove the piece from the build platform.
-
Add centering pins at the corners to align both prints.
If you have more questions about the workflow, make make sure to check our article FAQ: Injection Molding With 3D Printed Molds. For the complete process workflow and other best practices, download our white paper.
3D printed injection mold can accommodate side actions.
Combining moldmaking with desktop 3D printing allows engineers and designers to expand the realm of materials they’re using and bring the capabilities of their 3D printer beyond rapid rototyping and into the realm of production.
Using 3D printed molds, dies, and patterns to supplement molding and casting processes tends to be both faster and less expensive than CNC milling, and easier than working with silicone molds.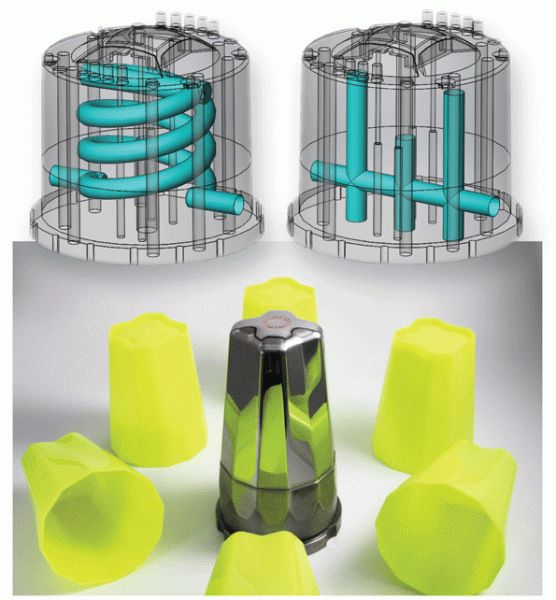
Beyond injection molding, 3D printed molds can be used for the following molding and casting processes:
- Thermoforming and vacuum forming
- Silicone molding (also overmolding, insert molding)
- Vulcanized rubber molding
- Jewelry casting
- Metal casting
Follow the links to download our white papers with the specific guidelines for each process.
White Paper
Interested in other applications of 3D printed molds? Download our white paper that also covers thermoforming and casting with elastomers.
Download the White Paper
White Paper
Download our white paper to see how to create complex molds with 3D printing fast and learn about tips and guidelines that you’ll want to follow when preparing your mold parts.
Download the White Paper
White Paper
Download this report for case studies featuring OXO, Tinta Crayons, and Dame Products that illustrate three different implementations of silicone molding for product design and manufacturing, including overmolding and insert molding.
Download the White Paper
3D printing mold making
Desktop 3D printing molding allows engineers and designers to get more functionality out of a 3D printer beyond prototyping. Molding opens up a world of production materials and provides the opportunity to produce small batches and sample test molds before using expensive
tools.
This booklet covers the following three mold making strategies: injection molding, high temperature molding and injection molded elastomers. Typically, molds are made from Formlabs clear resin, which is preferred for its transparency, although any standard resin can be used, and high temperature resin is ideal for processes with high temperature requirements. It should be noted that these processes are best suited for stereolithographic 3D printing (SLA) because the printed parts are isotropic and waterproof.
Prototyping and small-scale production with 3D printing tools
| Process | Equipment | Run time | Material cost (for example: 300 ml/cm3) |
| Do-it-yourself mold making and parts making | Mold 2 and injection molding machine | 5 to 24 hours (form print time) | Approximately $50 for High Temperature Resin |
| Outsourced SLA Form | injection molding machine | 3-5 days | Approximately $700 for back office printing on industrial SLAs |
| Outsourced metal mold | injection molding machine | 1-2 weeks | Approximately US$6,400 for office desk, aluminum finish |
| Outsourced mold Creation and production | no - full outsourcing | 1-3 weeks | $4,000 to $15,000 depending on volume and materials |
Silicone molding and some desktop molds are available using Formlabs Standard Resins High Temp, which has the highest HDT at 0. 45 MPa for any 3D printed materials currently on the market and allows print parts that can be used for high temperature forming such as thermoforming and injection molding of materials with higher melt temperatures
Injection molding
High-resolution SLA 3D printing on the Form 2 can be used to quickly prototype inexpensive injection molds that can be used to make real parts from a wide variety of
thermoplastic materials. Injection molds can be used to test mold designs prior to metal tooling or to produce low-volume parts
3D Printed Injection Molding covers injection molding using Formlabs clear resin printed molds. Following the release of Formlabs High Temperature Resin, designed to achieve higher heat resistance and stiffness, the booklet has been updated to describe the benefits of High Temperature Resin plates that are less likely to break due to thermal shock or temperature-related deformation
USB Device Enclosure Mold, 3D Printed on Form 2 High Temperature Resin
This mold contains a core, a cavity, and two "gates" leading to the two halves of the enclosure.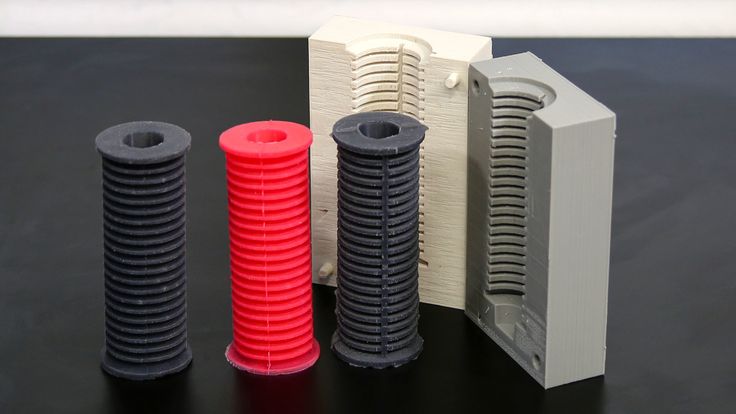 High temperature resin molds can be used to mold a wide range of thermoplastics without thermal stress or temperature-related deformation
Formlabs High Temperature Resin can be used to injection mold a wide range of plastics.
3D printed mold tools reproduce the exact quality of the SLA print finish on the Form 2. Forms can be printed at 100 microns for faster prototyping or the recommended 50 microns for fine detail and smoothness
electronics molded in HDPE with a High Temp tool.
This shape of the USB case has been adjusted over three iterations to remove cavities, entrapped air, and partial shrinkage. Total cost of materials for prototyping this high temperature resin mold tool: $25
Thermoforms
Form 2 3D printed thermoformed dies are a fast and efficient way to create high quality vacuum formed parts for low volume production. Printed thermoformed dies can be used to make packaging prototypes, clean orthodontic retainers, and food-safe molds for chocolate confectionery.
Thermoforming dies experience less pressure than injection molds, but still reach high surface temperatures.
High temperature polymer resists deformation and surface degradation from the combined heat and pressure of thermoforming for most plastics. Standard resins may also be suitable for thermoforming with some low temperature plastics such as vinyl.
APPLICATION EXAMPLE
Formech thermoformed prototype packaging.
Thermoforming a thin sheet of polycarbonate over a high temperature polymer matrix produces a transparent detail by matching the geometry and detail of the matrix. Thermoformed packaging can be easily prototyped and incorporated into the design process along with 3D printed product prototypes, and all this is achievable on the Form 2. The printed matrix was used without additional processing and the need for UV curing. Texture is recommended in thermoforming design to prevent air trapping under the sheet - layer lines on the printed thermoforming die can be helpful in this regard.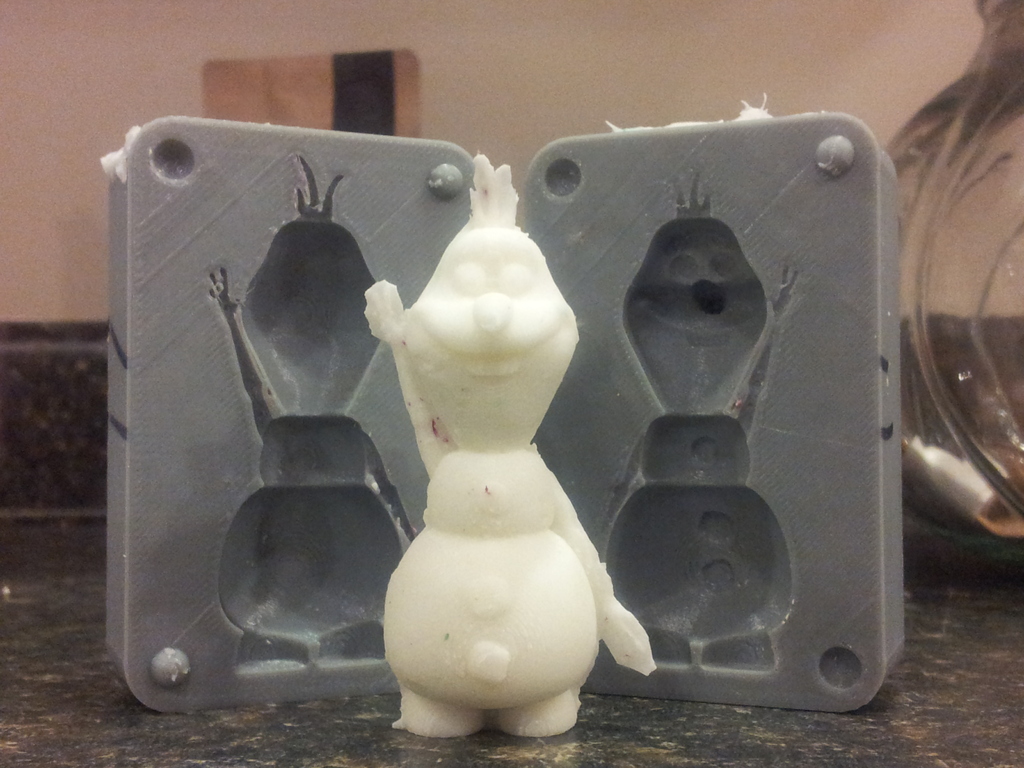
TEMPERATURE CONTROL
High Temperature Polymer Cycle Thermoforming
The surface temperature of the die reaches 130°C. The high temperature resin is highly resistant to deflection, whereas with standard resins you must allow the print matrix to cool between cycles, otherwise warping and degradation may occur.
If temperature rise becomes a limiting factor in molding efficiency, cooling channels are an effective way to remove heat from the print. When used in conjunction with an automated thermoforming machine, the water-cooled die can produce more parts with shorter cycle times.
Conformal water channels visible in the thermoforming high temperature die.
Thermoforming die surface temperature
Conformal cooling channels are easy to implement when designing for SLA 3D printing and print successfully without any internal supports to interfere with flow. After printing, the channels are flushed with uncured resin using isopropyl alcohol.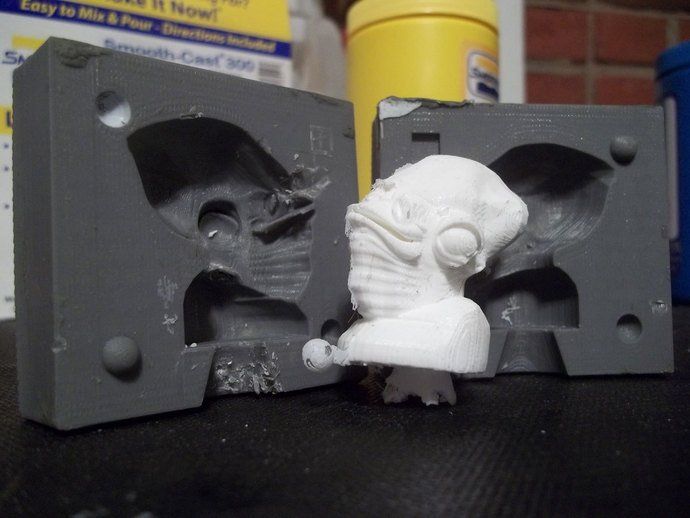 The mold is connected to a pump and a source of cold water.
Integrated water cooling as a strategy can also be applied to standard and rigid polymer parts to reduce heat dissipation when used in higher temperature environments.
Elastomer casting
Precision molds for most flexible elastomers such as silicone and urethane rubber can be printed on the Form 2 using standard resin. The transparency of Clear Resin allows the material to be observed during the pouring or injection process. Flexible materials can be easily removed from rigid SLA printing plates, and applications from model production to functional molding can be obtained. Silicone molding can also be used to quickly replicate master prints, greatly reducing production time when multiple rigid parts and objects are needed.
APPLICATION EXAMPLE
Forms printed on Form 2 are used to create composite parts with advanced built-in features. Assembly subcomponents such as electronic, metal and SLA printed elements can be embedded and sealed in soft surface molds.
RightHand Robotics used the Form 2 to create the production blocks of their robotic gripper using urethane molding. The forms were printed in clear resin, with black resin inserts forming the internal structure.
The Form 2 printer allowed RightHand Robotics to move from prototypes to small-scale production without the need for expensive tooling. The rapid transition from original printed prototypes to production materials that have longer flex cycle life was done with 3D printed plates on the same Form 2 hardware they used for initial prototyping.
The first layer applied from RightHand Robotics' multi-stage process includes urethane compounds that can withstand multiple flex cycles while still providing the high elasticity needed to securely return the gripper to its open state.
The outer layer provides improved tactile grip and control, as well as sealing the sensor electronics with softer, lower durometer rubber.
SLA 3D printed parts can also be encapsulated inside molds to provide a rigid structure for flexible materials.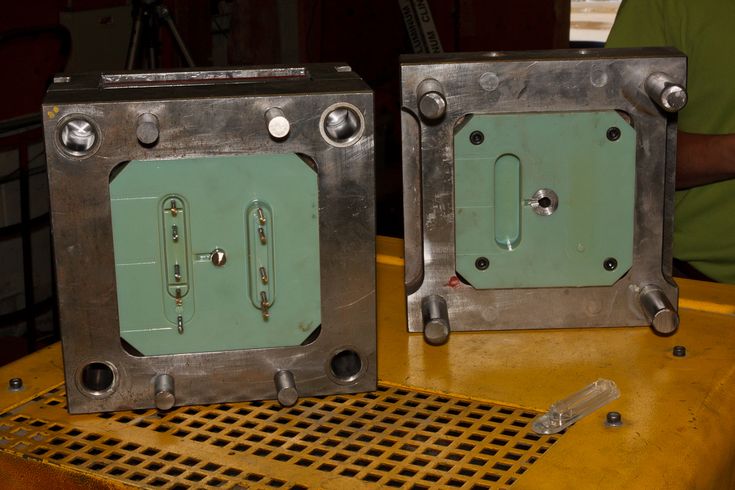 The overlay can be mechanically bonded to the insert by adding holes, recesses, and columns to the printed parts, which enhances assembly and reduces the need for chemical adhesive.
Conclusion
Form 2 molding is a powerful strategy for the production of parts in small batches, as well as production from commonly used plastic and elastomer materials. 3D printing tools allow engineers and designers to easily prototype parts that look and function exactly like the final product, with geometries and material configurations that are quite complex, using 3D printing, such as in the case of encapsulated electronics and thin packaging. For high temperature forming, high temperature polymer offers superior thermal properties at a lower cost and with shorter lead times than process outsourcing
3D printer models
Looking for 3D printer models? The Internet is filled with sites that offer them for free. We have collected the TOP 10 catalogs that you can use to search and download free models in STL format. We hope you can find what you are looking for.
- Yeggi
- Yobi 3D
- STLfinder
→ myminifactory.com
My Mini Factory is a 3D model depository operated by iMakr, an online store that sells 3D printers and accessories. It also has one of the biggest 3D printer shops in Central London. The site contains 3D models designed by professionals, and all models stored on it are checked for quality. You can also make a request for the desired model, which their designers will create and put in the public domain. Billing itself as a 3D printing social network, MyMiniFactory is a thriving community of makers who love to showcase their creations. Users vote for the best models, which allows popular creations to rise to the top of the list and gain popularity. The site presents models that are stored on its social network, as well as outside it, for example, on the Thingiverse and YouMagine sites.
→ thingiverse. com
com
The most popular and famous site among 3D printer users, Thingiverse is owned by MakerBot Industries, the creator of the popular Replicator 3D printer series. The site allows users to store and share 3D model files that are used with 3D printers. It's a very popular site and has a large community of people hosting various categories of files on it. So if you're looking for "cool" printable stuff, Thingiverse is worth a visit. It is a portal designed to provide its users with ways to share their designs and to help print 3D creations. The site has a system that tries to find out what you like. The more you interact with the site, downloading and evaluating various developments, the better its recommendations will be.
→ 3dshook.com
Another online community for 3D printing enthusiasts showcasing interesting 3D printer accessories, electronics and most importantly 3D models. The site contains many very interesting models of cars and buildings, as well as various add-ons and spare parts for your 3D printer.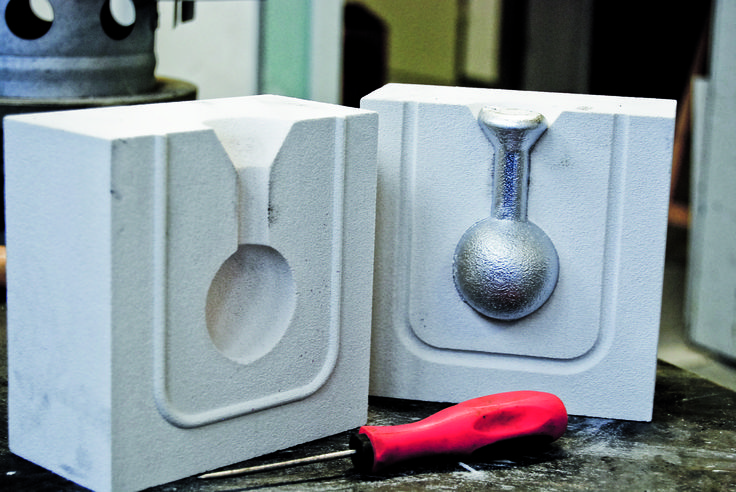 A huge catalog of paid and free models for a 3D printer. There are original unique products. Convenient search, navigation, rubricator. 3DShook has over 40 categories and adds over 100 new models to its collection every month. On 3DShook you can always find something for your home, animals, kids or something special for yourself.
→ youmagine.com
YouMagine catalog for 3D Systems Cube series consumer 3D printers. The site mainly offers various ways to buy 3D printer supplies and files, but it also has a number of cool free items available, mostly in the Kids section. Some of these elements can be customized by children using an online application. The company offers 3D modeling and publishing tools on its website for both hobbyists and professionals. The site offers a content warehouse where the community hosts and shares models. Registration is required to download files.
→ 123dapp.com
Autodesk 123D is a suite of computer-aided design (CAD) and 3D modeling tools aimed specifically at hobbyists.![]() Along with the toolkit, Autodesk also has a website where users can record their designs and share them with other users. Many of these models can be downloaded and printed using Autodesk as a utility to interface with the MakerBot 3D printer. The goal of the Autodesk website is to "help engineers build products faster." The site offers tools to help them collaborate on their files. For the casual 3D printing enthusiast, the best part of the site is the large library of free files created by a community of over a million engineers. Registration on the site is required, but the number of files that are then available is worth it.
Along with the toolkit, Autodesk also has a website where users can record their designs and share them with other users. Many of these models can be downloaded and printed using Autodesk as a utility to interface with the MakerBot 3D printer. The goal of the Autodesk website is to "help engineers build products faster." The site offers tools to help them collaborate on their files. For the casual 3D printing enthusiast, the best part of the site is the large library of free files created by a community of over a million engineers. Registration on the site is required, but the number of files that are then available is worth it.
→ cgtrader.com
Being primarily a place to buy and sell a variety of 3D models (not necessarily just those designed for 3D printers), CGTrader does offer a selection of free models that can be used on 3D printers. The site has a system that tries to find out what you like. The more you interact with the site, downloading and evaluating various developments, the body will have better recommendations.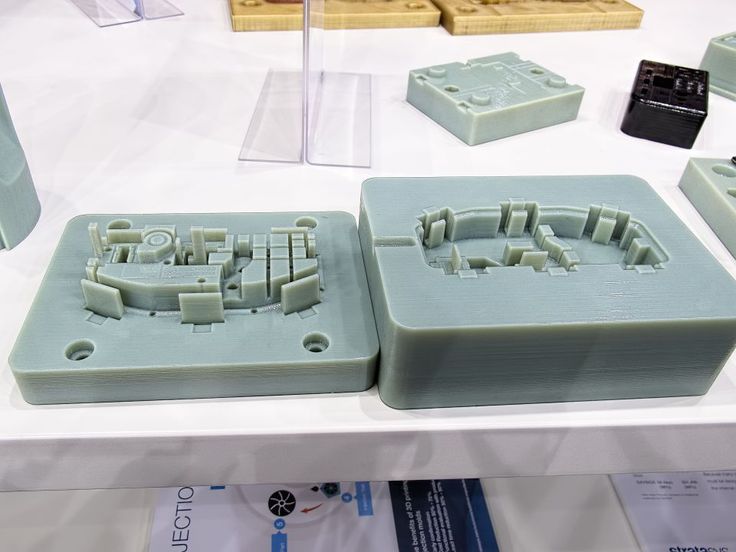
→ cults3d.com
A French community and marketplace where developers can share or sell their creations. The site has a collection of high quality models that you can download. Users can follow the work of the designers they like and get instant updates when a new creation is posted on the site. The site's name, Cults, is a backwards spelling of St. Luc, the patron saint of artists. The site also supports English. This is a relatively new community, so the number of its users is not very large yet.
→ instructables.com
The Instructables website is a community where users can share their DIY projects. This also includes products obtained using 3D printers. The site also provides explanations and instructions describing how to build 3D elements, and some designers take the time to answer questions from site members. Instructables allows users to store and organize their 3D printing projects. This is done to help them work together in the future. You can think of this site as a GitHub 3D printing site where users can share their files, discuss projects, and participate in them. The site also offers the ability to make a request, so if you can't find what you're looking for, you can ask the site's community about it.
→ pinshape.com
Pinshape, a marketplace for 3D models, is similar in style (layout, appearance, and ability to capture likes) to the well-known site Pinterest. You can buy models from designers, or download them for printing yourself if they are offered for free. Pinshape allows users to host and share 3D model files on it. Basically, this site acts as an online store where you can buy 3D printed parts, or order your own 3D model to be printed. But if you look closely enough, you can find people who sell their products and also offer the files you need so you can print them yourself.
→ 3dfilemarket.com
A new and growing repository of 3D File Market models. All models are tested for suitability for 3D printing. You can download as many models as you like without registration, although you must provide your email address to access the 3D model files. This is a very simple site aimed at being a repository of model files for 3D printers, and nothing more. The basic design of the site allows users to put files on it for public access, and download files that they would like to use. The site contains many small, simple 3D models ready to be printed, as well as a good selection of everyday items and even spare parts for 3D printers.
Search engines for 3D models in various formats, including STL for a 3D printer. Use queries in English, these search services collect information about models from all over the Internet.
→ yeggi.com
Yeggi is a search engine that will browse major 3D printing sites to find files compatible with 3D printers. You can also browse some popular searches to get an idea of what the community is currently interested in.