3D printer tips
Out of the Box 3D Printer Tips for Beginners
(Image credit: Shutterstock)You’ve unboxed your new 3D printer, put it together and installed any included software on your computer. Perhaps you’ve even printed a sample model from the manufacturer, just to make sure everything works.
However, even if you have one of the best 3D printers, you need more than optimism to make the most of it. Below, we’ve listed six tips for 3D printer fans who are just getting started with a new FDM printer.
1. Level your print bed.
(Image credit: Tom's Hardware)First, when we talk about “leveling the bed” understand that what we really mean is tramming the print surface. 3D printers have been tacked to the walls or flipped upside down and still work fine. Being level to a table has nothing to do with their ability to print.
When you level the bed on a 3D printer, you’re making sure that the nozzle is at the same height across the entire print surface. This allows the printer to lay down a perfect first layer and the foundation for a good print.
If your printer didn’t come with a probe to auto level the bed for you, have no fear. It’s really not that hard.
First, heat the nozzle and bed as if you’re setting up a print. Metal expands slightly when warm, so never calibrate a cold machine. Allow the printer to warm up for a few minutes.
Next, home your printer. This takes it to the 0,0,0 position.
Check your printer controls for something called Bed Leveling, Level Corners or Bed Tramming. This option will move the printer around the four corners of the bed while you adjust the springs underneath.
If you lack this option as well (basic Ender 3s don’t come with any leveling aids installed), it’s ok. Look for the “disable steppers” option, which turns off the stepper motors and allows you to push the print head by hand.
Slide the print head (or let the printer do it) to the first corner, centered more or less over the adjustment knob under the bed. Slip an ordinary piece of paper under the nozzle. Raise or lower the nozzle until it barely touches the paper.
Do this for all four corners and the center. Then do it again. Leveling the bed is indeed a balancing act and adjusting one corner can throw off the opposite corner.
2. Clean your print bed and make it sticky.
(Image credit: Shutterstock)Your print surface can be perfectly flat and level, but plastic won’t stick to it if it’s not clean. It’s a gross fact of life, but traces of skin oil from your hands can interfere with first layer adhesion. On top of that, a lot of PLA is made with gooey additives for extra shine and sparkle. These secret ingredients can leave a slick residue on your print bed.
91% isopropyl alcohol from the first aid aisle is the perfect cleaning agent. Wipe the print surface with alcohol and a paper towel after each print to keep it squeaky clean.
If you’re still having trouble getting that first layer to hold, it’s ok to use a little glue stick. Smear an even coating of washable glue stick – the purple kind is the best – on your warm print surface. The layer of glue gives it that extra bit of grab to hold down your prints.
3. Use rafts to increase your success rate.
(Image credit: Shutterstock)There are people who’d rather stick a fork in their eye than admit to using a raft. Rafts are exactly what they sound like – a chunky first layer that your model sits on. These adhesion helpers somehow defy uneven and dirty beds and practically guarantee a successful print.
You’ll find rafts under Build Plate Adhesion in Cura and under Support Material in PrusaSlicer. Other slicers have their raft options in other menus.
I still use a raft when printing tiny objects, like eyes or buttons for small models.
So why not use rafts all the time? The downside to rafts is they create a rough bottom on your print while wasting a bit of time and material. Believe me, they’re still worth it for new people just getting started.
4. Keep your nozzle clean and buy spares.
(Image credit: Tom's Hardware)Your new printer may have come with two nozzles, one installed on the hotend and a spare. Most FDM 3D printers rely on brass nozzles that wear out from use, especially if you're running filament with abrasive glitter or fibers.
If your printer uses them, the first thing you want to buy is more nozzles. For as little as 25 cents a piece, brass nozzles are the cheapest part of your printer. And the most critical.
Enclosed printers such as the Flashforge Adventurer 3 Lite and Voxel Aries use their own, proprietary hot ends that cost significantly more and presumably last a lot longer than the brass nozzles on popular, open-air printers such as the Creality Ender 3 Pro.
When the nozzle wears down, the opening becomes wider and throws off your carefully calculated print calibrations. Even worse, bits of grit and overcooked plastic can clog up the insides of your hotend.
You can spot a nozzle going bad when you have tiny gaps in the print or too much stringing. Run a 100mm of filament through your hotend – if it makes crazy curlicues instead of pouring straight down, your nozzle is dirty and you can replace it.
Keep the outside of your nozzle clean as well. Stray wisps of filament will collect on a hot nozzle and later drip on your print. Clean the outside of the nozzle while it’s hot by scraping it with a wooden craft stick or a brass brush.
5. Keep your filament fresh and tight.
(Image credit: Shutterstock)PLA is the most popular filament for 3D printing because it’s the easiest to work with and comes in a massive variety of colors. It does not readily absorb moisture, so you don’t need to worry about keeping it sealed in airtight containers.
That doesn’t mean you can throw it on the floor like your old collection of 90s CDs. The biggest problem for filament is dust and tangles. This is why proper spool handling is key to successful printing.
You can prevent dust and grit from clogging your printer by using a dusting sponge. Simply attach a small piece of sponge with a binder clip to the filament before it enters the extruder. Add a drop of olive oil to the sponge to lubricate the hotend and prevent stringing.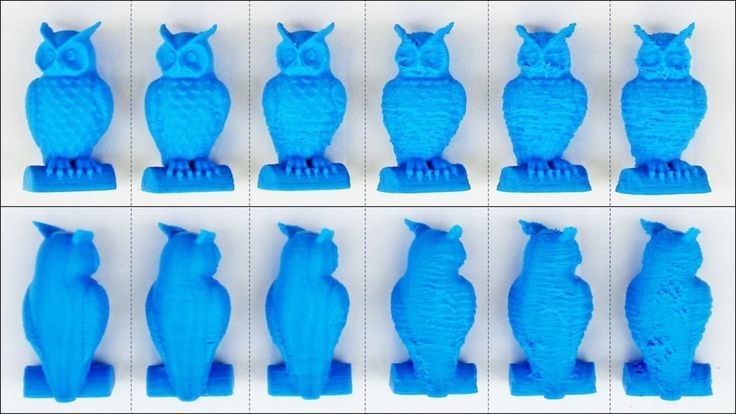
Want something more elegant? Print this universal filament filter from Creative Tools, the same people who made the 3D Benchy.
Tangles in your spool are even worse. If your spool develops a knot, the filament will stop feeding through the printer and cause a fail. Prevent tangles by never allowing the spool to uncoil. This means keeping one hand on the spooled filament at all times, and keeping it neatly wound by taping the filament in place.
I use masking tape since it’s easier to remove and doesn’t leave a sticky residue.
6. Find and download free files.
(Image credit: Tom's Hardware)The final piece to the 3D printing puzzle is finding the right models to print. Unless you’re an artist and know CAD, you need ready-made files. Lucky for you, there are literally millions of free files waiting for you to download.
The most popular file repositories are Thingiverse, Thangs and PrusaPrinters. All three of these websites allow you to download STL files for free.
- Thingiverse is the most widely-known file storage site and very popular, especially with students. Because of this, be wary of files without photos – they may have been uploaded by a 5th grader and never tested.
- Thangs is the newest file website and rapidly growing. Looking for a trendy print making the rounds on Tic Tok? It’s probably on Thangs.
- PrusaPrinters is the home of Prusa manufacturing, but they also sell filament and store free files that any brand of machine can use. They recently launched a reward program where you earn free filament by uploading files and submitting photos of your finished prints.
Denise Bertacchi is a Contributing Writer for Tom’s Hardware US, covering 3D printing.
Topics
3D Printing
30 Essential 3D Printing Tips for Beginners – Best Results – 3D Printerly
3D printing can be a difficult activity to get the hang of, especially if you are someone who isn’t used to these types of machines, so I decided to put some tips together to help users out.
There is a lot of information out there but I narrowed down some essential and useful tips that you can use to improve your 3D printing results and operation along the way.
We’ll go through tips for the best 3D print quality, tips for large prints, some basic troubleshooting/diagnostics help, tips for getting better at 3D printing, and some cool tips for 3D printing PLA. There are 30 tips in total, all spread out through these categories.
Stay tuned through this article to improve your 3D printing journey.
Tips to Make 3D Prints Better Quality
- Use Different Layer Heights
- Reduce the Print Speed
- Keep the Filament Dry
- Level Your Bed
- Calibrate Your Extruder Steps & XYZ Dimensions
- Calibrate Your Nozzle and Bed Temperature
- Be Wary of Your Filament’s Recommended Temperature Range
- Try a Different Bed Surface
- Post-Process Prints
1. Use Different Layer Heights
One of the first things you should look at learning about is layer heights in 3D printing. It’s essentially how tall each extruded layer of filament will be with your models, directly relating to the quality or resolution will be.
The standard layer height that you’ll see in most slicer software programs like Cura should be 0.2mm.
A lower layer height like 0.12mm will produce a higher quality model but will take longer to 3D print because it creates more layers to produce. A higher layer height like 0.28mm will produce a lower quality model but be quicker to 3D print.
0.2mm is usually a good balance between these values but if you want a model to have finer details and more pronounced features, you’ll want to use a lower layer height.
Another thing to note here is how the layer heights are in increments of 0.04mm, so rather than use a layer height of 0.1mm, we would either use 0.08mm or 0.12mm due to the mechanical function of a 3D printer.
These are referred to as “Magic Numbers” and are default in Cura, the most popular slicer.
You can learn more about that by checking out my article 3D Printer Magic Numbers: Getting the Best Quality Prints
The general rule with layer heights is to balance it out with the nozzle diameter between 25%-75%. The standard nozzle diameter is 0.4mm, so we can go anywhere between 0.1-0.3mm.
For more details on this, check out Best Way to Determine Nozzle Size & Material for 3D Printing.
Check out the video below for a nice visual about 3D printing at different layer heights.
2. Reduce the Print Speed
Print speed has an effect on the final quality of your parts, where printing with a slower speed can increase the quality, but at the cost of reducing the overall print time.
The increase in printing times usually isn’t too significant unless you really slow down the speed or have a pretty large model. For smaller models, you can decrease the print speed and not have much of an effect on printing times.
Another benefit here is that you can decrease some imperfections on your models depending on what issues you are having. Issues like ghosting or having blobs/zits on your model can be alleviated by reducing your print speed.
You do have to keep in mind though, sometimes having a slower print speed can negatively affect things like bridging and overhangs, since faster speeds means the extruded material has less time to droop down.
The default print speed in Cura is 50mm/s which works well in most cases, but you can try reducing it down for smaller models to get more detail and see the effects on the print quality.
I’d recommend printing multiple models at different print speeds so you can see the actual differences yourself.
I wrote an article about getting the Best Print Speed for 3D Printing, so check that out for more info.
Make sure you balance out your print speed with your printing temperature though because the slower the print speed, the more time the filament spends being heated up in the hotend. Simply lowering the printing temperature a few degrees should be fine.
3. Keep Your Filament Dry
I cannot stress how important it is to take care of your filament properly. Most 3D printer filaments are hygroscopic in nature, meaning that they readily take in moisture from the environment.
Some filaments are more hygroscopic while others are less. You should be keeping your filament dry to ensure that it performs optimally and doesn’t make your print’s surface texture look poor.
Check out the SUNLU Filament Dryer on Amazon to dry the moisture out of your filament. It provides a time setting up to 24 hours (default 6 hours) and a temperature range between 35-55°C.
Simply power the device, load your filament, set the temperature and time, then start drying the filament. You can even dry the filament while you are printing as it has a hole to put the filament through.
One of the best ways of doing this is to purchase a filament dryer which is a dedicated device engineered to store and keep 3D printer filament moisture-free. Here are the 4 Best Filament Dryers for 3D Printing that you can buy today.
There are different Ways to Dry Your Filament so check out the article to find out.
In the meantime, check out the following video for an in-depth explanation of why drying is necessary.
4. Level Your Bed
Leveling your 3D printer’s bed is fundamental for successful 3D prints. When your bed is uneven, it can lead to printing failures even near the end of a very long print (which has happened to me).
The reason leveling your bed is important is so the first layer can adhere to the build plate strongly and provide a solid foundation for the rest of the print.
There are two methods of leveling your print bed, either manually or automatically. A 3D printer like the Ender 3 V2 has manual leveling, while something like the Anycubic Vyper has automatic leveling.
Check out the video below for a guide on leveling your 3D printer.
You can learn How to Level Your 3D Printer Bed to start creating high-quality parts right away.
5. Calibrate Your Extruder Steps & XYZ Dimensions
Calibrating your 3D printer is important for getting the best quality 3D prints, especially the extruder.
Calibrating your extruder (e-steps) basically means that you are ensuring that when you tell your 3D printer to extrude 100mm of filament, it actually extrudes 100mm rather than 90mm, 110mm or worse.
It’s quite noticeable when your extruder isn’t properly calibrated compared to when it is extruding the perfect amount.
Similarly, we can calibrate the X, Y & Z axes so that your printing dimensional accuracy is optimal.
Check out the video below on how to calibrate your e-steps.
In the video, he shows you how to change these values in a software program, but you should be able to change it within your actual 3D printer by going to “Control” or “Settings” > “Movement” or something similar, and looking for the steps per mm values.
Some older 3D printers may have an outdated firmware that doesn’t allow you to do this, which is when you’d use a software program to do it.
You can download the XYZ Calibration Cube on Thingiverse. Once you print the model, you want to measure the cube with a pair of digital calipers and try to get a value of 20mm for each measurement.
If your measurements are above or below 20mm, this is where you would increase or decrease the steps value for X, Y or Z depending on which one you are measuring.
I put together a complete guide called How to Calibrate Your 3D Printer. Be sure to give it a read for detailed information.
6. Calibrate Your Nozzle and Bed Temperature
Getting the right temperatures in 3D printing is important for getting the best quality and success rate. When your printing temperature isn’t optimal, you might get print imperfections like layer separation or bad surface quality.
The best way to calibrate your nozzle or printing temperature is to print something called a temperature tower, a 3D model that creates a tower with a series of blocks where the temperature changes as it prints the tower.
Check out the video below to see how to create a temperature tower directly in Cura without needing to download a separate STL file.
7. Be Wary of Your Filament’s Recommended Temperature Range
Each 3D printer filament comes with a manufacturer-recommended temperature range in which the filament performs the best. Make sure that you print the material within the provided range for the best results.
You can look for this parameter on the filament’s spool or the box that it came in. Alternatively, this information is written on the product page of the website you order it from.
For instance, Hatchbox PLA on Amazon has a recommended nozzle temperature of 180°C-210°C in which it works optimally. So with the temperature tower, you would input a starting value of 210°C, then put it in increments down to where the top would reach 180°C.
8. Try a Different Bed Surface
There are many different types of bed surfaces that can be used on a 3D printer. Some of the most popular ones include Glass, PEI, BuildTak, and Creality.
For instance, the PEI build surface boasts the benefit of easy print removal and doesn’t necessitate the use of bed adhesives like glue. You can modify your 3D printer with a PEI print bed to make printing a lot easier.
Similar to PEI, other bed surfaces have their own pros and cons that may or may not suit your preferences.
I’d highly recommend going for the HICTOP Flexible Steel Platform with PEI Surface from Amazon. It has a magnetic bottom sheet with adhesive that you can easily stick to your aluminum bed and attach the top platform afterwards.
I’m currently using one and the best part about it is how my 3D models have great adhesion throughout, then after the bed cools down, the model actually detaches itself from the bed.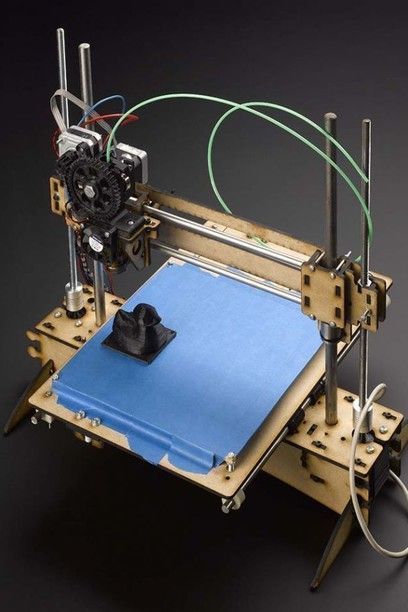
I wrote an article about the Best 3D Printer Build Surface, so feel free to check that out.
Do watch the following video for more useful information on the subject.
9. Post-Process Prints for Better Quality
After your model comes off the build plate, we can further process the model to make it look better, otherwise called post-processing.
The usual post-processing we might do is to remove the supports and to clean up any basic imperfections like stringing and any blobs/zits on the model.
We can take this a step further by sanding the 3D print to remove the visible layer lines. The usual process is to start with a low grit sandpaper like 60-200 grit to remove more material from the model and create a smoother surface.
After that, you can move to higher grits of sandpaper like 300-2,000 to really smooth and polish the outside of the model. Some people go even higher in sandpaper grit to get a shiny polished look.
Once you’ve sanded the model to your ideal level, you can start to prime the model using a can of primer spray lightly around model, maybe doing 2 coats.
Priming allows paint to adhere to the model easier, so now you can apply a nice spray paint of your chosen color for the model, either using a can of spray paint or an airbrush.
Check out my article on How to Prime & Paint 3D Prints, focused on miniatures, but still useful for normal 3D prints.
I also wrote an article about Best Airbrush & Paint for 3D Prints & Miniatures if you’re interested in that.
You can also skip the spraying and use a fine paintbrush to get those finer details in your models. It does take some practice to learn how to sand, prime and paint models to a good standard, but it’s a great thing to learn.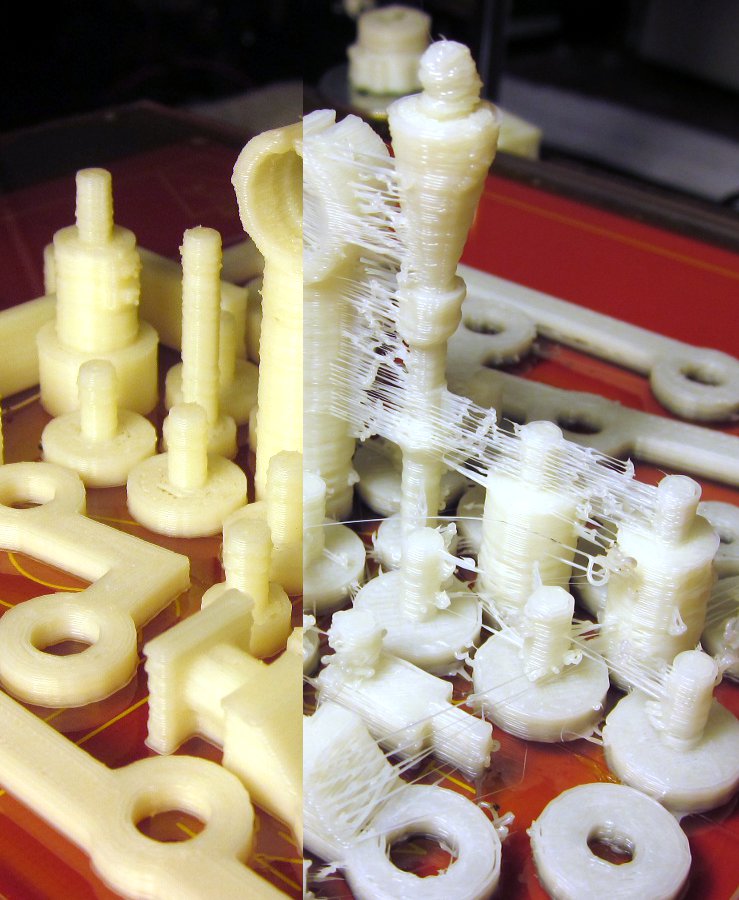
The video below is a great visual on how to post-process your 3D prints to a really high standard.
Tips for Large 3D Prints
- Consider Using a Larger Nozzle
- Split the Model Into Part(s)
- Use PLA Filament
- Use an Enclosure to Protect the Environment
10. Consider Using a Larger Nozzle
When 3D printing larger models, using a 0.4mm nozzle can take a very long time to complete a model. If you double the nozzle diameter to 0.8mm and double the layer height to 0.4mm, you would essentially half the number of layers being printed which would significantly reduce printing times.
The difference in quality would be noticeable, but if you are printing a large model where details aren’t important, this would make the most sense.
I’d recommend getting something like the SIQUK 22 Piece 3D Printer Nozzle Set from Amazon, including 1mm, 0.8mm, 0.6mm, 0.5mm, 0.4mm, 0.3mm & 0.2mm nozzles. It also comes with a storage case to keep them together and secure.
For objects like vase, you can easily take your printing time from 3-4 hours down to 1-2 hours by using a larger nozzle diameter, as shown in the video below.
11. Split the Model Into Part(s)
One of the best tips for large 3D prints is splitting your model into two different parts, or more if required.
Not only does it make large 3D prints possible to be printed if they are larger than the build volume, but also retains their overall quality. There are multiple software that you can use for cutting your model into different parts.
Some of the best ones include Fusion 360, Blender, Meshmixer, and even Cura. All of the methods are discussed in-depth in my How to Split & Cut STL Models For 3D Printing, so do check that out for a detailed tutorial.
A useful tip here is to cut the model where it’s less noticeable, so you can glue the parts together later and so there aren’t large seams or gaps in the connected model.
The following video by MatterHackers goes over cutting your models.
12. Use PLA Filament
PLA is the most popular 3D printer filament that boasts a variety of desirable features. It’s often compared to ABS in terms of its quality, but the former is simply undefeated when it comes to being user-friendly.
The experts recommend using PLA for printing large prints. Doing so can give you the best chances of success as PLA is less prone to cracking when a print enlarges, unlike ABS.
A very popular and great brand of PLA filament to go with would be HATCHBOX PLA Filament from Amazon.
Other options of filament that people use are:
- ABS
- PETG
- Nylon
- TPU
PLA is definitely the easiest out of all these materials due to the lower temperature resistance and the lesser chances of warping or curling away from the build plate.
13. Use an Enclosure to Protect the Environment
I’d highly recommend bringing in an enclosure for your 3D printer when creating larger parts. It’s not entirely necessary but it can definitely save some potential print failures due to changing temperature conditions or drafts.
When you get temperature changes or drafts on larger models, you are more likely to experience warping of the material since there is a large footprint on the build plate. The smaller the object you print, the less print failures you can expect, so we want to minimize that.
You can use something like the Creality Fireproof & Dustproof Enclosure from Amazon. Many users who were experiencing print failures, especially with ABS found that they had much more success printing with an enclosure.
One user who has the Creality CR-10 V3 said it was printing several large parts at once and he had pieces near the edge that would warp, wasting time and filament due to needing to print it again.
A friend recommended the enclosure above and it helped largely with warping, going from every other print having warping to none at all. It works well because it keeps the temperature more stable and prevent drafts from affecting the print.
Simply opening a door and cool air waving in could affect large prints easily.
You can also use an enclosure to protect the environment from hazardous fumes that are emitted from filaments like ABS and Nylon, then vent them out with a hose and fan.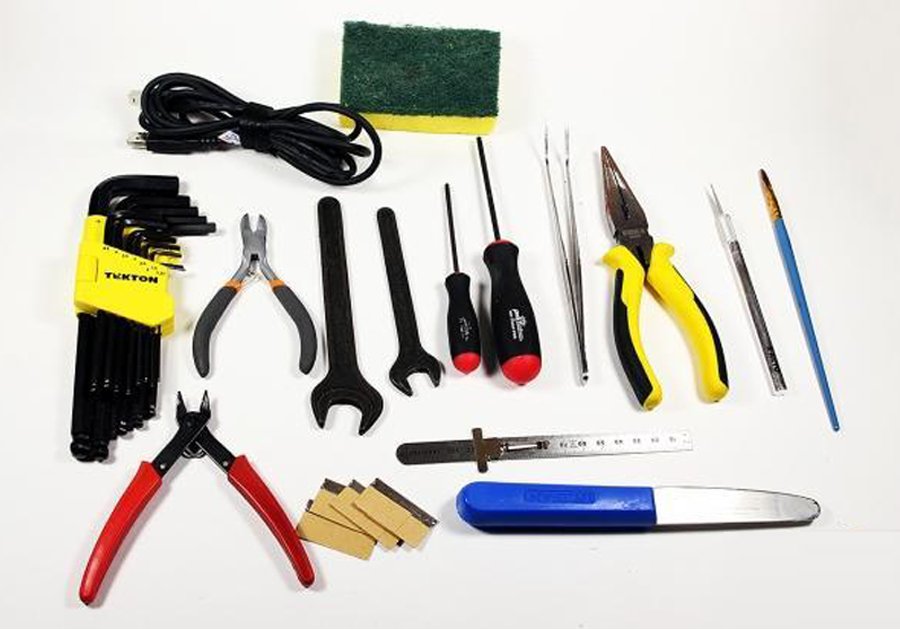
Tips on Diagnosing & Troubleshooting 3D Printing Issues
- Ghosting
- Z-Wobble
- Warping
- Layer Shifting
- Clogged Nozzle
14. Ghosting
Ghosting or ringing is when the features of your model reappear on the surface of your print in an undesirable way and make the print look defective. It is mostly caused by high retraction and jerk settings that cause the printer to vibrate during printing.
One of the first things that you can do to fix ghosting is to check if any printer parts are loose, such as the hot end, bolts, and belts. Make sure your 3D printer is on a stable surface because if the surface is wobbly, the print quality can be affected.
Another working solution is to place vibration dampeners (Thingiverse) on the feet of the 3D printer to prevent it from vibrating.
You can also reduce your print speed, which is also a great tip to get high-quality prints.
If you want to know more, check out my guide on How To Solve Ghosting in 3D Printing for an in-depth analysis.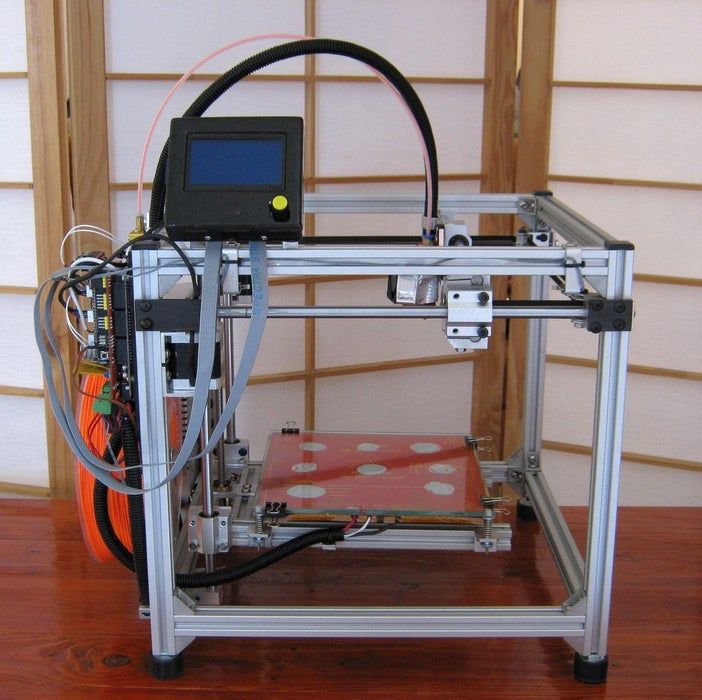
The video below is really helpful in showing you what ghosting looks like and how to reduce it.
15. Z-Banding/Wobble
Z-Banding, Z-Wobble or Ribbing is one common 3D printing issue that cause your model to look poor in quality. It can often make the part have visible imperfections that shouldn’t be there.
You can diagnose Z-Banding in your 3D printed model by looking at its layers and observing if they align with the layers above or below it. It’s easy to spot if the layers do not match with each other.
This usually results when the print head is wobbling slightly, meaning that it is not quite fixed in position. You can confirm the diagnosis by holding the 3D printer frame in one hand and shaking the print head a little with the other, being careful not to do it while the nozzle is hot.
If you see that the print head is shaking, you are probably experiencing Z-Banding. This will likely cause your prints to come out with misaligned layers and wobbling.
To fix the issue, you want to stabilize the movements of your print head and print bed so there isn’t a lot of looseness in your 3D printer mechanics.
The following video can walk you through the process fixing wobble of your print head and the print bed. A cool tip is, where you have two eccentric nuts, mark one edge of each nut so they are parallel.
Check out my article on How to Fix Z Banding/Ribbing in 3D Printing – 5 Easy Solutions to Try if you still have issues with Z-Banding.
16. Warping
Warping is another common 3D printing issue that causes the layers of your model to turn inwards from the corner, ruining the dimensional accuracy of the part. Many beginners experience it at the start of their 3D printing journey and fail to print high-quality models.
This issue is caused mainly due to rapid cooling and abrupt temperature changes. Another reason is the lack of proper adhesion to the build platform.
The ideal fixes to solve your warping issues is to:
- Use an enclosure to reduce rapid changes in temperature
- Increase or lower your heated bed temperature
- Use adhesives so the model sticks to the build plate
- Ensure cooling is turned off for the first few layers
- Print in a room with a warmer ambient temperature
- Make sure your build plate is properly leveled
- Clean your build surface
- Reduce drafts from windows, doors, and air conditioners
- Use a Brim or Raft
Whatever the cause, the first thing that you should do if you haven’t already is get an enclosure for your 3D printer.
This will help provide an ambient temperature for your prints, especially if you’re printing with ABS which requires a heated build plate.
However, if it’s not possible to get an enclosure at the present, you can increase your bed temperature to see if it fixes warping. If the temperature is already too high, try lowering it and check if that helps.
Another way to prevent warping is to use build plate adhesives. Anything from regular glue sticks to specialized 3D printer bed adhesive will work here.
- If you only want to settle for high-quality adhesives, take a look at the Best 3D Printer Bed Adhesives guide.
For more information on fixing warping, check out 9 Ways How to Fix 3D Prints Warping/Curling.
17. Layer Shifting
Layer Shifting is when layers of your 3D print start moving unintentionally in another direction. Imagine a square with its top half not aligning perfectly with its bottom half. That would be layer shifting in the worst-case scenario.
One of the most major causes of Layer Shifting is a loose belt that moves the print head carriage in the X and Y direction.
You can simply tighten the belt as shown in the video at the end of this section to resolve Layer Shifting. Another thing that you can do is 3D print an adjustable belt tensioner (Thingiverse) and place it on your belt, so it makes the tightening process much easier.
As for the tightness, it’s advised not to overdo it. Just make sure that your belts do not droop and are fairly firm in position. That should do the trick.
Other fixes for layer shifting are:
- Check the pulleys connected to the belts – resistance should be low with movement
- Ensure your belts aren’t worn out
- Check your X/Y axis motors are working properly
- Reduce your printing speed
Check out my article 5 Ways How to Fix Layer Shifting Mid Print in Your 3D Prints.
The video below should help out with layer shifting issues also.
18. Clogged Nozzle
A clogged nozzle is when there’s some sort of blockage inside the hot end nozzle that’s causing no filament to be extruded on the build plate. You try printing, but nothing happens; that’s when you know your nozzle is clogged.
- That said, your firmware can also cause your 3D printer not to start or print. Check out 10 Ways How to Fix Ender 3/Pro/V2 Not Printing or Starting for a detailed guide.
You’ve probably got a piece of filament stuck inside the nozzle that’s preventing any more filament from thrusting out. As you use your 3D printer, such pieces can accumulate over time, so make sure you maintain the machine.
Unclogging a nozzle is pretty easy for the most part. You first have to increase the nozzle’s temperature to somewhere around 200°C-220°C using your 3D printer’s LCD menu so the blockage inside can melt.
Once done, take a pin that’s smaller than your nozzle diameter, which is 0.4mm in most cases, and get to clearing out the hole. The area will be very hot at that time, so make sure your movement is careful.
The process can definitely get a bit involved, so it’s worth checking out How to Clean Your Nozzle and Hotend Properly for step-by-step instructions.
The video below by Thomas Sanladerer is helpful for cleaning out a clogged nozzle.
Tips for Getting Better at 3D Printing
- Research & Learn 3D Printing
- Make a Habit of Consistent Maintenance
- Safety First
- Start With PLA
19.
 Research & Learn 3D Printing
One of the best tips for getting better at 3D printing is to research online. You can also check out YouTube videos of popular 3D printing channels like Thomas Sanladerer, CNC Kitchen, and MatterHackers for good sources of relevant information.
Thomas Sanladerer did a whole series about learning the basics of 3D printing in easily digestible videos, so definitely check that out.
It’ll probably be a while until you learn the ins and outs of 3D printing, but starting small and staying consistent can both prove to be highly successful for you. Even after years of 3D printing, I’m still learning things and there are always developments and updates along the way.
I wrote an article called How Exactly Does 3D Printing Work to clearly understand the whole concept of this phenomenon.
20. Make a Habit of Consistent Maintenance
A 3D printer is just like any other machine, such as a car or a bike that requires consistent maintenance from a user’s end. If you don’t develop a habit of taking care of your printer, you’re prone to run into a number of problems.
Maintenance of a 3D printer can be carried out by checking for , damaged parts, loose screws, loose belts, intertwined cables, and dust accumulation on the print bed.
In addition, the extruder nozzle should be cleaned if you change filaments from low temperature filament like PLA to high temperature filament like ABS. A clogged nozzle can lead to issues like under-extrusion or oozing.
3D printers have consumables that you’ll want to replace every so often. Check out the video below for some great advice on maintaining your 3D printer.
21.
 Safety First
3D printing can often get dangerous, so make sure you put safety first to become more like the professionals of this business.
First off, the extruder nozzle is typically heated to high temperatures when it’s printing and you have to be careful not to touch it when it does.
In addition, filaments like ABS, Nylon, and Polycarbonate aren’t user-friendly and need to be printed with an enclosed print chamber in a well-ventilated area to protect yourself from fumes.
The case is even sensitive over at the department of SLA 3D printing. Uncured resin can cause skin infections when touched without gloves and respiratory issues when breathed in.
This is why I put together the 7 3D Printer Safety Rules You Should Be Following Now for printing like an expert.
22. Start With PLA
PLA isn’t the most popular 3D printer filament for no good reason. It’s considered the perfect material for beginners due to its ease of use, biodegradable nature, and decent surface quality.
Therefore, starting your 3D printing journey with PLA is a good way to get better at 3D printing. There’s nothing better than mastering the basics first and moving onto harder levels.
Let’s get into some useful tips for 3D printing PLA to get you started in the right direction.
Tips for 3D Printing PLA
- Try Using Different Types of PLA
- Print a Temperature Tower
- Increase Wall Thickness to Improve Strength
- Try a Bigger Nozzle for Prints
- Calibrate Retraction Settings
- Experiment with Different Settings
- Learn CAD and Create Basic, Useful Objects
- Bed Leveling is Very Important
23. Try Using Different Types of PLA
Many people don’t know that there are actually several types of PLA that you can make use of. I’d recommend starting out with regular PLA without any extra characteristics so you can learn about 3D printing, but once you’ve learned the basics, you can try using different types.
Here are some of the different types of PLA:
- PLA Plus
- Silk PLA
- Flexible PLA
- Glow in the Dark PLA
- Wood PLA
- Metallic PLA
- Carbon Fiber PLA
- Temperature Color Changing PLA
- Multi-Color PLA
This really cool video below goes through almost every filament out there on Amazon, and you’ll see plenty different types of PLA for yourself.
24. Print a Temperature Tower
3D printing PLA at the right temperatures gets you much closer to printing it successfully. The best way to achieve the perfect nozzle and bed temperature is by printing a temperature tower, as shown in the video below.
Basically, it will print a tower with several blocks with different temperature settings and actually automatically change the temperature as it’s printing. You can then view the tower and see which temperatures give you the best quality, layer adhesion, and less stringing.
I wrote a pretty useful article called PLA 3D Printing Speed & Temperature – Which Is Best, so feel free to check that out.
25. Increase Wall Thickness to Improve Strength
Increasing your wall or shell thickness is one of the best ways of making strong 3D prints. If you’re after a functional part but don’t want to use a complicated filament like Nylon or Polycarbonate, this is the way to go.
The default wall thickness value in Cura is 0. 8mm, but you can bump that up to 1.2-1.6mm for improved strength in your PLA parts. For more information, check out How to Get the Perfect Wall/Shell Thickness Setting.
26. Try a Bigger Nozzle for Prints
3D printing PLA with a large nozzle allows you to print at an increased layer height and make stronger parts among other benefits. You can also increase the print times significantly with a bigger nozzle.
The default nozzle diameter of most FDM 3D printers is 0.4mm, but bigger sizes are also available, including 0.6mm, 0.8mm, and 1.0mm.
The bigger the nozzle you use, the faster your print speed will get in addition to being able to print bigger parts. The following video discusses the benefits of 3D printing with a large nozzle.
In addition to calibrating your 3D printer for the right nozzle and bed temperature, it’s worth checking out the recommended temperature range for your specific PLA filament and staying within the provided figures for the best results.
As previously mentioned, you can go with the SIQUK 22 Piece 3D Printer Nozzle Set from Amazon which includes nozzle diameters of 1mm, 0.8mm, 0.6mm, 0.5mm, 0.4mm, 0.3mm & 0.2mm. It also comes with a storage case to keep them together and secure.
27. Calibrate Retraction Settings
Calibrating your retraction length and speed settings can help you avoid a ton of problems when printing with PLA, such as oozing and stringing.
These are basically the length and speed at which the filament retracts within the extruder. The best way to calibrate your retraction settings is to print a retraction tower that is made up of many blocks.
Each block will be printed at a different retraction speed and length, allowing you to easily pick the best result and get the optimal settings from it.
You can also print a small object with different retraction settings manually multiple times and evaluate which settings have produced the best results.
Check out How to Get the Best Retraction Speed and Length Settings for more information. You can also check out the following video for a nicely detailed guide.
28. Experiment with Different Settings
Practice makes perfect. Those are the words to live by in the world of 3D printing. The art of this craft is harnessed only when you keep at it relentlessly and let your experience guide you towards printing better.
Therefore, keep experimenting with different slicer settings, keep printing with PLA, and don’t forget to enjoy the process. You’ll eventually get there with time, given that you stay motivated to learn 3D printing.
Check out my article Best Cura Slicer Settings for Your 3D Printer – Ender 3 & More.
29. Learn CAD and Create Basic, Useful Objects
Learning Computer-Aided Design or CAD is an amazing way of honing your design skills and making basic objects to 3D print. Making STL files for 3D printing has its own class that’s levels above casual users.
That way, you will be able to better understand how models are designed and what it takes to create a successful print. The best part is that getting started with CAD isn’t very difficult.
Luckily, there are a good deal of great software that can help you begin your designing journey very easily. Don’t forget to use PLA as the 3D printer filament with your models to gradually get better at the craft.
Check out the video below for an illustration on how to create your own 3D printed objects on TinkerCAD, an online design software.
30. Bed Leveling is Very Important
One of the most important things with 3D printing is making sure your bed is leveled correctly since this sets the foundation for the rest of the print. You can still successfully create 3D models without a leveled bed, but they are more likely to fail and not look as great.
I’d highly recommend making sure your bed is flat and leveled consistently to improve your 3D printing experiences. If you want the best quality models as well, make sure to do this.
Check out the video below on a great method for leveling your 3D printer bed.
short tips for the transition from a CAD model to a printed object / Sudo Null IT News
was withdrawn from publication due to a technical error. Please be understanding. Thank you!
Whether it's just a hobby or a source of income, 3D printing is always based on product design. Those accustomed to traditional technologies will have to rethink the entire approach to product design and manufacture.
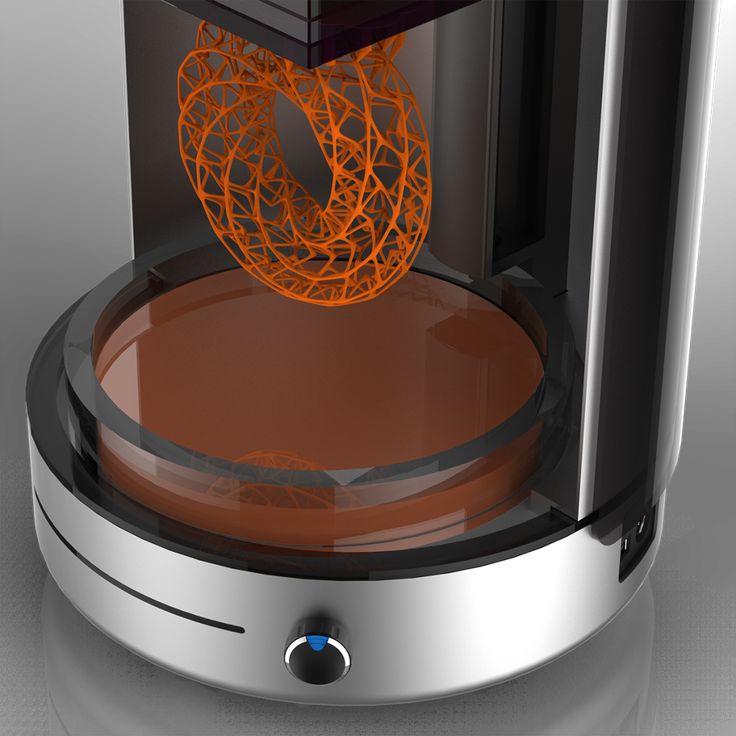
When the project is ready, a number of additional operations are performed: setting the orientation of the model and other parameters that ensure the proper printing process. In addition, it is necessary to take into account the fact that most 3D printers allow you to choose the degree of filling the model with cellular structures. The correct choice of this parameter provides protection of the object from deformation and destruction during the printing process, as well as significant savings in material and reduction in production time.
Finally, the last factor influencing the success or failure of the 3D printing process is the strength of the connection between the model and the table. If the workpiece is separated from the table during printing, then all the work will go down the drain.
Here, we'll walk you through the 3D printing process and give you some simple tips on how to use additive manufacturing in the design phase. In addition, we will dwell on the methods of preparing a finished project for printing, and also consider ways to securely fasten the workpiece to the table.
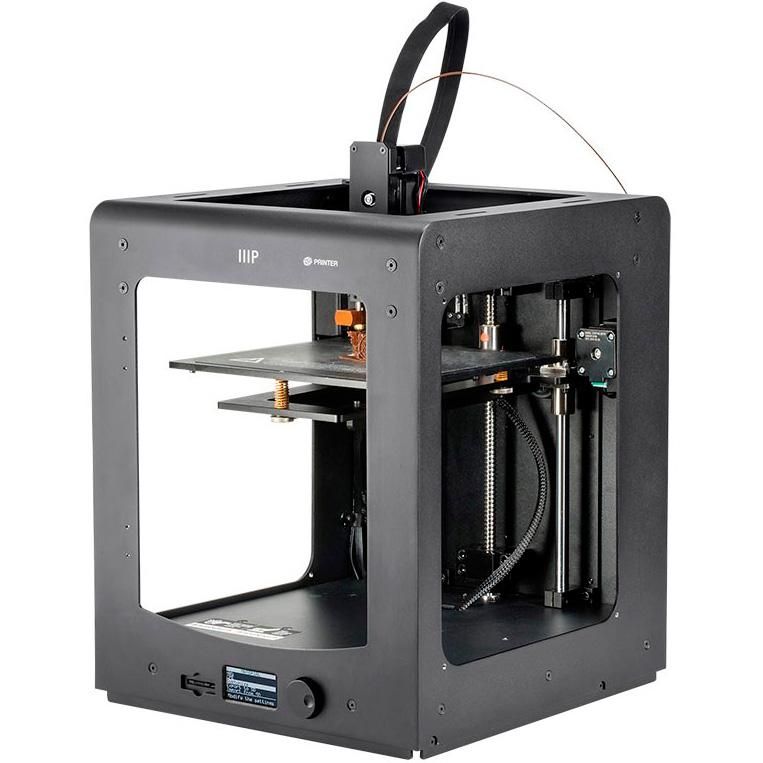
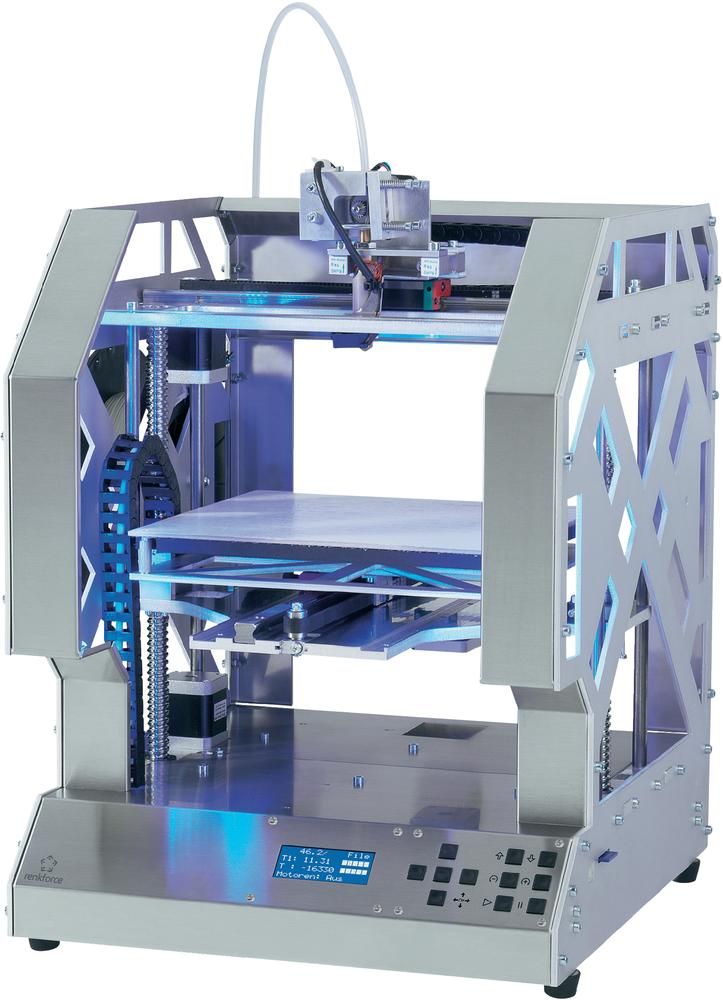
These guidelines apply primarily to Fused Deposition Printers (FDM) printers, but may apply to other types of printers as well. The process of obtaining a finished part by 3D printing is basically the same regardless of the method used.
Designing an object
Any 3D printing starts with construction. If you are developing a product yourself, then you need to build a 3D model of it in a computer-aided design (CAD) system to turn the designer's idea into reality. In this case, the object can be both very simple and very complex. However, too thin and too small models should be avoided.
3D-CAD from Siemens from this article for 49900r (90% discount), the promotion is valid until March 20, 2020. Read more>>
Saving the file in a special format for printing
To print an object, its model must be saved in a special file format - for example, STL, which has become the de facto standard in the world of 3D printing. In this format, model surfaces are represented as a grid of triangles. Simple surfaces are broken down into a small number of triangles. The more complex the surface, the more triangles you will need. Today, other formats are used in 3D printing, in particular, the 3MF format developed by Microsoft. But the most common is still STL.
CAD systems make it very easy to save the model in the desired format: just click the Save As command. To improve print quality, it is desirable to set a number of settings for saving to the STL format - for example, the tolerance during transformation and the angle of the plane. The lower the conversion factor and the better the angle, the smoother the printed part will be.
Opening the file in the slicer program
Most, if not all, 3D printers come with their own slicer software. The slicer loads the STL file created in the CAD system and cuts it into layers, and then creates a control program for the printer.
Place the model correctly in the print space
After entering the print settings, the model (or several models) needs to be placed on the printer table. You can print many objects on one table at once. At the same time, compared to printing a single object, the time slightly increases, but in general it still turns out to be less. Here are some tips for choosing the right model orientation.
Set parameters
In the slicer program, the user sets parameters such as print speed, material consumption, nozzle and desktop temperatures. Most slicers have simple settings for beginners. In this case, most often there are also advanced settings so that experienced professionals can achieve optimal results. Advanced settings include percentage infill, amount of backing material, and type of backing or raft (this is a small, thin base that keeps the printed part stable. The backing is removed when it's finished). The number of options is truly endless. Specific settings vary depending on the brand of printer. It's easy enough to set them up.
Sending the control program to the printer
After setting the print settings, the placement of future objects on the table, their orientation and quality, it's time to finally start the printer. It is enough to press the Print button and find something to do while the production is in progress. Depending on the complexity of the design, the process takes from several minutes to several hours.
Finishing
Finishing includes removing the printed part from the table, as well as removing the support material by melting, mechanical separation or dissolution (depending on the design of the printer). The part may require some light sanding or polishing, but overall a properly printed object looks good from the start. Other types of finishing are placing plastic parts in a container with acetone to smooth out surface roughness, gluing (if the dimensions of the structure exceed the dimensions of the 3D printer or individual elements of the object must have different orientations), drilling holes and painting.
3D printing process
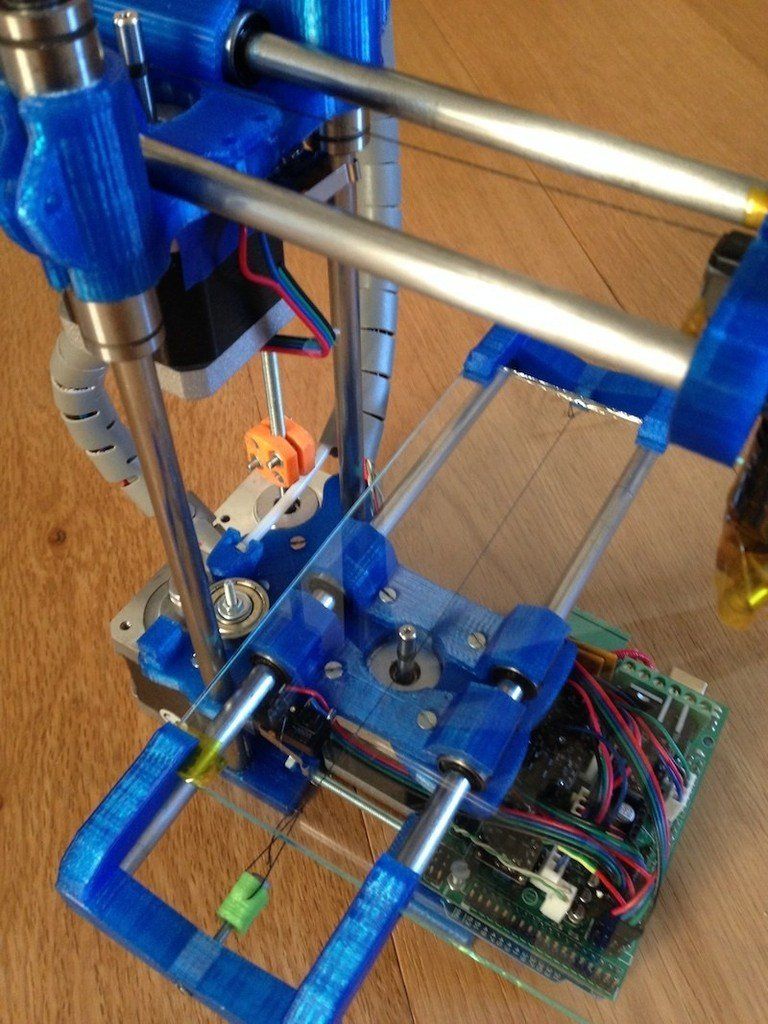
3D printer design considerations
Eliminate sharp corners
If the direction of the surfaces changes abruptly (for example, a vertical wall intersects with a horizontal overlap), then such a model is difficult to print. The printer will build excessive inner surfaces, wasting too much material. There are two easy ways to prevent this: add chamfers to smooth out where the surfaces meet, or round the corners so the printer gradually builds a vertical surface. In addition, rounding will increase strength, since destruction most often occurs at sharp corners.
Elimination of thin walls and small geometries
Layer by layer fusing technology consists in supplying hot plastic through a nozzle with the formation of a printed object layer by layer. The thickness of the extruded plastic layer cannot be made smaller than a certain limit, depending on the diameter of the nozzle and the speed of the print head. Excessively thin-walled details are difficult to print - often the result is a chaotic weave of fibers. If the part can be printed, it is very fragile and breaks easily.
Too thick walls - also bad
On the other hand, if the walls are too thick, they become brittle and crack easily. This is especially important when printing from materials other than resins, as excess thickness during the manufacturing process leads to internal stresses in the part. Even when printing from plastics, material is wasted on walls that are too thick and time is wasted.
Removing large overhangs
3D printers allow you to create amazing shapes and surfaces, but they are not capable of printing directly in the air. If there is a void in the part with material above it, additional support material must be used. Most slicers add material automatically, but require you to specify the orientation and volume of the support structure. Printers with a single nozzle create an array of thin columns, which then have to be broken off. The result is an uneven surface. Therefore, it is recommended to avoid large overhanging elements whenever possible in order to reduce the need for support material.
If such an element is unavoidable, you can try to flip the object. Most printers are capable of printing overhanging elements with an angle of about 45 degrees. At a certain height, the edge of such an element may sag somewhat. The actual capabilities of a particular printer are determined by trial and error.
Holes shrink
Remember that the part is made of heated plastic. As it cools, it inevitably shrinks. Therefore, holes and other critical structural elements have to be made larger so that after shrinkage their size is as close as possible to the required one.
However, if you need to make a tight tolerance hole, it is better to print it with a smaller diameter and then ream it with a suitable tool. This is especially true for holes whose axis is parallel to the printer table.
Increasing the footprint
If the area of contact between the object and the base is small, the part may separate from the table during printing. To prevent this from happening, wide bases are added to the model legs, which are installed on the printer table. In general, the closer to the table, the more material must be added to the support. There are other ways to securely fasten the part to the table, which we will discuss a little later.
Special moves
The right approach to design makes printing easier. In addition, there are special post-processing techniques that are important to be aware of.
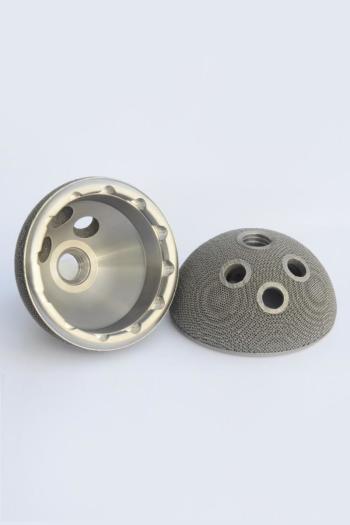
Place round surfaces vertically
The model should be oriented so that the minimum amount of support material is used. Ideally, it should rest on the table with a large flat edge. In addition, circular geometry must be placed so that the circular faces are vertical. If we look at the printer table from above, we should see a round silhouette of the object. In this case, the part comes out as symmetrical as possible with the formation of a solid round structure.
Place voids and holes vertically
If there are voids in the model (for example, it is a rectangular pipe), it is desirable to place such voids vertically in order to reduce the volume of the support material. If you print the pipe in a horizontal position, you will have to provide support for the entire interior. If you put the pipe on the end, then no support is required at all.
The same is true for holes: to get a hole with a straight axis, it is best to print it vertically - in the form of a stack of rings, which avoids warping or deforming a round hole into an oval one.
Set print quality settings
Proper selection of print parameters, such as STL conversion tolerance and slicer software settings, allows parts to be produced with a surface quality that matches that of cutting. However, this entails an increase in print time. When choosing quality parameters, one should proceed from the purpose of the object: is it a finished product or a prototype? Will the part be visible or hidden?
The quality parameters also affect the shape of the holes in the part. In CAD files, holes are represented as a set of straight lines at an angle to each other. The higher the quality of the model in the saved STL file, the less the circle looks like a polygon.
Reducing the layer thickness
To obtain the best quality, especially when using layer-by-layer deposition technology, it is necessary to reduce the thickness of the layers. It does increase the print time, but the end result is worth it!
Optimizing the filling with honeycomb structures
In terms of strength, objects do not have to be solid. Similar to a honeycomb, printers can create a honeycomb infill that balances strength and saves expensive polymer material. However, if the printed part serves as a prototype for strength testing, and the serial product will be manufactured by traditional methods, and also if the part is subjected to certain types of mechanical stresses and pressures, a solid design will be preferable.
Choosing a material
The success of printing largely depends on the correct choice of material. Materials have different properties. For example, the melting point of thermoplastic polyurethane (TPU) and polylactic acid (PLA) is lower than that of acrylonitrile butadiene styrene (ABS). In addition, the material is taken into account when choosing the type of support structures. For an object made of polylactic acid, supporting elements can be made from the same polylactic acid, since it will be quite easy to separate them from the finished part. If the part is printed from ABS plastic, then the support elements must be made from a different material, and it is better not to use such elements at all in thermoplastic polyurethane parts.
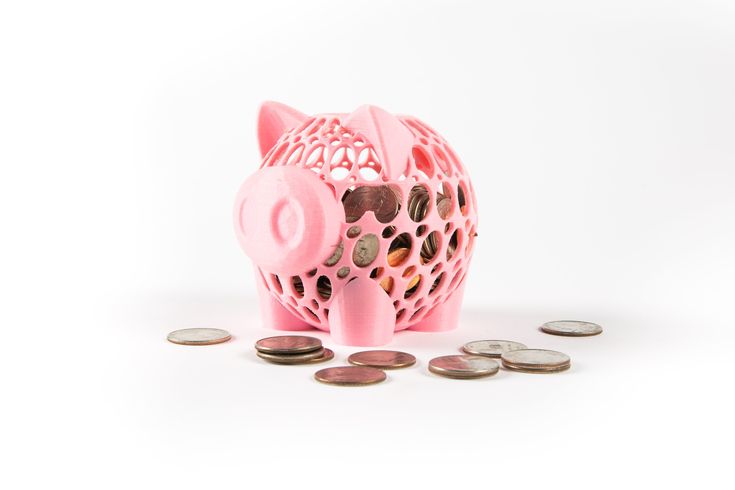
Cellular filling
A solid body is not always the best choice for 3D printing. Printing solid parts has its advantages, but the internal honeycomb structure saves both expensive material and time.
Creating objects with a specified degree of filling with honeycomb structures is a unique opportunity for 3D printing. Moreover, it is not required to design such a structure: this is done by the slicer program. As a rule, it is enough to set only the percentage of filling (the closer it is to 100, the more solid the object will turn out) and select the type of cells, if the printer has such an opportunity.
In addition to saving time and material, the internal honeycomb structure has many other advantages.
Cellular filling prevents warpage
Printing large objects as a single piece introduces a danger of warpage. By reducing the infill percentage, the air during printing passes through the part, providing more uniform cooling and eliminating warpage.
Cellular filling does not lead to loss of strength
Printing cells instead of solid material does not reduce the strength of the part. In many cases, a honeycomb part is strong enough for the chosen application, but lighter and less material intensive.
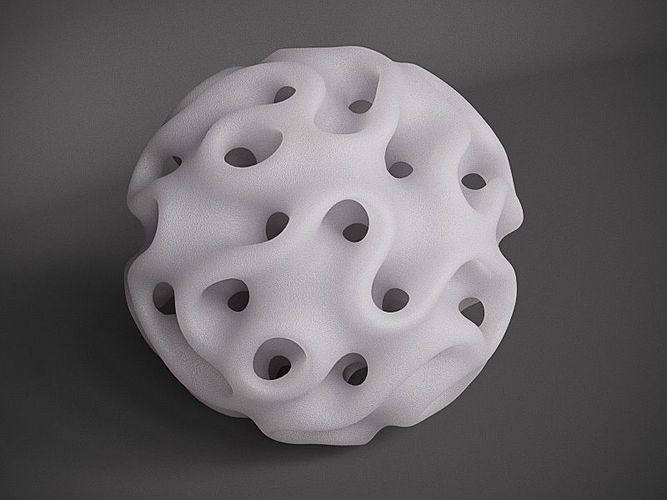
The function determines the choice of cell geometry
Most slicers support a wide variety of cell geometries. The optimal option is determined by the functional purpose of the object. Standard box padding simplifies printing, while hexagonal and triangular boxes add strength. Wave fill allows the object to bend or twist.
How to choose the right filling percentage?
In general, the strength of an object increases as the percentage of infill increases. Most printers have a default infill percentage of 20, which is optimal in some cases but too high or too low in others. Consider mechanical stresses in the printed object and increase the percentage of infill in areas where greater strength is required. If high strength is not required, choose the lowest possible filling. This saves material and speeds up printing. Most often, the selection of the optimal percentage of filling is done by trial and error.
Ways of fastening the workpiece to the table
“Rafts”, “brims”, “skirts” – these terms sound funny, but they just refer to the three main ways of attaching a 3D printed part to a printer table. Let's take a look at each of these methods and their areas of application.
Skirt
The skirt involves creating a few rings around the object at the beginning of the print to make sure the plastic is extruded normally. The skirt is not in contact with the object at all. It surrounds the printable area and helps start the fusing process. When creating a skirt, a large volume of hot thermoplastic polymer passes through the nozzle. This prepares the printer for printing the part itself. This guarantees good adhesion to the table and obtaining smooth surfaces of the object.
Brim
The brim is a wide, flat area connected to the main object as a support base (think of a brim of a hat). It is very similar to a skirt, but connected to the model. In addition to all the advantages of a skirt, the brim keeps the edges of the object being made on the table.
When printing, the outside of an object often cools faster than the middle, causing the edges to curl. Brim prevents this phenomenon by holding the edges.
Raft
A raft is a detachable base, made in the form of a thin mesh platform, located under the entire object (which lies on the raft). To create a raft, the printer first prints a flat plate in two or three layers, and then begins to manufacture the object.
The rafts provide excellent adhesion to the table surface and also provide a strong print base. This is especially useful when making small and oddly shaped parts that do not fit well on the table, as well as thin-walled objects.
After printing is completed, in most cases the raft will separate easily from the part.
If the printer does not have a heated desktop function
Rafts are used if the printer does not have desktop heating. In this case, excessive adhesion becomes a problem.
An alternative method is to apply adhesive paper tape to the printer bed, with the edges down if possible (this also protects the bed). You can also use packing tape, but it is usually more expensive.
If buckling does occur or the object separates from the table, apply a dissolvable glue stick to the adhesive tape. This will enhance adhesion.
Find out the features of a specific 3D printer and take them into account when preparing a model
3D printing is not only a science, but also an art. Effective design for subsequent 3D printing requires an understanding of the technological process, taking into account its features and the purpose of the future object. This will greatly improve print performance.
Using Solid Edge in 3D printing
Not all CAD systems are suitable for 3D printing
The capabilities of the applied system should not limit the designers. Our Solid Edge system is designed with the latest 3D printing technologies in mind. Various 3D printers and 3D printing services are supported.
Take it to the next level with specific techniques for designing 3D printed parts
Generative modeling in Solid Edge opens up new possibilities: the designer selects a specific material, sets the design space, allowable loads, restrictions and target mass of the part, and the system automatically calculates the desired geometry. As a result, 3D printing methods can produce the most complex shapes.
In addition, when building models, the use of the results of three-dimensional scanning is provided. Solid Edge successfully combines the traditional boundary representation of solid models (B-Rep) and the representation of surfaces in the form of a grid of triangles, which avoids time-consuming transformations that are fraught with errors.
If you've already downloaded an STL file for printing, our unique synchronous technology makes it quick and easy to edit your imported models in Solid Edge in preparation for the process.
Printing with your own printer or submitting an order to a 3D printing service provider
Printing in Solid Edge on a local 3D printer is done using the 3D print command. Models can be saved in STL and 3MF formats, or sent directly to Microsoft 3D Builder. If you don't have your own 3D printer or need to try out different materials and surface finishes, Solid Edge allows you to directly submit your models to cloud-based 3D printing services (such as 3YOURMIND). You immediately receive quotes for the production of parts from various materials with its subsequent delivery directly to your door.
3D-CAD from Siemens from this article for 49900r (90% discount), the promotion is valid until March 20, 2020. Read More>>
3D Printing Tips and Tricks
Blog navigation
Search articles
Categories
Latest articles
Popular articles
-
How to draw with a 3D pen?
12/16/2015
15678 views
Connect the 3D pen and let it warm up for a few seconds.
 Insert ABS or PLA filament into the feed hole...
 Read more
-
3D Printing Delamination - 5 Tips and Tricks to Avoid Delamination
Posted in: 3D printing tips and tricks, 3D printing
05/14/2019
10221 views
If you have owned a 3D printer for a while, then you are probably used to solving many problems. Delamination is...
Read more
-
10 improvements for your Ender-3
Posted in: Basics of 3D printing, 3D Printing Tips and Tricks
09/22/2021
9519 views
10 inexpensive upgrades to improve the stability, performance and security of Ender 3 - the most popular...
Read more
-
History of 3D pen
Posted in: Basics of 3D printing, Draw 3D
03/21/2019
9115 views
The advent of the 3D pen has led to some areas of art that were previously impossible.
 In this article, we...
 Read more
-
How to choose a 3D printer and 3D printing technology
Posted in: Basics of 3D printing, 3D printing tips and tricks
11/20/2015
7742 views
3D printing or additive manufacturing. This term accurately describes how this technology works to create...
Read more
Read all articles
Recommended articles
Article archive
3D printing tips and tricks. Articles, surveys. Materials, technologies, 3D equipment, 3D scanning, 3D modeling.
-
12 common 3D printing mistakes to avoid.
As an industry, 3D printing is evolving every day, so it's important to know all aspects of this technology today. In this article, we've rounded up 12 of the most common 3D printing mistakes and how to fix them.
-
3D printed elephant leg. How to get rid?
Posted in: Basics of 3D printing, 3D Printing Tips and Tricks
When it comes to practical applications of 3D printing, the elephant's foot can present serious problems. In this post, we will introduce you to ways to eliminate this defect from your prints.
-
How to calibrate extruder steps (E-steps)?
Posted in: 3D Printing Tips and Tricks
One of the most overlooked tasks is extruder pitch calibration. In this guide, we will go through all these points and tell you step by step what needs to be done at each stage.
-
How to eliminate sticking of PLA, ABS, PETG filament on a 3D printer nozzle.
Posted in: 3D Printing Tips and Tricks
Tips for cleaning 3D printer nozzles and preventing them from clogging. Causes of sticking plastic and methods for their elimination.
-
How to set up your new 3D printer?
Posted in: Basics of 3D printing, 3D Printing Tips and Tricks
To get the most out of your new 3D printer, you need to set it up properly.
 Read this guide to find out what you need to do and how.
 -
X offset on Ender 3. How to fix?
Posted in: 3D Printing Tips and Tricks
X-Axis Offset, Skew, Bend and Sag Ender-3. How to solve a problem? Tips for setting the geometric and mechanical parameters of a 3D printer.
-
10 reasons to buy a 3D printer for home use.
Posted in: 3D Printing Tips and Tricks
There are many uses for 3D printers around the world. In this article, we have listed 10 reasons why you should buy a 3D printer and get to know the world of 3D printing.
-
Is it worth buying a 3D printer? Pros and cons. Pros and cons.
Like any other hobby, 3D printing is fun, but not for everyone. Before buying a 3D printer, you should consider a few pros and cons and take into account the nuances.
-
10 improvements for your Ender-3
Posted in: Basics of 3D printing, 3D Printing Tips and Tricks
10 inexpensive upgrades to improve the stability, performance and security of the Ender 3, the world's most popular desktop 3D printer.

-
3D Printing for Beginners: Getting Started with 3D Printing
Posted in: Basics of 3D printing, 3D Printing Tips and Tricks
Getting started with 3D printers doesn't have to be intimidating. We have created this simple 3D printing guide for beginners to help all beginners understand the basic terms. In reality, there are many different 3D printing technologies, but the most common for beginners is the layer-by-layer modeling method (FDM or FFF), which this article focuses on.
-
Ender 3 belt tensioner (Pro/V2). How tight should they be?
Posted in: 3D Printing Tips and Tricks
In this article, we're going to look at some pretty important and useful information about belts on Ender 3 (Pro/V2) 3D printers and how tight they should be. Of course, we will also tell you how to properly tension the belts, as well as where to find convenient tensioners for Ender 3 and Ender 3 Pro (Ender 3 V2 already comes with tensioners) to make the whole process easier.
Learn more