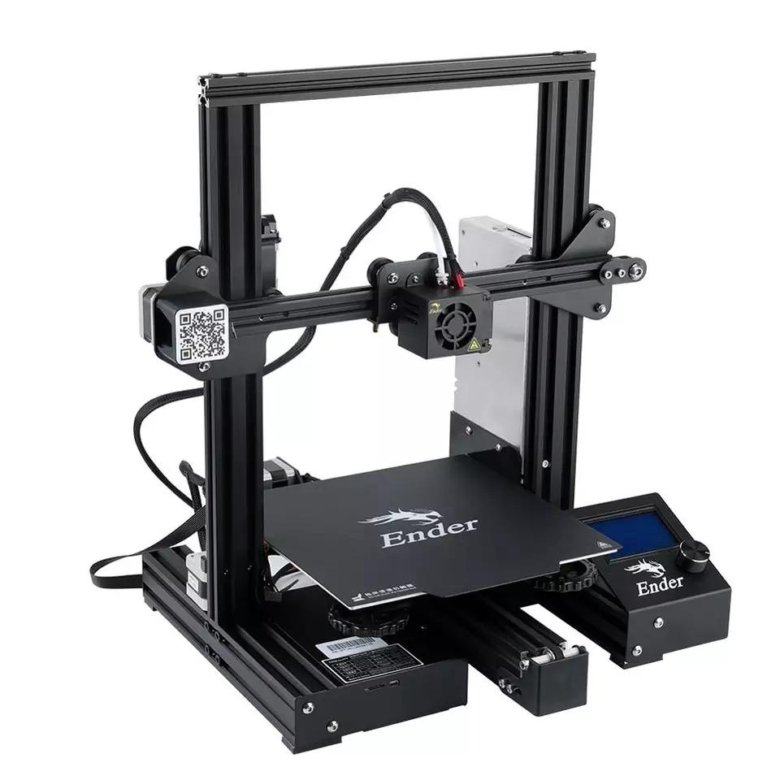
3D print ender 3 pro
The Best Creality Ender 3/Pro Upgrades and Mods – Creality 3D
The Ender 3 is an amazing 3D printer. For the money, it's hard to find one that will give you better prints right out of the box. However, it's far from perfect.
In this guide, I'll show you the top must-have upgrades and mods for the Ender 3 and Ender 3 Pro—both 3D-printable and purchased upgrades/mods.
A note on this guide:
In researching this guide, I found a lot of others with massive lists containing every upgrade and mod under the sun—unfortunately, many of those upgrades are pointless wastes of time and money. So, in this guide, I'll cut through the BS and cover the most impactful items that will give you better prints while also improving your overall printing experience.
- Upgrades and mods to 3D print
- Silent mainboard v1.1.5
- MeanWell power supply (PSU) upgrade
- Glass print bed
- BLTouch auto-leveling sensor
- LED strip
- Bed springs
- Metal feeder assembly
- Stepper motor dampers
- Direct Drive Extruder
- Firmware upgrade
Below are the top 3D-printable Ender 3 mods and upgrades you can perform. Tons of other printable mods exist, but this is the core list that will give you the best bang for your print time.
Board fan guard
Before you print anything else, print this mod. The location of the mainboard fan is directly beneath the build plate, meaning bits of filament can fall in and damage the fan or board. The model is available on Thingiverse.
Filament guide
This filament guide holds the filament away from the feeder, allowing for a more consistent feed rate and less skipping. It snaps directly into the side of the upper support.
Cable chain
This cable chain is a must-have for preventing dangerous cable snags when the bed moves along the Y-axis.
Display PCB cover
This simple screen cover protects your Ender 3 display's PCB (printed circuit board) from damage.
Bowden tube fitting fix
If your Bowden tube has popped out of place or if you're having print quality issues, you might want to print these pressure fitting shims that will prevent your Bowden tubes from shifting or popping out during printing.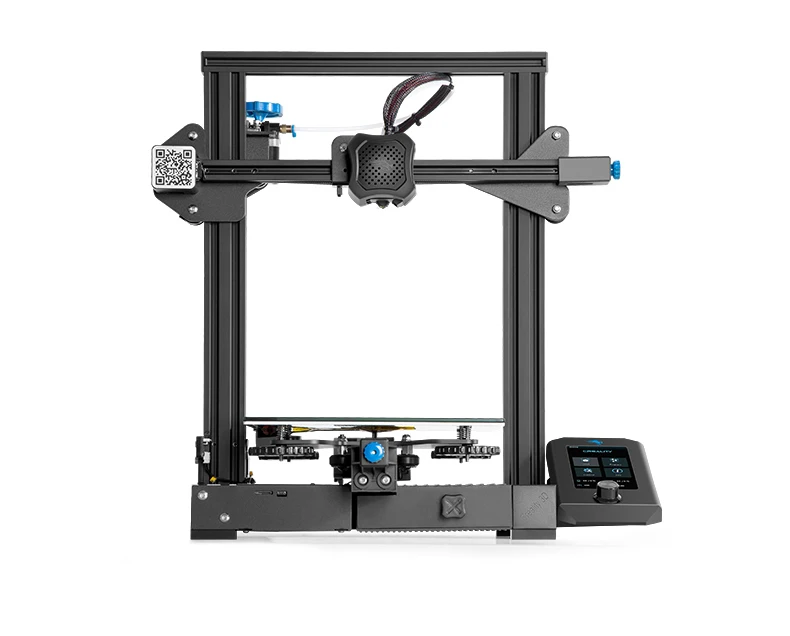
Beeper silencer
You've probably noticed how loud the Ender 3 beeps when navigating the menu interface. This beep can level villages and knock satellites out of orbit. This 10-minute print mutes the beep quite a bit, getting rid of that annoyance and protecting our countrysides and space assets.
If you're using a 3D printer enclosure, I recommend printing these mods using ABS or PETG filament; ambient enclosure temperatures can cause PLA to warp and deform over time.
There are two main sources of noise on your printer: 1) fans, and 2) the drivers (chips) that run your stepper motors. The "whirring" noise you associate with printing is caused by the cheap stepper motor drivers used on the stock Ender 3 board.
Enter the Creality Silent Mainboard (v1.1.5). This board directly replaces your existing Ender 3 mainboard, upgrading your printer to the silent TMC2208 stepper motor drivers. This is the biggest "sound" upgrade you can make. It reduces your printer's noise from approximately 48dB to 36dB, with the remaining sound coming from the Ender 3's fans (which can also be upgraded to quieter fans).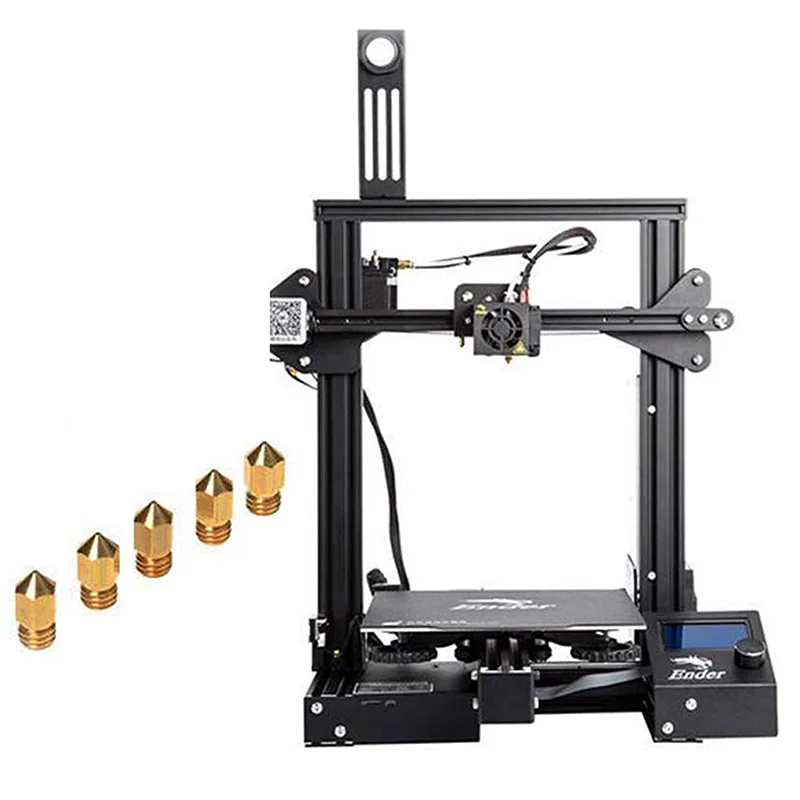
If I had to choose a single upgrade from this guide (other than OctoPrint), it would be this one. Combined with the MeanWell PSU upgrade also mentioned in this guide, I often forget my printer is running since it now generates so little noise.
Of course, in addition to decreasing noise, this board and its upgraded stepper motor drivers improve the quality of your prints.
There are several reasons to upgrade your Ender 3 to a MeanWell PSU including noise, safety, and even reducing bed-leveling issues.
Noise
Compared to the stock PSU whose fan runs continuously, the MeanWell PSU only runs when it needs to—usually less than 20% of the time. This means a much quieter printer, especially when paired with the silent board upgrade. This reason alone made the upgrade worth it to me. I work in the same room as my printer, so noise is a huge issue.
Safety
MeanWell PSUs use higher quality components than the cheap stock unit, providing cleaner power with fewer of the electrical spikes and sags that could pose a safety hazard.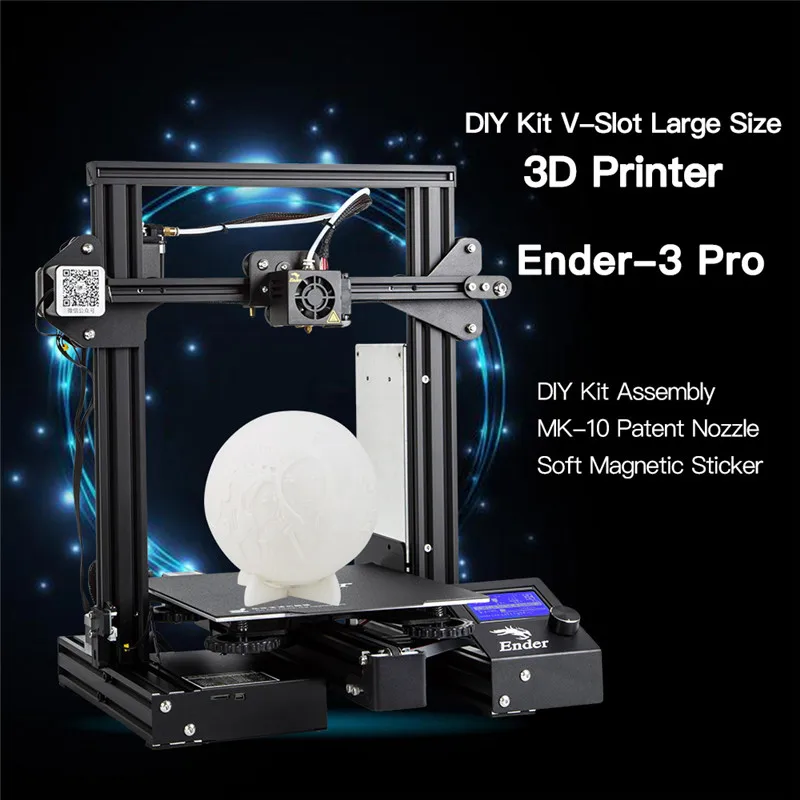
Reduce auto-bed-leveling issues
If you're using an auto-leveling sensor such as the BLTouch or EZABL, the MeanWell PSU's consistent, clean power reduces issues related to power ripples and grounding.
Form factor
The MeanWell PSU is noticeably thinner than the stock unit, which is handy if you're using an enclosure and need to relocate it.
Which one to buy (and where)
The MeanWell LRS-3500-25 PSU is the correct 24V MeanWell power supply for the Ender 3, and this upgrade takes about 20 minutes to perform, excluding PSU housing print time.
There are tons of different build plate surfaces out there: metal, magnetic, BuildTak, painter's tape, and tons more. But after printing for many years on several different printers, I've always had the best experience with glass.
Glass beds are supremely flat, fixing the all-too-common "warped Ender 3 bed" issue that many of us experience. Glass beds also save on prep time, are easy to clean, and offer effortless print removal with a semi-glossy print finish.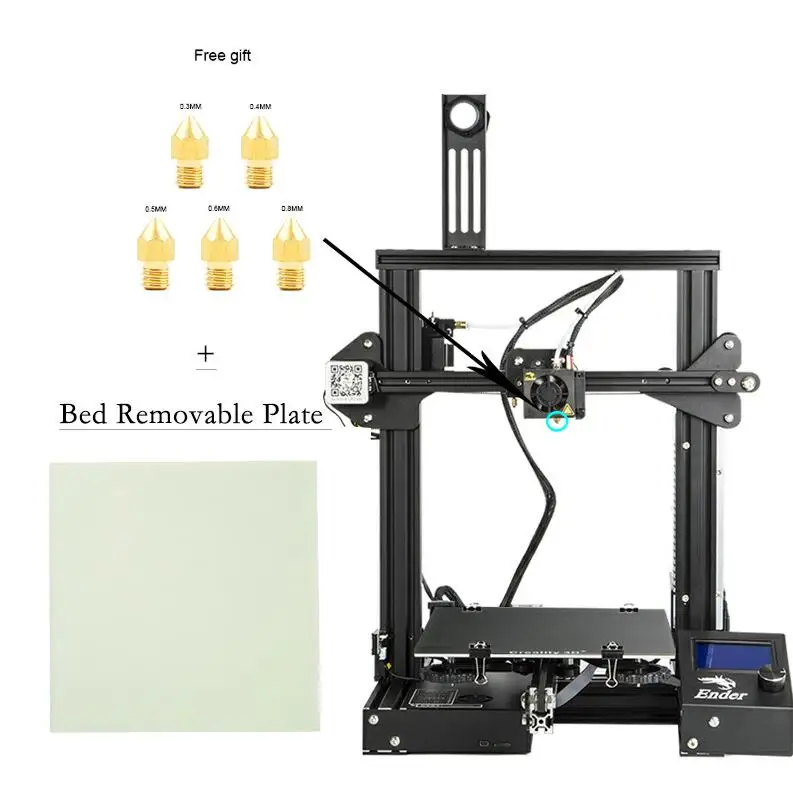
Choosing a bed
I wrote a comprehensive guide to 3D printing on a glass bed if you'd like to dive into the details. tl;dr; Choose a thin borosilicate glass bed, and adhere it directly to the existing build plate using small binder clips. This 235x235mm glass bed is the one I recommend for the Ender 3.
Bed leveling the Ender series 3D printers is key to the perfect first layer and overall print quality. Unfortunately, it's also one of the most annoying "chores" in 3D printing. Just when things are going well, you realize you forgot to relevel your bed and things look terrible.
But what if a simple sensor, installed in just 45 minutes, could automatically level your bed for you every time? That's what BLTouch does.
How BLTouch works
BLTouch uses a small probe to build a mesh of points at the beginning of each print to determine exactly how unlevel (or warped) your bed is, and in which directions. It then takes that into account when performing a print, altering each GCODE instruction as needed to account for the imperfect build surface.
The process
Here's a breakdown of what goes into this upgrade:
Hardware: The probe mounts next to your print head assembly and connects to the existing Ender 3 mainboard.
Software: A slight firmware modification is needed to allow BLTouch to work.
Slicer/OctoPrint: You'll need to insert a few lines into your slicer (and OctoPrint, if equipped) so that each GCODE file you generate will include some BLTouch instructions at the top.
This Instructables guide does a good job of explaining how to do this on the CR-10, though the process is similar for the Ender 3.
Which one to buy (and where)
I recommend this BLTouch sensor (V3.1 or newer) since older versions won't work with newer Marlin firmware.
Proper print illumination allows you to identify issues with your prints early—it's also nice to be able to see what's happening clearly. There are tons of methods for adding an LED strip to your 3D printer. I prefer one that places the light source as high as possible in order to illuminate the entire print bed, not just the current print area.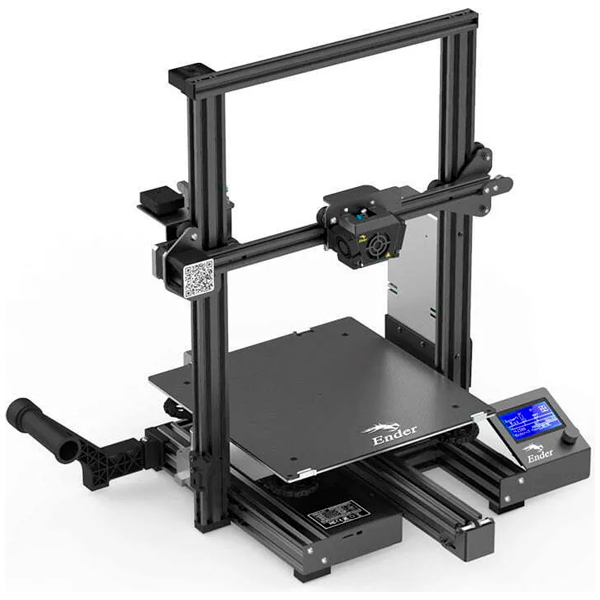
I wrote a comprehensive guide on adding an LED strip to your 3D printer, featuring the Ender 3 specifically. Using the method outlined there, you can even power your LED strip directly from your Ender 3 by regulating the voltage using this buck converter in conjunction with this XT60 splitter cable.
Your bed springs might seem like an insignificant part of your 3D printer, but they're actually quite important to bed leveling and stability.
The stock Ender 3 bed springs are terrible and can lead to print issues and frequent bed leveling. These issues are largely caused by:
The cheap metal used to manufacture the springs, and
The rounded design of the springs themselves
In fact, if you compare the stock and upgraded springs side by side, you can see only the upgraded ones feature a flat surface on the top and bottom. This leads to less shifting compared to the stock springs.
Upgraded Ender 3 springs take minutes to install and mean less frequent bed leveling between prints. This upgrade costs about $10, making it one of the least expensive Ender 3 upgrades out there.
The plastic metal feeder assembly on the Ender 3 leaves something to be desired, and improper tension can even cause feeder gear skips, leaving gaps in the layers of your print. Installing an all-metal feeder assembly such as this one will add durability and stability to your printer.
Yet another noise mod—adding these dampers to your X- and Y-axis stepper motors decreases the noise they generate by 5-10dB. This is a simple, inexpensive mod with a measurable noise reduction impact.
- All-metal case, sturdy and wearable
- Direct extruding, more precise feed-in
- Compatible with more filament. such as TPU, PLA, ABS, etc
- Easy to install and use
- Suitable for Ender-3 Series
- Output voltage: 24V
Get the latest Firmware
SOURCE: howchoo.com
Creality Ender 3 Pro Review: An Ideal First or Tenth 3D Printer
Tom's Hardware Verdict
The Creality Ender 3 is an open-source, DIY kit 3D printer that is ideal for beginners looking to get started in 3D printing or professionals looking to create an inexpensive fleet of printers for manufacturing.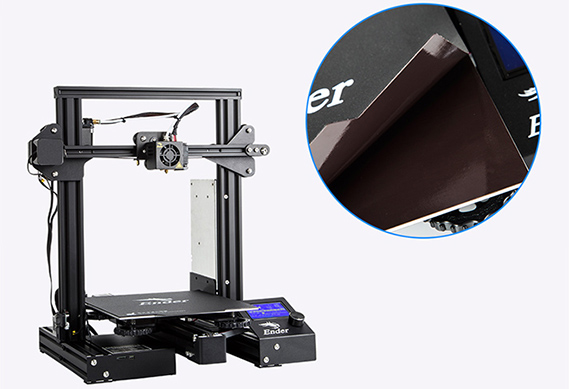
Pros
- +
+ Beginner-friendly assembly process
- +
+ Highly accessible and modifiable frame
- +
+ 350W 24V power supply heats up quickly
- +
+ Simple first-party app offers solid print quality
Today's best Creality Ender 3 Pro and deals
992 Amazon customer reviews
☆☆☆☆☆
$90.99
View
$224.99
View
$339.99
$236
View
Reduced Price
Show More Deals
Retailing for a very-reasonable $240, the Creality Ender 3 Pro is one of the most popular filament-based 3D printers, attracting both beginners and budget-focused makers. The device ships unassembled and uses an open-source design that makes it easy to modify. However, the great support and solid output quality of this printer also make it easy-to-use. Whether you’re interested in buying your very first 3D printer or you’re looking to set up a fleet for manufacturing, the Creality Ender 3 Pro is one of the best 3D printers you can buy.
Specifications
| Machine Footprint | 17.5 x 17 x 18 inches (44.5cm x 43.2cm x 45.7cm) |
| Build Volume | 8.7 x 8.7 x 9.8 inches (220mm x 220mm x 250mm) |
| Material | 1.75mm PLA, ABS, PETG |
| Nozzle | .4mm |
| Build Platform | Removable Flexible Textured Sheet |
| Connectivity | microSD, USB |
| Interface | 3.25" LCD w/ Dial Button |
Creality Ender 3 Pro: Included in the Box
(Image credit: Tom's Hardware)The Creality Ender 3 Pro ships unassembled and includes all of the tools you need to put it together and get it running. In addition to all of the printer components, the box includes: a full set of Allen keys, zip ties, a set of flush cut wire snips for cutting filament, a scraper for removing parts from the bed, a microSD card, a microSD-to-USB reader, a small sample coil of PLA filament, and a few extra parts for the assembly process. All of the bolts are bagged in sets which are labeled with their measurements, which is very helpful during the assembly process.
- Creality Ender 3 Pro at Walmart for $90.99
Assembling the Creality Ender 3 Pro
(Image credit: Tom's Hardware)Although the Creality Ender 3 Pro is a DIY kit 3D printer, the overall assembly process is designed to be friendly to users of all skill levels and can be comfortably completed in an afternoon. There is no soldering, crimping, or other advanced techniques required that would put this kit out of reach for a beginner with limited tools and/or experience. Building the Ender 3 Pro took me just over an hour from unboxing to flipping the power switch, and I didn’t need a single tool that wasn’t included with the printer.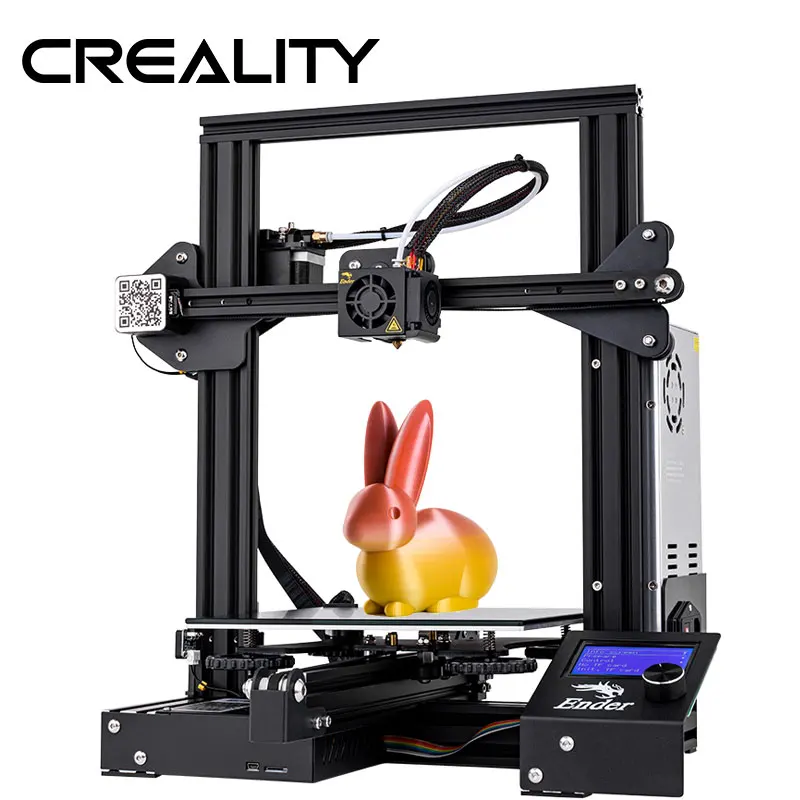
The assembly guide breaks down the assembly into 12 steps that are easily completed sequentially and is also included as a digital .pdf on the microSD card. Creality also includes a video showing the assembly process on the microSD card if you prefer a video guide instead of a written one. Among various quality-of-life improvements over the original Ender 3, the Ender 3 Pro has built-in belt tensioners for the X and Y axes that allow you to manually adjust tension if the belt isn’t stretched properly.
(Image credit: Creality)Loading Filament and Leveling on the Creality Ender 3 Pro
(Image credit: Tom's Hardware)Loading the filament is a breeze. I was able to easily load filament through the injection molded extruder and into the white Bowden tube. The 350 Watt Meanwell-brand power supply heated both the nozzle and the bed to loading temperature in just under two minutes, which meant I wasn’t waiting around for the bed to reach printing temperature after the nozzle had already heated.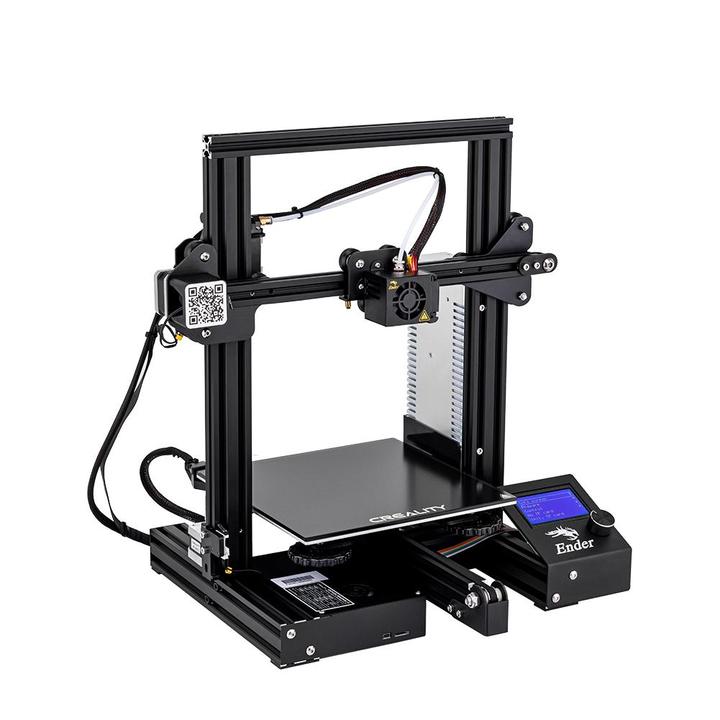
Once I had loaded filament into the extruder, I leveled the bed by using the included triangular piece of paper and adjusting the nozzle height with the thumbscrews at all four corners of the bed. This process is relatively straight-forward and I didn’t run into any problems during leveling. If you level the bed carefully, you'll get prints that adhere well to the build platform without being deformed. The piece of paper should be lightly pressed down into the build platform; too close and the paper becomes pinned down, too far and it can move freely. This can be difficult on a flat glass bed if the glass isn’t perfectly flat, but the combination of aluminum bed and textured sheet was easy for me to level quickly and accurately.
Creality Ender 3 Pro Build Quality
(Image credit: Tom's Hardware)The Creality Ender 3 Pro ships with the V4.2.2 controller board, which is the standard board for this model of printer. The wiring job is professional, with several of the wiring connectors affixed with a silicone potting compound into their sockets to prevent them from coming loose during shipping or operation.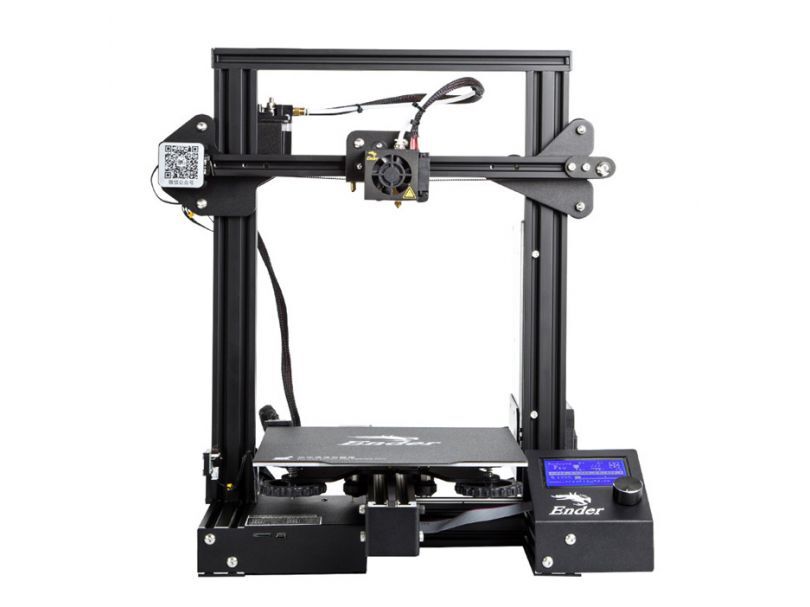
The wires are bundled and the overall cable management is clean and allows for good airflow over the stepper drivers. The board accepts a microSD card for uploading .gcode instructions and can also be controlled via the USB port on the front of the machine.
(Image credit: Tom's Hardware)The Ender 3 Pro's V4.2.2 controller board features HR4988 stepper drivers, which can create a noticeable amount of noise during printing. Combined with the noisy fan that cools the controller board and the intermittent fan on the power supply, this printer makes a surprising amount of noise when printing. The buzzing from the stepper motors reminded me of my very first 3D printer from 2013, a Printrbot Jr. that could be heard from clear across the house through multiple walls when it was printing.
If you’re planning to use this printer near your desk, it may be distracting during fast travel movements and when the power supply fan kicks on. I found that I was unable to concentrate with the machine on my desk, and had to move it to the other side of the room while it was running.
Printing on the Creality Ender 3 Pro
(Image credit: Tom's Hardware)The Ender 3 Pro ships with a microSD card that contains a user manual, a troubleshooting guide, various USB drivers, and several pre-sliced models in .gcode format. These pre-sliced models can be printed by simply inserting the microSD card into the printer and selecting a model.
I ran my first test print using the “cat-3.5H.gcode” file and, while it was printing, I took a look at the .gcode file in a text editor. The file was sliced at a .1mm layer height, using 3 perimeters, and prints completely hollow with 12 solid layers on the bottom and top of the model. This is an unusual strategy for printing small models, as having an internal infill structure can help to support any material overhangs that occur on the inside of the model.
(Image credit: Tom's Hardware)Despite the unusual printing configuration of this test file, the printed model featured a good amount of surface detail with no major visible defects aside from some stringing that occurred while printing the ears. To remove the print, I peeled the flexible magnetic build plate off and bent slightly, allowing the print to pop right off. The raft separated easily from the model and didn’t leave any defects on the bottom surface. The test part is an impressive example of what the Creality Ender 3 Pro is capable of.
Software and Settings
(Image credit: Creality)Creality ships the Ender 3 Pro with their own slicer called ‘Creality Slicer’, which is compatible with Windows PCs and is based on the open-source software Cura.. Other common slicers for this open-source printer include Cura, PrusaSlicer, and Simplify3D.
A typical printer in this price range, such as the Mingda D2 ($235 on Amazon) , will ship with a copy of Cura and a printer profile that was designed for that specific machine. These profiles can be hit or miss and typically require a lot of dialing in to get a good result.
For this review, I used both Creality Slicer as well as PrusaSlicer to print a model and used the default settings at . 2mm layer height for both to directly compare them.The model I used is the Benchy, a common benchmarking test used for this style of 3D printer that offers an insight into the performance of the printer when making difficult-to-produce geometry.
Creality Slicer Settings on the Ender 3 Pro
(Image credit: Tom's Hardware)| Profile | Fast (0.2mm) | |
| Material | Common PLA | |
| Platform Adhesion | None |
I used the default ‘Fast’ profile for the Ender 3 Pro built into Creality Slicer to test out the printer and see how much detail it was able to produce. The model printed with no major visible defects, save for the infamous ‘hull line’ which typically occurs when the printer transitions from sparsely filled layers to solid layers.
The layers laminated evenly, and I only saw a few visible bumps caused by the start and stop point of each toolpath on the outermost contour. For a part printed with no changes to the software, I was satisfied with the overall quality of the Benchy.
PrusaSlicer Settings on the Ender 3 Pro
(Image credit: Tom's Hardware)| Layer Height | 0.2 mm |
| Infill Percentage | 20% |
| Print Speed | 40mm/second |
| Extruder Temperature | 205 degrees Celsius (401 degrees Fahrenheit) |
| Heated Bed Temp | 60 degrees Celsius (140 degrees Fahrenheit) |
I ran the same test print using PrusaSlicer, another common slicer program that also includes a native printer profile for the Ender 3 Pro. In addition to the hull line artifact, this print also showed some banding towards the top of the print and seemed to lack a bit of the detail present in the model sliced with Creality Slicer.
This print wasn’t quite where I would like to see a benchmark print, and some optimization of the software (print speed, retraction settings, etc.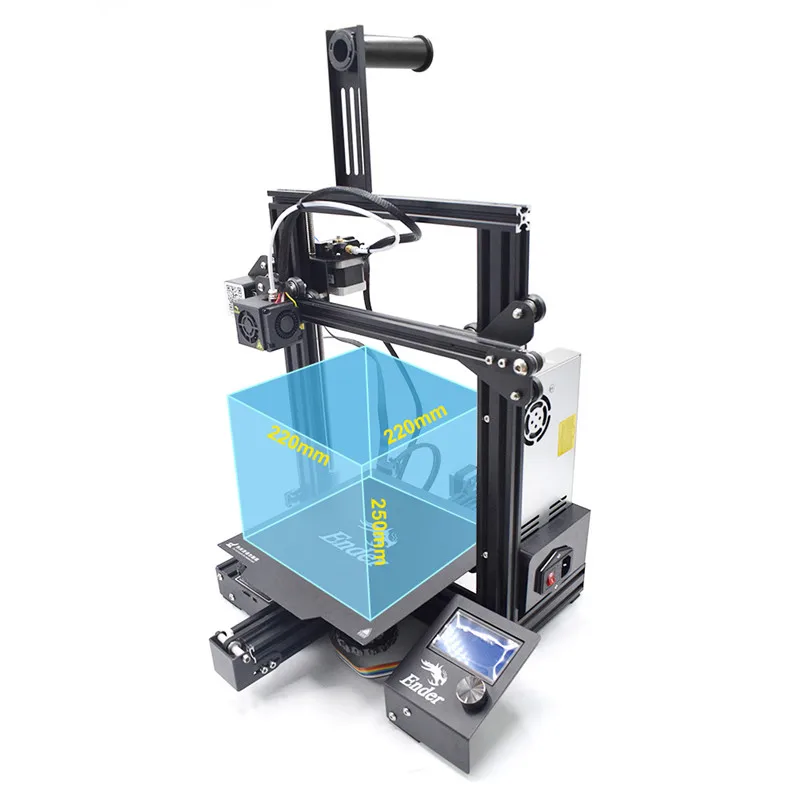 ) would likely be required to get this part to an acceptable level of quality. I’ve printed this part using similar settings on the Prusa MK3S using the same material in the past, and the quality is much higher than what I saw here. While the Prusa MK3S is a more expensive machine, I was still surprised to see this much of a difference in a test part using the same software.
Printing a second test print on the Creality Ender 3 Pro
(Image credit: Tom's Hardware)I was curious about the amount of banding present in the model printed with PrusaSlicer, so I decided to re-run another one of the pre-prepared files from the SD card to confirm the problem wasn’t being caused by a hardware issue. I ran the piggy bank test part, and it came out without any of the visible banding that I noticed on the model sliced with PrusaSlicer. The vertical walls were smooth and even, and the model seemed to be clear of any major defects.
The PrusaSlicer profile, while a good starting point for this printer, clearly requires a bit of calibration to get the best results.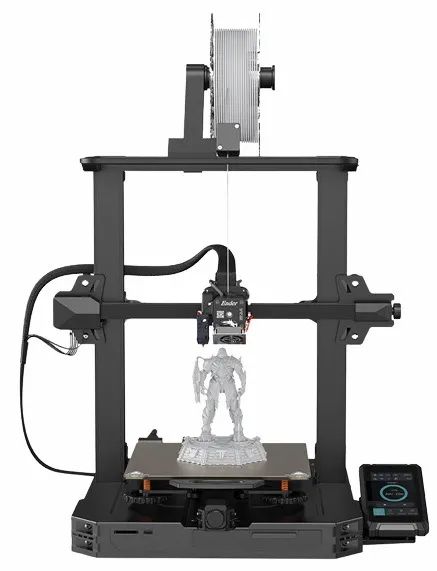 I’ve found that reducing print speed is typically a quick way to troubleshoot and can have a major impact on the overall quality of the part, and that may be a setting worth experimenting with to get the best results.
Adjusting retraction is another important consideration, as the Ender 3 uses a Bowden extruder, which pushes the filament through a long tube before it gets to the hot end. This pushing (and pulling during retraction) can cause defects in the print if not properly calibrated, so this might be worth investigating as well.
(Image credit: Tom's Hardware)By including Creality Slicer with the Ender 3 Pro, Creality has simplified the printer experience for first-time users who are interested in getting their printer up and running without spending a lot of time experimenting with third party software. I was impressed with how easy the Creality Slicer software was to install and use with the Ender 3 Pro, because most other manufacturers with printers in this price range ship without first-party software. The basic settings to create a print are brought to the front of the app and the included “expert” mode will let you adjust settings as you become more comfortable with the printer.
Whether you are a beginner interested in building your very first printer or an experienced entrepreneur looking to create a print farm to produce 3D printed products, the Creality Ender 3 has a lot to offer with only a few notable drawbacks. The noise produced by the Ender 3 Pro while printing is definitely a downer for anyone living in a studio apartment, and the lack of an enclosure to retain heat should be considered by anyone interested in printing with a higher-temperature material like ABS or Polycarbonate. Creality also offers the Ender 3 Pro V2 ($279 on Amazon) , which features silent stepper drivers and a more modern interface at a slightly higher cost.
Other printers in this price range, such as the Anet ET4X ($199 on Amazon) , offer similar features and specifications, but the removable textured build platform and the fast-heating 350W power supply on the Ender 3 Pro make it an easy choice for anyone looking for a user-friendly machine. In addition, the open-source Ender 3 Pro has a large and robust user base and multiple online communities dedicated to modifying and experimenting with their Creality machines.
It’s clear that Ender 3 Pro has a lot to offer anyone who is interested in 3D printing. It’s an excellent first printer for a beginner or an additional machine for the experienced hobbyist.
(Image credit: Tom's Hardware)Andrew Sink first used a 3D printer in 2012, and has been enthusiastically involved in the 3D printing industry ever since. Having printed everything from a scan of his own brain to a peanut butter and jelly sandwich, he continues to dive ever more deeply into the endless applications of additive technology. He is always working on new experiments, designs, and reviews and sharing his results on Tom's Hardware, YouTube, and more.
Creality Ender 3: Amazing low cost 3D printer
3DPrintStory Reviews Creality Ender 3: Amazing low cost 3D printer
The Ender 3 is a phenomenon in the world of 3D printing: never before have so many people shown interest in an inexpensive 3D printer and this interest is justified! In this review, we will understand why. And yes, spoilers are an amazing and inexpensive 3D printer that surprisingly combines quality-price-upgradeability.
Creality Ender 3 Features
Let's not beat around the bush and get straight to the point. One of the most compelling features of the Creality Ender 3 is its incredibly low price. While the cost varies a bit depending on the vendor, this 3D printer can currently be found for under $199. The Creality Ender 3 is now even cheaper than its predecessor, the Ender 2, in some online stores.
The differences in design between the Creality Ender 3 and Ender 2 are small, but still worth mentioning. The latest iteration still retains the features of the CR-10 with aluminum profiles making up the frame and a single lead screw driving the Z-axis on the left side of the frame. However, unlike its predecessor, which featured a cantilever style in which the X-axis rail protruded into the air, the Creality Ender 3 has a closed frame.
The Creality Ender 3 has a heated bed of rather modest dimensions of 220 x 220 x 250 mm, which, however, is almost twice as large as that of the Ender 2. There is a BuildTak-like sticker on the table, which should certainly help the adhesion of the first layer and not prevent your 3D model from tearing off during 3D printing.
Another impressive feature of the Creality Ender 3 is its ability to fully resume 3D printing after a power loss or shutdown. This feature was made popular by the Prusa i3 MK3 3D printer, but the fact that it was implemented in a sub-$200 3D printer makes this feature worth mentioning.
LCD display with control wheel located to the right of the desktop. The control panel is attached to the 3D printer rather than included as a separate component, making this 3D printer more compact and portable than the CR-10.
Creality recently fully open-sourced the Ender 3, perhaps a first for a Chinese 3D printer manufacturer.
The above features make the Creality Ender 3 quite attractive, but 3D printing speaks louder than words. So it's worth trying out this 3D printer by building it up and sending it out for a little test drive, which we'll talk about below.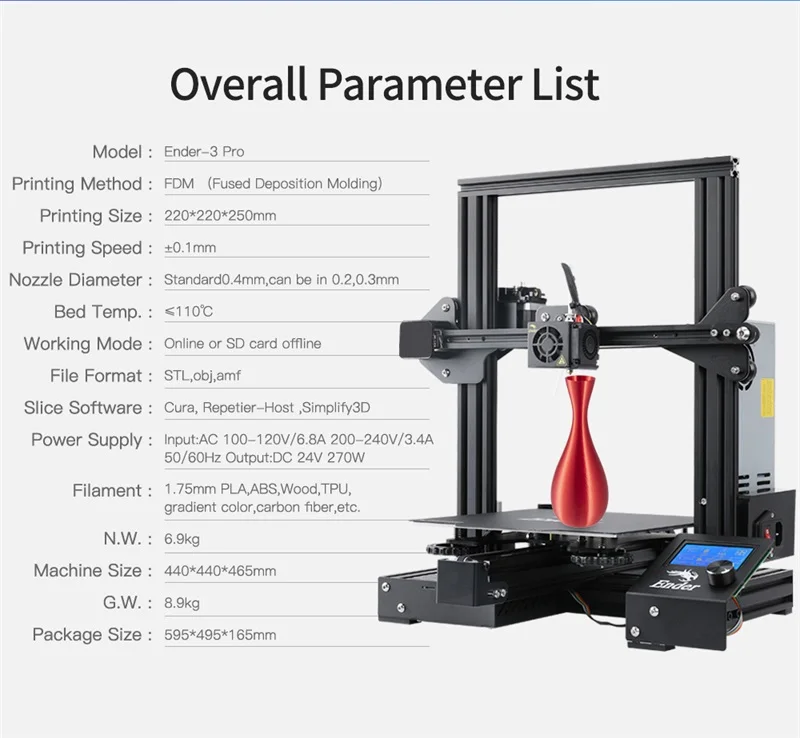
Unboxing the Creality Ender 3
As noted, the Creality Ender 3 is a fairly compact 3D printer and the box is true to size. When the 3D printer arrived, the box even caused some surprise due to its compactness.
When we unpacked the Creality Ender 3, we found that all the parts and tools were neatly tucked away in the packing foam.
In addition to the 3D printer parts that we'll cover in the next assembly section, here's what the Creality team provided in the box:
- USB stick (with instructions, test models)
- Various tools such as wrenches, hex keys and a small screwdriver
- White PLA plastic sample
- Nozzle cleaning tool
- Wire cutters Plastic cable ties
- Multiple nozzles
For a 3D printer that costs less than $200, we were happy to see accessories such as additional nozzles and a nozzle cleaner included in the kit. Once we've dug every last detail out of the cardboard box, it's time to start the long-awaited build process of the Creality Ender 3.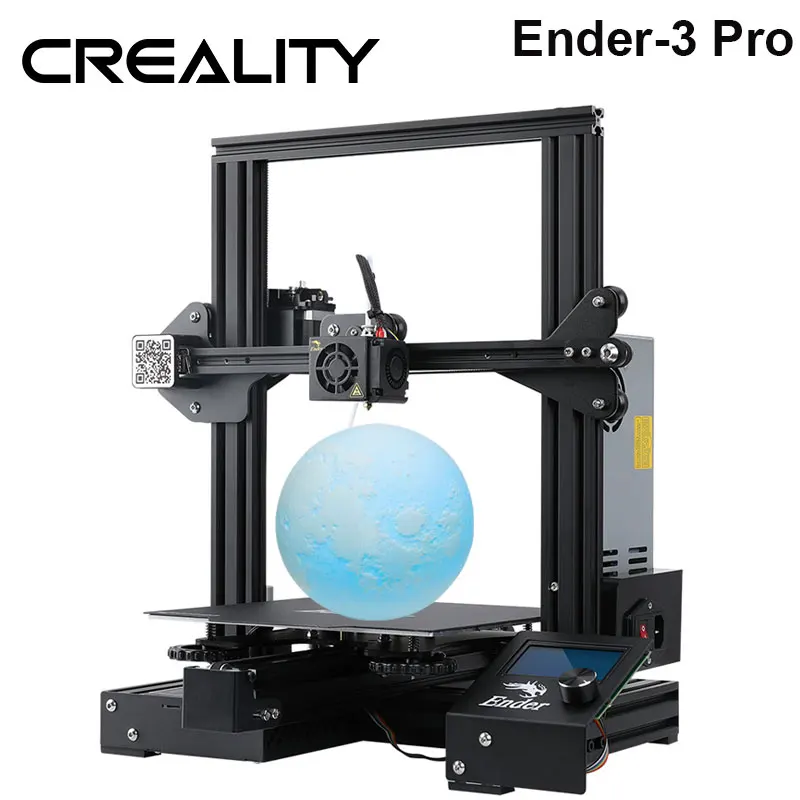
Creality Ender 3 Assembly
The manufacturer claims that the Creality Ender 3 does not need to be fully assembled, as the individual components are already assembled, but don't be fooled - this 3D printer will require a lot of effort before you can start 3D printing. Compared to the Creality CR-10, which also comes partially assembled, the Ender 3 will take longer to assemble.
The assembly process is described in detail in the small booklet that came with the 3D printer in just 12 steps. It seems simple enough, but there were some steps that lacked detail and explanation, which stretches the build time somewhat. If we take into account both the assembly of the 3D printer and the calibration of the table, it will take a beginner about 1-2 hours to do all this.
To simplify the task, you can break the assembly process into the following parts: frame assembly, X-axis assembly, belt installation, assembly of the main components of the 3D printer and electrical connections, wiring.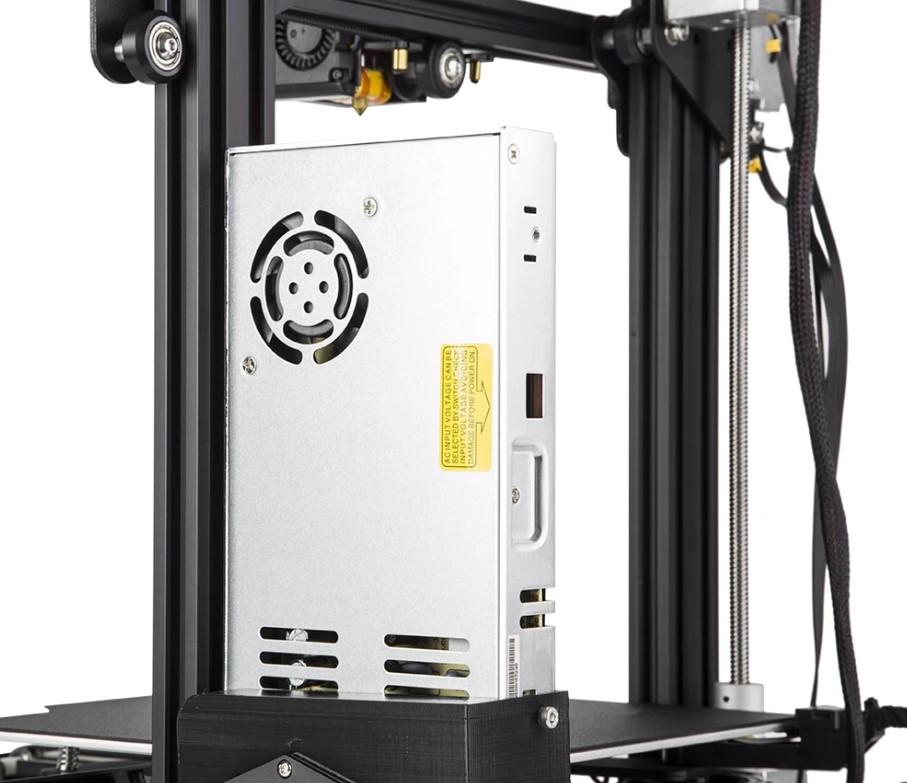
The first step is to assemble the frame together with a pair of 20 x 40 aluminum profiles, which will be attached to the frame with two screws on each side. If you turn the base on its side, then it will be easier to assemble the frame. The base of the Creality Ender 3 has pre-drilled holes for attaching aluminum profiles.
After that, step 2 - attach the power supply and LCD screen to the base. Again, this is a simple step, which is stated quite well in the instructions. But the next steps can already cause some difficulties.
After the LCD and power supply are attached to the base, the next step is to mount the Z limit switch and Z motor on the left side of the frame. You also need to install two more components - the Z limit switch and the Z axis motor. The Z limit switch must be installed on the side of the vertical stand, exactly 32 mm from the bottom of the Creality Ender 3 base. As it turned out later, this is an important step, because installing the limit switch switch too high or too low will result in an inability to adequately calibrate. Therefore, we strongly recommend not to be lazy and use a ruler at this step.
The Z-axis motor is attached directly to a pre-installed bracket on the back of the left upright. The lead screw is lubricated with grease, so be careful not to remove it during installation. Also be sure to loosen the bearings when installing the Z axis motor as the rail will not work properly if they are too tight.
The next step is to assemble the X-axis. This can also be tricky. Why? Well, there are two racks in the kit with the same exact dimensions, but only one of them has six pre-drilled holes. And that's the one you'll need for the X-Axis. The left mount includes both the X-Axis motor and the extruder motor, as well as a weird QR code to a Facebook page that seems a bit out of place on the Creality Ender 3's frame.0005
Starting from the open side of the X-pillar, you will need to slide the portal into place with the wheels up and down. The wheels should slide smoothly back and forth along the rail.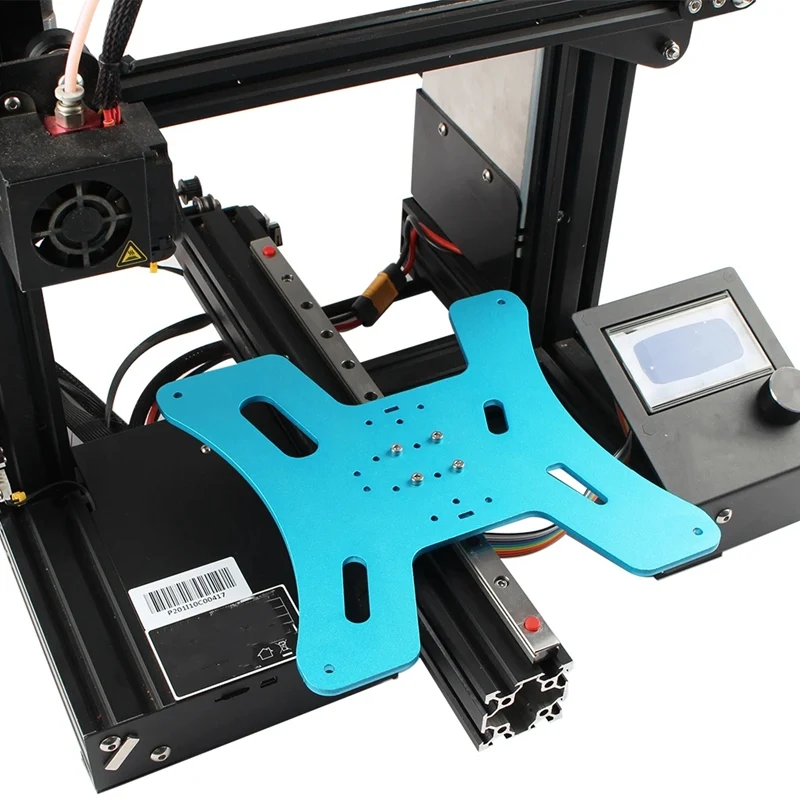 If this is not the case and the wheels are not properly installed, you will have to fiddle with the eccentric nut behind the bottom wheel until it snaps into place. Next up is assembling the mounting bracket and belt tensioner, both of which are mounted on the right side of the beam.
At this point, it starts to feel like we have a real 3D printer in our hands, but only after installing the GT2 belt on the X axis. At each end of the pre-measured tape there is a clamp that will be placed in the slots under the extruder carriage.
To install the belt on the Creality Ender 3, you need to carefully roll the extruder carriage over the belt, which will slide the belt under the wheel into the empty space. Do the same procedure for the second wheel, placing the other end of the belt under the bottom bracket. There is a belt pulley at each end of the X-axis, which will keep the extruder moving smoothly.
There were some issues with belt length, but we won't go into that now, but will mention them in the next section. The last step is to put all the pieces together and attach the material holder to the top of the frame.
Creality Ender 3 design
As mentioned above, the Creality Ender 3 has a minimalist design made popular by the company's crown jewel: the CR-10. However, the latest version of the Chinese manufacturer has a smaller amount of workspace and is more compact. Compactness is also ensured by the fact that the control panel with an LCD monitor is attached directly to the 3D printer, and is not taken out separately as a separate module, as it was before. Placing the motherboard directly below the printer avoids the spaghetti of wires and cables and gives the Ender 3 3D printer an elegant look.
The Creality Ender 3 features V-groove rollers that run along the aluminum profiles for smooth movement during 3D printing. For the most part, the design is solid and compact, but there are a few pitfalls.
The most egregious problem in the design of the Creality Ender 3 is the slight but annoying wobble of the 3D printing table.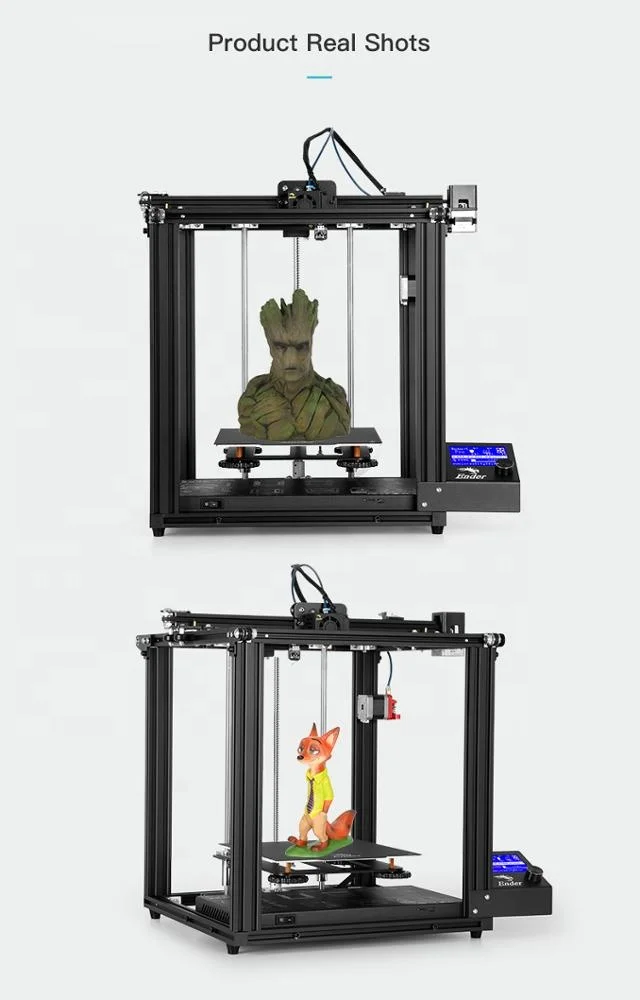 This may be a small defect of the 3D printer we got, but in fact, the stability of the 3D printer table is an important aspect, so keep in mind.
The portal-like open frame design offers a wide range of customization and add-on options, so you'll definitely have plenty of room to upgrade this 3D printer.
The X-axis belt that came with the assembly kit was too long, causing it to be under tension. The toothed belt has golden metal plugs at the ends, which is certainly convenient for installation, but only if it is of the correct length. So I had to tinker a little with its installation before we got decent 3D printing results. You can see in more detail the difference between the belt with good tension and the one offered in the kit in the section "First 3D printing on Creality Ender 3".
The Creality Ender 3 has a well-designed extruder system that uses a narrow bore Bowden extruder to aid in 3D printing with flexible plastics. The material supply system is efficient, but it is quite difficult to initially feed it into a narrow opening.
The table calibration process (which, by the way, is done manually) is also well thought out. There are really big and really easy to turn knobs at every corner of the 3D printing table on the Creality Ender 3, which makes the manual calibration process as convenient as possible.
The Creality Ender 3 control panel offers a wide range of settings. When working with the control panel, you will probably encounter minor freezes. Otherwise, the LCD display is a welcome addition to the Creality Ender family and is easy to navigate.
There are several useful features that are missing. The main one is the possibility of extruding the thread. When changing material, there is no efficient way to remove the previous material from the nozzle, and being able to extrude filament directly from the control panel would solve this problem.
Last but not least, a quick note about the noise level of the Creality Ender 3. You will definitely hear the mechanical purr of this 3D printer if you leave the door to the next room open, so keep that in mind.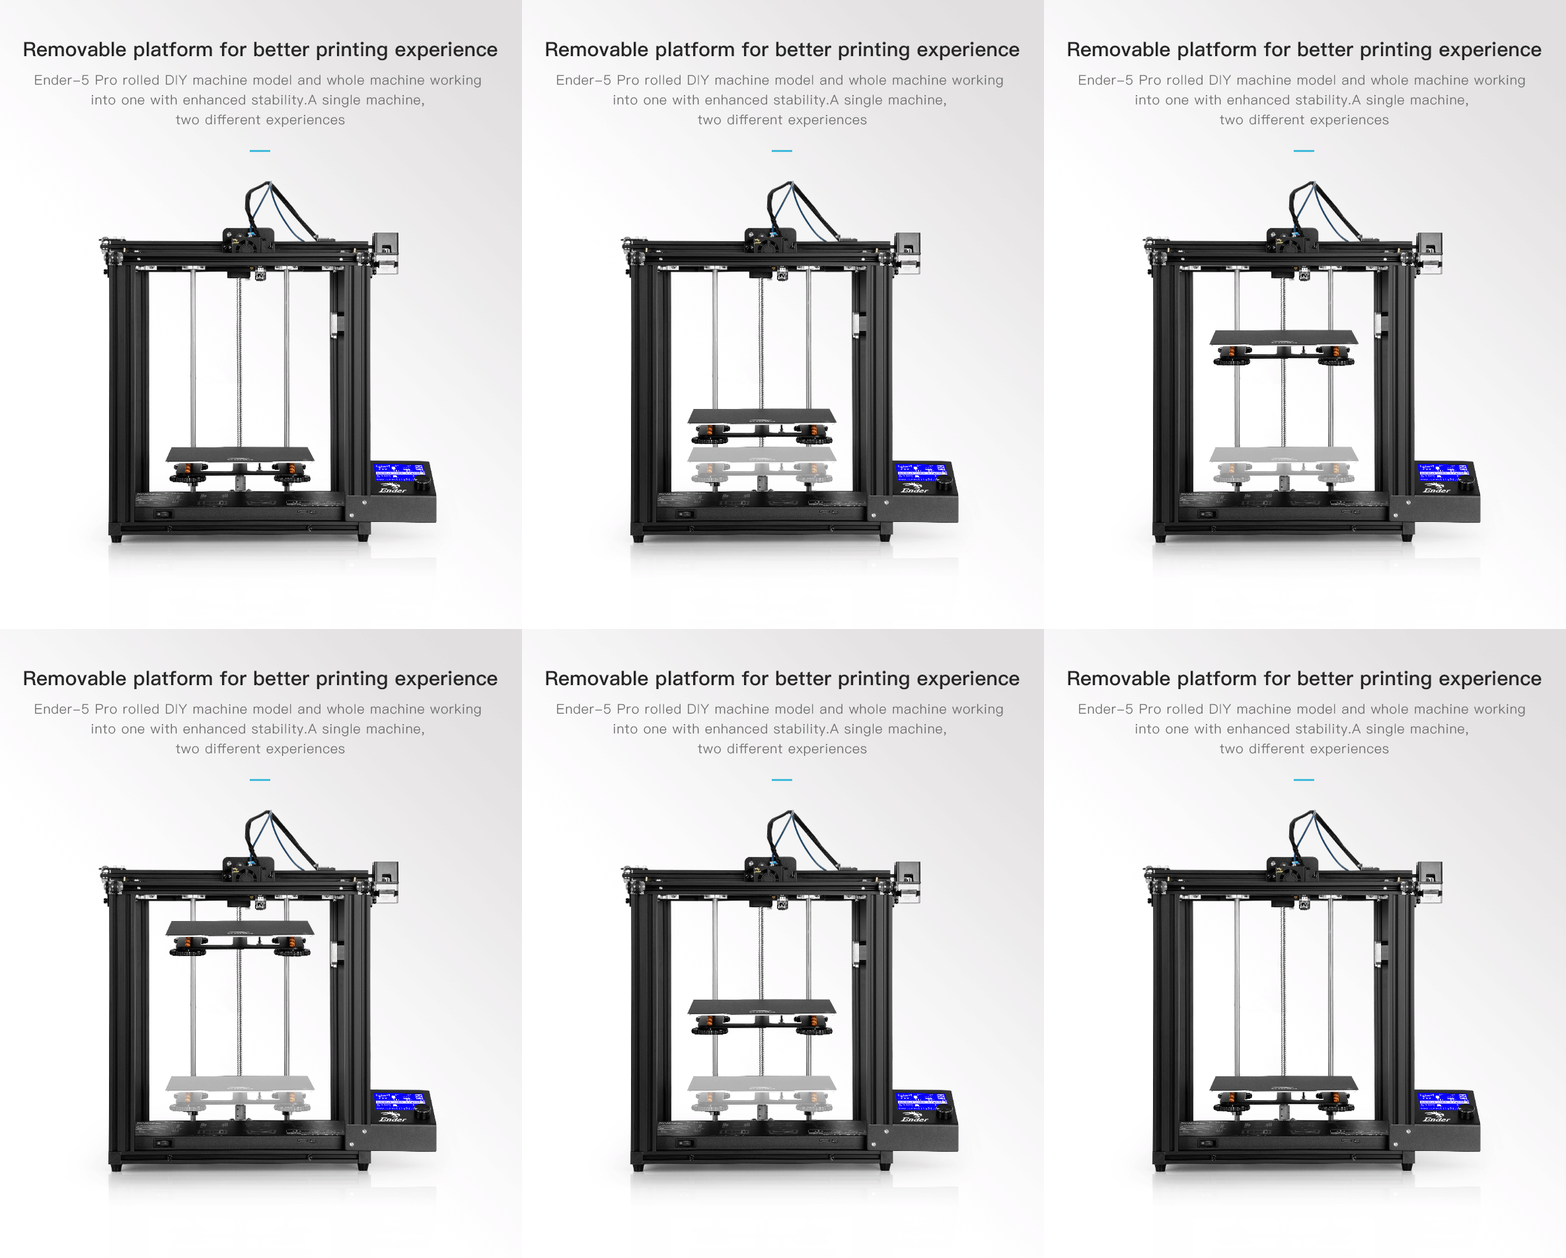
First 3D print with the Creality Ender 3
Time to get to the fun part: 3D print with the Creality Ender 3!
There have been several failed prints and subsequent adjustments before you get a perfectly working 3D printer. Benchy was used to set up the 3D printing, but you can consider other 3D models for test 3D printing. Matterhackers Black PLA was used for printing.
As you can see below, the first attempt was... well... interesting to say the least. The second attempt ended with a full-fledged boat. The 3D printer did a good job with the ridges and overlap, but there was a subtle wave pattern on the surface. At this stage, the problem with the length of the belt along the X axis was revealed. The final Benchy turned out to be almost flawless even with a layer height of 0.15 mm. Our third attempt gave amazing quality and passed almost all the tests set by 3DBenchy. On the first layer, signs of an elephant leg appeared, but the explanation for this most likely lies in the not ideal calibration of the table of the tested Ender 3.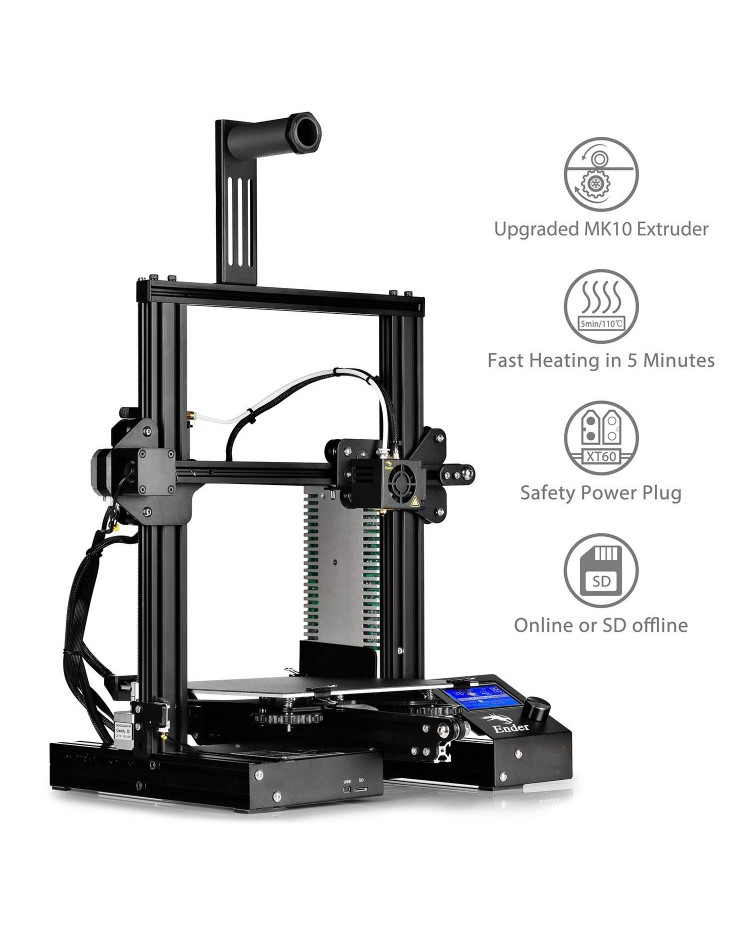
Wanting to add some variety to the first collection of prints, it was decided to choose a more functional item for the next model - a carabiner. Unexpected adhesion problems. After playing around with the temperature of the table and its calibration, in the end they added glue and the problem went away.
Tests with PLA are completed, we are moving to a higher temperature material - ABS plastic. Used Green ABS from CCTREE. For tests, a 3D model of Flexi Rex, a small but flexible dinosaur with several joints, was chosen. For the most part, the 3D printing was successful, but there was a small crack between the layers on the dinosaur's head. But this is probably not so much a matter of Ender 3 as of the quality of the material.
After normal calibration and fixing the tension of the Creality Ender 3 belt, the result began to please and even surprise. There was another ambitious attempt to 3D print the Waving Groot using colorFabb Corkfill wood-mix plastic. The 3D printing was left overnight, and in the morning it turned out that the print had failed almost at the very end. It's a shame, of course, although the surface of the model was excellent, especially for such a difficult material for 3D printing.
Further 3D printing on Creality Ender 3
After successfully 3D printing with PLA (despite the Groot print failing), it was decided to up the ante and try 3D printing with more exotic materials. The second round of printing experiments on the Ender 3 began with colorFabb nGen Flex, a semi-flexible material developed in collaboration with Eastman Chemical Company.
The first 3D printed model was the Cute Octopus SD Card Holder, a useful little model that can hold six SD cards and two MicroSD cards. We expected the semi-flexible material to be a little more difficult, but in the end we were pleasantly surprised by the quality, which we immediately achieved on the first test. The model had a little ductility (which is to be expected from flexible plastic) and the model came out just fine.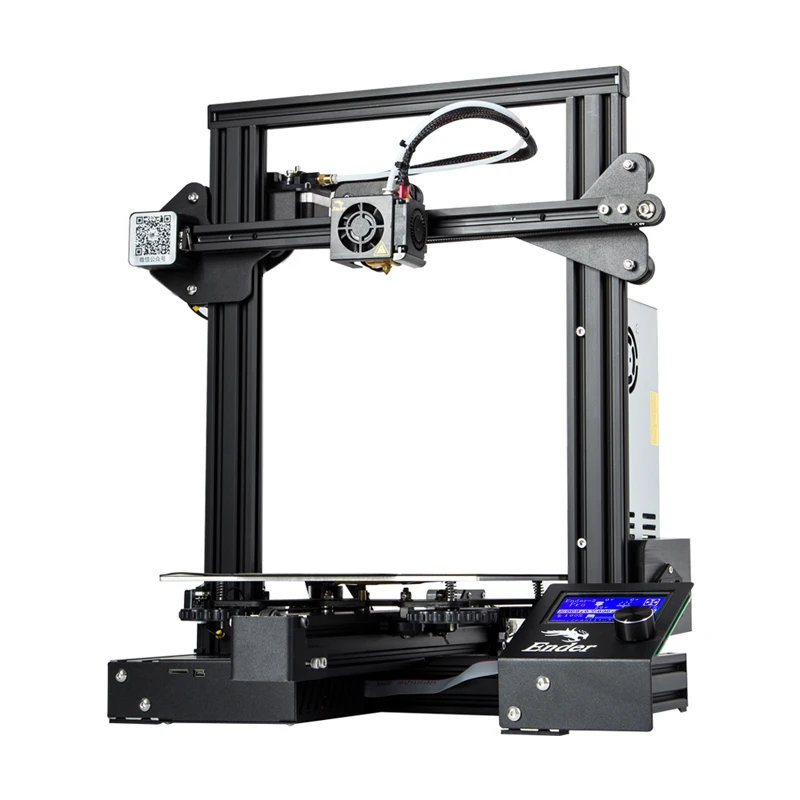
The next stage of bold experiments was to print a dimensional 3D model. Well, what could be better than a test print in gray color than the insidious and beer-burping robot Bender from the beautiful Futurama animated series? The model consists of six different parts that are glued together. Not only are these models larger than the previous ones, but the Creality Ender 3 had to print them with flexible plastic in one setup. It seemed like an adequate way to test the capabilities of this 3D printer, and once again it exceeded our initial expectations.
Even without the support material, we were able to print every part of the Bender model without error. Again, the right leg and antenna on the top of the head have some minor layering issues. But overall the model turned out pretty good and once we glued it all together we had a fantastic Bender model.
The next test we did was with pink ABS filament made by CCTree. Thinking about what would work with this light pink material, we ended up with the majestic Crystal Cluster.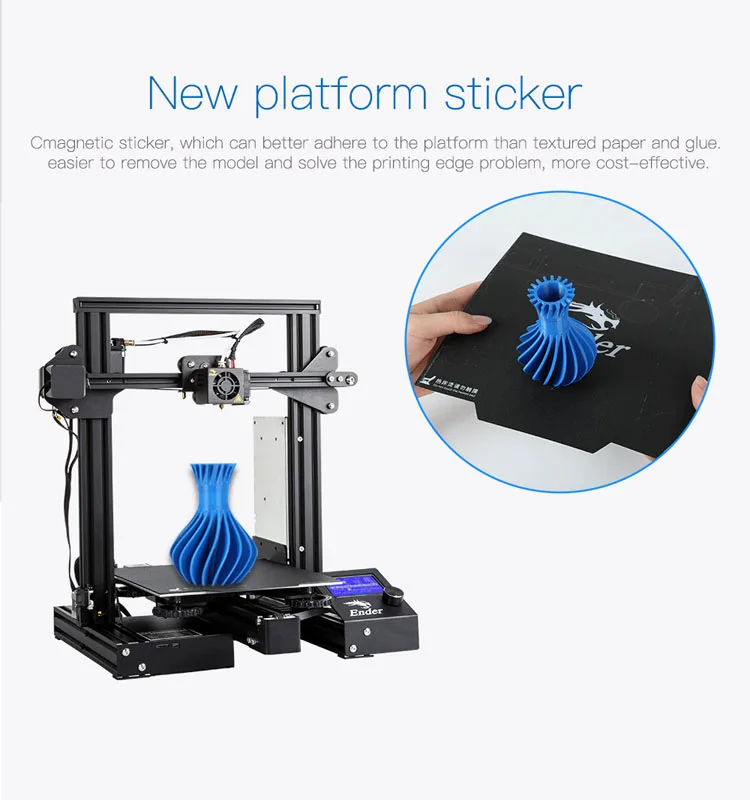 And the Creality Ender 3 did struggle with ABS at first.
It took about five or six attempts for the material to get a good grip on the 3D printer table and not deform, but again glue came in handy. The result is a great product. Despite some difficult angles, the surface quality of these crystals was almost flawless.
Everyone involved in 3D printing knows the favorite test of 3D printers: 3DBenchy. We printed one for our review of the Creality Ender 3, but decided to rock the boat a little... Well, what better than a Benchy stand that looks like a rough sea.
It just so happens that this model was perfect for our next material, Rigid.ink's clear blue PETG plastic. And the Creality Ender 3 did a great job with PETG as you can see in the photo above.
Finally, it was decided to give wood 3D printing another chance with another Waving Groot model. This time, the Creality Ender 3 made it to the top of the character's head before the clog occurred.
Wood effect 3D printing most likely requires a higher quality nozzle. It's probably worth inferring that the inability to 3D print with wood chips is a downside to the Creality Ender 3, but again, it's hard to complain when you consider that this printer costs less than $200.
Creality Ender 3 Specifications
- Technology: FDM
- 3D printable area: 220 x 220 x 250mm
- Nozzle: 0.4mm
- Material: 1.75mm PLA, ABS, TPU38
- Max. 3D printing speed: 200 mm / s
- Maximum 3D resolution: 0.1 mm
- 3D printing accuracy: +/- 0.1 mm
- Heated table: Yes
- Connectivity: SD card, USB
- LCD screen: Yes
By the way, if you are also interested in a newer version of Ender - wellcome to the article comparing Ender 3 and Ender 3 Pro to find out who is who and which model is right for you.
Welcome to NIOZ.RU
Sort by
Item Name +/-
Item Price
Featured Items
Item Availability
Showing 1 - 60 of 621
153060150
400 ml
RUB 1940.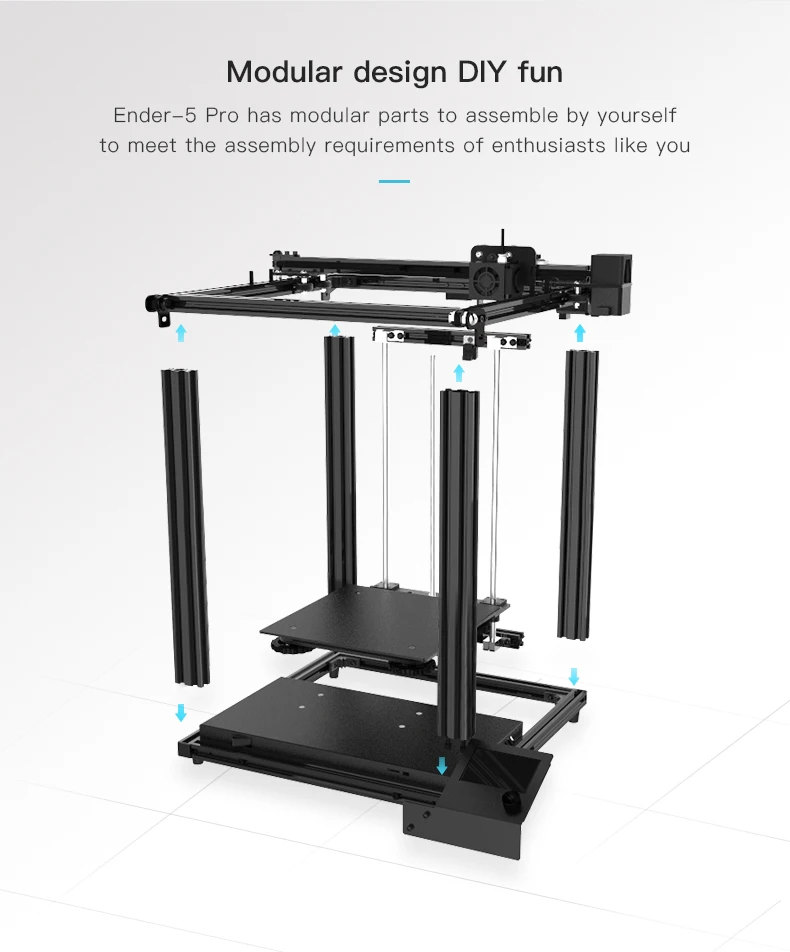 00
00
Product description
RUB 390.00
Product description
350 ml
RUB 850.00
Product description
Ready to print
RUB 23700.00
Item description
Ready to print out of the box
RUB 14500.00
Notify me when available
Item description
Print ready
RUB 20900.00
Notify me when available
Item description
Ready to print out of the box
RUB 43500.00
Item description
Ready to print
RUB 39000.00
Item description
LCD 0.7/1.75 mm
RUB 1550.00
Report Admission
Product description
RUB 650.00
Product description
Wiznet W5100 Arduino Shield
RUB 650.00
Notify me when available
Item description
RUB 550.00
Product description
Assembly kit
RUB 2500.00
Notify me when available
Item description
Volume: 1 l.
RUB 3100.00
Product description
Boscam 200mW, 5.8GHz
Chimera, e3d
RUB 1700.00
Product description
Print head 1.75mm 0.4mm
RUB 1100.00
Product description
Dual print head 1.75mm 0.4mm
RUB 2500.00
Notify me when available
Item description
Long
RUB 750.00
Item description
Short
RUB 700.00
Item description
RUB 1900.00
Notify me when available
Item description
APM2.6 mavlink
RUB 1350.00
Product description
RUB 250.00
Product description
11.1V, 20C
RUB 1900.00
Item description
11.1V, 25C
RUB 1250.00
Notify me when available
Item description
11.1V, 25C
RUB 2100.00
Product description
Heat block v6
RUB 150.00
Item description
cartridge type thermistor
Heat block Volcano
48V 12A
RUB 2700. 00
00
Notify me when available
Item description
12V 20A
RUB 1550.00
Product description
12V 30A
RUB 1950.00
Notify me when available
Item description
12V 5A
RUB 450.00
Notify me when available
Item description
24V 15A
RUB 2100.00
Notify me when available
Item description
RUB 250.00
Product description
Hobbed bolt
RUB 150.00
Item description
Price per 10mm (free cutting)
RUB 13.00
Product description
Price per 10mm (free cutting)
RUB 17.00
Product description
Cut-off 400mm
RUB 650.00
Product description
Price per 10mm (free cutting)
RUB 25.00
Item description
10mm (cut to size)
RUB 70.00
Item description
10mm (cut to size)
RUB 90.00
Item description
Price per 10mm (free cutting)
RUB 7. 00
00
Product description
Price per 10mm (free cutting)
RUB 10.00
Product description
Cut-off 400mm
RUB 400.00
Product description
2x400mm, 2x350mm, 2x325mm
RUB 2100.00
Product description
2x420mm, 2x405mm, 2x350mm, 1x20mm
RUB 2200.00
Product description
25x25x10mm
RUB 150.00
Product description
25x25x10mm
RUB 150.00
Item description
30x30x10mm
RUB 150.00
Product description
30x30x10mm
RUB 150.00
Product description
40x40x10mm
RUB 150.00
Notify me when available
Item description
40x40x10mm
RUB 150.00
Product description
50x50x10mm
RUB 150.00
Notify me when available
Item description
50x50x15mm
RUB 150.00
Product description
50x50x15mm
RUB 150.