3D print color mixing
Can 3D Printers Print in Color? How to Change Colors While Printing – 3D Printerly
The 3D printing process is one that has been developed gradually and has slowly been increasing its abilities. Some people wonder whether 3D printers print in color, so I decided to write an article answering that question.
3D printers can print in colors and can even have colors mixed together using a dual extruder 3D printer, using certain devices that separate colors during printing, and even manually changing filament yourself.
Keep on reading through this article to get more knowledge in 3D printing with multiple colors, and other useful info.
Do 3D Printers Print in Color or Multiple Colors?
3D printers are able to print in one color or multiple colors in a range of different materials. You have a wide range of filament colors to choose from such as white, black, yellow, red, blue, green, pink, purple, brown, rainbow, wood textures, and much more.
Some techniques even allow you to mix two filaments together to make a different color, but this is quite difficult to do and requires precision in certain settings, as well as the right equipment.
Multicolor printing is a fantastic technique for 3D printer hobbyists as it allows you to bring your simple 3D file into life using contrasting colors.
Color 3D printing options are majorly divided into two basic categories, direct color 3D printing, and indirect color 3D printing.
In direct 3D color printing, color is directly derived from the filament being used in the printing process while in indirect color 3D printing, an external device, equipment, or any type of external source is used to apply color to the model while it is being printed.
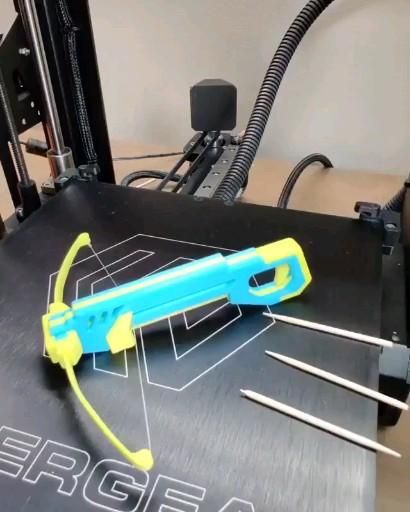
The print below is a mixture of silk gold PLA and red PETG using the pause at layer height or layer swapping method described later in this article.
How Do You 3D Print with Two Colors
One of the best methods to 3D print with two colors is to use the pausing function on your 3D printer, or inserting pauses within the printing file, then switching the filament yourself. You can get a dual-color hotend that has two entry points and one nozzle at the end, or a dual extruder 3D printer.
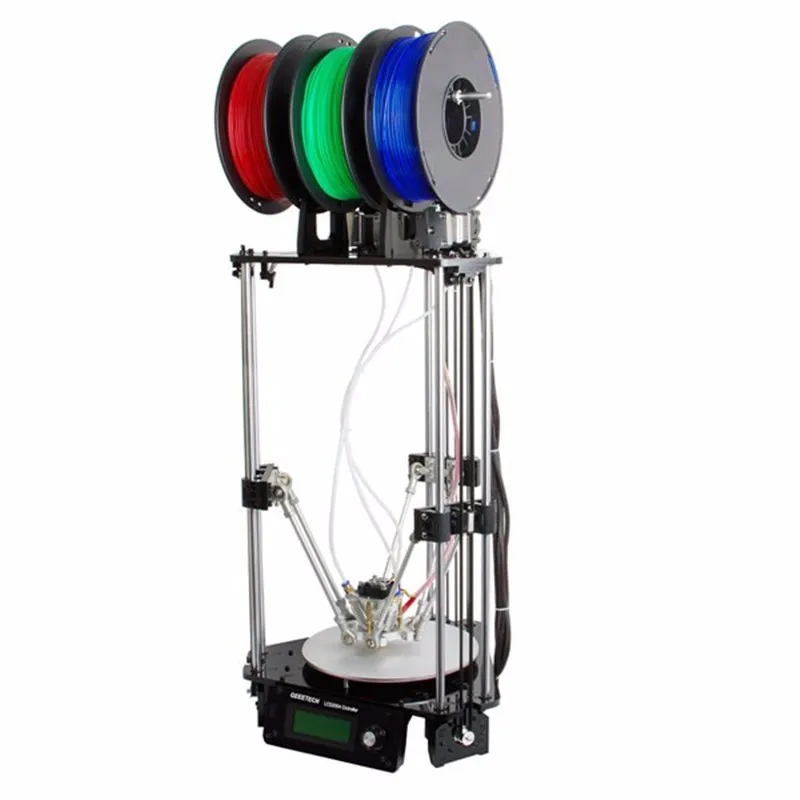
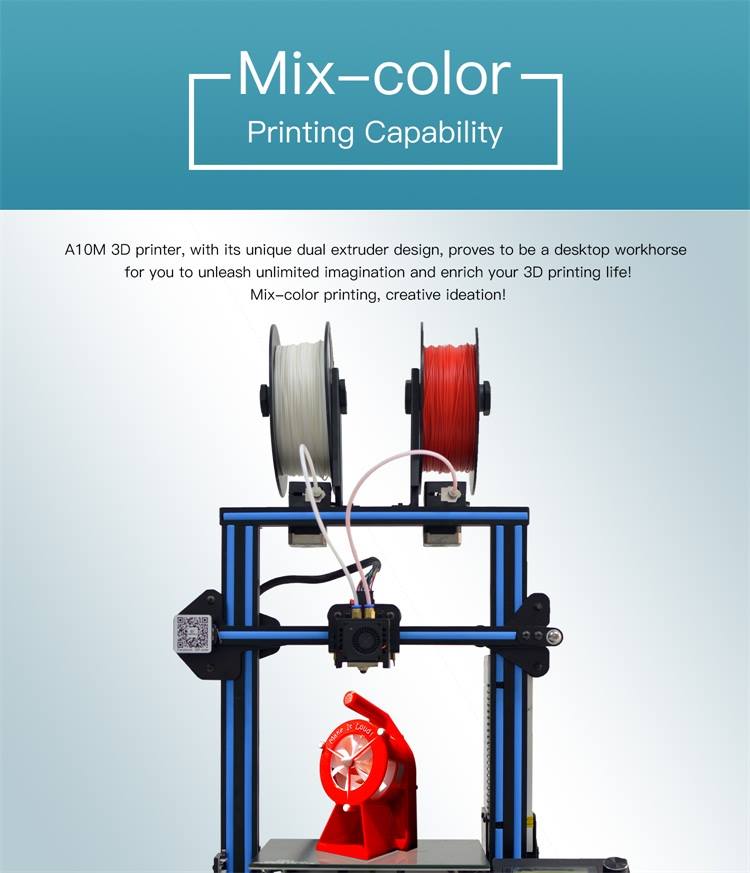
Color mixing is the process in which two different filaments are extruded at the same time to form two-color prints or develop a unique color by merging of both. It can be done with special hotends that are built to mix filament.
Many people have been starting to use objects like the Mosaic Palette 2 from Amazon or the Prusa Multi Material Upgrade 2S (MMU2S) from Prusa, which enables you to 3D print with up to 5 colors at the same time.
It simplifies the process by incorporating a calibration process, a new filament sensor, as well as a standalone filament buffer – all to produce reliable multi-color 3D prints.
How to 3D Print Multiple Colors on an Ender 3
As we all know that Ender 3 comes with a single extruder which is considered as not applicable to 3D print multiple colors, but the truth is that you can easily print multiple colors on an Ender 3 with the help of a few simple steps.
All you have to do is to slice the file in Cura a certain way and get it to work. We will go through printing a CHEP CUBE on the Ender 3.
The cube will be 100 layers and we can print every 25 layers of the model in a different color by inputting a pause function in the G-Code instructions.
Check out the video below to see how it’s done.
Load your CHEP CUBE into Cura Slicer.
Click on Extensions (in the top menu bar) > Post Processing > Modify G-Code.
A new window will open, click on the Add Script button (present on the left side of the window) and a drop-down menu will appear.
Click on the Pause at Height from the drop-down menu. (new settings will appear on the right side of the window).
Click on the dropdown menu located in front of the Pause at the option and (as height doesn’t have to be a dimension) select Layer No.
As we want to print the first 25 layers in a color, enter 25 in the Pause Layer
Adjust all other settings according to your needs or depending on your model. You can go with Park Print Head X at 20mm, Park Print Head Y at 20mm, Retraction at 25mm, Retraction Speed at 50mm/s, Extrude Speed at 3.333mm/s, Redo Layers at 1, and Standby Temperature at 25 Degrees Celsius (these settings are only recommended for printing color CHEP CUBE).
Setting the Standby Temperature is important because it will avoid the chances of over extrusion that can happen before starting the new layer because of nozzle heating up.
For layers 26 to 50, add a new script just like it is mentioned above.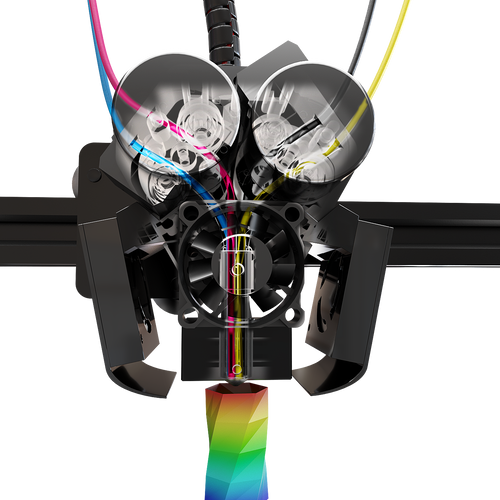 All the settings’ values will remain the same, the only thing that will differ is the number of layers in the Pause Layer tab which will be 50 now because it is the last layer for the second color.
Repeat this step from the Pause Layer at 75 and click Close (you are not required to perform the same steps for the 100th layer because it is predefined as an ending layer).
There will be a button called Prepare in the bottom-right corner of the Cura’s window with a Wrench symbol to its left as well.
Click on the wrench symbol if you want to go back to these settings for adjustments and if your settings are proper, click on Prepare.
Once the process is completed, save your file and review the newly generated G-Code.
Double-check your values in the G-Code before starting the printing process.
Now insert your SD Card into Ender 3, load the filament color you want to add in the first 25 layers and start the printing process like you normally do.
Once 25 layers are printed, the printing process will stop automatically with a message on Ender 3 screen as Wait for User…
Pull back your previous filament and insert the new color for layers 26 to 50.
Heat the nozzle to drain all the previous filament until you clearly begin to see your new color filament.
Now resume the printing process by pressing the printer button.
Another option which can be done in less steps is using the same “Modify G-Code” button, but choosing the “Filament Change” option.
This is a simple script which asks you to input which layer you want to change filament, where you can choose multiple options by putting a comma between the numbers.
The other options don’t really need to be changed, being the retraction distances and XY extruder position for changing the filament.
How to Do Two-Color 3D Printing with a Single Extruder Machine
People usually think that they can only print two-color models with a single extruder by spending extra costs on upgrading their printer. Well, we have summed up some of the best methods that can help you print two-color 3D prints of your interests with a single extruder.
- Separate Part Printing
- Layer Swapping
- First Layer Inlay
- Top Layer Inlay
Separate Part Printing
As its name implies, separate parts of a model are important in different colors and then combined to form a complete model. This is best suitable for prints that do not include any complex angles and have straight walls so that they can be slotted together properly.
Layer Swapping
This is one of the most common and favorite methods of printing color models using a single extruder because of its ease. You only have to pause the print where you want to switch the color.
Change the filament and pull back the previous filament from the nozzle properly.
The process of pausing and resume can be done through your printer’s control box or through the G-Code file. This method allows you to change colors with the specific layer count and can print models that will include a lot of colors.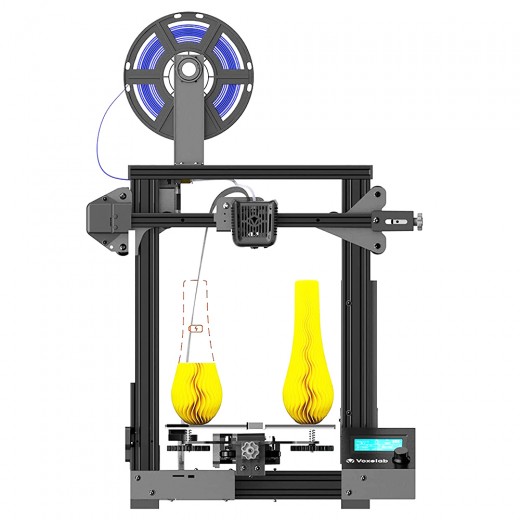
It is the same as the method described above, using the “Modify G-Code” line to help make those changes to the filament every so often.
First Layer Inlay
This is a process in which you print a part of the print and once the print is completed, let it stay on the print bed. Now design your second part, insert the filament of different colors, and print the second part directly on the previous printed model.
Top Layer Inlay
Instead of extruding into the model and declaring it finished, create the first layer inlay as usual. Then on the top surface, add the chamfer or draft angle to the extrusion. This process allows you to print multiple layers of the top inlay so that you cannot see through different layers.
The taper or cavity is specifically selected to leave enough space for the nozzle tip, to ensure that it doesn’t collide with the previously printed model layers. You usually have to print three models to get one of different colors as:
- Print first layer inlay and then pause the printing process.

- Print the main body and again pause printing.
- Print top layer inlay and complete your color 3D printed model
2-In-One Aibecy Dual Color Metal Hotend Extruder Kit
This dual-color hotend extruder kit is best suitable for CR-10 series or Ender 3 3D printers, but still works for others. This kit has the ability to access two different color filaments while extruding from a single extruder.
It works by switching from one input to another during the printing process. It is fast, reliable, stable and the resultant print usually doesn’t have any visible defects.
- Aluminum heating block
- Extrude through a hot end while switching between different inputs during the printing process.
- Quick processing
- Stable printing
- High-quality prints
- Stainless steel body
One user had nothing but praises for the 2-in-one Aibecy hotend after completing their first 2-color 3D print. Once you dial in your retraction settings such as distance and speed, you can get some amazing looking 3D prints.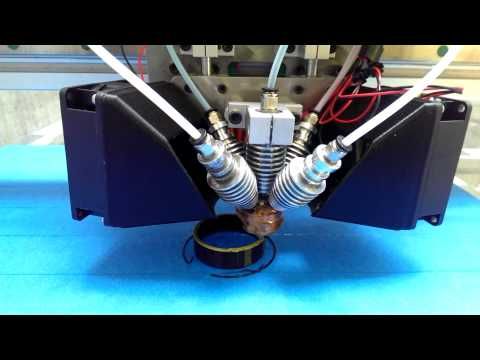
Even if you don’t use the two colors all the time, one user mentioned how he created some of the cleanest 3D prints he’s ever done after installing this device. They got zero clogs even after consistent 3D printing over a 2-month period.
Guide to Color 3D Printers
Are you looking to 3D print parts in color or to create vibrant, multi-color parts? Over the last few years, multiple new methods have emerged to 3D print in color, and newer 3D printers have become more accessible, empowering any designer, model maker, or hobbyist to create objects in a range of hues.
In this guide, we dive into the several techniques you can use to produce colored 3D printed parts, as well as the technologies and applications of color 3D printing.
There are several options to produce colored 3D printed parts, from color mixing to color matching, full color 3D printing, painting 3D printed parts, and hydrographics.
Direct color, also known as multicolor 3D printing is the most basic way to 3D print parts in multiple colors.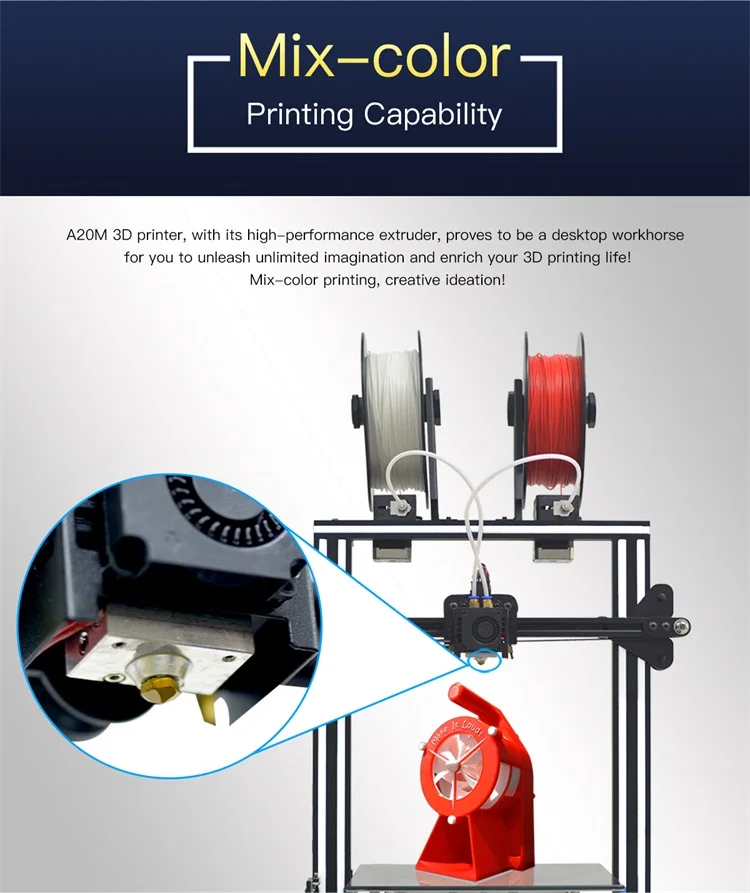 It involves loading colored raw material into the printer. The most common way is using colored filaments with 3D printers that use fused deposition modeling (FDM) technology, which melts and deposits the filament onto the printer bed.
FDM 3D printing in color. (source: 3Dnatives)
FDM 3D printers can print in a single color, using colored filament, in two colors, using a dual extruder, or in multiple colors and gradients using color mixing, depending on how many filaments feed through the printer simultaneously.
The main advantage of these multicolor 3D printers is that they're easy to use and affordable. However, the disadvantages are that it’s not possible to achieve a specific color tone, and the final part will likely have visible layer lines. Also, the more extruders an FDM printer has, the bigger the chance of print errors.
While direct color printing only offers off-the-shelf color options, color matching allows you to create 3D printed parts in almost any custom color.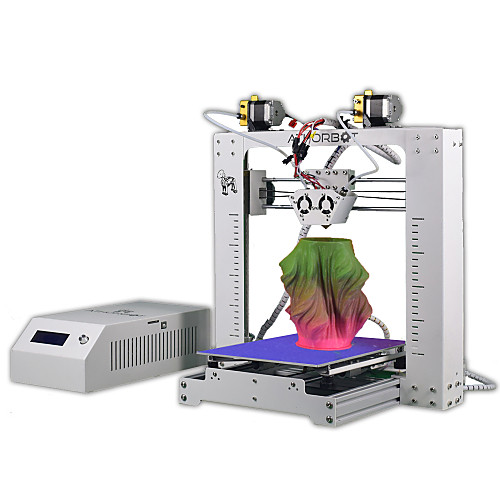
SLA 3D printed parts in various custom colors.
As the first integrated color-mixing solution for stereolithography (SLA) 3D printing, Formlabs Color Kit mixes color pigments into the base material to create a full cartridge of customized color resin. The SLA 3D printing process then uses a laser to solidify the colored resin and 3D print parts in vibrant colors with a smooth surface finish and almost imperceptible layer lines.
Color Kit, the first integrated color-mixing solution for SLA 3D printing.
Sample part
See and feel Formlabs quality firsthand. We’ll ship a free sample part to your office.
Request a Free Sample Part
Full-color 3D printing is the most versatile color 3D printing method, as it produces objects in multiple colors at the same time, matching any tone and making realistic parts.
Unlike colored filaments or resin, the material used in full color printing is not pre-colored—the color is added to the base material during the printing process, similar to a color 2D printer.
Full-colored 3D printed part with binder jetting. (source: Hubs)
Technologies such as binder jetting and material jetting are able to produce full-color 3D prints. However, these processes have a high entry price, making them inaccessible to most users, while only one manufacturer offers a more affordable full color FDM 3D printer.
In certain cases, colored 3D prints may lack the detail or the vivid colors that an artist or designer aims for. Painting monochromatic 3D printed parts with acrylic, oil, or spray paint, while more time-consuming, offers an inexpensive and fully custom solution.
Side by side comparison on the before and after painting a dinosaur 3D printed SLA miniature.
Models that need a perfectly smooth finish or very fine features may require post-processing techniques, such as sanding, priming, or using a solvent prior to painting.
Sanding reduces imperfections in the surface, and primer fills in small cracks and holes. Additionally, some 3D printed parts may need an undercoat to diminish the neutral color of the primer before the paint application.
Watch or read our step-by-step guide on priming and painting 3D printed parts.
Hydrographics, also known as hydroprinting, water printing, or water transfer printing, is a common method for applying printed designs to three-dimensional surfaces. The process uses an inkjet printer to print an image on a polyvinyl alcohol film. The film gets submerged in water and receives an activator chemical spray. The color film then stretches over and adheres to the object as it’s slowly dipped through the floating film.
If you're interested in this process, read our guide about full color patterns to 3D prints with computational hydrographics.
The most used technologies in color printing are FDM, SLA, SLS/MJF, binder jetting, and material jetting. Let’s look at the pros and cons of each process.
FDM, or fused deposition modeling, is one of the most common and least expensive technologies in consumer 3D printing. FDM 3D printers build parts by melting and extruding thermoplastic filament, which a printer nozzle deposits layer by layer in the build area.
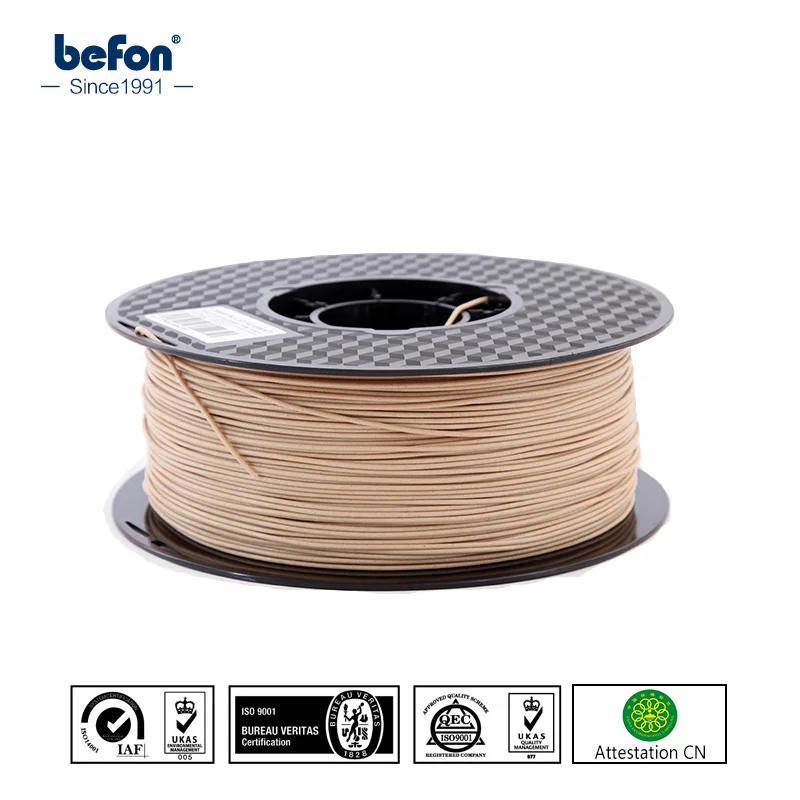
Filaments for FDM printing in various colors. (source: All3DP.com)
FDM is mostly used for direct color printing, with single extruder printers, or for color mixing 3D printing, with dual or multiple extruder printers.
FDM can now also be used for full color 3D printing with the da Vinci Color 3D printer. With a colorless filament that is dyed using CMYK inkjet cartridges right before being extruded, it produces colored parts in a similar way to a color 2D printer.
SLA, or stereolithography 3D printing, uses a laser to cure liquid resin into hardened plastic in a process called photopolymerization. SLA parts have the highest resolution and accuracy, the clearest details, and the smoothest surface finish of all plastic 3D printing technologies.
Colored SLA parts, 3D printed with Formlabs Color Kit and Standard Resins.
SLA offers the possibility for color matching almost any custom color using Formlabs Color Kit, the first integrated color-mixing solution for SLA 3D printing. Thanks to their smooth surface finish, SLA printed parts can also easily be post-processed, painted, and used for applying hydrographics.
White Paper
Looking for a 3D printer to realize your 3D models in high resolution? Download our white paper to learn how SLA printing works and why it's the most popular 3D printing process for creating models with incredible details.
Download the White Paper
Selective laser sintering is the most common additive manufacturing technology for industrial applications, trusted by engineers and manufacturers across different industries for its ability to produce strong, functional parts.
Dyed SLS 3D printed parts. (source: Hubs)
SLS 3D printers use white, grey, or black nylon powder as a raw material. While the parts cannot be directly printed in color, they can be dyed or painted in post-processing.
White Paper
Looking for a 3D printer to create strong, functional parts? Download our white paper to learn how SLS printing works and why it's a popular 3D printing process for functional prototyping and end-use production.
Download the White Paper
The binder jetting 3D printing technology is similar to SLS and MJF printing but uses a colored binding agent to bond powdered sandstone material instead of heat.
Parts produced with binder jetting have a porous surface and are very brittle, which means that this process is recommended only for static applications, such as creating full-color figurines and concept models.
Figurines printed with binder jetting. (source: Shapeways)
Material jetting 3D printers combine traditional inkjet printing with the use of photopolymer resins, by depositing droplets of the material on a build tray similar to 2D printers, which then gets hardened by UV light.
This process offers a myriad of color possibilities and can create photorealistic parts with vibrant colors. However, the parts have poor mechanical properties, are heat-sensitive, and the entry price for this technology is the highest of all color 3D printing options.
Color 3D printing with material jetting. (source: Hubs)
| FDM | SLA | SLS | Binder Jetting | Material Jetting | |
|---|---|---|---|---|---|
| Resolution | ★★☆☆☆ | ★★★★★ | ★★★★☆ | ★★★☆☆ | ★★★★★ |
| Accuracy | ★★★★☆ | ★★★★★ | ★★★★★ | ★★★☆☆ | ★★★★★ |
| Surface Finish | ★★☆☆☆ | ★★★★★ | ★★★★☆ | ★★★☆☆ | ★★★★★ |
| Ease of Use | ★★★★★ | ★★★★★ | ★★★★☆ | ★★★★☆ | ★★★★☆ |
| Complex Designs | ★★★☆☆ | ★★★★☆ | ★★★★★ | ★★★☆☆ | ★★★★☆ |
| Description | The print head melts and extrudes thermoplastic filament | A laser solidifies liquid resin | A laser or light source sinters nylon powder | A binding agent bonds sandstone powder | An inkjet-like print head cures droplets of resin |
| Materials | Thermoplastic filaments | Varieties of liquid resin | Varieties of polymer powder | Sandstone | Varieties of liquid resin |
| Color 3D printing options | Direct color, color mixing, or full color | Color matching | None | Full color | Full color |
| Post-processing with colors | Painting (requires a lot of post-processing) Hydrographic printing | Painting Hydrographic printing | Dyeing Painting Hydrographic printing | Painting Hydrographic printing | Painting Hydrographic printing |
| Applications | Basic modelmaking | Rapid prototyping, miniatures and models, medical models | Rapid prototyping, end-use parts | Miniatures and models | Rapid prototyping, miniatures and models, medical models |
| Price | Budget printers and 3D printer kits start at a few hundred dollars.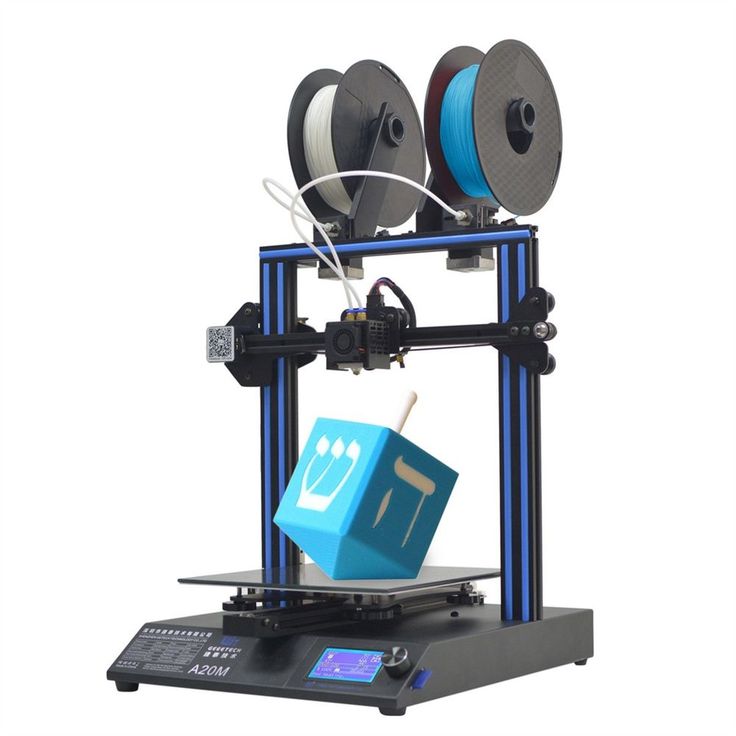 Higher quality mid-range desktop printers start around $2,000, and industrial systems are available from $15,000. Higher quality mid-range desktop printers start around $2,000, and industrial systems are available from $15,000. | Professional desktop printers start at $3,750, large-format benchtop printers at $11,000, and large-scale industrial machines are available from $80,000. | Professional benchtop printers start at $19,000. | Full color 3D printers start around $60,000. | Full color 3D printers start around $50,000 and large-scale machines are available from $100,000. |
Video Guide
Having trouble finding the best 3D printing technology for your needs? In this video guide, we compare FDM, SLA, and SLS technologies across popular buying considerations.
Watch the Videos
Color 3D printing empowers engineers and designers to save money and time with looks-like prototypes, movie makers to turn digital models into props, model makers to create vibrant miniatures, medical professionals to produce accurate anatomical models, and more.
Rapid prototyping helps companies turn ideas into realistic proofs of concept, advances these concepts to high-fidelity prototypes that look and work like final products, and guides products through a series of validation stages toward mass production.
The development team at birdkids used SLA 3D printing to create prototypes in color.
Concept models in color can demonstrate an idea to stakeholders, create discussion, and drive acceptance or rejection using low-risk concept explorations.
At later stages, realistic looks-like prototypes in color can give a better idea of what an end product will look like and how the end-user will interact with it. Ergonomics, user interfaces, and overall user experience can be validated with 3D printed looks-like prototypes before spending significant design and engineering time to fully build out product features.
Color matching 3D printing or full color 3D printing also allows product development teams to experiment with different color options and run studies with customers before moving into production.
In the entertainment industry, 3D printed props and models are blurring the line between physical models and digital effects. Artists create realistic, detailed models using 3D modeling software and then bring them to life in a matter of hours using 3D printing. High-resolution 3D printing processes, like SLA, can reproduce even the most complex parameters of a design, such as skin texture.
A behind-the-scenes look at visual effects (VFX) and design studio Aaron Sims Creative’s process to design of Stranger Things’ Demogorgon.
Props masters, such as Russell Bobbitt for Marvel movies and Jaco Snyman for the Raised by Wolves series, as well as visual effects (VFX) and design studio Aaron Sims Creative for Stranger Things, have adopted the technology, as it significantly saves time in prop making and fuels creativity in the design process. The creation becomes more flexible and fluid, and props and models can be created in an efficient manner.
Without a doubt, 3D printing has revolutionized the creation of custom miniatures and figurines, whether for model making, tabletop games, collectibles, or other hobbies.
As full-color 3D printers are often out of budget for hobbyists and model makers traditionally hand-paint models anyway, the most popular way to create colorful models is to paint them after 3D printing.
For example, artists at Modern Life Workshop combine 3D modeling design with SLA 3D printing to create hyper-realistic celebrity portraits. The artists use the digital freehand sculpting software ZBrush to create detailed models on the computer. Then, they 3D print the designs on an SLA 3D printer and paint the parts by hand.
The artists from Modern Life Workshop create hyper-realistic sculptures with ZBrush and 3D printing.
In gaming, online communities have sprung up around tabletop games like Dungeons & Dragons, for which gamers use 3D printers to create one-of-a-kind D&D 3D printed miniatures, figurines, terrains, landscapes, and other board game accessories.
Professional model-making companies, like DM-Toys, also use 3D printing to accelerate prototyping and production cycles of custom models.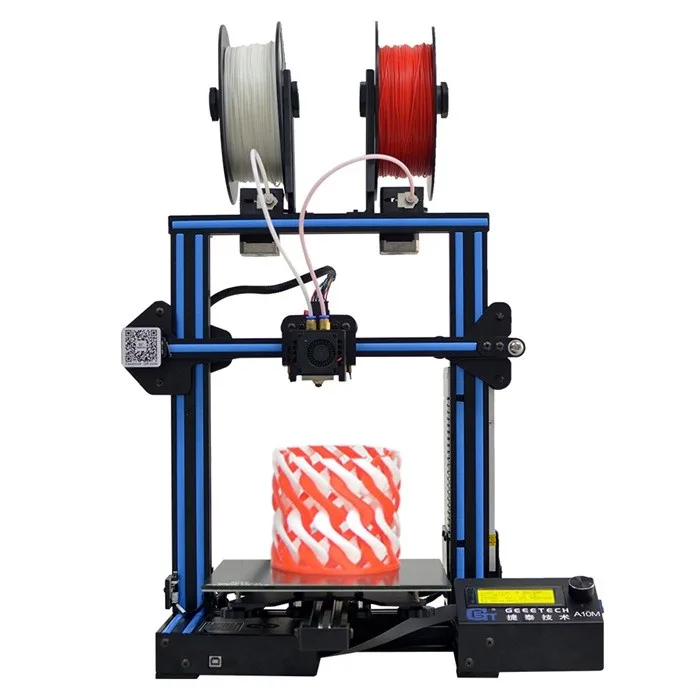
Global play and entertainment company Hasbro also uses the technology to create Hasbro Selfie Series figures—a groundbreaking endeavor to use 3D printing to manufacture personalized action figures at scale. For the first time, fans are now able to scan their face with a smart device and have a custom-made look-a-like action figure delivered to their door.
In healthcare, radiologists, surgeons, and biomedical professionals are increasingly turning to 3D printing to create accurate 3D models of anatomical features that can be used as reference tools for preoperative planning, intraoperative visualization, and education.
3D printing empowers medical professionals to create complex models with intricate details that would be impossible to produce with other technologies.
A fully colored pancreas model that was produced with SLA 3D printing and then painted with acrylic.
High-detailed color models are excellent in resident education programs, where each blood vessel or organ can be directly 3D printed or painted in different colors for easy classroom viewing.
Furthermore, patient-specific surgical models that are based on patient scan data are becoming increasingly useful tools in today’s practice of personalized, precision medicine.
Whether it is color matching to create 3D printed parts in almost any custom color, or printing high-resolution parts that can be painted to create hyper-realistic models, SLA 3D printing delivers incredible detail and seamless performance at an affordable price point.
Start 3D printing your own 3D printed parts on the Form 3 and bring your biggest ideas to life with the Form 3L.
See the Form 3See the Form 3L
Color 3D printing: some theory and practice
Technical
Subscribe to the author
Subscribe
Don't want
27
Briefly about RGB and CMYK color schemes. A little practice of mixing colors without a printer. We measure the color after mixing the plastics.
A bit of theory
Many are already familiar with the RGB scheme - it consists of three components, each of which is responsible for a certain part of the visible spectrum (red, green and blue). This scheme is more applicable to radiation sources in the visible spectrum. Depending on the spectrum and its level of radiation, we perceive the total radiation in the form of some kind of color. For example, if the spectrum of all three ranges is present in the radiation, then we see white. If the spectrum contains only red and green, we perceive it as yellow. Everything is simple here.
Now CMYK (the picture is taken from the same site) - many people are also familiar with this scheme. Only this scheme is no longer applicable to radiation sources, but to objects that reflect or absorb a certain part of the visible spectrum. These objects are all that we see around us in the presence of lighting. And, as we see it, it depends on the lighting. What is the fundamental difference? Yes, the difference is just in the difference ... Components C yan, M agenta, Y ellow, K ey color (Blac K ) actually describe the color that is obtained when a certain part of the radiation spectrum is completely absorbed. Cyan is a color that has no red component in its spectrum, i.e. There is only blue and green part of the spectrum. Magenta - the green part of the spectrum is missing. Yellow - the blue part of the spectrum is missing. The surface from which light is reflected absorbs part of the radiation, which goes into heating the surface of the object (most of it). Therefore, a black object (absorbs all radiation) heats up more than a white object (reflects all radiation) under the same illumination.
Colored plastic contains dyes that are responsible for the absorption of one or another part of the radiation spectrum. If you mix two plastics of different colors, you get a third color. If you mix plastics with dyes that absorb red, green and blue radiation, you get black (ideally).
A bit of practice
For mixing, you need plastic of different colors, cut into pieces of the same length, for a more convenient conversion of the percentage of a particular color. You also need a manual “mixer” - a soldering iron with a clean tip and temperature control is suitable here. Well, in order to “measure” the color, you need a spectrophotometer, which will show what part of the white spectrum is reflected from the surface. I have an X-Rite ColorMunki Photo and use it.
I must say right away that for proper mixing you need the “correct” CMYK plastics, and I don’t have them, so I took them from the BestFilament PLA 3D pen kit.
To begin with, I chose colors close to CMYK and checked their color. It was necessary to check all the colors, but I did not see the point in checking the color that I did not need.
The result can be seen on the pictures:
Here I checked the mixing of white and black - the result is expected. The result is an almost even (R, G, B almost the same) gray color.
Yellow - in theory there should be only R (203) and G (179) components, but we see the presence of a blue (47) component.
It was supposed to be magenta, but in practice we observe the presence of a green (93) component.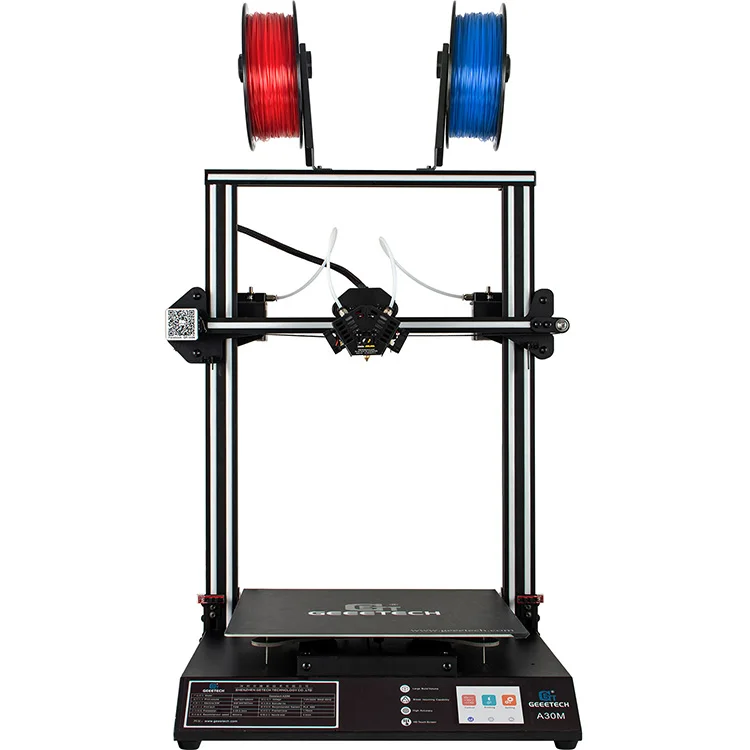
I thought that cyan is blue, but after reading a little and understanding it, I realized that it should be blue-green. Taking the blue plastic, you can see a good absorption of the red component. It's almost blue-green, only twice as much blue as green.
Now I'm trying to mix different not true CMYK…
It's almost done - I got green color, mixing yellow and not cyan, but blue.
Here I added all the colors and a little black - I got almost gray. Too much blue.
I added less blue - I got almost pure gray.
I mixed blue and pink and got some kind of blue.
Conclusions
- Mixing turns out - you have to try (measure the color) different plastics and look for real CMYK.
- Plastic makers will need to tinker a bit to get pure CMYK.
- If you learn how to mix plastics in the printer, you will need only CMYK and white in order to get a model of any color.
 Here, in fact, not every color can be obtained. Yes, and all sorts of transparent and luminous plastics will be mixed in different ways.
 - Color printing requires color calibration, ie. you will need to create color profiles for each combination of CMYK plastics. At least for different manufacturers of plastics.
Follow the author
Follow
Don't want
27
More interesting articles
12
Subscribe to the author
Subscribe
Don't want
Foreword
Second version of the manual. I ask the admins to delete the first one, or replace it with ...
Read more
Dmaw
Loading
10/25/2022
751
7
Subscribe to the author
Subscribe
Don't want
This problem has been known for a long time, but I didn't know about it. I'll tell you my story, how I helped a friend burn...
Read more
255
Subscribe to the author
Subscribe
Don't want
Snot. Who hasn't encountered them?
How many times this question has been raised. How many topics...
Read more
Color 3D printing with photopolymer. SLA Color Printing Capabilities
Is it possible to 3D print color with Formlabs resin?
“Is color 3D printing possible with photopolymer? Can I add pigments to Formlabs resins?” This question, sooner or later, arises in front of many users of Formlabs 3D printers. 3D printing service providers, designers, medical professionals and enthusiasts who print decorative items at home. Many are faced with the uniform color offering of standard and application resins from the Formlabs portfolio. Users, however, may need to have certain color polymers available.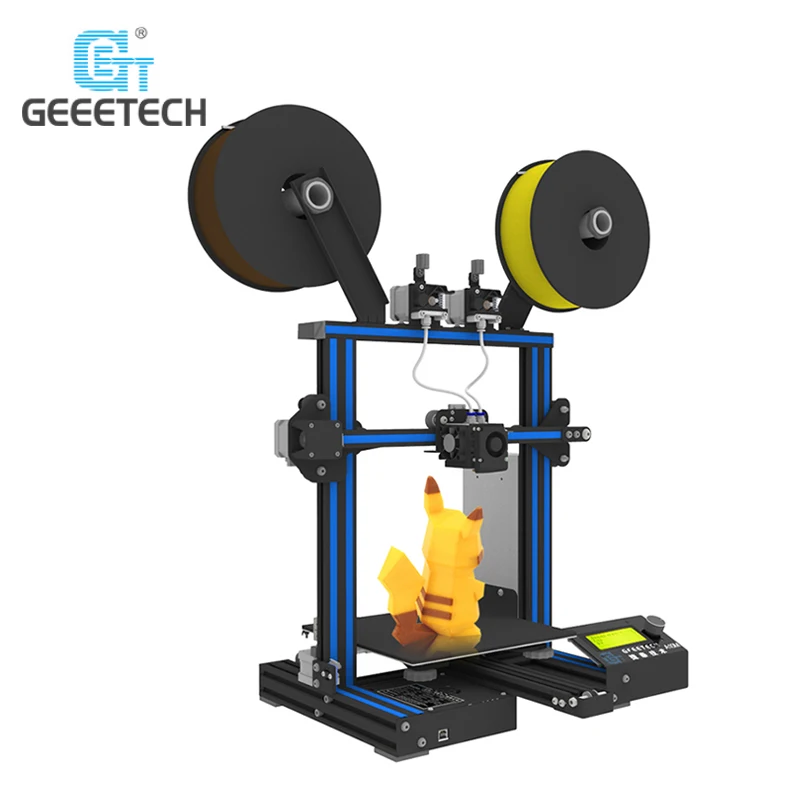 These may be decorative applications or the need to print a part in a different color.
On the one hand, the answer to this need already exists in the Formlabs Color Kit. It consists of a Color Base cartridge and a set of liquid pigments: white (White), black (Black), magenta (Magenta), blue (Cyan) and yellow (Yellow). It is convenient to measure these pigments with a graduated syringe and mix them into standard shades according to the color chart.
So it enhances the user experience. After all, now it is possible to print your prototypes, layouts, design and decorative items in the selected color.
SLA color 3D printing capabilities with flexible, rigid, biocompatible resins
On the other hand, Color Base is a standard resin that does not differ in any special application characteristics, such as flexibility, rigidity, extensibility, abrasion resistance, biocompatibility And so on.
What about the possibilities of 3D color printing with flexible or rigid resins?
The American company Formlabs, constantly updating the portfolio of photopolymers in its range, focuses on their high quality and focuses on their application properties.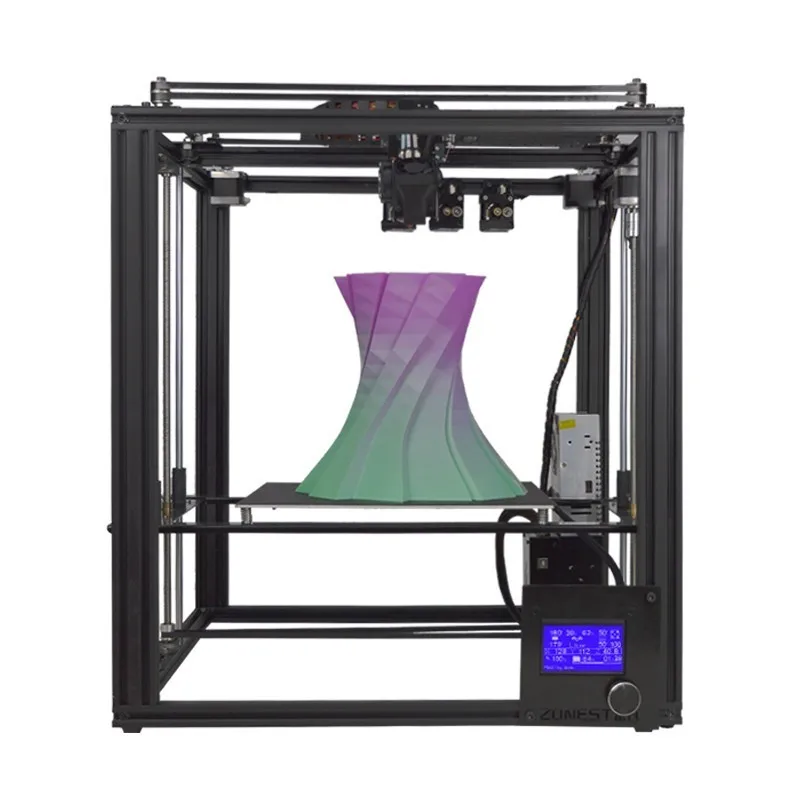 So, in 2020 they released a line of flexible and rigid engineering resins, jewelry resin, a range of dental and biocompatible medical polymers. Each resin is rigorously tested according to methods and standards recognized throughout the world. Its technical properties are measured instrumentally and published by the manufacturer.
What happens if liquid pigment is added to a flexible photopolymer such as Flexible 80A resin? We don't have a definitive answer to this question yet, but Formlabs has already announced this capability for dental applications. Thus, the Soft Tissue Starter Pack, consisting of Flexible 80A Resin and three pigments (white, yellow and magenta), was proposed by the company to test implant prosthetics. They proposed to print on a 3D printer fragments of anatomical models of the patient's soft tissues (gums) from the colored Flexible 80A polymer. By adding them to the prosthetic model, dentists can better plan and predict the outcome of prosthetics.
With a reasonable degree of certainty, it can be said that the addition of a pigment changes the mechanical properties of the polymer itself. But it is not displayed on the properties of the final model. However, this statement only applies to gingival models and the pigment has not been tested for other applications.
For medical applications where the visuals are more important than the physical properties of the finished print, Formlabs offers 4 staining methods:
1. Printing using dyed resin.
In this method, the manufacturer suggests adding 10 ml of alcohol ink of the selected color to 1 liter of Clear Resin. The alcohol-based ink is completely soluble in Clear Resin, making it an ideal coloring agent to ensure color consistency throughout the print.
Applications : printing of specific fragments for assembly from composite models, printing of individual organs, printing of individual vessels.
Pros : easy setup, uniformly colored parts, no additional post-processing.
Cons of : Need to use a whole liter of resin with paint, use dyed resin in Form Wash, one color per print.
Also, the manufacturer makes a note: adding any new substance to your resin can increase the chance of print failures and will void the printer's warranty if a problem occurs as a result of using that material.
In addition, Formlabs does not recommend using Elastic Resin or Flexible Resin in this way due to the difficulty of printing with these materials in general. If you want to dye stretchy or flexible materials, use the following instructions.
2. Color 3D printing with photopolymer. Post-print SLA detailing
If you don't want to dye the entire cartridge with pigment, you have the option of post-printing dye. You can dip areas of interest in different dye solutions to create multi-colored details. For this, the manufacturer suggests using resins such as Flexible 80A or Elastic 50A. Further, the resin manufacturer offers staining intensity options using 10 ml or 20 ml (for light and dark parts) alcohol ink per 1 liter of isopropyl alcohol (IPA) solution.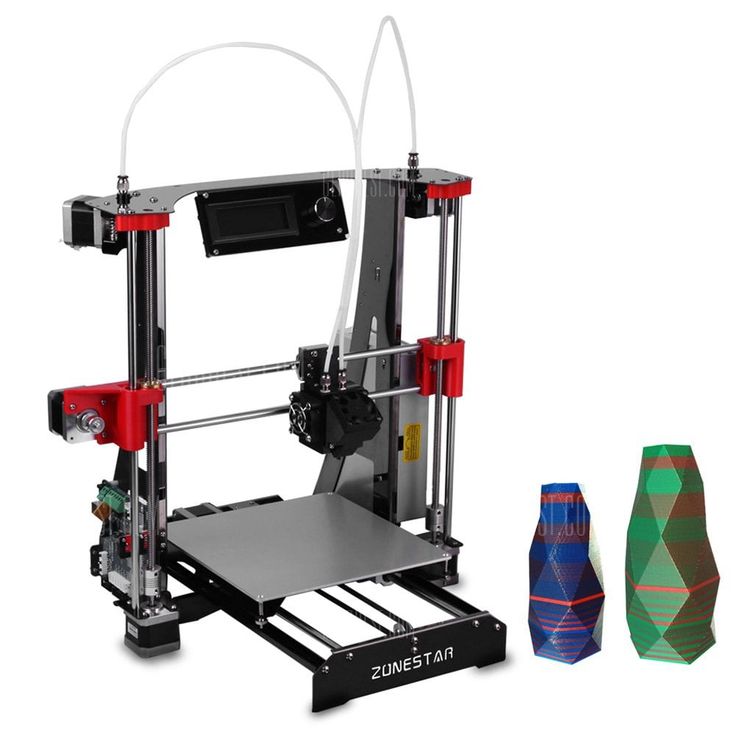 After washing the printed parts in IPA in the Formlabs Form Wash, soak your prints in the ink solution you prepared for 10 minutes. (Test times of 20 and 30 minutes resulted in no discoloration of painted parts.) Remove parts from solution and allow to dry before curing in Formlabs Form Cure. Part curing does not result in loss of color. It is recommended that you do not completely remove the supports so that your part maintains its structural integrity and does not deform during the curing process.
Areas of use : staining of certain fragments that need to be assembled using composite models, staining of individual organs, vessels.
Pros of : can paint a large number of parts at once, does not use dye in the Form Wash, does not stain a whole cartridge of resin.
Cons : somewhat messy procedure.
3. SLA acrylic detail painting
For complex models with intricate details, a little color can only be added by painting.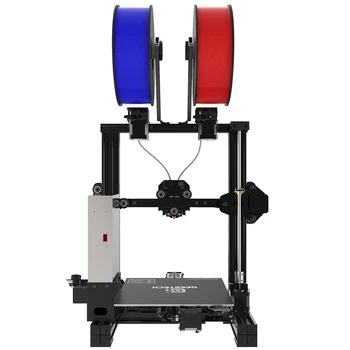 This process can take a long time, and the result depends on your drawing ability. But it offers the user a more artistic result. These highly detailed, hand-painted models are great for teaching medical students, for example. Each blood vessel or organ can be colored in a different color for easy viewing in the classroom.
The manufacturer recommends using , multi-component acrylic paints that adhere to non-porous materials such as Formlabs resins.
Applications: Complex medical models. Models with multiple parts. Models in which we are interested in a certain area of the outer surface
Pros: the ability to apply any color to certain regions.
Cons: to some extent depends on artistic ability, only works for models with external elements.
4. Coloring hollow parts
If it is necessary to highlight the internal areas of interest in the model, it is possible to use the following method. Vessel aneurysms, protrusions, tumors or other areas of interest can be filled with paint of various colors. This will help visualize the interior areas of interest easily.
The process involves creating a 3D model of the patient's anatomy based on computed tomography images. This model provides a hole into which the pigment will be poured during post-processing. This is followed by a printout of the model and the introduction of the selected paint color into the hollow spaces. The result is a realistic finish similar to real blood vessels or valves inside organs. Follow normal printing and post-processing procedures. Make sure any empty cavities are completely free of resin and IPA.
After washing and drying the printed part, pour acrylic paint into the hole created in the model using a syringe. Shake it for better coloring of surfaces. For small details, it may be necessary to thin the paint a little with water.
Applications: visualization of the internal surfaces of vessels, tumors or areas of interest.