Uprint se 3d printer
uPrint SE 3D Printer Review 2022
4.2
See Price
A compact printer with all the precision and quality of printers three times its size? Here’s our take on the uPrint SE 3D printer.
| Printing Area | 203 mm x 152 mm x 152 mm |
| Layer Resolution | 254 Microns |
| Supported Filament | ABS (ABSplus) and dissolvable support materials |
| Extruders | 2 |
| Software | CatalystEX |
Table of ContentsShow
Design & Features
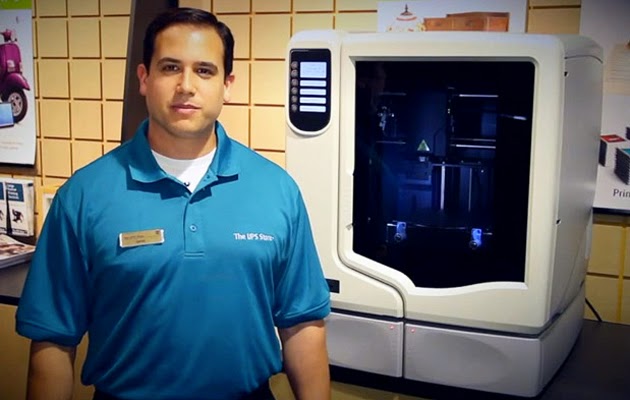
With the uPrint SE, Stratasys has taken all its industrial-scale printing know-how, then miniaturized it into a form factor fit for the desktop or home office. We have here a relatively diminutive device that is more akin to a coffee maker or large microwave than the fridge-sized units usually shipped from the company’s depots. The footprint measures in at only 635 mm x 660 mm x 787 mm weighing in at a comparatively light 76 kg.
Aesthetically, it borrows heavily from the Stratasys tradition with a thick off-white and gray acrylic outer shell supported by a CNC-milled steel frame on the inside. Stratasys isn’t known for making particularly visually enticing products, and as such, the uPrint SE follows suit with a functional, unembellished look.
The build chamber is fully enclosed (with an internal light activated during printing) and accessed via a hinged, heavyset door fitted with a see-through plexiglass window — the door locks during printing for additional security. Two retractable materials bays sit below the chamber and are used to store both filament and support material. Stratasys also sells additional material bays to expand and effectively double the material capacity of the printer. These sit on top of the existing row when installed.
Internally, the uPrint SE is based on Stratasys’ long-standing FDM technology powered by belted servo stepper motors running on all three axes along lead screws and guide rods. The build platform, or platen as Stratasys has coined it, support one-time use modeling bases or beds and provides a build volume of 203 mm x 152 mm x 152 mm for the standard uPrint SE or 203 mm x 203 mm x 152 mm for the larger, but internally identical uPrint SE Plus model.
Every new print needs a new modeling base. If not replaced, the printer is prone to calibration errors, and extrusion issues reflected in sub-par quality finished prints. Costs invariably stack up, but given that the uPrint SE is designed as a compact solution for professional R&D and manufacturing setups, the expenses remain comparatively marginal.
Two direct drive extruders sit inside the uPrint SE; one tasked with extruding filament, and the other exclusively used to deposit support materials. Layer thickness is locked in at 254 microns for a happy middle ground between precision prints and rougher sketch modeling. Minimum wall thickness is 914 microns. An extruder tip wiping assembly also sits alongside the extruders and is designed to remove filament build up on the tips/tip shields and deposit debris in a removable purge bucket.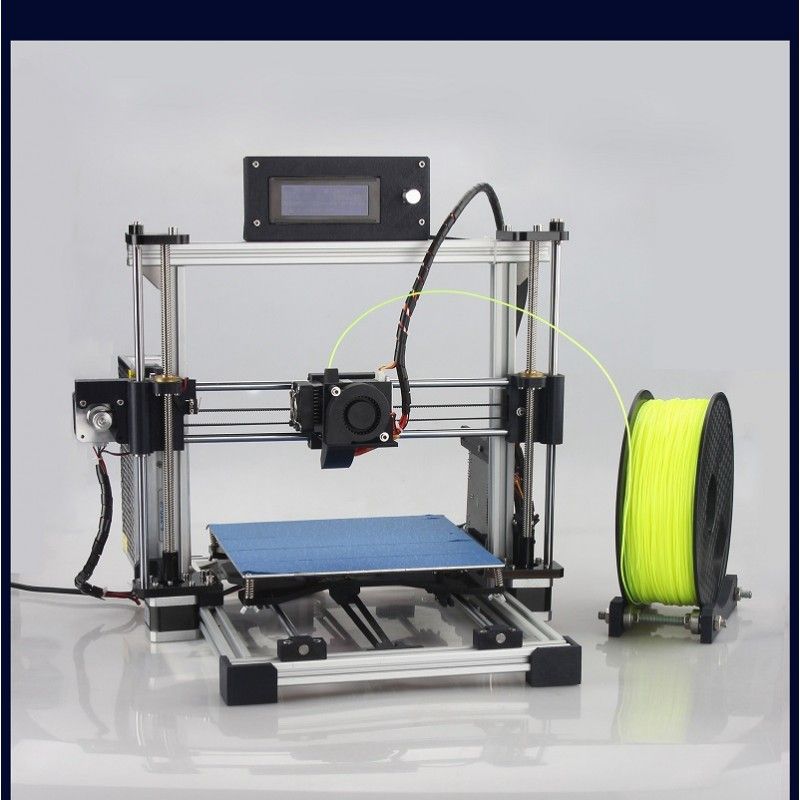
The uPrint SE is solely geared towards ABS thermoplastic and specifically Stratasys’ proprietary ABSplus material. ABSplus is available in ivory, white, blue, fluorescent yellow, black, red, nectarine, olive green, and gray.
ABSplus is marketed as being admirably stronger than classic ABS with a higher tensile strength, more heat resistance, and better impact toughness. The material ships in bespoke plastic cartridges that sit in the material bay below the uPrint SE. The same applies to the support material that is exclusively available from Stratasys. Third-party ABS is not supported.
A standalone WaveWash Support Cleaning System is available alongside the uPrint SE. As the name suggests, it is used to remove support structures from finished models by bathing them in a solution made up of part water, part EcoWorks Cleaning Agent.
The front top left of the printer features a backlit multi-line LCD, four single line displays, and a keypad to navigate a variety of menus that manage material loading/unloading, material levels, print triggering, printing status, setup, and maintenance options.
In what is a pretty standard move for a Stratasys product, connectivity is limited to Ethernet, which should suit most professional setups with multiple PCs being able to access the printer through a local network.
The uPrint SE uses CatalystEX software to convert CAD files in STL former into a sliced model readable by the printer. The software is fairly basic but is both reliable and easy to use with an almost point and click simplicity bolstered by scale, resize, orientation, position, infill, support, and rotation options. CatalystEX is compatible with Windows only.
Packaging & Assembly
The uPrint SE is a fully assembled device, and installation is limited to fitting a modeling base via a set of clips onto the platform and loading the ABSplus/support material into the cartridge bays. The bays do most of the heavy lifting by grabbing onto the filament end and feeding it to the extruder and as such no time is wasted toiling away forcing the filament through the tubing as is too often the case with 3D printers.
The printer comes well packaged in a range of protective materials. The package includes the uPrint SE alongside an ethernet cable, crossover cable, a tip replacement kit (support tip, model tip, eight tip shields, and four tip wipe assemblies), WaveWash Support Cleaning System, ABSplus spool, CatalystEX installation CD, 1/8 inch T-Handle wrench, 7/64 inch T-Handle wrench, system software installation CD, user guide CD, support material spool, needle nose pliers, 10 magnifier loupes, cutters, wire brush, gloves, and power cord.
Printing
The uPrint SE is capable of rendering all manner of elaborate, geometrically challenging models time and time again. We tested over 30 prints to see how far this model could go and we only faced one single clogging issue, which the system picked up automatically and provided instructions on how to proceed. We didn’t even have to start the printing process from scratch as the uPrint SE simply paused the print and picked up where it left off.
The results were smooth, intricate prints with next to no blemishes or issues. The support system works incredibly well allowing for some seriously complex overhangs, and the cleaning bin system did a great job of producing near-perfect post-production prints.
The focus purely on ABS is limiting, but given how well the uPrint SE handles the material, we can forgive this specialization. The chamber environment is ideally suited for ABS, and we encountered no warping issues nor problems with sustaining adequate temperatures.
Support
The uPrint SE has a one year warranty alongside Stratasys’ renowned customer service. Stratasys also offers a free comprehensive recycling scheme for both spent cartridges and excess ABS filament.
Verdict
With the uPrint SE, Stratasys have succeeded in morphing their large scale industrial grade printers into a much more manageable size. It’s compact, reliable, and just as performance oriented as other models from the company.
The precision of the prints means it is ideally suited to proof of concept models, functional testing, prototyping, product mockups, and marketing tool production along with more classic design functions.
The price tag does mean it is only reserved for commercial use, but within that very space remains accessible. The ongoing cost of sourcing ABSplus and modeling bases direct from Stratasys needs to be taken into account.
uPrint SE Plus Desktop 3D Printer
THE STRATASYS
Affordable & Accessible FDM Technology
Get started with professional 3D Printing right from your desk with the uPrint SE Plus. This desktop 3D printer from Stratasys allows you to print engineering grade 3D models in ABSplus thermoplastic quickly and easily. Powered by GrabCAD Print software, the uPrint SE Plus boasts a smooth and connected workflow.
View Video Brochure Request Demo
- Overview
- Features
- Advantages
- Materials
- Specifications
- Request a Quote
Realistic Models and Functional Prototypes Right from Your Desktop
Professional 3D printing, right from your desk with the uPrint SE Plus. Print professional grade 3D models in ABSplus thermoplastic quickly and easily. Using FDM technology, the uPrint brings you closer to tangible 3D ideas, at a great price.
Explore the uPrint 3D Printer by watching the video
Nine Colour Options
From ergonomics to manufacturing processes, evaluate form, fit and function with nine different ABSplus colour materials.
Easy-to-Use
The uPrint SE & SE Plus makes 3D printing affordable and trouble-free. Installation and operation is simple and fits right into your daily workflow.
Large Build Size
Fitting comfortably right on your desk, the uPrint carries a large build tray. Print with 8 x 6 x 6 inches on the SE and 8 x 8 x 6 inches on the SE Plus.
Not sure which 3D Printer is right for you?Give us a call and speak to an expert.
Contact Us
3D Printing Has Never Been Easier
The uPrint SE Plus 3D Printer is an office friendly 3D printing system, which compactly fits on your desktop. It is easy to use with new networking features that allow for better collaboration within small teams. Optional dual material bays means you can have uninterupted print time, and maximize productivity without being in the office.
An All-In-One 3D Printing Solution
With the uPrint SE 3D Printer package you receive all the tools needed to produce professional 3D printed models. With easy model material removal, and material cartridge changes, the uPrint is the perfect solution for busy office environmentsThe uPrint SE 3D Printer Bundle includes:
- uPrint SE 3D Printer
- CatalystEX 3D Printing Management Software
- WaveWash Support Cleaning System
- 3D Printing Start-up Package (Ivory build material, support material, EcoWorks Cleaning Agent, modeling bases and more)
Easy Support Removal
The WaveWash 55 support removal station allows you to quickly and effectively dissolve support material from models with intricate parts and moving assemblies without tedious cleaning or the rough surface finish from breakaway supports. This water-based solution is hands free and unattended, automatically creating the right temperature and agitation to dissolve support structures.
ABSplus
With the uPrint SE Plus, create parts from production-grade thermoplastics with nine different colours of ABSplus.
LEARN MORE
uPrint Print Bundle
With materials, bases and the WaveWash system, printing becomes easier than ever. The uPrint bundle allows for uninterrupted printing and easy to remove soluble support with the WaveWash system. Get everything you need to get started in one convenient bundle.
Request a Quote
GrabCAD Print
GrabCAD Print simplifies the traditional 3D print preparation workflow and provides intelligence around 3D printer usage so your team can get quality prints, faster.
Learn More
Model Material | Model MaterialuPrint SE: ABSplus in IvoryuPrint SE Plus: ABSplus in Ivory, White, Red, Blue, Black, Gray, Nectarine, Fluorescent Yellow & Olive Green |
Build Size | Build SizeuPrint SE: 203 x 152 x 152mm (8 x 6 x 6in)uPrint SE Plus: 203 x 203 x 152mm) (8 x 8 x 6in) |
Layer Thickness | Layer ThicknessuPrint SE: 0.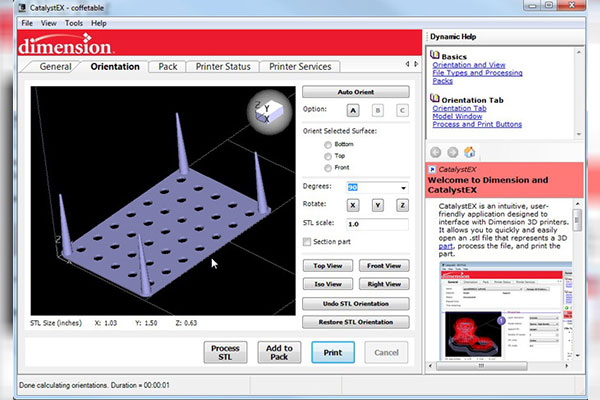 254mm (0.010in) 254mm (0.010in)uPrint SE Plus: 0.254mm (0.010in) or 0.330mm (0.013in) |
Workstation Compatibility | Workstation CompatibilityWindows XP / Vista / 7 |
Network Connectivity | Network ConnectivityEthernet TCP/ IP 10/100 base T |
Size & Weight | Size & WeightOne Material Bay: 635(w) x 660(d) x 787(h) mm (25 x 26 x 31 in) 76 kg (168 lbs)Two Material Bays: 635(w) x 660(d) x 940(h) mm (25 x 26 x 37 in) 94 kg (206 lbs) |
Power Requirements | Power Requirements100-127 VAC 50/60 Hz, minimum 15A dedicated circuit, or220-240 VAC 50/60 Hz, minimum 7A dedicated circuit |
Regulatory Compliance | Regulatory ComplianceCE / ETL / RoHS / WEEE |
Special Facility Requirements | Special Facility RequirementsNone |
Anycubic Photon Mono X and Mono SE
Reviews
Subscribe to
Subscribe
I do not want
5
3D printers Anycubic Photon Mono X and Anycubic Photo-Mono-Mona-Mona-Mona-Mona-Mona-Monama already 3DSN with free shipping and at the best price from Russian sellers (with warranty service in local service centers).
New 3D Printer Reviews by Anycubic has been written quite a bit lately, but most of them are translations of technical information published by the manufacturer. However, the manufacturer did not answer some questions either in the presentations or in his instructions. For example, not every user clearly understands how to make friends with the Anycubic Photon Mono X and Mono SE printers with the declared function of working from an application on the phone via a WiFi network. We faced requests to explain how to manage these models through the interface declared by the manufacturer. What IP address to enter? How to ask it? Explain:
The printers come with a USB flash drive, and this USB flash drive contains files. Some users are confused by incomprehensible overseas letters and the files so necessary for setting up simply fly into the trash. This is how the flash drive of the Anycubic Photon Mono X 3D printer looks like:
Find the WIFI text file on it and open it in notepad.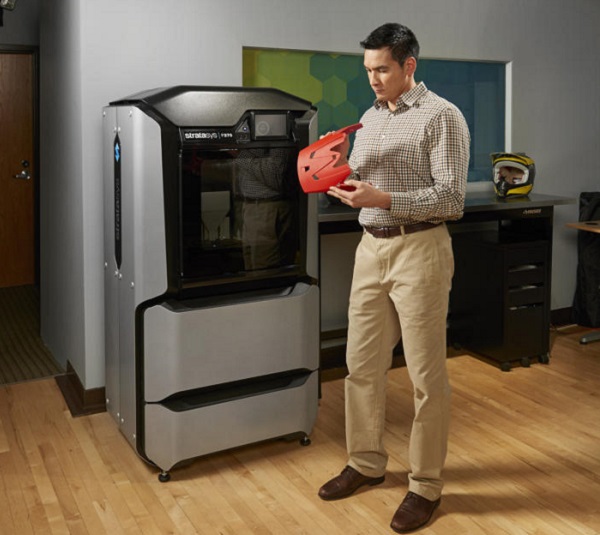 The file contains three lines. In the first line, between a colon and a comma, enter the name of your local network, in the second line, the password from your WiFi network. We do not touch the third line. If your network does not have a password, enter the word NONE in the password field.
We save the file, safely remove the USB flash drive from the computer and insert it into the printer. Given that the printer, unlike a computer, does not have a safe removal, we recommend inserting and removing the USB flash drive when the device is turned off. We inserted a USB flash drive, turned on the printer, go to the info menu and see this picture.
The printer tells us Check failed! Which on our paper clip means that the check failed. We do not panic, it should be so, because we have not yet configured the printer, have not connected it to the local network. To do this, go to the menu in which we see the file for printing and our text WiFi.txt
Click on it and start printing! Naturally, there will be no printing of a 3D object, but the printer will receive information about our WiFi network. After that, we go back to the info menu:
Patiently wait a few tens of seconds (usually 30-120 seconds is enough), and we see something like this:
Your network will assign an IP address to the printer, different from the address in the screenshot . It will need to be remembered, we will need it when we download the application to the phone and we will configure it.
Let's go to the application settings and fill in the data for our printer in the pop-up window. We choose Mono SE or Mono X, give a name to our printer and enter the IP address to which we configured it earlier.
However, we do not succeed right away, since the application developers for some reason left a comma in the keyboard, and we need a dot to enter the IP address. If we enter with a comma, of course, the application will swear at us and will not save our settings.
The way out of this situation is not difficult, go to the notepad application or any text editor on your phone, write the IP address with dots there, copy and paste it into the Anycubic application.
Press Confirm and that's it, our phone can send files for printing to a 3D printer!
Happy 3D printing!
Traditionally, we remind you that in our online store you can always buy 3D printers of the most popular brands:
- 3D printer Elegoo Mars - the most budget 2K photopolymer 3D printer
- DLP/LCD photopolymer 3D printer - ZOBU 3D ARTEL - one of the budget photopolymer printers
- Wanhao Duplicator 6 Plus MARK II with a frame - with an extruder that allows printing up to 300C
- Anycubic Photon S 3D printer is the choice of dentists and jewelers. Now also in black!
- Anycubic Photon 3D printer - the first model, hot seller Anycubic
- Wanhao Duplicator 8 3D printer - large table resin printer, size matters!
- Anycubic 4Max Pro (FORMAX) - secure printing on all types of plastic PLA, ABS, HIPS, TPU, Wood
- Artillery Sidewinder X1 - 3D printer with a large printable area, printing out of the box
- Anycubic photopolymer resins
Even more interesting articles
four
Subscribe to the author
Subscribe
Don't want
Good day.
Immediately to all readers who wish to ask the question: "What about...
Read more
3Dtool
Loading
07.10.2022
1061
one
Subscribe to the author
Subscribe
Don't want
Hello everyone, Friends! 3DTool is with you!
The need for high volume 3D printers...
Read more
nk.xcfg
Loading
05/10/2016
38206
117
Follow author
Follow
Don't want
“A good tester won't even launch the app.” (heard at work) Based on real. ..
..
Read more
3D wax printing on an FDM 3D printer. Recommendations and settings on the example of a 3D printer PICASO Designer X.
- 1. First, a little history of
- 2. What is Filamentarno Wax Base?
- 3. Which printer is suitable for printing?
- 4. How good is Picaso Designer X for Wax Base printing?
- 5. Preparing Picaso Designer X before printing Wax Base
- 6. Printing process
- 7. Result and output
Hello friends, 3DTool is with you!
Investment casting is a fairly popular method of manufacturing metal products. Most of the jewelry is produced in this way, this method is used to create parts of mechanisms, cases and other elements and assemblies that require increased strength. The starting point in the casting process is the original model or ready-made matrix, from which a copy is made from wax or other easily melted material to create shell molds into which the metal is already poured. But what if we bypass the initial model creation phase and make an immediately meltable wax model? This is where 3D printing and new material from 9 come to the rescue.0013 Filamentarno - Wax Base .
1. A little history first
The idea of printing wax on a 3D printer is far from new, initially, the technology appeared in the camp of photopolymer 3D printers, was used, and is still used today, for example, by such giants as 3D Systems and Solidscape . Entire lines of devices have been honed to produce high-precision lost wax printouts with a perfect surface. However, such printers had and still have one tangible minus - what if the desired object is much larger than the size of the working area of the device, and the quality of the surface, in general, does not matter much within reasonable limits? The first thing that comes to mind is to find a device with a larger working area, however, among photopolymer printers, there are negligible models that meet this requirement and, basically, they are sharpened precisely for high quality and miniaturization. Or too expensive to maintain. What to do? But what if you use FDM for these purposes?
Photo from open sources, site sapr.ru
The first experiments with FDM 3D-printed/lost-waxed models used PLA and PMMA, the relatively low ash content of which, in theory, promised to achieve good casting quality, and some enthusiasts actually achieved quite good results. Instead of smelting, however, the technique of burning the material was used. However, widespread practice has shown too high a dependence of the result on the quality of the material, the presence or absence of a dye, the correct temperature regime and a strong limitation on the equipment and materials forming the shell form, not all of which withstand subsequent annealing and do not burst. Moreover, the crust-forming compound is able to transfer even the smallest defects and artifacts on the surface and any spills, cavities and flaws immediately appear on the final result. And avoiding the formation of unwanted gases when burning PLA is very difficult.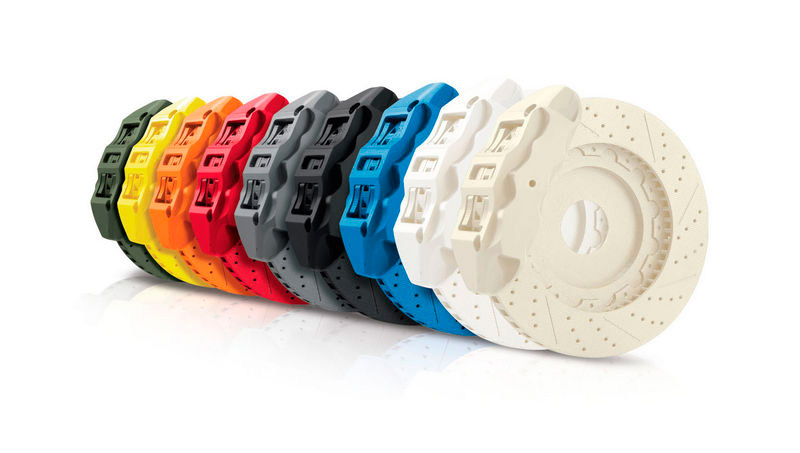
Photo from open sources, site sapr.ru
And if large-format casting in industrial, factory conditions allows the use of PLA and PMMA, due to the complication of production technology (there is a wide practice of using such giants of the world of FDM printers as BigRep for these purposes), then medium-sized workshops and small studios equipped with conventional boilerclaves require more flexible approach. And it is in this case that the Wax Base is perfect for them.
2. What is Filamentarno Wax Base?
Filamentarno WAX Base is a filament for 3D printing using FDM technology for subsequent investment casting from metals, the bulk of which is real jewelry wax. Of course, the composition contains other impurities to stabilize the rod and meet its characteristics in accordance with the requirements of fdm 3d printing, however, the final result is fully compatible with any melting techniques of conventional wax compositions and is easily glued to them, for example, to form sprues.
The company F ilamentarno took a long time to produce this material, the idea appeared a relatively long time ago, but the results were achieved only in the last couple of years, nevertheless, the sensation was such that the company even had to open a small 3D printing studio in order to gain experience applications and respond to the market demand since there were no analogues to this material before.
The material turned out to be promising, among its advantages there is a sharp increase in the maximum possible size of wax waxes, and printing speed, as well as the ability to greatly reduce costs, because the cost of melted wax in the form of a thread turned out to be much more profitable than photopolymer, not to mention the price of photopolymer 3D printers.
This material also has certain features that can hardly be called obvious disadvantages, but they impose strict requirements on the device on which it is planned to print. More about them below.
3. Which printer is suitable for printing?
Due to the physical characteristics of the raw material, Filamentarno Wax Base is printed at significantly lower temperatures than other materials. Softening occurs already at ~ 45 degrees, and melting, from ~ 95 degrees Celsius. Because of this, it can be easily smoothed out in post-processing using hot air guns, torches or soldering stations. The recommended print range is from 110 to 130 degrees, while most standard 3D printers do not allow the extruder temperature to drop below 190, less often 170 degrees Celsius, which is excessive in the case of Wax base .
Owners of simpler and cheaper models of 3D printers, as a rule, have the opportunity to correct the corresponding parameters in the printer's hardware firmware, or lower the temperature using special control commands. Meanwhile, expensive brands usually do not provide such opportunities and completely close both the firmware and the “console” commands from users from changes.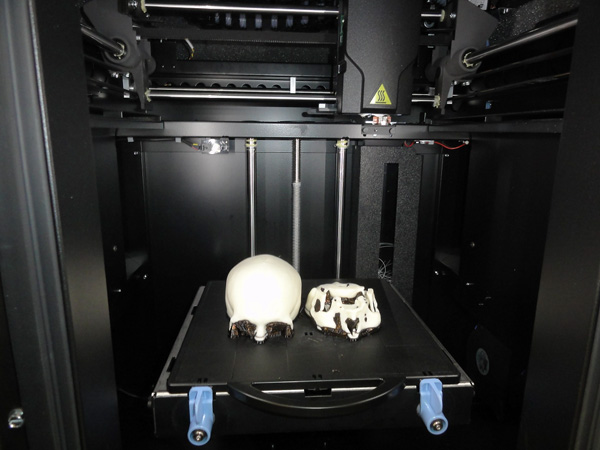 Here is what the manufacturer writes on its website in the description of the material in this case:
“Most often printing on a 3D printer with a nozzle temperature below 170°C is prohibited by the printer firmware. To bypass this limitation, use the G-Code command: "M302 S80" - it can be inserted into the starting G-Code in the slicer settings. This command will lower the print temperature limit to 80°C."
Also, since the material is quite easily torn, soft and melts easily even at low Cold End heating temperatures, you will need to use a direct extruder drive (Direct) for printing, a remote (Bowden) broaching mechanism will not cope with the task and, at best, will “jam » material.
Nevertheless, at least one manufacturing company that took care of printing with low-temperature materials “out of the box” and has printing units equipped with direct drive, we can definitely name. Of course, we are talking about the manufacturer of 3D printers Picaso3D and line of 3D printers Designer Series X .
Let's take a look at the benefits of the Series X line for wax printing using the Picaso 3D Designer X as an example .
4. How good is Picaso Designer X for Wax Base printing?
In addition to being able to set extremely low extruder temperatures for FDM 3D printing in material profiles, the Series X platform has a number of additional features that make working with the Wax Base easier.
First of all, it is the adjustable temperature of the cold zone (thermal barrier) of the printing unit. It has another temperature sensor that allows you to monitor and adjust peak performance by increasing and decreasing the cooling cooler speed.
This feature prevents the formation of plugs in the extruder tube above the melt zone. The special structure of the receiving "neck" in the pulling mechanism also plays into the hands, which eliminates the bending of the material during filling and printing.
In addition, the system of active “purging” of the working area, thanks to several turbine fans, allows you to quickly cool the material during printing, which also has a positive effect on the quality of the surface when printing roundings and overhanging elements.
And sensors for the presence of filament and control of the upper layer will help prevent damage to many hours of printing in the event of a break or end of the thread.
5. Preparing Picaso Designer X before printing Wax Base
To confidently print Wax Base on your device, you need to stock up on a clean, preferably new, extruder block with a new or carefully cleaned copper nozzle with a diameter of at least 0.4mm. In our case, the most suitable in the Picaso Designer X line is the 0.5 nozzle.
It is also necessary to take into account the following nuances:
-
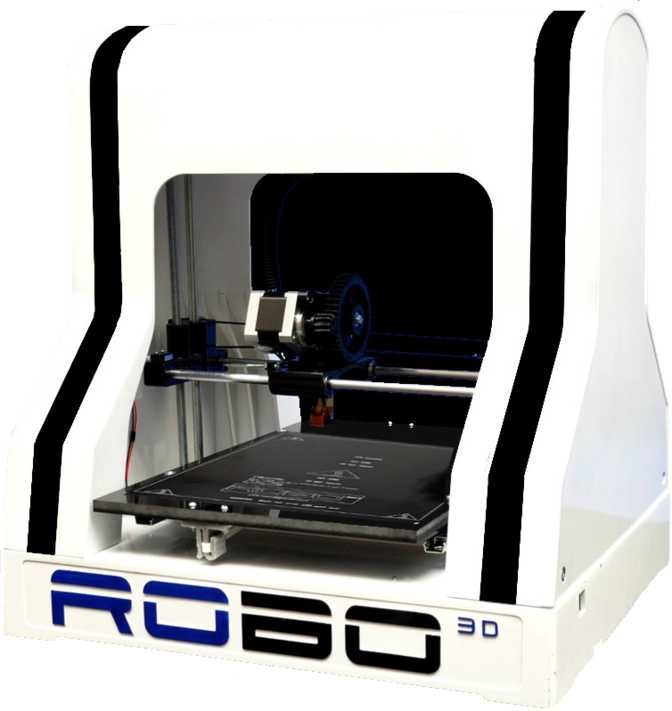
A rubber scraper is installed on Picaso 3D printers to clean the PG - when printing WAX, it smears the material and harms rather than benefits, it must be removed.
-
For normal adhesion, the heating table on the first layer must be heated to 85-90 degrees, subsequent layers must be set to 0-30 degrees so as not to deform the wax. To do this, you need to have two different material profiles.
-
Airflow - required when printing overhanging elements, the main thing is not to overdo it, otherwise the layers will not bake well.
-
Wax, like many elastomers, does not like retracts, this parameter must be set to 0.
-
Refilling plastic takes place in two stages. The first is filling at an elevated temperature of 190-200 degrees, to eliminate a possible wax plug. The second stage is filling at the extrusion temperature - 110-130C
-
It must be remembered that plastic is very sensitive to extrusion temperature, too high clogs the nozzle, too low gives poor interlayer adhesion. The optimum temperature for picaso designer x is 115 degrees for the first layer, 120-125 degrees for subsequent ones.
-
Periodically, it is necessary to check whether the plastic thread wound on the spool does not stick to itself, this can cause material slippage, because. it pulls out easily.
-
It is very important to correctly set the height of the nozzle above the table, because if the nozzle is pinched, a plug will quickly form in the extruder, which can be eliminated only by refilling the plastic again.
Before printing for the first time, be sure to replace the entire hot end or nozzle with a new / clean one, otherwise the desired result will not be achieved.
When preparing a 3D model for printing at Polygon X , you must adhere to the following rules, try not to make the outer wall very thin, the material may burst. The ideal option is 2 perimeters, approximately 1.2 mm, with a nozzle of 0.5
Percentage of filling, not less than 15%, if the geometry of the model allows.
Otherwise, the requirements for the material are the same as for conventional plastics. It should be noted that the supports come off very easily and, if necessary, the attachment point can be treated with a burner or a building hair dryer in order to achieve a smooth surface.
We printed the current models at the following settings (pictured above).
It remains to create two print profiles for printing the first and subsequent layers, send them to the printer and wait for the print results.
6. 3D printing process
Before printing, be sure to thoroughly rinse the glass stage bed and apply fresh adhesive to it. In our case, a regular spray is suitable - glue from PICASO 3D , however, the manufacturer also offers a proprietary adhesive:
Next, you need to prepare two print profiles according to the following settings, experimentally they showed the best result when printing.
Wax3D_F - profile for subsequent layers, Wax3D(1Layer) for the first.
When rendering the model, be sure to manually set a pause after the second layer in order to have time to switch print profiles.
If you have previously printed with wax on the current printer, you need to start another profile with a higher temperature and load the material only after the old material has “melted through”.
Leaving material in the nozzle at high temperatures is not recommended. This is fraught with traffic jams.
7. Result and conclusion
When printing, we encountered several times the delamination and peeling off of the material from the heating table during the printing process and the selection of parameters.
As you can see in the photo, the material diverges in layers and it may feel that the temperature is insufficient for sintering. However, this is not the case, because when the temperature rises, the material does not extrude, but flows out of the die, which disrupts the layer structure, and the wax does not have time to cool. The difference is clearly visible in the photo below, on the left the temperature is too high.
However, after several reprints, we managed to achieve good print quality. Both with and without support.
The material withstands rather steep angles of inclination "perfectly", as can be seen from this flange in the photo.
The artistic approach is not alien to the material, we printed the head of this character for about a day and, as you can see, the result is excellent.
In general, when printing products with low detail, it is best to select a slow (quality profile) or medium (standard profile) print speed setting so that the material has time to properly form and cool during extrusion. Otherwise, sagging "pulling" of the thread may form.