Trideo 3d printer
Impresión 3D Profesional - Industria Argentina
La impresión 3D permite la fabricación de los modelos de fundición para la realización de moldes en arena y arcilla.
Comparando con el trabajo de un modelista, la impresión 3D tiene la ventaja de ofrecer menor tiempo de fabricación, mayor precisión dimensional y un costo de manufactura más económico. Por estos motivos, muchas metalúrgicas ya trabajan con una impresora 3D instalada en planta o tercerizan esta producción a un servicio de impresión 3D.
El uso de plantillas y utillajes para el ensamblado de vehículos, es muy común en la industria autopartista.
Con la implementación de impresión 3D en la linea productiva se pueden crear posicionadores a medida para cada proyecto, volviendo el trabajo del operario más preciso, más rápido y más seguro, aumentando así la productividad general de la planta.
La impresión 3D funciona como una central de producción de repuestos en si misma. En una empresa que cuenta con líneas de productivas y de ensamblaje, una parada de planta significa perdida de dinero.
Aquí es donde las impresoras juegan un rol fundamental, ya que se convierten en un protagonista a la hora de desarrollar y fabricar repuestos optimizados para distintas maquinarias.
Desde simulación y planeamiento quirúrgico, hasta prótesis funcionales, la impresión 3D permite mejorar la calidad de vida de pacientes como así también simplificar tareas a los médicos en complejas operaciones.
Materializar un proyecto, realizar testeos dimensionales y funcionales, no es solo posible sino económico y rápido gracias a la impresión 3D.
Al momento de probar nuevos productos, los equipos de ingeniera pueden apoyarse en la fabricación aditiva FDM para prototipar en distintos materiales o crear piezas finales para sus procesos.
Una de las cualidades destacables de la fabricación aditiva es la creación de geometrías complejas, diferentes que sería muy complicado producir con procesos de fabricación tradicionales.
Esta posibilidad permite a diseñadores y artistas crear piezas que desafinan los limites de la imaginación y que tienen un real diferencial en su diseño.
La impresión 3D permite a las empresas de IoT de fabricar gabinetes a medidas según sus necesidades y así evitar de tener que trabajar con gabinetes estándares pocos adaptados a su producto/sensores y con una estética de otro tiempo.
Eso permite optimizar el espacio y por ende el tamaño del producto y personalizarlo tanto en termino de diseño como de logotipo.
Simplificar procesos es una de las premisas de la impresión 3D en la era actual, por esto mismo muchos estudios de arquitectura y urbanismo crean sus complejas maquetas a cualquier escala utilizando la fabricación aditiva, aprovechando su bajo costo de fabricación.
En ámbitos académicos, tanto de formación básica como de grado, las herramientas digitales son un medio indispensable para la producción en las aulas, a lo que se incorpora progresivamente tecnología que estimula y facilita el aprendizaje como lo es la impresión 3D; recurso que ofrece la versatilidad en la proyección y concreción de diferentes ideas según el campo de desarrollo.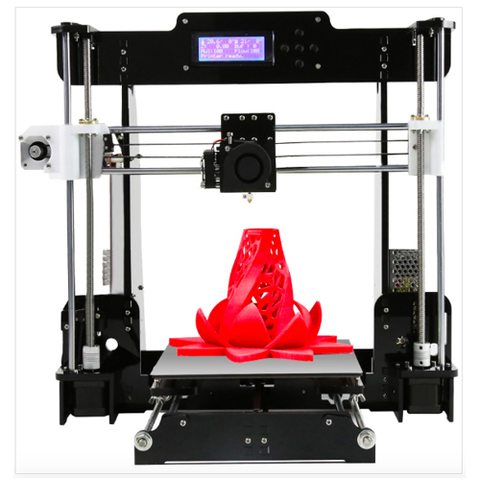
Trideo Factory | Servicio de Impresión 3D Profesional
Trideo Factory | Servicio de Impresión 3D ProfesionalEl PLA (poliácido láctico) es el material que más se usa en la impresión 3D por su facilidad de uso y su bajo costo. Se puede utilizar para prototipos, patrones, maquetas, plantillas y cualquier pieza que no requiera de resistencia específica.
🔎 ¿Sabías que?
• Es un plástico orgánico derivado del maíz y la remolacha.
• Se degrada con calor y humedad.
El ABS es un plástico derivado del petróleo. Este material se utiliza para fabricar piezas de uso mecánico y es muy común en la industria. Tiene buena resistencia mecánica y térmica, sin embargo, es más complejo de utilizar, especialmente con piezas altas, dado su alto coeficiente de retracción. Una de sus mayores ventajas es su gran resistencia al impacto.
🔎 ¿Sabías que?
•Es el plástico que se utiliza para la fabricación de las piezas de LEGO.
•Se puede usar también para fabricar paragolpes de autos.
El PETG es un plástico semi-rigido con terminación brillante y resistente a químicos. Es una alternativa al PLA para la fabricación de piezas más durables y al ABS dada sus propiedades similares y su facilidad de uso.
🔎 ¿Sabías que?
• Es una versión modificada del PET que se usa para las botellas de gaseosas.
• No suele dar buenos resultados para realizar puentes.
TPU, o Flex, es un plástico flexible y con muy buena resistencia a la abrasión. Es complejo de manejar y por default se imprime más lento que otros materiales. La densidad de relleno impacta directamente sobre la flexibilidad de la pieza final, es decir que se puede imprimir piezas más o menos flexibles adaptando los parámetros de impresión.
🔎 ¿Sabías que?
• Pega muy bien con el ABS.
• Se puede obtener piezas bastante rígidas con un porcentaje de infill elevado (> a 60%).
El Nylon es un plástico semi-flexible muy usado en la industria por su capacidad de elongación, resistencia al quiebre y a la fatiga. Dadas sus características propias es un material complejo para extruir y difícil de mantener pegado a la superficie de impresión, por ello es más exigente imprimir con este material que con ABS.
🔎 ¿Sabías que?
• Tiene muy buena resistencia química.
• Tiene una excelente adherencia entre capas.
El HIPS (High Impact Polystyrene) tiene propiedades muy similares al ABS pero mayor rigidez. Una aplicación muy interesante para este material es la posibilidad de usarlo como soporte para impresión en ABS gracias a que se disuelve fácilmente en una solución de D-limoneno.
🔎 ¿Sabías que?
•Su uso es muy común en la industria alimentaria como embalaje.
El ASA es denominado como plástico de ingeniería por mantener su aspecto y resistencia al impacto incluso después de estar expuesto a largos intervalos de tiempo al aire libre, lluvia, frío y al agua salada del mar. Es un material muy resistente a la luz ultravioleta de modo que resulta un filamento muy adecuado si vas a imprimir cosas que van a estar expuestas al exterior.
🔎 ¿Sabías que?
•Es un material muy similar al ABS por ende hay que tener el mismo cuidado al imprimirlo (warping, gases,…).
El PC / ABS es una mezcla de policarbonato y ABS que combina la resistencia mecánica y térmica del PC con la flexibilidad del ABS. Presenta también una alta resistencia al impacto, lo que convierte a este material en una opción ideal para entornos de ingeniería exigentes. Las aplicaciones incluyen ajustes a presión, componentes de uso final, plantillas, accesorios y repuestos industriales.
🔎 ¿Sabías que?
• Es un material que se utiliza mucho en la industria.
• Es un material perfecto para piezas que afrontarán un amplio rango de temperaturas.
El Nylon con fibra de carbono es un material innovador que combina la tenacidad y propiedades del Nylon con el bajo peso y dureza de la fibra de carbono resultando así en partes extremadamente resistentes y ligeras. Las piezas impresas en este material presentan una gran fusión interna lo cual las hace altamente resistentes al impacto permitiendo compararlas con otras fabricadas en metal. Además cuenta con una resistencia térmica fuera de lo común para un polímero.
🔎 ¿Sabías que?
• Tiene una temperatura de deflexión por calor (HDT) superior a los 160ºC.
• Por su relación peso-resistencia es ampliamente utilizado en la industria aeroespacial y la Formula 1.
En ámbitos académicos, tanto de formación básica como de grado, las herramientas digitales son un medio indispensable para la producción en las aulas, a lo que se incorpora progresivamente tecnología que estimula y facilita el aprendizaje como lo es la impresión 3D; recurso que ofrece la versatilidad en la proyección y concreción de diferentes ideas según el campo de desarrollo.
En ámbitos académicos, tanto de formación básica como de grado, las herramientas digitales son un medio indispensable para la producción en las aulas, a lo que se incorpora progresivamente tecnología que estimula y facilita el aprendizaje como lo es la impresión 3D; recurso que ofrece la versatilidad en la proyección y concreción de diferentes ideas según el campo de desarrollo.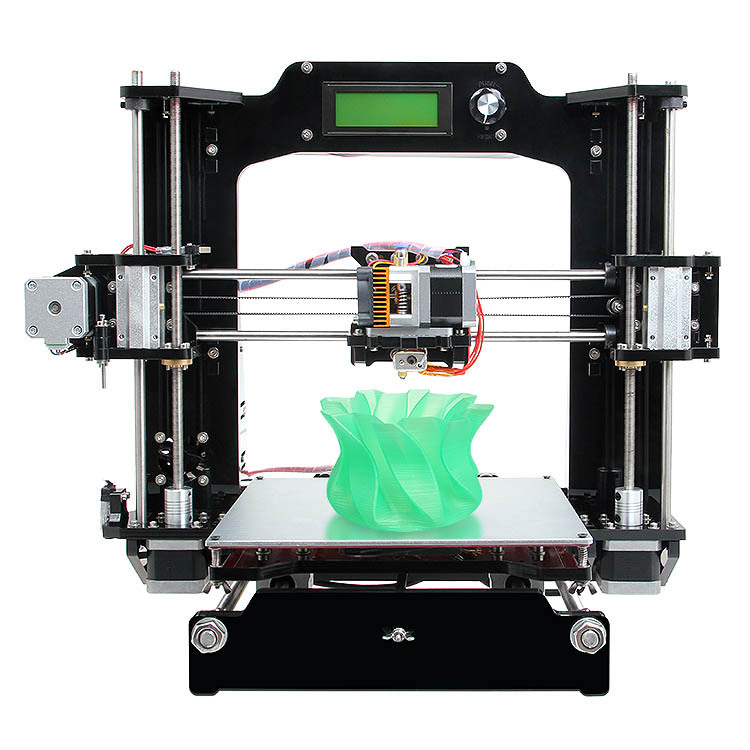
En ámbitos académicos, tanto de formación básica como de grado, las herramientas digitales son un medio indispensable para la producción en las aulas, a lo que se incorpora progresivamente tecnología que estimula y facilita el aprendizaje como lo es la impresión 3D; recurso que ofrece la versatilidad en la proyección y concreción de diferentes ideas según el campo de desarrollo.
Un prototipo permite probar una pieza tanto de manera dimensional como funcional antes de realizar una producción con mayor volumen de piezas. Hoy gracias a la impresión 3D, generar prototipos se vuelve un proceso más ágil, donde el tiempo y los costos de la fabricación se reducen drásticamente. Los insumos genéricos son otro factor importante para este procedimiento, ya que la fabricación de varias iteraciones no genera un gran impacto económico.
El trabajo del modelista suele ser un proceso largo y costoso.
Hoy en día, muchas metalúrgicas realizan modelos y cajas de noyo con impresión 3D. El trabajo consiste en digitalizar el modelo para después convertirlo en un archivo compatible con la impresora 3D. Este nuevo proceso presenta varias ventajas en comparación con el proceso tradicional:
Conseguir un nuevo modelo en cuestión de horas y facilitar iteraciones eventuales
Se puede lograr geometrías complejas siempre respetando una gran precisión dimensional.
La materia prima es económica.
Tener una línea productiva parada siempre genera demoras y perdidas financieras importantes. A veces puede pasar por falta de un solo repuesto que compromete a toda una maquinaría. Hoy en día, la tecnología de impresión 3D permite reproducir y mejorar repuestos para evitar los problemas relacionados con la importación de alguna pieza y así seguir produciendo gracias a repuestos definitivos o temporario fabricados en planta y a un costo unitario muy bajo.
Las plantillas o patrones sirven para simplificar operaciones manuales y respetar estándares de calidad controlando de manera más precisa los procesos de fabricación. La tecnología de impresión 3D permite crear piezas adaptadas a cada uno de sus procesos de fabricación con la posibilidad de fabricarlas internamente a un costo muy económico. En Trideo damos soporte a nuestros clientes en el diseño y fabricación de dichas plantillas, alcanzando los más exigentes estándares de calidad.
Gracias a la impresión 3D, las empresas de IoT pueden pensar y diseñar sus gabinetes optimizando volumen y diseño a sus necesidades. Más allá de la flexibilidad al nivel de diseño, la fabricación de los gabinetes por impresión 3D permite ahorrar el costo de realización de una matriz pudiendo así lanzarse al mercado de forma más rápida y más económica.
Actualmente las impresoras 3D profesionales nos permiten alcanzar alturas de capas cada vez mas finas, como así también una constante repetibilidad en las piezas. Esto quiere decir que una empresa puede fabricar y comercializar productos obtenidos por impresión 3D sin necesidad de realizar tratamientos adicionales. La tecnología de impresión 3D además permite lograr diseños y geometrías impensables de fabricar de otra manera.
Con nuestro servicio de impresión de hasta 1000 x 1000 x 1000 mm, canalizamos toda nuestra fuerza de producción en materializar tus ideas.
01. Archivo Digital
Para comenzar el proceso se necesita un archivo en formato .STL. La mayoría de los software de diseño 3D permiten la exportación a este formato de archivo con el que podremos trabajar.
Si no contás con el archivo podemos diseñarlo nosotros, para pasarte un presupuesto de diseño, necesitamos que nos envíes los planos técnicos de la pieza o fotos con todas las medidas.
02. Análisis & Optimización
Cuando nos envías tu diseño, es fundamental que nos des la mayor cantidad posible de información sobre la función de la pieza así podemos entender el tipo de resistencia que requiere.
Si es necesario te vamos a sugerir modificaciones de diseño para que tenga más probabilidades de cumplir su función. Te recomendamos el material y los parámetros de impresión alineados con tu objetivo y te enviamos una cotización por mail para que puedas analizarla.
03. Impresión
Cuando nos confirmas el trabajo, imprimimos tu diseño en el material elegido con la mejor calidad del mercado. Realizamos producción en serie, no dudes en consultarnos por descuentos por cantidades grandes.
Tenemos tiempos de entrega express así que unos días después ya podés pasar a retirarlo o coordinamos un envío a cualquier parte del mundo.
La innovación constante, una rápida respuesta al mercado y la reducción de costos, son ejes fundamentales para cualquier empresa/proyecto.
La tecnología de manufactura aditiva es ideal para lograr estos objetivos y se puede implementar en varios pasos del proceso productivo.
Nuestra Factory es una oportunidad de contar con un aliado estratégico para desarrollar rápidamente soluciones a medida y económicas gracias a nuestra experiencia usando la impresión 3D en varias industrias.
Nuestro equipo técnico te puede guiar con modificaciones de diseño, materiales y configuración que maximizan las probabilidades de éxito de la pieza final y así ayudarte a llevar una idea de la primera prueba a una producción importante...
Estamos a disposición, contanos tu proyecto y lo que necesitás realizar.
MRO: REPUESTOS INDUSTRIALES
ASESORAMIENTO
COMPLETO
INGENIERÍA
INVERSA
MATERIALES
TÉCNICOS
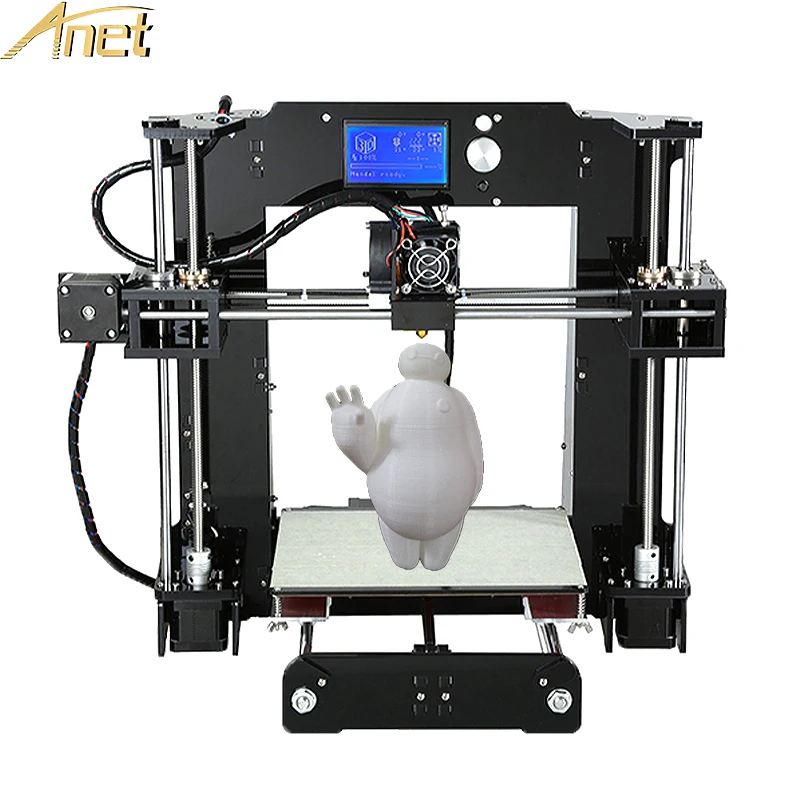
printing services is an on-demand manufacturing service aimed at both enterprises and individuals
Material Name
Material Name
Material Name
Material Name
Material Name
Material Name
Material Name
Material Name
Material Name
Material Name
Material Name
Material Name
Material Name
Material Name
Material Name
Material Name
Best 3D Printer Candidate 2022 / 3D Printers, Machine Tools & Accessories / iXBT Live
If you want quality printing out of the box as well as a solid build, then Kywoo3D Tycoon Max is the one for you. This printer attracted me with interesting features at a low price. And most importantly, what attracted me is a very reliable design. After all, it is she who affects the quality of the print.
I found the first mentions of this manufacturer and printer on Kickstarter, and then on local sites. Then the model was simply discussed, but there were no real owners. But then the first reviews appeared, and to be honest, the printer was not praised in them. Despite the thoughtful design, the printer had problems with airflow and buggy firmware. Therefore, when I needed a 3D printer, I took myself Anet ET4 Pro. But then there was a need for another printer, so I, again returning to the question of choice, decided to take myself a Tycoon Max. And now, having used the printer for several weeks, I realized that I made the right choice. The printer for its price really gives excellent print quality, and if necessary, also a very fast print speed comparable to deltas.
Characteristics of Kywoo3D Tycoon Max:
Well, in words, I’ll add something that is not in the table:
- Print area: 300 * 300 * 230mm
- Print type: FDM
- Number of extruders: 1
- l.
-0.4mm
- Nozzle: 0.4mm
- Control: USB, MicroSD card, Wi-Fi
- Power: 350W
- Maximum table temperature: 100C
- Maximum extruder temperature: 260C
- Additional design information:
- High rigidity aluminum profile frame.
- X-axis rails, Y-axis shafts.
- Z-axis motor belt synchronization
- 16-point auto-leveling
- 3.5" touch screen for printer and printing process control
- Convenient filament threading with ring on extruder 90 015
-
Now let's talk about the printer itself. It was ordered from a warehouse in the Russian Federation, and the delivery time took 5 days. A huge box weighing 16kg was received in the mail:
Inside the box is a printer disassembled into two parts. Everything lies in layers, which are laid with foam material. So it is unlikely that anything could be damaged along the way.
Opening the box, the first layer I saw was the lower frame of the Y-axis with a heating table and ultra-base:
Below the next layer is the main frame of the Z-axis, a coil of PLA test plastic, a box with accessories:
I’ll tell you right away about the complete plastic. It has a weight of 500g, wound on a plastic reel, sealed in a vacuum bag. I printed part of the coil during the tests, and I liked the plastic.
As for complete accessories, everything is relatively standard. Inside the box are a spatula, a set of hexagons in a convenient case, several spare ties, wire cutters, clamps for the ultrabase, four screws for assembling the printer, a Phillips screwdriver, a piece of heat pipe, a spare 0.4mm nozzle, a needle for cleaning the nozzle, a wrench for unscrewing the nozzle, spare limit switch, USB cable, reel mounting stand. Also included is a card reader and a MicroSD 8Gb flash drive manufactured by Netac ( a good manufacturer, I have several flash drives of this company, and they work well )
The printer is powered through a detachable cord with a European-type plug.
If necessary, it can be replaced without any problems:
Also included with the printer is an assembly and configuration manual. It is made on high-quality printing, but, in fact, there is no great benefit from it:
Now let's consider ultrabase glass. It has dimensions of 305*320mm and a thickness of 4mm. On the edge there is an inscription with the logo of the manufacturer:
Having already printed enough parts, I can say that the quality of the Ultrabase is excellent. It is strong, there are no problems with plastic sticking, it heats up evenly. And at the end of printing and cooling, the parts come off without problems.
The ultrabase is attached to the heating table with 4 stationery clips (they are included). The heating table itself is made of metal, and is attached to the frame on shafts through plain bearings. By the way, in order to reduce weight and inertia during movement, the manufacturer made the table itself with holes that do not affect rigidity.
By the way, the table is connected to the control board via the XT60 connector. This is the first time I see such a solution, but logically, this is a fairly reliable connection.
Another thing I would like to note on the table frame and X-axis is the presence of good legs that can be adjusted in height. This is useful if the printer is not standing on a completely flat surface, and correct adjustment will avoid unnecessary movement of the frame when printing.
Now let's move on to inspecting the frame along the YZ axes. It also contains the control board and power supply. It also has an extruder. This is what it looks like:
The first thing I want to pay attention to is the overall rigidity of the frame. It uses a double frame made of aluminum profile, on which there is a metal box on top. This box serves two purposes: hiding the interior of the printer and adding rigidity to the frame. And it has a very good effect on the quality of the print.
The Z-axis of the printer is fixed on the frame through two shafts rigidly fixed to the frame itself and a closed plain bearing, and for moving there are two studs with stepper motors on both sides.
 Additionally, the manufacturer has added a belt that synchronizes the operation of these stepper motors:
 Rails are installed on the printer to move the extruder. They are quite high quality, and during the work I personally did not have any problems with them. For better sliding, the rails are immediately lubricated from the factory, and the rails themselves also have holes through which this lubricant enters the rails. Also, through these holes, the rails were fastened along the entire length of the frame.
As for the extruder, the manufacturer did not reinvent the wheel, and equipped the printer with a proven solution. This is MK10, but with some modifications. First, it adds an iron frame that looks good while protecting the user from contact with hot extruder elements. I would like to think that this frame also serves as an additional radiator, but if you look at how it is fixed, it immediately becomes clear that there is not much heat coming to it. And the second addition is a special lamb for scrolling plastic when refueling.
And this is a really handy feature. When refueling, you do not need to press anything, as in other printers. We simply pull the plastic through the plastic sensor, point it into the hole of the extruder and turn the lamb. Plastic itself immediately clings and is pressed through. A simple and elegant solution that is sorely lacking in other printer models.
Also immediately above the extruder is a low filament sensor. This is also a pretty good solution, since the distance between the sensor and the extruder is minimized here. And this means that you don’t have to throw out 20-30cm filament bars that simply cannot be pushed into the printer. The amount of waste here is minimal.
As for blowing, a fan with an impeller is used here, which is mounted near the nozzle. Fan model pb04010ms4. The airflow itself is realized through a wide slot. I personally did not notice any problems with blowing during printing, there is enough blowing, and it blows directly on the model. The blowing speed can naturally be adjusted both during the cutting of the model, and already directly during printing, the fan has speed control.
I also once had to disassemble the extruder to replace the nozzle during printing. What was in the kit, I managed to score on my own stupidity, alternating types of plastics without changing the temperature. Therefore, I will show the extruder in disassembled form:
I also want to draw attention to the fact that the printer has a table auto-calibration function. For this, a BL Touch sensor is installed here. More precisely, there is not the original 3D Touch with a plastic plug.
But by the way, I have no complaints about his work. The table calibrates perfectly, and even if there is a misalignment of fractions of millimeters, everything is taken into account and there are no problems with printing. The table itself is calibrated using 36 points (6*6) and looks like this:
Also, in addition, I can also note the presence of a silicone lining on the hotend, so that the temperature is more stable:
Well, after we have examined both halves of the frame, we can start assembling the printer.
 She's very simple. The existing 4 screws are screwed through the grooves, and we stretch harder.
 Additionally, you need to connect the connector to the table and connect the motor along the X axis. By the way, in the printer, all the wires are laid right away, and where they can be fixed with ties. Therefore, nothing dangles here, does not hang down and is as neat as possible:
That's it, the assembly is finished. This is what the assembled printer looks like, well, with the exception of the ultrabase and the bracket for installing the filament spool.
The bracket itself, by the way, is standard, like most printers in this price range. Metal profile and plastic tube. The bracket is installed at any point of the aluminum profile, through two spacer nuts:
Well, once the printer is assembled, you can consider the rest of the design elements. If you look at the back of the printer, you can see the power button and the port for connecting the power cord:
On the other hand, there is a sticker on the frame with information about the printer:
Separately, I would like to note one more convenient feature of this particular printer, which I have not seen anywhere else.
 These are convenient carrying handles:
 They are metal and rigidly fixed to the frame, you can safely lift the entire structure with them and not worry that something will break. For me, this is very important, since my printer can be transferred to different points around the room, and even between rooms. Depending on how long the print is placed.
If you look at the printer from the right end, then you can see a slot for a MicroSD card through which a model for printing is thrown onto the printer. There is also a MicroUSB port for connecting to a computer (does anyone use this method of printing?) and another slot for SD cards, the purpose of this slot remains a mystery to me:
Well, now the most interesting. It is, of course, a touch screen. When you turn on the printer, we first see a splash screen with the manufacturer's logo, and then the main desktop, from which you can get to different settings:0003
All items on the desktop are interactive. Management is implemented by clicking on the desired element.
 For example, by clicking on the ruler of XYZ axes, we get to the axis calibration menu:
 And if you click on the flash drive icon, the files for printing located on the flash drive are opened:
The printer sees folders and subfolders without problems, but there are Russian file names Problems. In the current firmware, the Cyrillic alphabet looks like unreadable krakozyabry.
If you click on the gear icon, then naturally we get into the settings menu. Here you can select the temperature of the preheating of the table and extruder, change the filament during printing or in idle time. Find out information about the firmware, set up Wi-fi and select the interface language ( there is no Russian language in the photo, but it has already been added in the latest firmware )
By the way, the printer has a built-in Wi-fi module, and it can be run in access point mode or connected to a home wi-fi network.
In the first case, you can connect to the printer and use an additional plug-in in Cura to send files for printing over the air, as well as monitor the status of the printer:
True, the wi-fi module has one minus.
 It stands inside a metal case, and it dampens the signal very noticeably. If the printer is in the next room, then I can no longer connect to it because the signal level is too weak. In fact, the range of the access point is about 5-6 meters maximum.
 But back to the screen. Despite the modern 32-bit processor, another disadvantage that I want to point out is the lack of model previews. This option is already firmly in use, and I would like to hope that it will also appear in future firmware. But so far the interface looks pretty simple. By the way, this is also visible at print time, when progress is displayed simply as a blue bar with a percentage of completion.
But in general, the management here is really convenient. You can change the Z-axis gap on the fly, change the speed of the blower fan and the temperatures of the table and extruder.
Well, I also want to show the inside of the printer without disassembling it. How could I get the camera. The printer is powered by the built-in Mean Well LRS-350-24 power supply.
 Already by the name it is clear that this power supply produces 24v / 350w.
 In the future, I plan to crawl up to this PSU and add a backlight tape to the printer frame so that you can see the printing process.
The brains of the printer are located in the upper part of the case, it is already much more difficult to crawl there with the camera:
But since the board is sold separately, I'll just add a photo from the manufacturer here:
True, in this photo it is not clear which processor is used in the board. But let's hope it's good enough.
In general, if we talk about the assembly, then it did not raise any questions for me. The frame here is well thought out and very rigid. All axles run smoothly and there is no backlash. The printer is large, solid and heavy. And gravity, as we know from the words of Boris Razor, is good and reliable.
Now it's time to talk about the printing process and the models I have printed
The first thing I decided to do was check the speed characteristics of the printer.
 The specifications indicate that its maximum speed reaches 150mm / s. Therefore, I printed a test cube at this speed:
 I shot with a macro lens so that the flaws in the layers were immediately visible. And they are here, since my plastic is not the best, besides, it’s also old, taken from the remnants.
Then I printed the same cube, but at a speed of 180mm/s, and put it next to the first cube:
Try to guess from the photo which of these two cubes was printed at what speed.
I'll give you a hint. On faster printing, at 180 mm/s, the plastic from the nozzle no longer has time to come out and lay down evenly, so the layers appear thinner, and there are gaps between the layers.
And yes, on the left it's a cube printed at 180mm/s and on the right it was 150mm/s.
And by the way, this speed is quite suitable for printing rough parts, when you need to determine the degree of fit and size, without regard to quality. This saves a lot of printing time.
Well, at a speed of 150mm / s, you can already print full-fledged models. Here, for example, I printed a model at this speed:
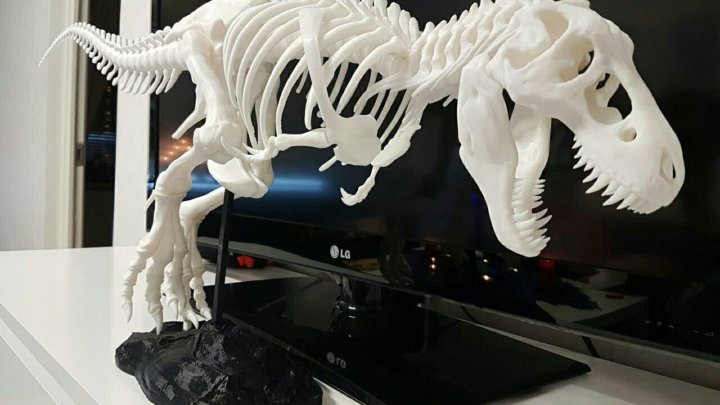
And this is not a draft part, but a full-fledged one, for a commercial order. Here is what I printed, the size of this medal is 22 centimeters:
If you look at macro photography, you can evaluate both the detail and the level of stacking layers at this print speed:
By the way, as you can see, the medal was printed in two colors of PLA plastic. This type of printing is not difficult, just at a certain moment of printing, you can pause the printer and replace the filament. But I want to add that Cura has a handy plugin that allows you to precisely set the pause on the desired layer. To do this, go to the plugins, and select the “Filament Change” function in the post-processing plugins, in which we simply set the layer on which the pause will occur. The printer will stop printing at the right moment, move its head to the extreme left side in front and squeak loudly, calling for a replacement of the filament:
Through this plug-in, you can set the replacement of the filament at least on each of the layers, which is very convenient and allows you to achieve interesting effects when printing art objects.
 I hope my advice will be useful to those who are fond of 3D printing.
 I also printed an axolotl toy for children, which consists of closed links:
Printing was done at a speed of 120mm / s, and could have been more successful if I had not forgotten to remove the automatic supports in Cura. But since there were supports, I had to spend time post-processing and separating the supports, as well as cleaning up excess plastic in the links. This is what this axolotl looks like on a macro shot:
Layer height 0.25mm, travel speed 120mm/s, table temperature 60 degrees, extruder temperature 220 degrees.
The next model was among the models on the flash drive provided with the printer, this is a ghost keychain.
By the way, I want to add a macro photo of the substrate that remained after printing, so that you can evaluate the uniformity of laying layers and tracks:
a piece of ordinary sponge to clean the plastic from dust, which is very visible on white parts.
 Some print different boxes and cases, but I just took a piece of dish sponge and pierced it with a filament, which I then moved on. After that, the parts became noticeably cleaner.
 Another custom-printed detail. Steering shaft bushings for Nissan Qashkai. Designed to eliminate the runout between the shaft and the tube in the steering reach adjustment mechanism:
Another model. Decepticon logo overlay for standard Mazda car logo:
Spinner gear. A toy that I printed to test the possibility of printing gears:
Stand legs for Sony PlayStation 4 Slim:
Well, there were many other models that were printed to order, but I did not have time to take high-quality photos. I mainly use PLA and Petg plastics when printing. Well, a little ABS, which I really dislike because of its capriciousness to ambient temperature and drafts. And as you can see from the photo, there are no problems with printing. The only problem I've encountered is changing different types of plastic during printing and clogging the nozzle as a result.
 But it's my own fault, I shouldn't have experimented.
 Conclusion:
As you can see from the review, I really liked the Kywoo3D Tycoon Max 3D printer. It is definitely worth the money, here it is clear that the manufacturer did not save on everything and everyone, as is the case with other manufacturers. I will try to indicate the advantages that the buyer receives:
Reliable design and rigid frame . A double profile and a metal frame are assembled into a single design that is reliable and does not give any backlash. This has a positive effect on detail and print quality, as well as on the maximum print speeds. Also, all cables and wires are correctly laid in the printer immediately from the factory. And the heating table is attached through the XT60 connector, which has long proven its reliability.
Shafts along the axes Z and X. The presence of shafts and plain bearings also has a positive effect on the accuracy of printing and the reliability of the design as a whole.
 Since they are less subject to wear and play, unlike wheels that drive along a profile.
 Axis rail Y . The advantage of rails over conventional wheels, I think, is not even worth discussing. This is a more accurate movement of the extruder, and the absence of backlash, and durability. Of course, it would be better to have rails on all axes, but this will significantly increase the price of the printer, and it will no longer be so interesting.
Convenient filament threading with scroll knob . Here I will attribute this not only to pluses, but directly to huge pluses. Such a trifle like, but very much affects the work with the printer, especially if you print a lot and often change the filament.
Short feed extruder MK10 . Allows you to safely print any type of filament, including flex. In addition, unlike Bowden, plastic is saved here. The retract works more adequately. In general, I personally prefer Direct extruders, although I have a printer with a bowden system.

Availability Wi- fi module. Let it be weak, and not everyone needs it. But for some it will be very useful and necessary.
Axis motor synchronization Z . Another little thing that many manufacturers neglect. Meanwhile, this little thing affects the accuracy of printing. And many people customize their printers by adding a Z-axis belt.
Auto level. The printer builds a table map using 36 points and then takes into account any irregularities during printing. Which is very good for the adhesion of the base layer. Well, of course, there are no dances around the printer with a leaflet for an exact fit. To be honest, this process is what I dislike the most during printing.
Print area 300*300*230mm. With such dimensions of the printed area, you can print a much larger number of details than with the usual 220 * 220mm in most models.
True, as a minus, the dimensions of the printer themselves are already acting here. Under it, you need to prepare a surface with dimensions of 62 * 62 centimeters, and not every table is suitable here.
But to be honest, I did not find any minuses for the printer. Well, except perhaps the dimensions and the weak signal of the Wi-fi module. But I already wrote about this above. Well, perhaps the relatively simple firmware can be attributed to the minuses, although it does not affect the print quality, it's just an interface.
Kywoo3D Tycoon Max is currently my main 3D printer, on which I print most models. For yourself and to order. Print field 300 * 300 * 230mm allows you to print large enough parts or batches of parts, which suits me completely. I also liked the robust, well-thought-out and monolithic design of the printer, as well as the speed of its operation. As for working on wi-fi, this did not take root for me. At first I dabbled in sending and monitoring, and then, out of habit, I returned to the flash drive and card reader again.
In terms of noise, the printer does not raise any complaints, it is the same as most FDM printers. Mostly you can only hear the fans. I also cannot fail to note the most convenient type of filling the filament with the help of a lamb, in my opinion, this bribed me very much.
Well, as it became clear from the review, I can safely recommend this printer for purchase, especially since its price is quite affordable, and frankly, for its price of $280, I cannot find a single competitor for this model. If you like the printer and want to buy it, you can use the promotional code KY3D06 when ordering, which will give an additional discount. And these printers are in stock in the Russian Federation, so delivery will be fast.
Current price for 3D printer Kywoo3D Tycoon Max
Way to 3D printing with your own hands
While relaxing in nature and walking long distances with a backpack, you want to discard everything superfluous and heavy, but the desire remains to shoot photos and videos with tripod .
It is necessary to get out of this situation or look for other options for comfortably achieving goals.
The Internet gives us the opportunity to plunge into the abyss of data and extract the information we need from there or purchase a product with the required properties. With ultralight tripod did not work out that way, so the talking monkey, that is, the descendant of the Cro-Magnon, took up the independent development of
Read more »
Tags: tripod 2023-01-10 Section: 3D printing, Design and printing, Printing and product assembly
Author: AKDZG Views: 1 093 No comments yetAfter building my own printer, I have been printing on ordinary window glass for a long time. In principle, everything suited. BUT! As always happens, I wanted something better. I'm tired of fussing with glue, constant fuss with adjusting the table, constant “tacks” of corners, and so on. In general, I decided to purchase such a magnetic mat
Read more »
Tags: UBL, table auto level, magnetic mat 2022-06-19 Section: For beginners, Firmware, Secrets and life hacks of 3D printing, Electronics
Author: dark184 Views: 1 337 8 commentsTask: provide yourself with electricity while walking autonomously.
The usual power bank immediately comes to mind, and if you think about it, there are still portable solar panels, but then the second condition appears: you need a high current to charge at once and a lot, as well as the ability to charge the battery of the Mavic Air quadrocopter. A slow portable solar panel is not suitable for this task and I already want something like a car battery, but with less weight and dimensions ...😄
Read more »
2021-12-19 Section: Design and printing
Author: AKDZG Views: 1 945 No comments yetGreetings to forum visitors. The surveyor again arose spontaneously (I purposefully do not deal with them at all, somehow time does not allow sssss). I decided to briefly acquaint you with the blowing of hot ends and a couple of new hot ends for me, which at the same time, by coincidence, were on hand. The review will be mainly in the weight category (since I assemble printers mainly with pipe feed) and quality / practicality in general.
All airflows with the opposite direction of air on the seal. I don’t use ring and similar ones, so they won’t be here. Photo more than words) let's go ...
Read more »
Tags: blowing parts, hotend 2021-12-01 Section: Overview
Author: Ufamak Views: 1 173 No comments yetHello dear forum users. Honestly, the review was formed spontaneously. Not even a review, but a dilemma). Not even a dilemma, but the choice of who needs what).
The background is as follows. I've been using the Lerdge X exclusively for the last couple of years. The main advantages are that they are ready out of the box, printer settings are entered through the display, no dancing with marlins and other things, and of course a chic display (and the display is the best, and very reliable, etc., there are many pluses). Periodically I use Lerdge K when two color printing is needed. But recently, about a month ago, Lerdge made a sharp turn, removed the X and K versions from sale, releasing an intermediate Z.
Which was immediately ordered. Along the way, just a couple of days before the appearance of Z, a competitor from 9 was ordered0149 MKS , namely the board Eagle with a very interesting IPS screen MKS h53 . For sim upon receipt, I decided to share the unpacking “what did it come”).
Read more »
Tags: Lerdge Z, MKS Eagle, MKS h53 LCD, review 2021-11-14 Section: 3D printing, Review
Author: Ufamak Views: 1 127 1 commentThe other day I encountered the need to flash the MKS Gen_L board. It was necessary to reconfigure the firmware. As always, after the firmware, it was necessary to select the parameters of the PID controllers (well, for me to prescribe them every time in the firmware or in the EEPROM). My printer has both the table and the hotend configured for PID control. As usual, because I do this far from every day, it was necessary to remember which commands and its parameters are responsible for this.
There is always a hint on the official Marlinfw website.
М303 – start of autotuning
С – number of autotuning cycles, minimum 3, default 5.
Е – hotend number (-1 for table)
S – target temperature.
Read more »
2020-12-04 Section: For beginners, Secrets and life hacks of 3D printing
Author: dark184 Views: 5 361 9 commentsPeople, hello everyone! Today I want to tell and show how I got to making filament for 3d printing at home. For manufacturing, we need - a PET bottle from any drink, a stationery knife, a soldering iron, a vise and a windshield washer nozzle of a VAZ 2101 - 2106 car. I want to add to the video that a filament can be made from any PET bottle, but there are some nuances. From under highly carbonated drinks, bottles should be dissolved into tapes of 7 mm, since the plastic density of the bottle is sufficient, but the plastic from under less carbonated drinks is much thinner and, accordingly, the tape must be cut wider, about 10 mm.
Read more »
Tags: 3D printing, bottle cutter, PET, DIY, filament 2020-07-11 Section: DIY, Bar extruder
Author: monsterprint Views: 7 678 No comments yetGreetings. The review came about by accident. As it happens, I ordered one thing from Ali - they sent another. I wrote to the seller - he sent a replacement without any problems. And what to do with the sent “net”? Only open and compare with “what_what_is necessary”.
Ali has a small selection of two-color hotends. The choice fell on “2 IN 1-S1 Hotend”, they sent “2IN1-V2 Hontend”. Before quotes, you can put several names of companies that sell them on Ali. Differences, as usual, will only be in the configuration and the name of the company on the hotend itself. In order not to be confused, let's call it briefly:
- red - S1 (correct)
- white - V2 (wrong)
Read more »
2019-12-09 Section: 3D printing, Review
Author: Ufamak Views: 4 289 1 commentIn the first parts of the series of articles about PrusaSlicer, the basics of the new program interface, print settings, filament and printer were discussed.
- Maximum print speed: 0mm/10mm s (personally tested up to 140mm/s and it prints fine)