3D printing a helmet
How to 3D Print a Cosplay Helmet (Any Size!) – Clever Creations
Image: Boxandloop via Thingiverse
Our site is reader-supported. When you buy via the affiliate links on this site, we will receive a commission at no cost to you. All opinions remain our own. Learn more
If you are a passionate cosplayer (or just like to print props for decorations), 3D printing your own wearable helmet is a fun way to bring your costume to the next level. In this post, we’ll tell you everything you need to know about finding the right helmet STL file or OBJ file, printing it, and making your 3D printed helmet look as realistic as possible.
Whether you’re reading this post as a seasoned 3D printing enthusiast or someone completely new to the hobby (in that case, we suggest you also read our buyer’s guide to 3D printers for cosplay), we’ve included lots of helpful information and resources for your skill level.
Making your own 3D printed helmet
3D printing a helmet can be a tricky process. You have to consider things like creating or sourcing a good model, sizing the model to fit your head, and splitting the model to fit your print bed. Also important are choosing the right print settings, what type of printer to use, and how to paint and post-process the 3D printed helmet to give it its final look.
If it sounds like a lot, don’t worry. It’s not as complicated as it seems, as long as you know the basics.
Getting a 3D model of a helmet
The first step to 3D printing a helmet is either finding or creating a 3D model of one. Both options have benefits and drawbacks, so it really comes down to your personal preferences and your aptitude for 3D modeling.
Creating a 3D model
When it comes to sourcing the perfect 3D model for printing a cosplay helmet, sometimes it’s hard to find exactly what you’re looking for online. Or maybe you only have an idea for an original helmet design that you want to bring to life. Either way, the easiest solution in these situations is to make the model yourself.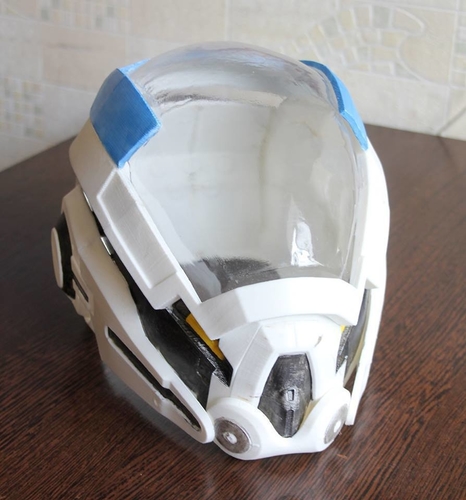
If you’re a total beginner to 3D modeling, this may sound like a daunting task but it is not as difficult as it seems. You can make a helmet (especially a basic one) in most 3D modeling or CAD software options, but some programs make the project easier than others.
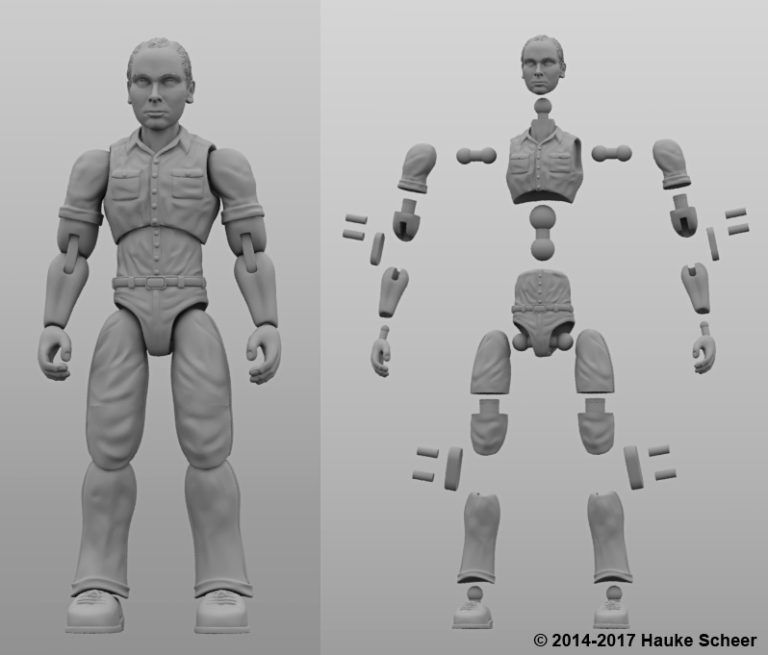
Visual effects and animation suites such as Blender, Maya, Wings3D, and 3DS Max that use box modeling are one of the easiest choices for modeling a helmet. Since you can import a 3D model of a human head and scale it to size, you can easily and quickly build the helmet around the head, shaping and contouring it perfectly.
You can also take this approach in 3D sculpting programs like ZBrush, Mudbox, and Sculptris, but these programs are rather inefficient for creating hard surface models. If the design needs a high level of fine details, sculpting can make that process much easier when used in tandem with another modeling program.
CAD software like Fusion 360, AutoCAD, TinkerCAD, and Shap3r are other great choices for designing your helmet. Since they are programs that are highly dependant on precise measurements and proportions, they make it easy to size your model appropriately. They are best suited for straight designs that don’t contour to the shape of the face.
Regardless of what type of modeling you decide to use, there are plenty of other options for free software for 3D modeling that you can use to design your helmet.
If you aren’t sure how to get started, here are a few of our favorite video tutorials to help you out:
- How to Make a Titanfall Style Helmet in Blender (Blender)
- Star Wars Darth Vader Helmet (Blender)
- Modeling a Star Wars Stormtrooper Helmet (3Ds Max)
- Mandalorian Helmet sculpting (ZBrush)
Downloading a 3D model
If you aren’t confident in your abilities to model your own helmet, don’t worry! There are plenty of downloadable files for helmets available online that other 3D printing enthusiasts have shared.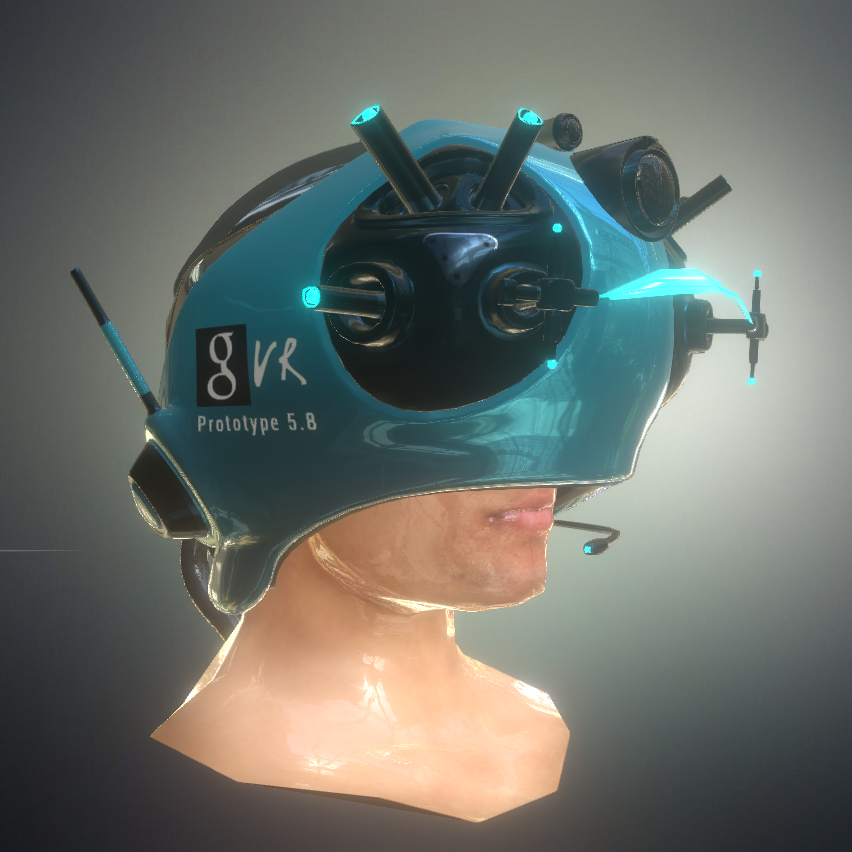
These files usually come in the form of an STL file or OBJ file that you can use with your favorite 3D printing slicer. The most popular sites to get them from are:
- Thingiverse
- MyMiniFactory
- PrusaPrinters.org
- Cults
- CGTrader
If you are unable to find what you are looking for on these sites, we recommend checking out our complete list of sites with free STL files.
You can use the search functions or categories to find an assortment of possible projects, including several different helmets and masks for cosplay. When picking out a model, be sure to read through the file details, comments, remixes, and user makes before printing.
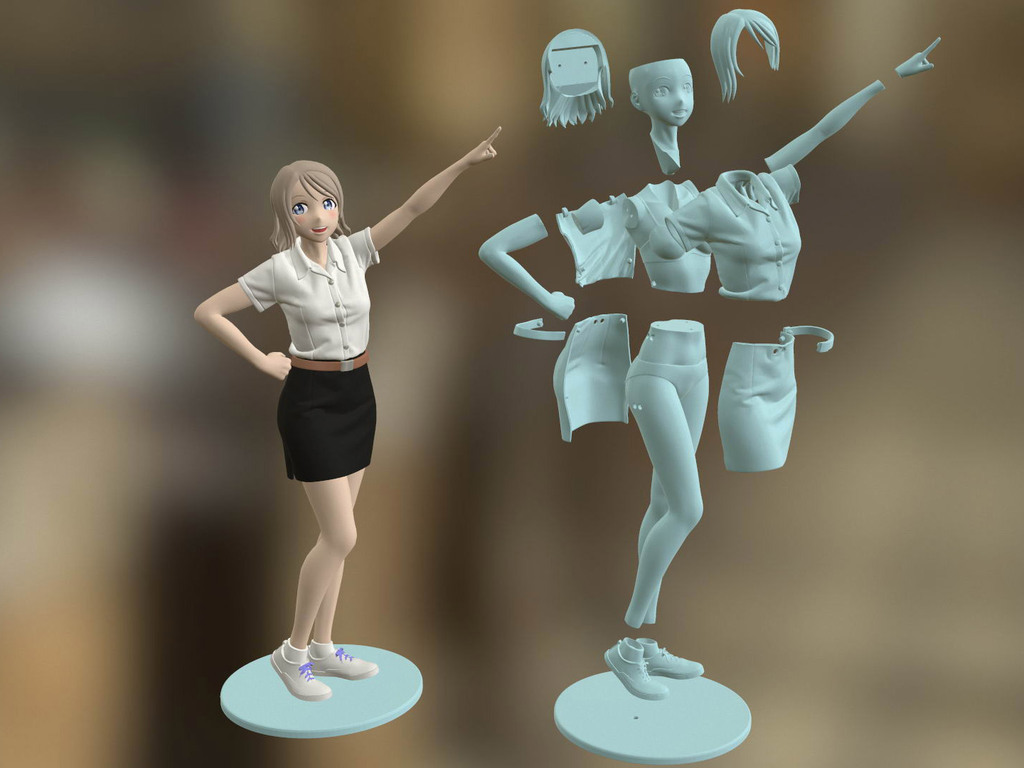
A render of a 3D model of a helmetMost of the time, the designer will leave valuable information in the model description about the best slicer settings, what printer they used to test print the helmet, and notes on updates and fixes.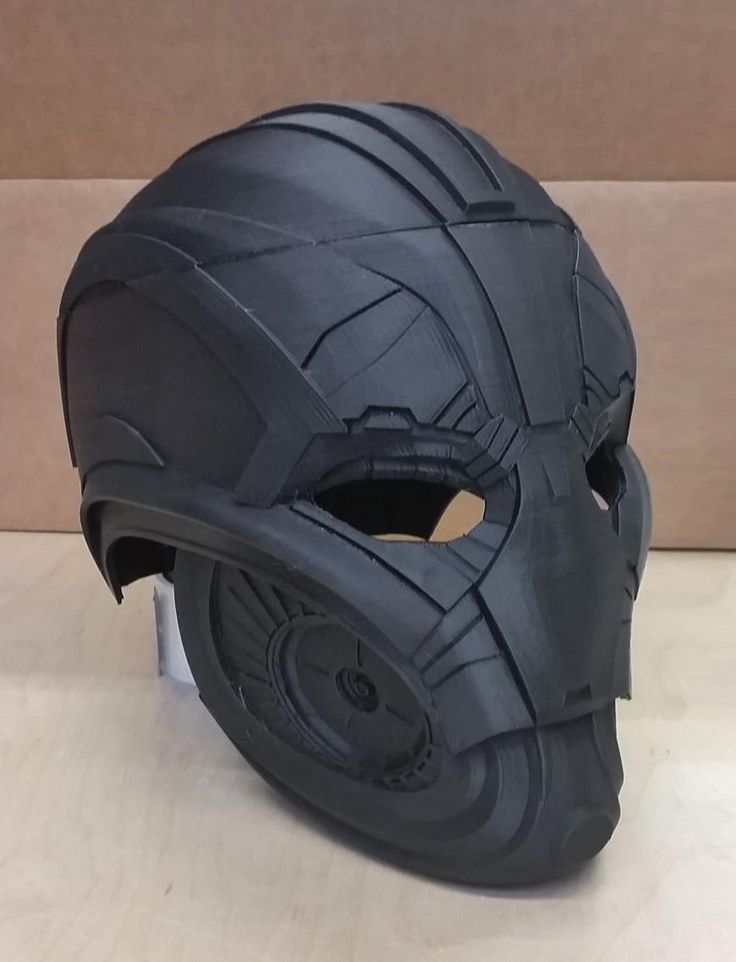 If there is any type of assembly or special instructions that go along with the model, this is where the designer usually puts them.
The comment section often has valuable insights about possible broken or missing files, common problems, and the settings that worked best for their 3D printer. If someone fixed or improved a part of the design, you can find that update under remixes. Looking at the makes from other users ensures that the helmet does indeed print without issues.
Top 3D printed helmets in 2023
To make things easier for you, we have listed some of the most popular models to make. If you are interested in 3D printing an Iron Man helmet, Boba Fett helmet, or other Star Wars helmet, we’ve got you covered.
Mandalorian helmet – v2
Image: robpauza via MyMiniFactory
Rob Pauza’s Mandalorian helmet comes with three different versions to choose from. You can print it in one, two, or eight pieces so that you can easily print it regardless of your printer’s build volume.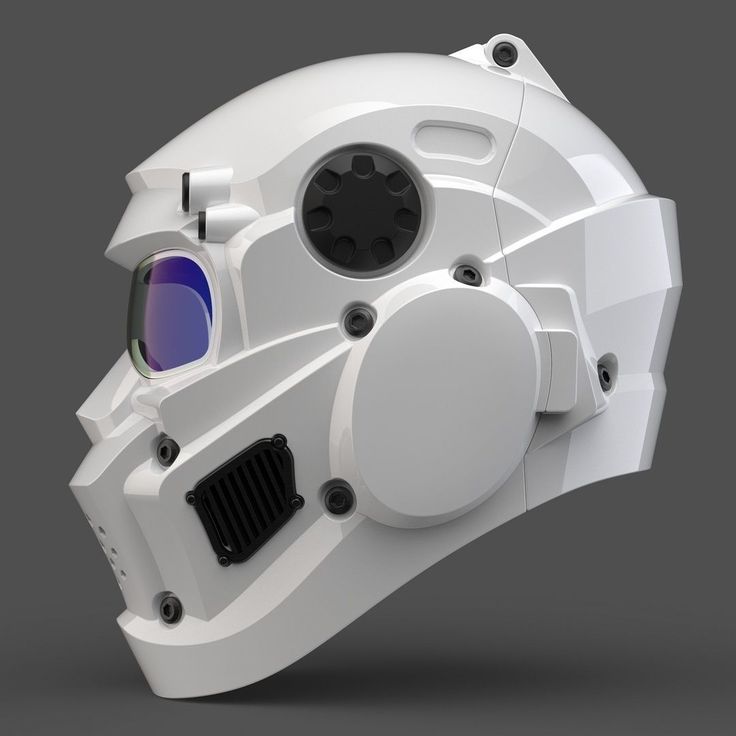 That makes this print file an ideal choice for users who want to leverage the high detail of the best resin 3D printers, since the pieces are small enough to work with their modest print areas.
Recommended:
Resin vs Filament 3D Printers: What’s the Difference?
- Found on: MyMiniFactory
- Designed by: Rob Pauza
Halo 4 helmet (full-size)
Image: bnicholsban via Thingiverse, CC BY-SA 3.0
This particular print had a colored face shield added.This 3D printed full-sized Halo 4 helmet brings to life the distinctive design from the games with close attention to detail. The model even has casings to add LED lights to both sides, as well as multiple inserts for the eye guard. While this is obviously an excellent choice for cosplay, the lighting and electronics make it an excellent decor piece as well.
- Found on: Thingiverse
- Designed by: big_red_frog
Collapsible Squid Game soldier mask
Image: kimgooni via Thingiverse
3D printed in two split pieces and designed to snap together, this soldier mask model is a fantastic nod to the Squid Game series.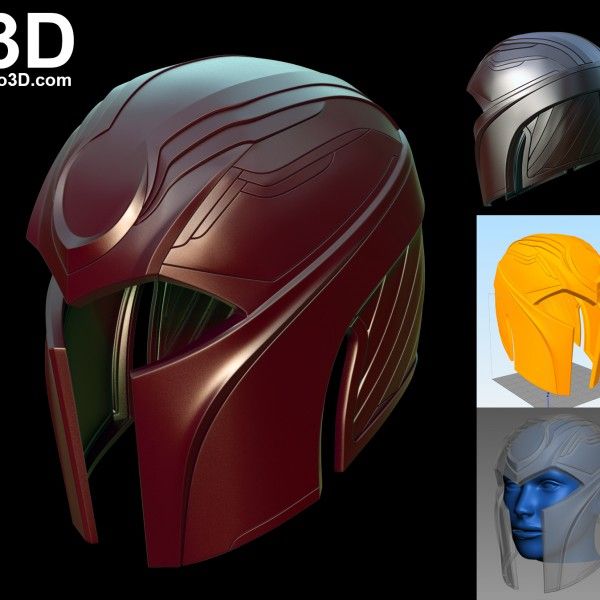 Once assembled, the mask slides together to save room in your bag or pocket. You can leave the mask blank or use one of the included stencil files to recreate one of the three shape designs.
- Found on: Thingiverse
- Designed by: Jh Kim (kimgooni)
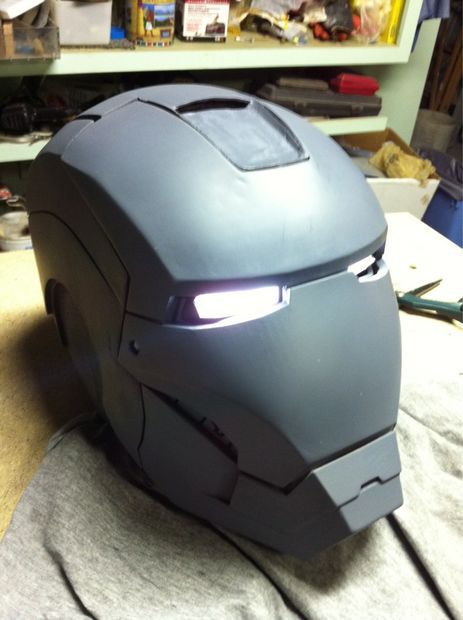
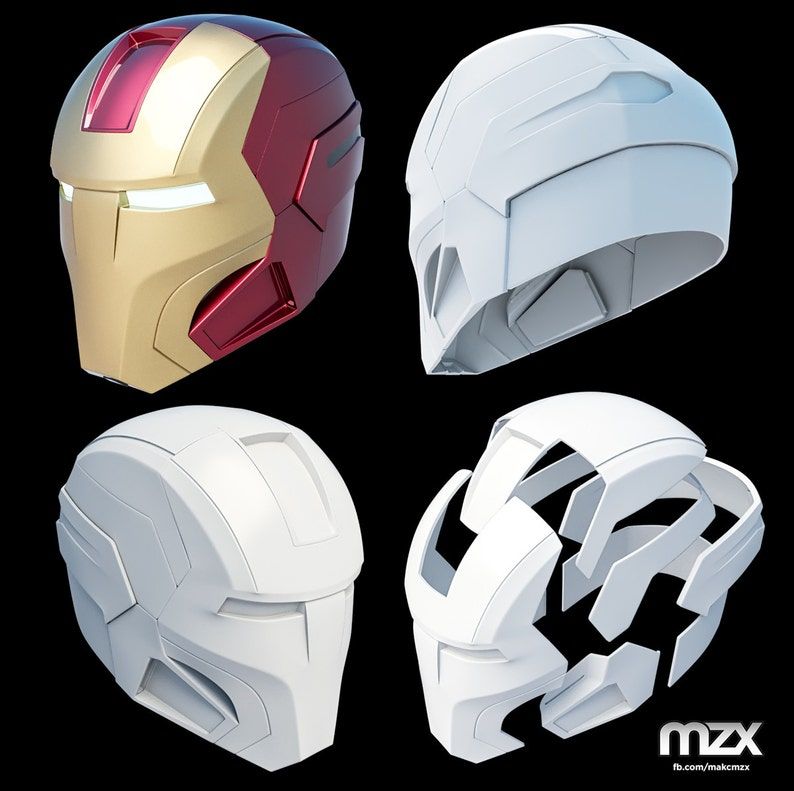
Articulated Iron Man helmet
Image: Boxandloop via Thingiverse
For a design that looks and functions as closely as possible to the original design, this movable, light-up helmet wins hands-down. The articulated panels on this amazing Iron Man helmet let the faceplate lift up, while the optional electronic components light up the eyeholes with LEDs.
The designer provides a wiring chart and a step-by-step video for setting up the lights. The lights for this 3D printed Iron Man helmet are an optional feature but are worth trying.
- Found on: Thingiverse
- Designed by: Boxandloop
Star Wars Clone Trooper helmet (Phase 2)
Image: Killonious via MyMiniFactory
With such an abundance of options for 3D printed Star Wars and Storm/Clone Trooper helmet models available, it’s hard to pin down a single one as better or worse than the rest.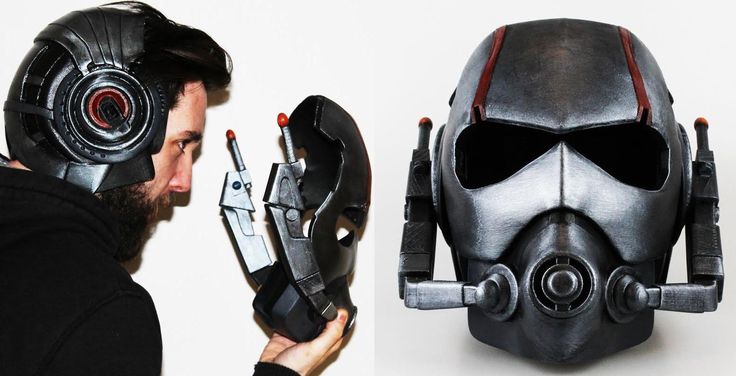 This design, however, adds a considerate touch to both functionality and aesthetics. Since the bottom hole on this type of helmet is too narrow to fit over your head, two pieces at the bottom are designed to attach and detach with magnets.
- Found on: MyMiniFactory
- Designed by: Peter Snyder
Magneto helmet
Image: fynngro via MyMiniFactory
Magneto’s helmet is a classic look in the Marvel universe that any dedicated fan can usually identify immediately, and this amazing model captures the simple but eye-catching design quite nicely. The tip of the m-shaped opening in the front makes it a bit tricky to 3D print in one piece, but it can be done with the liberal use of 3D printing supports.
- Found on: MyMiniFactory
- Designed by: Fynn Große-Bley
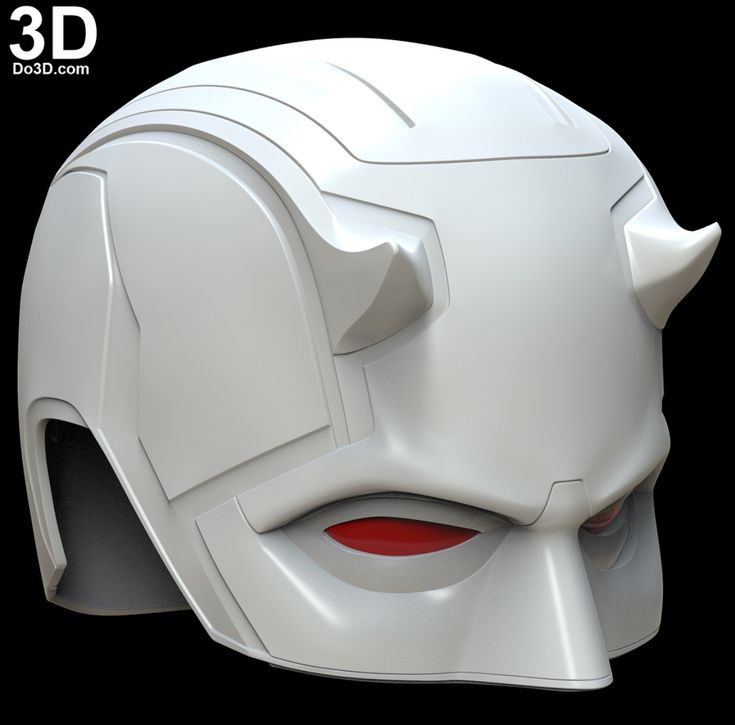
Marvel Daredevil helmet
Image: 3DPrintModelStore via MyMiniFactory
If you’re an avid Marvel fan, this Daredevil helmet is a great project to try.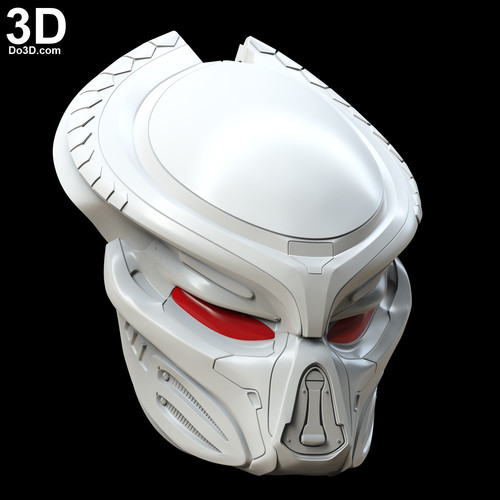 While the model itself is highly-detailed, you’ll get the best look from taking your time in the post-processing period.
The pieces on the side of the helmet make it awkwardly shaped. This is definitely a design that is best suited for cosplay and not as decoration, since it won’t sit straight on a flat surface.
- Found on: MyMiniFactory
- Designed by: 3DPrintModelStore
Preparing the model for printing
Splitting
If your helmet model is too large for your printer’s build plate, you will need to split it into multiple pieces to make it fit. After 3D printing, the split helmet pieces can be glued together with superglue or another adhesive.
When 3D printing a full-size helmet, splitting the model is nearly always required unless you use a large 3D printer. These have a larger build volume and are able to 3D print a full-size helmet in one go.
Recommended:
The 10 Best Large 3D Printers For Massive 3D Prints
There are a few different ways to split a 3D model, depending on what software options you have access to.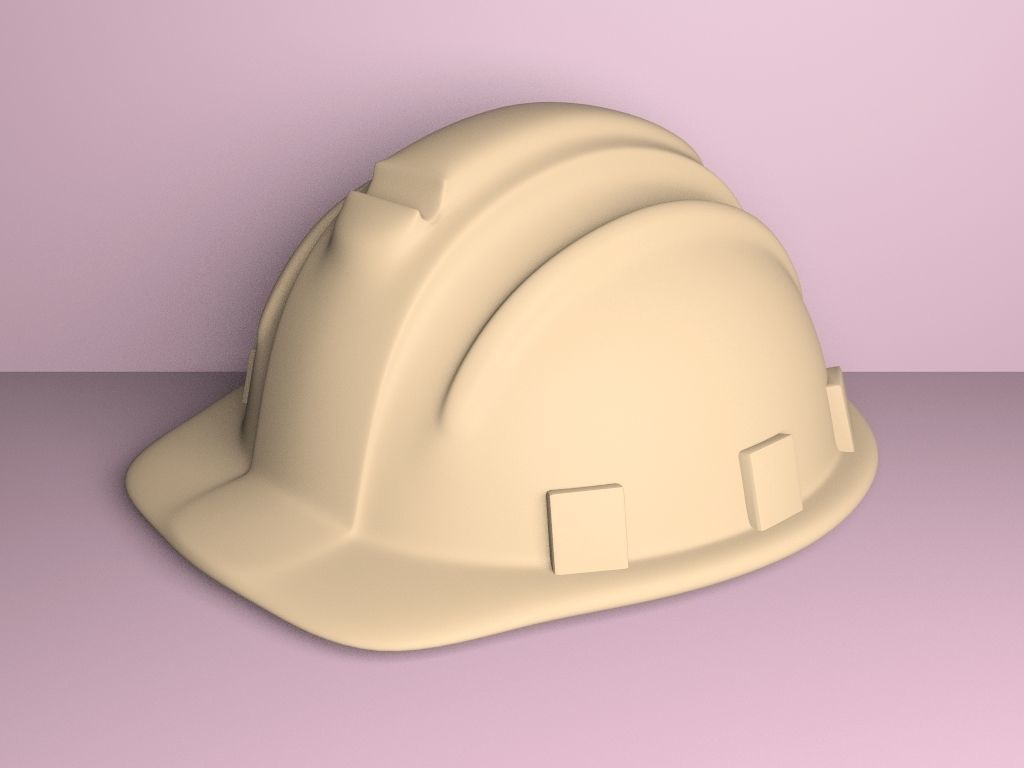 Some free software options like Slic3r and Netfabb can separate an STL into multiple parts. Most CAD programs can also cut STL models into smaller parts using the plane cut tool.
Autodesk’s Meshmixer tool also has a function for splitting 3D models. If you already use this to check for errors and possible print issues before sending it to your slicer, you can easily add this to your workflow.
Many designers will offer a full-size helmet and a split version of their models on model sharing sites if the full-size version is larger than a typical print bed can handle. So often when you download a helmet 3D model online, there may already be a split option in the file section.
Image: Marcus Bergner via MyMiniFactory
3D printing the split pieces in multiple colors is perfectly fine if you are going to paint the helmet later!Generating GCode (configuring print settings)
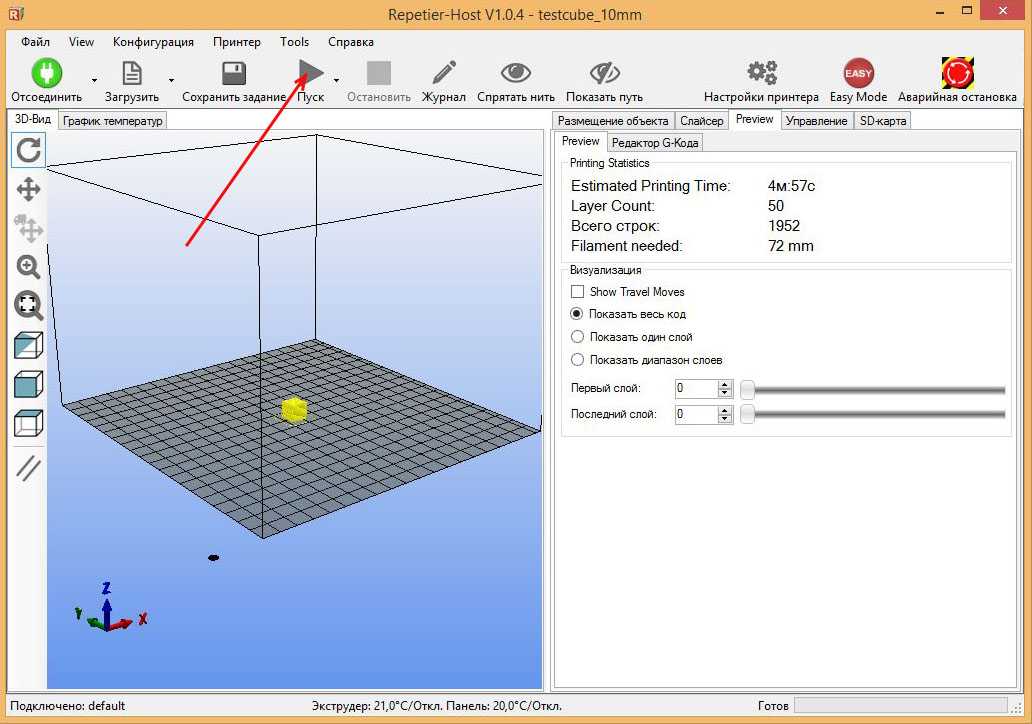
Once you have your helmet 3D model of choice, you can import it into your slicer to set your print settings and generate your GCode file.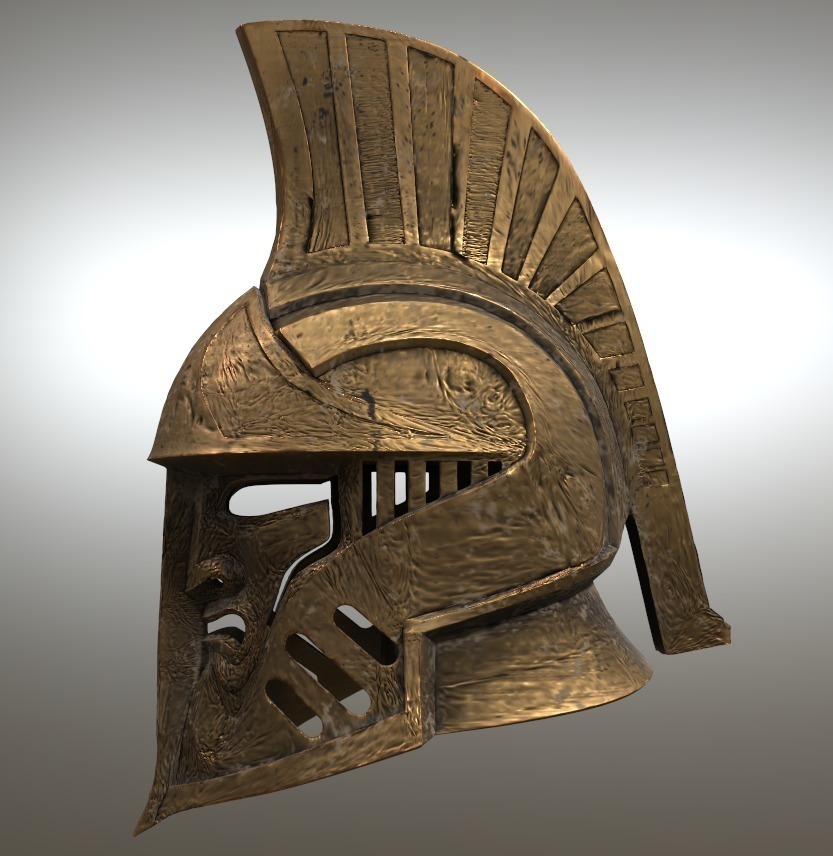 There are numerous settings in a typical slicing software, and which ones to use varies from printer to printer.
Likewise, different types of filament require different settings. Even filaments made from the same material can vary from brand to brand, so even if certain settings work with one brand of PLA filament, they might not with a lesser quality brand.
Recommended:
The 10 Best PLA Filaments for 3D Printing
Some of the most important settings to consider in your slicing software for your helmet 3D model are:
- Wall (shell) thickness: As we’ll discuss later in this article, 3D prints need to undergo quite a bit of sanding to get rid of the layer lines on the outside of the model. This usually results in a loss of material from the outer shell of the model and can even lead to a hole in the model if too much material is removed. Adding extra material to the outer walls can ensure that you don’t accidentally damage your model if you get too aggressive with your post-processing work.
- Infill: Since you are most likely going to wear the helmet after printing, try to use as little infill as possible to keep the model from getting too heavy. Most helmets don’t need much infill to stay structurally sound since they don’t have to bear weight or otherwise undergo much stress. You also don’t need to worry about using the strongest infill pattern.
- Retraction: If your nozzle has to travel over gaps while printing, make sure retraction is turned on to avoid stringing and messy edges.
Recommended:
How to Use a Temperature Tower for Better 3D Prints
- Layer height: Your layer height is a valuable setting to tweak if you want print speed over aesthetics. Increasing layer height allows the printer to finish your print in fewer layers, which can significantly speed up the overall print time. This also results in a less detailed print and requires more sanding or filling to get rid of the layer lines during post-processing.
- Supports: You will most likely need to use supports when printing your helmet. Since the model curves at the top to accommodate the shape of the head, the printer often needs extra help to make sure the layers don’t droop while it is printing the overhangs. Support structures like rafts and skirts that go on the print bed are also useful for helping with adhesion in the first few layers.
3D printing the helmet
Once you have your GCode generated, you can send it to your printer!
While you can make almost any printer make helmets with enough model splitting and dedication, we recommend the Prusa i3 MK3S+ as the go-to 3D printer for making cosplay items and props.
It has a large build plate, so you won’t need to do much splitting and gluing for most projects. On top of that, it is extremely easy to level with its mesh auto-leveling system. To prevent failure on large prints, it has filament detection and print resume after power loss, which are incredibly useful features when printing large objects like helmets and other props.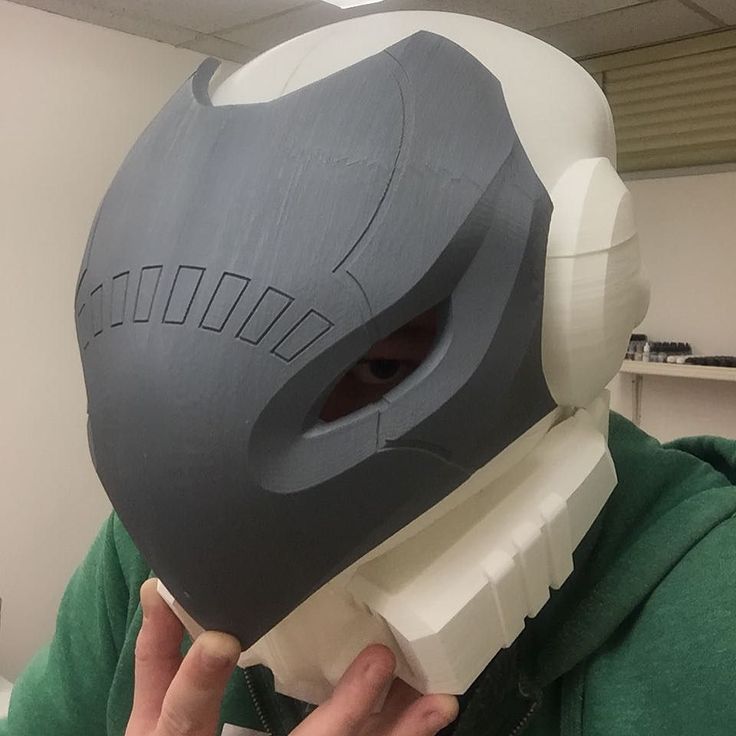
If you want to learn more about the Prusa MK3S+ or to read up on our other recommendations, check out our article with the best 3D printers for cosplay.
Recommended:
The 6 Best 3D Printers for Cosplay
Finishing your 3D printed helmet
Once the helmet is printed, that’s when the real hard work begins. If you want to make your finished helmet look realistic, you’ll need to do some post-processing.
Removing supports
If you had to use any supports while printing your helmet, you’ll need to remove them before doing anything else. The easiest way to deal with supports, rafts, and skirts is to use needle- or flat-nosed pliers to pry them off the model. Just remember to be gentle so you don’t accidentally damage your helmet in the process.
Some dual extruder 3D printers can print PVA water-soluble supports from one nozzle and normal filament from the other. This makes it much easier to remove supports since they dissolve when you put the model in water. If you have a dual-extruder 3D printer, it is worth exploring if it can use PVA.
Assembling the printed parts
Glue together any 3D printed parts that needed to be split to fit on your print bed. You can use two-part epoxy glues, superglue, or any other adhesive that is safe for plastic and creates a strong bond. Make sure to tailor the adhesive to the type of filament that you use. The best glue for PLA is not necessarily the best for ABS.
Recommended:
How to Glue 3D Prints: The Best Glue for PLA, PETG & ABS
Be careful to line the pieces up as closely as possible, since major misalignments here will result in a seam too large to cover up.
Image: Marcus Bergner via MyMiniFactory
Clamps can be useful when gluing split parts together.Once the glue is dry, use a piece of rough-grit sandpaper on all the seams to remove any excess glue and to help the crack blend in. Don’t worry if the area looks rough. You will be doing a lot more sanding and filling in the next steps.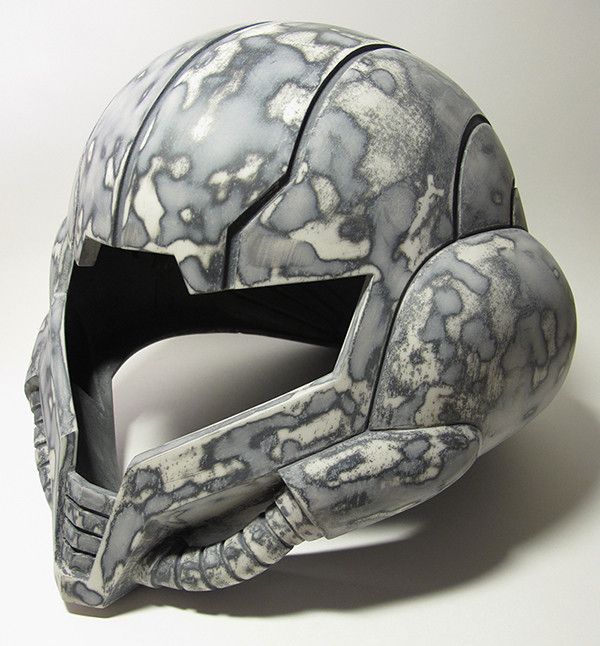
Sanding
At this point, your 3D printed helmet will have unsightly spots and visible lines from the printing process. If you just want to use your helmet as a decoration and don’t mind the “3D printed” look, you can leave the model as-is.
However, if you want to use the helmet as part of a cosplay costume (for example, with 3D printed armor) or to look like a professional prop, you will need to smooth out the surface imperfections.
Start with a piece of rough-grit sandpaper and sand the entire helmet. Repeat this step multiple times, each time using a sandpaper grit that is one step up from the previous grit.
Continue this process until the helmet is smooth. This typically happens when you reach a fine-grit paper around 2000 grit.
Remember that as your grit increases, your sandpaper will remove less and less material, so make sure you’ve removed all the layer lines before moving on from the first few sandpaper grades.
You can also use a filler product like Bondo, wood putty, and even epoxy filler to fill in the layer lines.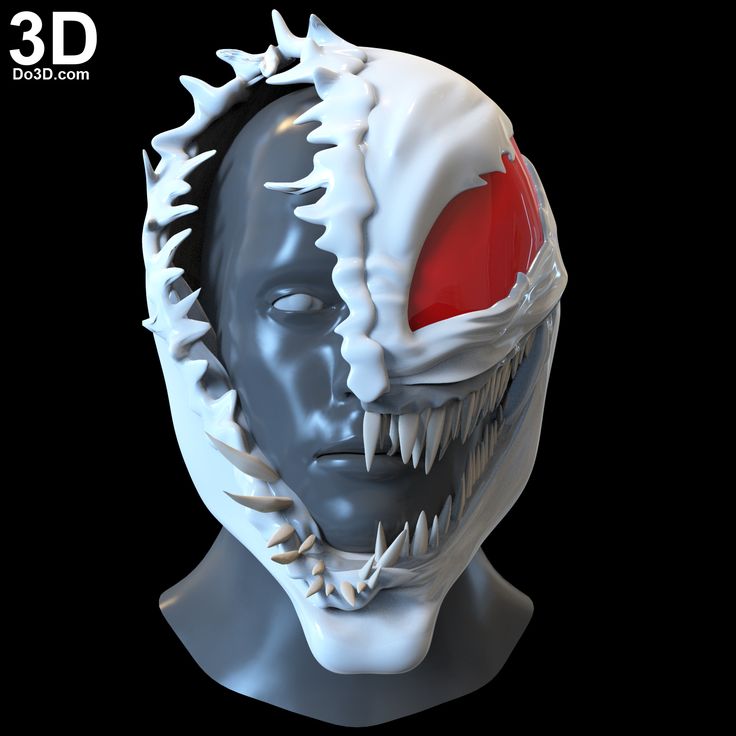 Just cover the helmet with the product before sanding and let it dry. Filler primer works well too.
Image: gregsecrist via MyMiniFactory
This Mandalorian helmet has a liberal amount of filler applied before sanding.Then you can sand the filler until smooth, instead of the actual print. This takes significantly less effort than sanding the layer lines down.
If you are using a filler spray, applying masking tape beforehand will prevent it from entering unwanted areas.
Recommended:
PLA Smoothing: How to Get Perfectly Smooth PLA 3D Prints
Priming
While you can technically skip this step, it is a good idea to put a coat or two of primer on your 3D printed helmet before you start painting it. The primer gives the paint a surface to adhere to, and you’ll need fewer coats of paint to cover the helmet.
Some paints (especially spray paints) have the primer included as a 2-in-1 formula, so you can paint and prime at the same time.
Painting
Painting your 3D printed helmet is the last step of post-processing.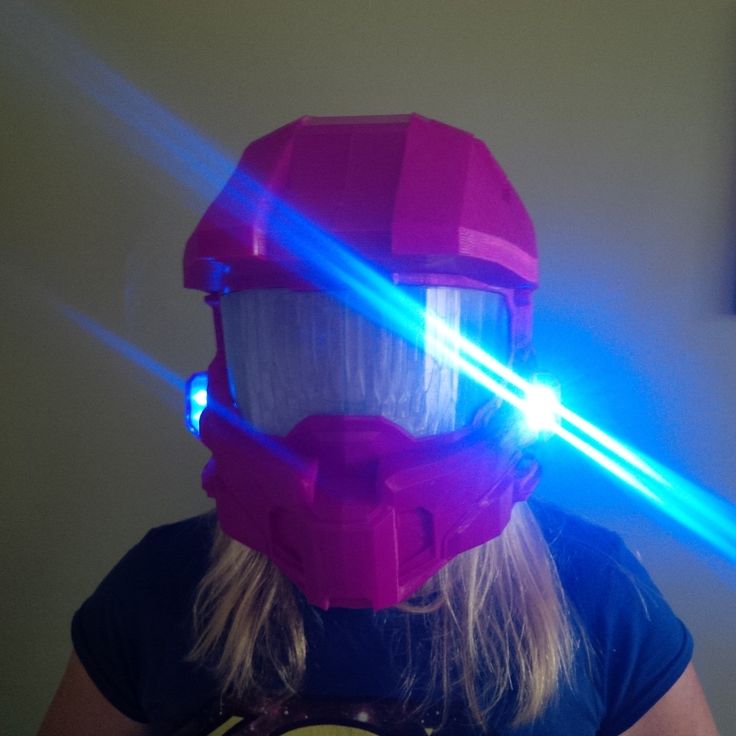 How long this part takes depends on how much detail you want to put into it.
Spray paints are a good way to quickly put a base color on the whole model, while hand-painting can add in the finer details after. You can get as creative with the detailing as you’d like. Painting on scuffs and other types of damage can really make your helmet look amazing.
Always make sure that you paint in a well-ventilated area.
Image: MarkTan via MyMiniFactory
You can make painting your 3D printed helmet as elaborated as you want it to.Adding padding (optional)
Finally, you can glue foam strips or other types of padding to the inside of your painted helmet for added comfort. This is completely optional, but it may be worth the extra time and materials if you plan to wear the helmet for extended lengths of time.
Frequently asked questions
How long does it take to 3D print a helmet?
The 3D printing duration depends on the size and complexity of the helmet, whether you print the whole thing in a single piece or in multiple pieces, and what slicer settings you use.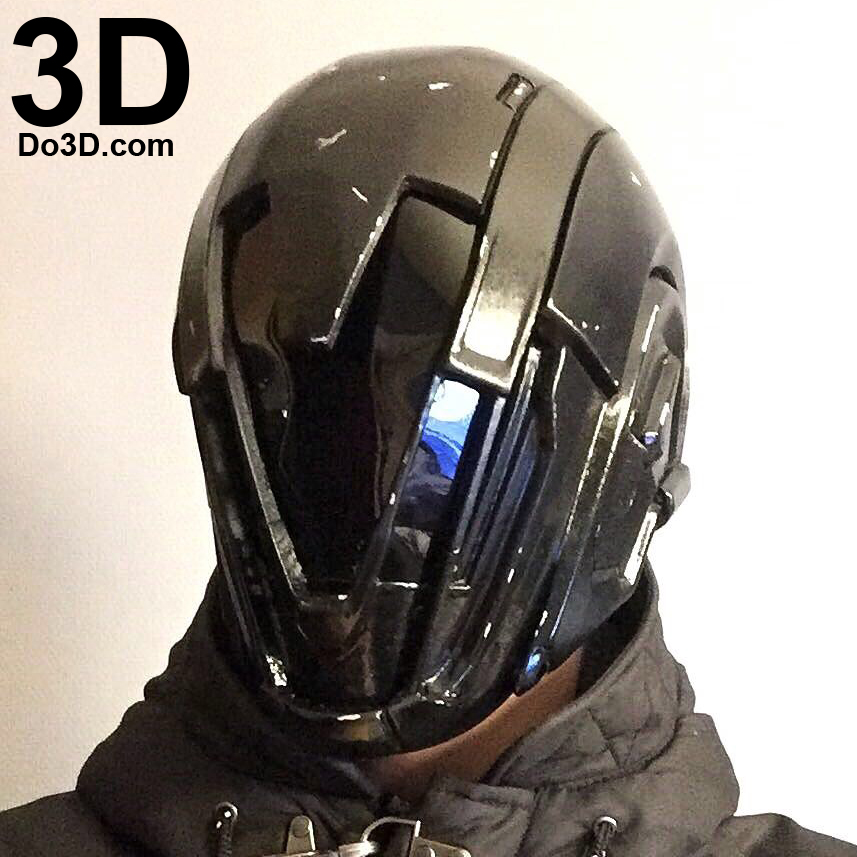 Most helmets will take 4 hours at the very least, with 6-10 hours being more likely.
Using a high print speed, high flow, and large layer height in your print settings will speed up the printing process quite a bit, but you will lose a lot of detail. You are also more likely to get defects and messy areas during printing, which will just make the filling and smooth sanding of your 3D printed helmet take longer.
You can use a CoreXY 3D printer to partly remedy this problem. CoreXY printers have less moving mass and are able to achieve higher print speeds without decreasing the quality of your 3D prints.
How much does it cost to 3D print a helmet?
Again, it really depends. The final 3D printing cost of your finished helmet depends on what type of filament it is printed from, how much infill is used, and what materials you used in the post-processing phase.
What size printer do I need to make helmets?
You can 3D print a helmet on almost any build plate with enough determination, but it’s much easier to use a printer with a decent-sized print volume. A larger print volume allows you to create 3D printed helmets in a single piece.
Printing a full-size helmet at once saves a lot of time and effort. You won’t have to split the model, assemble the plastic parts and fill and smooth seams afterward.
You should look for a build plate of at least 200 x 200 x 200 mm (8” x 8” x 8”) if you plan to print helmets and other cosplay items, though 300 x 300 x 300 mm (12” x 12” x 12”) is ideal.
Conclusion
There you have it! That’s everything you need to know to get started 3D printing your own helmet. Have you created any 3D printed helmets, armor, or other cosplay props? What was the most challenging part for you? Let us know in the comments below!
3D Printed Helmet with STL Files to Make Your Own
3D printing enthusiasts love making 3D printed helmet props from video games and movies that have become classics. The variety of cool designs, custom projects and cosplay ideas meet even the most strict tastes.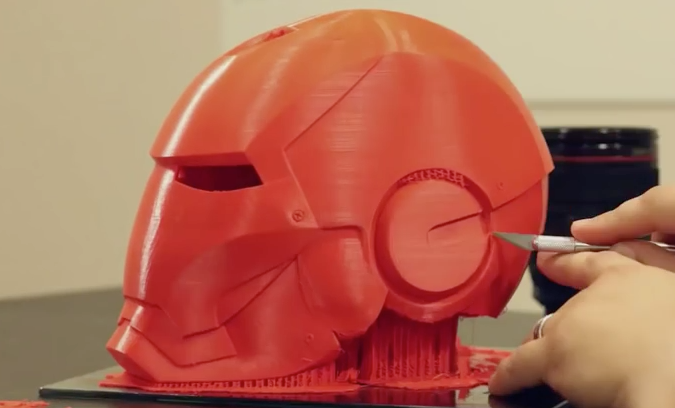 Thus, you can always find the full size or small versions of helmets to make with a 3D printer for yourself, your friends and kids.
From Star Wars, Mandalorian, Boba Fett, Iron Man, and to great Spartan DIY projects, you can 3D print the full-size wearable helmet of your dreams.
3D Printed Helmets
The astonishing 3D designs of the 3D printing helmets you will see below are inspired by popular video games, movies, comic book characters, and life. A legion of fans worldwide with a 3D printer at home will admire this selection.
Be it a holiday assignment or a surprise 3D printing project, the custom helmets and ready-to-print pieces look truly unique and deserve to appear in your collection.
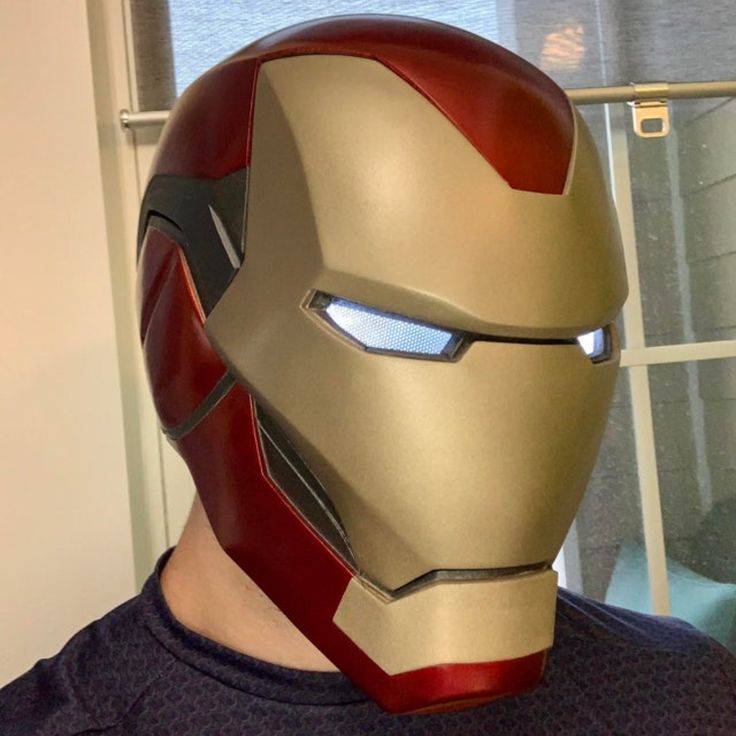
1. 3D Printed Iron Man Helmet
Fans of Iron Man will love to 3D print a wearable prop of their hero. All you need are helmet STL files or good instructions on making a custom model yourself, from 3D modelling to painting the finished 3D printed project.
Recent films featuring the Iron Man have catapulted the character to incredible popularity.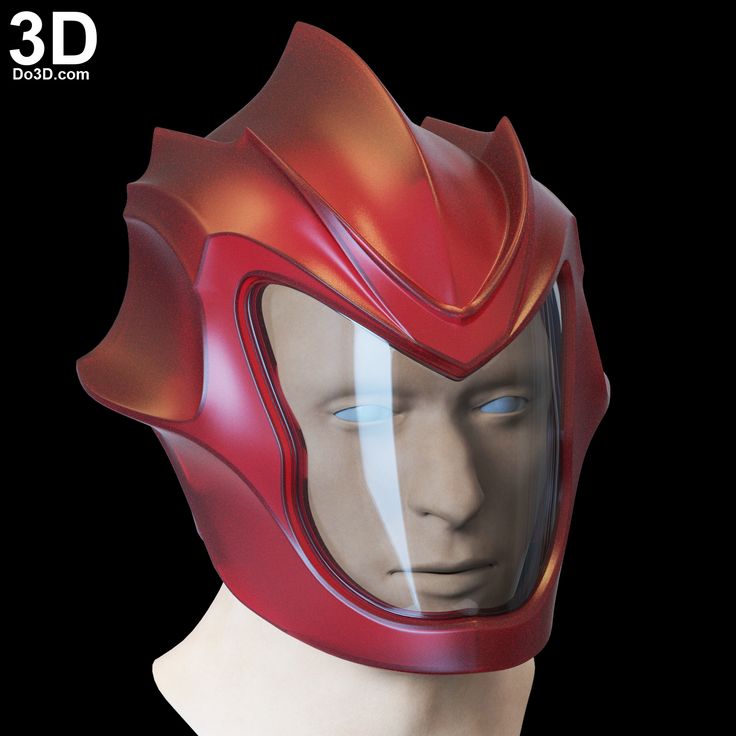 Wearing a 3D printed Iron Man helmet gives the wearer that movie character allure that we’re all familiar with.
There are various 3D printed helmets designs of Iron Man on the Internet. The one featured in our selection is great to make because its creator shared the step-by-step instructions with everyone who intends to 3D print this masterpiece.
The enthusiast provided both the STL and OBJ file formats so you can get the files your 3D printer supports.
2. 3D Printed Mandalorian Helmet
DIY Mandalorian helmet has been a real trend of the last couple of years. Ever since the release of The Mandalorian TV series, many cosplayers and hobbyists have enjoyed turning themselves into Mando by wearing his costume.
Hobbyist jstayton26 has alienated himself from the over-replicated props and created the full-size Mandalorian helmet 3D model. The project is split into eight pieces, which you can recreate using a 3D printer. It is fun to paint the piece according to your liking.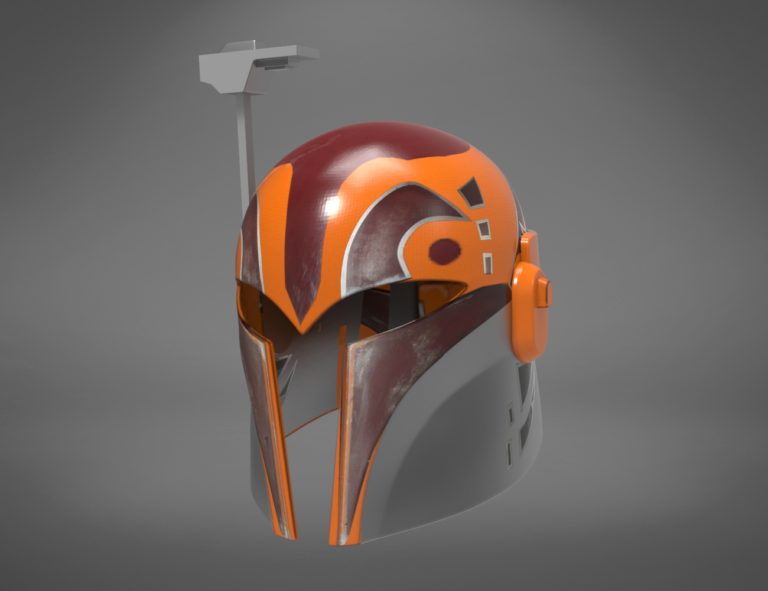
Go ahead and download the Mandalorian helmet 3D file for printing at Thingiverse.
Also, you can extract Mandalorian helmet STL files from the stunning Mando figurine for 3D printing you will find on gambody.com. Enthusiast Tom Anton used these files to 3D print a full-size prop. He finished his cosplay outfit with armour resembling what Din Djarin wears in the TV series.
Photos by Tom AntonYou can even make yourself a bag and place a 3D printed Baby Yoda figurine inside. This way, your DIY Mandalorian helmet will distinguish you from other assassins. Unlike others, you will protect the Child and receive many compliments on your costume.
3. 3D Printed Star Wars Helmet
Star Wars is an insatiable source of inspiration for every cosplayer in the world. With many fictional characters, badass droids and soldiers, new inspirational 3D printed helmets appear every year.
It is more likely for any cosplayer with a 3D printer at home to recreate the well-known Darth Vader, Stormtrooper, Boba Fett props using detailed 3D print files or build a replica of Luke Skywalker’s lightsaber.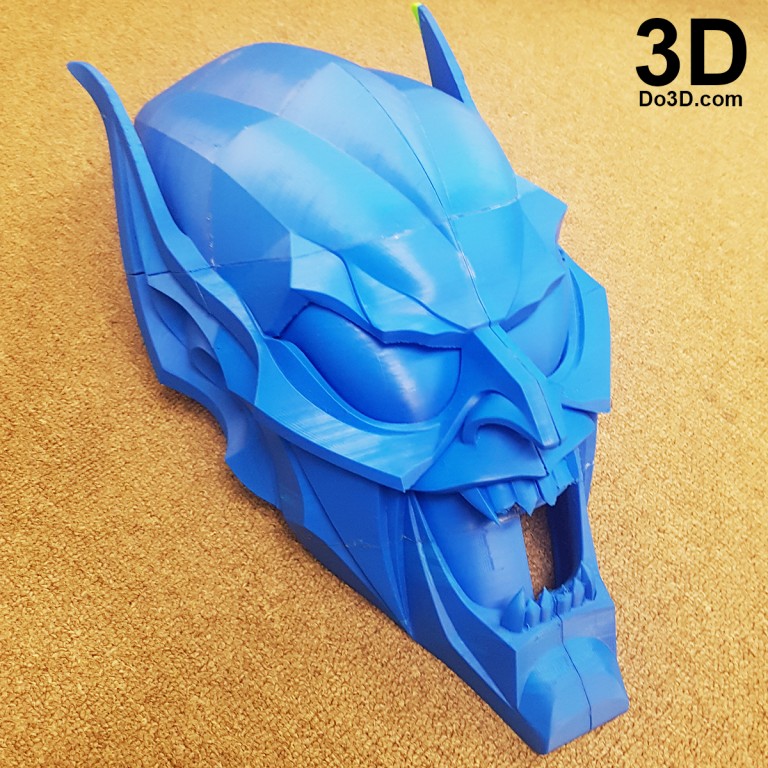
3D Printed Stormtrooper Helmet
Fans of Star Wars films who love making cosplay props will enjoy a stunning 3D printed Stormtrooper helmet. It is probably one of the most recognized items to the space opera series fans.
The latest Episodes VIII (The Last Jedi) and IX (The Rise of Skywalker) made this item reborn more potent than ever. Only look at the 3D printing model created using Blender software. It consists of 22 parts that must be super-glued together and painted to make it look just like the Stormtrooper helmet in the movie.
Boba Fett Helmet 3D Print Files
The former bounty hunter Boba Fett is an iconic character whose story began in the Star Wars movies and continues in The Book of Boba Fett TV series.
Image: CGTraderYou can find Boba Fett helmet 3D print files on different marketplaces to create such a prop for yourself. While it looks like the one worn by Din Djarin, it has distinguishing features, such as an antenna and particular colours.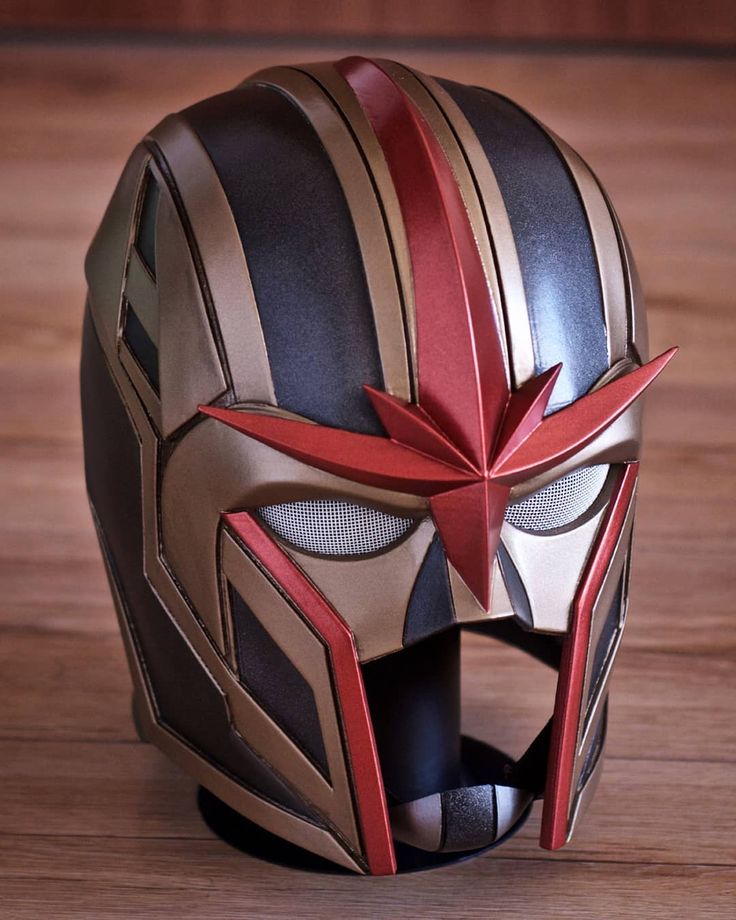 So paint it correctly and enjoy wearing it for various costume parties.
3D Printed Darth Vader Helmet
Our list of cool 3D printed helmets from the Star Wars franchise will never be complete without a Darth Vader prop. The antagonist in the original movies and protagonist in prequels is easily recognized for his headpiece.
Only think about your finished 3D printed Darth Vader helmet covering your face behind the mask. No one will even recognize you if you wear this black prop complimented with a dark coat for a party.
Pictures: CGTraderOne of the most notable fictional characters ever existed cannot wait for you to work on its prop. So, get the Star Wars helmet STL files and spend some time printing this thing on your 3D printer.
Kylo Ren Helmet STL
When you are looking for even more 3D printed Star Wars helmet ideas, think of making a Kylo Ren headpiece. It is recreated from Star Wars Episode VII. It is the miniature version, while a wearable piece is still being made.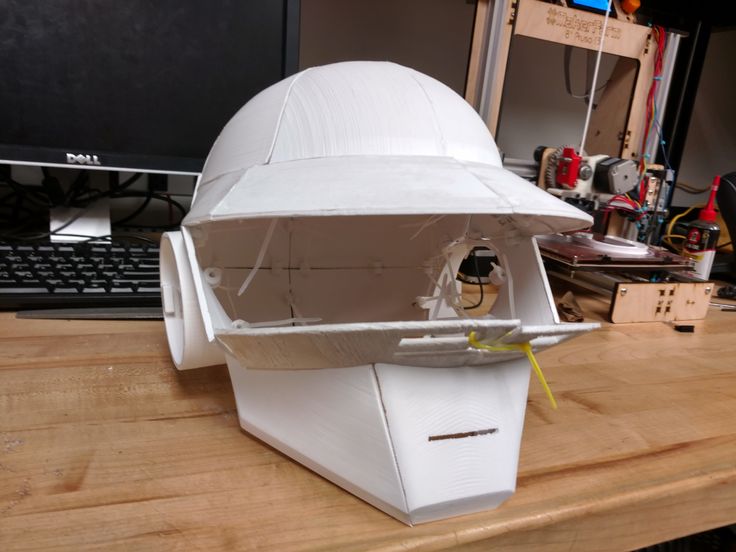
Turning into a Sith Lord hasn’t been more accessible than 3D printing a project just like his. You will need to use supports while breathing life into the Kylo Ren helmet STL files, but this 3D model can improve your collection.
4. 3D Printed Master Chief Helmet
Many Xbox One owners have played the Halo games. If you are one of them, work on a 3D printed Master Chief helmet. Such a project can be done for kids and adults because its free STL files are designed in several sizes.
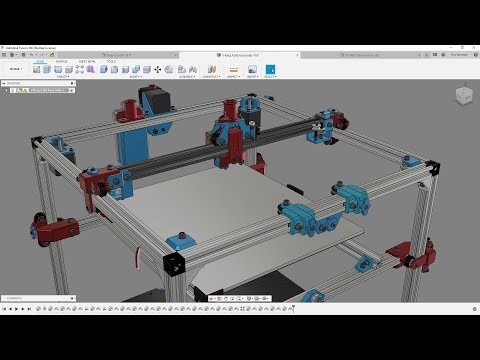
If you look closer at the 3D printed Master Chief helmet you will notice how close this replica is to the video game prop. It was designed in Autodesk Fusion 360, and this Halo accessory makes a perfect cosplay item.
It will take about 60 hours to print it at 0.2mm layer height with 5% infill.
5. 3D Printed Spartan Helmet
For 3D printing a helmet, a 3D printer is a must-have, along with detailed STL files. Take a chance if you enjoyed the 300 (film) and wish to transform into one of the 300 Spartans to battle against the invading Persians.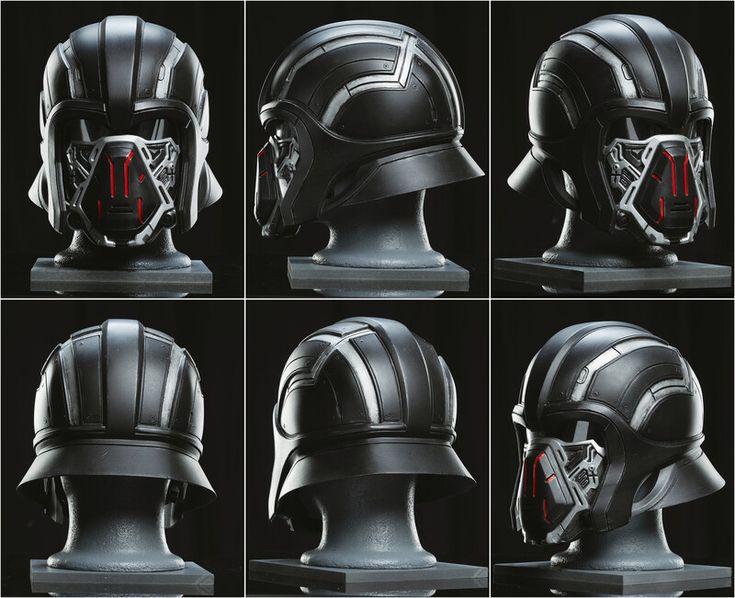
Thanks to the fun warrior prop STL files, you can add a 3D printed Spartan helmet to your wardrobe. The author of this project used a brush to create the mohawk style on top of the wearable accessory.
6. 3D Printed Destiny Helmet
Your helmet 3D print could resemble the piece from the Destiny video game. You can recreate the Mask of the Third Man using your 3D printer and Destiny helmet STL files.
Pictures: MyMiniFactoryOf course, your finished 3D printing model will lack all virtual perks. But this piece will look fantastic, significantly if you can add LEDs to light it up. Being a three-eye hunter should be awesome if you plan to go to a cosplay event or costume party.
Your 3D printed Destiny helmet will be made of several parts, which you should glue together.
7. 3D Printed Captain America Helmet
The leader of the Avengers team, America’s World War II Super-Soldier, is a popular Marvel character among cosplayers. To prove that heroes live among us, you can work on your 3D printed Captain America helmet.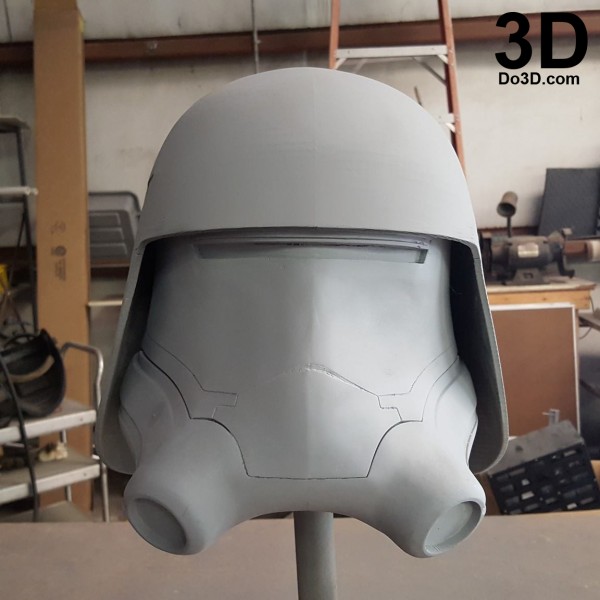
Download these or those STL files and let this prop be one of the most fantastic 3D printed helmets in your collection.
Images: Thingiverse; PinshapePaint the piece in the colours of Captain America (blue, red and white) or leave your 3D printed helmet black.
8. 3D Printed Doom Helmet
Those 3D printing enthusiasts who love first-person shooters and are big fans of the Doom video game will be happy to see this 3D printed helmet. Once you paint this prop into life-like colours, it will look like the one in the game.
3D model: prusaprinters.orgTurn into the Hellwalker and amaze everyone with your unique 3D printed Doom helmet at the costume party. Such a DIY project will last for years and make you proud of yourself.
9. 3D Printing Helmet for Everyday Use
Many enthusiasts with a 3D printer at home love to work on various things to improve their everyday life. Making 3D printed helmets can be fun for kids’ parties as little boys love dressing as knights, samurai, astronauts, space travellers, and football champions.
And adults could use their desktop machines to 3D print a headpiece for their personal needs, such as a motorcycle or bicycle ride. However, such projects might not meet safety standards if made with a regular 3D printer at home.
10. Avengers Ultron 3D Printed Helmet
Among 3D printed helmet files, you will notice a model from the Avengers: Age of Ultron movie. And since the film is based on comic books, it is no surprise it has a huge fan base.
This fully wearable 3D printed Ultron prop was inspired by the movie’s supervillain character. The mask was modelled in 4 separate parts to facilitate its printing: the jaw, the main face, the top of the prop, and the ears. Printed at 0.15-0.2mm layer height, the creation of the entire Ultron helmet took about 80 hours of work.
Once you finish 3D printing all the parts, you will have to assemble the pieces and fill the part lines with putty. After this, paint your 3D print and enjoy wearing it for parties.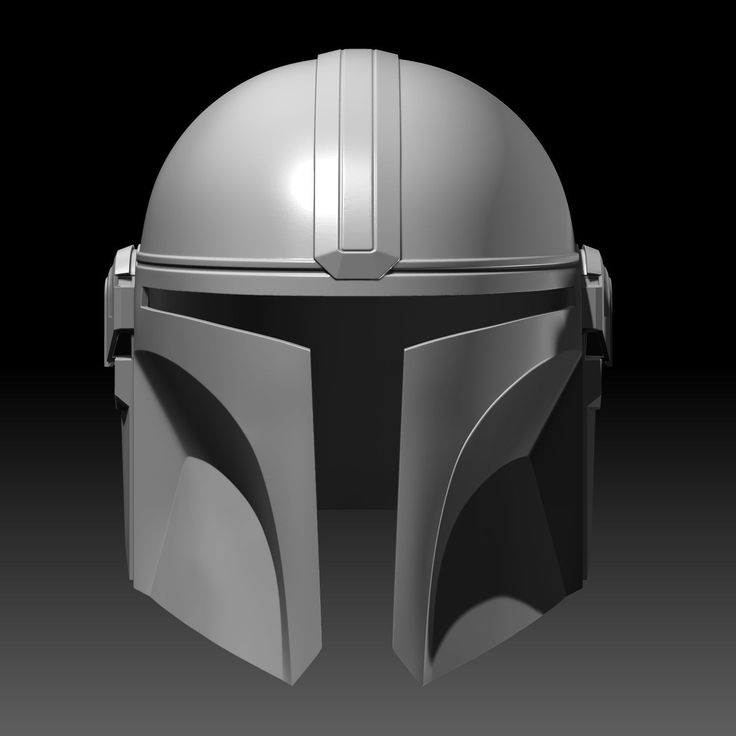
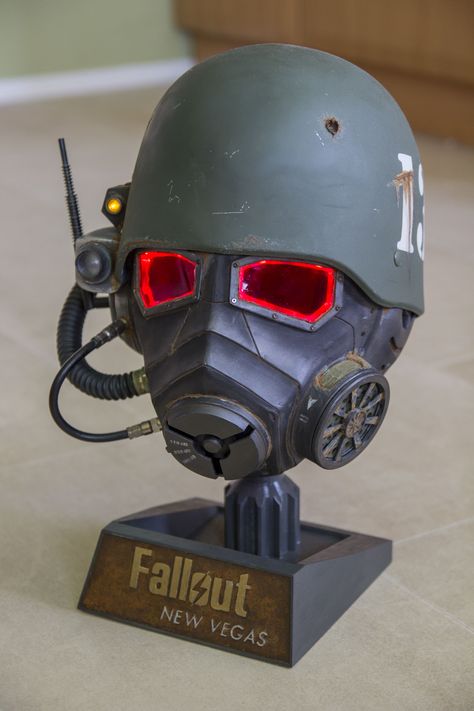
11. 3D Printed Helmet from Fallout
Another source of endless inspiration for cosplayers is the Fallout video game. From 3D printed helmets to entire power armour suits, it might seem that every bit of the amazing video game content has already been replicated for cosplay. But, there’s still room for imagination and your approach.
Photos: ThingiverseThis T-60 helmet was improved for 3D printing by Jace1969. Today, you can download its files and breathe life into such a fantastic project.
Also, you can recreate the T-51-b Power Armour prop just like the one designed by Daniel Lilygreen. This 3D print consists of 12 separate parts which, according to the creator’s advice, must be glued together, to hold the entire weight.
12. 3D Printed Star-Lord Helmet
Suppose you’ve seen the acclaimed Guardians of the Galaxy movie. In that case, you will find this 3D printed helmet a fun cosplay prop to behold. Marvel fans can rejoice because you can find a stunning Star-Lord prop for 3D printing and download the model’s STL files to work on your project.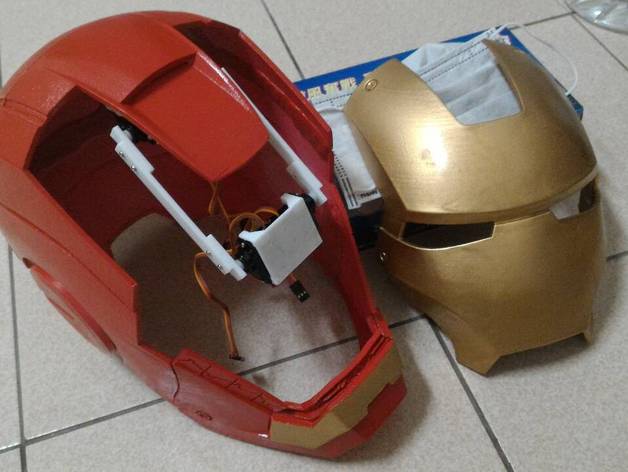
The model was created by the RPF member Helagak, who provides complete 3D printing instructions. You can follow each step and recreate an impressive accessory from Guardians of the Galaxy.
Try to light up the “eyes” to wear this piece in the dark! Everyone will enjoy your new look.
13. 3D Printing Daredevil Helmet
This Daredevil helmet for 3D printing is about 221mm high, 188mm wide and 221mm deep. However, according to the creator, the piece can be scaled either down or up, depending on the wearer. It means that you could also turn into Daredevil if you want.
The 3D printing model is available for download as STL files, compatible with many affordable 3D printers.
14. Cyberman 3D Printed Helmet Files
Are you a Doctor Who kind of guy or girl? Then this 3D printed helmet is precisely for you. It was a spooky project for Halloween for a father and a son. The 3D model was created entirely in ZBrush modelling software and printed on MakerBot Replicator 2.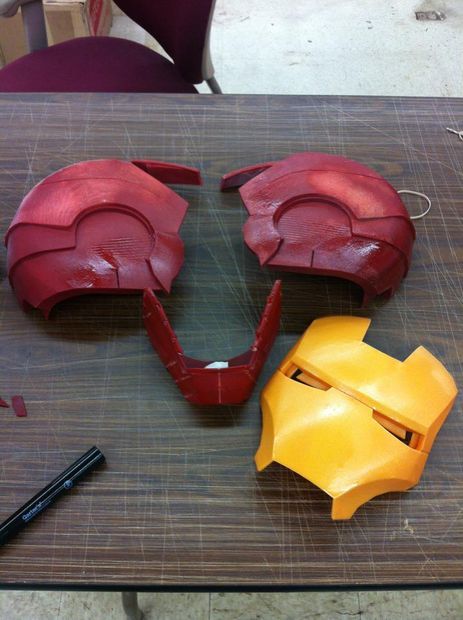
The designer behind the epic Cyberman helmet has shared the entire process of modelling and printing this piece here. You will love pictures of the painted work. It looks fantastic!
Cool, huh? These 14 inspiring 3D printed helmet models will put you in the cosplay spirits. Don’t hesitate! Right now is the perfect time to boost your creativity and craftsmanship. And don’t forget to share your 3D prints in Gambody 3D Printing Community on Facebook for the joy of other hobbyists.
(Visited 18,883 times, 1 visits today)
Author
A 3D printing website where users can buy and sell 3D printer files.
Best STL Files for 3D Printing %D1%88%D0%Bb%D0%B5%D0%Bc・Cults
French tank AMC 35 with pilot - 28mm
9. 99 €
99 €
Wemos D1 Wifi (ESP8266)
Free
ESP32 Cam / Wall switch / 2 buttons / Sensor DHT11 / Hassio
Free
T13 Type 1 Belgian tank - 28 mm
9.99 €
Case WeMos D1 mini
0.63 €
ESP12F (ESP8266) Programmer (OpenSCAD version)
Free
ESP8266 module model library
Free
Sermoon D1 thread guide options see instructions
Free
Sovol Sermoon Creality 3d Direct Drive PTFE cut guages
Free
shelf installation
7 €
hydrofoil shell
2,50 €
Vantactic washbasins
2,50 €
Buoy trap
2. 50 €
50 €
xtool air help hose guide D1
Free
Wall mount for laser head D1 Xtool
0.69 €
Tank Renault G1 with pilot - 28 mm
9.99 €
Tank Renault D2 with pilot - 28 mm
9.99 €
Tank Renault D1 with pilot - 28 mm
9.99 €
Wemos D1 with temperature humidity sensor DHT for Domoticz
Free
WeMos D1 Mini ESP8266 reference model with F3D and Step/stp
Free
Wemos ESP8266 with sensor housing DS18B20
Free
Laser engraver X Tool D1 Pro, 3D printed cover to protect PCB from dust and debris
2. 31 €
31 €
Wheel set for DR!FT Racer by Sturmkind
4,99 €
Micromake Power Plate
Free
Clone of Nanoleaf Lines
Free
Clone of Nanoleaf Lines
Free
Arduino Mini Oled Case
Free
DR!FT Racer Storm Child rear spoiler for D1
1,99 €
Critical Hit Dice (Mighty Nat 1 die)
5 €
Sermoon D1 Display Cover
Free
Enclosure for ESP32 D1 Mini (NodeMCU)
Free
Wemos D1 Mini Screen Storage Rack for Standard Hardware Storage Cabinets
Free
D1 mini box with lid
Free
GOLDEN CHEST OF FATE
7 €
D1 Mini Wifi Extender Box
Free
Wemos D1 Mini cover
Free
Ender 3 Rear MKS Gen L with Mosfet and Wemos D1 Mini
Free
ESP D1 Mini v3
1. 06 €
06 €
xTool Honeycomb Angle Bracket
Free
LED hexagonal panels
Free
Wemos D1 Mini Relay Case
Free
Temperature, humidity, humidity sensor with OLED display
Free of charge
PIR motion sensor - WEMOS D1 Mini + HC-SR501 - Philips Hue
Free
D2 DESK STAND FOR LAPTOP 2 CM THICK
0.95 €
Mounting/locating foot XTool D1
0.94 €
Floor lamp with LED strip MK1
0.99 €
Wemos D1 Mini Temperature Sensor Case
Free
WEMOS D1 mini Project Box / Case
Free
Photopolymer ski helmet 3D printing project
Implementation stories
Rapid prototyping
Art and design
Author: Aleksey Chekhovich
Author: Aleksey Chekhovich
Concept | Project analysis | Challenges | Solutions | Stages of work
Laser stereolithography is one of the most widespread 3D printing technologies, providing undoubted advantages in prototyping compared to traditional production methods.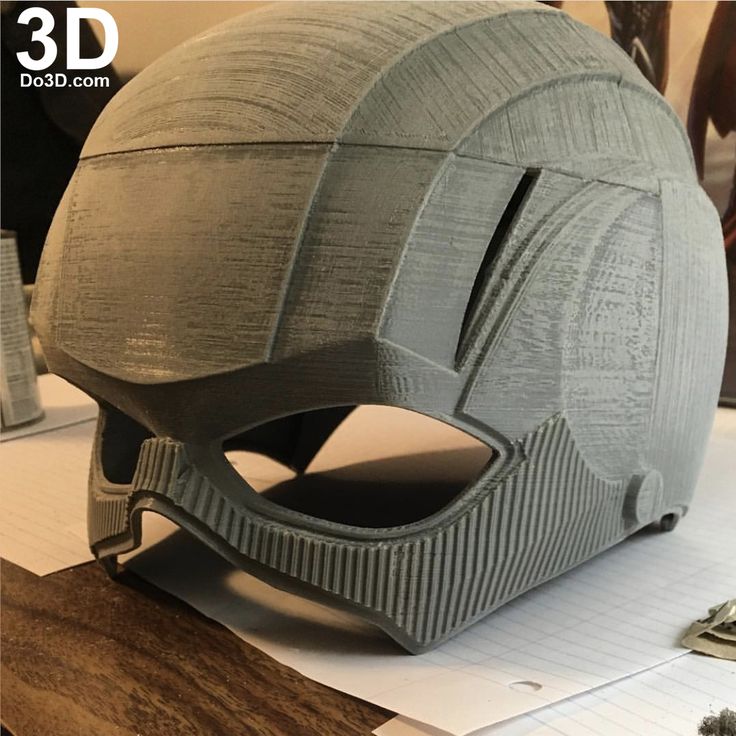 Let's see how ProtoFab completed a complex project in a short time using a photopolymer 3D printer to create a high-quality model of a ski and snowboard helmet.
- Model: Blizzard ski helmet with drone
- Material: ProtoFab Formula W photopolymer
- Fabrication Technology: 3D Stereolithography
- Lead time: 3 days
- Customer requirement: eye-catching lines, uniform coloration, clear color contrast, overall stylish and attractive appearance
ProtoFab was contacted by the organizing committee of the Cross-Strait Industrial Design Awards with a request to produce prototypes for each of the contestants. It will be much easier for the participants to showcase their innovative and original designs if they submit high quality models to the competition. The creators of the ski helmet contacted ProtoFab and sent in their drawings. They wanted bold, streamlined lines to be used in the design, and the quality of the finish to be as high as possible.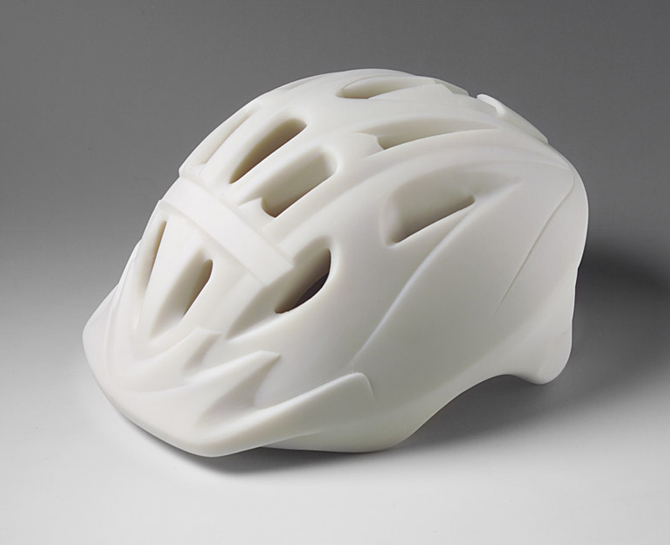
Concept
The Blizzard (Snowstorm) helmet is designed primarily for skiers and snowboarders. These extreme sports involve certain risks and can lead to serious injury. Therefore, it is extremely important to use the proper equipment that would provide increased safety. The Blizzard helmet is equipped with a GPS tracking chip, which can significantly speed up the search for an athlete in the event of a fall, disorientation or avalanche. This is especially important in frosty weather, which is typical for alpine skiing.
The Blizzard helmet also features a high-speed camera capable of capturing breathtaking moments with incredible clarity and detail. However, the most unique feature of the helmet is the support for an unmanned aerial vehicle. The video recording drone inside the helmet can fly out of the helmet and return to its place at any time.
Project analysis
After receiving the drawings from the client, the ProtoFab team had to decide which technology to choose - CNC machining or 3D printing.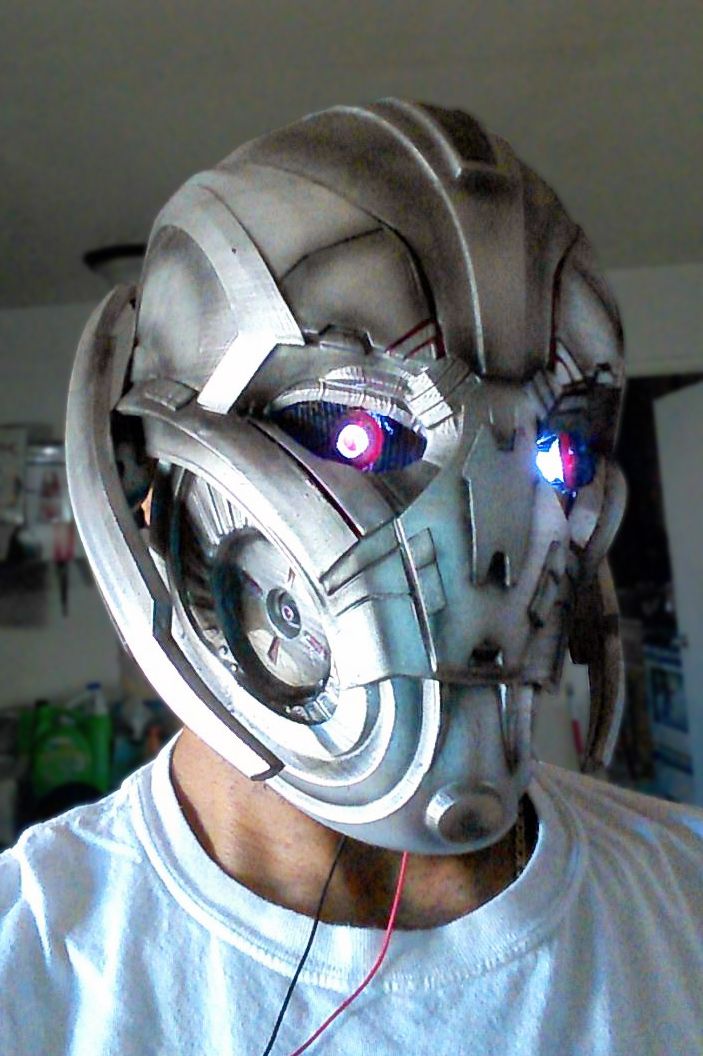 It immediately became obvious that additive manufacturing would be the best solution. Traditional CNC machining includes careful design analysis, programming, direct machining on the machine, and a number of other complex and time-consuming tasks. All this usually leads to high costs. In turn, 3D printing is a much simpler process, which can significantly reduce the lead time. And for such projects, where the product does not have to withstand a lot of weight, 3D printing is especially suitable.
Calls
Surface quality played a major role in the project. Polishing and painting had to be done exactly according to the client's vision. The design of the helmet features multiple protrusions and four colors - Matte Black, Gloss Black, Gloss Orange and Steel Grey. The experienced ProtoFab team faced some challenges in polishing and ensuring perfect contrast between different colors.
Solutions
Since the model could be printed as a single piece, the technicians only needed to correct the drawings in the software and add the necessary supports.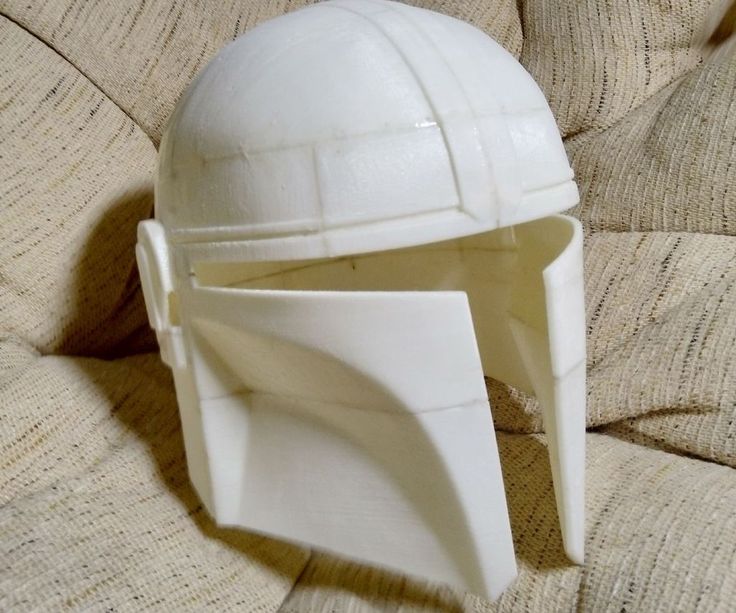 The use of supporting structures ensures the stability of the product during printing and prevents possible deformations. In addition, the entire model can be printed in one session, without the need to break it into parts.
Complex post-processing
Upon completion of printing, the model was carefully removed from the 3D printer and washed with alcohol. This removed any residual liquid material that may have remained in the helmet after printing. The next step - removing supports - requires special care so as not to cause any damage to the model. Below is a view of the product after separation of all supporting structures.
The printed object may be slightly rough and have visible surface defects. ProtoFab sanded the model, starting with coarse sandpaper (400) and gradually moving to fine sandpaper (1500). Polishing was a particular problem due to the complex surface texture on the top of the helmet. The application of paint also required special care.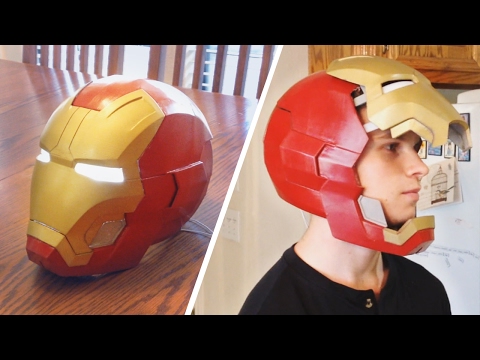 In order to ensure an absolutely uniform coating, three separate polishing and painting cycles were carried out.
Top coat application
To get the look the client wanted, it was important to choose the right paint color. The ProtoFab team needed to use all their experience to ensure that the color separation was perfectly sharp and the shades were completely uniform. One of the photos below shows how the paint was matched against the reference shade map provided by the client.
Choosing the right color requires patience and great care. In this case, it was extremely important that the final color exactly matched the client's requirements.
Lacquering and fine polishing
In accordance with the task, the helmet was varnished to give it the necessary shine.
After the varnish had dried, all that remained was to polish the helmet again to ensure the most attractive appearance.