Tiko 3d printer for sale
5 Best Tiko 3D Printer Review – Alternatives 2022
On March 30, 2015, a Kickstarter project was opened to create a revolutionary new 3D printer. One month later, in April 2015, the Kickstarter had raised $2,950,874 from 16,538 backers who put up at least $179 each. Shipping was estimated to start in November 2015, approximately seven months later. The printer was going to be known as the Tiko Unibody 3D Printer.
The designers of this printer were visionaries in every sense of the word. The Tiko 3D printer what the creators of the term "state-of-the-art" had in mind when they coined the phrase. Here are some of the planned specifications.
- The maximum print volume was supposed to be 138.3 cubic inches.
- The shape of the print area wouldn't have been the usual rectangle or circle. Instead, it would have been triangular but with rounded corners. The height would have been 4.9 inches. If you were printing something with a cylindrical shape, the diameter of that cylinder could have been as large as 4.
9 inches.
- The layer resolution was supposed to be 50 to 250 microns.
- The printing zone would have been enclosed.
- The print bed would have been made of a flexible plastic. That would have made it easy to pop off the printed item without damaging it.
- Tiko would have been able to connect to Wi-Fi so that you could print from virtually anywhere, including a smartphone. If Wi-Fi was not available, you could have used the printer to create a wireless access point. This would have let you print directly from your computer to the printer.
- If the unit was ever jarred or moved while printing, a built-in accelerometer would have sensed this and shut the Tiko down automatically.
- The accelerometer would have also had a role in the automatic calibration process.
This was your big chance to participate in the development of cutting-edge technology. For a mere $179, you could have contributed to a Kickstarter project and gotten a new type of 3D printer, one that would have made IT history.
The first shipment (from Hong Kong) went out in December 2016. That was 13 months after the initial expected ship date. Those units, once they were set up by the new owners, had problems. By February 22, 2017, the project was over. The Tiko 3D printer became someone’s broken dream. There were subsequent efforts to revive the brand, but nothing came of them. In the end, the biggest problem was probably not the design or planning. It was probably that the project was underfunded and couldn’t survive the bad times.
Even though their $179 investment was gone, those who contributed to the Tiko Kickstarter project were offered an inexpensive way to acquire a 3D printer. The CEO of M3D offered anyone who lost money on the Tiko Kickstarter the opportunity to purchase a Micro 3D Printer for a discounted price of $199. It was a good deal for anyone who accepted the offer and a smart way for M3D to expand its customer base.
There are plenty of other options available for those who were hoping to purchase a Tiko 3D printer. We will list some of those alternatives for you. But first, here is some background information on 3D printers.
| Preview | Product | Price | |
|---|---|---|---|
| Monoprice Mini Delta v2 3D Printer (110 x 120mm) Heated Build Plate,... | $244. 56 56 | Buy on Amazon | |
| M3D Micro+ Desktop 3D Printer for Home, Work, and School Use, Includes... | Buy on Amazon | ||
| Promotion! Print-Rite CoLiDo Delta 3D Printer Kossel Kit D1315 Plus... | Buy on Amazon |
Image by Karolina Grabowska from Pixabay
The printers we reviewed were chosen based on price. We were looking for printers at a price close to the $179 that would have been spent on the Tiko. Quite a bit of time has passed since the beginning of the Tiko project. In that time, technology has marched on. It is reasonable to expect that since then, prices have dropped, and functionality has increased. It is interesting to see how some of the ideas in the Tiko design have made it into currently available printers.
All the printers reviewed here are delivered completely assembled. There are many more available in this price range that require assembly. Some even come in the form of a kit, which sounds like an extreme form of assembly. If you are good with your hands, have a sense of adventure and have the patience of a saint, you might do well to find a kit. This will give you lot more printer for the money.
Overall Price Range of This ProductImage by Lutz Peter from Pixabay
In general, the cost of filament-based 3D printers ranges from the low hundreds to many thousands of dollars. Because we are looking to replace a $179 Tiko printer, we have decided to limit our price range to between $150 and $350.
Monoprice Mini Delta 3D Printer
Monoprice Mini Delta v2 3D Printer (110 x 120mm) Heated Build Plate,...
- Touchscreen Control, Updated Firmware and UI: You spoke and we listened. Larger icons, clear and concise instructions,...
- Fully assembled: the mp mini delta 3D printer comes fully assembled, ready to print out of the box
- PoloPrint Pro Wi-Fi Connection: Connect to the printer over Wi Fi using the updated PoloPrint Pro app for iOS or...
Price | $159 |
Setup | Assembled |
Interface | Wi-Fi, USB, microSD |
Display | LCD |
Technology | FFF |
Print Area | 4. |
Enclosed | No |
Heated Bed | Yes |
Bed Leveling | Auto |
Nozzle Size | .04 mm |
Extruders | 1 |
Software Inc. | Cura, supports Windows XP or later, Mac OS X (10. |
Resolution | 50 micron |
Dimensions | 14.2” x 10.4” x 16.9” |
Weight | 30.6 lbs |
Includes | USB cable, microSD card, power adapter, cord |
Where To Buy | Monoprice, Amazon |
Warranty | 30-day money back guarantee, one year for repair of manufacturer’s defects |
 3” x 4.3” x 4.7”
 6 64-bit)
This low-end printer has it all.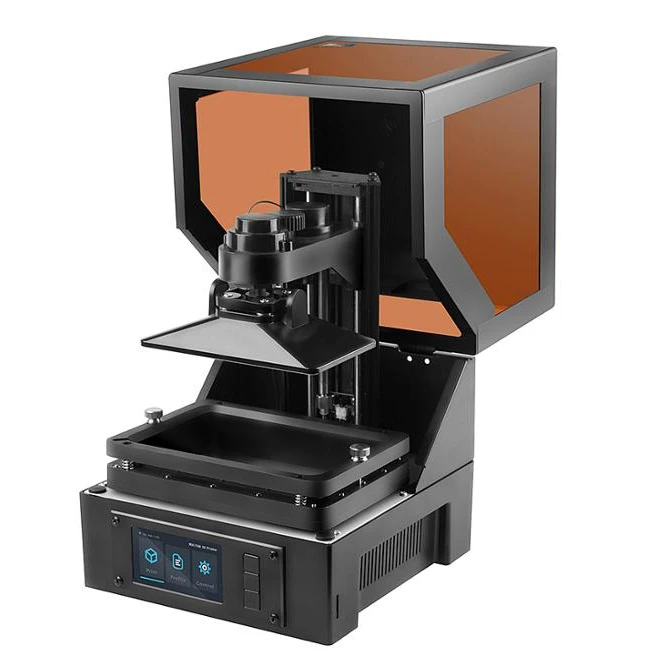 It works right out of the box and, except for its lack of enclosure, it has all the great features of higher-end systems. Wi-Fi connectivity allows you to cut the leash to your computer. It only addresses smaller print projects, but if you can work with that limitation, this printer is for you. This model is also worth considering if you are looking to buy your first 3D printer.
- Wi-Fi interface
- SD card
- Excellent features at a low cost
- Heated bed
M3D Micro+ Desktop 3D Printer for Home, Work, and School Use, Includes...
Price | $349 |
Setup | Assembled |
Interface | USB |
Display | No |
Technology | FFF |
Print Area | 4. |
Enclosed | No |
Heated Bed | No |
Bed Leveling | Auto |
Nozzle Size | 0.35 mm |
Extruders | 1 |
Software Inc. | M3D |
Resolution | 50 to 350 microns |
Dimensions | 7. |
Weight | 4.4 lbs |
Includes | M3D software, USB cable, power adapter |
Where To Buy | Amazon, M3D website |
Warranty | Three months for manufacturer’s defects |
 3” x 4.5” x 4.6”
 3” x 7.3” x 7.3”
- Lightweight
- No Display
da Vinci Mini Wireless 3D Printer
No products found.
Price | $200 |
Setup | Assembled |
Interface | USB, Wi-Fi |
Display | No |
Technology | FFF |
Print Area | 5. |
Enclosed | No |
Heated Bed | No |
Bed Leveling | Auto |
Nozzle Size | .04 mm |
Extruders | 1 |
Software Inc. | XYZware, supports Windows 7 and above, Mac OSX 10. above |
Resolution | 100 microns |
Dimensions | 15.4” x 13.2” x 14.2” |
Weight | 18 lbs |
Includes | Starter filament |
Where To Buy | XYZ Printing, Amazon |
Warranty | Undetermined |
 9” x 5.9” x 5.9”
  8 and
8 andThis is another excellent entry-level printer that works right out of the box. Wi-Fi connectivity is a big plus, as is that automatic bed-leveling feature. The resolution of 100 microns is good, but not great. It only runs filaments available from XYZ Printers. The proprietary XYZware software is provided.
- Wi-Fi interface
- Uses only XYZ Printing filaments
- Resolution
HopeWant Desktop 3D Printer
No products found.
This seems to be a good entry-level printer. Remove it from the shipping carton, and it’s ready to go. It prints either from the computer or the SD card (TF card).
- SD Card
- Price
- No Display
- Resolution
Print-Rite CoLiDo Delta 3D Printer
Promotion! Print-Rite CoLiDo Delta 3D Printer Kossel Kit D1315 Plus...
- Fast print: Delta design, 3 axles moving at the same time, 30% faster than XYZ printing technology
- 0.
 05 mm layer resolution printing quality, two times more precise than other low cost 3d printers, which usually print...
 - Ready to print, fully assembled and calibrated. Compact design with premium quality parts, portable machine with...
Price | $269 |
Setup | Assembled |
Interface | USB |
Display | No |
Technology | FDM |
Print Area | 5” diameter x 5. |
Enclosed | No |
Heated Bed | No |
Bed Leveling | No |
Nozzle Size | .04 mm |
Extruders | 1 |
Software Inc. | Repetier-Host, supports Windows 7 and above, Mac |
Resolution | 50 microns |
Dimensions | 9. |
Weight | 12 lbs |
Includes | Flash drive, USB cable, adapter, filament |
Where To Buy | Amazon, CoLiDo |
Warranty | 30-day return policy, one-year international warranty |
 9” high
 9” diameter x 17.5 high
The price of this unit is at the high end of our range but, as always, you get what you pay for. This printer is different from the others in that it is configured for a circular print area. It is easy to set up, and it prints quickly due to its three-axis parallel movement system. This is an excellent printer for a beginner, but the quality and consistency are good enough for professional applications. At 30 watts, it is economical to operate.
- Fast printing
- Low power
- No Display
- Resolution
The Monoprice Mini Delta 3D printer was the clear winner here. For a printer with its features, the price is almost unbelievable. Wi-Fi connectivity and use of SD cards to store print files make it very user friendly. The heated bed also makes this the only printer on the list that could be comfortably used in a professional setting.
Featured Image: Image by ZMorph4D from Pixabay
Last update on 2021-12-12 at 04:27 / Affiliate links / Images from Amazon Product Advertising API
The Tiko Printer: What Happens When You Innovate Too Much
Sometime in the very distant future, the Universe will become the domain of black holes. Energy and entropy will be compressed into minuscule quantum fluctuations. Even in this domain of nothingness, there will still be one unassailable truth: you should not buy a 3D printer on Kickstarter.
We’re no strangers to failed 3D printer crowdfunding campaigns. Around this time last year, backers for the Peachy Printer, an inordinately innovative resin printer, found out they were getting a timeshare in Canada instead of a printer. This was unusual not because a crowdfunding campaign failed, but because we know what actually happened. It’s rare to get the inside story, and the Peachy Printer did not disappoint.
For the last few months, we’ve been watching another crowdfunding campaign on its long walk to the gallows. The Tiko 3D printer is another 3D printer that looks innovative, and at the time of the crowdfunding campaign, the price couldn’t be beat. For just $179 USD, the backers of the Tiko printer would receive a 3D printer. Keep in mind the Tiko launched nearly two years ago, when a bargain-basement printer still cost about $400. Fools and money, or something like that, and the Tiko 3D printer campaign garnered almost three million dollars in pledges.
Now, after almost two years of development, Tiko is closing up shop. In an update posted to the Tiko Kickstarter this week, Tiko announced they are laying off their team and winding down operations. It’s a sad but almost predictable end to a project that could have been cool. Unlike so many other failed crowdfunding campaigns, Tiko has given us a post-mortum on their campaign. This is how the Tiko became a standout success on Kickstarter, how it failed, and is an excellent example of the difference between building one of something and building ten thousand.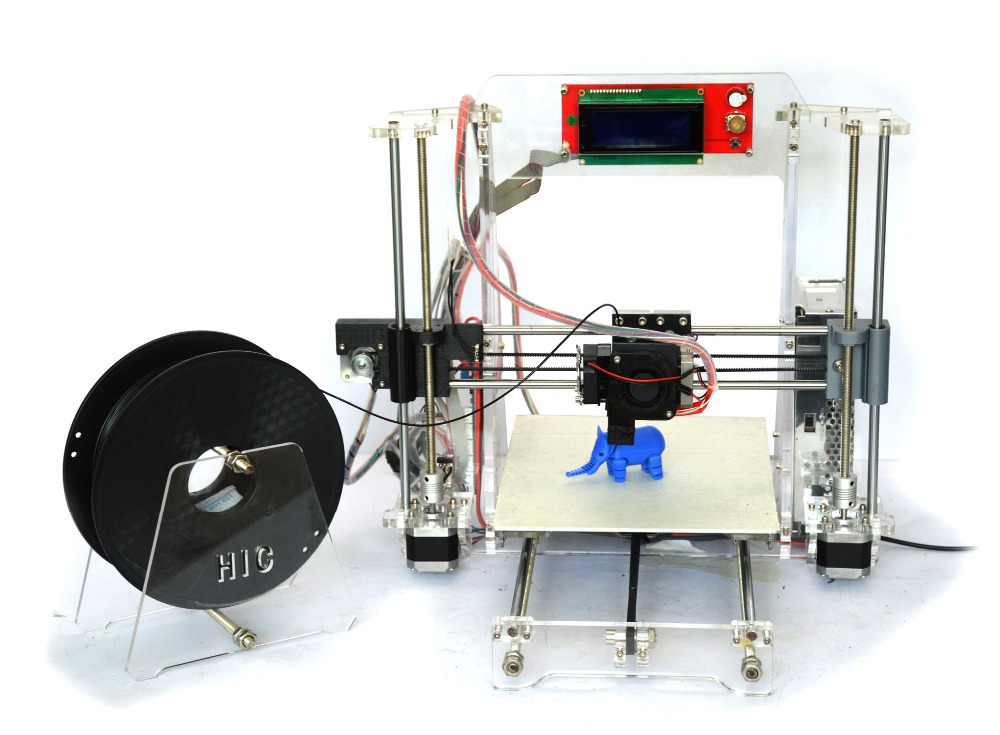
Why the Tiko Was a Hit
The Tiko printer was an easy sell. All you had to do was look at your favorite tech blog and see someone was selling a 3D printer for less than one hundred dollars. Yes, that was the super early bird price, but that’s cheap for a 3D printer. In 2015, unimaginably so. The regular price, and what non-early bird Kickstarter backers paid, was only $179 USD. Even today, with the machinations of dozens of factories in China, this is a very inexpensive price point. In fact, only with the upcoming release of Monoprice’s $150 delta printer will we see a printer that is as capable while still being this inexpensive.
The astonishing economy of the Tiko leads to an obvious question. How did the Tiko team plan to build a 3D printer and send it out the door for less than $200? Even today, sourcing and building the most bare bones i3 clone will cost more than that. In 2015, the costs were even higher.
Tiko’s unibody construction. By building a linear motion system into the enclosure, Tiko significantly reduced the cost of their bill of materials.
The answer comes from something that sounds like it’s glomming onto Apple ad copy: unibody construction. The body of the Tiko is a single part with an integrated c-channel used as the linear rails of this delta bot. This unibody construction is, quite simply, ingenious. If you’ve ever assembled a RepRap Mendel, or any of the other threaded rod printer monstrosities from back in the day, you know the frame of a 3D printer is what makes or breaks the build. By using an extrusion with integrated rails, the Tiko team brought the cost of a frame down while making their assembly easier. From a manufacturing standpoint, Tiko’s unibody construction is brilliant, and we won’t be surprised when we see another delta bot with the same sort of enclosure.
At its very core, Tiko was innovative. This is a 3D printer that was built around standardized manufacturing processes. Yes, building a ‘unibody’ 3D printer will require a significant capital investment to get the first printer off the assembly line. Once that’s done, though, the creators of the Tiko printer would have a viable product that could be manufactured for far less than their competitors.
Why the Tiko Failed
Tiko put a lot of innovation into their unibody frame. Unfortunately, they decided to extend that innovation to the rest of the printer. Even before the Tiko Kickstarter was a week old, the 3D printer forumheads had questions about the Tiko printer.
The usual method for linear motion in a 3D printer is a stepper motor. NEMA 17 stepper motors are par for the course. The historical pricing of NEMA 17 motors is itself interesting: back in 2008, before the RepRap project came to fruition, it wasn’t unrealistic to spend $40 on a single NEMA 17 motor with a driver. Now, you can pick up the same parts for less than half that cost.
Instead of relying on the ecosystem that has enabled very inexpensive printers, Tiko chose to go their own way. They used cheaper but much lower torque stepper motors on their printer. This would cause severe issues with the printer. Of the over four thousand units Tiko shipped, there were far too many reports of layer shifting and missed steps than you would expect. In the most severe cases, the Tiko printer could not print a simple cube.
Even in the electronics, Tiko strove for innovation.
Right now, the state of electronics for 3D printers is heavily derived from the original RepRap projects. Derivatives of the Arduino Mega, using the ATmega2560 and ATmega32u2 microcontrollers, are the norm. The new LulzBot Brain Box uses a RAMBo board with this microcontroller. The electronics for the vast majority of 3D printers is derived from those initial 3D printer experiments, and that means a decade of technical debt.
Tiko advertised WiFi printing during their Kickstarter campaign. Right now, the easy way to do a WiFi printer would be a standard ATmega-based controller board with an ESP8266 WiFi module. This would be easy, but it wouldn’t be cheap. Instead of the easy solution, Tiko turned to a neat WiFi-enabled microcontroller released by Texas Instruments. The CC3200 gave the Tiko a powerful ARM Cortex-M4 microcontroller and WiFi. Given the smooth acceleration found in even the cheapest ARM controller boards, this is a win.
But there’s a reason everyone keeps using older Arduino-based controller boards. Nearly all the firmware for 3D printers is built around the Arduino Mega. Building a printer controller board around a relatively new part means building everything from scratch. This is development time Tiko didn’t have, and engineering time Tiko couldn’t afford.
Despite this, Tiko actually managed to build and ship over four thousand printers. Given Tiko took in nearly three million dollars from 16,000 Kickstarter backers, this doesn’t sound like much. Consider the decisions Tiko made, and it’s remarkable. They had ordered their complete BOM before a prototype was finalized. The decision to use cheap stepper motors led directly to the very poor performance of the finalized design. The efforts to fix hardware problems in software were not effective. Eventually, Tiko had too much technical debt to pay off. It certainly didn’t help that this was a 3D printer selling for a bargain-basement price, either. There’s only so much margin on a $200 printer, and from the start there wasn’t much left over for the engineering needed to make a good, cheap 3D printer.
The Future of Tiko
By the end of 2016, Tiko was effectively dead. Last week, they gave up, shutting down production, and refusing to refund backers. Tiko has even refused refunds on shipping costs, a move that led to an online petition and — get this — a Kickstarter campaign to start a class action lawsuit against Tiko. Tiko is dead, although they are actively pursuing additional investors.
Far too often we look at Kickstarters from an engineering perspective. What’s missing in these discussions is a look at Kickstarters from a business perspective. What Tiko has done is out-innovated themselves. They came up with a rather remarkable system for the frame of a 3D printer, but one that isn’t quite right for a hardware startup. They developed brand new hardware for the 3D printer community but backed themselves into a corner when their engineering team couldn’t keep up. They spent all their money buying components before their design was finalized. These aren’t poor engineering decisions, they’re poor business decisions.
Twelve thousand people have spent $200 (plus about $60 in shipping) on a printer they won’t receive. Four thousand people have a printer that doesn’t live up to their expectations. The Tiko team has a three million dollar failure hanging over their heads. No one is happy with this situation. Yet it can all be traced back to a single problem. This is what you get when you innovate too much.
Tiko 3D Printer - A Kickstarter project that almost took off
Probably someone followed this odious project on the Kickstarter site. Someone heard about this printer from third-party sources, and even on this portal it was mentioned several times: tiko 3d. And in the comments, even someone wrote that he was a baker and was waiting for this printer ... But this is all a prelude, and then the real story begins. One day, I accumulated a few extra bucks in my PayPal account and, out of habit, I went to the e-bay site in search of something interesting. I soon found some interesting used 3D printers for very little money. And I thought, why not? I'll take a small printer and put it side by side with a computer on the loggia, there are just 30 centimeters on the side. And began to consider the available options. They offered cubes from M3D in large quantities, I heard about their problems and understood why they were sold so much, but this, in principle, did not frighten me. Almost anything can be brought to mind :) And then I came across an advertisement for the sale of a Tiko 3D printer. The seller wrote that he is the exclusive baker among the first who ordered this printer, its number is 6 or 9.
 .. He received it, but on the second print, the extruder stopped feeding plastic and he sells everything as is for half the price. For $100. I wrote to him that I was ready to buy for $ 80, he replied that he would give in for 95. They agreed on that. :)
By the time I paid for the purchase, I already knew what problems this device has and how to solve them. Thanks to Walter of Thingiverse who also bought it and posted a ton of info on how to get it up to par. The failure of the extruder did not scare me either, since most parts can be replaced. Although now I understand that if the problems were in the control board, then nothing could be done. And the fee here is very interesting ... In general, the package arrived by express delivery to the parcel post warehouse, since I have been using this service for a long time and everything has always been on top. But not this time)0003
Having ordered fast delivery and paid the approximate cost in a parcel in a day, they answered me that they could not send it by express, since this is a 3D printer and it does not fit the household appliances section. Although I did not specifically write that this is a 3D printer, but indicated that this is a used Tico printer. It's funny that a small printer with dimensions not exceeding 25cm in a triangular base is considered industrial equipment. Well, okay, I had to send it by plane to Germany and then by regular Russian Post. For an overabundance of funds introduced, I ordered improved packaging and increased insurance. And now the package has arrived...
Enhanced packaging usually includes additional rigid cardboard and full tape with reinforced tape. Here, alas, I did not notice additional cardboard, but at least they wrapped it with adhesive tape ...
The box is most likely native and it is good that the original TIKO packaging has been preserved and it turned out to be very vandal-resistant. (The sweets were put in a parcel, as usual).
Inside lay the printer itself, the power supply, a magnet-gift from the package and an envelope as if under a disk. But in fact, there was a postcard from the manufacturer, where there were special words of gratitude for the premium bakers from the kickstarter.
The same branded TIKO packaging. by the way, the caring seller also put all the printouts that he could do on this printer))
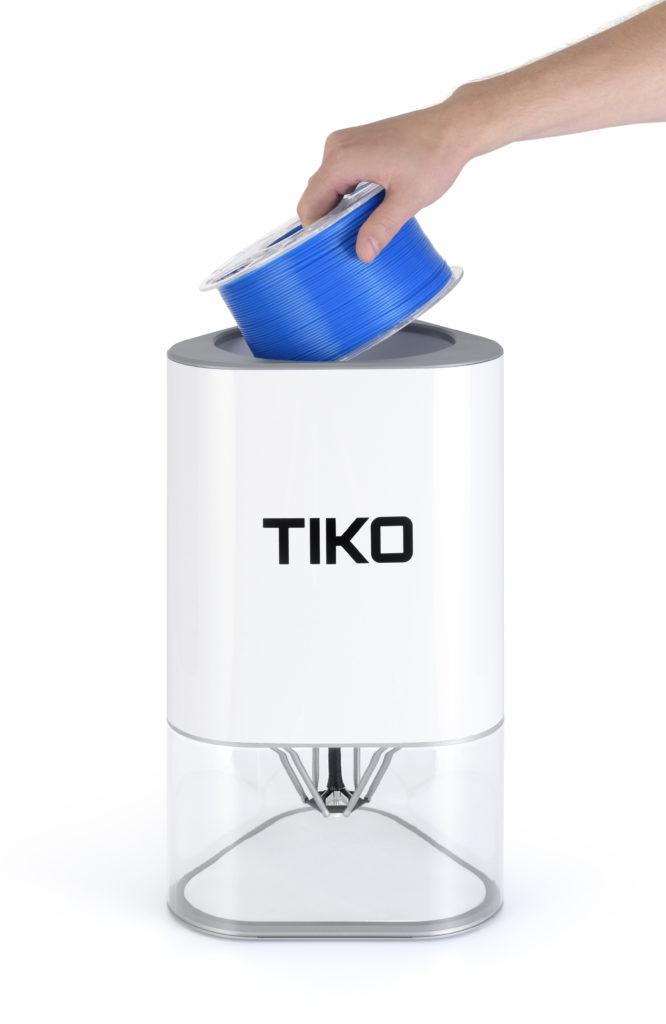
The TIKO printer looks chic, which bribed me) Fully aluminum case in the upper part and a transparent base. The bottom is removable, it is also a table for printing. A type of rubber mat with an interesting texture is glued on the table. The rug is soft and easy to squeeze through with your fingers. The table itself also bends, but not much. Most likely it is made of nylon or plastic of similar properties.
The printer was immediately with a branded PLA plastic spool. She's a little smaller than anyone I know. Possibly comparable in size to Taulman coils.
But a standard FD coil won't fit in there.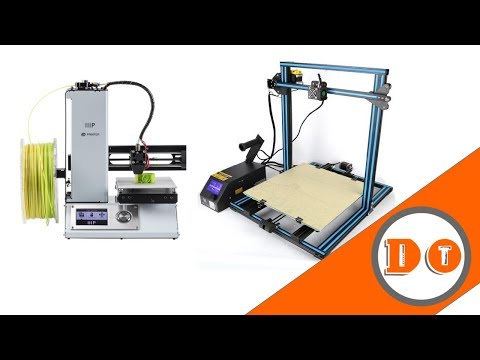
Starting the printer... The hardest part of this process at first was... Finding where to insert the power cord. The hole is small and inconspicuous located at the bottom end, next to the transparent base. I was looking for him for two minutes exactly.
After the power is connected, the printer starts blinking smoothly with the backlight, at this moment it has already created a WiFi host to which you need to connect by typing www.tiko.print in the browser or 192.168.1.1 In my case, the first option did not work in any way, but the second one immediately picked up.
When you first turn on the printer, it offers to connect to your WiFi network, this is necessary to download updates and it was also intended that it would work with a cloud print service, but alas, this will never be implemented. It's good that all the updates have arrived, judging by the firmware version, it was updated 3 times. If you read the Tiko printer forum, then there are many complaining about terrible printing and hoping that the next firmware update will fix this and the printer will start printing well. Alas, guys, the problem here is not in the software part.
After all the simple settings, the print window opens.
Yes, it's that simple. I took it out of the box, plugged it into a power outlet, connected via WiFi, and after 3 minutes you can already print. It is enough just to throw STL into the browser. This is the perfect printer for beginners. I took the STL, threw it into the printer and pressed the print, that's it. No more manipulation is needed. But alas, the chic idea was not 100% finalized. Despite the Unibody aluminum body with built-in rails. The carriages are made of the same plastic as the base. That is, something like nylon, and since BYJ-48 motors are based on 12 volts, the carriages are as light as possible, which is why the nylon guides sliding along the rails are very flimsy and the whole structure has backlash. The head of the printer is made of metal, but again the guides are plastic. Also, there is no blowout.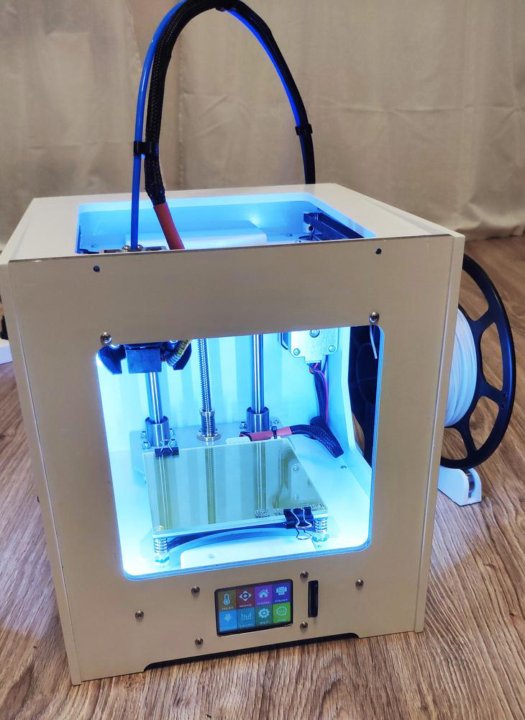 The kickstarter video says that an innovative convection system is used here, when hot air itself rises and airflow is not required ... Yeah, of course, only the rise of this air is so insignificant that it is clearly not enough to remove heat from PLA plastic. Okay, let's try to print.
The demo model is already built into the printer, you just need to press the print button.
All settings are default to start with.
Temperature set to 210, layer 0.2, infill 25%.
We press the button and the printing starts... The interest runs... But no, the printer does not move.
Trying to load and unload the filament. It seems to be doing something. The brightness changes. But when you press print, it does not print. Ok, let's deal with the filament first. Why is there no submission?
Everything turned out to be banal. The bar crumbled and stood somewhere in the spacer.
I unscrewed the tube clamp and inserted my bar from the back side and pushed out all the pieces of the crushed bar.
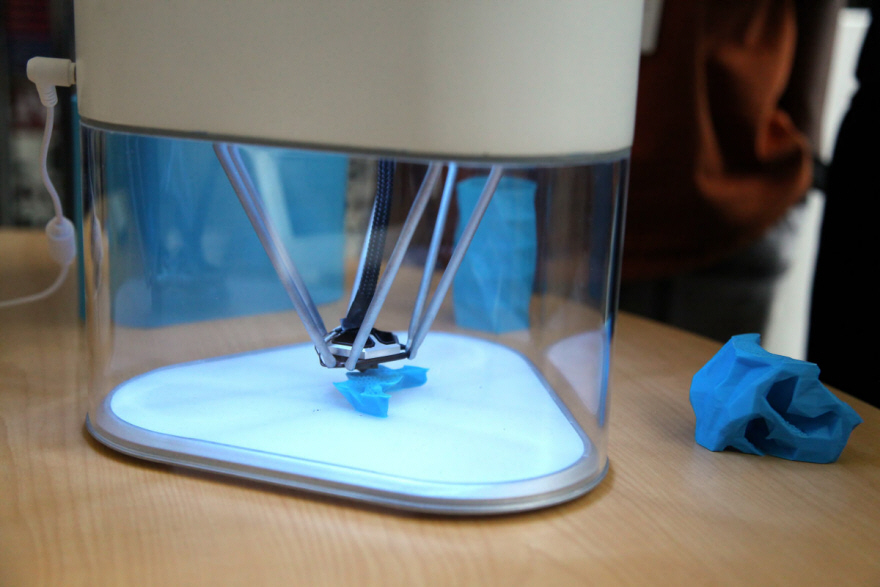
This is what TIKO looks like from the inside. The yellow cable is an interesting feature of this printer. An accelerometer is built into the head and the auto level is implemented on this sensor.
The head drives up from the surface of the table from the edge and rests on the table with a nozzle, while the head tilts, then the printer slowly raises the head up and at the moment when the head becomes parallel to the horizon, it fixes this value, lifts it up until the limit switches are activated and repeats the procedure on the next two corners. The process is fun. True, the table cover from this at three points deteriorates a little.
Video of the calibration process: TIKO auto calibrate And a piece of video of the start of printing a simple cube 20x20mm:
Link if the video is not inserted: Tiko printing And Timelapse video of printing the cube:
the print button, you can disconnect from the printer's network and it will continue to print completely offline. In general, this is a great idea: a printer with a built-in print server and a slicer, fully automatic. And spoils this idea only one, but a very significant omission.
Print quality.
It prints disgustingly out of the box. Moreover, it turns out even more or less with a native filament, as soon as you insert a non-native one, it already becomes critical how the temperature, retract, etc. are set. Yes, it needs to be configured on all printers. But all that I had before allowed me to fit into fairly wide ranges so as not to change the settings 10 times for each plastic manufacturer.
This is the test cube 20x20x10mm. A pair of sides are curved, one outward, the other inward. There are some gaps in the center of the layers, the filling does not reach the walls. Raft is required and is not disabled. The surface above the raft turns out to be nasty))) Not smooth, but nasty.
Lower corners turned up because the layer above the raft lay poorly. raft by the way does not turn off and is not configured.
This is the very first print, when there was some native plastic left in the bowden tube after the extruder.
Due to a poorly adjusted first layer gap and raft, the model was torn off the platform and it was not finished printing. but the next white figure was printed out and came out so-so.
there are displacements of layers and hairiness, in general, the whole thing is some kind of curve))) In general, there is room to grow and something to tweak.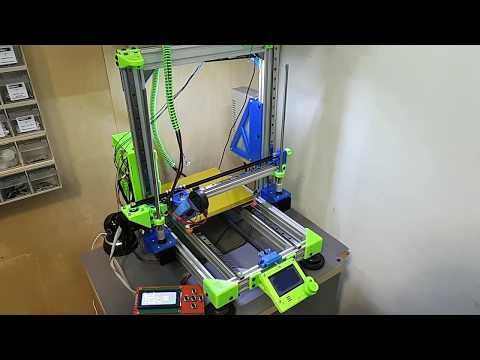
Finally, a couple more photos of the cube and the miracle table.
This is how the printer turned out, and in principle it is clear why the project did not take off, the printer had too many problems out of the box, and there were not enough resources for improvements.
Although in general there are quite a lot of interesting solutions, just look at the nozzle. Titanium nozzle with a ceramic annular compact heater, this is a fairy tale. Heats up in a couple of seconds! A fully cast aluminum body with built-in rails, such a solution should have given amazing accuracy, but alas, the backlash due to the lighter weight of the bottom brackets ruined everything. By the way, one solution to this problem is just to add weights to each carriage. Paradox)
Well, for me, a big plus is the dimensions.
Fits perfectly in my temporary mess :)
Well, a bonus, if you are a happy owner of this printer and you are not satisfied with its print quality, then you can pay attention to Walter's improvements: My collection for TIKO.
Tiko start-up small 3D printer with delta kinematics, pros and cons of servos
Hi all!
A small report on the purchase of a 3D printer (used) from eBay (America).
The Tiko 3D printer is a small and interesting machine.
Details under the cut.
Greetings to all Mysku visitors!
A short story about how I bought and completed the 3D printer of the famous startup Tiko 3D.
This is quite an interesting 3D printer with delta kinematics. Not without childhood diseases of course.
Tiko official site.
For convenience, I will make a little content in the review.
Contents and quick navigation through the text:
Description of the startup, characteristics, purchase
Parcel, packaging, kit
Appearance, first use
Program interface
Calibration
First print. Improvements
Testing
Conclusion
Now, in order.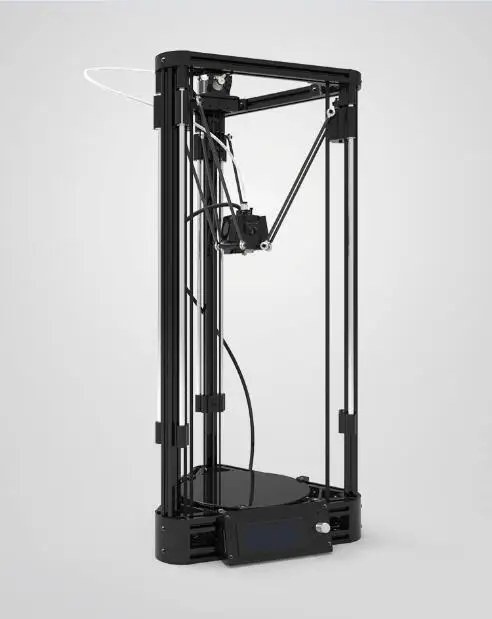
Startup description, characteristics, acquisition
Top ▲
I have long wanted to participate in large crowdfunding companies. I occasionally participate in small ones. Especially in the field of various technologies.
Constantly monitoring new startups with 3D printers and 3D printing. Now we are raising funds for a small and inexpensive printer Geeetech E180
As for the Tiko project specifically, The Unibody 3D Printer is one of the most successful projects at the start. Tiko raised over $2.9 million. There were over 16,000 backers.
Project page on kickstarter
I did not have time to buy as a backer. The last opportunity to deposit funds was closed at the beginning of this year. The guys collected much more than they had planned and, to celebrate, began to spend money. They launched mass production of printers ... not completely correcting children's sores. For example, the lack of airflow. Well, there were certain problems with accelerations and inertia at high speeds - the printer still "specializes" for printing to 30 mm/s , although it is clear that it can be more.
I had to look for one of the used printers. There are quite a lot of them (there were) - the backers refuse, they don’t know how to get rid of the received device. There were several options on eBay, at very low prices. It was possible to take for a quarter or half the price of a printer in excellent condition.
Here is the lot I won.
The seller is one of the first backers, a fireman from Cloverdale, California, who bought and got upset because he couldn't print on the printer. The printer had a minimal gap, a virtually untouched native spool of filament.
At the moment (at the time of the publication of the review) - it was not possible to buy a printer on eBay or on the official website (out of stock). In the title of the review, I indicate the lot, which I also bought.
But there are other interesting options , for example, M3D Micro - a similarly inexpensive device with children's "sores", around $ 100. Can be taken for a child or as a first printer. Similar to the Tiko 3D, the M3D Micro's pros are its small size and good looks (and it's easier to ship).
Features:
Brand: TIKO
Model: Unibody 3D Printer
Type of kinematics: deltabot
Extruder type: bowden.
Construction area: Diameter 125 mm. Height 125mm
Features: carrying case, Wi-Fi hotspot, built-in slicer.
Adhesion: polymer backing.
Effector: steel+ceramic, 0.4mm
Materials: PLA/ABS.
Dimensions: 222 x 235.9 x 450mm.
Externally, the TIKO 3D printer looks like a white plastic tower with a transparent insert. The coil is located at the top under the cover. The whole structure is fixed on the supporting white part of the body. Removable underlay. There is no heating or cooling.
Unibody size illustration and construction area
With the right approach, this is a good printer. Of course, not everything is smooth with him, but we will try to cope.
Parcel, package, kit
Top ▲
I was looking for a suitable lot for a long time (there were three options during the summer months). But there were no problems to win the lot - not the most popular product.
I purchased the printer through an intermediary forwarder (details at the end).
After about 20 days (painful waiting, especially the results of customs clearance) I received a huge box
Inside the native packaging with a printer, the printer is in a foam plastic shell.
“Shell” repeats the shape of the printer - very good packaging.
Separately, I will highlight the instructions - very detailed.
There was also a backer card and a DVD.
Separately in the cell there was a power supply - an adapter for 12V (2.5A)
The coil with native blue PLA filament was installed in the compartment at the top
The coil is almost intact. True, plastic for six months in printed form has already begun to crack and break.
Coil cell
I unpack the printer, check the status
They brought it whole))) The printer deservedly takes its place on the desktop. It looks like the rest of the office equipment - very good. At least the design is head and shoulders above that of Pryush.
Manufacturer's label. The basic information is carefully indicated, up to the connection address.
Appearance, first use
Top ▲
A photo of the printer on the desktop. Connects via Wi-Fi.
I'll tell you in detail about the design.
The main bet of the developers is minimalism and lightness of design.
The effector is made minimal: composite + ceramics. It heats up quickly, does not require blowing the thermal barrier.
The extruder motor is centrally located on the main body.
Carriages are lightweight, made of flexible plastic such as high impact polystyrene (or similar). You can take it off and put it back on with almost no effort.
Guides (3 pcs) - plastic "rails".
Small 12 volt BYJ-48 motors are used.
The motors move on the rack. Lubrication is present.
Please note: the limit switch is installed on the carriage itself.
Power connector
Rods and effector - everything is as light as possible.
The backlight is dynamic, strong enough. The LEDs are arranged in a ring on the board.
All wiring harnesses are connected with connectors. A flexible cable goes to the hotend.
Bowden tubes with fittings. Can be disassembled, disconnect the tube for maintenance. Made very thoughtfully.
The print liner has a special plastic pad for adhesion.
There are traces of the previous owner's print.
The Tiko board is very specific. It has Wi-Fi and a slicer on board.
All parts of the printer - the design turned out to be very technological.
Program interface
Top ▲
Connect the printer to the socket, wait for the software to load (the backlight turns on after loading).
To connect to the printer, select the Tiko Wi-Fi network and then type in the browser line:
print.tiko/editor or - 192.168.1.1 .
Connect from a smartphone in the same way.
When turned on, the printer thinks for a while, then starts blinking in greeting.
You can connect it to the network or print directly
Printer properties
Load model (Add object)
You can also use the manual options (menu on the left). This is the heating of the nozzle, the loading and unloading of the filament.
We insert the filament into the tube and push it all the way into the extruder mechanism.
Press Load filament and wait for the end
You can squeeze out a little to check
Extrusion result
Unloading is similar - Unload filament
Choose a model, press print
Slicer is working. You can print. Don't forget about calibration.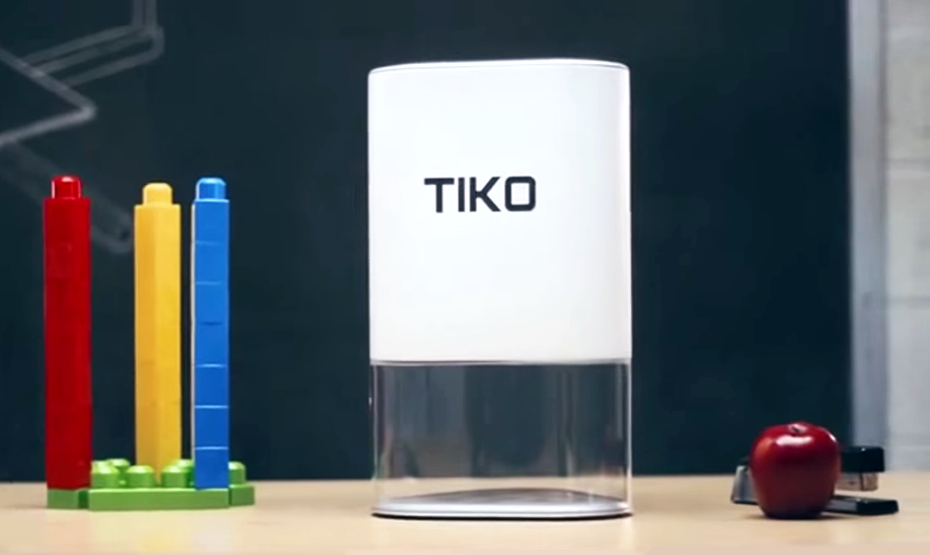
Printing settings
You can skip the calibration step when printing
Printing process
You can lift and tilt the printer to stop printing
When accessed from a smartphone, the same pages open. And slicing does not "strain" the smartphone.
It is extremely convenient to perform calibration from a smartphone - it is easier to control and adjust the nozzle manually
The point is to alternately set the height (touch) of the nozzle on the table surface.
Use the ▲ and ▼ keys to adjust the nozzle close (well, or under a piece of paper) to the substrate.
Click Done for each step (3 dots).
The printer moves to the next point.
Finishing and parking
Calibration completed
The first model can be sent to print.
First print. Improvements
Top ▲
When I turned on the printer, it gave a series of beeps and an error "301" - auto-home failure. It was necessary to correct one of the engines on the rail. By the way, they install almost effortlessly.
Loading filament. Here I encountered the fact that the old filament was present (and two colors at once). The former owner printed with silver filament, which was pushed heavily through the nozzle. I had to clean it by hand.
It is necessary to push through the old filament, which remained in the area after the extruder - the former owner could not cope, he apparently had a clogged nozzle or tube.
Normally, the loading did not go through, apparently pieces of the old filament remained inside.
Disconnect the tubes from the extruder (there is a simple clamp) and push through.
I pushed mine by hand with the nozzle warmed up.
Now standard loading
First print.
Raft on models is not disabled (Gcode editing only)
It can be seen that the printer does not have enough airflow. The plastic is starting to sag.
Printing a test cube
The cube is better.
Calibration steps.
By the way, the Z-hope option is enabled. The printer raises its head slightly when moved.
The top is slightly smudged from overheating.
Again, you can see that there is not enough airflow for PLA.
Pay attention to the printer modification models on thingiverse, in particular to this collection
The easiest way to implement this is with tubes and a small turbine or compressor.
You can print the tube holder for the effector.
This is what it looks like assembled. Tubes can be used silicone with an outer diameter of 6 mm (as from an aquarium).
Additionally, you can print a tee for tubes (one inlet, and three pieces are blown).
Air can be blown with an aquarium compressor or turbine.
I used a 12V impeller with a tube adapter.
It blows quite decently, but I would like more
I printed several splitters in advance.
The tubes are threaded into the holders on the effector.
Or separate nozzles can be used
The hot end of the printer is best insulated with silicone tape or Kapton.
After installing the blower with a turbine, I started printing again.
That's what happened. For PLA print quality has increased to an acceptable
For comparison, both models: on the green (without blowing), the edges are smoothed due to the lack of blowing of the model when printing
Well, similarly, the "native" test model Tiko. The print quality has improved)))
Testing
Top ▲
Here are a couple of printed models.
Flat hare figurine
The print quality is quite tolerable, especially for a $100 printer.
Frog
I will note some hairiness. Still, the turbines are not enough, I will put the compressor from the aquarium (larger and quieter).
Print animation)))) I will process the video and add later - separately about calibration, separately printing. Quite an interesting process.
Conclusion
Top ▲
Conclusions:
A fairly good budget 3D printer with an excellent price / quality ratio. The guys from the startup Tiko almost turned out. Almost - because improvements are required.
Pros : Great balance between price and features. There is a built-in slicer (a huge plus when controlled from a smartphone / tablet), there is Wi-Fi, backlight, some functions such as turning off the printer by tilting and auto-calibration.
Cons : Due to the servo drives used in the design, the printer turned out to be very slow, the carriages and motors need to be heavier. And given that there is no more than complete airflow in the drain, it is difficult to print PLA with good quality. Improvements and treatment of "childhood diseases" of the printer are required.
Regarding shipping: on the one hand, the price is decent, on the other hand, it is an opportunity to get a printer for half the price.
Before paying for the lot, I carefully selected the forwarder-intermediary. I talked about the possibility of sending exactly a 3D printer, packaging, transport tariff, as well as about the declaration and customs clearance. The cheapest came out Pochtoy . In agreement with the support of Pochtoy.com, the declaration indicated the name simply TIKO printer , without 3D (this is an extra clue for customs).
Reseller site Pochtoy
We register, we get the address, we indicate the address in our Ebay account.
We make a purchase (payment) in our name, but to the Pochtoy.com warehouse.