Reprapguru 3d printers
Notes on the Reprap Guru Prusa i3 V2 3D Printer Clone
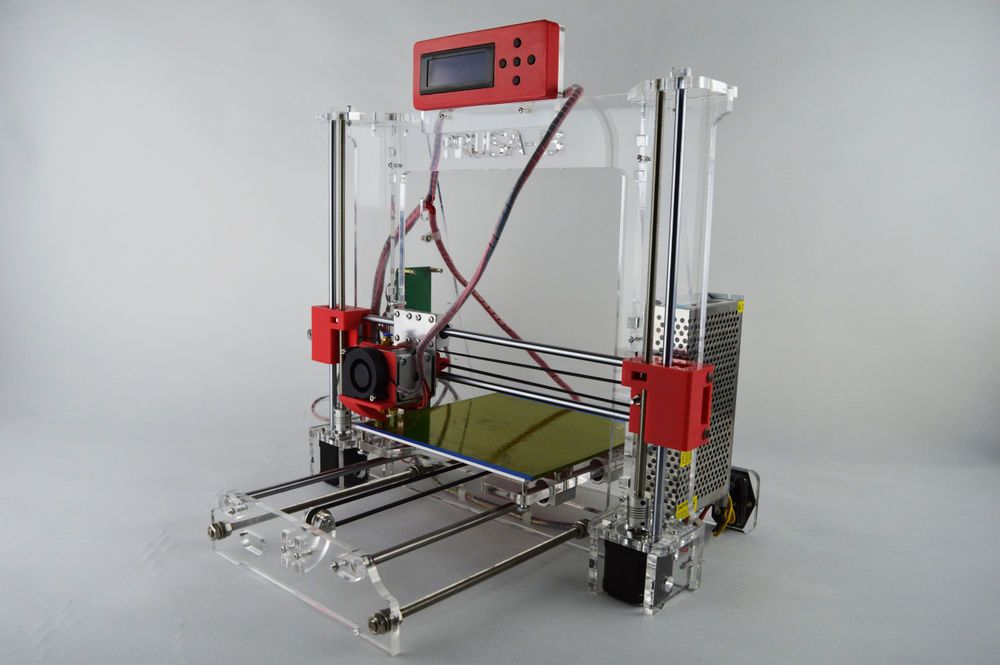
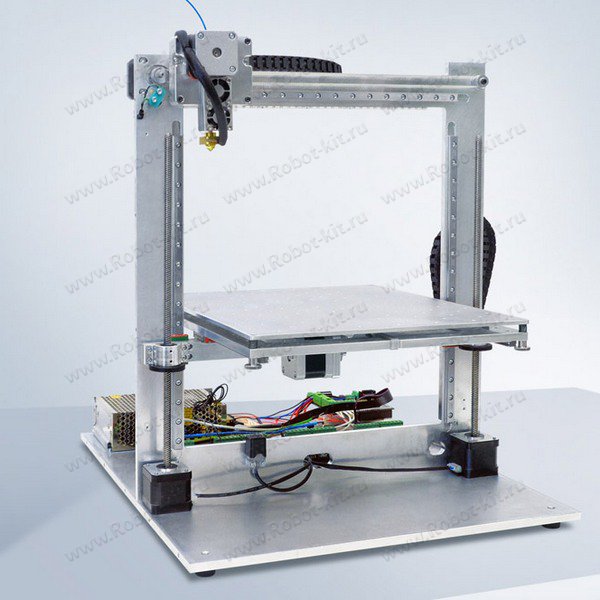
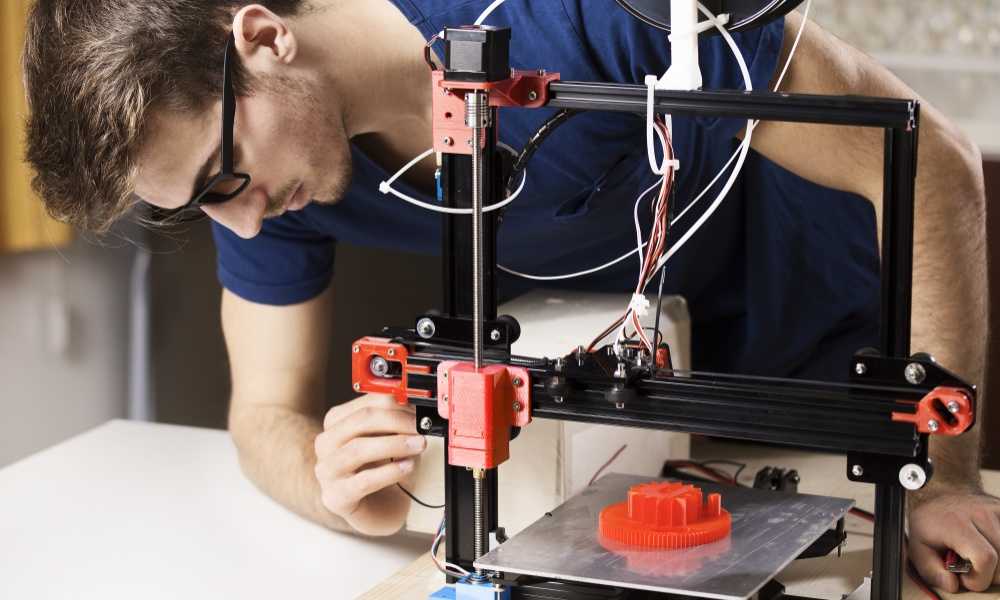
In the summer of 2017 I bought and assembled a 3D printer kit from an outfit named Reprap Guru, which sells, among other things, clones of Prusa open-source designs. I would have happily bought from Prusa directly, but their top-of-the-line i3 V2 was back-ordered at the time, and I really needed a new printer quickly. This was a very cheap machine, and came with a certain number of problems, some expected, others surprising. This page exists to document my fixes for the benefit of any other owners of this machine (and so I don't forget things myself!), and is likely to be updated frequently for some time to come.
I named this printer Crystal Palace, in reference to its clear acrylic construction and in honor of one of the greatest feats of Victorian engineering.
Now this won't hurt a bit.
Fixing the Heated Bed
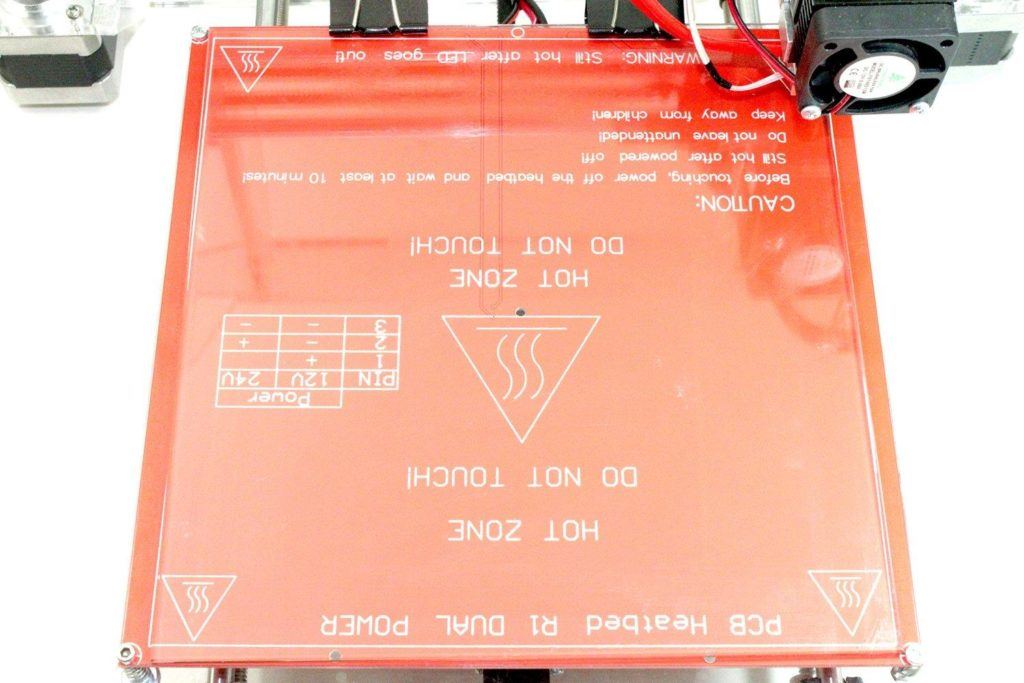
Right out of the box the thermistor on the heated bed PCB was shorted by a splash of solder, producing a MAXTEMP error in Repetier. The solder bridge was clearly visible with some magnification and was easy to clean up with a soldering iron.
About to resolder the broken thermistor wire.
After some running time I also experienced a failure of the thermistor wires where they join with the PCB; I fixed this by resoldering. Although without some method of strain relief for the y-axis wires I expect this will happen periodically.
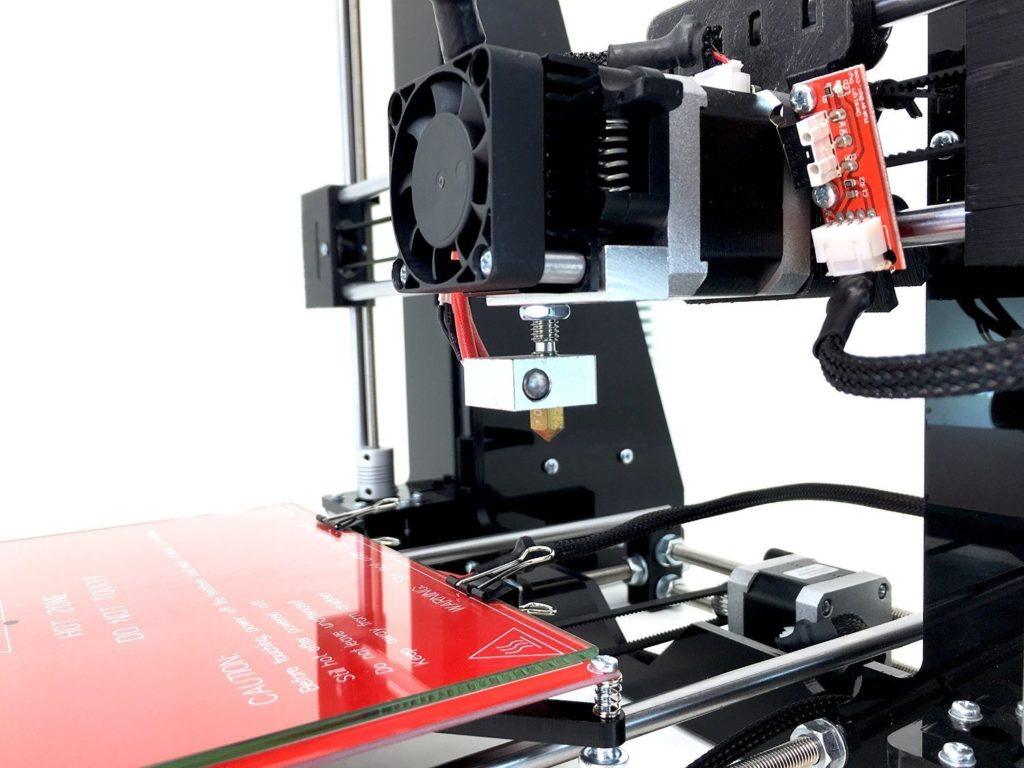
Cooling Nozzle
The small amount of epoxy visible in the photo fixes a crack caused by rough handling.
One of the first improvements I made to this machine was to print and install a cooling nozzle. This particular design, from thingiverse user James McGall diverts a small amount of cooling air from the extruder heat sink to the end of the nozzle. You can download the part at thingiverse or right here:
- Cooling nozzle, STL
Filament Extender
Revision A.0, installed
I designed some guidance structures to keep the filament feed from the spool under control. These mount to the top-most two of the four screws in the control panel assembly; the original screws are just long enough to engage with the nuts when used this way. I've experimented with two designs. The first one, (rev 0.0), keeps the filament further out and prevents it rubbing on the x-axis cable chain but it puts a bit more load on the feed mechanism. The second one (rev A.0) allows the filament to travel quite a bit more along the x-axis to keep up with the extruder, but it does permit some interaction between filament and cable chain.
Revision 0.0
- Filament Guide, Revision A.0, Onshape document
- Filament Guide, Revision 0.0, STL
- Filament Guide, Revision A.0, STL
Cable Chain
I've been steadily upgrading Crystal Palace by adding wire management, most importantly to wires that go to moving parts of the machine. For the x-axis I've adapted some cable chain parts from thingiverse; this version uses some snap-in cable retainers so that after assembling the chain, you can lay the entire cable bundle in the trough before snapping the retainers in place; this is much easier than feeding the end of the wire through.
X-axis cable chain.
I connected the x-axis cable chain from the x-axis stepper motor to the extruder stepper using two clamp-on adapters I designed. They use a 6-32 x 3/8 panhead machine screw and a 6-32 hex nut to provide the clamping force. The cable chain attaches to the adapter via a special male or female chain link that screws on with four #2 x 3/16 thread-forming screws.
- Cable chain x-axis adapters, Onshape document
- Cable chain link, STL
- Cable chain stepper motor adapter, STL
- Cable chain root link, female, STL
- Cable chain root link, male, STL
Upgrading the Linear Bearings and Rods
After not very many hours of operation at all I discovered that the printer was losing its position along the x axis multiple times during a typical print. At first I attributed this to insufficient current to the x-axis stepper and played with the potentiometer, trying to power my way out of the trouble.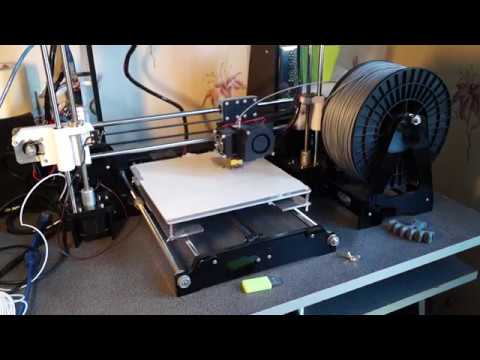 I also rigged a temporary cooling fan so that I could comfortably push the stepper drivers even harder.
A fan kludge.
None of this really worked for long however, and I shortly discovered the real problem: there were noticeable grooves worn into the guide rods! This is down entirely to the low-quality parts shipped with the RepRap Guru kit; it turns out that the rods are ordinary non-hardened stainless steel and are quickly worn down by the hardened balls in the linear bearings. Those bearings aren't great either; a few balls escaped at the slightest provocation during assembly and the bearings never felt or sounded smooth, even when everything was brand new.
So I sprung for top-quality Misumi parts. All the rods and bearings are 8 mm diameter; the rods are 52100 bearing steel with a hard chrome finish. If you wish to replace all the components, you will need:
- 2x z-axis rods: 320mm long, Misumi #PSFJ8-320, $12.00 each.
- 2x x-axis rods: 365mm long, Misumi #PSFJ8-365, $12.
 00 each.
 - 2x y-axis rods: 390mm long, Misumi #PSFJ8-365, $12.00 each.
- 10x linear bushings: 24mm long, Misumi #LMU-N8, $5.05 each at 10-19 units.
Replacing them is straightforward, just follow the Reprap Guru assembly instructions and these parts will fit just as the originals did. There is a night-and-day difference in smoothness however, as the next video shows.
MINTEMP Errors
The extruder thermistor joints are sleeved in orange (original) and black (my fix).
After some more operating time, prints starting failing due to an intermittent MINTEMP error. I was seeing a lot of “cold extrusion prevented” errors in Repetier. After some research I discovered this was due to an intermittent connection to the thermistor wire at the extruder end. Fortunately I was able to resolder the joint without cutting or stripping any wire; the end that comes out of the extruder itself is very short and I don't want to have to make it any shorter.
Replacing the Extruder Fan
In December, after six months of fairly hard service, including leaving the printer running all night after completing a print on many occasions, the extruder fan became noticeably noisier. Tapping on the hub while it was rotating would quiet the fan briefly, but for a period of time that decreased the more I ran it. I expected this was due to bearing failure so I found some replacements.
Original fan as installed (left) and its hidden face (right)
Naturally the original fan was a cheap unit made in China by “Pengda Technologies”. Reprapguru.com sells replacements for only $3.99 with the following specifications claimed:
- Size: 40 x 40 x 10mm
- Voltage:12V
- Bearing: Sleeve/Dual-ball
- Airflow: 5.5 to 10.3CFM
- Speed: 5000 to 9000RPM
I don't know what a “sleeve/Dual-ball” bearing is but I suspect this term is marketing nonsense; I'd rather pay more for something that definitely has ball-bearings instead.
Two possibilities.
Searching at Mouser quickly yielded two suitable replacements: CUI's CFM-4010-13-10 and NMB Technologies' 1604KL-04W-B50-B00. I bought both but installed and am currently operating the NMB one; I'll update this page if I test the CUI product. So far the NMB fan is operating well.
NMB ball-bearing fan spinning.
Z-Axis Threaded Rod Replacement
During an un-attended zeroing of the z-axis one of the printer's loose wires got caught under the actuator of the z-axis limit switch, preventing the switch from closing. This meant that the z-axis stepper kept turning for minutes, causing the nuts on the lead screws to back out of the plastic housing, and giving me another reason, as though I needed another, to add cable-management features to the many wires that are still unsecured on this printer.
Plastic dust from the spinning nut on one of the couplers.
Although I reseated the nuts and leveled the printer again, I kept running into failures in which one side's z-axis mechanism would make a noise, and the bed would be out of level again. Turning the lead screw by hand felt crunchy and revealed many damaged areas of the thread. Also the area under the nut on that side was accumulating black plastic dust, as though the nut would turn in the housing when it encountered resistance.
For a simple solution I ordered new 316 stainless steel nuts (M5 x 0.8) and threaded rods (M5 x 0.8, 300 mm long) from McMaster-Carr. Although this wouldn't necessarily help if the plastic housing is very damaged and unable to hold a hex nut, it runs much smoother and so far I haven't encountered any more trouble; there must not be enough resistance to cause the nut to turn in the housing.
Y-Axis Stop Upgrade
After a full year of merely managing the problem, I finally fixed one of the more irritating flaws in the printer. The designer intended the microswitch lever for the y-axis stop to be engaged by the edge of the y-axis bearing housing. But the housing doesn't extend far enough out to contact anything but the root of the lever, instead of the more effective far end of it, and to even achieve this you have to very precisely adjust the angle of the switch so that it's high enough to (barely) catch the edge of the bearing but not so high that the end of the lever catches the bottom of the bed leveling screw.
A tacky-looking fix.
In practice this balance wasn't easy to get right. Very often the switch would be able to stop the bearing mechanically without the switch actually closing electrically, so the stepper would skip and make noise until I'd rescue the printer by slapping the end of the lever myself. Or the bed leveling screw would trigger the switch and we'd be very far from the real zero position. For a while I stuck a wad of blu-tack putty under the bearing housing so that it could engage with the lever instead. This would work for a while until the blu-tack was mushed too far away and I'd have to reform it.
Right-angle bumper design, approaching the switch.
Success!
Once I decided to fix this problem seriously it only took about 40 minutes to get into Onshape, design something quickly, print it, and install it. Here are the links if you want to make one for your printer:
- Y-Axis Bumper, Onshape document
- Y-Axis Bumper, STL
RepRapGuru DIY Prusa i3 V2 3D Printer In-Depth Review
ADVERTISEMENT
6. 8Expert Score
RepRapGuru DIY Prusa i3 V2
As always, the Prusa i3 V2 3D printer has left no stone unturned in finding its place among those users who admire results. This machine is great at performing and you can achieve precision and accuracy with the right calibration setting without a hassle.
Affordability
9
Quality
7
Speed
6
Capability
7
Practicality
8
User Expectations
6
PROS
- It is affordable
- Heated build plate
- Amazing customer support
- Great print quality
CONS
- Assembling required
- Manual calibration
Open frame design and sturdy look, the printer is there to impress you with looks and with features too. Easy to keep an eye on, while the print of ...
Add to wishlistAdded to wishlistRemoved from wishlist 0
Add to compare
|
 34 L
34 L 75 mm 0.07 in
Table of Contents
RepRap has been flourishing with time by offering something unique and new with their every new offering. Being one of the leaders in manufacturing 3D printer kits, the company is looked up for results and high performance.
Apart from the exceptional product quality, the US-based company also offers unmatched customer support. The Prusa I3 V2 review highlights the most important aspects of the very popular I3 series from RepRapGuru.
This 3D printer is created to compensate for the limitations I3’s flagship version had. Hence, offering its customers better and enhanced results.
As we know about the company, RepRapGuru is popular for manufacturing budget printers. Many homemakers and tinkerers depend on the company for buying their first DIY Kit.
Although this isn’t the only company offering affordable machine, it does have huge backing from the 3D printing community for its high-quality products. Instead of the cheaper price tags, the printers from RepRapGuru are precise and accurate.
Though you may have to work a lot more for assembling and calibrating the machine before use, it does pay off later. Those who love to experience things themselves and experiment a lot would definitely welcome this amazing DIY kit for getting into 3D printing.
And, with so many online videos helping users assemble and connect the parts together, it does not seem that much challenging anyway.
Read the complete RepRapGuru DIY Prusa i3 v2 review to find out if the 3D printer is worth your consideration.
ADVERTISEMENT
Features
Jumping to the features is what you should be doing before buying a 3D printer. You must like to know the various functionalities the machine offers, isn’t it? So, here is a list of the features that tag along with this 3D printer.
DIT Kit: Let’s just say it one more time, the printer isn’t a plug and play design. On the contrary, it is a DIY kit that would need a lot of effort from your end to put the components together.
Sturdy Body: The first look says it all. This 3D printer with an acrylic frame is enough to provide you with balance and stillness when printing. Hence, users can work without vibrations and similar problems. You can make precise parts. Thanks to the sturdy frame.
Open Frame Design: Unlike those enclosed frames, this one is completely open from all ends. However, it does make it easy to keep an eye on the parts being printed on the machine. Printing with flexible materials that require a consistent temperature for printing may seem like a difficult job. However, with the proper setting, you can beat that challenge too.
Spool Holster: In this design, the company has been a lot thoughtful. By using the holster to hang the filament spool, the printer makes more space for the work area. Hence, easing the organization of the different components of the machine.
Heated Bed: This is a great addition to the entire printer’s design. A heated bed is something that could provide you the flexibility of printing with more than just PLA. Many materials have a higher melting point and they do require a heated bed to minimize warping. With this feature, Prusa i3 V2 becomes capable of printing with a variety of materials.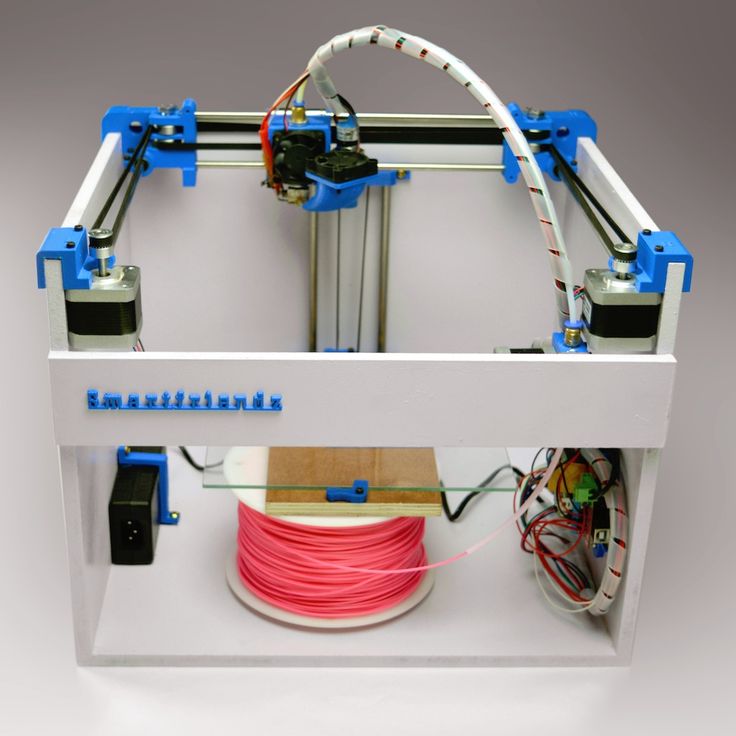
Stand Alone 3D Printing: If you would notice, there is an SD card slot on the 3D printer. This means that you do not need to hardwire the printer with your computer to upload the 3D design. You can just save the digital files to the SD card and put that into the slot on the 3D Printer. It will do the job perfectly.
Open Source: There are many individuals who only prefer to go with the open-source firmware. And, there are obvious reasons for the same. With this kind of design, every user can make useful changes to the firmware which every other user can take advantage of. Hence, the entire community grows together.
Customizable: If you are a maker, and an enthusiast, you must always try to find more upgrades for your existing 3D printer. And, this machine would allow you to test those theories in real. The same printer can print the customizable parts for itself. It is as amazing as it sounds.
Affordable: How can we miss that? The 3D printer is very much affordable and offers huge perks at this price range.
Manual Calibration: Although the 3D printer is affordable and home users can go for it, one must consider the trade-offs. For this budget, one must be ready to put in extra effort to calibrate the machine all by oneself. Yes, the printer isn’t equipped with auto-calibration. And, if you wish to achieve the best results, you must learn how to do that.
Multi-Material Support: As mentioned before, the 3D printer, with heated bed support, lets you 3D print with a variety of filaments. This certainly is a huge plus for those who are looking for a much serious engagement than just printing for fun. You can print with ABS, Wood, PVA, PLA, and TPE. Hence, it offers you the flexibility to prepare for a plethora of product types and creations.
ADVERTISEMENT
Specification
With the acrylic frame, the 3D printer offers a build space of 8″ x 8″ x 7″. This is impressive looking at the price tag. It has an Arduino mega 2560 R3 clone microcontroller.
It flaunts an Mk8/9 Direct drive extruder with 1.75mm filament space. The product footprint comes to 17 x 18 x 17 inches and it weighs 15 pounds.
You would need to work for the assembly, it being the DIY kit. And, the machine is compatible with MAC, Windows as well as Linux. The printer also has the user interface control for better flexibility with settings of the prints.
Price
RepRapGuru DIY Prusa i3 V2 costs around $279. This is a pretty affordable printer and can help you start your 3D printing journey without a need for spending a huge amount.
With a few hundred dollars expense, you can own your own 3D printer. And, this does not mean you must compromise in terms of quality.
Prusa printers are popular for their amazing performance. These are difficult to assemble, however, it does bring with itself a huge array of opportunities. From quality to the reliability, you get everything you need to move on.
Best for makers and home users. Although a bit tricky for beginners to assemble, it does offer a huge potential for in-depth learning of the technology.
ADVERTISEMENT
First Impressions
After unboxing, you would find the different components of the 3D printer snuggled safely inside separate packages. Each one labeled for your convenience.
Unlike the boxes for assembled 3D printer, this one would seem a little smaller. But that’s obvious. You still need to connect the components together to complete the 3D printer in one piece.
One thing to note, you do not receive any accessory along with this 3D printer. It’s just the different components, the power cable, and the manual for assembling the machine.
You must manage to get the screwdrivers and other tools for tightening the different screws on the Prusa i3 V2 3D printer.
Setup
Coming to the setup of the 3D printer, you must be expecting a lot of work from your part. And, this is what it is. When unboxing the parts, remember the name of the components.
If not, do not worry, the manual is well explanatory and helps users in assembling the machine with as much less hassle as possible.
To make the connections, you must follow the instructions clearly. If the manual seems not enough, you can also look for online guides and videos illustrating the setup of the printer. Make sure you connect the parts correctly and check the screws if they are tightened for sure.
Once you do that, you must download and install the software and firmware. This isn’t a plug and plays machine. Hence, it would ask for a lot of help from your end to start its work.
After you install the app, you must calibrate the 3D printer from scratch. This is important as the precision of the parts depends on the calibration of the machine.
All this would take hours of your time. And, if you are a beginner, it would be even more hectic. Just be patient and the later results would be worth all your efforts.
ADVERTISEMENT
Printing Type/Cost
The 3D printer is an FDM machine. This says almost everything about how these 3D printers work. The plastic filament after heating extrudes from the nozzle for preparing the first layer.
The layer is deposited on the print bed. After it sets, another layer is deposited. Hence, the process continues until the entire part is printed out of the machine.
In some cases, depending on the design of your parts, you may require to add support. And, if that happens, you must go through the post-processing steps to remove and smoothen the surface finish.
Printing cost is a variable that depends and varies with each part design. You must consider the amount and type of filament used, the complexity of the parts, etc with various indirect expenses such as electricity bills.
Print Quality
As always, the Prusa i3 V2 3D printer has left no stone unturned in finding its place among those users who admire results. This machine is great at performing and you can achieve precision and accuracy with the right calibration setting without a hassle.
In other words, you do need to work with the settings of the printer to find the sweet spot. If you can do that, the 3D printer will pay off with astonishing results.
ADVERTISEMENT
Software
The company offers its PrusaSlicer for its 3D printing users. This software was known as Slice3r formerly. PrusaSlicer is compatible with Linux, MAC as well as Windows.
It comes with pre-loaded filament profiles. Plus, it has three different modes of operation: Beginner, Advanced, and Expert. Hence, the users can choose the mode as per the expertise level and work with invited complexities.
Using the software, you can check the number of hours it would take to complete the parts as per the layer height and design. Not just that, the software is available in 14 different languages.
It offers users a user-friendly interface and an intuitive design. Hence, providing enough ingredients for all level of users.
Customer Service
RepRapGuru is popular for its commendable customer service. It provides users the best experience by providing 30 days refund guarantee. The company claims to refund the entire amount if the printer is returned within 30 days.
Moreover, customer support is highly informative and is always ready to help you in need.
Parameters Influencing Buying Decisions
Before you plan to get this budget printer, you must look at all the sides of the coin. The RepRapGuru Prusa i3 V2 review helps you take an informed decision by outlining the important concerns.
3D Printer cost: It is affordable. Build for home users and beginners.
3D Print quality: The print quality is par expectation considering the price tag of the machine.
3D Print speed: Prusa i3 V2 offers manageable speed. And, it is enough for most of the users.
3D Printer capability: You can create all sorts of designs, either with overhands or with complex geometries. Plus, you can print with different filaments.
3D Printer Practicality: Best for home use and for makers and hobbyists.
3D Printer User expectations: Although the 3D printer is cheap and budget-friendly, a few more feature addition would have helped enormously to the beginners. Such as inclusion of tools inside the box, if not automatic, then assisted bed leveling, etc.
The Verdict
When buying a 3D printer, it’s important to weigh the options. And, at this price range, Prusa DIY kits do leave many other competitors behind.
Reading the Prusa i3 V2 review, you must have gained this insight. However, it may not seem a good option for those who are not ready to invest this much time fixing the components together.
Answers to reprap questions
For questions related to the RepRap (repicating rapid prototyper) project, its firmware of the same name and related topics as FFF (Fused Filament Fabrication).
- How thick should the aluminum platen be? I am extending the platen of my TronXY X3 FDM RepRap printer. I expand the table from 220mm x 220mm to 220mm x 300mm. For now, I'll keep the existing table and add an aluminum sheet on top. This is…
- Heightmap generation with Rep Rap I recently performed a G29 calibration (perform mesh calibration) and my printer ran a 25 point probe and outputted statistics to the console. After that, I went to the height map section, and it says...
- Do I need to fence the 3D printer? I have a home package open on all sides.. Would there be any advantage to enclosing the printable area in acrylic?
- Hot end temperature increases to infinity after several layers I have a "classic" home 3D printer, Arduino Mega, RAMPS 1.4 with Marlin 2.0. It worked, was put into storage, and now I'm trying to start it again. During all stages…
- Dual Extruder Does the secondary/secondary extruder stay hot during the entire print run? The hot end setup for my printer consists of 2 Titan Aero extruders.
 The printer uses Reprap firmware and a Duet 3 controller board. When I'm done with the setup, my main extruder…
 - Problems with "Discount Full Graphic Smart Controller"! I bought a new "RepRap Discount Full Graphic Smart Controller" for my printer. It's hard for me to install it. The LCD did not turn on and a ticking sound came from the buzzer. It turned out that some…
- TMC2100 stepper motor drivers not found on SKR 1.4 turbo with RepRap firmware I updated my board to SKR1.4 turbo with RepRap firmware. The heated table and the heated nozzle work, but the motors do not move. OctoPrint reports them as "not detected drivers". …
- Translating values from Marlin firmware to RepRap firmware for Prusa i3 MK3S I am also a beginner trying to understand firmware values and know my printer before I actually get duo so please be patient with me let me know when I got the values...
- Prusa i3 Mk2 (RepRapGuru kit) stops extruding mid layer So I've been struggling with this all weekend, decided to see if others had suggestions.
 When I try to print, my printer will work just fine until the middle of the layer and then it will...
 - Is there a grease that can be used for both linear bearings and bronze sinter bushings and threaded rods? My printer will be equipped with LM8UU bearings/threaded rods for the z axis and bronze sinter bushings for the x and y axes. As also, but not only, it is written here http://reprap...
- The new RepRap Discount Smart Controller blinks and beeps, but is not displayed Main board: MKS GEN L V1.4 The SD card reader on the controller's original LCD display (about four years ago) went out, so I replaced it with a touchscreen. However, I…
- Marlin keeps restarting when I press the LCD controller button I'm new here and also new to the world of 3D printers. I built the 3D printer myself. Everything seems to be in order, but when I install the Marlin firmware, I cannot use the printer. While my…
- Can't get the print to work on standby while I insert the nut slicer - Prusa Slicer and Tronxy XY2 pro I'm using a Prusa Slicer on a Tronxy XY-2 pro which I believe is using RepRap firmware.
 I believe it is using the RepRap firmware because I had to put it in the questions...
 - Underextrusion towards the end of print I have a really weird problem. The thing is that my print (first layer) started normally, not good and not perfect, but good, and everything went well, but then suddenly, towards the end of the print, ...
- Steppers do not work properly during printing I'm having a problem with my RepRap 3D printer steppers I'm making. I assembled the car and calibrated the limit switches. when the machine is not printing, the steppers move like...
- Makerbase MKS Slot2 V1.0 + RepRapDiscount Full Graphics LCD + RAMPS 1.4 I want to add an external SD card adapter to my RepRapDiscount Full Graphics LCD. My 3D printer is based on (Arduino Mega + RAMPS v1.4 + RepRapDiscount Full Graphics LCD). I'm buying…
- How to mount Duet3D on Ender 3 frame while pausing in the middle of printing I just installed Duet3D Wifi 2 on Ender 3 Pro.
 I cut my first print with Cura and uploaded it via the web interface. It prints fine, except it pauses for...
 - 3D printer stepper motors only go in one direction and don't go in the other I've built a couple of 3D printers now and I'm having a little trouble with the one I'm currently on. I frankenstein this with two of my other printers that I...
- Z axis at home, then bounces up 15mm and stays there when printing Prusa, I3 Mk2. Marlin 2.0.3 Before installing Marlin 2.0.3, the test model is printed in small print. It's not a slicer or GCode. I tried several models and they all worked fine until…
- Cherry 3D printer Nema upgrade I am currently trying to build a reprap Cherry 3D printer. I am doing a Nema 17 update for a printer. I realized that the instructions on the web are optimized for 28byj-48 stepper motors.…
- 3D printer hot end always stuck I just built my first 3D printer.
 He uses the Bowden setup. When I try to print the extruder, it starts working fine, but after a few seconds, the motor...
 - How to use the second hotend for table heating? The heated bed output on my printer has recently stopped working. I have an output for the second hotend. How can I reprogram this output as table warmer output? Geeetech board…
- Tips on how not to burn out Arduino Mega when connecting Prusa i3? I am reading about connecting electronic components to my Prusa i3 using Arduino Mega 2650 and Ramps 1.4. I have stepping sticks, a heated table and a 12V switching power supply…
- What is the advantage of two z-axis motors? Some RepRap models use only one motor for the Z axis, others use two. For example, there is 3drag , which has only one motor and a smooth rod on the other side. There are…
- How to switch motor outputs and use E1 as X in Marlin firmware? I broke my electronics and now the output for X is not working.
 Stepper is fine. Is there any simple solution for remapping output pins? I want output E1 to work...
 - Display setup MKS 12864OLED I bought an MKS 12864 and connected it to my DIY 3D printer with a Mega/RAMPS combo. The marlin.h configuration file has the following lines to uncomment: // MKS OLED 1.3" 128 × 64 FULL…
- G-code firmware for portable plotter (Arduino) I would like to build a plotter to work without a PC (battery powered). The plotter will write only a few numbers (very short G-code) on the card. Tell me the firmware, which can be easily changed according to ...
- What is this printer? I was watching this video of the 3D Printing Guide: Calibration and Reasons You Might Be Doing It Wrong, and at the beginning (at 0:30 AM) the first three Reprap printers are mentioned (and shown): …
- Wrong Z-axis movement in G-code Okay, I bought a broken mini. There was only a defect on the board, so I connected the components to the Wi-Fi Duet 2.
 Everything is fully functional and I can manually move all the axes correctly using the interface, and…
 - Is there a G-code to determine the state of the power supply? I am using G codes M80 and M81 for power on/off. Is there a G-code to know the actual state of the power supply?
- Can I repurpose the ISP pins in the lower right corner of the Melzi board? Background: I have years of experience with AVR and ARM Cortex PLCs and feel very comfortable using them in projects, but I am not an EE or SE. So if I'm wrong or wrong...
- Advantages/disadvantages of using synchromesh cables instead of straps? Some 3d printers use synchromesh cables instead of straps. For example, Deezmaker Bukito (http://bukito3d.com/) and a number of RepRap transformations. Photo from http://christophergranz.com/?p=449 …
- Dual extruder clogging problem I connected a dual extruder (2 in 2) to my 3D printer.
 There is a recurring issue of clogged printing. I fixed the Chimera hot end. A large fan that occupies an area of…
 - Extruder gear sliding on filament I've been printing PLA on a Pegasus 12" for 2 years. The print quality has been great, but in the last few months the print quality has deteriorated. Looking at this, it seems that when the head…
- Sharing a 3d printer over the network I have a Tronxy X3 (i3 clone) with Repetier firmware on a Melzi board. I would like to share a printer over my home network in order to: Both me and my boys can use the printer. (We have…
- MKS board loses power after installing end stop I just bought MKS gen v1.3 and everything works fine except when I connect endpoints. My X-End Stop works great in every outlet, but when I…
- RepRap Laser Cutting I've seen a few lasers attached to the RepRap cutting platform, but most of them seem to cut paper, balsa wood, or just etch .
 If I wanted to create a cutting platform...
 - Z axis stepper motors are not working properly I have been searching the internet for the last 3 days trying to figure this out. My Z axis motors for pursa-i3 3D printer are not working correctly. I have marlin firmware and using repetier host. I am sending…
- Reprap Ormerod 2 Duet web control does not start automatically, how can I fix this? I have an Ormerod 2 which is controlled by a duo board with original modern firmware. When I turn it on and try to use the web interface (web control) it doesn't seem to start.…0008
- Y-axis shift problem - only in positive direction and only on very specific radius movements I'm running RepRap based ORDBOT Hadron on Repetier firmware version 1.0 that I built from the kit. I slowly figured out the excesses, but this one is completely stupid. Basically I sometimes…
- Can't insert milled drive and filament into extruder drive I'm making an AlfaMendel 3D printer (edited: original question called it Prusa Mendel I2).
 I printed the extruder drive using the PLA material from the STL available in the package, but I don't…
 - Arduino Mega voltage regulator overheats with RAMPS board This is my problem: I'm building a 3D printer with a RAMPS 1.4 board and an Arduino Mega. I assembled the structure and electronics (installed drivers, placed jumpers, connected stepper motors...) and uploaded… ) I ended up burning the voltage regulator on my Arduino Mega 2560. Now, powering the Arduino…
- How to use MEGA pin numbers instead of RAMPS pin numbers in marlin I am designing my own shield for the MEGA2650 that I will use to control my printer. When defining pins in marlin firmware, pin numbers are pin numbers…
- Marlin temperature sensor problem I have RAMPS 1.4 and Arduino Mega 2560. The problem is 100k NTC thermistor. I checked it with a multimeter, it gives ~ 122 Kom. I'm using Marlin 1.0.2 (latest stable version). I…
- Z motors work in sync ToyRep I have a problem with Z direction.
 As you know it has two motors. And my problem is that one sometimes goes in the other direction (so basically one is screwed in and the other is screwed out).…
 - Ramps 1.4 and extruder I have a ToyRep (RepRap) printer, with RAMPS 1.4 on the board. And I turn on the power from the ATX power supply with 12V. And the problem is that it does not get warm up to 230 (for ABS), the maximum ...
- reprap scaling I have been 3D printing for almost 4 years now. Now that I have the M180 my RepRapPro Huxley is picking up dust as I only use it for flex and ABS prints as it is… . It prints quite well, I'm really surprised by the quality of all the surfaces and the overall accuracy of the printed parts. BUT I HAVE A PROBLEM: when…
- How to make your own 3D printer? I'm wondering if I can get some electronic and mechanical layout of the machine. Is it possible to make 3D printer components with a 3D printer?
Reprap prusa i3 3d printer review, extruder – 3dprofy
Turch February 7th, 2015
RepRap is a brand that offers quality prototyping devices. These 3D printers allow you to create 3D models based on computer generated diagrams. The main goal pursued by the creators of the 3d RepRap printer is to ensure that users can reproduce versions of their own copies.
Aims and Purposes
The functionality of this printer opens up a wide range of possibilities for users who prefer to create original products at minimal cost. The main goal of the project is to create a RepRap Prusa self-copying 3D printer, which is distinguished by minimal costs and convenience of the production process. In the first version of the RepRap model, printing was carried out on the basis of thermoplastics and duroplastics: the former melt at high temperature, the latter after curing. The updated printers are able to work on the basis of filler materials such as marble dust and talc. Using RepRap allows you to create prototypes of various household items, as well as various fantasy details.
Features of technology
Printing with printer 3d printer RepRap Prusa i3 is based on the technology of extrusion of melted plastic rod. It allows you to perform step-by-step layering on a loaded three-dimensional model, which ultimately turns out to be of high quality and high accuracy. The printer comes with a heated platform for printing. Due to its presence, the models do not peel off during printing, so this process does not take much time. An important advantage of the printer is in the electronic print management system. The distinctive features of the model include:
- Quiet operation for optimal printing conditions at home and in the office.
- Printing can be done via SD slot or USB card reader.
- High functionality as the RepRap 3d printer is not dependent on the computer, any problems will be solved quickly.
Where is it used?
RepRap printers are widely used in various fields. So, at home, you can use it to create ordinary household items or some kind of designer delights, for example, original gifts or unusual toys for your friends. In the office, on the basis of this 3D printer, you can create various objects of complex design solutions by just pressing the "print" button. The RepRap Prusa printer allows you to create models of buildings, structures, various devices, mechanisms for cars.
Model developers have tried to create the most simple and efficient printer model that would be understandable even to a novice user. At the same time, on the basis of this device, it is quite possible to create high-quality parts, even without knowing the features of the technological process.
Extruder Features
The RepRap extruder is an item that should be given close attention. It is created on the basis of plastic wire and allows you to print various objects even at home. On the other hand, the extruder has a complex structure and quality, and it is also important to choose the right plastic for it. The disadvantages of the RepRap extruder include:
- small diameter melt jet,
- the need for the use of polymer wire, heat-resistant plastics, which are difficult to find,
- not very fast print speed,
- Impossibility to create parts of different scale.
On the other hand, everyone - both the developers themselves and 3D printing specialists - note that despite numerous shortcomings, this printer is of high quality and ease of use, which cannot be underestimated.
RepRap Prusa Mendel i2: a printer worthy of attention
This 3D printer model is perhaps the most affordable, and therefore the most popular. The main advantage of this device is the ease of assembly, which novice users will surely appreciate. The model, made in 2011, attracts attention with its ease of assembly, simple and cheap design, as well as the maximum possible number of plastic parts that can reproduce themselves. In addition, the possibility of finalizing and modifying the device attracts attention - for this, the reprap firmware is used. Thanks to the large print area, high quality and large size prototypes can be produced.
An important feature of the RepRap Prusa i3 printer is the presence of several extruders that allow simultaneous printing of several types of plastic or several colors of material.