3D printing gold jewelry
Shapeways: Gold 3D Printing
9K, 14K and 18K Gold
Wax Casting
Upload a model
Loading contents...
Show menu
9K, 14K and 18K Gold
Wax Casting
Upload a model
Material info
About Gold 3D Printing
Gold 3D printing is perfect for creating everyday wear, and timeless pieces too. Available in yellow, white, and rose, as well as 9K, 14K and 18K, Gold is one of the highest quality materials Shapeways offers. Capable of showcasing intricate details, Gold offers a professional, finished look and feel.
Color & Finishes
Yellow
Available in 9K, 14K and 18K
Rose
Only available in 9K and 14K
White
Only available in 14K
Technology
- Wax Casting
Description
Material Highlights
High quality, shiny finishing, skin-friendly, 9K, 14K and 18K gold. 3D printed Gold is capable of showing intricate details.
Handling and Care
Skin-friendly, 3D printed Gold offers high electrical conductivity and is heatproof to 800°C/1472°F.
Design Guidelines
Bounding Box
Bounding Box Max
89 × 89 × 100 mm
Bounding Box Min
2.4 × 2.4 × 0.6 mm
The bounding box is a 3D imaginary outline of a box that encloses the smallest area occupied by your model. Your model must be within the minimum and maximum bounding box sizes. If the size of the model is close to the maximum bounding box, then the printing orientation will be restricted.
Supported Wall Thickness Min
0.8 mm
Unsupported Wall Thickness Min
0.8 mm
A supported wall is connected at least on two sides of the wall, while an unsupported wall is connected only on one side of the wall.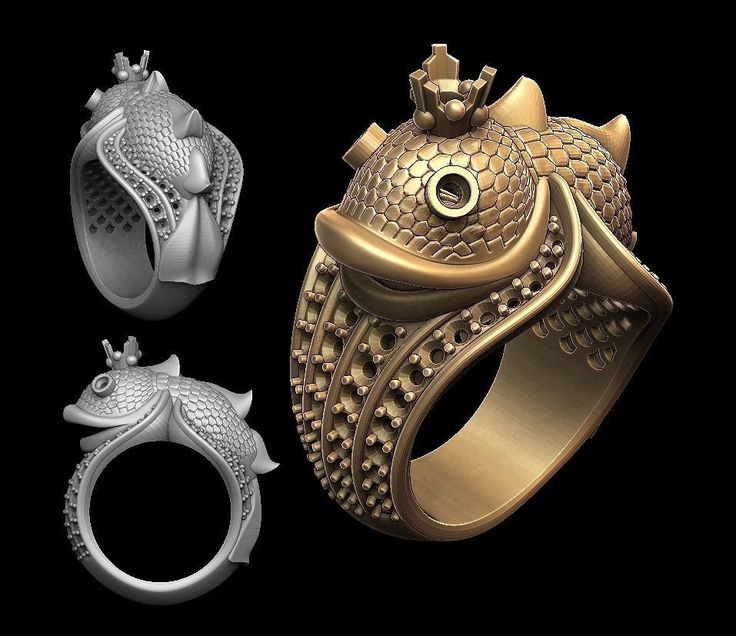 Walls that do not meet the minimum requirements may not survive printing and cleaning processes. Additionally, models may still be rejected based on the wall geometry of the model. Please consider the size of your model and reinforce the walls or add support structures as needed as minimum guidelines will not always be adequate for large models.
Supported Wires Min
0.8 mm
Unsupported Wires Min
1.0 mm
A wire is a circular, rectangular or even triangular feature that is thinner in its unconnected directions than its length. A supported wire is connected at least on two sides of the model, while an unsupported wire is connected on one side of the model. Wires that do not meet the minimum requirements may not survive printing and cleaning processes. Additionally, models may still be rejected based on the wire geometry of the model.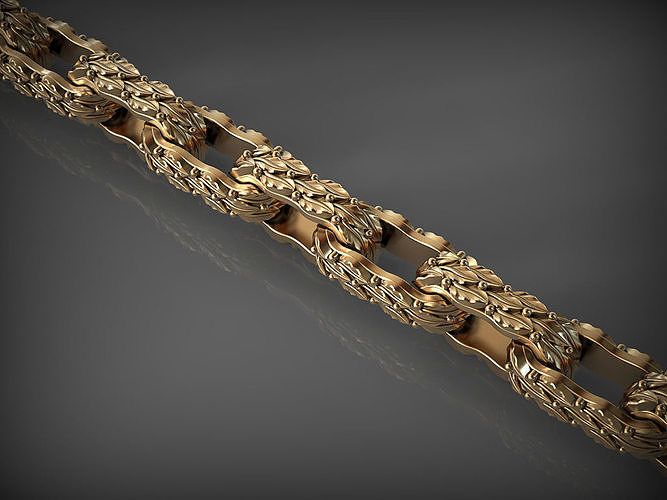 Please consider the size of your model and reinforce the wires or add support structures as needed as minimum guidelines will not always be adequate for large models.
Details
Details Min Embossed
0.4 mm high & wide
Details Min Engraved
0.35 mm high & wide
For text, the ratio between width and depth, should be 1:1 and sans-serif fonts are preferred for line weight consistency.
Escape Holes
Single Escape Hole Diameter (Min)
4.0 mm
Multiple Escape Hole Diameter (Min)
2.0 mm
Escape holes are necessary to empty the support material of a hollow model. Two escape holes at the opposite ends of the model is optimal for the support removal process.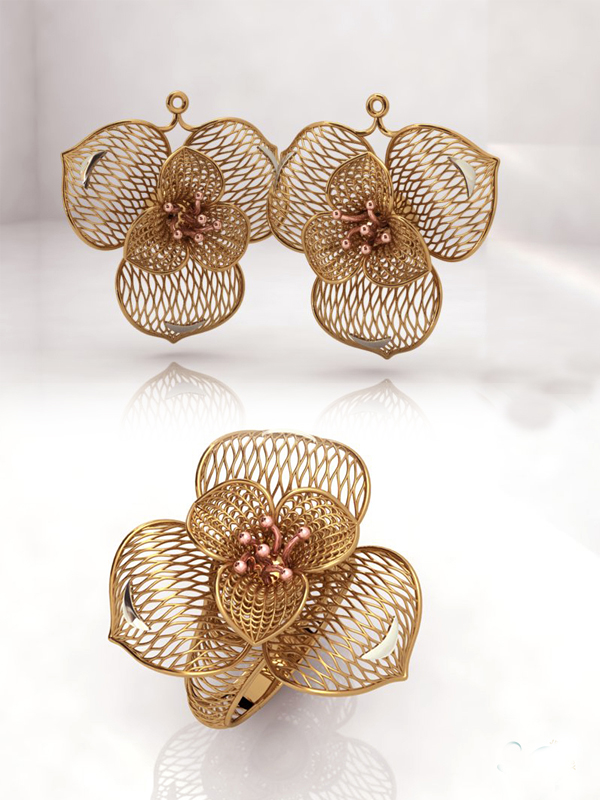 Please consider the size of your model and make the escape holes bigger or add more escape holes as needed as minimum guidelines will not always be adequate for large models.
A single escape hole at the end of a cavity will not allow material in the corners near the escape hole to fully escape. So we recommend multiple escape holes at both ends of the cavity.
Clearance
Min
0.3 mm
Clearance is the space between two individual parts in a model. If the space among the individual parts do not meet the minimum clearance, then parts can fuse together or can be difficult to clean. This is important for movable pieces like hinges, gears, etc.
Interlocking & Enclosed Parts
Interlocking
No
Enclosed
No
Parts in File
Max
Upload as many as two identical parts, like earrings or cufflinks, in the same model file for the Gold 3D printer. Multiple, unique, non-interlocking parts cannot be ordered in the same model files; therefore, separate files are required for unique parts.
Accuracy
Accuracy Your Gold 3D printing model may shrink about 0.25 mm plus 2.5% after casting and finishing. For rings the inner diameter is accurate within +/- 0.1 to 0.15 mm. On average, the Gold 3D printing model shrinks about 2.5% after casting and finishing. We do our best to polish the internal diameter to match your model file.
For example: A product with dimensions of 50 x 50 x 100 mm can be 0.25 mm + 0.025*100 mm = 0.5 mm smaller in any direction.
Stay up to date on promotions, case studies, and more.
Newsletter Sign up
Stay up to date on promotions, case studies, and more.
Email Address
Gold 3D Printing Explained: Technology, Material, Tips | 3D Printing Blog
Begin typing your search above and press return to search. Press Esc to cancel.
by Fabian | January 8, 2020 | Materials
Gold 3D Printing Explained: Technology, Alloys, Colors, Design Tips
by Fabian | January 8, 2020
3D printing is changing the way goldsmiths work and design. More and more people are asking us how 3D printed jewelry items in gold look and feel. In this article, we explain how gold items are created, the difference between 14k and 18k, its various colors, and how to model your 3D design to get the perfect gold 3D print!
The Technology: It’s All Based on WaxInstead of printing your gold item directly, we use wax 3D printing and lost wax casting to build your design. The wax printing process is a type of Stereolithography that uses a wax-like resin. Support structures are printed along with the model to make sure the item does not fall apart. These support structures are automatically generated and then manually removed after the printing process.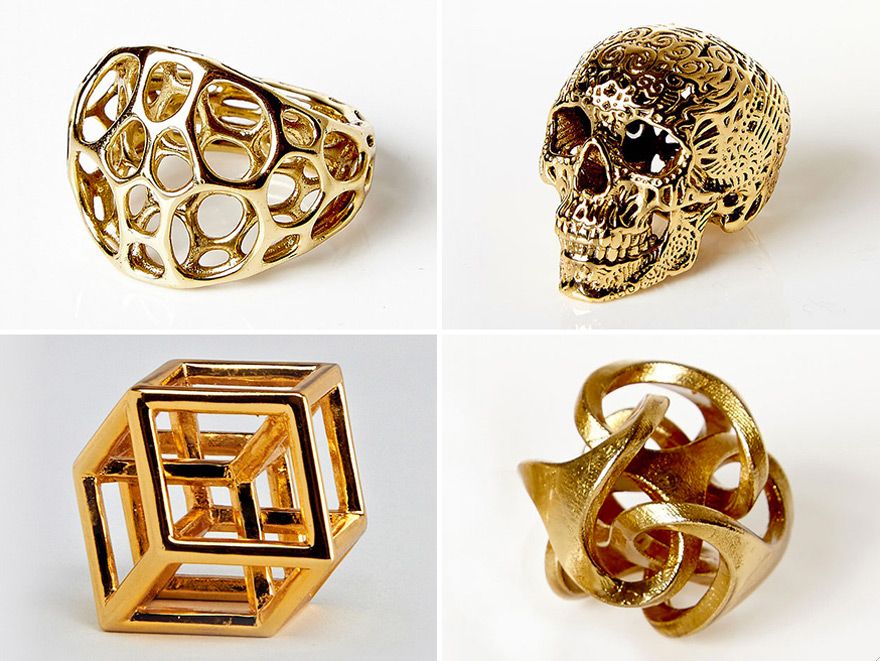
The wax cast is subsequently covered in a fine plaster. When the plaster solidifies, it is put in an oven until the wax is completely burned off. The gold is then poured into the empty cast, thus creating a 3D printed gold item. In the final step of this process, the item is polished and finished manually.
Wax 3D printing and lost wax casting are used to create a gold item.
14k or 18k: The Amount of Gold MattersA pure gold item (composed of 100% gold) is too soft for durable jewelry. With this in mind, jewel makers and goldsmiths usually mix pure gold with other metals, typically silver, copper, or zinc, in order to make it stronger.
The karat (often just written as “k”) indicates the amount of pure gold in the metal: the higher the karat, the larger the percentage of pure gold in the metal. For instance, 100% of pure gold is equal to 24k. However, as already pointed out, an object made of 24k would be too soft. This is why the amount of gold needs to be reduced: while 18k contains 75.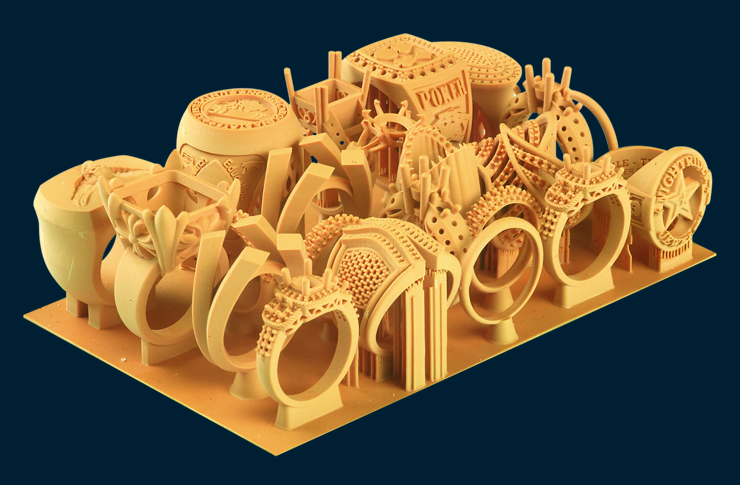 2% pure gold, which is the standard in Europe, 14k gold only contains 58.5% of pure gold and is somewhat less expensive. In fact, 14k gold is the most popular choice for gold jewelry in the United States.
Tulip Shell Pendant by Vulcan Jewelry. Printed in 14k red gold.
Rod of Asclepius Pendant Mini by Marcus Ritland. Printed in 14k yellow gold.
Yellow, White, and Red Gold: The Amount of Silver, Copper, and Zinc MattersSince neither 14k nor 18k gold contains 100% pure gold, the metals we choose to strengthen pieces of jewelry (silver, copper, and zinc) have an impact on the color of the final item. As a result, gold can be offered in several colors: white, yellow, and red.
Take a look at the following examples of the color difference depending on the amount of pure gold as well as the amount and type of metal alloy:
Our three gold color options: yellow gold, red gold, and our updated white gold.
White Gold: A Loose TermThe term ‘white gold’ is used very loosely in the jewelry industry to describe karat gold alloys with a whitish hue.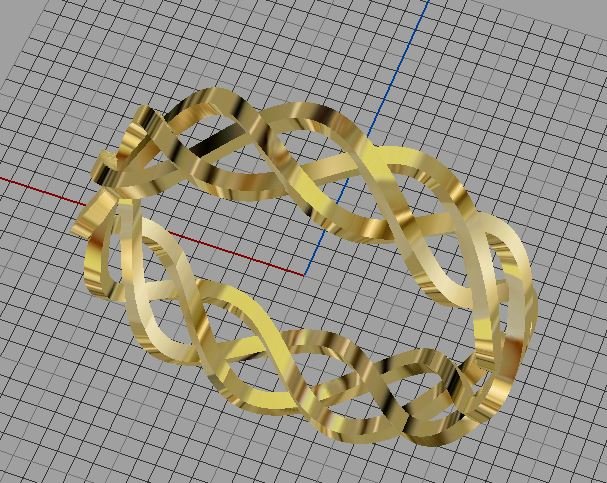 The term ‘white gold’ covers a large spectrum of colors that borders or overlaps with pale yellow, tinted brown, and even very pale rose.
To create a white color effect, nickel is often added to the alloy. Since 1 out of 8 people have allergic reactions to nickel, and in order to comply with a European regulation called REACH, we didn’t want to go this way and preferred a slightly yellowish look.
The jewelry industry often conceals these off-white colors by using rhodium plating. It is a common misconception that the color of the rhodium plating, which is seen on many commercial pieces, is actually the color of white gold. In reality, however, rhodium plating will inevitably wear off. So you would need to ask your local jewelry shop to apply a rhodium plating to whiten your model each time it wears off.
Since neither nickel nor rhodium plating were acceptable options, we decided to add palladium, a rare and lustrous silvery-white metal, to the alloy.
Design Tips: Some Things to Remember- Wall thickness: For most models in gold, the minimum wall thickness is 0.
 5 mm. However, when making something small, such as the band of a ring, the wall thickness should be at least 1 mm. If the model is too thin, the fragility of the gold might cause the ring to break when you wear it.
 - High definition: The resolution of the wax-printing process is very high, so it is important to create and export your model with enough definition to cover the triangles of the original design.
- Hollow models: Gold can also be used to print hollow models. However, keep in mind that you need to incorporate holes or slots, so we can get rid of the unprinted wax resin and make sure that the casting plaster is sufficiently supported. Without these holes, you will not be able to cast your model properly. To prepare your model for casting, make as many holes or slots as possible (at least two holes or slots for each side), each with a minimum diameter of 1.5 mm.
For more essential tips & tricks for designing your gold model, please visit our gold design guide.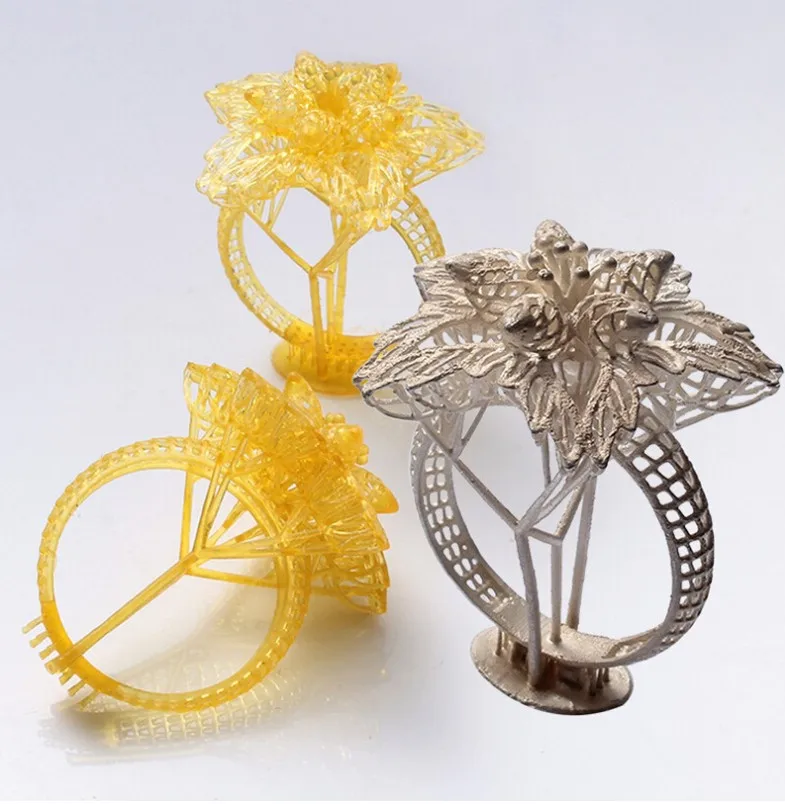 You can also learn more about 3D-printed jewelry in our blog posts about Desmond Chan’s stunning jewelry collection, Czech jewelry label blueberries, and our ultimate jewelry style guide.
3D printed jewelry - ideas
The technology of photopolymer 3D printing is rapidly improving and is increasingly being used in the jewelry industry. 3D printing in jewelry is no longer a rumor, but an established reality. Rings, bracelets, brooches, earrings of the most unusual shapes can be printed on a “magic” 3D printer and then cast from metal.
All you need to do is select a 3D printable file online or create your own 3D model using a CAD jewelry design software such as 3Design, MatrixGold, etc. The file is then "cut" into layers in a special slicer program, appropriate settings are selected on the 3D printer and printing is started.
You can read more about the technology, comparing it with traditional manufacturing methods, and application examples on our blog in the Jewelry Making section.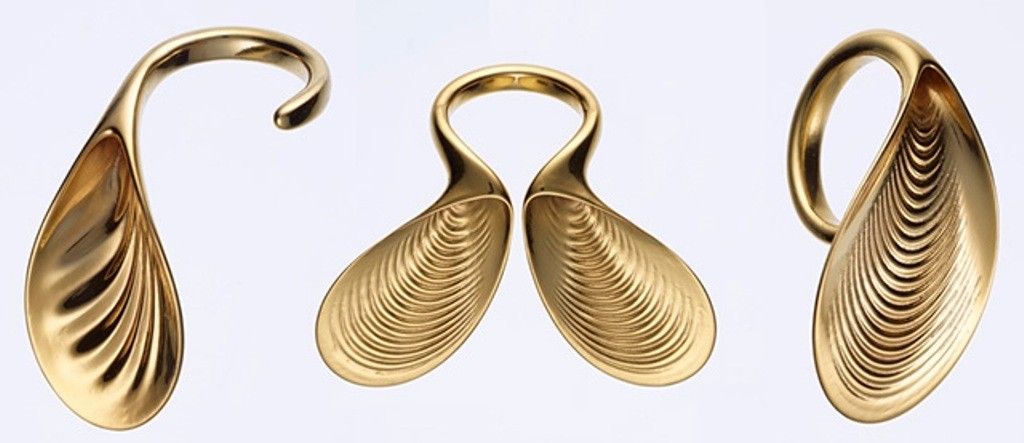
Examples of unique jewelry that can be created with resin 3D printing:
3D printed skull ring
Skull rings are a common fashion accessory. They are worn by both men and women, regardless of style and occupation. The symbol of the skull, as the infinity of life and wisdom of the ancestors, is one of the most common and ancient in the history of mankind. Traditional jewelry making methods require long and painstaking processing of small and intricate details of the ring. A 3D printer will print it out for you, like Phrozen Sonic Mini 4K or Phrozen Sonic Mini 8K.
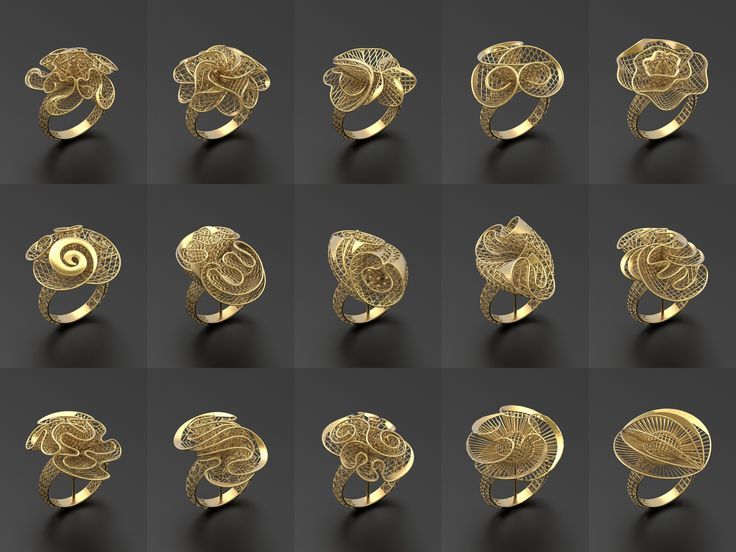
3D printed flower ring
A flower ring is something that almost every girl wants to have in her collection. For many of them, this is a must-have accessory. Flowers come in different sizes and styles, small and large, thin and graceful, or, conversely, massive.
For 3D printing, you can use model or burnout resin. According to the burnt-out model, in the future, you can cast a metal decoration. The range of resins is very large, there are high resolution 4K and 8K resins for creating highly detailed models. Models shown are in Phrozen Wax-like Castable Violet.
3D printed anchor
Anchor pendant is an incredible piece of jewelry inspired by the sea. It has a special meaning for people close to the sea. The anchor is a symbol of hope, stability and confidence in the future. It is associated with a ship that has landed on its native shore.
3D printed tiger pendant
According to Chinese astrology, this year is the Year of the Tiger! This means that people all over the world will wear tiger-themed jewelry.
3D printed bouquet brooch
A brooch-bouquet is another fashionable decoration. Just look how delicate this brooch is. 3D printing did an excellent job with her intricate details.
Conclusion
With 3D printing, you can create an unlimited number of designer jewelry.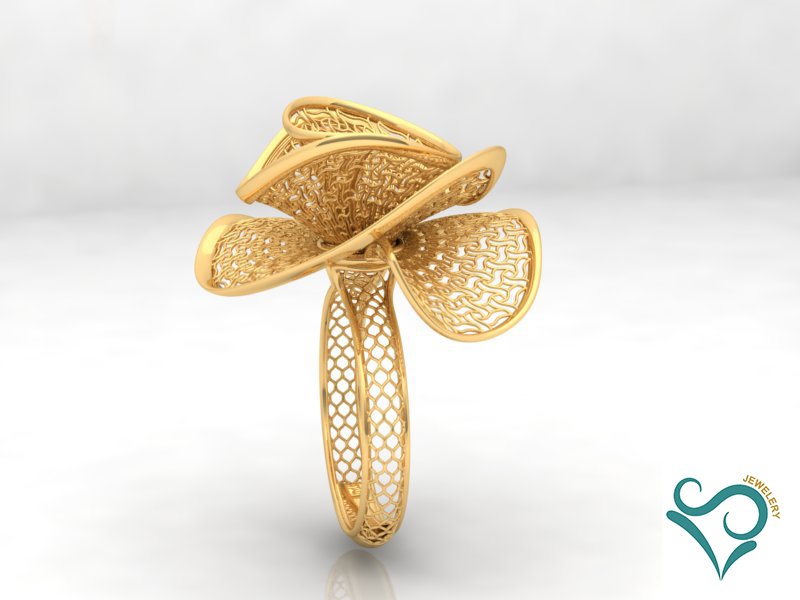 You can create a one-of-a-kind unique decoration. The detail is amazing. At the same time, jewelry 3D printing definitely increases the production capacity of the enterprise. Many modern manufacturers are using resin 3D printing technology as a way to save time and money in the long run.
Choice of technology and 3D printer for jewelry making, pros and cons
Currently, there are many new technologies that are designed to simplify production in various industries. Progress does not stand still and, despite some opponents, 3D printing has its own niche in the production of jewelry.
3D printing can speed up and reduce the cost of jewelry production due to the low cost of consumables. With 3D printers, jewelers have the ability to quickly change the design of a product and make prototypes at least several times a day. For many jewelry industries, 3D printing is becoming a good alternative or addition to milling machines and other equipment.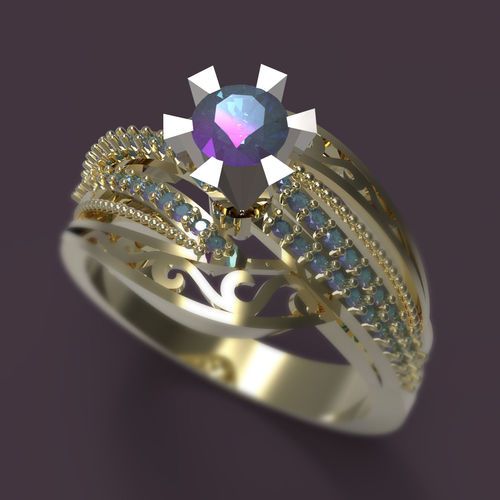
Until now, some believe that handmade is a sign of craftsmanship, especially when it comes to creative work, and models made using 3D modeling and printing are amateurish. But many people forget that behind the computer is the same person who not only mechanically presses the buttons, but also puts his soul into his creation.
Benefits of 3D printing
In order to understand how justified the use of a 3D printer is, you need to know how jewelry is made. This is very painstaking work. No wonder the expression "jewelry work" appeared, denoting a very delicate and complex work.
Any decoration begins with a sketch. Usually several sketches are made in order to accurately determine the design and location of the inserts. Not only stones are used as decor, it can be elements made of wood, bone, precious metals, it all depends on the designer's imagination.
At the next stage, the product is drawn in a 3D editor. This allows not only to visualize the future product, but also to correct some errors and inaccuracies made at the design stage.
Ring model
Some craftsmen still carve "stencils" by hand. Such work requires certain skills and perseverance. Usually this is how products are made that will be cast in a single copy.
A finished 3D model can have several ways to be implemented in a physical version - this is milling or 3D printing.
Stencil milling
Currently, 3D printing is not much inferior in accuracy to a milling machine and often has a significant advantage in speed, despite the fact that after printing it is still necessary to separate the supports and clean up the points of contact with the model. Once a physical model has been obtained, it can be cast immediately if the material used is wax or a burnable polymer.
If it is necessary to cast a large batch of products, then a mold is made from the master model made with the help of special rubber for subsequent wax casting.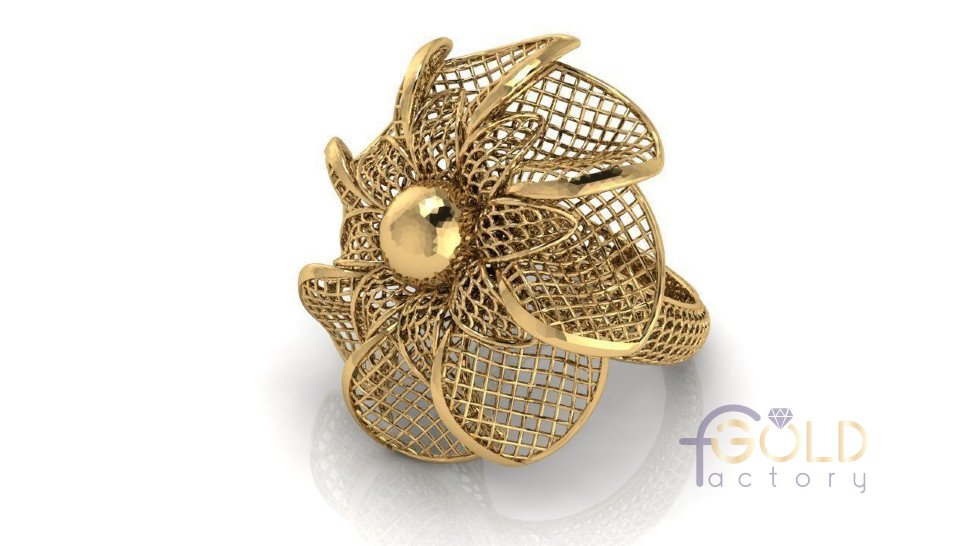 There are many types of rubber that vary in hardness and curing temperature. Rubber is selected depending on the material from which the master model is made.
For pouring molds, a special machine is usually used - an injector. In some models, you can not only heat the wax, but also vacuum it or leave it under pressure. This helps to reduce the number and size of air bubbles for better pouring of the rubber mold.
In home workshops, silicone is used instead of special rubber. After all, a special machine is needed to vulcanize rubber. But rubber molds are too soft and short-lived for making a large batch of stencils.
After making the required number of stencils, they are collected in "Christmas trees". "Elks" are waxes soldered to a wax rod. To save space, the distance between them is very small and they resemble fluffy Christmas trees, hence the name. The finished Christmas tree is weighed to calculate the required amount of metal.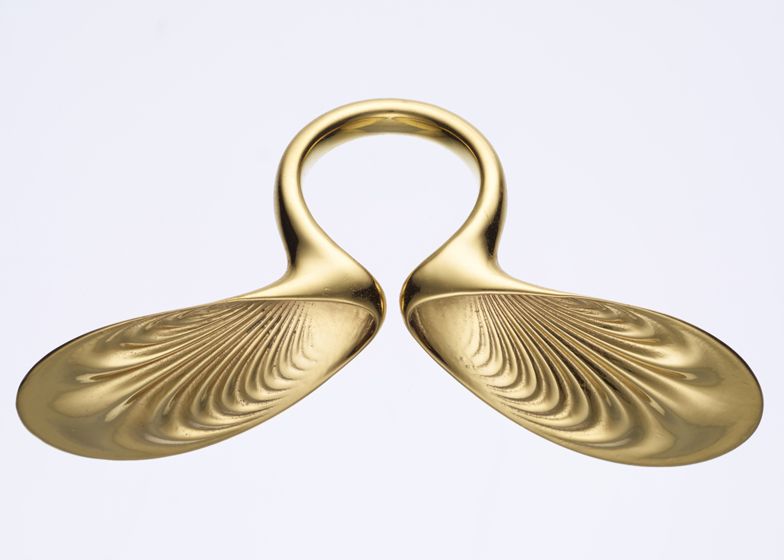 In some places, stones are immediately inserted into the stencils, unless another mounting option is provided.
Stencil Christmas trees
Ready "Christmas trees" are placed in a special cylindrical "cassette" without a bottom, which is called a flask, and filled with a gypsum-based molding mass. The flask with uncured gypsum must be evacuated to get rid of unnecessary air bubbles that can lead to defects on the surface of the finished casting.
After hardening, the gypsum flask is sent to a muffle furnace to melt the wax.
The calcination mode is selected depending on the material of the wax. For wax or burnout polymer, different modes are needed in order for the material to be completely removed from the gypsum!!!!!!
When all the wax is melted, cavities are formed inside the gypsum, repeating the contours of the wax. Metal is poured into these voids. After casting, the flask is cooled and the gypsum mold mass is washed out under the pressure of water. The result is a metal Christmas tree.
Herringbone after casting
Finished castings are cut from the Christmas tree and washed, polished, if necessary, blackened by the master until the desired appearance is achieved.
3D printers for jewelers
There are several 3D printing technologies that may be suitable for the needs of jewelers. Each has its pros and cons. Some 3D printers are ideal for a large workshop, and some are ideal for a small workshop.
SLA
SLA or stereolithography is based on the principle of layer-by-layer solidification of a photopolymer resin under the action of a UV beam. The UV beam is focused by means of mirrors on the surface of the resin and illuminates the model in layers.
How the SLA Printer Works
SLA 3D printers were the first to be noticed by jewelers. SLA devices are compact, while they have high printing accuracy.
Pros and cons
pros
Minuses
Print examples
From prototype to finished product
Cast and printed ring
Rating of printers.
Leadership among the production of SLA 3D printers is held by Formlabs.
Formlabs Form 3
Formlabs Form 3
Specifications:
XY resolution: 25 µm
Laser spot size: 85 µm
Laser power: One 250mW laser
Working area size: 14.5×14.5×18.5cm
Layer thickness: 25 – 300 µm
A professional 3D printer that is popular with professional jewelers and dentists.
Formlabs Form 3L
Formlabs Form 3L
Specifications:
XY resolution: 25 µm
Laser spot size: 85 µm
Laser power: One 250mW laser
Working area size: 33.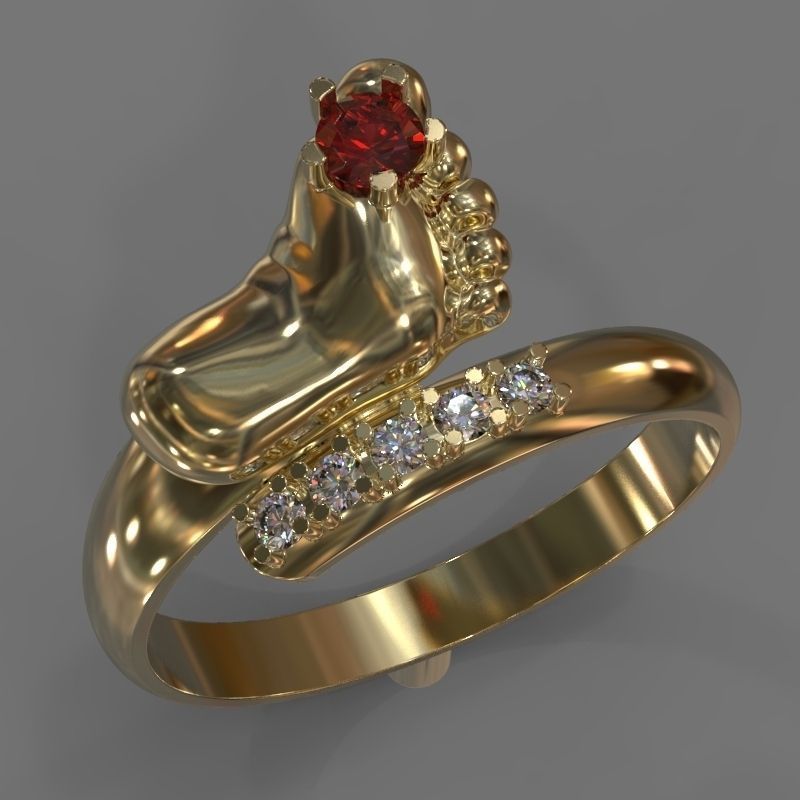 5×20×30cm
Layer thickness: 25 – 300 µm
Form 3L differs from younger models in its large print area, which allows you to produce truly large products without losing quality and accuracy.
DLP/LCD
DLP is very similar to SLA, only as a source of UV radiation, to illuminate the photopolymer resin, not a directed beam of light is used, but a DLP projector. DLP printers illuminate the entire work area at once, so they greatly outperform SLA in print speed.
How a DLP Printer Works
Today it is one of the most affordable photopolymer 3D printing technologies. In terms of cost, LCD printers have caught up with the price level of amateur FDM. DLP printers are much more expensive due to the use of an expensive projector as a UV source.
The projector is of course more expensive, but more durable, on the other hand, the LCD display is not so expensive and can be easily seen, unlike the projector.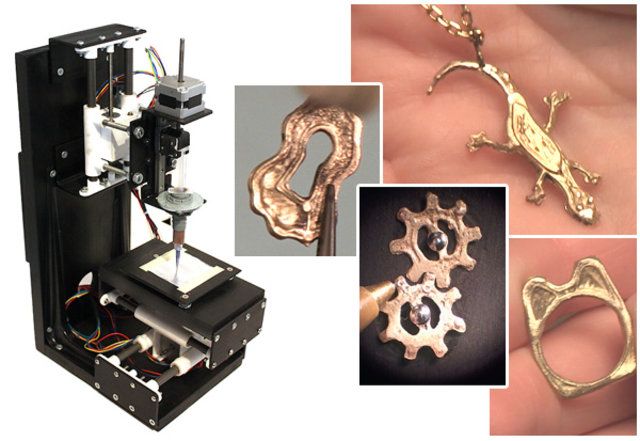 What to choose each user decides for himself.
Pros and cons.
pros
Minuses
Print examples
Comparison of 3D printed master model and cast part
Burnout resin model and finished product
Demonstration of products cast with burnout resin
Rating of printers.
The print accuracy of LCD printers depends on the pixel size, so you should pay attention to this parameter when choosing a printer.
Anycubic Photon Mono
Anycubic Photon Mono
Specifications:
LCD display resolution: 2560x1620 (2K)
XY Positioning Accuracy: 0.051mm
UV wavelength: 405 nm
Working area size: 130x80x165 mm
Layer thickness: 0.01-0.15mm
The Anycubic Photon Mono is an inexpensive LCD machine ideal for hobby printing.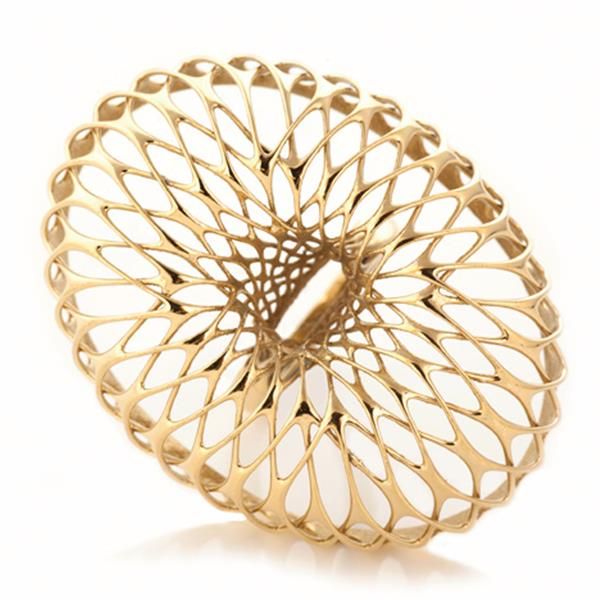 The monochrome display allows you to reduce the exposure time and speed up printing.
Phrozen Sonic 4K
Phrozen Sonic 4K
Specifications:
LCD resolution: 6.1" 4K Mono LCD
XY positioning accuracy: 35 microns
UV wavelength: 405 nm
Working area size: 134x75x200 mm
Layer thickness: 0.01-0.30mm
Phrozen Sonic 4K is specifically designed for use in the dental and jewelry industry. Despite its compact size, the printer is not inferior to professional machines in accuracy, and the exposure time of one layer is only a few seconds.
Phrozen Sonic Mighty 4K
Phrozen Sonic Mighty 4K
Specifications:
LCD resolution: 9.3" 4K Mono LCD
XY positioning accuracy: 52 microns
UV wavelength: 405 nm
Working area size: 200x125x220 mm
Layer thickness: 0. 01-0.3mm
Phrozen Sonic Mighty 4K is a professional device with a large print area. This allows you to quickly produce small batches of models.
Phrozen Sonic XL 4K
Phrozen Sonic XL 4K
Specifications:
LCD resolution: 8.9" 4K Mono-LCD
XY positioning accuracy: 50 microns
UV wavelength: 405 nm
Working area size: 190x120x200 mm
Layer thickness: 0.01-0.3mm
The Phrozen Sonic XL 4K is a professional machine with a large print area and a high resolution monochrome LCD display. This allows you to quickly produce batches of products with high accuracy.
Peopoly Phenom XXL
Peopoly Phenom XXL
Specifications:
LCD display resolution: 3840x2160 (23.8", 16:9, UHD 4K)
XY positioning accuracy: 137 µm
UV wavelength: 405 nm
Working area size: 527x296x550 mm
Layer thickness: 0.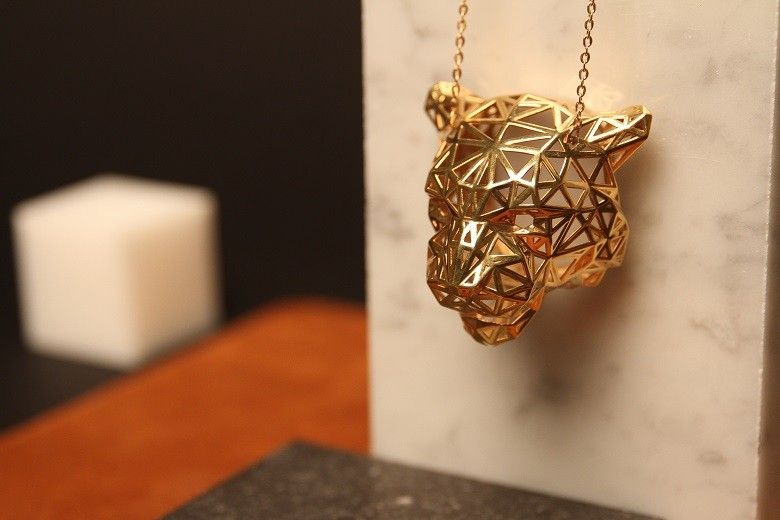 01-0.3mm
The Peopoly Phenom XXL is a device with a huge build area, which is ideal for serial production of not only jewelry.
Phrozen Sonic MEGA 8K
Phrozen Sonic MEGA 8K
Specifications:
LCD resolution: 15" 8K Mono LCD
XY Positioning Accuracy: 43 µm
UV wavelength: 405 nm
Working area size: 330 x 185 x 400 mm
Layer thickness: 0.01-0.3mm
This is the first LCD printer with 8k monochrome matrix resolution, and a huge working area allows you to produce large batches of products in one print.
MJM/MJP
MJM (or similar PolyJet technology) is a technology for layering photopolymer or wax through many fine nozzles. Typically, the print head is located from 96 to 448, depending on the printer model.
If a photopolymer is used as a material, it is immediately cured by a UV lamp, which is located on the printer's head.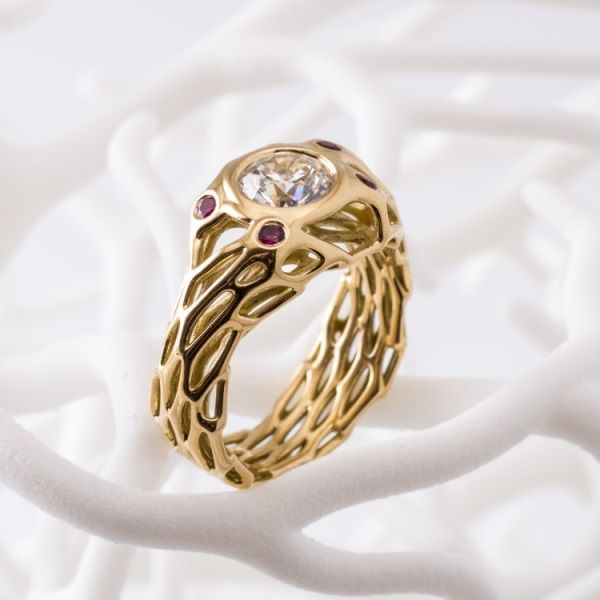
How the MJM printer works
In addition to photopolymer, MJM 3D printers can use wax as a material for printing.
MJM printers can print multiple materials at the same time. This allows you to print complex models with soluble or investment supports. This makes it possible to produce complex models with a smooth surface quickly and easily.
Pluses and minuses
pros
-
Ability to print multiple materials at the same time. This means that another, soluble material can be used as a support. This allows you to save a lot of time on removing the support from the finished model and cleaning up the places where the supports come into contact with the print.
Minuses
-
To install the printer, most likely, you will need a separate room. 3D printers based on MJM technology are quite bulky in their dimensions, this is not a device that can simply be placed on a desktop or nightstand.
Print examples
Seal of a batch of stencils
Ring printed with wax
Master models made with MJM printer
Lot of jewelry stencils for subsequent casting
Printer rating
FlashForge WaxJet 410
FlashForge WaxJet 410
Specifications:
Materials: Wax, support material.
Resolution: 1200*1200*1600
Building area size: 289*218*150mm
Layer thickness: 16 microns
Accuracy: ±0.04mm / 20mm
The FlashForge WaxJet 410 is an industrial machine designed for serial printing of wax models, which will then be cast from metal. Machines of this class can be useful not only in jewelry production, but also in the dental industry, aerospace, mechanical engineering, prototyping, etc.