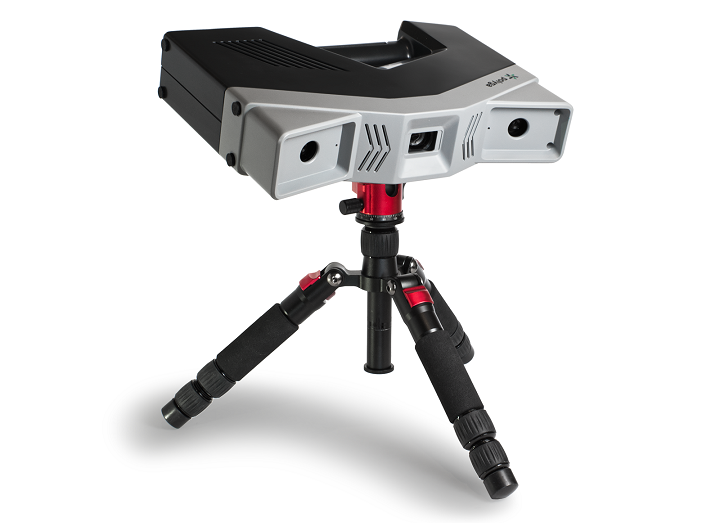
Stationary 3d scanner
Choosing Between a Stationary or Handheld 3D Scanner
News and resources on 3D scanning and measurement technologies
Published on February 28, 2017. Written by: Darryl Motley
Every day, we have great conversations with people who are looking to find the right 3D scanner to help them solve work-related challenges—from quality managers who are looking for a computer-aided inspection system, to archaeologists who want to preserve ancient artifacts into digital formats.
We find a majority conduct their own research before contacting us. There are times when they have already decided on whether to get a stationary or handheld 3D scanner before realizing one might be better suited for their applications after talking with us.
How do you know if a stationary or a handheld 3D scanner is most suited for your needs?
Before you decide, let’s take a look at the two options and the various factors that will influence your decision.
How Stationary and Handheld 3D Scanners Work
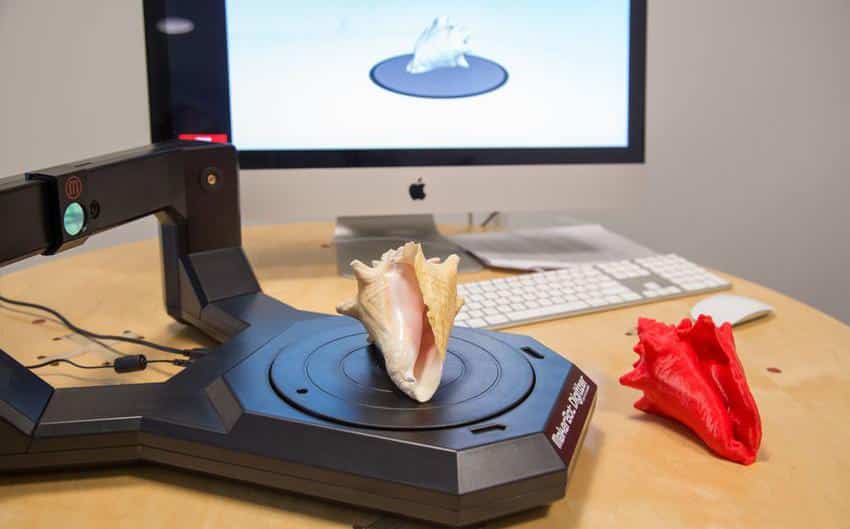
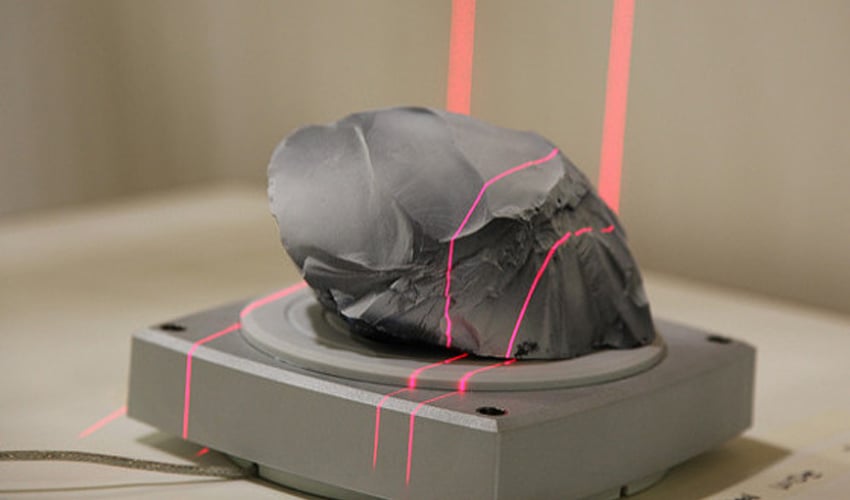
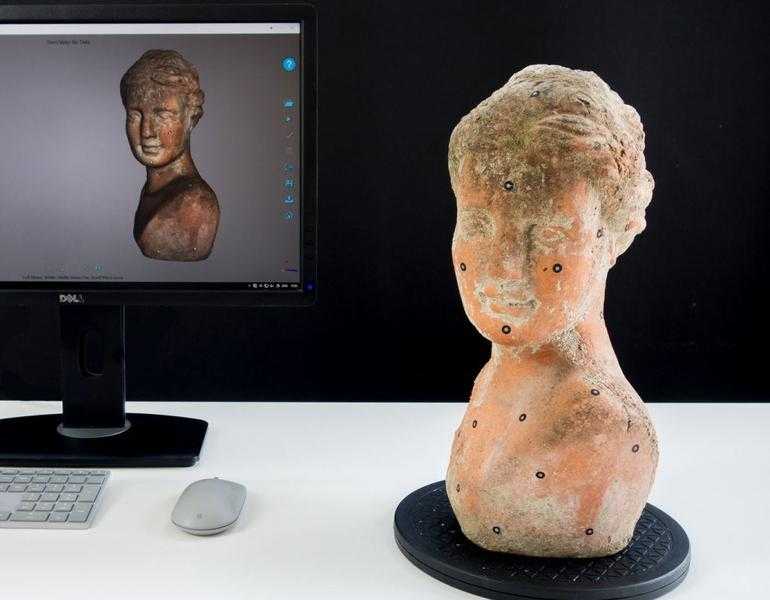
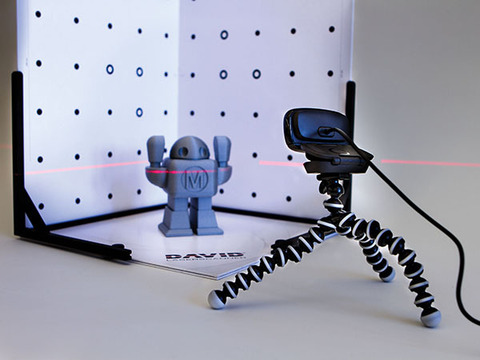
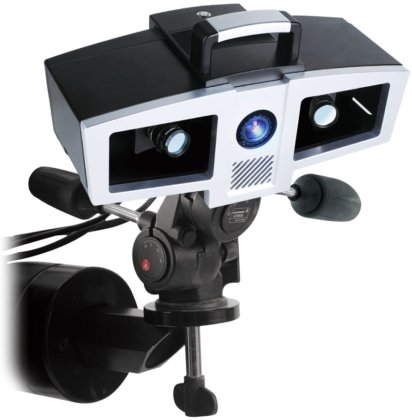
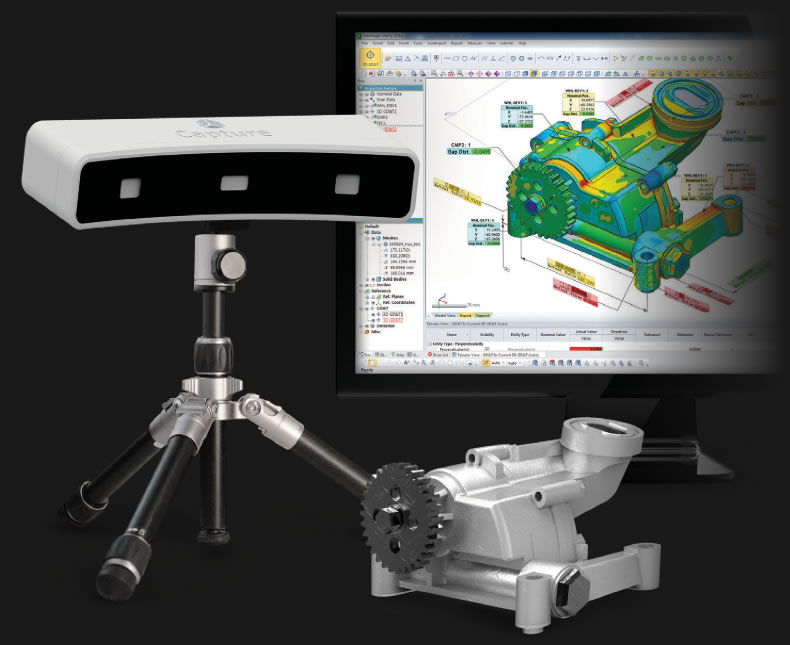
A stationary 3D scanner is mounted to an arm or a tripod and it’s fixed at a location. The user turns the object, the scanner captures a scan, and this process continues until all scans are captured of the entire object at various angles. Depending on the processing software, some can automatically merge the scans together during the scanning process or this might be done when all the scans are collected at the end. Individual scans are later stitched together to create one complete digital model.
For a handheld 3D scanner, the user hovers and paints around the object in order to obtain 3D scan data of the entire object. It operates similar to a video camera but it captures objects in 3D with continuous scanning.
Factors to Consider
-
Accuracy and Resolution
Currently, if you are comparing a stationary 3D scanner to a handheld using the same technology (e.
 g. structured-light), stationary 3D scanners provide better accuracy and resolution. If your application needs to drive the best possible accuracy and resolution you can get and it’s the most important factor you need in a scanner, stationary 3D scanners would be a good choice.
The scanner’s scan quality is influenced by how it works. For example, stationary 3D scanners using structured-light technology take a series of images in one snapshot and consolidates the average to generate one scan. Handheld 3D scanners using structured-light technology take one shot per frame (equivalent to one scan) and then the user moves the scanner to take another scan. It’s similar to comparing a still image taken from a camera versus a frame taken from a video recording. The former will get you better quality than the latter. The scan quality is still great for a handheld 3D scanner, but typically the stationary 3D scanner provides slightly better results when comparing scanners that are similar in price point.
However, it’s important to remember that a majority of applications don’t require the high quality. There are other factors such as portability and ease of use that might be more important to you. A handheld 3D scanner is a great solution for reverse engineering, 3D visualization, and even quality inspection applications if you don’t require the absolute best accuracy and resolution you can find.
-
Portability
Handheld 3D scanners are synonymous to portable 3D scanning. These scanners give you maximum portability compared to a stationary 3D scanner.
You can essentially take them anywhere. For example, Artec 3D scanners support battery operation for scanning offsite in the field for up to 6 hours, even in areas with no electricity. It even supports the use of a tablet to power its 3D scanning software so you don’t have to carry a lot of heavy equipment for your travel.
A stationary 3D scanner requires a desktop computer or laptop to power the 3D scanning software for data acquisition and post-processing, so you would require electricity to run the system at all times.
-
Scanning large volume of objects with a repeatable process
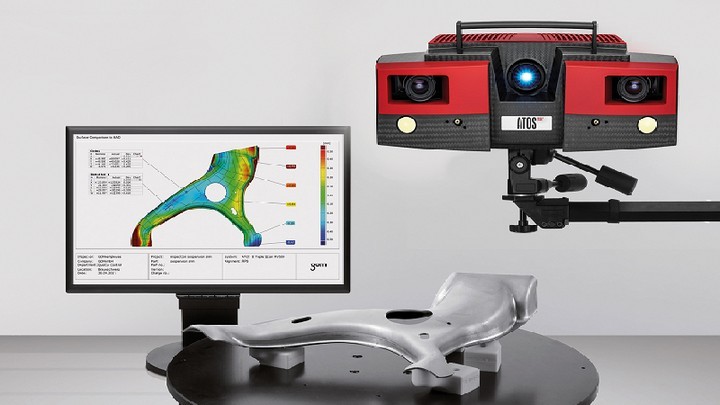
Automating the 3D scanning process of converting fossils into 3D digital format to capture surface measurements for a research study.Stationary 3D scanners are a great option if you need to scan similar sized objects in volume quickly. It enables an automated standardized setup without the need for much human involvement to help gain efficiency in the scanning process.
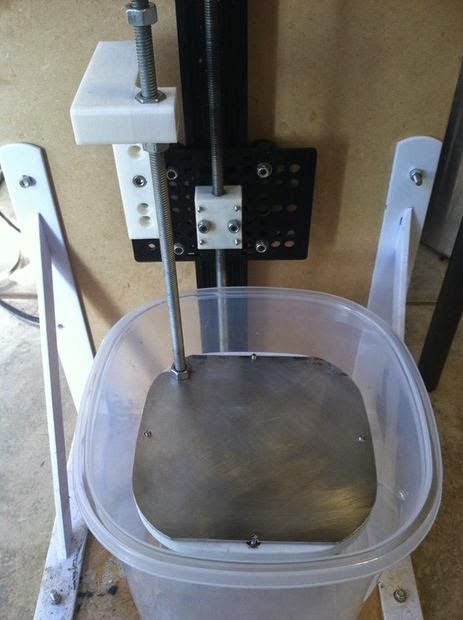
Automating the scanning process with a stationary 3D scanner is possible when paired with a motorized rotary turntable accessory. The user sets the rotary table to capture a certain number of scans while it spins the object in 360 degrees horizontally. When the rotary table stops spinning at certain intervals, the scanner captures a 3D scan of the object at that particular angle. Once it captures all the scans, the scanner automatically post-processes the scan data by merging and stitching all the scans together into a complete digital 3D model.
Once the object is completely scanned, the next object would be placed on the rotary table and the process starts all over again. An assembly line workflow to 3D scanning takes out much of the manual labor-intensive work.
Using Handheld 3D Scanner For Robotic Scanning
Compared to a stationary 3D scanner, a handheld 3D scanner is normally setup so the user holds the device while scanning. Because human factor is involved, it would be difficult to replicate the exact process every time you scan a set of similarly-sized objects. However, handheld 3D scanner manufacturers are starting to give users an automated, hands-free option with robotic 3D scanning.
Instead of operating the handheld 3D scanner manually, the scan head is mounted to a robotic arm programmed to move automatically. The scanning station would do it faster and more accurately than if a person is scanning by hand.
 Robotic scanning is also an option if you are using a stationary 3D scanner.
 -
Scanning hard to reach places
It’s easier to maneuver a handheld 3D scanner compared to a stationary 3D scanner because the scan head is portable. You can easily scan holes or undercuts that would be more challenging to scan with a stationary 3D scanner.
Using the Artec Eva to scan a water pipe to determine its corrosion levels.
Final digital 3D model of the water pipe. Comparing the 3D models from before and after the corrosion enables corrosion levels to be mapped to a good level of accuracy.
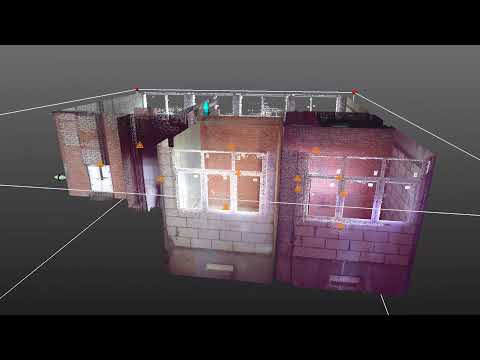
Handheld 3D scanners also great for scanning in confined spaces where the object, such as museum sculptures, cannot be moved to a different location for scanning. This scenario would be difficult for a stationary 3D scanner to be placed at a certain distance for scanning, where there isn’t ample space.
-
Field of view
There are certain stationary 3D scanners in the market where one system is capable of scanning objects of different sizes by adjusting the scanner’s field of view (FOV). Depending on the object size you’re looking to scan, the scanner’s cameras and lenses can be moved to different mounting positions to adjust the FOV.
Field of view (FOV) is the observable area that a 3D scanner can capture a
3D scan at a certain distance. HDI Advance 3D scanner scans objects of different sizes by changing the scanner’s FOV.Handheld 3D scanners have a fixed FOV so it is restricted to the object size it can scan while retaining its accuracy.
Using the HDI Advance 3D scanner as an example, if a drastically smaller field of view is required to scan an object such as small turbine blade, screw, or small insect with high precision accuracy, the scanner is flexible to be converted into a macro scanner.
 All you need is to use an add-on accessory kit without the need to purchase an entirely new system. If you need to scan objects that vary in a range of sizes, stationary 3D scanners might be the most cost-effective solution for your needs.
A standard HDI Advance 3D scanner is transformed into a macro 3D scanner for scanning small parts.
-
Ease of Use and Training
We train our customers on both types of scanners. Overall, the handheld device is an easier technology to pick up and to learn. It requires a shorter learning curve compared to a stationary 3D scanner.
However, if you are striving for high accuracy and resolution in your 3D scans, it takes more knowledge and training to achieve these results. It’s worth spending more time on training to use a stationary 3D scanner because you want to get optimal performance the equipment has to offer.
Get Expert Advice
Our goal here is to provide some general guidelines to help you start thinking about what factors are most important when deciding on which option is right for you.
It’s always a good idea to contact a reputable 3D scanner solutions provider who can understand your application, what you are looking for in a 3D scanner, and walk you through the different options available. They can also give you a demonstration of the stationary and handheld 3D scanners to help you ultimately make an informed decision.
Leave a Reply
Stationary 3D Scanner or Handheld 3D Scanner?
We have received customers’ inquiries concerning how our 3D scanners can help their applications. But most of them have no idea about what fits their purposes. Our customers come from a wide array of industries, such as architecture, engineering, and education, so their uses of 3D scanners are varied. In many cases, they need to decide whether to select a stationary 3D scanner or a handheld one. Before making the decision, it is better to have some knowledge about the two categories of 3D scanners and some factors that matter.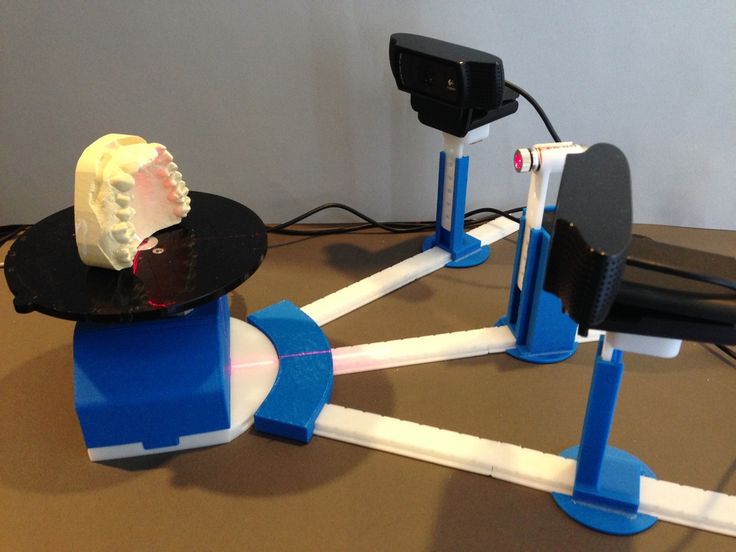
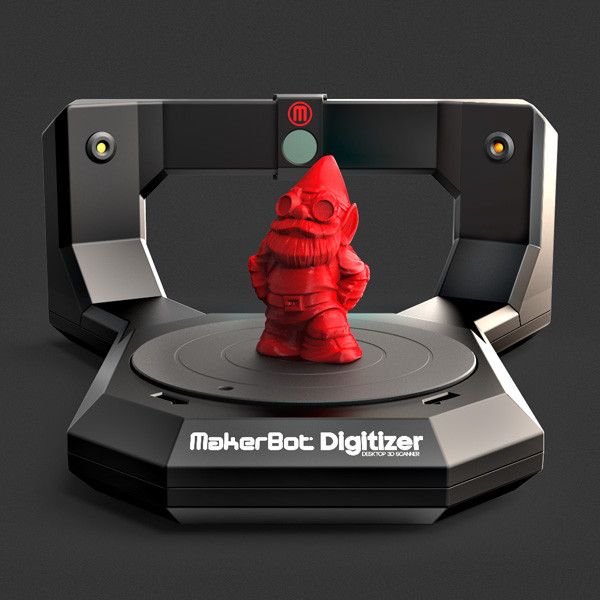
Stationary 3D scanners often sit in a fixed location, mounted to a tripod or an arm. And the object is often placed on a turntable which rotates the object 360 degrees during scanning. After the scanner captures the entire object at different angles, the computer software merges all the scans to generate a complete 3D model.
Handheld 3D scanners are known for their portability. Users hold and move the scanner and point it around the object to scan from all angles. A computer installed with the scanning software, connected to the scanner, would do the processing work.
Apart from the differences in the method of working, there are some factors that can help users differentiate between the two kinds of 3D scanners.
Flexibility
As explained above, handheld 3D scanners are more portable than stationary 3D scanners in the scanning process. Therefore, it can work in hard-to-reach places, for example, pipes, cabins of cars, and even buildings.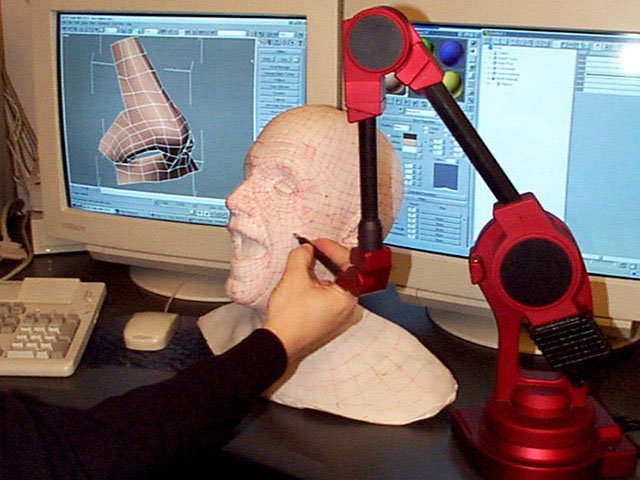 In terms of accessories, stationary 3D scanners often work with a tripod, turntable, and computer. For handheld 3D scanners, normally, a computer with scanning software installed is required. The weight of handheld 3D scanners also influences their flexibility. Nobody wants to carry a bulky machine everywhere.
Accuracy
When using the same technology, for example, structured light, a stationary 3D scanner would be more accurate than a handheld one because the former takes still photos (like a camera) to construct a 3D scan, while the latter takes moving frames (like a video camera) to generate a 3D scan. The quality of the source data determines the accuracy of the result.
Scan volume
Scan volume is often determined by the scanner’s FOV. 3D scanners set at a fixed location have a fixed field of view. A stationary 3D scanner, paired with a turntable, can capture small to medium-sized objects. Handheld 3D scanners, though with FOV similar to stationary 3D scanners in each frame, are able to scan larger objects due to their mobility. Many handheld 3D scanners can capture large objects like the human body and automobiles.
Whether to select handheld 3D scanners or stationary 3D scanners, the factors listed above and the specific applications should be taken into full consideration. If you have any questions about purchasing one of our 3D scanners, please feel free to contact us.
8 steps of quick and easy work with a stationary 3D scanner
The convenience of working with a stationary 3D scanner can be perfectly demonstrated by the example of the C500 device from the South Korean manufacturer Solutionix. It is a fully automated small to medium digitizing solution for complex quality control and reverse engineering tasks in the automotive, aerospace, mechanical engineering, medical, jewelry and other industries. The device will be included in the State Register of Measuring Instruments in the first quarter of 2021.
The Solutionix C500 is an easy-to-use, reliable and high-precision optical 3D scanner that offers a number of convenient features such as an automated calibration and scanning system and synchronization of the position of the object and cameras with one click (Active Sync).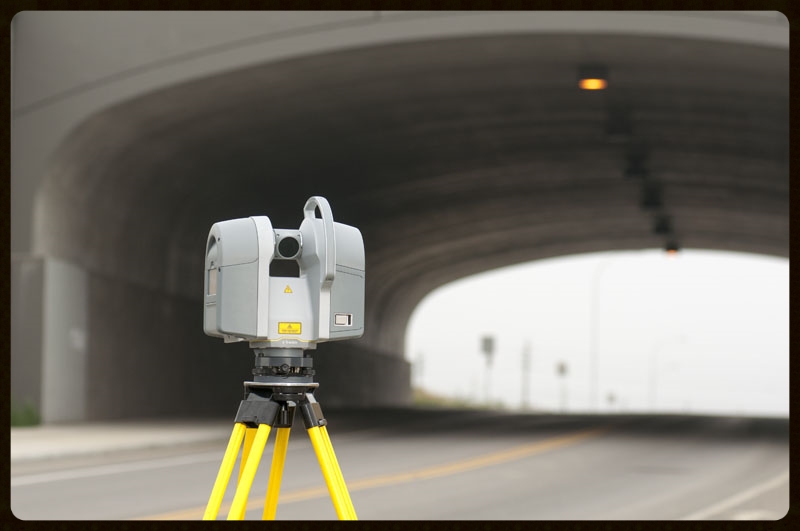 The scanner is equipped with 5-megapixel cameras and an automatic turntable with three planes of movement. Included is the intuitive ezScan software.
Let's see how quickly and easily you can get the job done with the Solutionix C500.
I. Preparing to Scan
This overview describes the procedures to follow after you have completed the lens setup (field of view) and calibrated the appropriate area for the object being scanned.
Step 1. Fixing the object to be scanned on the turntable
What should be checked before fixing the object on the turntable? Pay attention to the following points.
What size and weight object can be fixed on the turntable?
If the dimensions of the product exceed 350 x 300 x 200 mm (FOV500 standard lens) and the weight is more than 10 kg, it is recommended not to use the turntable.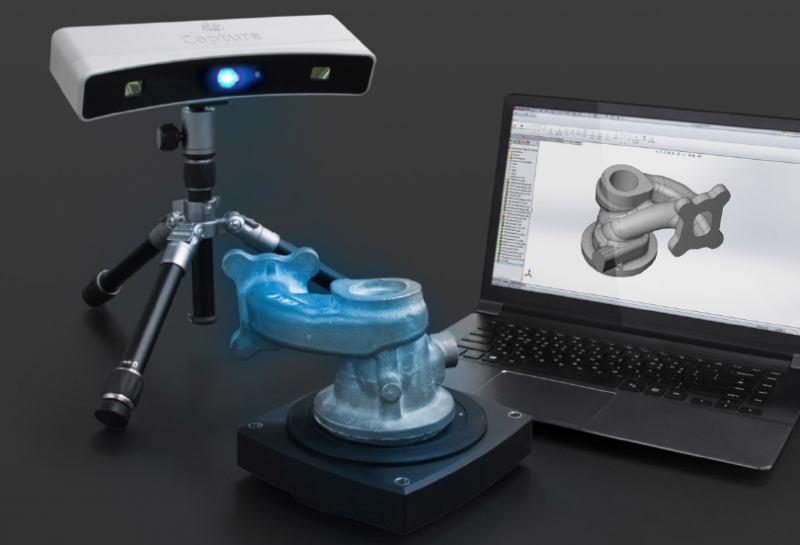
Should I use matting spray?
If the object is shiny, transparent or black, spray on it. So it will reflect less, and if the material is black matte, then it can be scanned. If the material is dark, then the lighter you make it, the more data you can collect. We recommend doing one test scan before spraying.
How to fix an object?
When digitizing small objects with the FOV90 lens, area 175, adjust the height of the object using the lifter. This is easily done by activating the laser pointer.
Left: The lift is in the center of the turntable.
Center: turn the lift to set the height.
Right: lock the bottom of the lift by pushing the washer down.
II. 3D scanning process
Step 2: Autoscan
1. Set the brightness to match the part being scanned (Auto).
Live display of the left and right cameras can be set. If you have selected a part of the object circled on the screen with a blue circle, then the brightness will be set automatically relative to the surface of this selected part.
2. Check the save path of the results, then click "Auto" to start automatic scanning.
Automatic back side scanning (if necessary):
Step 3: Active Sync
1. After Auto Scan is complete, check if there are any additional areas that need to be digitized for data collection.
2. Lock the extra scan area in front of the camera and double-click the area.
3. When the table turns in the desired direction, click on 1+ (add scan).
4. Check if you have received additional data in your area of interest.
5. Repeat data collection in areas where additional scans are to be performed using the Active Sync feature.
Step 4: Set Scan Path
1. Click the Set Scan Path icon and select New Template.
2. Enter a name for the new path.
3. Right-click the scan path setting box.
4. Select Add Auto Path.
5. Enter the rotation angle and rotation interval and click OK.
6. Additional paths can be set for automatically generated paths.
7. Click Close to exit the scan path selection window.
8. You can check/use the newly created path by clicking on the Select Scan Path menu.
Adding an active sync path
1. A path for active scan sync can be added to an existing scan path.
The Active Sync function synchronizes with the position and angle information of the model and the turntable. You can easily set/add angle information for a specific scan direction when viewing a model view.
2. When the auto scan is complete, check to see if there are any areas left to scan further.
3. Lock the extra scan area in front of the camera and double-click the area.
4. When the turntable has rotated to the extra scan position, press the 1+ button to end the scan.
5. Check if the data received in the additional scan area is correct.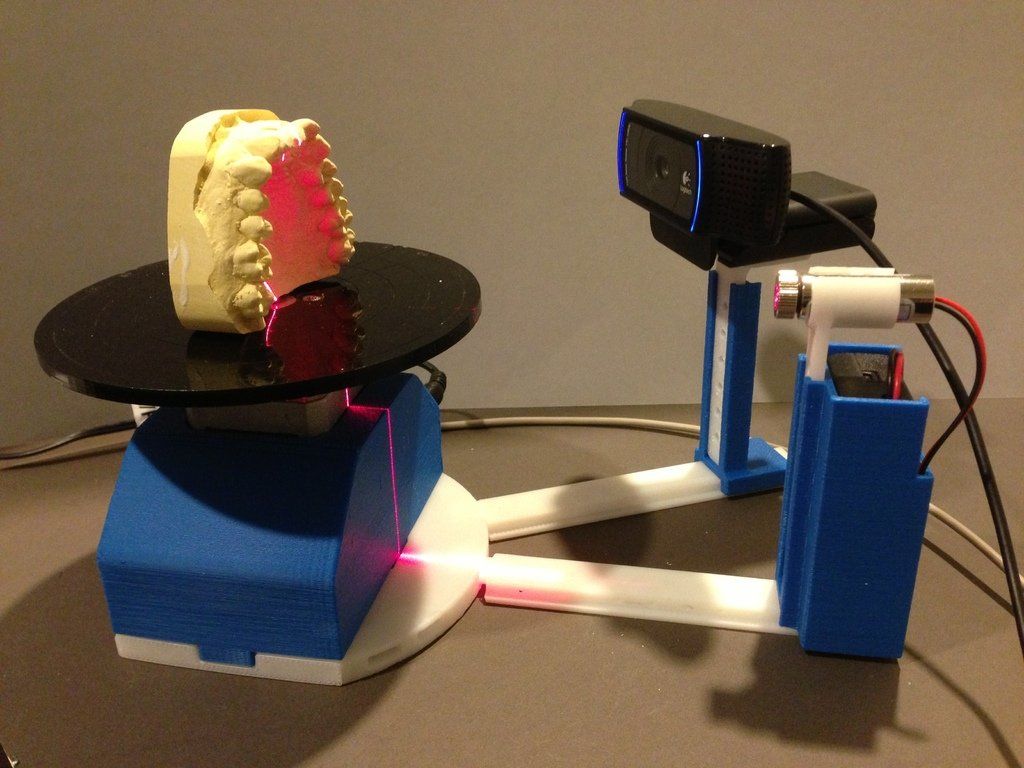
6. Activate the scan path setting box to add the appropriate path and click the + button.
7. Make sure that additional paths are added to the existing scan paths and exit by clicking the Close button.
III. Data processing
Step 5: Select and delete unwanted data
1. Select the data of the scanned top of the object (Group 1) and click Global Alignment. The average distance value will be different for different scan data.
2. Select and delete some unnecessary data from data group 1.
If you turn on the view and rotate the product horizontally on the turntable, you can easily select and delete unnecessary data. Once selected, press the Delete key to delete them.
3. Hide data group 1 to scan the opposite side of the object.
Step 6: Manual and Global Merge
Merge two or more groups of scan results into one complete shape.
1. Select the group you want to use as the base (fixed) from the two scanned groups.
2. Select Manual Alignment.
3. Select Group 1 marked as Not Aligned.
4. Set the same view for the moving (Moving) and fixed (Fixed) models and select the number n of similar areas.
5. Click Apply when the two groups match in the Result preview window.
6. Data from the "Uncombined" group will be moved to the "Combined" group.
The Unmatched group will be highlighted in blue in the result preview window. By rotating the blue group directly, the two groups can be approximately equally aligned. After moving the object, you can also combine groups by clicking "Apply" (Apply).
7. If the two groups were well aligned, click Close > Yes.
8. Double check that the data in both groups are properly aligned.
9. Select both groups and start Global alignment.
10. Apply global match 2-3 times to keep the average distance as short as possible.
Step 7: Merging and Reducing Data
1. Select both groups and click Merge.
2. Select Apply in the default option status.
3. The merge operation will continue.
4. After the merge is completed, the Data1 folder will be created in the new group.
5. Selecting the Data1 folder activates post-processing functions and information. If an STL format file is exported, the file size will be approximately 590 MB.
6. If the resulting data volumes are too large, you can decrease the volume using the Decimate button. Estimated final data size: 1 million points = about 100 MB (standard export to STL format)
7. In the Decimation box, enter the Target Percentage and select Apply.
Step 8 Export Data
1. Select the data you want to export and click Export.
2. In the export pop-up window, select the path, file name, and file format.
3. Click Save to export the final data.
Author Semen Pladyuk
Source
Tags:
3D scanner, Optical 3D scanner Solutioni C500, EZSCAN software, 3D scanning
Blocks
when buying 3D scanner you you will definitely come across a variety of choices in the current market conditions, offering dozens of different solutions. In our article, we will help you choose effective equipment and talk about common misconceptions that prevent you from making a choice.
Today, 3D scanning plays an important role at the beginning and end of the production process, as well as during operation. Engineers, designers, developers, designers, and others use a 3D scanner to start creating a digital model of a part, relying on an already created part (reverse engineering), using bionic shapes, or digitizing complex curved surfaces.
After production, 3D scanning can be used to evaluate the accuracy of the resulting part by comparing the mathematical model of the part with the scan.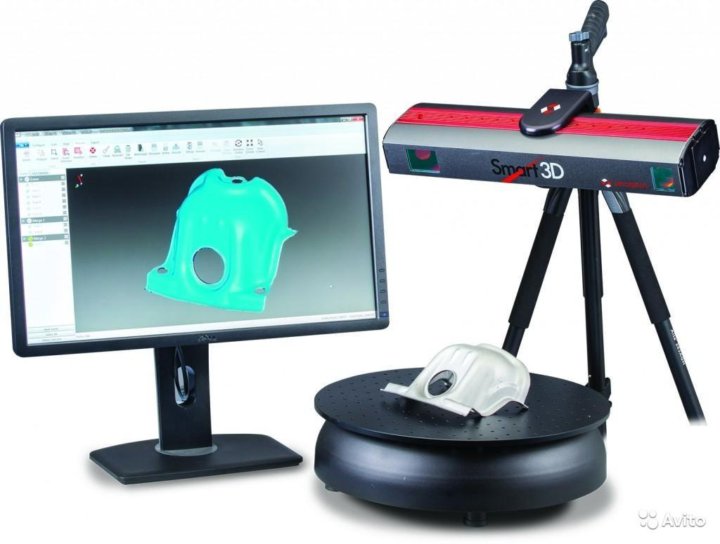 During the operation of the part, a 3D study will help to assess wear and deformation, and make the right and timely decision to repair or replace the part.
Basic applications.
Reverse engineering - Solving the problems of digitizing originals. This is necessary if the drawings are lost, or some changes have been made to the part and it is necessary to take them into account in the part model. Possibility of industrial design, digitization of complex surfaces obtained by hand when finalizing the part in place. The main criteria are ease of use, accuracy and resolution. For such tasks, it is worth considering stationary solutions with an automated turntable. If your parts are up to 1 m in size, you want to automate the work as much as possible.
If the dimensions of your parts are from 10 centimeters to 12 meters, a handheld 3D scanner can serve as a good solution.
Geometry Inspection - Solving problems of optical non-destructive control of the geometry of a part immediately after production or during operation. Comparing a scan with a mathematical model, obtaining surface deviation values or checking given dimensions and tolerances for compliance.
The main criteria - accuracy, resolution, ease of use. Historically, this area of problems was solved by stationary 3D scanners with structured light technology, but it was difficult to control large parts. Now there are mobile hand-held scanners that allow you to control parts with dimensions up to 12 meters.
Rendering - Solve problems by quickly digitizing existing parts to create a model on the screen. Allows you to add the appearance of your product to the site, presentation, virtual tour\museum.
The main criteria are ease of operation, speed of operation and the ability to scan in color. Handheld 3D scanners with the ability to scan in color are suitable for this task. You can also use small stationary devices, this will help save.
Archiving - Ability to save the geometry of an object for further analysis when needed.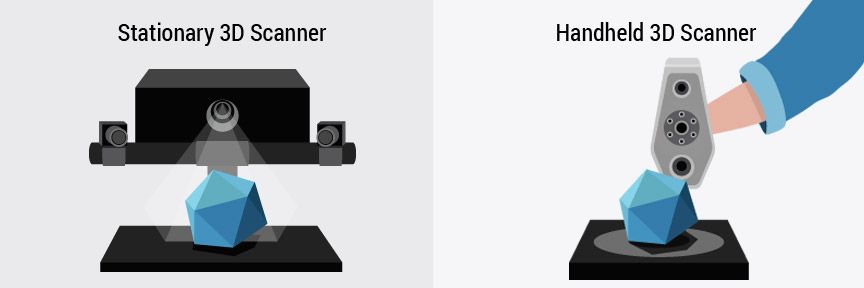
The main criteria are ease of operation, speed of operation, accuracy. The task can be solved by stationary 3D scanners for parts up to 2 meters in size. For work with large parts, we recommend manual solutions
Once you have decided, you can contact the i3D team for help in selecting equipment. We are ready to offer different options based on the criteria listed below.
Feedback form with a request for the selection of equipment.
Key criteria for choosing a 3D scanner
Below we list the main criteria that will help you in choosing equipment.
Accuracy is the key to any professional 3D scanner. The value of this parameter is indicated in microns (microns). For stationary scanners - as a constant value for a certain field of view, and for hand-held scanners, in general, as a value depending on the dimensions of the object. A 3D scanner with high accuracy will allow you to get the right measurements, high-quality data. Quality data, obtained the first time, will allow you to quickly get results. Scanning accuracy can be improved using a photogrammetry system.
Resolution is an important parameter. It determines what is the minimum size of an element that will be clearly visible on our 3D scan. It is very important to understand that the resolution value can be worse than the precision value and these are not linearly dependent parameters. Processing high-resolution scans is a laborious and time-consuming task. Therefore, many devices allow you to make scans with different resolutions, using a software or hardware solution, in order to optimize the value of this parameter for your task.
The price of equipment - immediately after the main technical characteristics comes economic. Depending on the technical characteristics, ease of use, convenience, brand awareness, the price of the device is formed. A proper understanding of the tasks and operating conditions of the equipment will help you choose the most cost-effective solution.
Scanning speed is a combination of the speed of data collection, their transfer to a computer and the speed of data processing algorithms to obtain the final result. Make sure that the scanner comes with software that is easy to use. The very process of the 3D scanner is only the beginning, to obtain the final result, processing in the software supplied with the scanner will be required. The functionality and user-friendliness of the software interface are just as important to the overall scanning speed.
Dimensions of the scanned part - a parameter that determines the convenience of using a particular system. For parts smaller than half a meter, stationary systems with a turntable are ideal. For parts with dimensions up to 8 meters, hand-held 3D scanners are suitable. If you need to scan parts with dimensions up to 12 meters, you can use the handheld 3D scanner + photogrammetry kit. To scan parts with large dimensions, you can also use a stationary 3D scanner + photogrammetry kit, but manual solutions are more effective.
The external environment - it is very important to understand who/where will use the measuring equipment when choosing it.