Nextengine 3d scanners
NextEngine 3D Laser Scanner
Hardware
Software
Accessories
Service
3D Scanner Ultra HD
Learn More
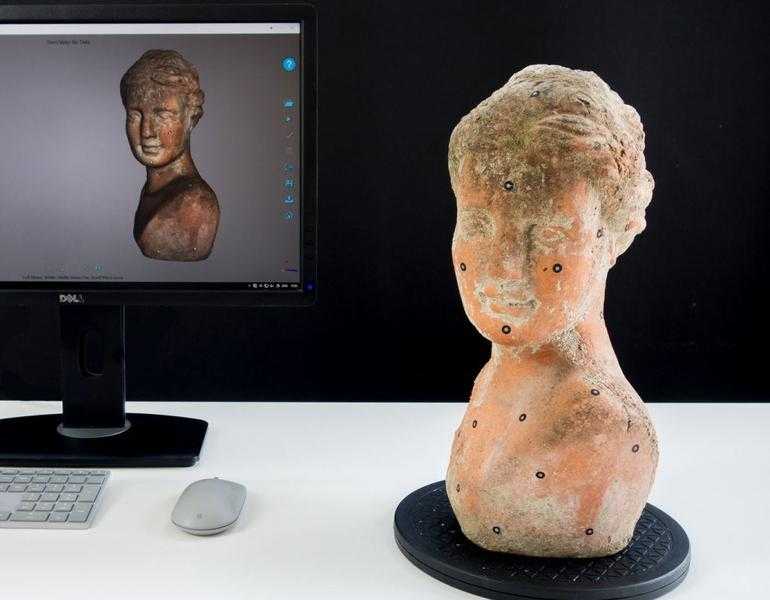
To capture all the stuff you work with, you want 3D input at your fingertips. NextEngine's exclusive Multi-Laser Technology delivers superior precision and fidelity. Find out what has made NextEngine's Desktop 3D Scanner the World's best-seller. New Ultra HD sensors deliver stunning resolution.
$2,995
Buy Now
30-Day Money-Back Guarantee
MultiDrive
Learn More
Fully automate alignment of multiple scans with tilt/rotary object positioning. Define multiple scan families and with one click execute creation of your 3D mesh model. Just trim unwanted overlapping scan
data, fuse, and polish. A new level of simplicity for NextEngine 3D
Scanner users.
$995
Buy Now
30-Day Money-Back Guarantee
ScanStudio
Learn More
Every NextEngine 3D Scanner comes equipped with high performance Scanning and Modeling Software at no extra charge. ScanStudio manages your scanner hardware, refines your data, and assembles it into a fully healed precise mesh model.
STANDARD
ScanStudio ProScan
Learn More
Increase your scanner performance with the ScanStudio ProScan upgrade. Double scan speed for faster cycle times and capture more surface area with Large Format mode.>
$995
Buy Now
30-Day Money-Back Guarantee
CAD TOOLS
Learn More
Want to convert your mesh model into a CAD model? Need spline outputs or NURBS surfaces? Want to quickly determine volume or surface area? ScanStudio CAD TOOLS gets the job done in one integrated and quick to learn package.
$995
Buy Now
30-Day Money-Back Guarantee
RapidWorks 4.0
Learn More
Are you a Solid Modeling CAD expert? If you need industrial-strength tools to convert Scans to CAD parts, RapidWorks is the World's state-of-the-art in Engineering Software for 3D scan data. Get robust full feature set design tools for under 3K!
$2,995
Buy Now
30-Day Money-Back Guarantee
QA-Scan 4.0
Learn More
Need fast verification that a physical sample meets design requirements?
QA-Scan provides easy-to-use tools for precisely comparing 3D scans with CAD models. Made for high volume applications, QA-Scan automatically aligns your data, checks tolerances, and produces detailed GD&T reports.
$1,995
Buy Now
3D Curriculum
Learn More
Ten simple lesson plans help students become proficient with the NextEngine 3D Scanner and RapidWorks reverse engineering software. Capture the imagination of your students as they explore the future of 3D design.
$995
Buy Now
Black Bases
Reduce trimming time, replace white platforms on your AutoDrive or MultiDrive positioner with black platforms nearly invisible to the scanner.
$10
Buy Now
AutoDrive Extension
24 inch extension between Scanner and AutoDrive increases flexibility to orientate large objects.
$10
Buy Now
PaintPens
Learn More
Scan your transparent or mirror-finish objects with these convenient valve-action paint pens. Coat parts with water-based white tempra paint for excellent scanability. Wipes off with a damp sponge. Use at your desk and store in a drawer. One set of PaintPens is included with your scanner.
$15
Buy Now
Extra PowderPen
Learn More
Scan shiny objects with handy pushbutton powder brush pen. Coat parts with microfine talc granules suspended with a trace of lanolin for mild clinging to surfaces. Wipes off easily with a tissue. One PowderPen is included with your scanner.
$10
Buy Now
Extra PartGripper
Learn More
Adjustable stainless steel part-holding fixture has soft silicone pads to protect and grip your part.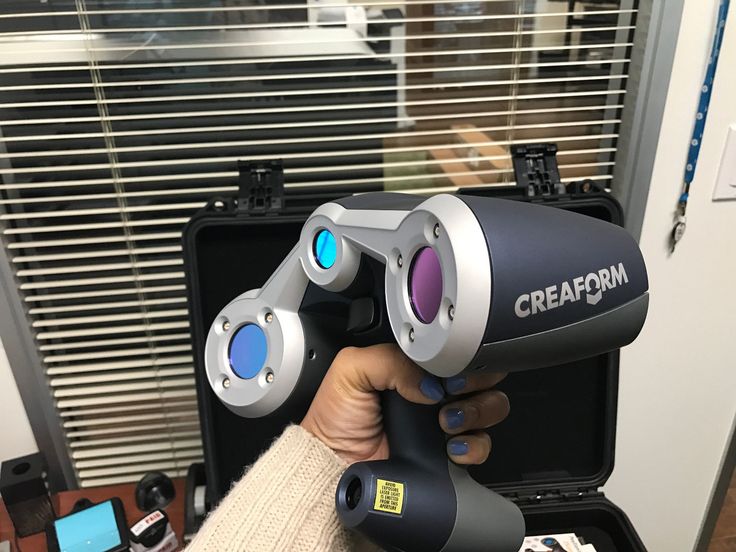 Use additional Grippers for difficult objects, or to modify for special purpose jigs. One PartGripper is included with your scanner.
$55
Buy Now
3 Year Extended Warranty
Total warranty coverage for your 3D scanner for repair/replacement of any defect for 3 full years. No charge for any parts, labor, or services.
$295
Buy Now
RapidWorks ProCare
Learn More
Talk with our engineers via phone or real-time NextWiki chat, and get one-on-one assistance from reverse engineering experts. 3 Years of Software upgrades for RapidWorks, plus phone support, priority real-time chat, priority e-mail support, and project-specific assistance.
$995
Buy Now
QA-Scan ProCare
Talk with our engineers via phone or real-time NextWiki chat, and get one-on-one assistance from experts. 3 Years of Software upgrades for QA-Scan, plus phone support, priority real-time chat, priority e-mail support, and project-specific assistance.
$795
Buy Now
ScanStudio ProCare
Learn More
Extends support for your Scanner and ScanStudio software for 3 full years. Includes unlimited support and all major software upgrades.
$295
Buy Now
NextEngine 3D Scanner Tutorial
Consider your need for scanning a 3D object:
Is it unique? Will the scan satisfy your expected level of detail? Can a comparable 3D model be obtained from a repository, or maybe it is easier to model it yourself?
See Staff at the ACS desk to check out Rotational Base and Next Engine surface prep tools.
NextEngine 3D Scanning Instructions:
Before attempting to follow these instructions, we recommend you watch the provided video tutorials (in a folder on the Desktop of the scanning computer) to get a visual introduction to the scanning process and software interface.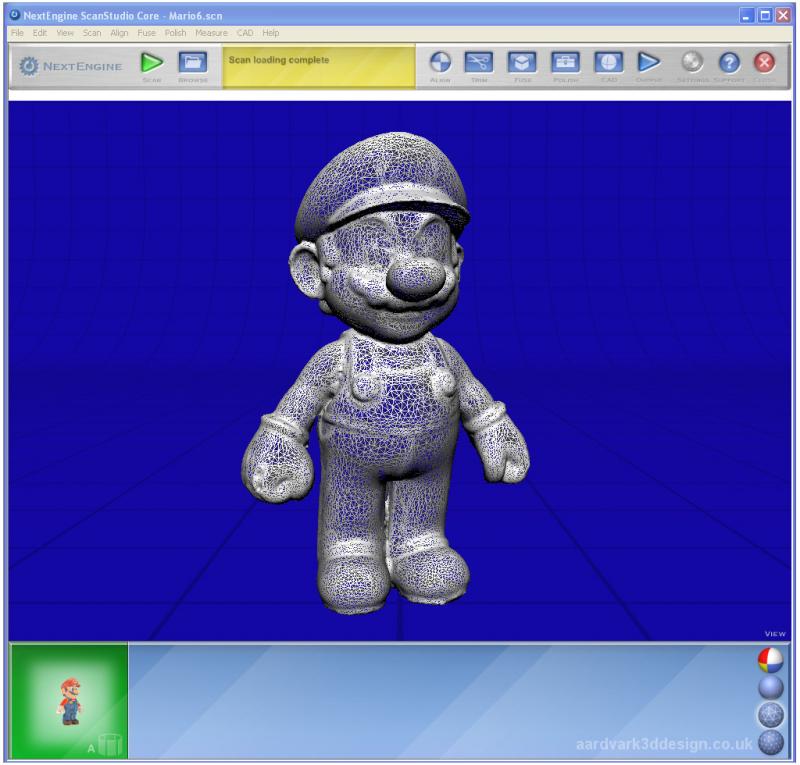
Be prepared to scan object from multiple angles for every surface to be captured: If your specimen is very oddly shaped it may be difficult to get the scans to align, and may take several tries with different options before you get a scan that works just right.
- 1- Use existing base for small objects
OR connect the rotational base (check out from Access Services desk) to the scanner using the modem line cable - 2- Inspect the object, and make preparations for any of the following :
-- Bring down any shine on glossy surfaces
-- Mark complex surfaces that will have trouble fusing together
-- Use clay to pinch the model in place if the model is asymmetrical
TIP: Run a test scan at a "QUICK" setting in order to determine if your object is scan-ready - 3- Open NextEngine: Locate for a NextEngine icon on a desktop -- shaped like a blue cog; OR If it is not there:
Click the Start button > go to All Programs > NextEngine > ScanStudioHD :
-- Open ScanStudioHD
-- Click on the "?" (question mark) in the upper right hand corner to bring up the Help File :
-- Click on NextWiki/Help/Getting Started > view the video of how to scan the palm tree - 4- Place your specimen on the raised pad
-- If your object is small enough, prop the board stored in the scan box with white side for dark-colored objects, and the black side for the light-colored objects to increase contrast for scanning
-- Close the overhanging black curtain to enclose the object and the scanner, especially if the object is light-colored - 5- Press the green arrow (scan button) the scanner will calibrate, your object will appear in the scanner window
- 6- Choose your scan style:
-- 360 will scan the specimen from every angle; Bracket - will scan it in three chunks, and Single - will scan it from one angle
-- If you choose 360 choose the number of divisions you want to scan in, this will determine the number of rotations and individual scans - 7- Choose QUICK, SD or HD scan - POINTS/IN2 - is how many pixels are scanned per inch (density aka resolution)
-- The higher density the more time and memory the scan will take
-- What density is best will depend on the specifics of your specimen, how much detail you actually need, and how long you want it to take. Specimens with more curvature will need a higher resolution, etc. It may take some trial and error to figure out which resolution works best for your specimen. The time and memory that the scan will take is given at the bottom of the screen. This is determined by how many divisions and how high a resolution you are using
 - 8- Choose the Range and select Scan Area - Depending on the size of your specimen, choose the range you want to scan at:
-- For most things MACRO is fine, for something wider or larger choose WIDE or EXTENDED
-- Use the ruler to make sure that the specimen is the recommended distance away from the scanner, and get the specimen as close to the center of the scanning area as you can
-- Select the area you want scanned (i. e. your specimen) - in the scanning window click-drag the mouse around the object; exclude unnecessary parts (base, shaft, etc)
-- It is a good idea to leave some extra space around your object, as its perspective will change as it’s rotated
-- Once you have chosen your scanning area use the TURN arrows at the top of the screen to rotate your rotate and make sure that it stays in the scanning area for the entire rotation. If it does not adjust it as necessary, but stay as close to the optimum distance as you can - 9- Press the green START button to begin. Depending on how long it’s going to take, go get a sandwich
- 10- When the scan is completed, inspect the 3D model: use the left mouse button to rotate, use the right mouse button or the scroll wheel to zoom in and out, use (both or either?) buttons to pan
- 11- ALIGN models: When the scan is complete, you may need to align the different scans
-- Press ALIGN and place the colored pins at identical spots on the different scans. If your specimen doesn’t have any distinguishing points, like a coral, you may want to somehow mark a specific spot or two before the scan. When you have placed the points click ATTACH SCANS
 - 12- TRIM: Click on TRIM - this is to get rid of unwanted data in your scan, such as the turntable
-- The arrow will let your adjust the specimen’s viewpoint, the circle, square, and rectangle allow you to select areas you want to delete
-- If you accidentally select an area you don’t want to delete, click the "–" button and select the area again, this will deselect it from the trim area. "+" will add to the selection
-- When you have selected what you want to cut out, click the scissors
-- You don’t have to do it all at once - if you accidentally delete something you didn’t want to, click Edit/Revert To, and you can start over - 13- SECOND SCAN: You’ll notice that the top and bottom of your specimen are big holes it is because those surfaces weren’t scanned.

-- Click the green SCAN button again and reorient your specimen so that it is now horizontal
-- Do not move the platform in relation to the scanner, and use the same settings
-- Take all the previous steps with this scan, it should align automatically, if not, follow the same steps as before; Trim this scan as well - 14- ALIGN again: To Align the two scans you will need to place three differently colored pins at identical spots on different scans
-- Space out the pin placement as much as possible
-- When the pins are placed click ATTACH SCANS. - 15- FUSE: When the scans are aligned, click the back arrow, then click FUSE, and FUSE again -- this combines the multiple scans into a single mesh.
- 16- REFINING: Click on POLISH, and REMESH, this should fill some left over holes
-- You can also smooth down any rough areas with BUFF
-- The refining process is also time consuming, depending on how clean you want the scan to look.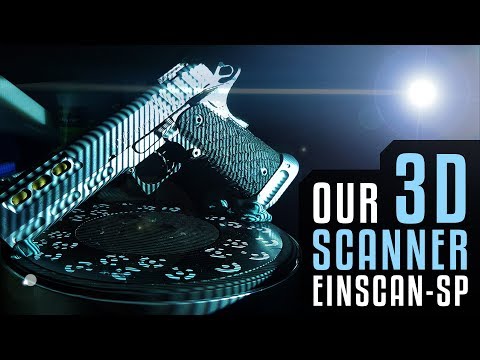 All images will require some amount of refining to look presentable. Some will require a great deal of it, and it takes practice to learn how to use all the options, just like any other image manipulation program.
-- You can adjust the viewing options by clicking on the balls in the lower right corner of the screen. The top beach ball is the standard color view, and second ball is a monochromatic shaded morphology view, the third ball is a mesh, and the bottom ball is a points view. - 17- SAVE: When you’re happy with your image, click File/Save As and save the file as an SCN file
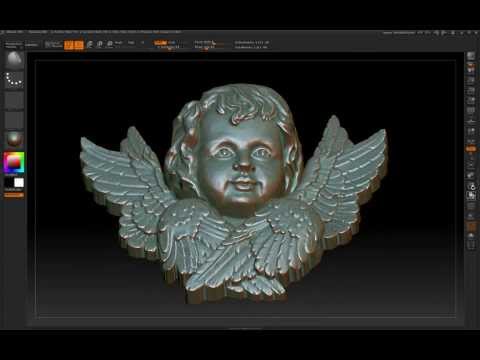
-- If you are looking to import your model into another 3D program, save it in OBJ or STL file format - these are the most common 3D model format and will be easy to import into 3D programs for model correction, manipulation or printing.
Tips:
-- In other environments: If there is ambient light coming in from the window this may affect your scan. Bright white light on a cloudy afternoon seems to make the scanner think that very light objects are actually blue. If this happens close the blinds or wait until it gets dark to scan your specimen.
-- Scan at the highest resolution at your own risk. The computer doesn’t seem to be powerful enough to handle it consistently. Sometimes it works, and sometimes the program keeps crashing. There doesn’t seem to be much difference between high standard resolution and high
resolution, anyway.
-- Save your model often! The program crashes frequently. It is unclear if it's a hardware problem, a Windows 7 instability, or something else. After you finish a set of scans, or before and after you perform a function like trimming or aligning -- save your model. Otherwise you might have to rescan...
-- If you do a 360° scan 16 rotations are recommended. This adds time to the scan, but it makes aligning much easier.
-- Sometimes the program will try to align the model automatically and it will come out a mess, or your manual alignment won’t come out as good as you wanted. If this happens go to Edit/Detach All. Then drag the first section into the green box and align again. The more pins and the wider they are spaced out the better.
-- Sometimes the fused model of your two scans will look worse than either individual one, small details such as teeth etc may be missing. Try realigning and fusing your scan again
-- Make sure you have the correct color option (Dark/Neutral/Light) chosen. If you have a really dark object or a really light object and have the opposite option checked the laser won’t pick it up. Neutral usually works, unless it’s very very light or dark.
3D scanners NextEngine, Inc.
Filter
Designation
Designation
tabletop
manual
stationary
3D scanner type
3D scanner type
Dental
Industrial
Architectural
Manufacturer
Manufacturer
Creaform Inc.
24
MakerBot Industries, LLC
1
Open Technologies Srl
5
Fuel 3D Technologies Limited
1
DAVID 3D Solutions GbR
3
SHINING 3D TECH
44
AICON and Breuckmann
3
3D Systems
3
4DDynamics Bvba
8
Artec 3D
6
Volumetric technologies
1
Range Vision
9
Roland DGA Corporation
3
Rubicon Technologies
1
Solutionix Corp.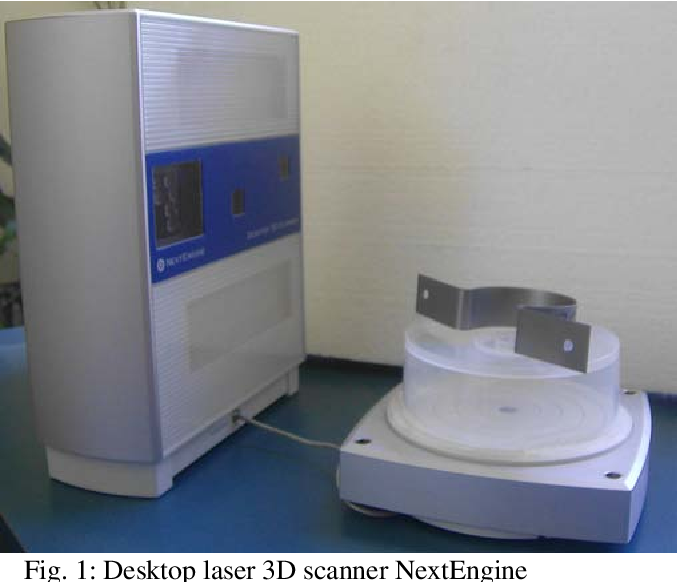
7
Dental Wings inc.
3
FARO Technologies UK Ltd
8
nextengine, inc.
1
Basis Software Inc.
10
LLC RIFTEK
1
Trimble Navigation Limited
5
LMI Technologies Inc.
3
smart optics Sensortechnik GmbH
7
DotProduct LLC
1
GOM mbH
9
Leica Geosystems
6
Texel
1
AGE Solutions
1
SMARTTECH 3D
7
XYZprinting
1
Thunk 3D Technology Co. , Ltd.
Thor3D
1
ScanTech
6
Peel 3D
5
Reset filters
Filter
Sort: By price Rated
3D Scanner HD
NextEngine 3D Scanner HD is a desktop professional 3D scanner that uses tech...
No offers
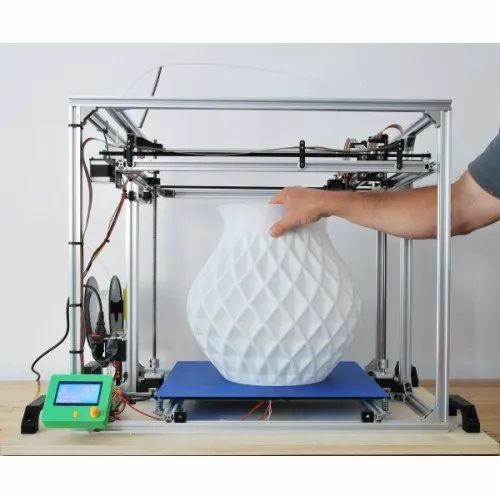
What is a 3D printer?
TOP 12 Inexpensive 3D Scanners
TOP 12 Inexpensive 3D Scanners
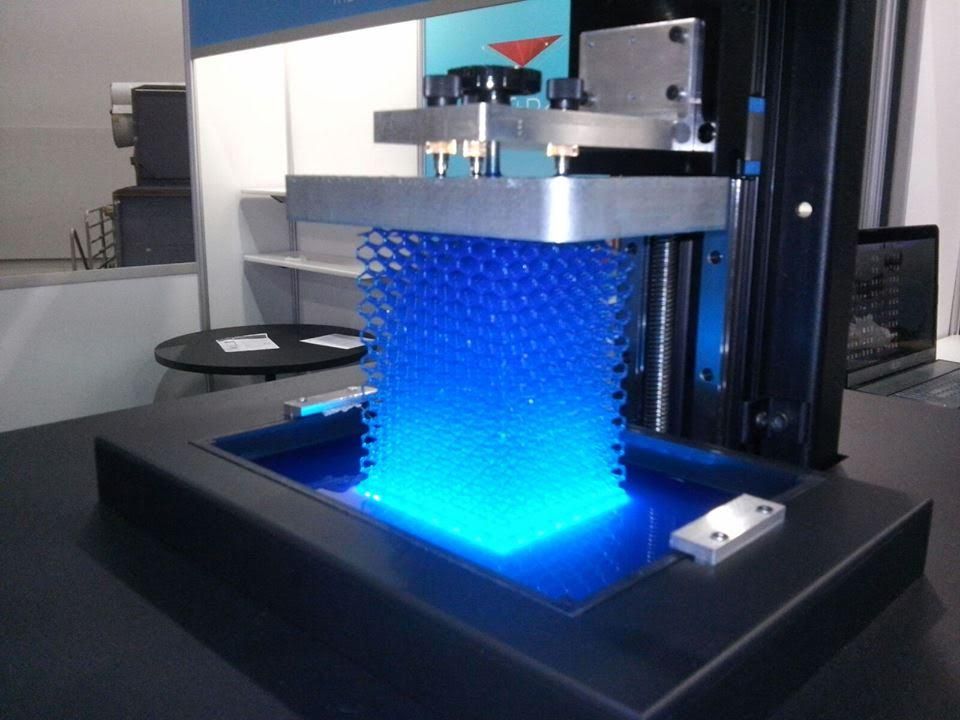
Introduced in the late 1970s, laser triangulation technology paved the way for the first devices capable of digitizing objects in 3D. This tool, long reserved for industrialists, has gradually become so popular that we are now finding affordable 3D scanners that are easy to use.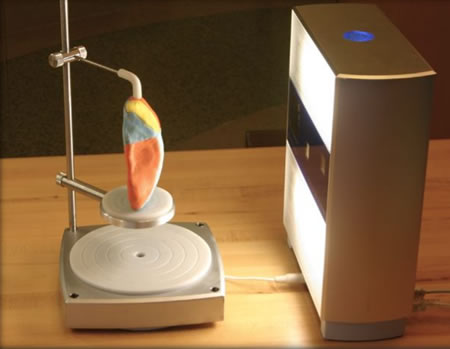 From Einscan-SE by Shining 3D to Ciclop by BQ, find our TOP 12 cheap 3D scanners (under 7000€), sorted by increasing price!
TOP 1 XYZprinting 2.0 Scanner A
Chinese 3D printer manufacturer XYZprinting added its first 3D scanner to its product range in 2015. A new version, 3D Scanner 2.0, has recently been released. It is relatively small and light with its 238 grams, offering the user great portability and ease of use. It includes 4 different scan modes which allow you to scan objects, the whole body, head or face. The maximum scan size is 100 x 100 x 200 cm. Lateral resolution, it ranges from 1 to 2.5 mm. Price available from 199€.
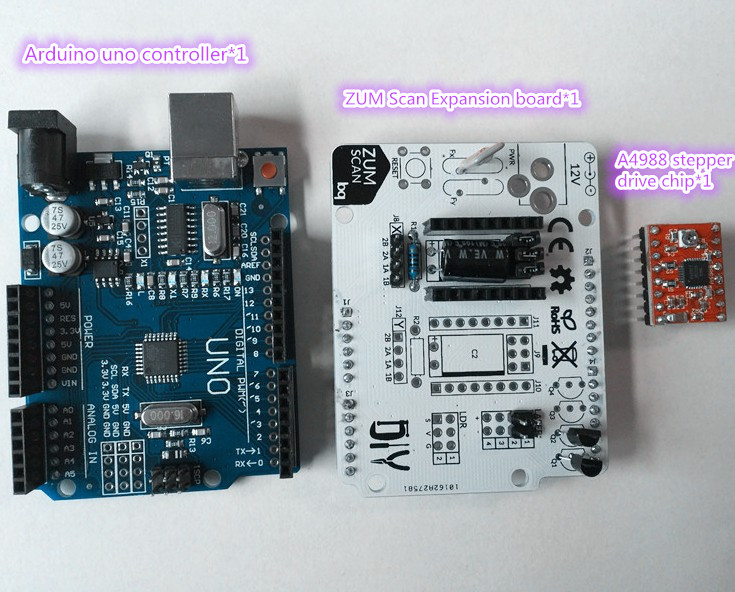
TOP 2 - Ciclop BQ
Ciclop was developed by the BQ teams and is the only open source 3D scanner in this ranking. It comes with Horus software and all information regarding its design, software and electronic components is freely available on the Internet.
Ciclop is based on laser triangulation technology and can scan objects in less than eight minutes. This version is available at the price of 249€. It contains a step by step guide to install the 3D Scanner by yourself in less than an hour.
TOP 3 - Structure Sensor
This amazing scanner has the feature of connecting directly to your Apple tablet or smartphone. After downloading the appropriate application, you will be able to scan 3D models with an autonomy of 4 hours thanks to the built-in battery.
Its dimensions are 119.2 x 28 x 29 mm and weighs 95g makes it one of the smallest 3D scanner in the world. Its accuracy can reach 0.5mm. Its cost is 379 dollars, which is about 345 euros.
TOP 4 - inexpensive 3D scanner Cubify Sense
Sense was developed by American 3DSystem and today remains one of the most popular inexpensive scanners on the market.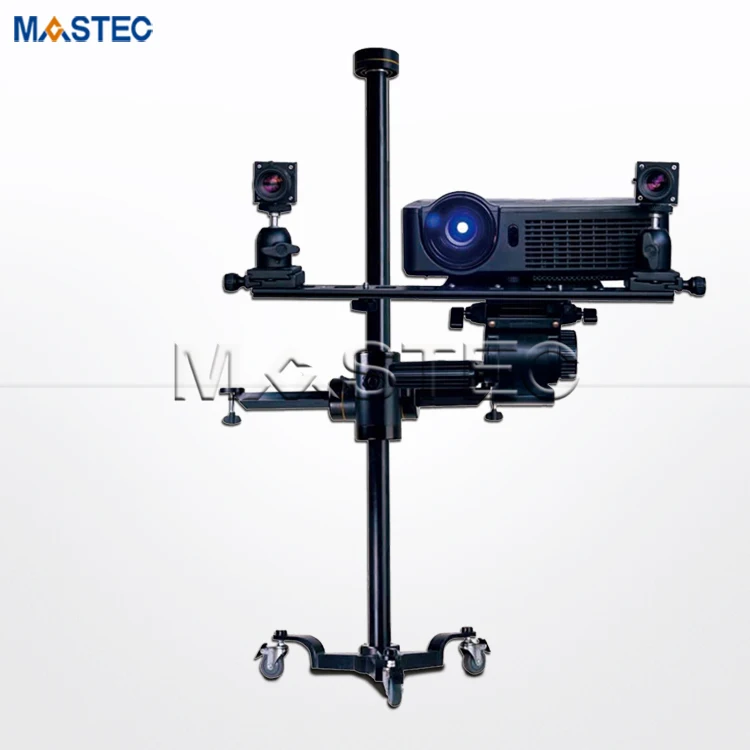 It can scan large volumes from 200 x 200 x 200 mm up to 2 cubic meters. This portable scanner measures 178 x 129x 330 mm and offers an accuracy of 0.90 mm.
It uses structured lighting technology and comes with 3D Sense software, which includes a simplified interface and interesting post-processing tools. It also offers an image resolution of 1920 by 1080 pixels for scanning textures and colors. The scanner is available from 479 €.
TOP 5 - Matter & Form V2
This 3D scanner was developed by the Canadian company Matter and Form. With two lasers, the Matter & Form V2 can scan objects up to 25 cm in size and 18 cm in diameter. With an accuracy of 0.1 mm, it is compatible with all by 3D printers and can be used by manufacturers for applications ranging from art to design to education. The 3D scanner is currently available for $749. the 3D scanner itself; As the name suggests, this is a hybrid machine that allows you to scan, print and burn for 899 euros. Therefore, a scanner module is built into the machine, which works through laser triangulation. If you look at its specifications, the scanner offers an accuracy of 0.25 mm and a resolution of 2,140 dots per cm2. A machine that will allow you to cover the entire creation process, from design to manufacturing.
TOP 7 - Einscan SE
The first 3D scanner from the Chinese company Shining3D hit the market thanks to a Kickstarter campaign. From now on, the range has expanded, and the manufacturer offers 3D scanners adapted to any need. EinScan-SE is an evolution of the S, with a new design and improved performance that is even more suitable for beginners, education and desktop 3D printing .
Like its predecessor, the EinScan SE uses structured white and invisible light technology, making it much safer for children. This scanner offers two types of scanning: automatic scanning and fixed scanning. First, you place the object to be digitized directly on the turntable; after two minutes, the scan scans the object at a 360° angle with an accuracy of 0. 1mm. For larger models (700 x 700 x 700 mm) you need to use the second method, where you place the part at the end of the stand, i.e. in place of the board. This scanner is available from 1438 €.
TOP 8 - RangeVision Smart
This structured light 3D scanner was developed by Russian manufacturer RnageVision. This is a professional desktop scanner tripod that is ideal for scanning objects from 4 cm to 1 meter. In terms of specifications, it provides 0.1mm accuracy and 0.12mm resolution. Its near scan range is 150 x 112mm and its furthest is 500 x 375mm. Finally, it has two cameras and autofocus, making it easy to calibrate. It is now available in grey, yellow and red from €2,500. Several accessories can be added to the RangeVision Smart as a turntable.
TOP 9 – NextEngine Ultra HD
NextEngine, an American manufacturer, stands behind the NextEngine Ultra HD professional 3D scanner. It is able to scan various textures as well as objects in color. Its near scanning surface is 130 x 97mm and its distance is 343 x 257mm. NextEngine Ultra HD is based on laser triangulation and offers a maximum resolution of 0.1mm. It can scan 50,000 points per second with a maximum accuracy of 0.13mm. Finally, it can work with or without a tray, thus opening up a field of possibilities. Scanner available from € 2995.
TOP 10 - HP Pro SLS-3
This professional structured light scanner is an evolution of the DAVID Pro SLS-3D manufactured by DAVID Laserscanner, which was purchased in 2016 by the American giant HP. With a scanning price of 3930 euros and a 360° scan, this scanner has an accuracy of 30 microns or 0.5 mm, which corresponds to 0.05% of the size of the object being scanned. It includes an adjustable metal stand and tripod. It consists of a video projector and a professional HDMI camera.
TOP 11 - EinScan Pro+
Shining3D's EinScan Pro+ was officially unveiled at CES 2017.