Spring steel 3d print bed
3D Print Bed Plate – Glass Vs Aluminum Vs Spring Steel – 3D Printerly
Most 3D printers will be equipped either with a glass or aluminum bed surface, both having their own advantages. You also have another candidate which is spring steel, so how do you know which one you really want to print with?
Choosing the right 3D printer bed is something that will affect your 3D printing journey, either for better or worse. This post will help you to identify which print bed plate you should be using on your 3D printer.
There is a difference between your 3D print bed plate and the build surface. Here we are talking about the bed plate, directly on top of the heated bed, so let’s look into the comparisons between glass, aluminum and spring steel.
3D Printer Glass Beds
You have a few types of glass print beds, so I’ll go through each one to give you a better understanding of the choices you can make.
- Borosilicate glass bed
- Tempered glass bed
- Normal glass bed (dollar store, scanner glass etc.)
- Mirror
Glass beds usually tend to be flatter, easier to clean, and simpler to use overall. Many people love the nice bottom surface finish you get on PLA and other materials from printing directly on a heated glass bed.
They are also cheaper depending on what type of glass you get, but the more you pay, the better quality you’re likely to get.
Borosilicate Glass
Borosilicate glass is the print bed material you want for ideal print quality.
It’s very popular in the 3D printing space for many reasons, the main ones being:
- It’s very strong and durable
- Has high temperature resistance and low thermal expansion
- It can chip, but it’s very less likely to with the right care
- Easy to try build surfaces with (glass in general)
- Cleaning glass is much easier than aluminum or steel
- Known to sometimes have adhesion issues
Borosilicate glass is made by combining many chemicals together, with the magic one being boron trioxide. You can actually use this type of glass in a freezer or pour boiling hot water in it.
You can purchase a high quality Dcreate Borosilicate Glass from Amazon at a great price. It’s highly-rated, easy to clean and comes with a 12 month, hassle-free warranty and replacements for quality.
Trying to remove a print from a heated borosilicate glass can result in chipped glass.
You’ll find this type of glass being used in some Pyrex products because it has more resistance and is stronger than your normal glass.
Compared to other types of glass, borosilicate has a higher level of thermal shock resistance and a lower thermal expansion factor.
Once this glass has been tempered and in its final form, it can’t be cut or physically altered.
Tempered Glass
There is also Tempered glass which is a good print bed for you to use.
The chances of this print bed flaking while trying to remove prints is very rare and it is stronger than normal glass and shatter-resistant. This type of glass is usually found in laboratories, safety glass windows or doors.
Rather than shattering, it breaks into several fragmented pieces that still connect together. This is why hockey rinks use this same glass to protect people in the crowd.
The way Tempered glass is treated, it is a lot stronger and heat-resistant compared to normal glass.
In a 3D printing environment, some people have had Tempered glass beds run for thousands of hours of printing without running into any issues.
It’s a fairly popular choice to add to your 3D printer so definitely consider Tempered glass.
- Much stronger than regular glass
- More heat-resistant
- A lot safer because it is shatter-resistant
- Less likely to chip under high temperatures
Normal Glass
Some people even use picture frame glass or cheap dollar store glass for their 3D printers, and although it might work for some time, they are a lot more prone to chipping and breaking.
You can even use normal glass plates on top of your heated borosilicate glass. You won’t have to wait for prints to cool down to start a new print, just put another sheet of glass on top and begin printing.
There are some cases where people have seen their PLA or PETG prints actually take out pieces of glass from sticking down too hard. The force needed to get these pieces of the glass bed would’ve been too much so you don’t want a low quality glass bed.
As most people know, normal glass has tendencies to shatter in several pieces on impact. This also occurs with sudden changes in temperature so in a 3D printing environment, it wouldn’t be an ideal choice.
One person managed to get a glass plate from a flatbed scanner that was thrown away, he then cut it to size using a glass cutter and it has been doing a great job with printing. This glass is more likely to be treated in some way to give it structural strength.
Mirror
This may seem like an odd suggestion for a build plate, but you might be surprised! A mirror used as a 3D print bed has heard many praises throughout the 3D printing community, it just gets the job done so well.
It does take some tough work to get this done, but it is worth doing if you enjoy doing some DIY.
Extra Info on A Glass Bed
- Requires raising the temperature around 10° to compensate
- It’s advised to try printing without using adhesive, then depending on the result use a small bit if necessary.
- Depending on the strength of the glass, Z endstop failures can crack a weak glass bed
- Let them cool down after a print and parts usually pop right off due to thermal expansion
- Ensure your nozzle isn’t too close to the build plate as it can make prints stick down too hard
- A heavy glass bed isn’t ideal since it can cause print imperfections like ghosting
- Leveling is easier with glass beds
3D Printer Aluminum Bed
This material has many properties that are admirable:
- It’s a lightweight material that reduces the load on the Z axis
- Has a significantly high measure of conductivity compared to other bed materials
- Very widely available to be used on 3D printers
Aluminum is widely used due to its ability to conduct heat so well, so it helps in getting an even temperature across the whole print bed. Some adhesion issues arise from uneven bed temperatures so this works out well in that regard.
My Ender 3 has a standard aluminum heated bed which works great and ihas been giving great prints so far.
If you are looking for a solid aluminum heated bed replacement, your best off going with the Official Creality Heated Bed. It’s mainly for an Ender 3 and Ender 3 Pro with 235 x 235 x 3mm dimensions.
To achieve adequate adhesion, people that use Aluminum beds usually need an adhesive substance such as Blue Painter’s Tape or Hairspray when printing difficult materials. It’s more so true for large ABS prints since they can have trouble sticking to the build plate rather than PLA.
When you 3D print on aluminum, it is likely to expand when it’s heated, resulting in a convex or concave shape over time (center higher than sides) due to its physical characteristics. You don’t get this with glass, at least at a significant enough level to affect prints.
The video below shows how you can compensate for a warped print bed with simple post-it notes!
It’s less likely to happen with filament that doesn’t require heating up your bed so high, but when it comes to ABS and other similar materials, it can definitely be a problem.
On the other hand, the expansion of aluminum from heat can be prevented by increasing the thickness of the aluminum bed (around 3mm), while at the same time, making sure it heats up evenly.
Many people actually choose to place a glass plate above their aluminum bed which works well, but it does require a longer heating time overall.
When you are trying to clean the residue (dried hairspray, glue etc) off of an aluminum bed, it is quite prone to scratching so having a build surface on top is a good idea.
If you do want to check the flatness of your bed you want to do it while it’s heated up. Aluminum beds may be flat when cool, but after reacting to the heat, you can start to experience warping.
Extra Info on An Aluminum Bed
- Aluminum conducts heat the best out of all bed types
- Needs replacing more often due to warping tendencies
- Works well with the popular inductive probe for bed leveling
- Won’t break due to a hotend crash
3D Printer PEI Spring Steel Bed
Spring Steel is actually used in tandem with your standard aluminum plate that comes with your 3D printer so, you just remove your original plate and stick this one down.
The adhesive behind the Spring Steel is very strong so make sure it is aligned properly before putting it down.
Spring Steel sheets have very high strength and heat-resistance, making it ideal for high temperature filament out there like ABS and PEEK.
You would see this type of bed used with a magnetic PEI bed because it sticks very well, and gives you a smooth surface for the first layer. All you have to do it let it all cool down before removing the steel plate, then flexing it until your print pops off.
Spring Steel is an addition that many people wish they had gotten sooner, to save them several hours of trying to get extruded filament to stick down.
I would recommend getting the Sovol PEI Magnetic Flexible Spring Steel Bed from Amazon. It comes with a PEI plastic sheet attached with your Spring Steel sheet and a magnetic sheet.
Assembly is easy, printing is made easier, and you get better quality prints! It’s a simple choice to make if you are a 3D printer hobbyist.
Verdict
There are many people out there who have made the switch to a glass print bed and never went back. Depending on your printing needs, glass might be a great choice for your 3D printing journey.
For adhesion, simply applying a few coats of hairspray or glue stick does the trick every time. If you exclusively print with PLA, you probably won’t even need adhesive at all because the glass bed surface works just great.
You can use a build surface like PEI, BuildTak, or some other material to add to your glass bed if you print with less manageable materials like ABS.
It seems like one of the best options is to have an aluminum build plate, then have a glass surface on top of that so you can detach the prints from the printer if need be. Just use binder caps or ZUPAYIPA Silicon Thermal Pads (Amazon) to adhere them with each other.
Instead of covering your whole bed with the silicon pad, you should cut it up into 2-inch squares and spread them out. This is beneficial because the heat rises between them so the areas which have small spaces get enough heat transferred.
It’s also a good idea doing this because it won’t act like a suction cup, making it hard to remove.
They have a good amount of grip so you don’t have to worry about your glass plate sliding around, when heat is being applied.
People have reported seeing binder clips be the cause of glass warping when they are too strongly clipped. Having multiple glass plates you can swap out is ideal, so you can remove it to wait for it to cool, then use that glass plate to start another print.
Flexible Build System
What Is The Wham Bam Flexible Build System?
Are you having a difficult time getting your 3D print to stick to your printer bed? Does your print peel up during a long print and destroy your work? Are you tired of temporary fixes such as glue sticks, hair spray, and painter’s tape? Once you get your print to stick, do you have to pry, chisel, cut the perimeter, or put your bed in the freezer, just to get your print off the surface without gouging the surface or cutting yourself?
We have created the specially formulated Wham Bam PEX Polymer Build Surface which surpasses PEI in temperature resistance, performance, and material ‘stickability”. It sticks so well you would have a heck of a time getting the print off the bed without our Wham Bam Flexi Build Plate. Simply remove the Wham Bam Flexi Build Plate from the Wham Bam Flexi Magnetic Base on your 3D printer when the print is finished and flex slightly to pop your print right off! See our demo video below.
Flexible Build System In Action
What the Reviewers are saying:
"Thank You Guys"
"It Just Pops Off"
"It Just Pops Off"
"I honestly stopped using my printer for a while because my prints stuck so well that I'd ruin them or break the glass trying to get them off. The Wham Bam System has got me heavily into 3D printing again. Thank you guys!" - Rob R.
"It Just Pops Off"
"It Just Pops Off"
"It Just Pops Off"
"I’m liking how the prints look. Super smooth on the bottom. And I love that it just pops off. No more spatula. My installation experience went pretty smooth" - Carlos P
See More Reviews
"Class Of Its Own"
"It Just Pops Off"
"Class Of Its Own"
"The fact that the magnets are able to withstand higher temperatures puts this system in a class of its own. Capable of using a wide range of materials that other companies cannot claim without damaging their magnetic sheet permanently." - James P
The fit to your machine is the buyer's responsibility
Please measure your bed (do not rely on build volume) before ordering noting that the spring steel Flexi Plate has two front tabs that stick out by 10mm on smaller kits and 15mm on larger kits. Wham Bam will not be responsible for mistaken sizes ordered. Click here for more sizing info
Sizes and Machine Fits
Shop Now
More sizes being developed now!
Click here to request a new size Flexible Build System.
Quality Materials
Our Wham Bam Flexi Build Plates are made from high quality spring steel that won't kink or warp when you flex them, they just return back to shape! The Spring Steel has been formulated with a Chromium Alloy creating a rust proof steel for long life.
Our magnets and films have all been formulated to resist over 150°C so you can heat your bed to high temps for specialty filaments and not worry about loss of performance.
We have developed the Wham Bam PEX Build Surface from a specially formulated polymer with a higher melt point than even PEI to attract most any filament without damaging the sheet. Prints easily pop off once cooled and flexed.
Wham Bam Newsletter
Get exclusive deals, new product insights, plus some helpful tips and tricks . .. just let us know where to send it!
Sign Up
Metal 3D Printing - The Essential Guide
There is no hotter trend in 3D printing today than metal. We will talk about metal printing at home, how it is done on an industrial scale, about technologies, applications, printers, processes, prices and materials.
Metal 3D printing has grown in popularity over the past few years. And this is quite natural: each material offers a unique combination of practical and aesthetic qualities, can be suitable for a wide range of products, prototypes, miniatures, decorations, functional details and even kitchen utensils.
The reason metal 3D printing has become so popular is because the printed objects can be mass-produced. In fact, some of the printed parts are just as good (if not better) than those made with traditional methods.
In traditional production, working with plastic and metal can be quite wasteful - there is a lot of waste, a lot of excess material is used. When an aircraft manufacturer makes metal parts, up to 90% of the material is simply cut off. 3D printed metal parts require less energy and waste is reduced to a minimum. It is also important that the final 3D printed product is up to 60% lighter than a traditional part. Billions of dollars could be saved in the aviation industry alone—mainly through weight savings and fuel savings.
So, what do we need to know about metal 3D printing?
Metal 3D printing at home
If you want to make objects at home that will look like metal, your best bet is to look at metalized PLA filaments (Photo: colorFabb)
Where to start if you want to print metal objects at home ? Given the extreme heat required for true metal 3D printing, a conventional FDM 3D printer will not be able to do this.
It is unlikely that in this decade it will be possible to print with liquid metal at home. Until 2020, you probably will not have a printer specialized for this purpose at home. But in a few years, as nanotechnology advances, we may see significant developments in new applications. This can be 3D printed with conductive silver, which will emit in much the same way as it does in 2D home printers. It will even be possible to mix different materials like plastic and metal in one object.
Materials for metal 3D printing at home
Even though you can't print actual metal objects at home, you can turn to plastic filament that has metal powders added to it. ColorFabb, ProtoPasta and TreeD Filaments all offer interesting metal-PLA composite filaments. These filaments, containing a significant percentage of metal powders, remain pliable enough to be printed at low temperatures (200 to 300 Celsius) on virtually any 3D printer. At the same time, they contain enough metal to make the final object look, feel, and even weigh like metal. Iron-based filaments even rust under certain conditions.
But you can go further. Typically, up to 50 percent metal powder is added to 3D printing filament.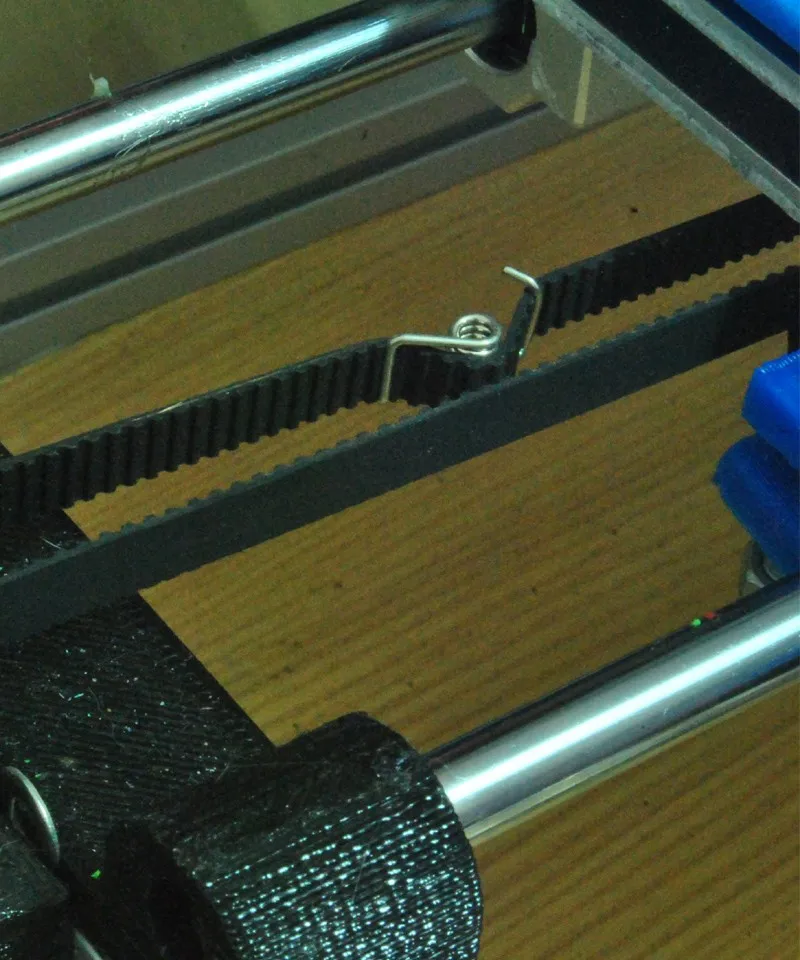 Dutch company Formfutura says they have achieved 85 percent metal powder with 15 percent PLA. These filaments are called MetalFil Ancient Bronze and Metalfil Classic Copper. They can be printed even at "moderate" temperatures from 190 to 200 degrees Celsius.
Metallic 3D Printing Filament Spools, in this case from SteelFill and CopperFill colorFabb (Steel and Bronze), Ancient Bronze (Ancient Bronze) from Formfutura
Here are the key points about metal printing at home
- Gets a unique metal surface and look
- Ideal for jewelry, figurines, housewares, replicas
- Durability
- Objects are not flexible (structure dependent)
- Objects do not dissolve
- Not considered food safe
- Typical print temperature: 195 - 220°C
- Extremely low shrinkage on cooling
- No table heating required
- Printing complexity is high, requires fine tuning of nozzle temperature, feed rate, post-processing
Preparing Your Home Printer for Metal 3D Printing
Since getting metal 3D prints is more difficult than usual, you may need to upgrade your 3D printer nozzle, especially if you are an entry-level printer. The metal filament wears it out quickly. There are hard-wearing hot-ends (like the E3D V6) that are themselves made of metal. They can withstand high temperatures and fit most printers. Be prepared for the fact that the nozzles will have to be changed frequently, because the metal filament is very abrasive.
You will also need to take care of the final finishing of the surface (cleaning, grinding, oiling, waxing or priming) so that the printed metal object shines as it should.
How much does metal filament for 3D printing cost?
And what about metal filament for 3D printing? - you ask. Here are a few examples:
- ColorFabb's 750 gram Bronzefill spool is $56.36
- ColorFabb 750g Copperfill Coil $56.36
- Protopasta's Polishable Stainless Steel PLA Composite is $56 for 56 grams of
- Protopasta's Rustable Magnetic Iron PLA Composite is $34.99 for 500 grams of
Industrial metal 3D printing
But what if you want a better result or even full metal 3D printing? Should a real "metal" 3D printer be purchased for business needs? We wouldn't recommend it - unless you're going to be doing it every day. A professional metal 3D printer is expensive: EOS or Stratasys devices will cost you 100-500 thousand dollars. In addition, the costs will be even greater, since you will have to hire an operator, a worker to maintain the machine, as well as to finalize the printouts (polishing, for example). Just a note: In 2016, an affordable metal 3D printer didn't exist.
Lowering Metal 3D Printing Costs
If you are not going to start a metal 3D printing business, but still need a professionally 3D printed metal part, it is best to contact the appropriate company that provides such services. 3D printing services like Shapeways, Sculpteo and iMaterialise offer direct metal printing.
They currently work with the following metal materials in 3D printing:
- aluminum
- steel
- brass
- copper
- bronze
- sterling silver
- gold
- platinum
- titanium
If you are a jeweler, you can also order wax models for casting in precious metals.
If we talk about wax models, then in most cases they (with subsequent melting) are used when printing with metals (including gold and silver). Not all orders are carried out directly by these firms. They usually turn to other metal 3D printing companies to complete the order. However, the number of such services around the world is growing rapidly. In addition, metal 3D printing techniques are becoming more and more common in companies that offer such services.
The reason big companies love 3D printing so much is that it can be used to build fully automated lines that produce "topologically optimized" parts. This means that it is possible to fine-tune the raw materials and make the components thicker only if they must withstand heavy loads. In general, the mass of parts is significantly reduced, while their structural integrity is preserved. And this is not the only advantage of this technology. In some cases, the product turns out to be significantly cheaper and affordable for almost everyone.
Please note that metal 3D printing requires special CAD programs for modeling. It is worth paying attention to the recommendations of Shapeways - 3D printing metal guidelines. To delve further into the topic, check out Statasys' information on related 3D printers and the nuances of metal 3D printing.
Here are some examples of Benchy test model prices for metal 3D printing:
- Metal plastic: $22.44 (former alumide, PLA with aluminium)
- Stainless steel: $83.75 (plated, polished)
- Bronze: $299.91 (solid, polished)
- Silver: $713.47 (solid, mirror polished)
- Gold: $87.75 (gold plated, polished)
- Gold: $12,540 (solid, 18K gold)
- Platinum: $27,314 (solid, polished)
As you might expect, solid metal 3D printing prices are quite high.
Metal 3D printing. Applications
GE LEAP aircraft engine parts 3D printed at Avio Aero (Photo: GE)
There are several industries already using 3D printers to make everyday objects - you may not even know that these objects are printed.
- The most common case is surgical and dental implants, which are considered the best option for patients today. Reason: they can be tailored to individual needs.
- Another industry is jewelry. Here, most manufacturers have abandoned resin 3D printing and wax casting, switching directly to metal 3D printing.
- In addition, the aerospace industry is becoming more and more dependent on 3D printed metal objects. The Italian company Ge-AvioAero was the first to do all-metal 3D printing. It manufactures components for LEAP aircraft engines.
- Another industry targeting metal 3D printing is the automotive industry. BMW, Audi, FCA are seriously considering this technology, not only for prototyping (3D printing has been used for this for quite some time), but also for making real parts.
Before metal 3D printing really takes off, however, there are some hurdles to overcome. And first of all, this is a high price, which cannot be made lower than during molding. Another problem is the low production speed.
Metal 3D printing.
Technologies
Most metal 3D printing processes start with an “atomized” powder
You can talk a lot about “metal” 3D printers, but their main problems remain the same as any other 3D – printers: software and hardware limitations, material optimization and multimateriality. We won't talk too much about the software, we'll just say that most of the major specialized software companies, such as Autodesk, SolidWorks and solidThinking, try to emphasize as much as possible the fact that as a result of the 3D metal printing process, you can get any shape you want.
In general, printed metal parts can be as strong as parts made by traditional processes.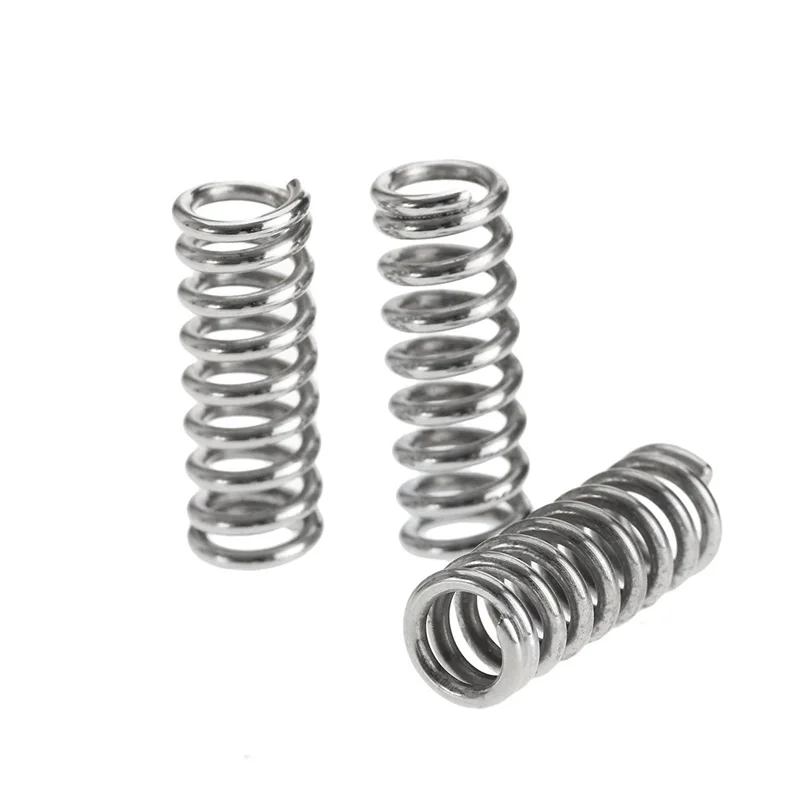 Parts made using DMLS technology have mechanical properties equivalent to casting. In addition, the porosity of objects made on a good "metal" 3D printer can reach 99.5%. In fact, manufacturer Stratasys claims that 3D printed metal parts perform above industry standards when tested for density.
3D printed metal can have different resolutions. At the highest resolution, layer thickness is 0.0008 - 0.0012" and X/Y resolution is 0.012 - 0.016". The minimum hole diameter is 0.035 - 0.045". formed layer)
The metal 3D printing process used by most relevant large companies today is called Powder Bed Fusion. This name indicates that some source of energy (a laser or other energy beam) melts an "atomized" powder (i.e., a metal powder that is carefully ground into spherical particles), resulting in layers of a printed object.
There are eight major manufacturers of metal 3D printers in the world that already use this technology; while we are talking here, there are more and more such companies.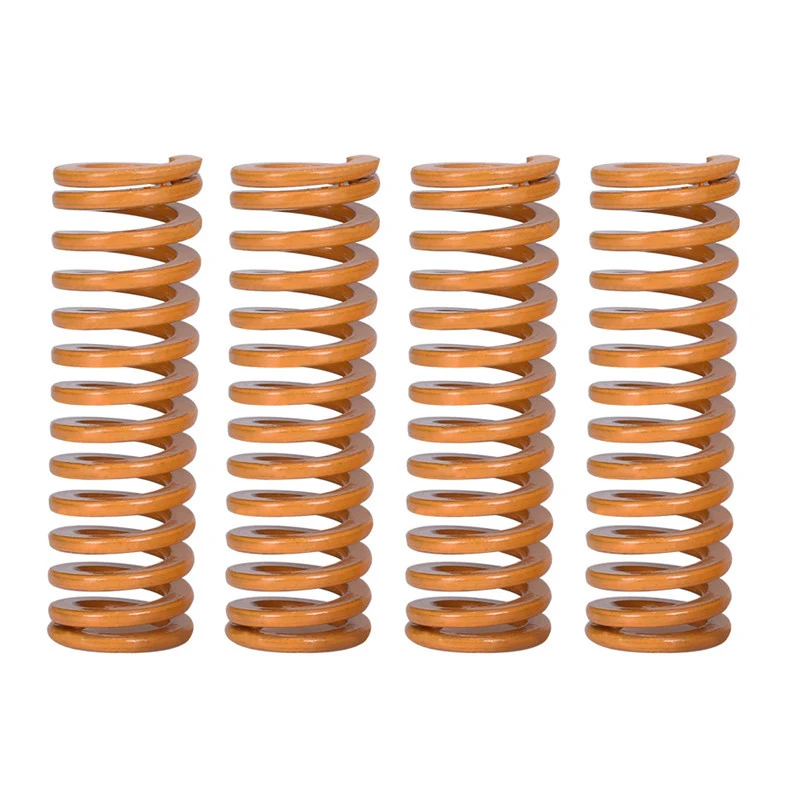 Most of them are in Germany. Their technologies are called SLM (Selective Laser Melting - selective laser fusion) or DMLS (Direct Metal Laser Sintering - direct metal laser sintering).
Metal 3D-printing process No. 2:
Binder Jetting (spraying the binder)
under 3DP technology EXONE Metal objects are printed due : ExOne)
Another professional approach that also uses a powder base is called Binder Jetting. In this case, the layers are formed by gluing metal particles together and then sintering (or fusing) them in a high-temperature furnace, just like it is done with ceramics.
Another option, which is similar to working with ceramics, is mixing metal powder into metal paste. A pneumatically extruded 3D printer (similar to a syringe bioprinter or an inexpensive food printer) forms 3D objects. When the required shape is reached, the object is sent to the furnace, i.e. in the mountains
This approach is used in the Mini Metal Maker, apparently the only inexpensive "metal" 3D printer.
Metal 3D printing process #3: 9Metal Deposition This is not entirely true. Of course, on some desktop device, simply fusing metal threads onto the base will not work. However, very large steel companies can do it. And they do. There are two options for working with "metal surfacing".
One is called DED (Directed Energy Deposition) or Laser Cladding. Here, a laser beam is used to melt the metal powder, which is slowly released and solidifies as a layer, and the powder is fed using a robotic arm.
Normally the whole process takes place in a closed chamber, but the MX3D project used conventional 3D printing techniques to build a full-size bridge. Another option for metal fusion is called EBAM (Electron Beam Additive Manufacturing - additive electron beam technology), which is essentially soldering, in which a very powerful electron beam is used to melt 3 mm titanium wire, and the molten metal forms very large finished structures. As for this technology, its details are known so far only to the military.
Metallic 3D printing. Metals
3D Printing Metal #1: Titanium
Pure titanium (Ti64 or TiAl4V) is one of the most commonly used metals for 3D printing and is definitely one of the most versatile, strong and lightweight. Titanium is used both in the melting process in a preformed layer and in the process of spraying a binder and is used mainly in the medical industry (for the manufacture of personal prostheses), as well as in the aerospace industry, automotive and machine tools (for the manufacture of parts and prototypes). But there is one problem. Titanium is very reactive and explodes easily in powder form. Therefore, it is necessary that titanium 3D printing takes place in a vacuum or in an argon environment.
3D printing metal #2: Stainless steel
Stainless steel is one of the cheapest 3D printing metals. At the same time, it is very durable and can be used in a wide range of manufacturing and even artistic and design applications.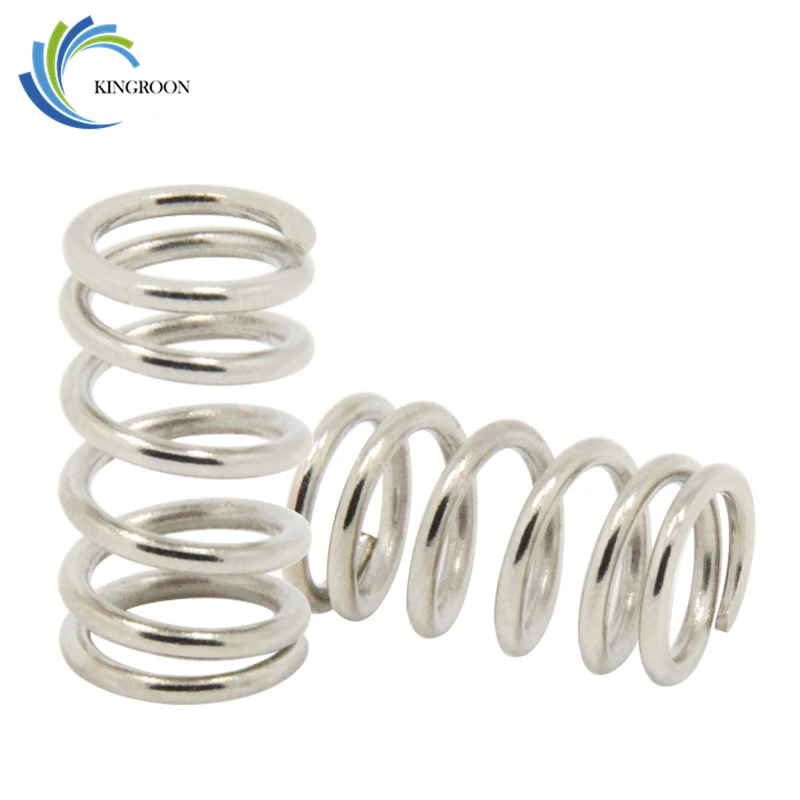 The type of steel alloy used also contains cobalt and nickel, is very difficult to break, and has a very high elasticity. Stainless steel is used almost exclusively in industry.
3D Printing Metal #3: Inconel
Inconel is a superalloy manufactured by Special Metals Corporation and is a registered trademark. The alloy consists mainly of nickel and chromium and is very heat resistant. Therefore, it is used in the oil, chemical and aerospace (for black boxes) industries.
3D Printing Metal #4: Aluminum
Due to its lightness and versatility, aluminum is very popular in 3D printing. Aluminum alloys are commonly used.
3D Printing Metal #5: Cobalt Chrome
gap). It is most commonly used in the manufacture of turbines, dental and orthopedic implants, where 3D printing has become the dominant technology.
3D printing metal #5. Copper and bronze
With some exceptions, copper and bronze are used in wax melting processes, rarely in layer melting. The fact is that these metals are not very suitable for industry, they are more often used in the manufacture of works of art and crafts. ColorFabb offers both metals as the basis for a special metal filament.
3D printing metal #6. Iron
Iron, incl. magnetic, also mainly used as an additive to PLA-based filaments, which are produced, for example, by ProtoPasta and TreeD.
3D printing metal #7. Gold, Silver, and Other Precious Metals
Most preformed layer companies can 3D print precious metals such as gold, silver, and platinum. Here, along with the preservation of the aesthetic properties of materials, it is important to achieve optimization of work with expensive starting powder. Precious metal 3D printing is required for jewelry, medical applications and electronics.
Metallic 3D printing. Printers
Do not hesitate - the purchase of a metal 3D printer will not pass without a trace on your budget. It will cost at least 100-250 thousand dollars. Here is a list of a variety of "metal" printers, some of which can be found in firms providing 3D printing services.
Metal 3D Printer #1:
Sciaky EBAM 300 - Metal Filament Printing
If you need to print really large metal structures, Sciaky's EBAM technology is your best bet. By order, the device can be built in almost any size. This technique is used mainly in the aerospace industry and the military.
Sciaky's largest production printer is the EBAM 300. It prints objects in a volume of 5791 x 1219 x 1219 mm.
The company claims the EBAM 300 is also one of the fastest industrial 3D printers on the market. A three-meter-sized titanium part for an aircraft is printed on it in 48 hours, while the material consumption is about 7 kg per hour. In general, forged parts that usually take 6-12 months to complete can be made in 2 days with this 3D printer.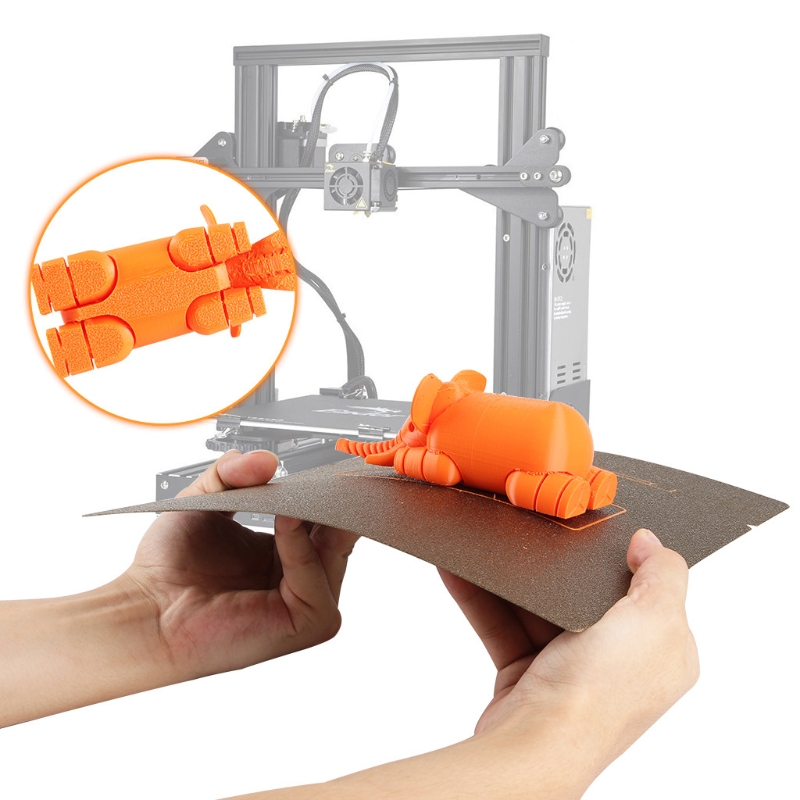
The metal layers are first cut and then ultrasonically welded. The largest Fabrisonic 7200 printer operates in a volume of 2 x 2 x 1.5 m. The metal powder 3D printer is the Concept Laser XLine 1000. It has a modeling volume of 630 x 400 x 500 mm and is the size of a house.
Its German company, one of the main suppliers of 3D printers for aerospace giants like Airbus, recently introduced a new machine, the Xline 2000.
This machine uses two lasers and has a working volume of 800 x 400 x 500 mm. Laser technology LaserCUSING (selective laser fusion) from Concept Laser is used, which allows printing with alloys of steel, aluminum, nickel, titanium, precious metals and even some pure substances (titanium and stainless steel).
Metallic 3D printing. Services
There are more than 100 companies worldwide offering metal 3D printing services. We list the most popular services for consumer needs.
Metal 3D Printing Service #1: Shapeways
The world's most popular 3D printing service, Shapeways offers two types of services.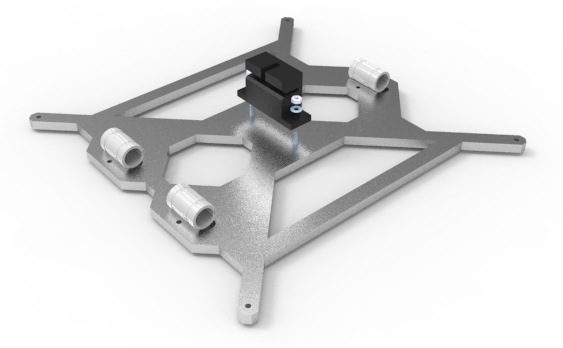 As a consumer, you can choose from a wide range of professionally designed objects, customize them, and then have them printed to your specifications. Like other 3D printing services, Shapeways offers a platform for designers to sell and print their work. Shapeways is also a good place for rapid prototyping: customers benefit from industrial-grade printers (EOS, 3D Systems) and personal technical support.
3D printing metals: aluminium, brass, bronze, gold, platinum, precious metal plating, silver, steel. There are also wax molds for jewelry purposes.
Metal 3D Printing Service #2: Sculpteo
Like Shapeways and i.materialise, Sculpteo is an online 3D printing service that allows anyone to upload 3D models and send them to fabrication in a wide range of materials . Like its competitors, Sculpteo provides a platform for hobbyists and professionals to showcase and sell their designs. The stable of Sculpteo printers includes highly professional machines from 3D Systems, EOS, Stratasys and ZCorp.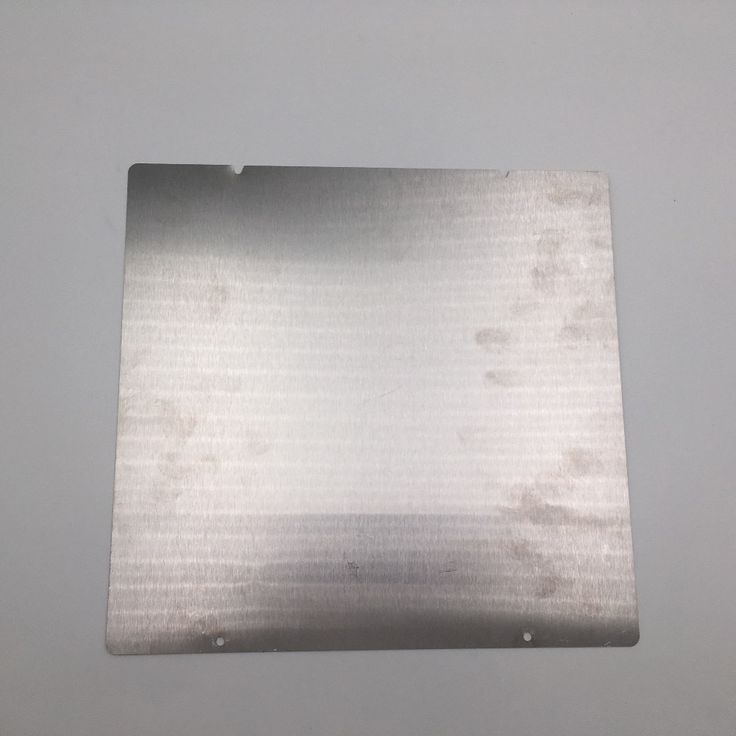 Extensive technical documentation will help identify design flaws and select the right material for the project.
Metals for 3D printing: alumide (plastic with aluminum particles), brass, silver.
Metal 3D Printing Service #3: iMaterialise
Materialise is a company that works with industrial customers to prototyp 3D printed products. For casual users and designers, Materialize offers an online 3D printing service called i.materialise. As with Shapeways, this service allows anyone to upload their 3D designs and print them out. Once an object has been uploaded and successfully printed, a designer can list it for sale either in the gallery of the i.materalise online store or by embedding some code into their site.
3D printing metals: alumide (plastic with aluminum powder), brass, bronze, copper, gold, silver, steel, titanium.
Metal 3D Printing Service #4: 3D Hubs
Through 3D Hubs, you can search for individuals and firms that offer 3D printing services in your area, upload STL files (which are immediately evaluated for defects ) and contact service providers directly to get the job done.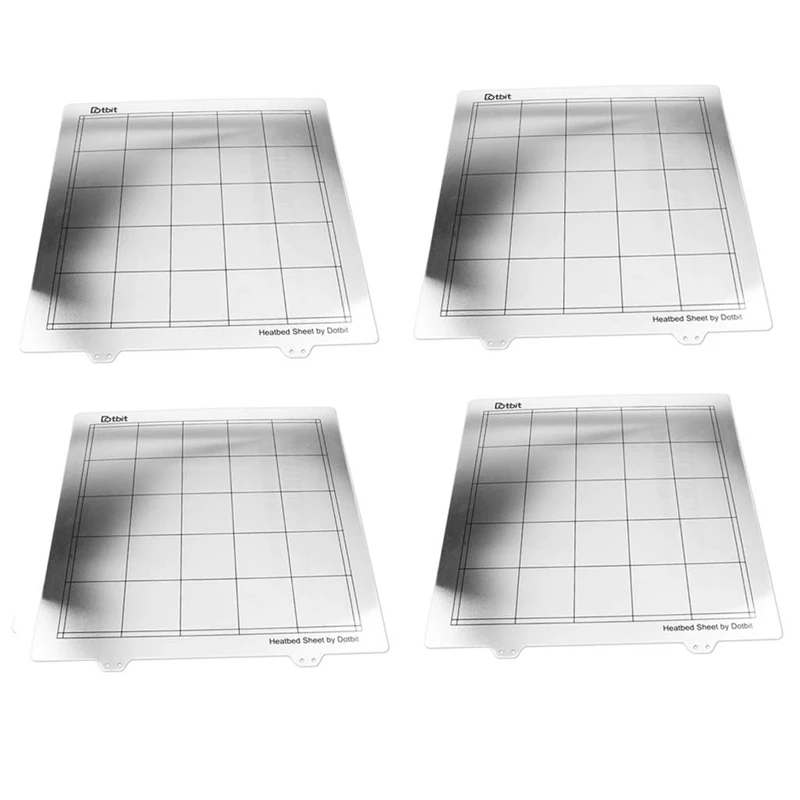 The online 3D printing service also allows you to sort offers by materials, customer rating, distance and many other parameters. Whatever object you wish to print, chances are there is someone nearby who can do it. A significant number of materials can be printed in industrial quality, such materials have an HD mark in the search field.
3D printing metals: aluminium, bronze, cobalt-chromium, stainless steel, titanium.
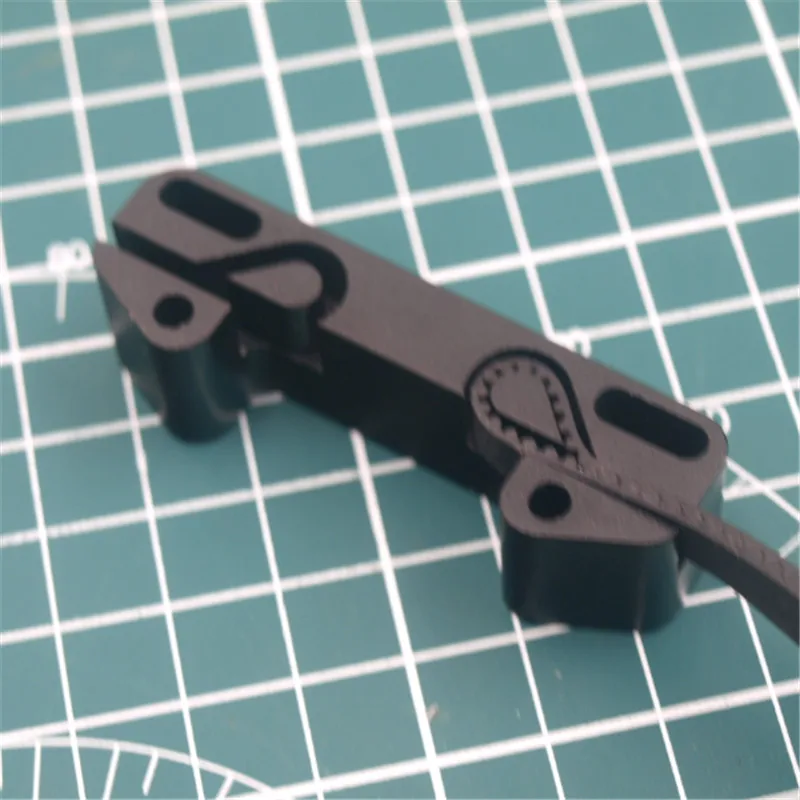
High-tech bed - perfoboard
Technician
2 plus. You can endlessly sing odes to him, he suited me with everything except a small area of \u200b\u200bprint. What about Afinia (Tiertime)? He has a unique bed - punchboard. It is a perforated textolite. The raft settings in the 3D printer were such that the first layer was slowly and calmly poured partially into the holes. This is the best, simplest, most reliable and fastest way to hold a part that I have seen. The part is removed simply - with a sharp knife or spatula we hook the edge and drive it under the part - it will fly off.

If the plastic remains in the holes after removing the part, it does not matter, the next time you print, the new layer will be firmly welded to the old plastic.
After buying a new printer, I wondered where to get such a platform. It was not possible to do it, but on Ali I saw options - what is in the photo is an ordinary circuit board 15x20cm, with drilling of not very good quality. Only it has 4K holes. Checked out: it's holding up well. In the next photo, the reverse side of the raft shows traces of fastening in the holes - spikes.
You can separate the model with a spatula sharpened on one side, such a 'Japanese leather knife' is best suited, searched on Ali.
Pluses:
+ quick detachment of the model
+ quick start of printing - no need to smear anything
+ no smell (except for the initial smell from the textolite) UP, circuit boards, punch boards from Aurora 3D printers, homemade punch boards.
+ no matter the type of plastic - everything sticks. Checked ABS, PLA, nylon.
Cons:
- the initial stench of the textolite (if not a branded perforated board)
- printing only with a raft
- when printing a large part, it requires a longer warm-up time so that the textolite warms up evenly.
Features:
- degreasing is mandatory after touching with hands (this is not a minus - there is nothing to touch the bed)
- the need to fine-tune all slicer profiles to the maximum thickness of the first raft layer
- separation requires a flat knife or sharpened spatula
Happy printing everyone!
Subscribe to the author
Subscribe
Don't want
29
More interesting articles
levscha
Loading
11/22/2022
1242
13
Subscribe to the author
Subscribe
Don't want
In the previous publication (link), the collective project of the experimental board is described.