Modeling with sketchup for 3d printing
3D Printing with SketchUp: 10 Tricks | 3D Printing Blog
3D Printing with SketchUp: 10 Tips and Tricks
by Fabian | March 30, 2017
SketchUp is one of the most popular 3D modeling & design programs for 3D printing, as we found out from our analysis. However, preparing a SketchUp model for 3D printing can be a little tricky. That’s why we put together a list of 10 simple yet effective tips and tricks to make your SketchUp design 3D printable.
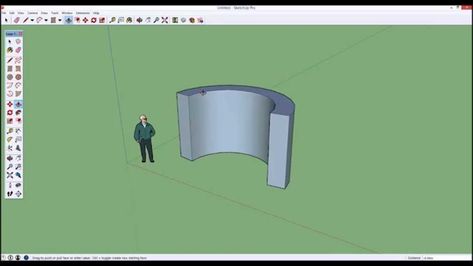
1: Set your Template to Millimeters or InchesSome simple clicks before getting started will make your life easier: you may want to set your SketchUp template to metric or imperial units. This way, you won’t need to re-scale the printing size of your model later.
You can change the template by clicking on Window > Preferences > Template and selecting ‘3D Printing – Millimeters’ or ‘3D Printing – Inches’.
2: Install the SketchUp STL ExtensionTypically you can save your 3D model as a SketchUp file (SKP). Even though our online 3D printing service accepts these files, you might want to get SketchUp’s free STL Extension. The STL file format is the most commonly used in the 3D printing community and will make it easier to share, print, and edit your design in other software.
With the SketchUp STL extension installed you can export your model as an STL file. Make sure to select the same unit type that you chose in your template (millimeters or inches) when exporting, and choose the binary file format to reduce the size of your file.
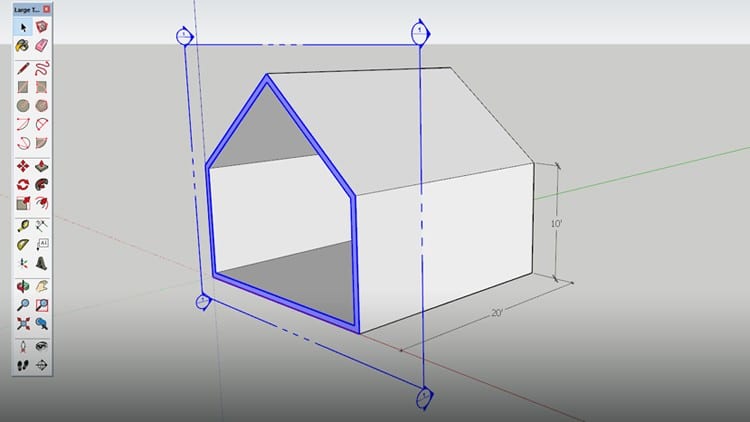
3: Avoid Paper-Thin Surfaces & Set Wall ThicknessesIn order to make your SketchUp model printable, you need to ensure that each and every surface has a wall thickness. Without setting a wall thickness, a 3D printer has no information about how thick or how thin it is supposed to print your part.
The picture below shows a model with paper-thin surfaces (not printable, left) and a solid object with thick walls (printable, right). If you want to learn more about how thick your walls need to be exactly, make sure to read this blog post.
A printable model must not feature any holes in its surface. Ask yourself the question: if I were to put water inside my model, would it flow out? If that’s the case you need to find these holes and close them. This is one of the trickiest parts of creating 3D printable models in SketchUp.
The design below is an example of a model that is not watertight. You can clearly see that there is one big hole on its surface.
Once this hole is closed (for example by drawing new lines), SketchUp recognizes that the object is solid on the inside and ready for the printer! You can see such a watertight (also referred to as manifold) object below.
5: Avoid Internal OverlappingIntersections and walls within your design can make your life difficult since your model needs to have one continuous ‘outer shell’. That’s why it makes sense to think about your model in a 2-dimensional space first.
In the case below, the left shape will not be printable once it is pulled into a 3-dimensional object since it will feature paper-thin walls within the object. The shape on the right, however, won’t be a problem to print once it is pulled into a 3D object because it will only have one ‘shell’. It doesn’t feature paper-thin walls on the inside. We’ll look at an automatic way to create one outer shell later.
6: Check if Your Model Is SolidCreating watertight models with one continuous outside can be tough sometimes. Luckily SketchUp lets you check if you made any mistakes.
Here’s how it works:
- Triple-click on your model with the select tool (this will select everything).
- Right-click on your object and select ‘Make Group’.
- Right-click on your object again and select ‘Entity Info’.
If you designed an object with holes (not watertight) and internal intersection (not in one shell) the Entity Info window will say ‘Group’. This means that your model is not printable and you’ll have to check it again. Right-click on it and select ‘Explode’ to re-edit the components.
If you designed a watertight model in one shell, the Entity Info window will say ‘Solid Group’ and then you know that your model is ready to be 3D printed (in the next steps we’ll tell you how to fix this).
7: Look inside Your Model with the ‘Hide Tool’ and ‘X-Ray-Mode’Looking at your model from the outside means that the inside is a ‘black box’ for you. However, even the inside of your model could feature many modeling mistakes that would make your object unprintable. In the example below, the ‘Entity Info’ window indicates that the object is not solid.
Since it looks solid from the outside, it makes sense to take a look at what’s going on inside. Select a surface (face) you want to hide and select ‘Edit’ > ‘Hide’. And voila: you can find the trouble-making mistake. Alternatively, you can switch into x-ray-mode by clicking on ‘View’ > ‘Face Style’ > ‘X-ray’.
We already pointed out that designs with overlapping objects create problems for 3D printers. The good news: there’s an automated solution for creating one ‘outer shell’ around the overlapping objects, deleting all internal overlapping parts.
To start with, we have these two solid blocks. Each of these blocks was ‘grouped’ separately (Select > Right click > Make Group). We also selected the x-ray view to make things easier.
We then move one block into the other. We now have overlapping areas in the interior of this object.
To get rid of these, we select one block, click on ‘Tools’ and choose ‘Outer Shell’.
The last thing to do is to click on the second block. SketchUp automatically created one solid group out of these blocks. As you can see, the internal overlapping parts are gone. The result is a new solid object that is ready to be 3D printed!
9: Fix Reversed Faces (Inverted Normals)Another problem that can occur is so-called inward-facing or reversed faces.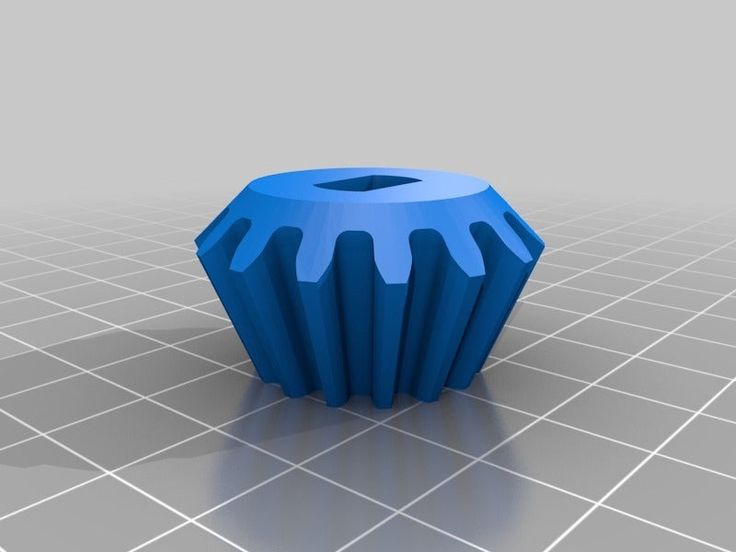 This means that a surface of your model is facing in the wrong direction (typically this means that it is facing the inside of the object instead of the outside). These surfaces are automatically colored in light blue.
To fix this, right-click on the inward-facing surface (face) and select ‘Reverse Faces’. You can see an example of this in the image below (left). On the right, you can see the object how it is supposed to be: all faces point to the outside again.
10: Increase Circle/Arc Segments to Getting Smooth CurvesSketchUp ‘smoothens’ arcs and circles in its visual presentation. Even though circles might look perfectly spherical in SketchUp, they are actually only made of 24 sides. Click on ‘View’ > ‘Hidden Geometry’ to see theses sides. When being printed, this circle might come out quite edged.
When you select the arc or curve tool, SketchUp will show you their default sides in the bottom right corner. You can then enter a higher number to increase the number of sides. Validate your entry by hitting the ‘Enter’ key and then draw your arc or circle.
The image below shows a comparison between the default 24 sides (left) and 150 sides (right).
Extra: Automatic File Fixing and PreparationSometimes problems are tiny and hard to see with the naked eye. There are SketchUp extensions like the Solid Inspector 2 that find problems automatically and point them out to you. Simply select a group or component and activate the Solid Inspector tool for an analysis of what would prevent it from being a solid manifold.
Another handy extension is CleanUp 3. It allows you to cleans up and optimize your SketchUp model with handy tools like “Erase hidden geometry” and “Erase duplicate faces”.
Also, SketchUp added a cool feature to their 3D Warehouse that was developed by Materialise. When uploading a model to the 3D Warehouse, you can check the “I want this to be 3D printable” button (see video below) to get modeling errors fixed instantly. This tool will make your 3D model watertight and allow you to download it as an STL file. While it might lead to somewhat less accurate results, it’s a very fast way to get a printable file. So if you’re searching for an easy-to-use tool that will save you a lot of time and effort (no more searching for file issues, no more exhausting fixing sessions), this is the tool for you.
Did you manage to follow our tips and tricks and create a printable SketchUp file? In order to send it to our printers, download the SketchUp 3D print service plugin. Alternatively, you can upload your models here and choose from hundreds of material options.
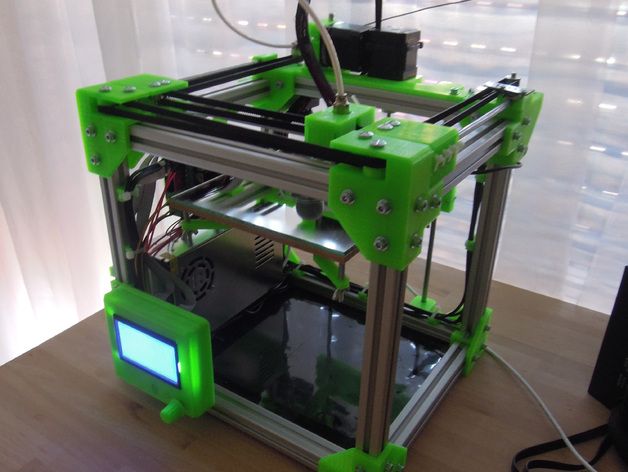
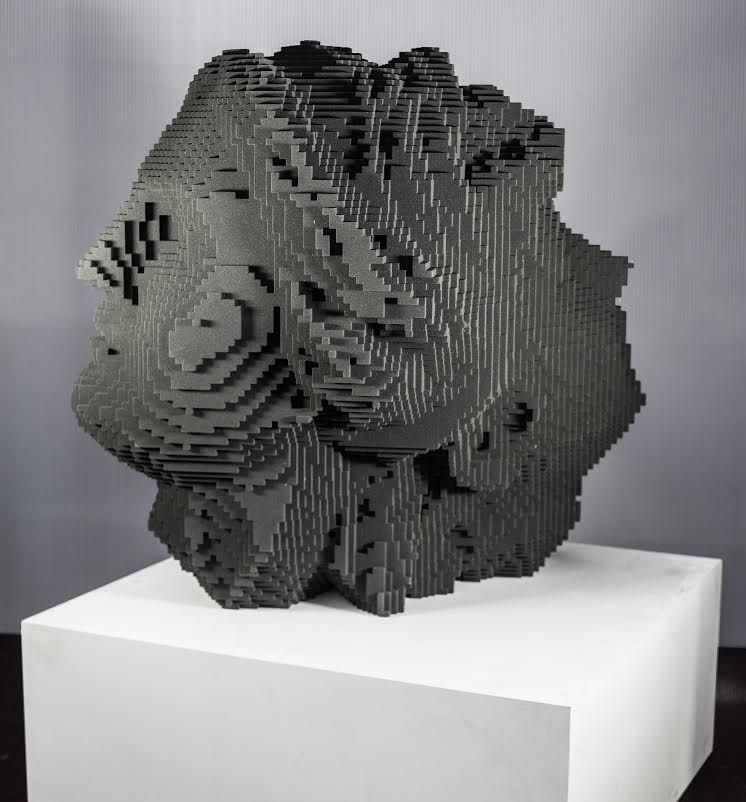
Get high-quality 3D prints like these with i.materialise’s online 3D printing service.
Using 3D Modeling Software for 3D Printing
This tutorial was created for SketchUp 3D modeling software users and will focus on its use for 3D printing.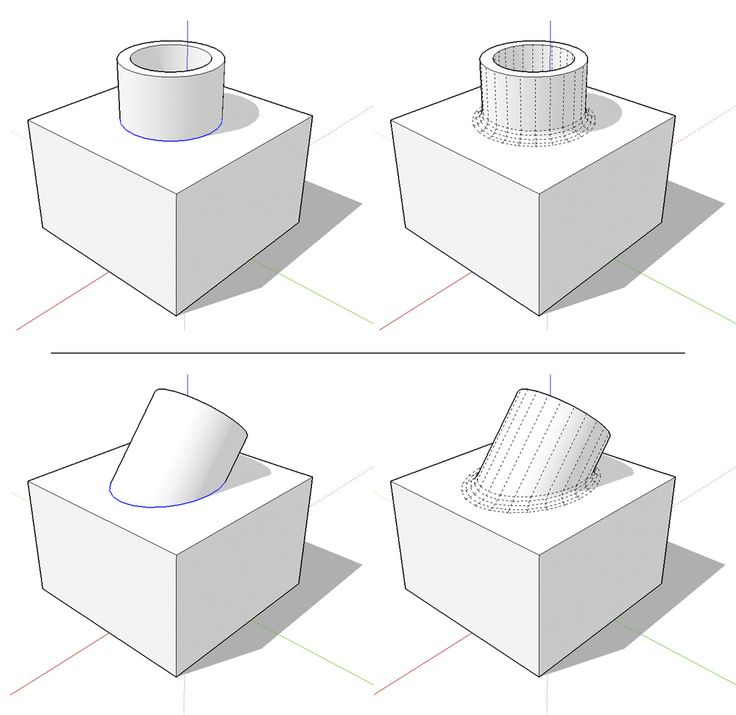
In this tutorial, we will provide a brief overview of modeling best practices. We will show you the main pitfalls to avoid and solutions you can use to resolve them. After reading the tutorial, you will be able to:
- Create models for 3D printing
- Analyze and export your 3D file
- Correct common errors
Then, you will be able to upload your 3D file on our website and 3D print it!
Developed by Trimble, SketchUp is a 3D software that is suitable for everyone. It is one of the most-widely used 3D-modeling software, used both in schools and at workplaces. It is surface modeling software with which you are able to manipulate faces and edges. One of the reasons for its success is that it has simple, intuitive modeling tools, with an easy-to-use user interface. This 3D design software can be used both by people wishing to use 3D printing, by interior designers, by design modelers, for architecture design or by engineers for product design.
You do not have to be an expert on SketchUp to take this tutorial. This tutorial is intended for both beginners and professionals alike, independently from their skill level, this tutorial will simply give you a good foundation.
We will give you some practices and quick tips for optimal 3D file creation to ensure successful 3D printable models. We will introduce you to the main design tools in Sketchup, how to deal with shapes in Sketchup, how to optimize file size in this 3D modeling program, and how to make the most of the essential Sketchup plugins to get the best user experience. You will become the next Sketchup modeling champion thanks to our essential training!
To learn about modeling with SketchUp, please refer to SketchUp’s learning center. In addition, you can consult Jean-Luc Clauss’ book, 3D Printing with SketchUp or his training video Modeling an Object for 3D Printing to start 3D printing with SketchUp on the right footYou will also find many Sketchup tutorials on Youtube.
This 3D modeling software tutorial was created based on the 2015 version of the software (Windows version). All of the operations described can also be performed on the Mac version of the software. Furthermore, you do not need Sketchup Pro, the professional and paid version of SketchUp software to create models for 3D printing. However, this version does provide you with additional tools (such as importing and exporting other documents) to optimize your modeling.
To download SketchUp, please refer to the developer’s website, you will install Sketchup in a few minutes: http://www.sketchup.com/fr/download/all.
For further information, you can also learn Sketchup with our online video tutorial. This video contains useful Sketchup tips. Getting started will be easy thanks to our introduction to the features of Sketchup, step by step. The design tools of this 3D modeling software won’t have any secrets for you any more thanks to these tips and tricks!
SketchUp STL Export Guide
Share on Facebook Share on Twitter Share on Vkontakte
This walkthrough is for Sketchup 7. 1 or higher. It also applies to both free versions of SketchUp as well as SketchUp Pro 7.
Step 1: open your model in SketchUp and export to the correct format
to convert .stl files without help Sketchup , but after several attempts, you come to the conclusion that most, if not all, are not good enough at this task.
Since the last update of Sketchup to version 7.1, it has become very easy to create almost perfect files for 3D printing .stl, in addition, there are a couple of very useful and free programs like Sketchup - MeshLab and Accutrans3D . Meshlab
Step 3: Opening the file in Acceptrans
Open the ACCUTRANS3D program and take the test for waterproof, take advantage of the TORS -> CHECK contributions -> Check
If there are errors in the model, you will see the following picture:
blue.
Pro Tip: Remove a large surface or area
Sometimes these errors are obvious, but sometimes they are REALLY hard to see. With one trick, this can be avoided. It is enough to go back to your file in SketchUp and intentionally delete a large surface (in this case, the flat base of the model).
So much better - even though we now have a HUGE hole in the model, we know exactly where it is, because we just made it ourselves!
Pro Tip 2: Go back to Accutrans and fix it in SketchUp
Now we export the file again, converting it to .stl 190 format and reloading it again check for water tightness, this will allow you to easily "look inside" your model to spot those pesky bugs (you'll most likely see the hole in the base that we just made is highlighted in red - ignore it and look for others! ).
Go back to the model in Sketchup - find and fix the errors.
Look! Lots of holes!
And we fixed them with ease!
Step 4: Correcting model edge errors
There are many such errors: when you deepen these areas SketchUp leaves panels in front of them - you need to remove them!
Now everything is fine.
Step 5: Last water test
So, everything is in order and you can save your file. To export it again, open File -> Export -> 3D model -> COLLADA file tabs.
Open in Meshlabs .
Save as .stl.
Open Accutrans3D in and run the waterproof test again.
Step 6: Upload the file
So now you are ready to upload your file, for example, to can-touch.ru, it should have a .stl extension.
3d modelingSketchUp
How to make a model for engraving with Sketchup
3D modeling
To create a 3D model on a 3D printer, you first need to make a model in SketchUp.
 SketchUp Pro 2015 will be considered as an example. After creating a model in SketchUp, you need to save it in STL format, then convert this file to G-code
 1. Open the program SketchUp (template in millimeters), Select in the menu bar: Tools (Tools) -> 3D text (3D text).
2. Enter the text, adjust the text parameters (change only the length) and place it in the horizontal plane relative to the line.
3. In the Toolbar, click on the button with the image of the arrow "Select" (Select), then double-click on the text, in the toolbar select the tool "Offset" (Offset).
4. Using the “Offset” tool (offset), make a contour near the inner and outer faces (for the contour of the inner faces, before using the “Offset” (offset), select these inner faces with the “Select” (select) tool, holding down the Ctrl key). To contour was the same on other letters, after selecting the faces, double-click on one of the selected faces with the “Offset” tool.
5. To create hollow objects with the push/pull tool, which sets the height, lower the plane between the contours to the bottom plane until a green end point appears.
6. Save the menu model "File" (file) -> Export STL
Download Cura - https://software.ultimaker.com/?show=all Video lessons of Cura - http://www.youtube.com/watch?v=Nw8xqE0EZ4E 7. In the Cura program, open the STL model, menu file -> load the model file.
8. Click on the model and adjust the X Y Z axes so that they fit on the printer's working area.
9. Set the desired printer settings in the Basic, Advanced tabs.
10. Save the model in GCode format, menu file -> save Gcode.
11. Transfer the file to a flash card and insert it into the printer.
12. Correct the coordinate axes and print.
Video with laser:
eleven
Subscribe to the author
Subscribe
Don't want
Good day, colleagues.