Smoothing petg 3d prints
How to Smooth PETG 3D Prints
- Author
- Recent Posts
Martin
Martin has a M.Sc. in physics and has gained many years of experience in industry as a lab manager and quality assurance manager. He has now tested dozens of 3D printers and is happy to share the collected experience with each new article.
Latest posts by Martin (see all)
- BQ-Hurakan vs. Ender-3 V2 Neo | Comparison, Pros & Cons - November 10, 2022
- Mouse Ears (Brim Ears) vs. Warping in 3D Printing – Guide - November 10, 2022
- Ender-5 S1 vs. Ender-5 Pro | Comparison, Specs, Pros & Cons - November 9, 2022
Disclosure: Links marked with * are Affiliate Links. I earn from qualifying purchases if you decide to make a purchase through these links – at no additional cost for you!
PETG (PET modified with glycol) is considered an easy-to-print material that is cost-effective and very tough. As it also shows high temperature resistance, it is popular for printing technical parts.
PETG is printed at 230 °C in the nozzle for the first layer and 240 °C for all further layers. The heating bed should be 85 °C at the beginning and 90 °C from the second layer on. PETG adheres well to powder-coated printing beds, but also separates well after printing.
For technical parts, especially mechanical parts, a good surface finish is important. The component may have to fit exactly, for example when screws and brackets or clamps are made from it.
Covers and other parts for the 3D printer can certainly be made from PETG. However, this is not possible without surface processing after printing. There are various ways to smooth PETG.
PETG can be smoothed with fine sandpaper, epoxy resin and paint. Similar to ABS with acetone, PETG can also be smoothed with dichloromethane. However, dichloromethane is very dangerous and not easy to obtain.
Table of Contents:
- 1 PETG Properties
- 1.1 Durability can be a Disadvantage
- 2 First Remove the Supports
- 3 Smoothing after Printing
- 4 Fill Small Gaps with Paint
- 5 Filing after Printing
- 6 Smoothing with a Polishing Machine
- 7 Finishing with Spray Paint and Polyurethane
- 8 Dichloromethane
- 8.
 1 Excursion: Building a Dichloromethane Steam Bath Yourself
- 8.
- 9 Conclusion
PETG Properties
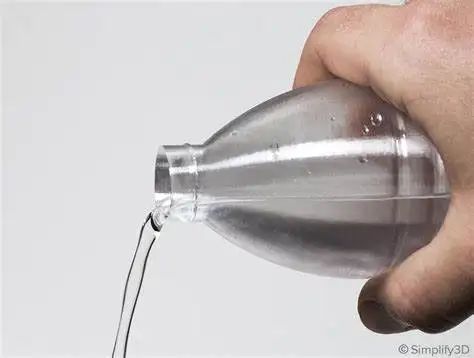
PET stands for polyethylene terephthalate. The thermoplastic belongs to the polyester family and is used, among other things, for transparent beverage bottles.
Some textile fibers are also made from PET. If PET is modified with glycol, PETG is produced.
The filament is easy to print and shows good layer adhesion. The processing of the material is better after the addition of glycol, because it makes the material less viscous/gooey.
Glycol thus ensures that the filament remains rather liquid when warm and also looks highly transparent. However, the milky, almost transparent surface requires a lot of skill when setting the print speed and print temperature.
After cooling and curing, it is very durable and, above all, highly temperature resistant. Warping is very low during printing, and PETG is water and moisture resistant.
Prints made from PETG are not always food safe – only if you follow a few important things!
PETG itself is food-safe, but the printed parts are not without further treatment. This is because fine layers are created during printing, between which bacteria can thrive. If PETG parts from the 3D printer are to be used for food, the finished component must be coated with a food-safe epoxy resin*.
In general, however, the surfaces of professionally printed components made of PETG are very good. This is because the material hardly warps at all, does not shrink and exhibits great layer adhesion.
Shrinkage on cooling is a slim 0.5 percent! In contrast to other filaments, reproducibility of the print results is therefore quite possible with PETG at the same printer settings.
However, there are also disadvantages: PETG is not UV-resistant, gets scratch marks easily and is otherwise just hard.
PETG can be glued: Cyanoacrylate adhesive*, for example, provides several components made of this material with a very quick hold to each other.
This works very simply: The adhesive is applied very carefully along the seam, and distributed in the central areas. You will achieve even adhesion if you apply the adhesive at regular intervals from the inside to the outside.
Excess adhesive should in no case remain on the part to be bonded, but should be removed with a paper towel! This must be done immediately after joining. This is because cyanoacrylate adhesive hardens immediately.
However, you can also work with epoxy glue. This is a classic two-component adhesive that is mixed and then quickly applied with a brush.
Epoxy adhesives require up to five days to cure. Therefore, it is essential to fix the parts bonded with it using a rubber band or clamps.
Durability can be a Disadvantage
Because PETG is so hard and durable, it is difficult to remove supports from the component. PETG does dissolve in some chemicals, but these are dangerous and should therefore only be used by laboratories professionally trained to do so.
PETG has a tendency to bond very strongly with the printing surface. So it is also rather difficult to detach the printed parts from the build plate.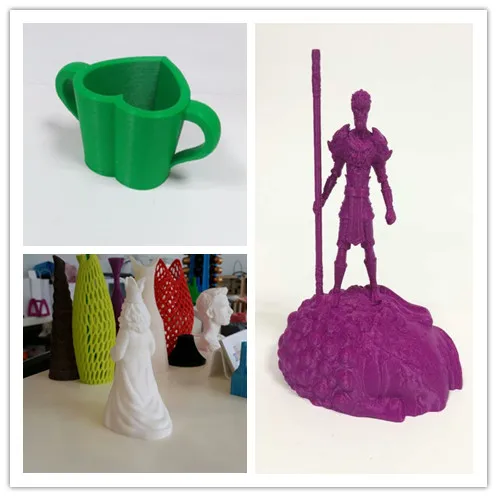 Bridging and overhangs often do not look so appealing, and PETG is not suitable for printing filigree parts. Sometimes the material pulls threads during printing (PETG Stringing).
These properties make it clear that anyone printing with PETG must process the surfaces after printing.
There are basically two ways to do this: The surfaces can be filed wet (i.e. warm and not yet completely cured), or the surfaces can be treated with dichloromethane.
This chemical is critical to handle, but it dissolves the PETG and can thus be used for polishing the surface. Subsequent smoothing of the printed parts is not easy, because the effort involved is great.
Therefore, the print settings should be made as carefully as possible: This saves a lot of work after printing.
First Remove the Supports
Before the surface of the print models can really be smoothed, the support structures must be removed.
This is not easy with a material as durable as PETG. If you work with two extruders and have the appropriate equipment available, you can of course print the support structures with a water-soluble filament and simply place your model in a water bath after printing.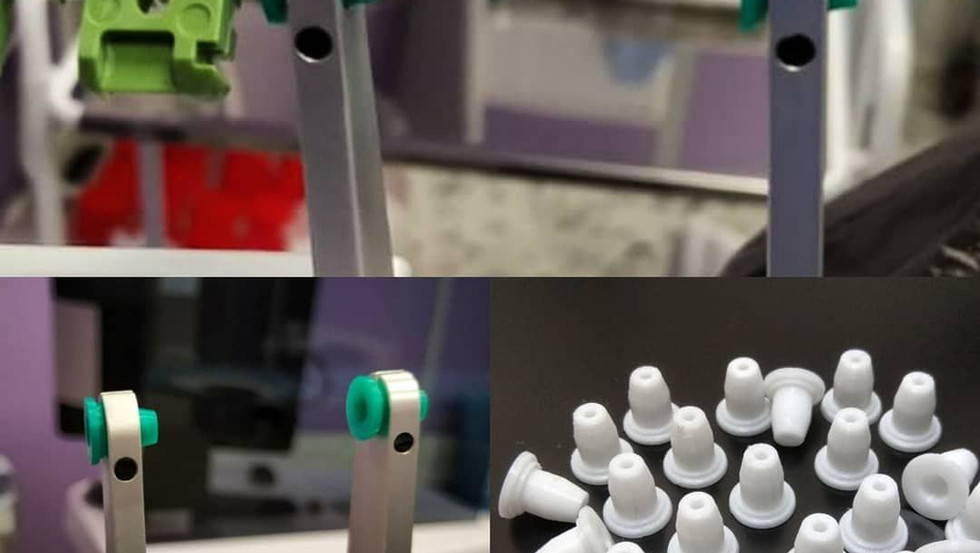
The supports then dissolve and are gone. However, this option is probably available to very few people.
All others carefully remove the support structures of PETG models with a scalpel. The material is very hard, so work must be done carefully and with great care.
Cutting PETG requires a lot of force. If you slip, not only the model may be ruined, but also your hand. Therefore, you should fix the print model for postprocessing and work with a steady hand, patiently and with the least amount of force possible.
It is normal that small irregularities remain visible after removing the support structures. These can be removed or concealed using various methods. Sandpaper is a good idea for easily accessible areas. Very fine files from model making or a nail file can also be helpful.
If there are still unevennesses or deeper cuts, you can fill them with paint.
PETG can be printed in color, but many crafters still finish the printed models with paints and varnishes.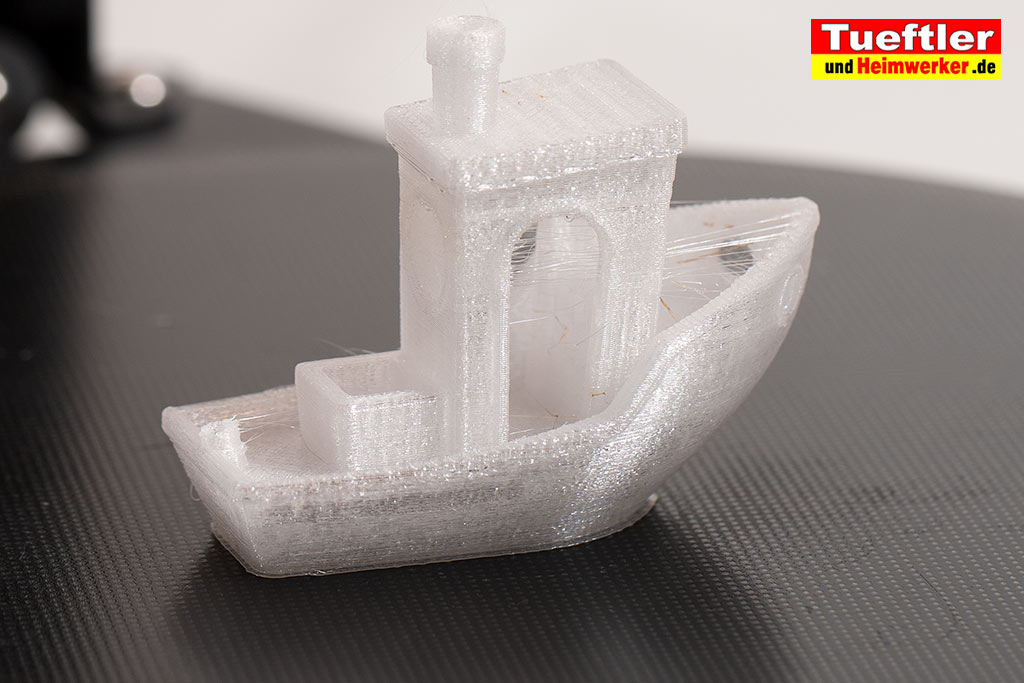 Finally, you can achieve a perfectly smooth and glossy surface by coating your model with a transparent epoxy resin*.
This means that after your printed part has cooled down, several surface treatment steps are necessary to ensure that your printed model looks really nice.
These are the things you should have ready:
- Cutter or scalpel
- Deburrer blades in various designs
- Side cutter or fine scissors
- various files and emery paper of different grain size
- the polisher from the manicure set or optionally a modified electric toothbrush (you can find building instructions on the Internet)
- a possibility to blow dust residues from the print model (strong hair dryer or similar)
- Brush, acrylic paints, maybe epoxy resin
- chemical resistant gloves
- Respiratory protection and safety goggles
Smoothing after Printing
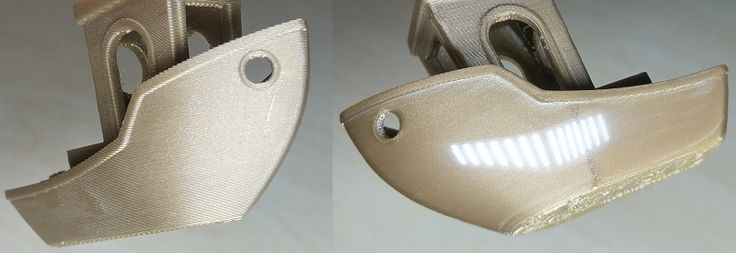
It is true that the surface of components made of PETG is already much smoother after printing than that of other filaments.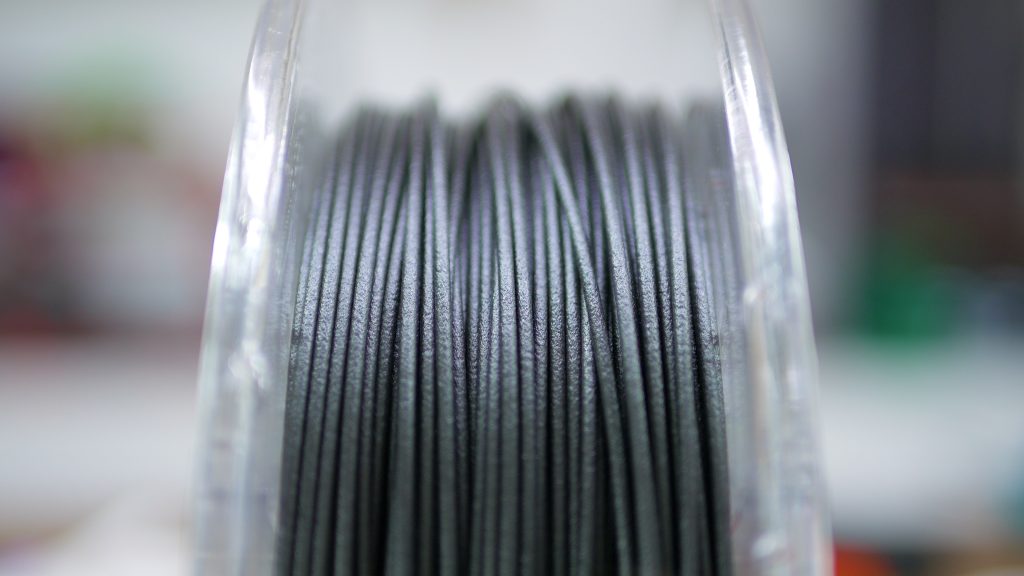
However, it is not perfect.
For a really smooth surface, you may need to sand it. However, you will get a better surface if you coat your print model with a glossy layer of transparent epoxy resin after it has cured.
The model then looks very high quality.
If you don’t want to mix your own epoxy, you can buy a special 3D printing epoxy*. The resin achieves incredibly smooth and even surfaces, but can simply make smaller details disappear due to its thick consistency.
Epoxy resin is transparent. This means that if the surface of your model is uneven, if printing layers are visible, they will remain so even after treatment with the epoxy resin. But you will no longer feel them because the resin covers them.
For other filaments (ABS*, for example), it is often advised to smooth the surface with acetone (ABS Smoothing Guide).
This does not work with PETG, because the solvent cannot harm the PETG. And this also applies to the other solvents that are commonly used in 3D printing to smooth surfaces.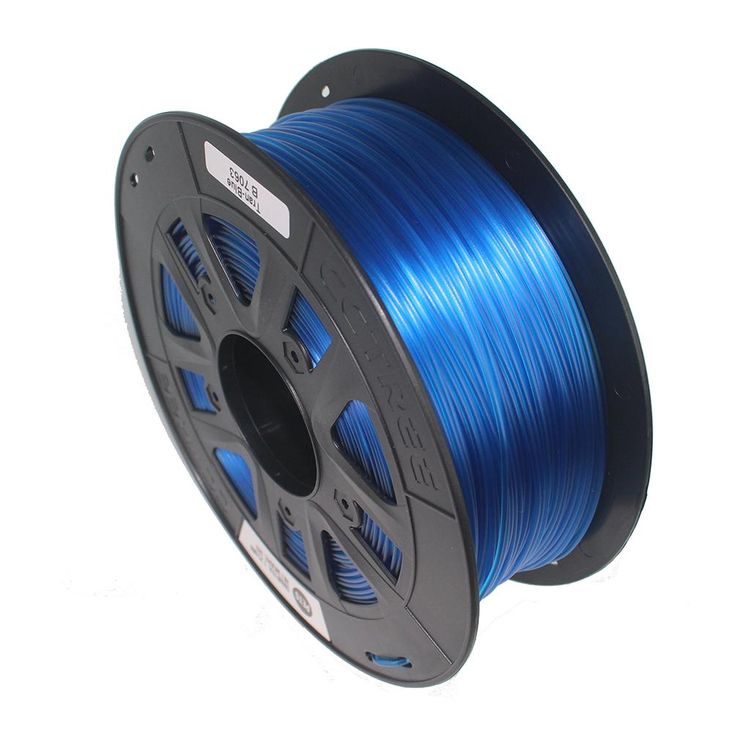
Fill Small Gaps with Paint
PETG prints can be colored and painted with acrylic paint*.
In the case of small models from the 3D printer, this is usually done with a fine brush. If the surface of the model is very uneven or if there are noticeable dents somewhere in the printed image, these impurities can be evened out with acrylic paint.
This will remove dust and grease from the surface of the print model. For a beautiful color result, a primer should be applied. Only then is the paint applied with a brush.
It may be necessary to apply a second or even a third coat of paint until the surface looks really smooth. This should always be done after the layer underneath has already dried.
Filing after Printing
The usual way here would be to reach for sandpaper. In the first pass, a coarser grit should be used, then it becomes finer and finer.
You rub your print model with the paper again and again until the surface meets your expectations.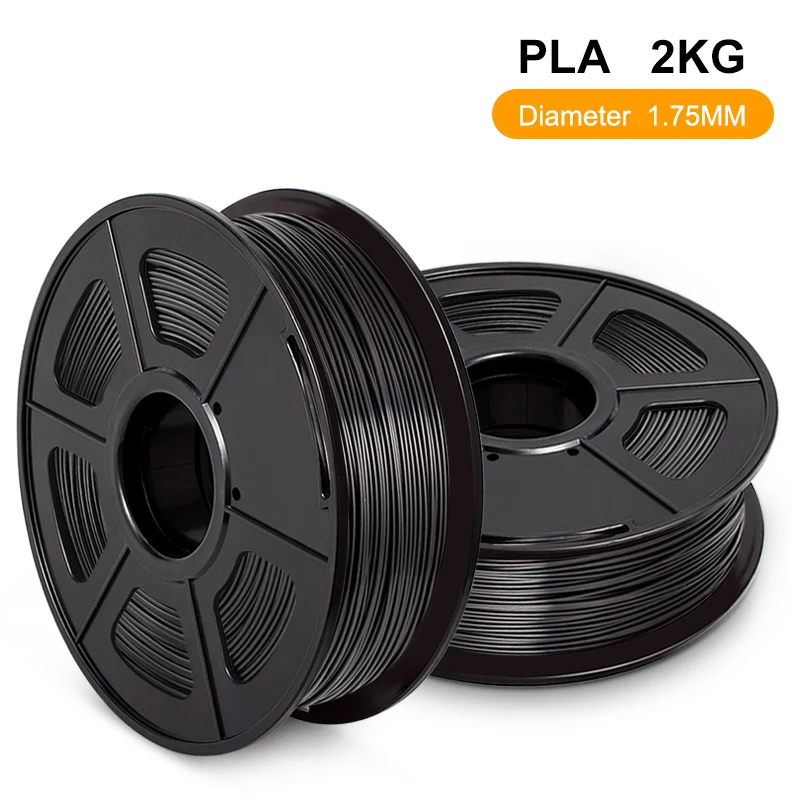 It is somewhat easier if you have a lathe at hand or can work with a small grinding machine.
Resourceful people have also already misused the manicure set with the small polishing machine for the fingernails. That works quite well. Which grinding or polishing attachment you use depends on how precisely you want to shape the surface.
A hard felt pad might work, but the coarser grit attachments do more damage than good.
For a clean result when sanding, it is important that the print model is fixed. A workbench with a vice works just as well as an improvised jig.
If you work with tools instead of sanding by hand, you should pay attention to the skin of your hands: It also reacts to sandpaper and polishing attachments! Perhaps you can work with gloves to keep the damage within limits.
The disadvantage of grinding is that PETG chips and fine plastic dust are released. You should not necessarily inhale these particles. It is better to work with respiratory protection.
Protect your eyes with chemical goggles*. The finishing process is somewhat less dusty if you use fine wet sandpaper*.
In grit sizes of 600, 800 and 1,200, the paper is available in DIY stores, while finer versions tend to have to be ordered on the net.
PETG can also be processed well with damp sandpaper, which provides you with a relatively clean and, above all, safe method. However, think carefully about where and how you dispose of the water after sanding, because it contains large quantities of microplastics.
Since PETG is very susceptible to scratch marks, you should not use very coarse sandpaper for the first revision. Grits of 60, 80 or 120 are more likely to destroy your print model than to give you a smooth surface!
Smoothing with a Polishing Machine
3D printing fans are known for designing and printing out their own tools when in doubt. Therefore, it is not surprising that a small polishing machine for smoothing PETG print pieces is described online.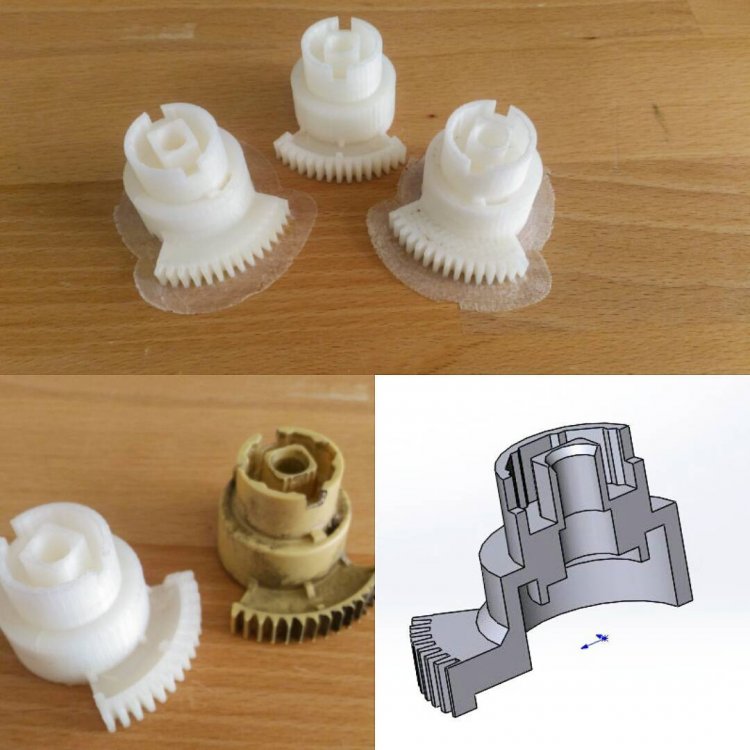
At Techdroid, for example, the exact building instructions for such a polishing machine are available as well as the corresponding parts list, a circuit diagram, the Arduino base code and all other information.
The entire polishing machine consists of a small, rotating roller on a very minimalist support structure including motor. The device is operated similarly to the small grinders that you can get inexpensively in pedicure or manicure sets.
3D printing fans wouldn’t be what they are if they hadn’t found another solution: With a little skill and imagination, an electric toothbrush can also be modified so that you can use sandpaper to smooth your PETG model.
Depending on the model and building instructions, the head will be so fine that you can get into smaller interiors and work out the details on edges.
In the craft sector, for example for the fine processing of stone sculptures, there is also the right device. However, the local hardware store tends not to have these devices in stock.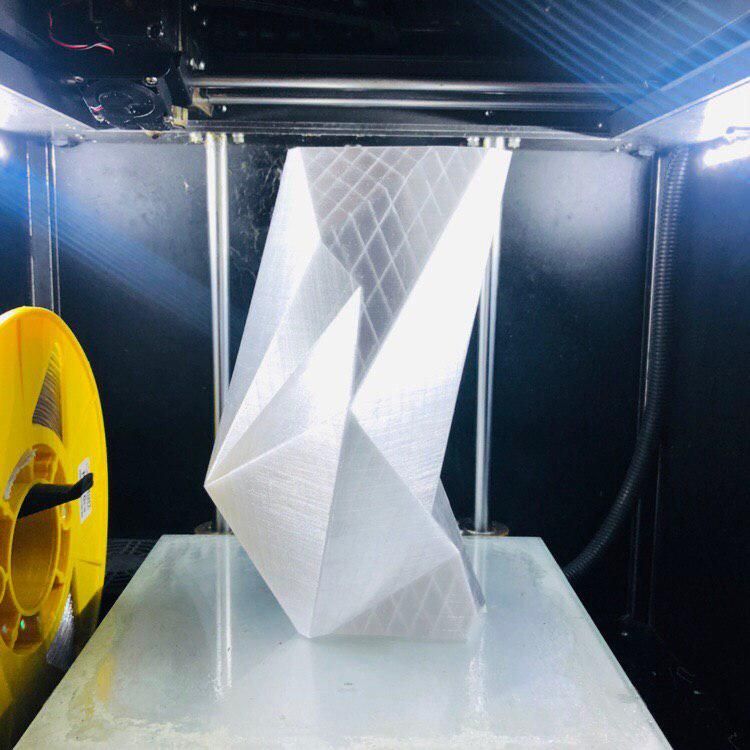
What also speaks against it is the price: Such special (usually very high-quality) tools are not exactly inexpensive. If you just want to play around with PETG and try out the material, it’s not worth buying a professional tool.
Finishing with Spray Paint and Polyurethane
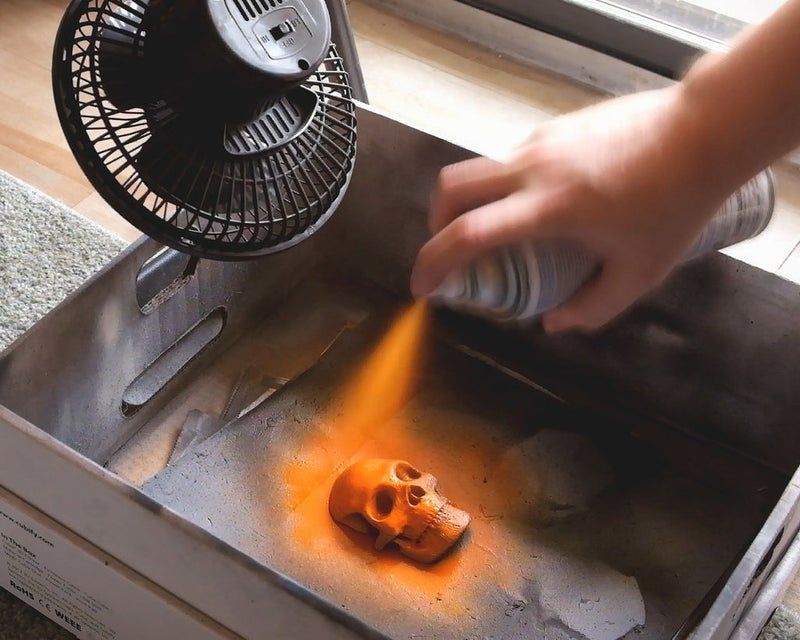
If you want your print model to have only one color, you have another option for surface finishing. You can apply paint with a spray can*.
The advantage of the spray can is that, with a little skill, a very even paint result is achieved and paint noses and accumulations in hollows do not form as easily as when working with a brush.
Before the spray paint is dry, apply a layer of polyurethane (also as a spray*). The model should now be placed in front of a fan so that the paint does not run down completely.
The two sprayed substances mix and run into the grooves and irregularities of the model. The advantage: You can apply very thin layers of paint and varnish, so even the finest irregularities are evened out.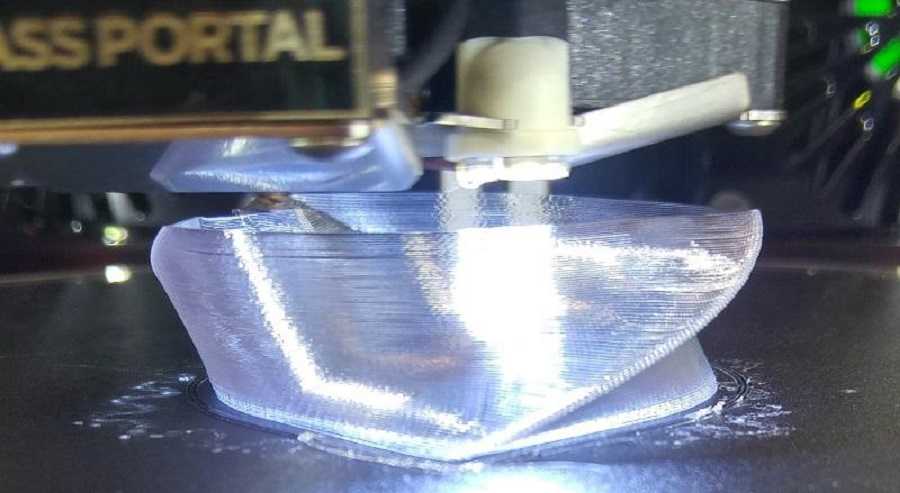
If the model is still not satisfactorily smooth after one pass (and at least 20 minutes of drying, more likely a day), repeat the process.
This way you can apply several very thin, fine layers of paint and varnish until your model is really as smooth as you want it to be.
And of course you can also deliberately provoke color effects in this way: If you apply each layer in a different shade, the colors mix visually. The polyurethane varnish then fixes the colors.
However, it is not easy to control these mixing effects – it takes practice and experience.
Dichloromethane
Dichloromethane is suitable as a solvent for PETG. However, the material is dangerous like chloroform and can only be purchased at all with an appropriate permit. The chemicals may also only be used by appropriately trained personnel with sufficient experience.
Also known as methylene chloride, dichloromethane has been used for about 60 years as a solvent for stripping paints and varnishes and resin compounds.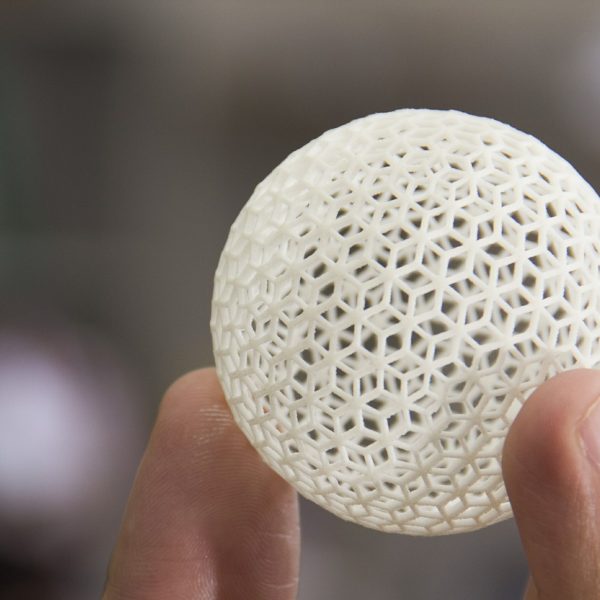 It is extremely flame retardant in air and has long been considered a safe substitute for other solvents.
However, you should work with dichloromethane if you wear personal protective equipment and ensure adequate ventilation of the premises.
Nearly 800 incidents and fatalities associated with dichloromethane are known today. In most cases, the accidents were fatal when ventilation was not adequately provided, personal protective equipment was not (or only partially) worn, and higher exposure occurred as a result.
If you are exposed to the chemical dichloromethane even for a short time, it already affects your nervous system. Visual, auditory and motor functions deteriorate relatively quickly – this can be described as a kind of paralysis of perception and movement.
As soon as the dichloromethane is removed from your environment, your body will recover – but you may not be able to take care of it yourself. Therefore, the handling of dichloromethane in the hobby sector is seen as extremely critical.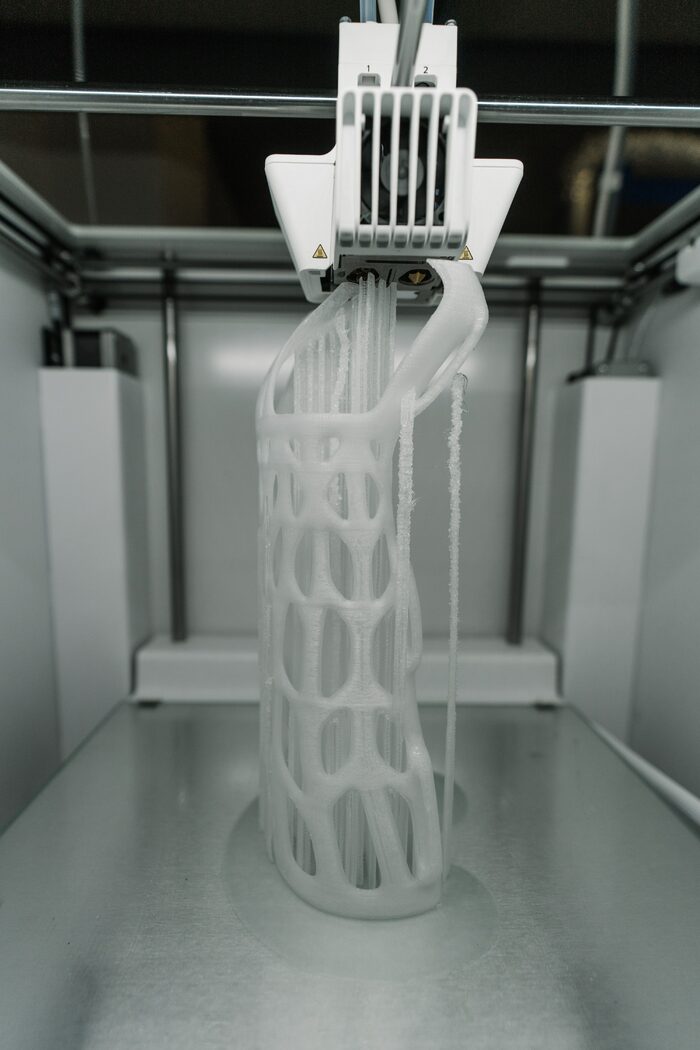 In a nutshell: It is forbidden in most countries to sell and use paint strippers containing DCM – with the exception of appropriately inspected laboratories.
It is prescribed that the chemical must firstly not escape into the ambient air and secondly that the workplace must be extremely well ventilated in order to protect the people present from damage to their health caused by the chemical.
There’s a contradiction in that if you want to implement this at home – that’s why we advise using an appropriate service provider.
Dichloromethane is not applied directly to the surface of the printed part. This also works, but the result is not satisfactory. It is better to expose the PETG component to the vapors of dichloromethane for a short time. This is because PETG dissolves in dichloromethane. A bath in the chemical is therefore also not expedient.
If for some reason you are allowed to buy dichloromethane and do so, too much caution in handling the chemical is advised.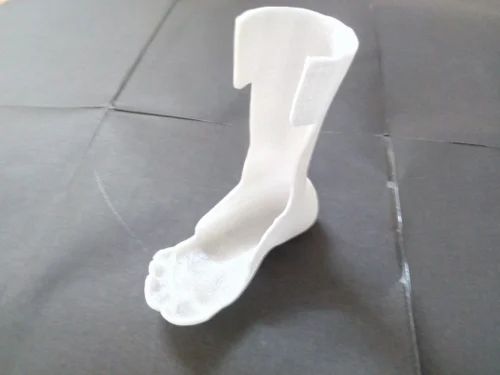 With relatively simple measures you can build a steam bath for your printed parts.
Excursion: Building a Dichloromethane Steam Bath Yourself
Treating PETG surfaces with a brush soaked in dichloromethane will not completely smooth the surfaces.
It also consumes a large amount of the chemical. White spots may appear on the surface of your print. With some prolonged contact, the print will warp and bend.
But you want to work sparingly, because firstly, dichloromethane is not entirely harmless to your health, and secondly, it is a question of cost. Ideally, you should use only a little dichloromethane at a time.
You need a transparent PP (polypropylene) box for the steam bath. Such plastic boxes can be purchased inexpensively at IKEA, for example.
Important: Make sure which plastic the box is made of! A box made of PETG would dissolve in a dichloromethane steam bath. A box made of ABS or ASA would dissolve in an acetone steam bath.
As someone a little more experienced with 3D printing and the respective materials, you know that you can surface-smooth your ABS/ASA models in an acetone steam bath.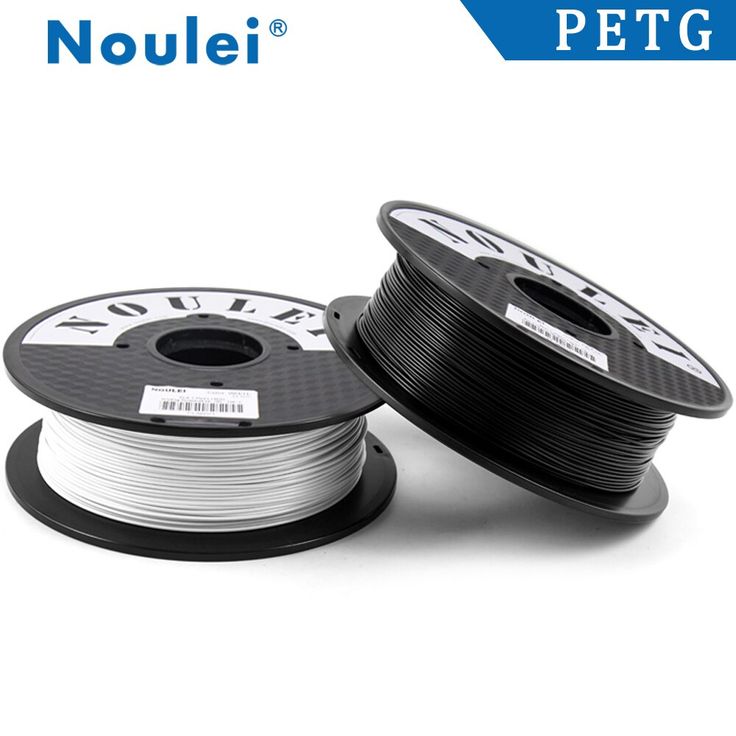
If you buy such a box, you want to use it for both the ABS/ASA models and the PETG models. Therefore, PP is the right choice in terms of material. It has proven useful to always have several boxes in different sizes and shapes in stock, so that several models can relax in the steam bath at once.
Inside the box, create a raised platform. This can be a pane of acrylic glass on an empty cardboard box, but a metal plate with an empty tin can underneath will also do.
To make the dichloromethane vapors waft through the box and around your print model on the platform, soak napkins, paper towels, or pieces of toilet paper in the liquid so that they absorb some of it.
Dripping wet would be unfavorable, you should be able to place the cloths in the container without spilling. If you are working with acetone to smooth your ABS/ASA models, you should of course proceed in the same way.
A good number of such cloths is sufficient to smooth smaller models. Even better results can be achieved if you install a small fan in the lid of the box, which evenly circulates the vapors in the box. It is important that the dichloromethane remains in the box, so the fan sits on the inside of the unpierced lid!
With large models, the result can be uneven with such a setup. This is because the vapors tend to collect at the bottom of the container, so that the surfaces of your model at the bottom become nice and smooth, but the superstructure just below the lid of the box does not get much.
In this case, it is advisable to use a so-called smoothing station such as the Polymaker Polysher or the Zortrax Apoller. However, these tools are quite expensive. These smoothing stations work with heat, because experience shows that the surfaces smooth out somewhat faster when heat is applied.
If you use your own construction, you should absolutely refrain from supplying heat! Dichloromethane volatilizes very quickly in the air and can lead to health problems when inhaled – this happens even faster when heat is added. And acetone is explosive
Conclusion
Prints made from PETG can also be given a wonderfully glossy surface.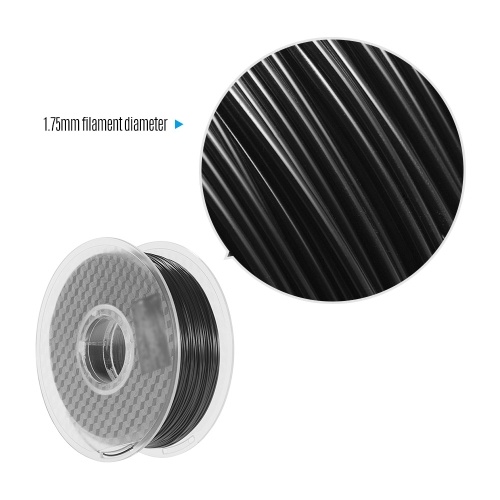 However, the post-processing in several steps is somewhat time-consuming.
PETG is a very hard material that does not make it easy for you. So you need not only the appropriate equipment and some skill, but also patience. If you choose the print settings very carefully and balance quality and print speed very much in favor of quality, you can save yourself a lot of effort in post-processing.
As a very hard and durable material, PETG is a good choice especially for the coverings of technical devices and the like. For example, if you print a cover for your 3D printer or a small toolbox yourself, extensive surface processing is not necessary.
Because these functional parts don’t have to win any beauty contests – they are just functional. The situation is different for parts with mechanical functions: Here, a smooth surface is necessary for proper function.
Disclosure: This website is the property of Martin Lütkemeyer and is operated by Martin Lütkemeyer. Martin Lütkemeyer is a member of the Amazon Services LLC and other Affiliate Programs.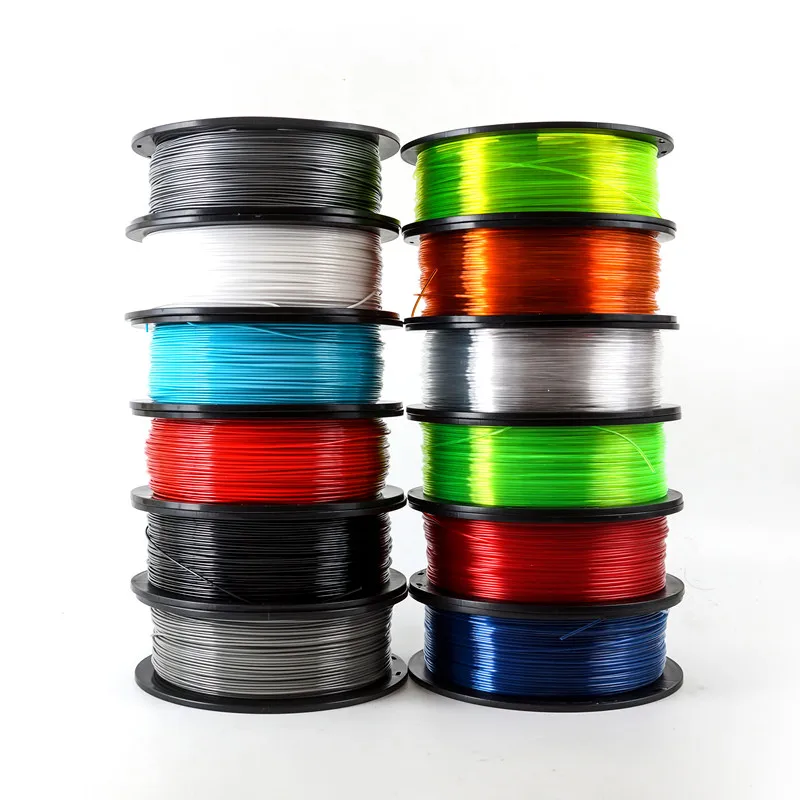 These are affiliate advertising programs designed to enable websites to earn advertising revenue through advertising and linking to Amazon.com and others. Links marked with * are affiliate links.
5 Best PETG Smoothing Methods
3D printing with PETG filaments is a dream. You get the best of both PLA and ABS: PLA’s easy printability and ABS’ durability and heat resistance while also having flexible properties.
The only drawback to it is that it is difficult to smooth PETG. Since it’s chemically resistant, typical post-processing methods will not work on it. Instead, you will have to use different methods and chemicals with it. Here are the 5 best ways to smooth PETG.
1. Sandpaper
While PETG has chemical properties that elude other chemical smoothing methods, the old trick of sanding it down still works on it. If your 3D print has support marks, zits, and visible layer lines, you can buff them away by sanding. What makes this method difficult though is when your 3D print is huge or intricate.
Tip: Start with low-grit sandpaper and work your way up to higher grit as you sand. You can also use water while using high-grit sandpaper as this is less abrasive and reduces the risk of over-sanding your print. It also results in a smoother finish. Make sure to sand in an even, circular motion.
2. Polishing
This is the next step after you sand your 3D print. If you want a glossy finish, you can apply a liquid metal polish. Be forewarned though that this process is recommended only for tougher parts.
Tip: You can start by pouring a small amount of polish on a soft cleaning cloth. You can then rub the cloth all over the part until the polish is absorbed. Take a dry part of the cloth or get another cleaning cloth and then buff the surface until it’s shiny.
3. Chemical dissolving
PETG’s composition makes it difficult to dissolve by typical dissolvents used in 3D printing such as acetone. Fortunately, there are stronger chemicals that work but require special permission to purchase, a high level of chemical handling skill, and protective gear to ensure safety. So use them at your own risk.
Ethyl acetate, dichloromethane, methyl ethyl ketone (MEK), toluene, and cyclohexanone all work to dissolve PETG.
4. Epoxy resin coating
If you don’t have the time to manually sand and polish and don’t want to risk using chemicals, you can conceal imperfections on your 3D print by coating it with epoxy resin.
The process varies depending on the brand of epoxy resin you buy. Check the manufacturer’s instructions for application tips.
5. Heat treatment
PETG’s high heat resistance is an invaluable feature when being post-processed as it can be smoothed down with a heat gun as long as it has precise temperature control. It also has to be set close to PETG’s melting point of 250 °C or so.
Applying heat treatment on your PETG prints melts the top layer to remove any visible layer lines and gaps in the surface.
Tip: The heat must be applied consistently and slowly throughout the surface. To prevent ruining your 3D print, start with a lower temperature and maintain a safe distance between the heat gun and the 3D print.
Get smoother 3D prints with our PETG smoothing tips!
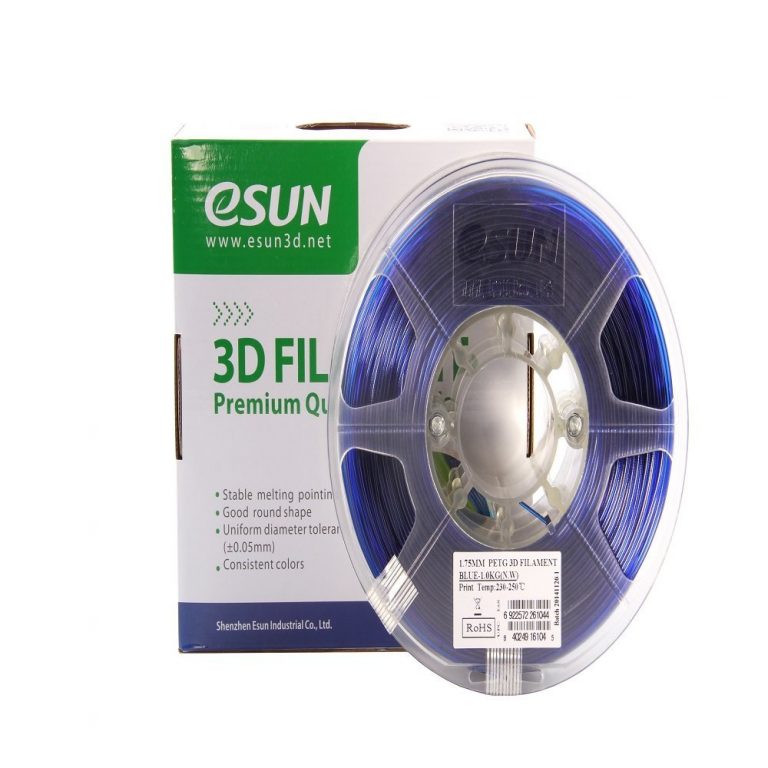
Getting smoother PETG 3D prints still depends on the kind of PETG filament you use. Check out our range of high-quality PETG 3D filaments to get high-quality 3D prints. To find out more about printing with PETG, check out our how-to guide.
How to smooth PETG prints
Author Kirill Sokolov Reading 10 min. 468 views Posted by
After the ever-popular ABS and PLA filaments, PETG is probably the third most widely used material in desktop 3D printing. Simply put, PETG combines the best properties of ABS and PLA to create a durable, heat-resistant material that is easy to work with. However, PETG's unique characteristics also make smoothing it more difficult. What makes PETG so special? What is the best way to smooth out a PETG print?
Contents
- What is PETG?
- Characteristics PETG
- 1.
 The strength and impact resistance
 - 2. Chemical resistance
- 3. Thermal resistance
- 4. Ease of use
- 5. Printing without a smell
- Petg
- 1. Grounding
- 2. Sanding with polishing paste
- 3. Heat treatment
- Smoothing with solvents and why it is not recommended
- Why smoothen your PETG prints anyway?
- Final thoughts
What is PETG?
PETG is a variant of polyethylene terephthalate (PET) and is one of the most widely used plastics in the world. Nowadays, you can probably see PET everywhere - in water bottles, food containers, and even in some clothing fabrics. It has become extremely popular due to its high mechanical strength, moisture resistance and resistance to extreme hot and cold temperatures. Due to these characteristics, PET has become widely used in the food industry and as a precursor to technical resins.
Modification in PETG occurs with the addition of a glycol group during the polymerization process, making PETG the "glycol modified" version of PET. The addition of glycol makes PETG slightly more flexible, less brittle, more transparent, and easier to handle. PETG is also excellent for printing and especially suitable for laminating, making it one of the most preferred materials for outdoor signage, electronic devices, medical and food containers, shop fittings, prostheses, and credit or gift cards.
Characteristics of PETG
PETG has a set of characteristics that easily distinguish it from other filament materials. Combining the best properties of PLA and ABS
1. Strength and impact resistance
The addition of a glycol group to the PET polymer chain gives PETG flexibility, which allows it to better absorb sudden impacts or sustained pressure. This characteristic is unique to PETG and is one of the few areas where it outperforms ABS and PLA. In terms of durability, ABS is only slightly ahead of PETG. While PETG prints are also very durable, their scratch resistance is not quite up to ABS standards.
2. Chemical resistance
The chain that defines the PETG polymer is laced with ring structures and double bonds that give the polymer its characteristic chemical resistance. This makes PETG resistant to degradation upon contact with alkalis or acids, including solvents. While the chemical resistance of PETG is one of its most desirable characteristics, it is also one of the reasons why smoothing out PETG prints is challenging. Since PETG is dissolved with a solvent, smoothing by applying a solvent (for example, smoothing with acetone for ABS) is not a good option.
3. Heat resistance
PETG prints at around 230°C, slightly lower than ABS but much higher than PLA. This makes PETG an excellent filament material choice for prints that need to be exposed to heat. While its heat resistance is still slightly lower than ABS, its high melting point makes it an alternative worth considering. In fact, PETG's heat resistance has made it one of the main materials for medical equipment that needs to be autoclaved.
The addition of glycol groups to the PETG chain makes it difficult for the polymer to crystallize when exposed to high temperatures. This means that PETG is not prone to heat embrittlement, and this property has made PETG a good material for outdoor signage and home fittings.
4. Ease of use
PETG offers the benefits of durability and heat resistance without the complex printing of ABS. When cooled, PETG undergoes very little shrinkage, so warping won't be that much of an issue. PETG also has excellent layer adhesion resulting in longer lasting prints and easier first layer adhesion to the build platform. PETG adheres so well that it's considered a terrible material to create support structures because it's the hardest to remove.
5. Odorless printing
Another property of PETG that makes it better than ABS is that it prints without an unpleasant odor. The smell that comes with printing with ABS is one of the most undesirable characteristics, and PETG offers an easy solution.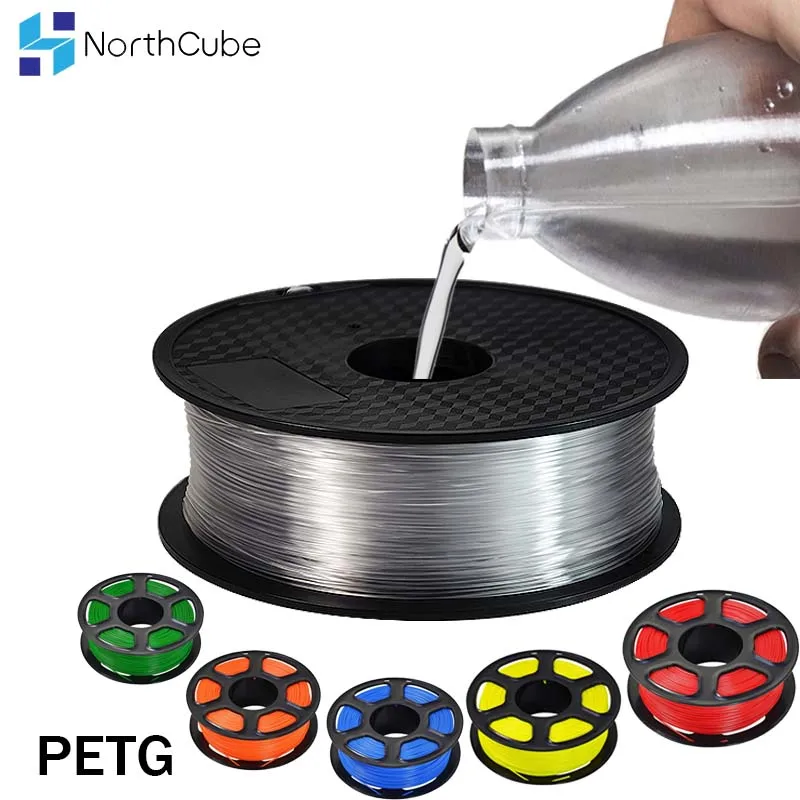
The characteristics of PETG highlight why many 3D printing professionals consider it a "bridge" material. between PLA and ABS. It offers a comparable level of strength, heat resistance and chemical resistance to ABS, but is just as easy to handle as PLA. Many users consider PETG to be "the best of both worlds" - a material they can use when they want to get a quality print without resorting to a complicated printing process.
Anti-aliasing methods for PETG
However, the same characteristics that make PETG a very popular material also make PETG print anti-aliasing a bit more of a challenge. Since PETG is more flexible than it is brittle, sanding out irregularities on its surface is not as easy as it is with PLA. The chemical resistance of PETG also means that smoothing with controlled solvent application is not an option. If you want to create perfectly smooth PETG prints, what are your options?
1. Sanding
Although sanding a PETG print is a bit more difficult than a PLA print, sanding smoothing is not a completely useless option. In fact, the process of sanding a PETG print is very similar, although a bit more complicated and time consuming.
When sanding a PETG print it is best to have a set of sandpaper with different grit sizes. Start by using the coarsest sandpaper to quickly remove the layer lines that are most visible in the final print. 200 grit paper is recommended for the first step. When you are satisfied with the results, you can move on to a coarser grit. This may require several steps if you really want a professional finish. We recommend a sequence of 400, 600, 800, 100, 1500, 2500 and up to 3000 grain sizes.
Please note that when sanding the PETG print, the circular sanding motion must be maintained. so that there are no visible lines in the print due to the direction shift. The sanding process can be accelerated by using the wet sanding method, which uses slightly damp sandpaper to remove loose particles from the outer surface of the print. Please note that for wet sanding you will need waterproof sandpaper. We recommend the 3M Wetordry Sandpaper Set, which includes a set of all the grit sizes needed to achieve a perfectly smooth PETG print.
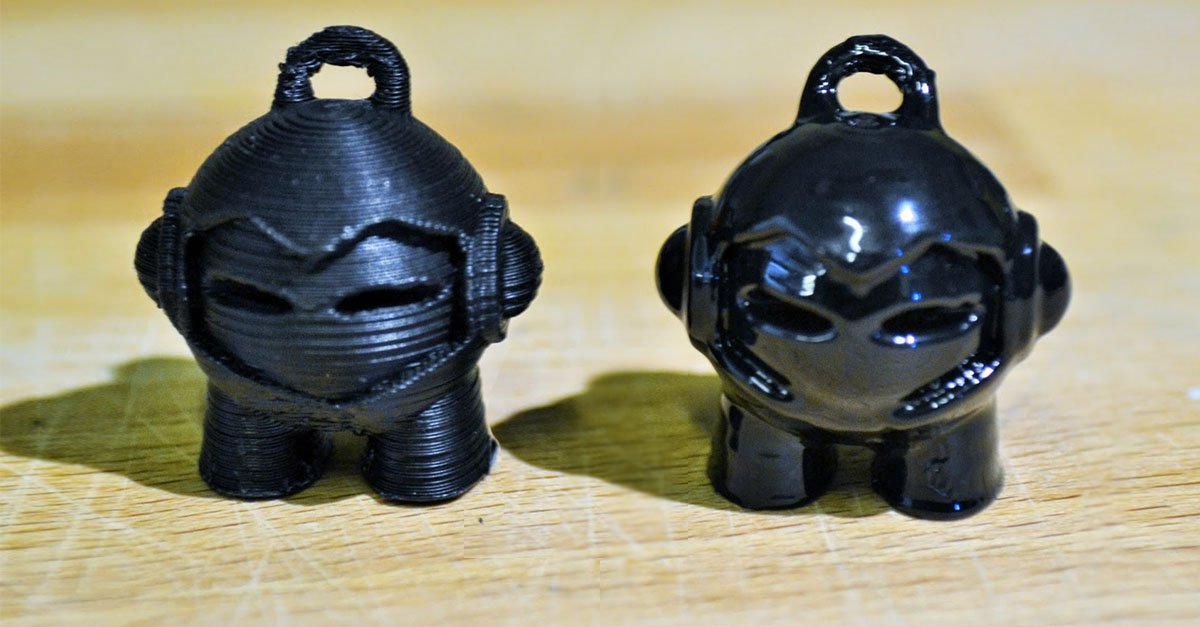
2. Sanding with polishing paste
Even with the best efforts, it is simply impossible to get rid of the microscopic lines of the layer with sandpaper alone. The key to getting a smooth surface, even at the microscopic level, is to fill these gaps with the right polishing compound. You can use a metal polishing solution such as 3D One Polishing Finishing Compound or a solid wax based compound such as BeaverCraft's Polishing and Buffing Compound.
To use polishing compound, simply apply a small amount of compound to a soft cotton cloth and rub it into the print in a firm circular motion. The composition will fill the voids on the surface of the print. Then the imprint must be polished by wiping the surface with a piece of cloth that has not been treated with polishing paste. The improvement in the finish of your print should be obvious. The polishing paste can be reapplied and polished again to further improve the quality of the print until you are satisfied. With a little patience, you can achieve a mirror-like finish with a simple sanding and polishing.
3. Heat treatment
The heat resistance of PETG means that heat treatment smoothing will be very energy intensive, but it is possible. To do this, you will need a heat gun with very precise temperature control. Since the recommended temperature for heat treating a PETG print is very close to the melting temperature of PETG, the slightest mistake in temperature settings can ruin your print very quickly.
The purpose of heat treatment is to melt a very thin layer of material onto the surface of the PETG print. Done right, this results in layer lines melting and gap filling, even at the microscopic level. However, smoothing by heat treatment can also fail very easily. Excessive heat may result in distorted detail or a "wavy" surface finish..
Smoothing a print with a heat gun relies on a continuous and smooth movement to produce consistently good results. Easier said than done. If you are inexperienced with a heat gun, we recommend lowering the temperature settings to around 240°C so as not to permanently damage your print. Heat treatment at a lower temperature may be slower, but it is more forgiving of small errors.
Solvent smoothing and why it is not recommended
There are several user reviews of the possibility of smoothing PETG prints with solvents. There is no specific consensus on which solvents are best for smoothing PETG, but there are a few names that are more common, namely MEK (methyl ethyl ketone), toluene, and cyclohexanone.
The difficulty in flattening PETG using these solvents is that they are all highly regulated for different reasons. Toluene may sound familiar, if only because it is one of the main components of a very common explosive material. Both MEK and cyclohexanone are regulated because they are considered precursors in the illicit manufacture of certain illicit drugs.
In any case, none of these solvents is as harmless and available as acetone.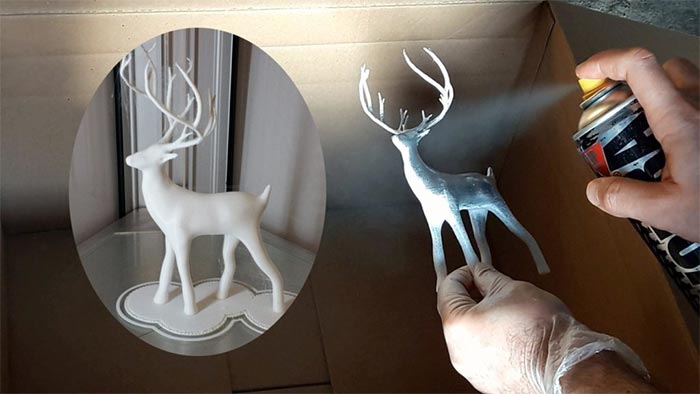 Unfortunately, acetone has absolutely no effect on PETG.
The difficulty of obtaining these solvents, as well as the risks associated with them, are the main reasons why the practice of smoothing PETG with solvents has not become widespread. The rewards are simply not worth the risk and effort, which is why we recommend sticking with the tried and true methods we detailed above.
Why smoothen your PETG prints anyway?
Fused Deposition Modeling (FDM) prints are inherently layered with layer lines, resulting from an individual layering process. Although this drawback is simply inevitable, the print, which still shows the lines of the layers, creates an amateur atmosphere. Whether intended for rapid prototyping or more creative pursuits, professional 3D prints require a smoother, more polished surface. The smoothing of the PETG print allows it to visually stand out and give it an aesthetic that complements its excellent durability and heat resistance.
Final Thoughts
PETG is one of them. filament materials favored by the 3D printing community, and it's easy to see why. Like PLA, it is very easy to work with but has almost the same durability and heat resistance as PLA. It also has unique chemical resistance, which has made it a popular storage material for weakly acidic or alkaline compounds. However, the chemical resistance of PETG also means that it cannot be smoothed out with chemicals such as the acetone vapor bath used for ABS.
If you want to smooth out the PETG print, you're going to have to go back to the basic approach. If you are a beginner, we recommend going through the path of grinding and polishing. This is a slow and deliberate process, so there is very little chance of making a fatal mistake. It also does not require great skills, but requires an investment of time and effort. Even with this simple method, you can achieve a mirror-like sheen on a PETG print.
You can also smooth out the PETG imprint with a heat gun. This method requires less time and effort, but can easily fail without the proper technique. A heat gun is also very expensive compared to a set of sandpaper and polishing paste.
Your measurements may vary, but either method can produce perfectly smooth PETG prints. Although there are users who successfully smooth with solvents, we do not recommend these methods. We'd rather stick with tried and tested methods for now.
Attention! Never leave 3D printers unattended. They can pose a fire safety hazard.
Post-processing of 3D printed parts (PLA, ABS, SBS, PETG)
Table of contents
- Removal of supports
- Removing Soluble Supports
- Sanding
- Cold welding
- Filling voids
- Polishing
- Priming and painting
- Pair smoothing
- Epoxy coating
- Metallization
Introduction
FDM technology is best suited for rapid, low-budget prototyping. Layer lines are usually visible in FDM prints, so post-processing is essential if a smooth surface is to be achieved. Some post-processing techniques can also make a print more durable by changing the degree of its elastic properties, density, structural and textural features.
In this article, we will discuss the most common post-processing techniques in FDM.
Post-processed FDM prints (left to right): cold welded, void filled, raw, sanded, polished, painted and epoxy coated. Photo 3dhubs.com
Removing supports
Removing supports is usually the first step in post-processing for any 3D printing technology that uses them. In general, props can be divided into two categories: standard and soluble. Unlike other post-processing methods discussed in this article, the removal of props is mandatory and does not result in improved surface quality.
Initial printout with props, poor prop removal, good prop removal. photo 3dhubs.com
Removal of standard supports
Tools
- Wire cutters, needle nose pliers, tongs
- Toothbrush, brush
| Finishing | ★ ☆ ☆ ☆ ☆ |
| Approvals | ★ ★ ☆ ☆ ☆ |
| Speed | ★ ★ ★ ★ ☆ |
| Suitable for | all thermoplastics FDM |
Process
Normally, backups come off the printout without problems, and hard-to-reach places (such as holes or cavities) can be cleaned of backup material with an old toothbrush. Proper placement of support structures and correct print orientation can significantly reduce the negative impact of supports on how the final printout will look.
Pros
- Does not change the overall geometry of the part.
- The process is very fast.
Cons
- Does not remove layer lines, scratches or other surface defects.
- If excess material or marks remain from the support structure, print accuracy and appearance suffer.
Dissolvable Support Removal
Instrumentation
- Solvent resistant container
- Thinner
- Ultrasonic cleaner (optional)
| Finishing | ★ ★ ★ ☆ ☆ |
| Approvals | ★ ★ ☆ ☆ ☆ |
| Speed | ★ ★ ★ ★ ☆ |
| Suitable for | all thermoplastics FDM |
Process
Soluble support standard materials are removed from the printout by immersing it in a reservoir of the appropriate solvent.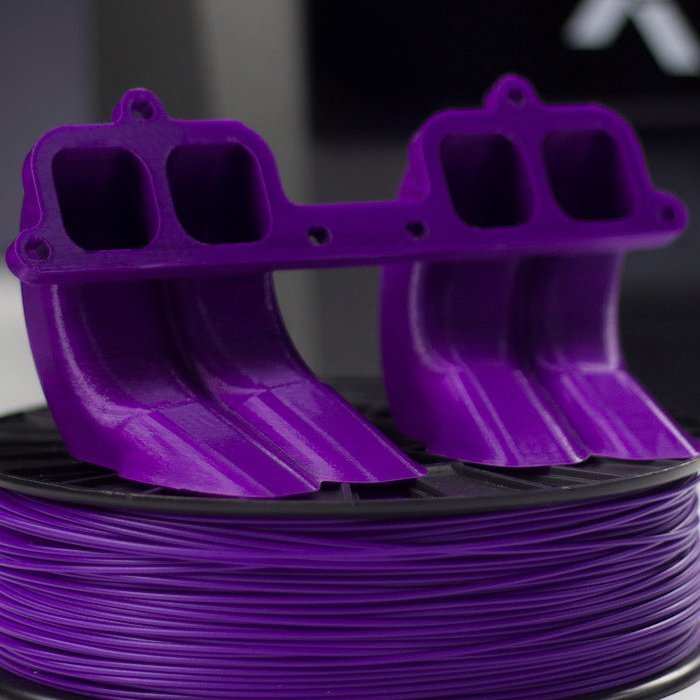 Supports are usually printed:
- HIPS (usually with ABS)
- PVA (usually with PLA)
A glass container like a preservation jar is fine. Any non-porous vessel is suitable for water treatment. To quickly remove props from HIPS/ABS printouts, you will need a solution of equal parts D-limonene and isopropyl alcohol. Many other support structure materials such as PVA (with PLA) dissolve in normal water.
Pro Tips
Use an ultrasonic cleaner to shorten the solution time and change the solvent as it becomes saturated. A warm (not hot) solution works faster - heating is useful if there is no cleaner.
Pluses
- Complex geometry is allowed for which the standard method of removing props is not possible.
- Smooth surface at the support points.
Cons
- Improper dissolution of the props can cause discoloration and skewed printouts.

- Does not remove layer lines, scratches or other surface imperfections.
- May cause small holes or holes if soluble material seeps into the object during printing.
Cleaning with a skin
SHID SHIP SHIP ABS ABS ABS PROBECTION
Instrumentation
- EVERTICAL PREASE with grain
on 150, 220, 400, 600, 1000 and 2000 222222 - Wiping cloth
- Toothbrush
- Soap
- Face mask
| Finishing | ★ ★ ★ ★ ☆ |
| Approvals | ★ ★ ★ ☆ ☆ |
| Speed | ★ ★ ☆ ☆ ☆ |
| Suitable for | all thermoplastics FDM |
Process
After the props have been removed or dissolved, sanding can be done to smooth the part and remove any obvious defects such as blots or marks from the props. Which sandpaper to start with depends on the thickness of the layer and the quality of the print: for layers of 200 microns or less, or for prints without blotches, you can start with sandpaper at P150. If there are blobs visible to the naked eye, or the object is printed with a layer thickness of 300 microns or more, stripping should begin with P100.
The process can be continued up to P2000 grit (one approach is to go to 220, then 400, 600, 1000 and finally 2000). Wet sanding is recommended from the very beginning to the very end - this will avoid excessive friction, which can lead to an increase in temperature and damage the object, as well as contaminate the sandpaper itself. Between sanding, the printout should be cleaned with a toothbrush and washed with soapy water, then wiped with a cloth to remove dust and prevent it from sticking together. Even P5000 can be sanded to achieve a smooth, shiny FDM part.
Pro Tricks
Always sand in small circular motions - evenly over the entire surface of the part.![]() It may be tempting to sand perpendicular to the layers, or even parallel, but this can lead to gouges. If the part is discolored or has a lot of scratches after sanding, it can be heated a little to soften the surface and allow some defects to smooth out.
It may be tempting to sand perpendicular to the layers, or even parallel, but this can lead to gouges. If the part is discolored or has a lot of scratches after sanding, it can be heated a little to soften the surface and allow some defects to smooth out.
Pros
- An exceptionally smooth surface is obtained.
- Further post-processing (painting, polishing, smoothing and epoxy coating) is greatly facilitated.
Cons
- Not recommended for double or single shell parts as sanding may damage the printout.
- The process is difficult in the case of sophisticated surfaces and the presence of small details in the object.
- If the grinding is done too aggressively and too much material is removed, the appearance of the part may be affected. Acetone for ABS. Dichloromethane for PLA, ABS
- Sponge Applicator
| Finishing | ★ ★ ☆ ☆ ☆ |
| Approvals | ★ ★ ☆ ☆ ☆ |
| Speed | ★ ★ ★ ★ ★ |
| Suitable for | all thermoplastics FDM |
Process
If the size of the object exceeds the capacity of the printer, the object is printed in parts and then assembled.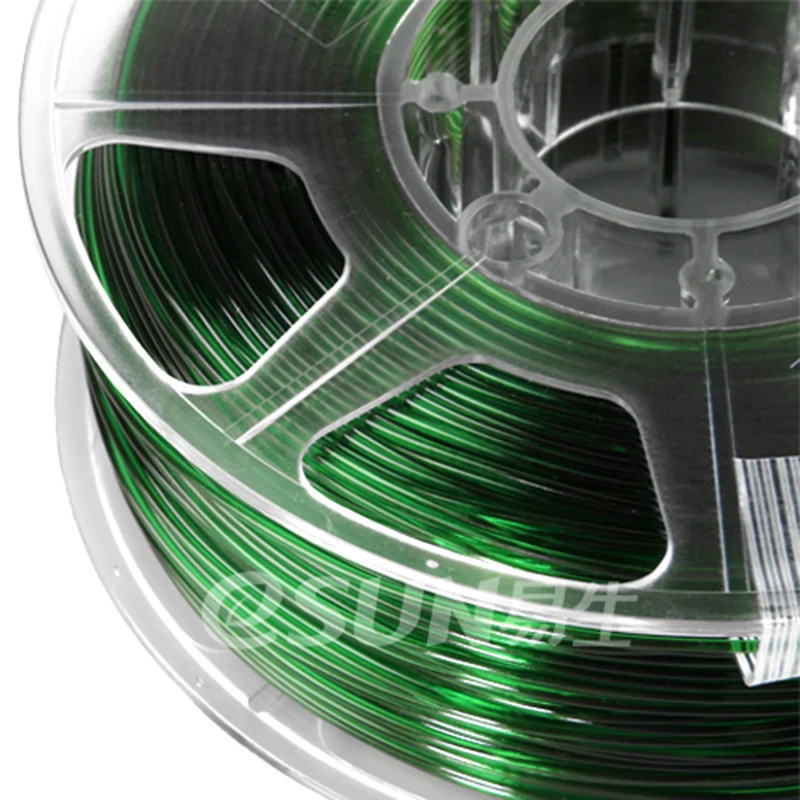 In the case of PLA and some other materials, assembly can be done with Dichloromethane or a suitable adhesive (the choice of adhesive depends on the plastic). In the case of ABS, it is possible to "weld" with acetone. The mating surfaces should be slightly moistened with acetone and squeezed tightly or clamped and held until most of the acetone has evaporated. So the parts will be held together by chemical bonds.
Pro Tricks
Increasing the surface area of the acetone contact increases bond strength. Tongue-and-groove to help.
Pros
- Acetone does not change surface color as much as most adhesives.
- After drying, the compound acquires the properties of ABS, which makes further processing easier and more uniform.
Cons
- Cold "welding" acetone on ABS parts is not as strong as if the part were printed as a whole.
- Excessive use of acetone can dissolve the part and affect final appearance and tolerances.

Void Fill
Black ABS Print, Filled and Sanded
Tool Kit
- Epoxy (for small voids only)
- Automotive body filler (large voids and joints)
- ABS filament and acetone (only for small voids in ABS printouts)
| Finishing | ★ ★ ☆ ☆ ☆ |
| Approvals | ★ ★ ★ ☆ ☆ |
| Speed | ★ ★ ★ ☆ ☆ |
| Suitable for | all thermoplastics FDM |
Process
Unusual voids may come out after the part has been ground or dissolved. These voids are formed during printing when the layers are incomplete due to any restrictions on the trajectory of the print head, which is often inevitable. Small gaps and voids can be easily filled with epoxy and no additional treatment is required in this case. Larger gaps or voids left by assembling a multi-part object can be filled with automotive bodywork filler, but the printout will then need to be re-sanded. Putty works great, is easy to process with sandpaper and can be painted. Moreover, the parts connected by such a filler, or voids filled with it, turn out to be stronger than the original plastic.
Slots in ABS printouts can also be filled with ABS thinned with acetone, which reacts chemically with the ABS object and seeps into the existing voids. It is recommended to make such a putty from 1 part ABS and 2 parts acetone, then it will not spoil the surface if used correctly.
Dichloromethane works on all plastics: ABS, PLA, HIPS, SBS, etc.
Epoxy is also useful if you want to make your 3D printed part more durable
Pros
- Epoxy filler is easy to sand and prime, resulting in an excellent surface for painting.
- ABS solution of the same filament will give the same color so nothing will be visible on the surface.
Cons
- Auto body filler or other polyester epoxy adhesive is opaque when dry and will leave discolored areas on the printout.
- Additional processing required to achieve a uniform surface.
- If the grinding is done too aggressively and too much material is removed, the appearance of the part may be affected.
Polished
PLA model, polished. Photo rigid.ink
Tools
- Plastic Polishing Compound
- Sandpaper for P2000
- Wiping cloth
- Toothbrush
- Polishing pad or microfiber cloth
| Finishing | ★ ★ ★ ★ ★ |
| Approvals | ★ ★ ★ ☆ ☆ |
| Speed | ★ ★ ☆ ☆ ☆ |
| Suitable for | all thermoplastics FDM |
Process
Once the part has been cleaned, a plastic polish can be applied to the part to give a standard ABS or PLA object a mirror finish.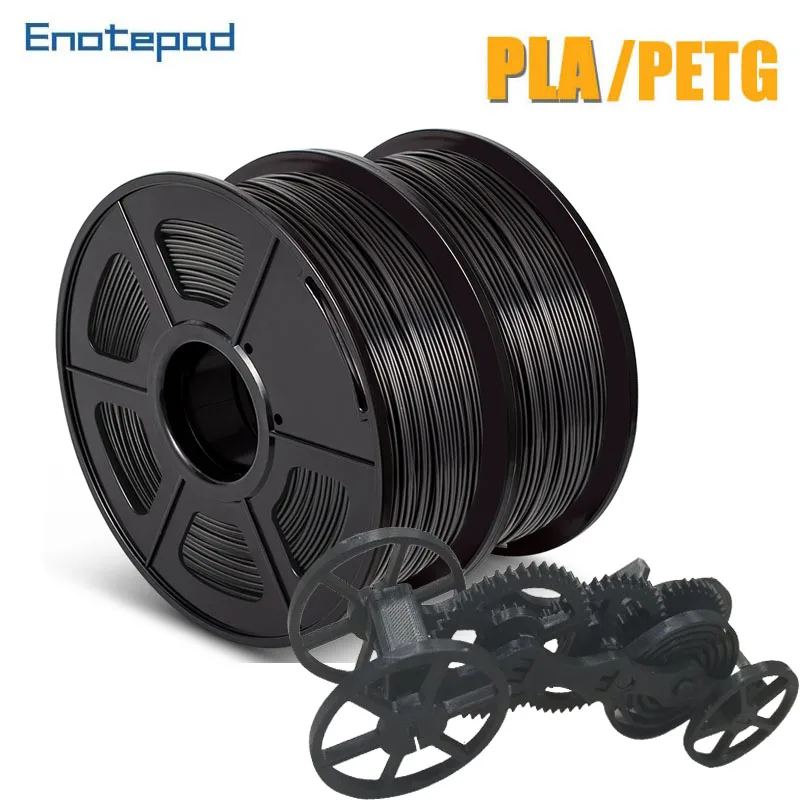 After the part has been sanded for 2000, it is necessary to remove dust from the printout with a cloth and rinse the printout under warm water using a toothbrush. When the object is completely dry, buff it on a buffing pad or microfiber cloth, adding a polishing compound as you go, such as polishing jewelry. They are designed specifically for plastics and synthetics and provide a long-lasting sheen. Other plastic polishes, such as those used to polish car headlights, also work well, but some of them contain chemicals that can damage the printout.
Pro Tricks
To polish small parts, place the polishing wheel on your Dremel (or other rotary tool such as a power drill). For larger and stronger parts, you can use a grinder, just make sure that the part does not stay in one place for too long, otherwise the plastic may melt from friction.
Pros
- The part is polished without solvents that can warp it or change its tolerances.
- When properly ground and polished, a mirror-smooth surface is obtained, very similar to cast.
- Polishing and deburring plastics is extremely economical, making this a very cost-effective method of achieving a quality finish.
Cons
- If you want to achieve a mirror-smooth surface, the part must be carefully ground before polishing, which may affect tolerances.
- After polishing, the primer or paint no longer sticks.
Primer and paint
Gray PLA FDM print spray painted black. 3dhubs.com
Tools
- Wiping cloth
- Toothbrush
- 150, 220, 400 and 600 grit sandpaper
- Spray Primer for Plastics
- Finish paint
- Polishing sticks
- Polishing paper
- Masking tape (only if multiple colors are expected)
- Nitrile gloves and matching face mask
| Finishing | ★ ★ ★ ★ ★ |
| Approvals | ★ ★ ★ ☆ ☆ |
| Speed | ★ ☆ ☆ ☆ ☆ |
| Suitable for | all thermoplastics FDM |
Process
Once the printout has been properly sanded (it is enough to reach P600 when painting), it can be primed. Aerosol plastic primer should be applied in two coats. This primer is intended for subsequent painting of models, provides an even coating and at the same time thin enough not to hide small elements. Thick primer, which is sold in hardware stores, can clump, and then you have to seriously work with sandpaper. Apply the first spray coat with short pressures from a distance of 15-20 cm from the object, trying to do it evenly. Let the primer dry and smooth out the unevenness with 600 grit sandpaper. Apply a second coat of spray with light, quick pressures, also very gently and evenly.
When priming is completed, painting can begin. You can paint with artistic acrylic paints and brushes, but a spray gun will provide a smoother surface. Hardware store spray paints are thick and viscous and difficult to control, so use paints that are designed specifically for modeling. The primed surface must be sanded and polished (sanding and polishing sticks, which are used in nail salons, can be purchased online, they are great for our task), and then wiped with a cloth.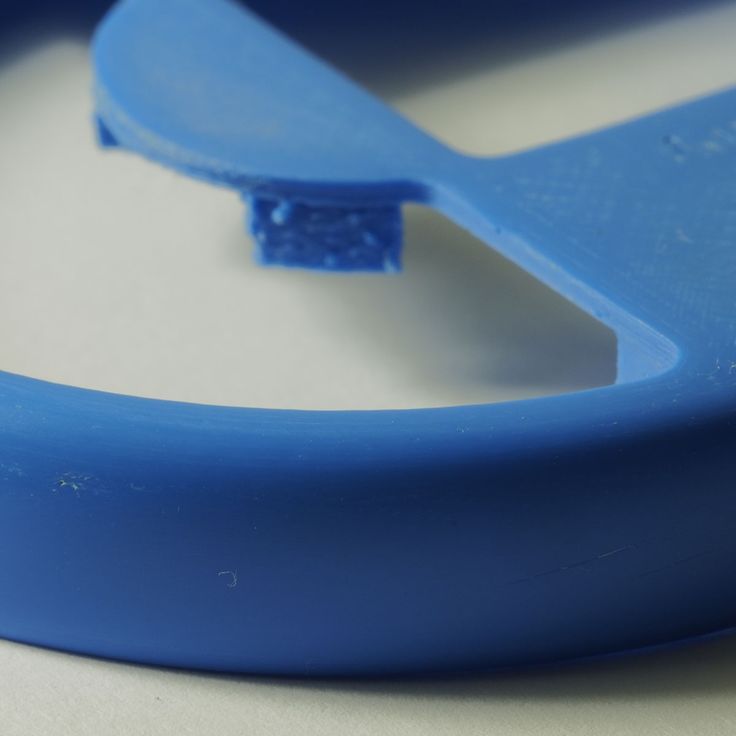 The paint should be applied to the model in very thin layers, the first layers should be transparent. When the paint finish becomes opaque (usually 2-4 coats), let the model rest for 30 minutes to allow the paint to dry completely. Carefully polish the paint layer with manicure sticks, repeat the procedure for each of the colors (between each applied paint).
Separate parts of the model can be covered with masking tape so that the colors, if there are several, do not mix. When painting is complete, remove the masking tape and polish the object with polishing paper. Polishing paper, such as 3M or Zona, comes in a variety of grits and is a relatively new product. It is sold in packs in various online stores, and after processing with this paper, the ink layer or topcoat will literally shine - and nothing else can achieve this effect. Apply 1-2 coats of top coat to protect the paint and let it dry completely. The top coat is selected in accordance with the recommendations of the paint manufacturer. If the topcoat and paint are incompatible, it can render your entire painting job meaningless, so compatibility is very important here.
Pro Tips
Don't shake the can when spraying! It is important not to mix the pigment or primer with the propellant (propellant gas), which will cause bubbles to form in the spray. Instead, the can must be rotated for 2-3 minutes so that the mixing ball rolls like a pearl, and does not strum.
Pros
- Excellent result, if you take into account all the nuances of the process and practice.
- You can do anything with the final look of the object, no matter what material it is printed on.
Cons
- Primer and paint increase the volume of the model, which affects the tolerances and can be a problem when it comes to a part of a larger object.
- High quality spray paint or spray gun increases costs.
Vapor smoothed
Vapor smoothed black ABS printed hemisphere
Tools
- Cleaning cloth
- Solvent resistant sealed container
- Thinner
- Paper towels
- Aluminum foil (or other solvent resistant material)
- Face mask and chemical resistant gloves
| Finishing | ★ ★ ★ ★ ☆ |
| Approvals | ★ ★ ☆ ☆ ☆ |
| Speed | ★ ★ ★ ☆ ☆ |
| Suitable for | all thermoplastics FDM |
Process
Line the bottom of the container with paper towels, if possible along the sides. It is critical that the vapors cannot damage the container and that the container itself is sealed. It is recommended to use a glass or metal container. Apply enough thinner to the paper towels so that they are wet but not soaked - this will also help them adhere better to the walls. Acetone is famous for its ability to smooth out ABS. PLA can be smoothed with a variety of other solvents (dichloromethane works well), but this plastic tends to be much harder to smooth than ABS. When working with any solvents, please follow the safety precautions for handling chemicals and always take appropriate precautions. Place a small "raft" of aluminum foil or other solvent-resistant material in the center of the paper towel-lined container. Place the printout on the "raft" (either side of your choice) and close the lid of the container. Steam polishing can take varying amounts of time, so check your printout periodically. To increase the speed of polishing, the container can be heated, but this must be done carefully so as not to cause an explosion.
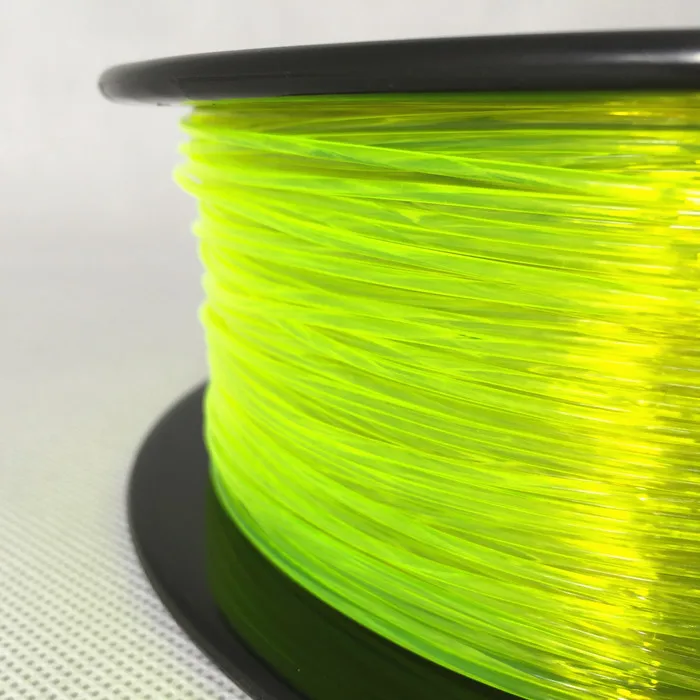
When removing the printout from the container, try not to touch it in any way, leave it on the “raft”, take them out together. In all those places where the printout has come into contact with something, there will be defects, since the outer layer will be under-dissolved. Before working with it, let the printout completely “breathe” so that all solvent vapors have evaporated.
Many aerosols and/or solvent sprays are flammable or explosive and their vapors can be harmful to humans. Be extremely careful when heating solvents, always handle them and store them in a well ventilated area.
Pluses
- Many small blotches, as well as many layer lines, are smoothed out without additional processing.
- The printout surface becomes exceptionally smooth.
- The procedure is very fast and can be performed using commonly available materials.
Cons
- Does not “heal” gaps, does not completely hide layer lines.
- During the smoothing process, the outer layer of the printout dissolves, which greatly affects the tolerances.
- Negatively affects the strength of the printout due to changes in the properties of its material.
Immersion
PLA model immersed in dichloromethane. Photo 3dpt.ru
Tools
- Solvent resistant container
- Thinner
- Eye hook or screw
- Heavy wire for sculpture or landscaping
- Dryer or drying frame
- Face mask and chemical resistant gloves
| Finishing | ★ ★ ★ ★ ☆ |
| Approvals | ★ ☆ ☆ ☆ ☆ |
| Speed | ★ ★ ★ ★ ☆ |
| Suitable for | all thermoplastics FDM |
Process
Make sure the container you are using is wide and deep enough to completely submerge the printout in the solution. Fill the container with the appropriate amount of solvent - be careful not to splash. As with vapor smoothing, ABS dip smoothing can be done with acetone, which is easy to find in the store, and for PLA, dichloromethane can also work well with ABS, HIPS, SBS, PETG, and many other materials. PLA is quite resistant to solvent smoothing, so it may take several passes to achieve the desired result. Prepare the printout for dipping by screwing a hook or eye screw into it in an inconspicuous place. Pass the wire through the eyelet or wrap the wire around the screw so that the printout can be immersed in the solvent. If the wire is too thin, it will not be able to withstand the buoyant force on the printout, and it will be difficult to sink the object.
Once the printout is ready, use a wire to completely immerse it in the solvent for a few seconds. Remove the printout and hang it by the wire in a dryer or on a drying frame to allow the solvent to completely evaporate from the surface.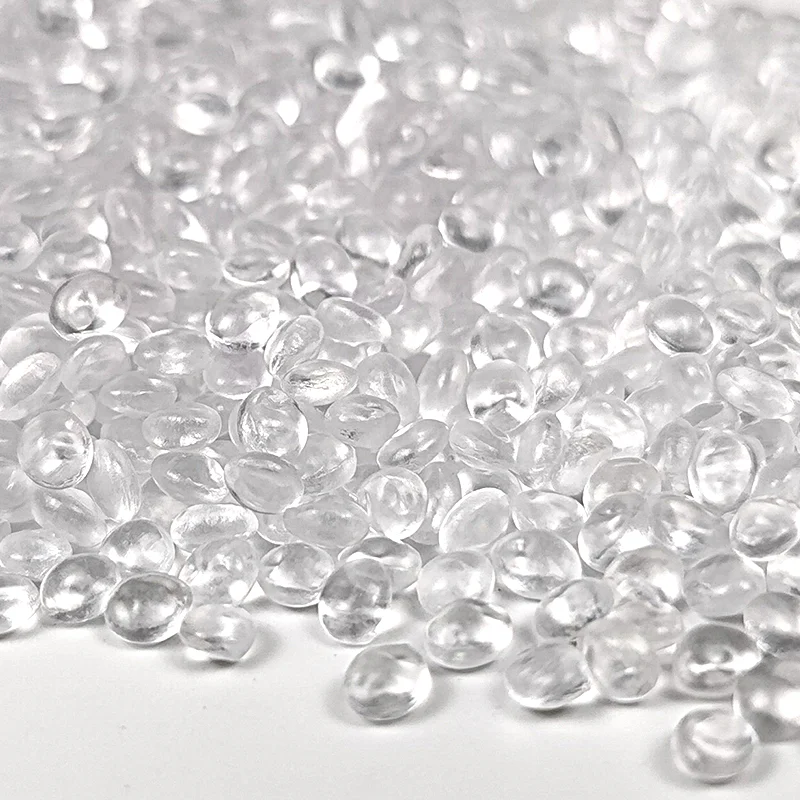 After ejection, the printout can be gently shaken to facilitate the drying process and ensure that no solvent has accumulated in the depressions.
Pro Tricks
If an opaque whitish coating appears on the printout after drying, this can be corrected by holding the object over a solvent bath for a while so that its vapor slightly dissolves the surface. This restores the original color of the printout and achieves a shiny outer layer.
Pros
- The surface of the print is smoothed much faster than steam polishing.
- Significantly less fumes are generated than other solvent polishing methods, so this method is less hazardous.
Cons
- The surface is smoothed very aggressively, so you can forget about tolerances.
- Immersion for too long can result in complete deformation of the object and a significant change in material properties.
Epoxy
Black ABS printout, half coated with epoxy, half uncoated
Tools
- Two-component epoxy02
- Sponge Applicator
- Mixing container
- Sandpaper P1000 or finer
| Finishing | ★ ★ ★ ★ ☆ |
| Approvals | ★ ☆ ☆ ☆ ☆ |
| Speed | ★ ★ ★ ★ ☆ |
| Suitable for | all thermoplastics FDM |
Process
After the printout has been cleaned (preliminary cleaning gives the best end result), wipe it thoroughly with a cloth. Mix the resin and hardener in the proportion indicated in the instructions, accurately measuring all volumes. The curing process of epoxy resin is exothermic, so glass containers and containers made of materials with a low melting point should be avoided. It is recommended to use containers that are specifically designed for mixing epoxy resins. Incorrect ratio of resin and hardener can result in longer curing time or no curing at all and result in a permanently sticky substance. Mix the resin and thinner as directed in the instructions - carefully, in smooth movements to minimize the amount of air bubbles remaining inside the mixture. Very little epoxy is needed, and most of these resins only work for 10-15 minutes, so plan accordingly.
Apply the first coat of epoxy with a sponge applicator, being careful not to build up in crevices and small parts. When the printout is sufficiently coated, allow the resin to fully cure - as described in the instructions that came with it. One coat may be sufficient, but for optimum results it is best to lightly sand the printout with fine sandpaper (on P1000 and above) to eliminate any imperfections. Wipe off the dust with a cloth and, in the same way as before, apply a second layer of epoxy.
Pros
- A very thin coat of epoxy won't affect tolerance too much (unless the printout has been sanded too hard beforehand).
- A protective shell is formed around the object.
Cons
- The layer lines will remain visible, they will only be covered by a smooth shell.
- If too much epoxy is used, it can flood parts and edges, and the surface can appear greasy.
Plating
FDM printed structural element nickel plated with Repliform RepliKote technology
Tools (for home use)
- Sacrificial anode. The anode material must match the metal of the solution: for example, if copper sulfate is used in the solution (with water it is copper sulfate), then the anode must also be copper. Any object made of the appropriate metal will do (for example, copper wire for copper plating), or you can buy special strips of metal for galvanization.
- Conductive paint or acetone with graphite. Electroplating requires the print surface to be electrically conductive, and this can be achieved with a conductive ink or a solution of equal parts graphite and acetone. Conductive paint will work with any material, but acetone with graphite will only work with ABS.
- Power rectifier. A simple battery can be used as this element, only it will not be as effective and will not give a fast enough result than the rectifier itself (household current).
 The rectifier is safer in the sense that it can simply be turned off and thus cut off the current during the galvanization process.
 - Conductive screw or eye hook
- Non-conductive container
- Contacts
- Non-conductive gloves and goggles. Electroplating solutions are acidic and can cause injury if splashed into the eyes, so wearing glasses is very important. Solutions also irritate the skin and conduct electricity, so insulating gloves are needed.
- A galvanizing solution can be obtained by mixing a metal salt, acid and water, but if the proportions are inaccurate and the substances are of insufficient quality, one cannot count on a professional result.
 If you buy a ready-made solution (as in Midas kits), you can be sure that the problems with plating are not caused by the solution.
 | Finishing | ★ ★ ★ ★ ☆ |
| Approvals | ★ ★ ★ ☆ ☆ |
| Speed | ★ ★ ★ ★ ☆ |
| Suitable for | all thermoplastics FDM |
Process
Electroplating can be carried out at home or in a professional workshop. To do everything right, you need to be well versed in the materials, in what is actually happening - and at home these opportunities are usually limited. In order to achieve excellent surface quality and to have more plating options, including chrome plating, it is best to use the services of professional workshops. The copper galvanization process will be described below as an example.
At home, you can galvanize with copper or nickel, and this coating will then serve as the basis for galvanizing with other metals. It is critically important that the printout surface be as smooth as possible before it is galvanized. Any bumps and lines in the layers will be enhanced as a result of the process. Prepare the sanded and cleaned object for plating by coating the plastic with a thin coat of high quality conductive paint, or with a graphite and acetone solution for ABS printouts. Allow the conductive coating to dry completely, sand if necessary to ensure a smooth surface. At this stage, it is extremely important not to touch the printout with bare hands or to wear gloves, because sweat marks on the object will certainly affect the quality of the galvanization.
Insert a screw or eyelet in an inconspicuous place on the printout and connect it to the negative terminal of the rectifier. This will be the cathode. Connect the copper anode to the positive contact of the rectifier. Fill the container with enough copper plating solution so that the printout is completely covered with it. Immerse the anode in the container and turn on the power. After the rectifier is turned on, immerse the printout in the container, making sure that it does not touch the anode anywhere. Beware! When the object is already in the bath, the galvanization system is active, and contact with the solution, cathode or anode can be traumatic. Set the voltage on the rectifier to 1-3 Volts, and the process will go to full metallization. To speed things up, the voltage can be increased, but not more than 5 volts. When enough metal has deposited on the printout, simply turn off the power and dry the object with microfiber towels. When it's dry, varnish the object to protect it from corrosion.