Washu 3d printing
3D printing | WashU Tech Den
The Tech Den operates a 3D printing service with several different printers. The service is designed for non-residential and graduate students and can be used for personal or school projects.
Submit a 3D Printing Request
- Submit a request though ServiceNow using the button above
- The Tech Den will reach out if we have any clarifications or questions about your submission
- We’ll email you when the print is finished and you’ll come to our desk to pick it up
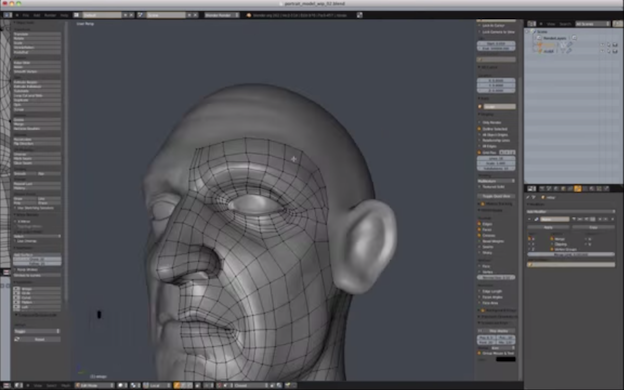
There are many applications for creating 3D printing files these days. Some of the more popular ones are listed below:
- TinkerCAD = Beginner 3D CAD program that runs completely in the browser.
- AutoDesk Fusion 360 = A more advanced CAD software used by architects and engineers. Is free for educational use.
A more comprehensive list of 3D file editing tools can be found here.
There are a wide variety of websites that host 3D files. Some of the more popular ones are:
- Thingiverse
- Yeggi
However, you can find 3D models and files on a variety of websites.
Tech Den’s primary focus for 3D printing is for class-related projects. Personal and non-academic requests will take secondary consideration and be added to the print queue on a first-come-first-served basis. At no time will the Tech Den print any object that could be considered offensive, dangerous, or harmful to the students or the general public. The following acceptable use policy serves as a guideline:
- Request must abide by all applicable local, state and federal laws and University policies
- Students will not be allowed to create unsafe, harmful, or dangerous objects or those which replicate such objects, or pose an immediate threat to the well-being of persons or property. Pursuant to University policy, no weapons or life-like replicas of weapons are allowed on campus, nor may anyone produce them in the Tech Den area.
 This includes parts of weapons, ammunition, and defensive as well as offensive weapons or any object which is regulated
 - The Tech Den shall not print any obscene or otherwise inappropriate objects which they determine, in their sole discretion, are inappropriate and not conducive for a learning environment
- The Tech Den, in its sole discretion, reserves the right to decline any print request for any reason
- The Tech Den will not create or print any object in violation of another’s intellectual property rights related to patented, trademarked or copyrighted materials
- Only authorized Tech Den staff shall have access to and use of Tech Den 3D Printers
- By utilizing the 3D printing service at Tech Den, you are allowing your 3D prints to be used in advertisement and marketing for the 3D printer program.
- To ensure fair and free usage, students may not have more than 2 print requests open at the same time
FAQ | Spartan Light Metal Products Makerspace
Got questions about our studio, activities, and resources? Chances are, you’ll find the answers here! For additional information, contact us and we’ll get back to you as soon as we can.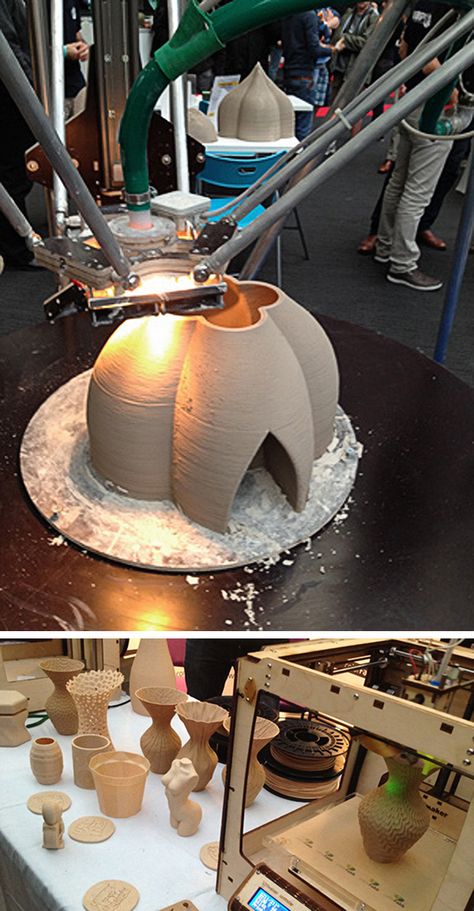
What is a makerspace?
A space that provides access to a wide variety of tools and equipment for prototyping. It fosters a collaborative community that encourages creativity and design. No prior making skills are necessary.
How do I join the makerspace?
Enroll in our course to register as a member and access other training modules.
I was a member last year. Do I have to re-take all my training?
Membership is renewed on an annual basis for the academic year (July 1st – June 30th).
Members only need to retake the orientation module to reactivate their membership for the year.
Other completed modules (on equipment) do not need to be retaken annually.
How do I submit a 3D print job?
The Makerspace uses 3DPrinterOS to facilitate its 3D printing services, allowing members to submit their print jobs remotely.
Completed 3D print jobs will be placed in a labeled plastic bag on the table outside the Makerspace for pickup.
How much does 3D printing cost?
It costs $0.025/gram to print in PLA or PETG on the Prusa and Lulzbot printers. Each job also has a $0.25 base charge. This means that if you have a 24 g print, you will be charged (24 x $0.025) + $0.25 = $0.85.
It costs $0.25/ml for gray or clear resin used on the Form 3 printer. If you have a failed print and we have to print a cleaning mesh, you will be charged an additional $1.00.
Contact us for a price estimate if you would like to use a different type of filament on the Lulzbot printer. If there is a print error due to user error (not printer error), you will be charged for used filament.
Who is eligible to join?
All Washington University students, faculty, and staff are eligible to join the makerspace.
Where is the makerspace?
The makerspace is located on the first floor of Jubel Hall in Room 138.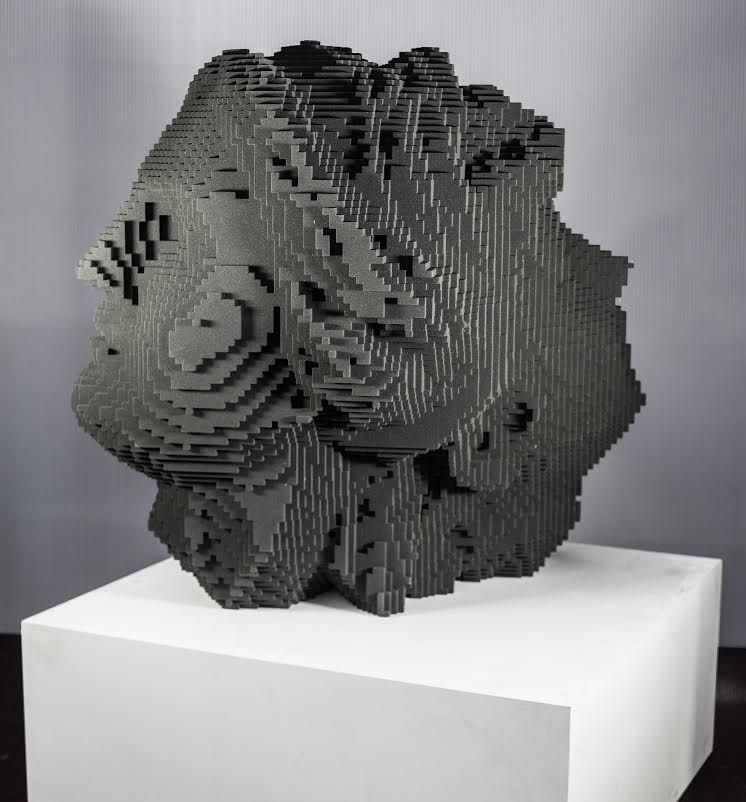 Jubel Hall is in the northeast section of Washington University’s Danforth Campus, just east of Brookings Hall.
How do I make an appointment?
Visit our OnceHub booking page to make an appointment. The makerspace is open for general use during the hours posted on the website and front door.
How do I get access to the equipment?
Most hand tools and basic equipment are available for use once you complete your annual member orientation.
Some more advanced equipment require training in order to use them. These include the 3D printers, laser cutter, mini mill, power tools, electronics, band saw, and drill press.
Where can I store my projects?
We do not allow members to leave any projects on the tables or floor of the makerspace. You can reserve a locker and store your active projects. Talk to a staff member about reserving a locker.
How do I purchase materials?
Materials are usually sold at cost. Your Bear Bucks account will be charged for personal projects (not related to a course or research lab).
• 3D Printers: You must use our provided materials for all of the 3D printers.
• Laser Cutter: You are allowed to bring in wood and chipboard for the laser cutter, but you must purchase all plastic and anodized aluminum from the makerspace.
How do I pay for a 3D print job?
Individual Users: New 3DPrinterOS users are automatically credited $20 to their accounts. This balance is intended for personal prints. To reload your 3D printing balance, you will need to come into the Makerspace to refill your Bear Bucks account. For example, if your balance is $8 and you want to submit a $15 print job for personal use, you will need to come in and make a payment with BearBucks to increase the balance on your 3DPrinterOS account
Course/Research: The Makerspace Studio provides 3D printer filament, Formlabs 3D printer resin and select laser cutter materials (currently acrylic) for courses and research labs. The instructor or PI must complete the Course Use Authorization Form or Research Lab Use Authorization Form for these materials to be covered for students using the Makerspace for course/research related activities.
Note to users!
If you submit Prusa or Lulzbot print jobs for an approved course or a research lab, the cost of the print job will initially be debited from your 3DPrinterOS balance. Thus, if you spent $2.50 on personal prints and $10 on prints for a course, your balance should be $20 – $12.50 = $7.50.
We will restore the charges for courses/labs to your 3DPrinterOS balance on a monthly basis. If your balance is too low when you try to submit a print job for a course or research lab, you may email [email protected] to request an immediate balance adjustment.
- Holiday Ornaments 🦃
- November 20, 2022
- Studio Closed – Thanksgiving Break
- From November 23, 2022 to November 27, 2022
- Studio Closed – End of Fall Semester Hours
- December 11, 2022
- Winter Break Studio Hours Begin
- December 12, 2022
- Studio Closed – Holiday Break
- From December 23, 2022 to January 2, 2023
Wax3D.
 From drawing to metal.
 It has been a year and a half since we started selling our modeling wax composition for 3D printing of wax molds for metal casting. At first, there were many doubts, including ours, that this material was generally needed by someone. There were fears that the value of the totality of its consumer properties lies outside the range of economic feasibility. I had to experiment a lot, work with foundries across the country, communicate with both foundry workers and with the end customers of castings. In fact, we have come a long way in introducing our technology into production: from an idea that arose more than 2 years ago to working with end customers of castings on a commercial basis.
Somewhat unexpectedly for us, we are engaged not only in the production of Wax3D, but also in the printing of wax waxes on order, and at the moment, in the full cycle of work with clients. This was not our goal from the beginning, but as it turned out, you can tell someone for a long time and stubbornly and explain the prospects, but all this is empty when there are no real examples of commercial use. And what can be commercial use if no one is doing it? The result is a vicious circle. A year of speeches at various forums, exhibitions and seminars showed that the public somehow revives only by the time the photos of real waxes appear on the big screen and, most importantly, castings made from them. And it is desirable that these were not trinkets. Based on the understanding received, the decision was born: to do it yourself. For, as they say in the troops of Uncle Vasya: 'No one but us'!
The path is difficult, but, as it turned out, quite commercially justified!
For about half a year now, the queue for wax printing has not been getting smaller, despite the constant growth of the printer fleet. On average, machine time for printing from Wax3D is scheduled for all machines for a period of 3 to 4 weeks.
Now, re-reading the comments to my first articles on wax printing, I can't help but smile - there was so much skepticism and doubt! However: 'The dog barks, the caravan moves on. ' - a principle for all time.
This concludes the lyrical introduction. Let's move on to facts and figures.
Initially, I wanted to give detailed information in this section with numbers, formulas for calculating the cost and cost-effectiveness, but I realized that this would be beyond the scope of such an article, and no one would read it anyway. That's why I didn't waste my time or yours. Everything is short and sweet.
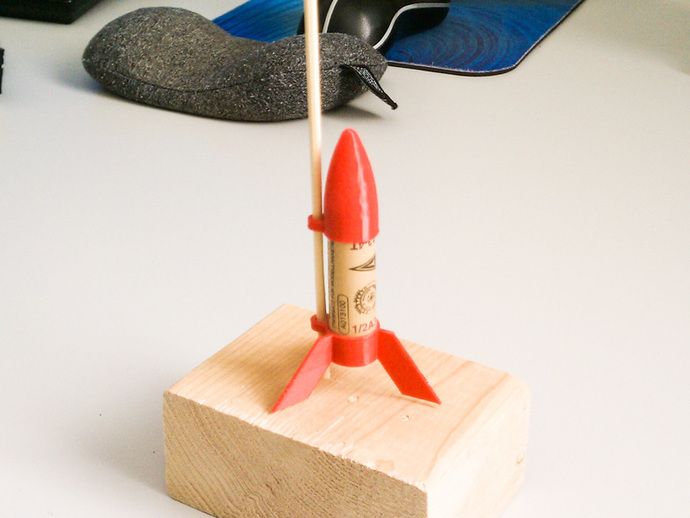
1. What products are Wax3D stencils suitable for?
For any products, the detailing of which does not exceed the capabilities of FDM 3D printing. That is, these are not jewelry, but rather the casting of rather large technical parts.
The photo shows examples of what we have been doing recently:
Meticulous Quality Control Department ))
Bronze casting on printed wax wax
2. For which runs is the technology suitable?
From a single piece to a run of dozens of stencils. With the increase in circulation, the cost of the final product falls slightly.
Here's a simple example we've been working on:
We were ordered to print a batch of stainless steel test casting waxes. 4-12 copies of each item were printed. The cost of one stencil ranged from 500 to 1500 rubles. That is, the average price of wax can be taken for 1000 rubles.
For a trial run, this price is more than justified, since the cost of manufacturing wax casting equipment for one wax mold in this case is on average 150.000 rubles. Subsequently, after all approvals and field tests, each product had its own wax casting equipment. This was justified, since the circulation of each casting subsequently amounted to about 5000 copies and the price of the tooling added only 3-5 rubles to the price of the final product. It is not difficult to estimate that a batch of 150 castings is on the borderline of the expediency of manufacturing tooling. For smaller batches, it is advisable to use 3D printing of Wax3D stencils.
Staples, staples... A whole bunch of staples!
But the staples are already made of steel. No wonder they tried!
3. Economic feasibility. To what extent is printing from Wax3D with subsequent casting more profitable than other technologies for producing metal products?
In short, the entire production cycle of casting is on average 10-12 times cheaper than milling and 8-9 times cheaper than metal 3D printing.
Let's take as an example one of the completed orders for casting from steel CT45. The pedal assembly of an ancient mechanism that wished to remain anonymous. Printing with metal to the client was calculated in the region of 500.000 rubles. Printing the same wax + casting cost him about 60,000 rubles.
4. Is it possible to print everything from PLA, burn it and cast?
Possible.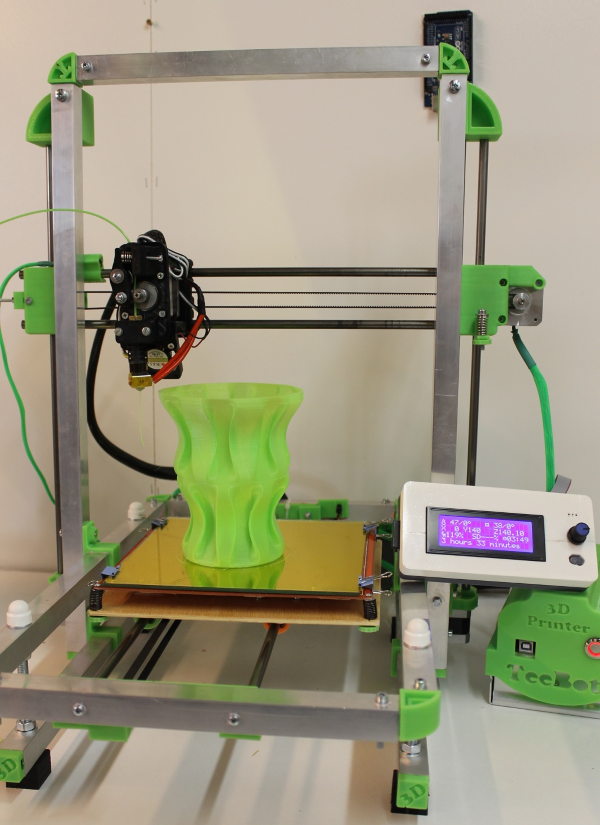 Burn it out. Cast off! :) Once, now, our regular client asked us to print one form from PLA for him to try out for subsequent burning. Of course, we went to meet him and did everything as he asked. The next time he ordered stencils from us, he didn't even think about PLA. What happened, I asked him?
In the course of burning out, the crust of the mold burst and the casting was hopelessly damaged. Its surface was far from ideal - there were caverns and non-straits. The rather high ash content is to blame for everything, but the most important thing is the increased gas formation during burning. And there is no way to defeat this flatulence without changing the technology and composition of the molding sand.
Printing from PLA costs about the same as from Wax3D, but not sure about the result. The price of a mistake is quite high. That is why for us the issue of burnable polymers is closed once and for all.
5. What is the process for working with Wax3D stencils? What needs to be changed in the casting technology in order to work with such waxes?
If the foundry is equipped with a boilerclave for melting waxes from classic model wax compositions, then nothing needs to be changed.![]()
Sprues and sprues adhere to Wax3D wax just as well as wax models.
The shaping of the crust is just as easy and with the same technology.
A good plus, which was appreciated by casters, is the rather high strength and flexibility of our stencils. Unlike stencils made from model waxes, our Wax3D printouts can be dropped more than once :)
6. Who are Wax3D stencils NOT suitable for?
For foundries not equipped with a boilerclave, but using open baths of hot water to melt wax models from the crust. The melting point of Wax3D is 96C +-3c. The temperature of boiling water is not enough to bring the printout into a highly fluid melt state. The required temperature for this is 120-150C, and it is easily achieved in the boilerclave.
7. Are there any tricks to printing from Wax3D?
Wax3D is a very unusual material for 3D printing. The rod is quite delicate, flexible, breaks easily, softens at temperatures above 45 ° C and melts at 96C.
Printing with this material is possible in a rather narrow temperature range: from 110 to 135c. Below these temperatures, it does not adhere well in layers; above this range, it is prone to slipping and the formation of artifacts on the surface.
The table for the first layer must be set to a temperature of 100-110c, for the remaining layers it must be turned off!
Nothing out of the ordinary? However, there are 4 most common obstacles in the way of a wax printer :)
a. Not every printer out of the box will print at temperatures below 170C. These features of the firmware can of course be fixed or bypassed. Information on how to do this is on our website in the description of the wax.
b. To paraphrase Dr. House from the TV series of the same name: 'All printers lie!' - they lie shamelessly, without embarrassment and a twinge of conscience! Maybe because they are not burdened with faith or morality, but most likely because they all have different temperature sensors that are calibrated differently, or not calibrated at all! At hot end temperatures around 100c, the spread of real indicators can reach 10-15c, but there are also unique ones. ..
..
The same, and even more so, for the table temperature. And if your printer cheerfully reports to you that the table is heated up to 100s, then its actual temperature can range from 60 to 90s.
Therefore, I note separately that I mean exactly the degrees of Mr. Celsius, and not the parrots and 'parrot wings' of a certain spherical printer in a vacuum. A calibrated thermocouple is an essential tool for any 3D printer!
in. Some slicers, such as Polygon slicers from Picaso, for some reason, do not know how to work with the printer table and change its temperature during printing. It is impossible to manually change the temperature of the table during printing on Picaso printers. I have not encountered similar difficulties on other printers. Of course, you can get around and solve all this, but how - it's better to ask Picaso3D.
#supovsorry! ))
Some printer models are designed in such a way that they can only print with a very limited set of polymers. And the reason for this is most often the device of the head
 designer printer. We recommend our customers to have a Teflon tube inside the thermal barrier, going all the way to the nozzle, as well as good cooling of the thermal barrier. If the thermal barrier does not cool well or the filament pulling mechanism itself heats up, do not expect stable printing. Here I will not poke a finger at any manufacturer - everyone knows his own heroes :) Also, a direct filament supply to the extruder is required without long Teflon tubes with several kinks. And, of course, NOT a 'bowden' serve.
Our choice of plywood workhorses with direct feed and Titan Aero print head.
Shall I urge you to master this material? For you, like us, to print wax wax at a price 50 times cheaper than printing on Solidscape? The fact that the market for such a service is not saturated and is practically devoid of offers? Of course not! Why do we need competitors? Print better gnomes - they are so lacking for everyone !!! :D
All our materials and works will be available at the 3Dtoday Fest in November. Don't miss it - https://fest.3dtoday.ru
With respect to engineers and dreamers!
Team 'Filamentarno!'
www.filamentarno.ru
3D printing opens the door to space colonization / Sudo Null IT News It is clear that with modern engines, the flight will take millions of years, but in the perspective of the fading of the Sun, the colonization of other M-class planets seems to be the only possible way for the development of civilization.
One way or another, before settling in other systems, you have to master your own system well: for starters, the Moon and Mars. It is necessary to create permanent bases. According to experts, 3D printing should become a key technology along this path. With the help of 3D printers and robots, we will be able to create any objects on the lunar and Martian bases, successfully develop colonies, controlling the process from Earth. With the help of 3D printing, we can assemble interstellar ships directly on the lunar and Martian bases, fitting consumables there.
One way or another, but 3D printers are a key technology for the successful implementation of space programs, the construction of alien bases and the colonization of other worlds. One of the companies that works in this area is Made In Space. Her goal is to develop a 3D printer that works well in microgravity on the International Space Station.
The cost of lifting cargo from Earth into orbit is estimated at about $22,000 per kilogram. This is quite an acceptable cost for lifting the necessary building materials. If you still manage to extract something from the asteroids that are brought into orbit, then it will come out even cheaper. And most importantly, materials for production can be mined on the very planet where the 3D printer is installed. In fact, not least for this reason, Curiosity is now conducting such a thorough analysis of the soil of Mars.
“Spaceflight structures are currently being built on Earth,” says Dan Barry, a former astronaut and consultant for Made In Space, “so they must withstand Earth's gravity as well as the vibration and g-forces that come with launching into orbit. If structures are 3D printed in orbit, they can be much more elegant, and in some cases not strong enough to support their own weight on Earth, but still functional enough in microgravity.” 3D printing in orbit with the delivery of only consumables in any case allows significant savings in logistics and shipping costs.
Starting next year, this company, in partnership with NASA, will start testing its 3D printers directly on the ISS. It turned out that designing a printer that works in zero gravity is not such an easy task. The device must be able to withstand rocket-launched G-forces, be compact and safe, and still operate flawlessly in microgravity. Made In Space has tested dozens of popular 3D printer models, but none of them passed all the tests. So I had to design my own model.
Over the past year, this printer has been extensively tested in microgravity conditions on Earth, and finally qualified for testing on the ISS by a NASA engineering team.
“Imagine being able to colonize a distant planet with just a 3D printer and some mining equipment.