Review snapmaker 3d printer
Review: Snapmaker 2.0 - 3-in-1 3D printer with CNC and laser capabilities
3D Printing Industry reviews the Snapmaker 2.0 3D printer.
Designed and manufactured by Shenzhen-based Snapmaker, the Snapmaker 2.0 is a 3-in-1 modular FFF 3D printer with CNC machining and laser engraving/cutting capabilities. Intended as a successor to the company’s debut Snapmaker Original system, the desktop machine started out as a very successful Kickstarter campaign, raising $7.8 million with over 7,000 backers.
Now commercially available in three different models, the smaller A150 ($1,199), the mid-range A250 ($1,499), and the large-format A350 ($1,799), the Snapmaker 2.0 aims to make waves in the 3-in-1 manufacturing engine market. For this review, we’ll be working with the top-of-the-line A350.
The Snapmaker 2. 0 is undeniably built for the workshop and provides users with all of the manufacturing capabilities a DIY enthusiast could possibly want. When needed, users can switch out the single 3D printing head for a CNC tool or a laser diode, meaning the sky’s the limit when it comes to creative potential. This isn’t to say the system is inaccessible, however, as all of the setup steps are laid out in the comprehensive instruction manual and all of the necessary hand tools can be found in the box.
With prices starting at a surprisingly affordable $1,199, the system is suitable for just about anyone looking to get their craft on, including professional engineers, designers, educational institutions, and even advanced prosumers.
Seeing as Snapmaker has dedicated itself to 3-in-1 manufacturing systems, the company also offers a number of add-ons for use with the Snapmaker 2.0, including an Enclosure and a Rotary Module. We’ll cover all of these and more in this review.
The Snapmaker 2. 0. Photo by 3D Printing Industry.
A 3D printer, first and foremost
At its core, the Snapmaker 2.0 is still an FFF 3D printer. Sporting a cartesian coordinate system, the machine features a sleek, notably sturdy anodised aluminum chassis with an open form. The largest of the three models, the A350 variant, comes complete with a build volume measuring 320 x 350 x 330mm. This is significantly larger than the average desktop 3D printer, so it should provide ample leeway for most reasonably-sized engineering projects.
We found the system’s single printhead to be lightweight and very well-designed, with a magnetic sensor as standard. The maximum nozzle temperature clocks in at 275°C. Equipped with a direct drive extruder, this configuration should have no problems printing with materials such as PLA, ABS, PETG, and TPU.
Turning to the build plate, Snapmaker has chosen to implement a magnetic print bed with glued-on, smooth build surfaces on either side. If one of the faces were to sustain damage, the user would simply be able to flip the bed over and use the other side – a small but welcome consideration.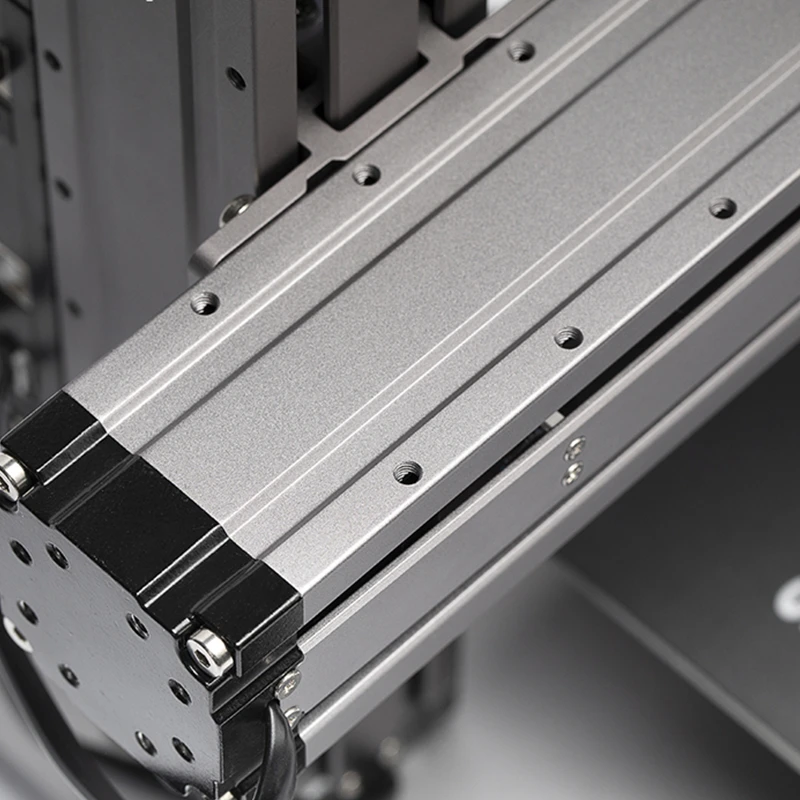 The bed heats up to a maximum of 80°C, which is crucial for part adhesion and to prevent warping on the undersides of prints.
It’s also worth mentioning that the Snapmaker 2.0 is equipped with a Cortex-M4 processor (Quad Core A7 CPU at 1.1GHz) and an Android controller. Recently, we’ve seen a few manufacturers implement Android into their higher-end 3D printers, and it absolutely makes all the difference when it comes to user experience. The 5” full-color touchscreen on the Snapmaker is extremely responsive and provides a beautiful graphical UI, which itself can be used to preview print models, calibrate the bed, load the filament, and manage print jobs. The system also features Wi-Fi functionality, which is always a godsend for remote work.
Unfortunately, the bed calibration process is really where the Snapmaker 2.0 falters. The company has opted for an automatic multi-point leveling system, which works based on a magnetic proximity sensor. This often posed a challenge when trying achieve a successful first layer.
Unlike other similar printers, the Snapmaker’s bed doesn’t have any physical screws to manually increase or decrease the distance to the nozzle either. It also doesn’t have any springs on which to rest the build plate. This combination (or lack thereof) makes it extremely difficult to achieve a flat, horizontal bed that is parallel to each axis.
Instead, once the system deems itself flat, the user can modify the Z-offset via the touchscreen, with increments as small as 0.05mm. While this works well enough to achieve a successful print, the first layer is often flawed and just getting to that point is unnecessarily difficult. Therefore, we advise 3D printing with a raft on this printer. This will help reduce the error of the first layer.
The print bed of the Snapmaker 2.0. Photo by 3D Printing Industry.Laser engraving and CNC machining
Of course, the Snapmaker 2.0 isn’t just a 3D printer. The 3-in-1 machine also comes complete with its own laser cutting/engraving and CNC Modules, which the user can simply screw on in place of the 3D printing head.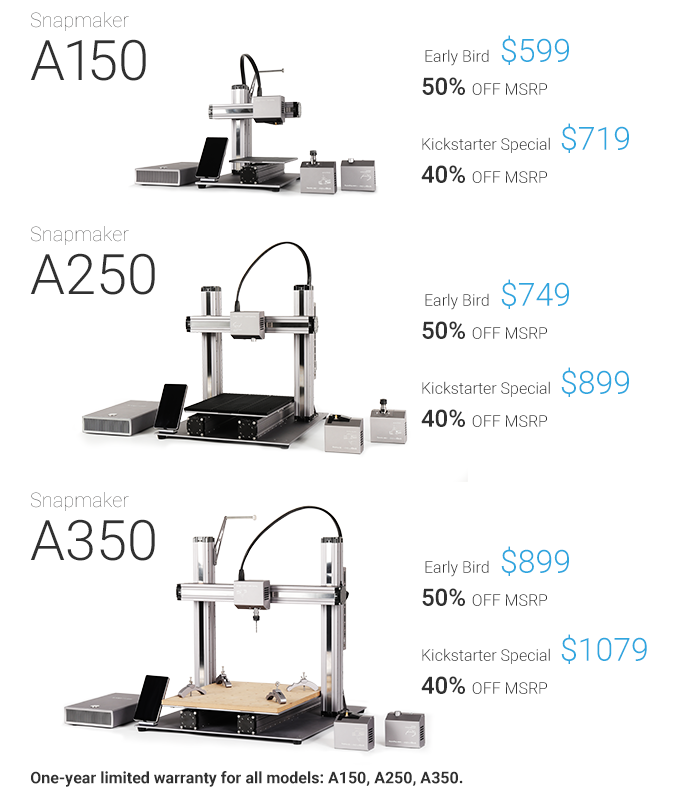 Additionally, the system has an extensive aftermarket, meaning there are a plethora of add-ons and extra modules to play around with (more on these shortly).
Firstly, we’ll have a look at the core ‘out-the-box’ modules included with the printer itself – the laser cutter and the CNC. The laser cutter is a blue Class 4 diode, and operates at 1.6W with a wavelength of 450nm. Designed in-house by Snapmaker, the module looks as elegant as the 3D printer head, but it also features an in-built camera to preview designs before engraving.
The module offers four main functions depending on the application: Black and White, Greyscale, Vector (outline cutting), and Text. The laser is compatible with a number of substrate materials, including wood, acrylic, polymers, and even leather. It’s worth noting that the system also comes with a purpose-built aluminum lasering table, which does a great job of reducing reflectivity.
Although the user will have to recalibrate the laser cutter every time a module switch is made, we’re happy to announce that the automatic process works significantly better than that of the 3D Printing Module.
On the other hand, users can also turn the Snapmaker 2.0 into a CNC router by swapping in the subtractive toolhead. This CNC Module has an ER11 collet that can hold hundreds of different third-party bits ranging from 0.5mm – 6.35mm (0.02” – 0.25”) in diameter. The spindle speed can also be varied between 6,000 – 12,000 RPM.
Much like the laser engraver, the CNC Module also has its own dedicated machining bed, which is a removable MDF wasteboard. Dotted around the board are a series of embedded threads, into which the user can screw up to four clamps. These clamps are used to hold the workpiece in place as it is milled, and they do a mighty fine job of it – no complaints there.
When it comes to core functions, the CNC head offers Text, Relief, and Vector, again depending on the application. Text and Relief are used to engrave text and images respectively, while Vector is used to cut out object outlines.
The CNC machining bed.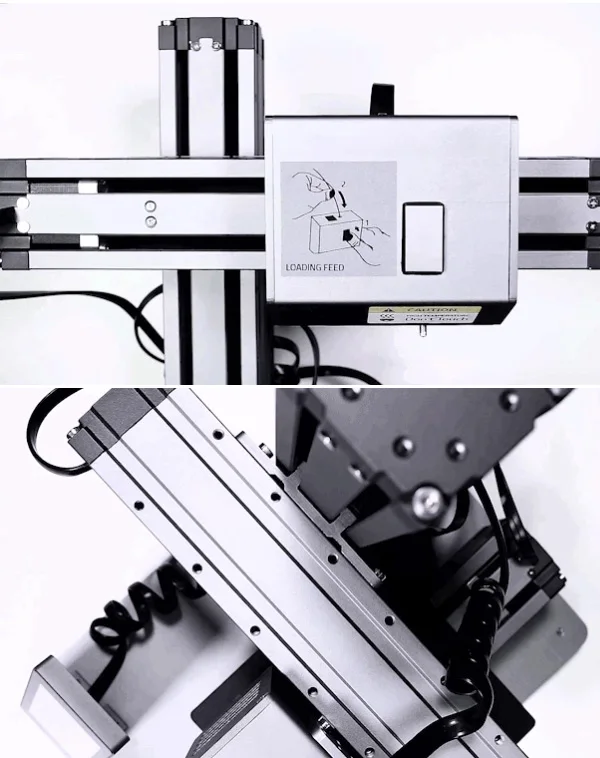 Photo by 3D Printing Industry.
Optional add-ons
Snapmaker also very kindly sent us three optional add-ons to try out with the system: an Enclosure, a Rotary Module, and an Emergency Stop Button.
Made of high-quality anodized aluminum, the Enclosure can be used with all three core modules. For the 3D Printing Module, it helps maintain the temperature in the build chamber, which is crucial for printing with higher temperature filaments such as ABS. When used with the laser engraver, the filtering panels help protect the user’s eyes, and with the CNC Module, it can keep swarf and material chippings from flying around the workshop.
Additionally, the Enclosure also features an exhaust duct to extract odors and hazardous particles from the workspace, meaning we were able to conduct all of our testing indoors safely and comfortably. There is even a built-in kill switch that automatically stops the Snapmaker 2.0 if the door of the Enclosure is open. All in all, we thought the Enclosure just provided too much value to pass up. It’s a must-have addition to the Snapmaker 2.0.
Moving on, we also gave the Rotary Module a spin. Much like a lathe, the Rotary Module spins a workpiece in the horizontal plane. Designed to be used in conjunction with the laser engraver or the CNC tool, this optional module works best with cylindrical and rectangular cuboid substrates, whereby images and texts can be engraved or cut all around a continuously spinning object.
Finally, we also had an opportunity to try out a big red Emergency Stop Button. There’s not much to say other than the fact that it works as intended and stops the Snapmaker 2.0 dead in its tracks (although this really should be included in the box, rather than being an optional add-on).
Snapmaker Luban slicing software
Snapmaker provides its own slicing software for use with the Snapmaker 2.0, and it’s called Snapmaker Luban. Characterized by its well thought-out grey and blue UI, the program operates very similarly to most other FFF slicers on the market.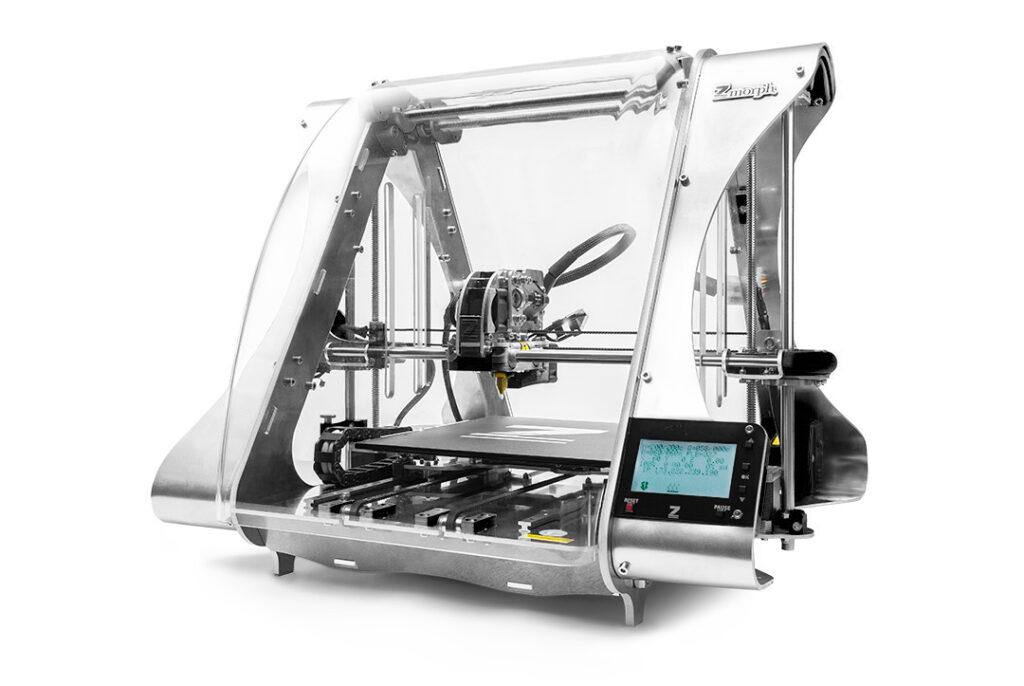 The basic translation, rotation, and rescaling functions are all there and responsive. However, we discovered that the software was lacking some of the more complex process parameters, which may be a problem for advanced users.
Naturally, Luban also has the ability to generate gcode for the laser and CNC Modules, with options for the various manufacturing modes of each. It is compatible with Autodesk Fusion 360 for CNC operations and Cura for 3D printing operations.
Still, we found Luban to be one of the more intuitive slicing platforms we’ve used here at 3D Printing Industry, and everything from the automatic support generation to the default print profiles work as expected. Ultimately, all that’s needed to pick up the intricacies of the software is a little trial and error and a dash of common sense.
Snapmaker Luban slicer. Image by 3D Printing Industry.Benchmarking the Snapmaker 2.0 A350: 63/100
It’s time to see what the Snapmaker 2.0 3D printer is really capable of.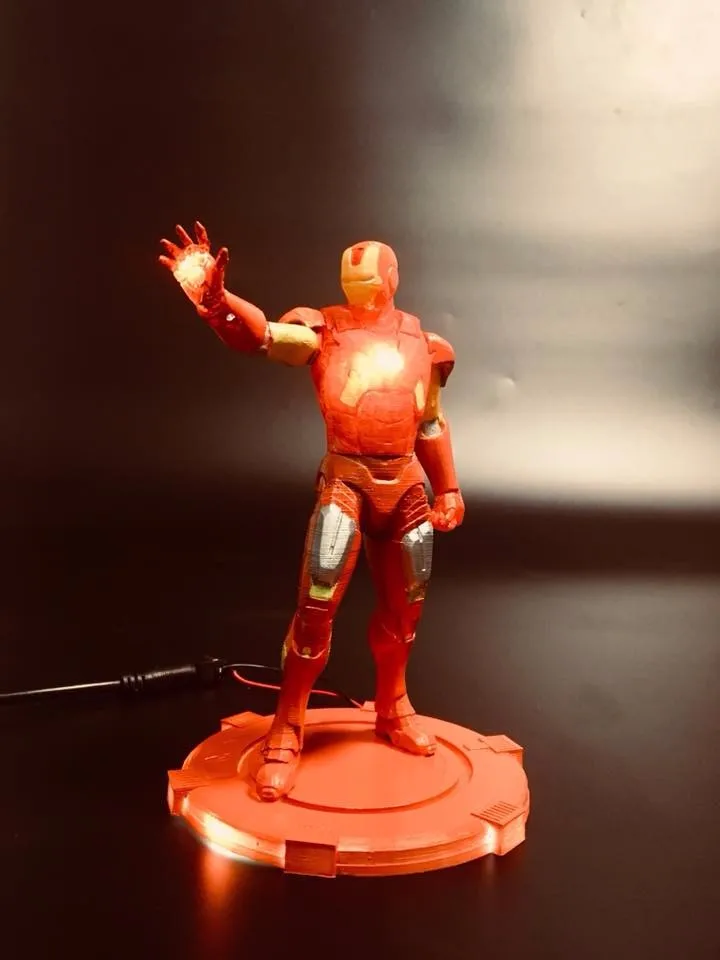 We start off with 3D Printing Industry’s own benchmarking model in PLA, which consolidates many of our smaller print tests into one comprehensive part.
For this test, we assign each of the individual sections a weighted score based on factors such as dimensional precision, surface quality, and structural integrity. The A350 earned an overall 3D Printing Industry score of 63/100 – a good professional-grade 3D printer is a 60+. Below you’ll find some bell curves depicting the repeatability of the Snapmaker.
The Snapmaker’s performance was around average for this test, as it 3D printed most of the individual sections to a decent standard. Overhangs were printed successfully up to 60° without any problems, and the horizontal bridging test was printed straight up until the 30mm mark. There was some minor stringing in the retraction test but nothing that can’t be removed in post-processing, and the spiked structures themselves are solid with an acceptable surface quality.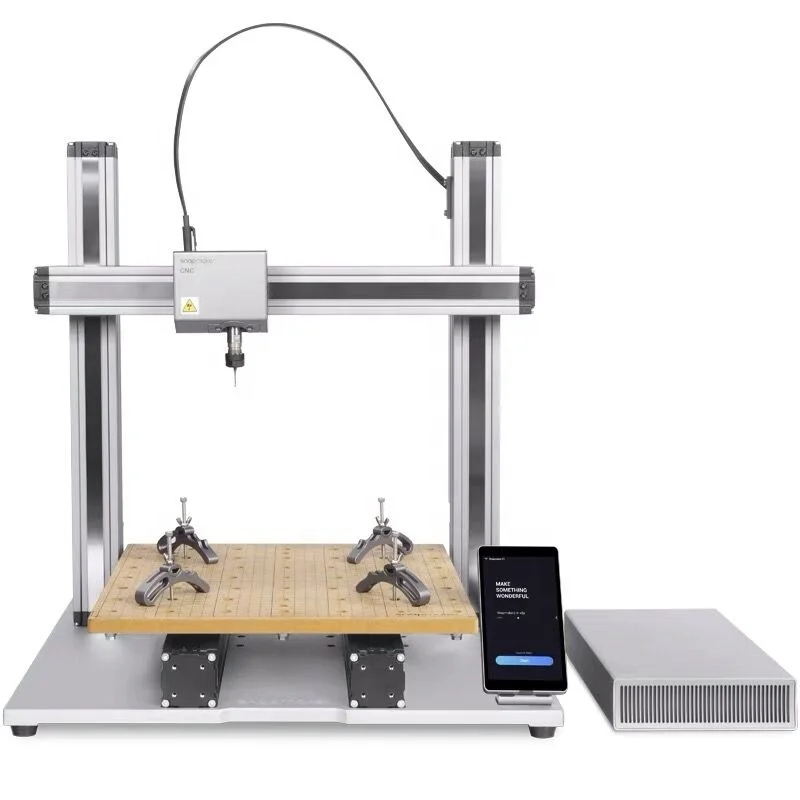
However, the leveling process let down the system in the negative precision test, since the printed tubes can’t be removed all that easily – we only managed to pull off three of them. We thought this might have something to do with the flatness of the first layer, seeing as the base of the tubes seem to be stronger than they should be.
We then 3D printed a circular trajectory test to see how the Snapmaker would handle circular structures. By studying the normal distribution of the concentric circles’ diameters, we can say that the printer offers sufficient repeatability when the mean of difference is under 0.1mm and the standard deviation is under 0.05mm. Our measurement devices are accurate to ±0.015mm.
Circular trajectory test. Photo by 3D Printing Industry.The Snapmaker certainly surprised us with some strong results here, delivering an average offset of just 0.115mm for the X axis, and 0.085mm for the Y axis. This resulted in an average of 0.091mm for all axes. The average standard deviation also came in low at 0.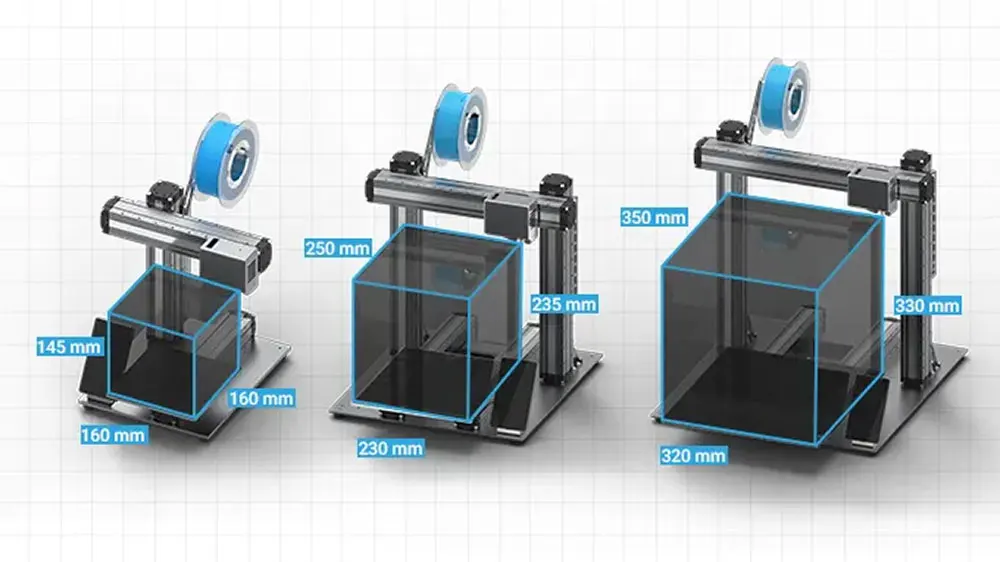 035mm, where 0.05mm is a good target. For context, industrial FFF 3D printers often boast dimensional accuracies of up to 0.1mm, which qualifies them for applications such as high-precision automotive tooling.
As with all of our reviews, we also had the system print an artistic model to see how it might handle itself out in the real world. This time, it was a Statue of Hygieia, which can be found in the gardens of Schönbrunn Palace in Vienna. Overall, the Snapmaker 2.0 held its own admirably, with smooth surfaces and well-preserved features. The only real defects on the print were scarring from some of the more difficult-to-remove support structures, along with imperfections on the underside of the model as a result of poor leveling.
Statue of Hygieia. Photo by 3D Printing Industry.Moving on, we tried our hand at some cutting and engraving tests with the Laser Module. First up, we pushed the limits of the machine by cutting and engraving test matrices in plywood. We did this in order to evaluate the quality of the laser and to better understand the differences in the parameters – feel free to use our results as a guide for your own projects.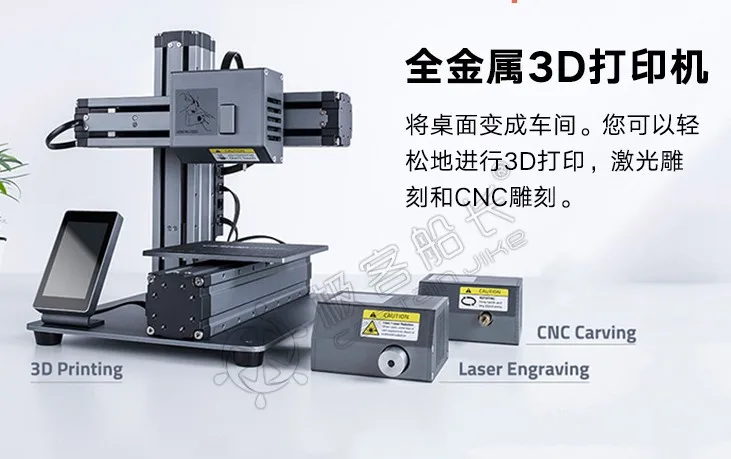 The best parameter combinations are the ones with definitive edges, solid infills, and minimal burning on the outer rim.
Next up were a set of flat laser engraving tests: one was done on a leather wallet and the other was a world map on plywood. Both of these tests were conducted using the ‘Greyscale’ mode on Luban.
We were very impressed at just how clean each of these jobs came out, as both the logo and the map had extremely clean edges with virtually no burn-induced fuzz. The leather wallet, in particular, ended up with this rough, almost rocky texture that felt awesome to touch.
Then, we decided to try out the cutting capabilities of the laser with three distinct projects. The Snapmaker-designed gift box and the 3D Printing Industry keychain were done in plywood, while the laptop sticker was cut out of vinyl. All three cutting tests used the ‘Vector’ mode on Luban (the engravings used ‘Greyscale’).
Once again, we were very impressed with the performance of the laser cutter. The gift box was precise enough to be assembled with ease, and the vinyl sticker looks like it was manufactured professionally by a specialist. The 3D Printing Industry keychain even managed to emulate the color scheme of our logo, despite it all being in greyscale.
Happy with the performance so far, we then used the laser engraver in conjunction with the optional Rotary Module, which enabled us to engrave a series of images and texts into spinning objects. The rotary laser tests were as follows: London Bridge on cardboard, manufacturing text on a PLA bullet, a chemicals symbol on a transparent PP beaker, and the London Underground logo on a ceramic mug.
The cardboard, the PLA, and the PP handled the laser beautifully, with engraving densities of 7, 4, and 4 dots/mm respectively. The London Bridge image was particularly stunning as it looked a lot like an old photograph from a distance. However, the ceramic mug is really where the cracks started to show, with the Underground logo looking patchy and faded. It’s worth noting that this was due to the material choice and the variable gradient of the mug’s curvature rather than the laser itself.
Moving onto the CNC Module, we machined a Snapmaker-designed smartphone holder made of a 3.2mm thick acrylic sheet. This CNC test used a flat end mill (1.5mm) running at 12,000 RPM and a 300mm/min work speed. We were glad to see the CNC performed exactly as expected, the parts ended up with a smooth finish, and they came off the work plate with ease. Moreover, the smartphone holder works perfectly – a big win.
Acrylic CNC machined smartphone holder. Photo by 3D Printing Industry.Finally, we combined the CNC with the Rotary Module for four final benchmarking tests. These included an epoxy chess piece, an epoxy lion, an epoxy PolyPearl tower, and a wooden PolyPearl Tower (lime tree).
All we can say is wow. The CNC and the Rotary Module make one hell of a team. Our chess piece and lion came out incredibly detailed, with the passes of the toolhead barely visible to the naked eye. The same goes for the PolyPearl tower torture tests, as the helical geometries were machined with magnificent precision. The Snapmaker 2.0 really exceeded expectations here.
The verdict
Riding the coattails of its predecessor, the Snapmaker 2.0 managed to raise almost $8 million in its initial crowdfunding campaign, and it’s not hard to see why. Snapmaker clearly knows what it’s doing when it comes to 3-in-1 manufacturing systems, having built one of the most cost-effective workshop companions we’ve had the pleasure of reviewing.
Don’t get me wrong, the machine is far from perfect. The print quality is marginally above average, the 3D printer calibration process needs work, and the day-to-day operation is far too noisy for a close-quarters office environment.
Despite this, the Snapmaker 2.0 simply offers too much in such an affordable package to pass up. We’d go so far as saying the 3D printing capabilities of the system are the weakest, but the laser and CNC Modules carry their weight and then some. As far as optional add-ons go, the Enclosure is an absolute must and the Rotary Module can be a game-changer if you’re in the market for a good old spin.
Technical specifications (A350)
| Build volume | 320 x 350 x 330mm |
| Bed temperature | 80°C |
| Nozzle diameter | 0.4mm |
| Nozzle temperature | 275°C |
| Dimensions | 700 x 660 x 580mm |
| Connectivity | Wi-Fi, USB cable, USB drive |
| Layer resolution | 50 – 300 microns |
| Laser work area | 320 x 350mm |
| Laser power | 1. 6W 6W |
| Laser wavelength | 450nm |
| Safety class | Class 4 |
| CNC work area | 320 x 350 x 275mm |
| Shank diameter | 0.5 – 6.35mm |
| Spindle speed | 6,000 – 12,000 RPM |
Buy the Snapmaker 2.0 3D printer here. The system is available to order now, starting from $1,199.
Subscribe to the 3D Printing Industry newsletter for the latest news in additive manufacturing. You can also stay connected by following us on Twitter, liking us on Facebook, and tuning into the 3D Printing Industry YouTube Channel.
Looking for a career in additive manufacturing? Visit 3D Printing Jobs for a selection of roles in the industry.
Featured image shows the Snapmaker 2.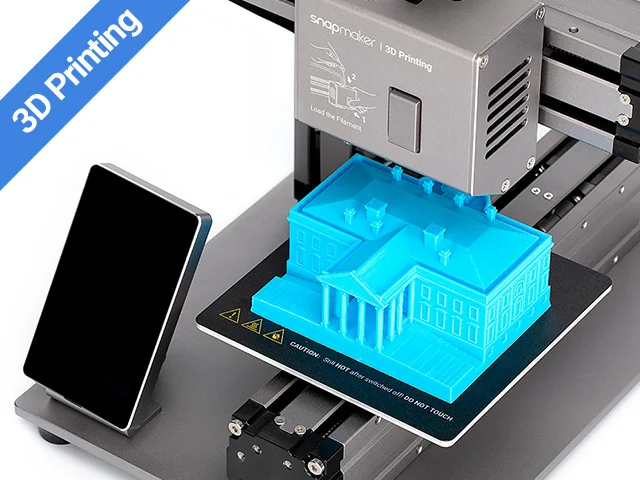 0. Photo by 3D Printing Industry.
Snapmaker 2.0 Modular 3-in-1 Review: 3D printer, Laser Cutter and CNC
Tom's Hardware Verdict
Snapmaker 2.0 A350T is a beautifully engineered all-in-one 3D printer, laser and CNC machine that takes a bit of time, and a good bit of money, to use.
Pros
- +
3-in-1 machine
- +
Well engineered
- +
Quality prints
- +
Auto bed leveling
- +
Direct drive
- +
Touch Screen
Snapmaker 2.0 is a 3-in-1 modular machine with swappable parts to make it a 3D printer, laser and CNC machine. It’s an impressive feat of engineering, with an equally impressive price. It’s great for makers who want to make everything – but lack the space for three machines.
We tested the Snapmaker 2.0 A350T, which retails at $1599 and has a large 320 x 350 x 330 build volume. You get what you pay for – the Snapmaker 2.0 is a deluxe printer/laser/CNC made almost entirely from metal with gorgeous presentation. Our unit also came with an optional enclosure complete with folding laser safe panels, ventilation and lighting. This adds $599 to the overall price tag, but makes for a safer work environment.
Snapmaker 2.0 has a few flaws. All three modes are slow compared to dedicated machines, the software has an inaccurate preview screen and the method for swapping work surfaces is tedious. It’s not quite ready for the Best 3D Printers of 2022 list, but if you’re interested in a 3-in-1 machine, it’s definitely worth a look.
(Image credit: Tom's Hardware)Specifications: Snapmaker 2.0 A350T
| Machine Footprint | 508 x 482.6 x 533.4 mm (20 x 19 x 21 inches) |
| Build Volume | 320 x 350 x 330 mm (12.6 x 13.7x 13 inches) |
| Material | PLA/PETG/TPU/ABS |
| Extruder Type | Direct Drive |
| Nozzle | .4mm (Interchangeable) |
| Build Platform | PC coated flex sheet, heated |
| Filament Runout Sensor | Yes |
| Bed Leveling | Automatic |
| Laser | 1. 6 watts 6 watts |
| CNC | ER11 collet |
| Connectivity | USB stick, Wi-Fi |
| Interface | Color Touch Screen |
Snapmaker 2.0 A350T: Included in the box
(Image credit: Tom's Hardware)Unboxing the Snapmaker 2.0 A350T is an experience in its own right. Inside the shipping box you’ll find dozens of beautifully labeled smaller boxes. Right away, you know you’re unboxing a deluxe machine.
The Snapmaker 2.0 comes with everything you need to get your printer set up. You get a tool box full of tools to build and maintain the printer, side cutters, a deluxe screwdriver with swappable heads, a metal scraper, a spare hotend and a USB stick. You also get a 1kg spool of Snapmaker filament, standard safety glasses for woodworking, laser safety glasses, a piece of acrylic, two pieces of light plywood and a cloth for cleaning the laser.
(Image credit: Tom's Hardware)Snapmaker includes a magazine-sized, full color instruction manual to get you started. Video instructions and custom slicing software, Snapmaker Luban, require a visit to the Snapmaker website for a free download.
The Snapmaker 2.0 A350T has an impressive design unlike any hobby grade 3D printer we’ve seen. It is completely made from aluminum alloys and every moving part is fully enclosed to keep it free from dust kicked up by the CNC module. This will probably make maintenance a bit of a chore, however during our testing it didn’t require any tuning.
The machine sits on a heavy baseplate, with a separate, unattached power module. This allows the power to stay cool outside the optional enclosure should you have it. The touch screen is a small Android tablet on a cord, with a magnet that allows it to snap onto a holder at the front of the machine.
It has both a dual Z axis and a dual Y axis. There are no belts on this machine and each “linear module” conceals a stepper motor and heavily greased screw.
(Image credit: Tom's Hardware)Each of the three tool heads mounts on the X gantry with four screws. The 3D printer head is a compact direct drive capable of reaching 275°C. The laser is a low-power, 1.6-watt diode, which is best used for etching, but can also cut through extremely thin wood. The CNC module has an ER11 collet that will fit standard 3rd party bits, with a spindle speed of 6000-12,000 RPM. It can cut wood, acrylic and softer stones.
The three work surfaces are a bit over engineered, and a point of frustration. The Snapmaker’s multipurpose base is an aluminum grate. Each mode has its own specifically-designed build plate, which has to be screwed into the grate with as many as 22 screws. Swapping plates requires 15-20 minutes, especially with the supplied hand tools.
The optional enclosure has five laser safe acrylic sides and an open bottom. The front and right side have sliding panels to allow access to the machine. The spool holder mounts to the back outside corner and there’s a cutout in the front door for the touchpad. The enclosure comes with LED lights and a ventilation fan that plug into the Snapmaker’s control strip and are operated from the touchpad. The enclosure gets a bit gross looking after a long CNC session, but that just shows it’s doing its job.
Snapmaker 2.0 has built in Wi-Fi for sending gcode files, but can also use a USB memory stick.
Assembling the Snapmaker 2.0 A350T
The Snapmaker 2.0 is a DIY kit that takes about an hour and a half to build. Even experienced makers will need to consult the directions because the Snapmaker is unlike any other 3D printer. It’s not that it’s hard to put together – it’s actually rather easy – but there are an insane number of parts, screws and little boxes.
First, we have to pause a moment and admire the toolkit Snapmaker includes with this printer. This is no bag of loose hex keys, but an actual box to store all your tools, bits and extra screws.
(Image credit: Tom's Hardware)You won’t need to watch a video to assemble this machine, because the “quick start guide” is actually a full color 93-page book with illustrations.
Putting it together is much like working with a giant erector set, with every part mounted to the frame by several screws.
Because the Snapmaker is built to be completely dustproof, all the electrical components have plugs that feel more like they belong on a home appliance than a science fair kit. Cables are pre attached to their modules, and you’ll need to thread them through the machine to connect to a control strip mounted to the right side Z axis.
(Image credit: Tom's Hardware)Each tool head has a similar case and is mounted onto X gantry with four screws, then plugged into the control strip.
(Image credit: Tom's Hardware)There are three build plates specifically designed for their function. It takes 22 screws to hold on the printing plate, and 14 to hold both the laser and CNC work surfaces in place.
(Image credit: Tom's Hardware)Preparing Files / Software for Snapmaker 2.0 A350T
(Image credit: Tom's Hardware)Snapmaker has partnered with Luban to create “Snapmaker Luban” which can slice models for all three functions.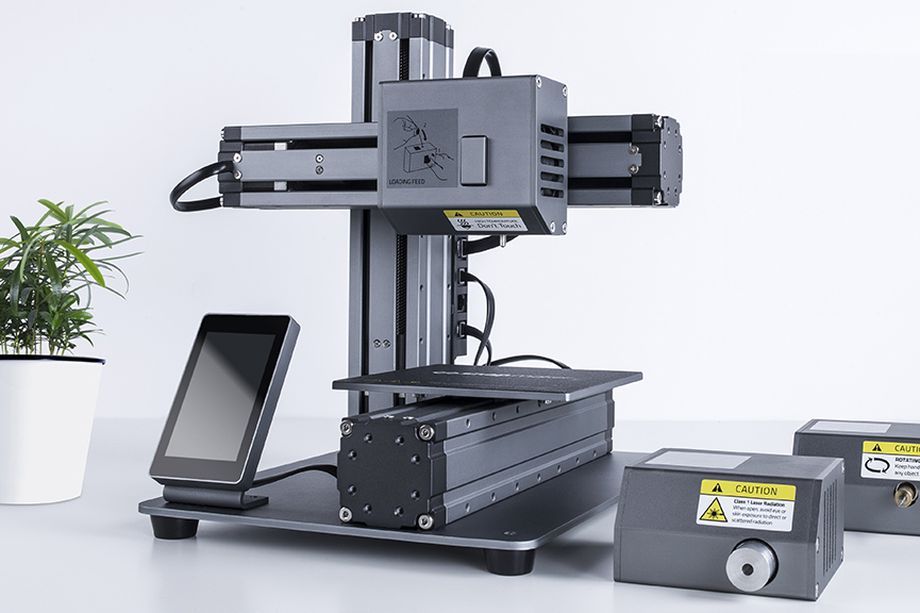 The software is beginner friendly, with lots of presets aimed at producing high-quality prints, laser engraving and CNC pieces.
You can use Cura instead of Luban for 3D printing – Snapmaker profiles are included with Cura 5.0 and up – but you will lose access to the Wi-Fi abilities. I found no adequate replacements for prepping laser or CNC gcode, so I recommend you stick with the provided software for this machine.
(Image credit: Tom's Hardware)3D Printing Mode on the Snapmaker 2.0 A350T
To 3D print, you’ll need to install the 3D printing direct drive tool head, the heated bed and its magnetic flexible build plate. The build plate is quite stiff, two-sided, and coated in a BuildTak type PC surface that releases prints easily when flexed.
The Snapmaker 2.0 can use a wide range of filament beyond ordinary PLA. It also handles PETG, ABS and TPU quite well. Check out our guide of the Best Filaments for 3D Printing for examples of our favorite materials.
Leveling the Snapmaker 2.
 0 A350T(Image credit: Tom's Hardware)
The Snapmaker 2.0 will need to be leveled for 3D printing each time you install the 3D printing tool head. The machine can detect which tool head you have installed, and will prompt you to run the appropriate calibrations as needed.
For 3D printing, the Snapmaker 2.0 uses a magnetic probe for leveling. The bed is hard mounted, with no ability to make manual adjustments. Pressing the Calibration button on the touchpad’s home screen will start the process. After it moves through 9 points, it will ask you to set the Z offset with a sheet of paper.
The Snapmaker 2.0 defaults to leveling with a cold bed. If you prefer to level the machine while hot, you can change the default in the settings menu.
Loading Filament on the Snapmaker 2.0 A350T
(Image credit: Tom's Hardware)Loading filament in the Snapmaker 2.0 is exceptionally easy. Click Control → Change Filament and the tablet will prompt you to raise the nozzle temperature.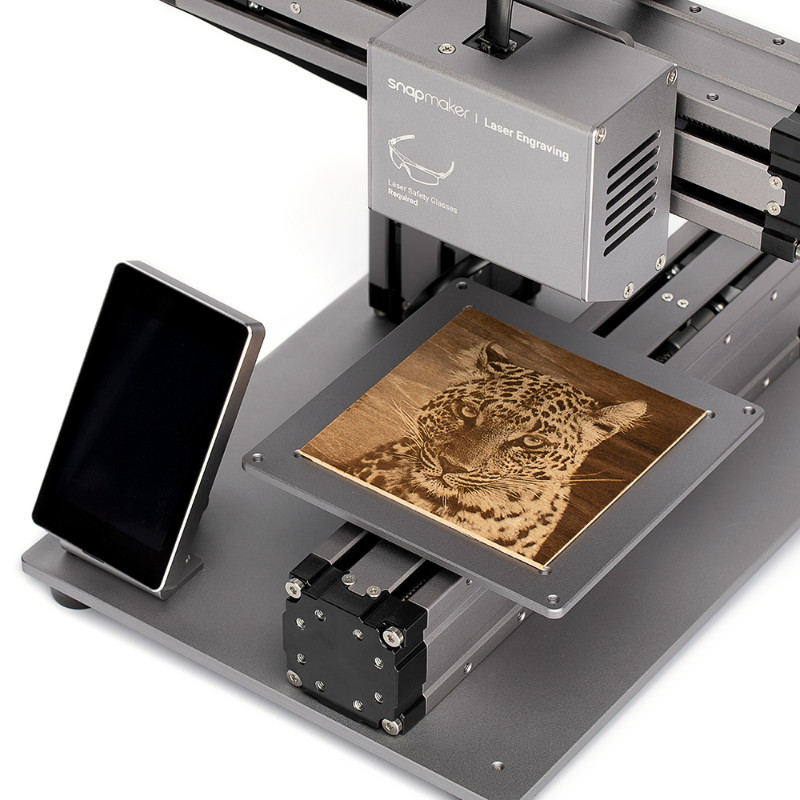 Place the filament into the hole at the top of the printing module and click load.
To unload material, just reverse the process.
Printing on the Snapmaker 2.0 A350T
Print speed for Snapmaker 2.0 has been throttled by its software. Whether it’s to compensate for the screw driven Y and X axis, or the smallish cooling fan, we’re unsure. We’ve run it faster than suggested, and the results were perfectly fine, but for these test prints we decided to keep the settings at the manufacture’s suggested speeds.
It’s easier to see the limits placed on the Snapmaker when you view its official profile inside Cura. No matter what speed you enter for overall “print speed” the machine will default to 20mm/s on the outer wall, 25 mm/s on the inner wall, infill at 60mm/s and travel speeds of 80 mm/s. I noticed that it keeps this speed no matter what material profile you use – PLA, PETG, TPU and ABS are all run at the same slow and steady rate.
By comparison, my Ender 3 S1 Pro produces quality PLA prints at 65mm/s, with a general wall speed of 32.5 mm/s, infill at 65 mm/s and travel at 175 mm/s.
I tested PLA with McGybeer’s classic Cute Mini Octopus, blown up to 250% with Inland White PLA. This was using Snapmaker Luban’s “fast print” default setting, which has a layer height of .24 and took 23 hours and 35 minutes to print. The print quality is respectable, but using layers this thick does leave visible layer lines and stair stepping on the rounded top surfaces.
McGybeer’s Cute Mini Octopus (Image credit: Tom's Hardware)I tested vase mode with Clockspring’s Illusionist Vase at 200% in Keene Village Deep Translucent Blue PLA. I kept with the Fast Print settings and this jewel like vase printed perfectly in 16 hours and 17 minutes.
Clockspring’s Illusionist Vase (Image credit: Tom's Hardware)The Snapmaker 2.0 handled TPU exceptionally well, and printed the Thwack Hammer by Low 351 in Matterhacker’s Translucent Purple TPU with very little stringing using the Fast Print default settings.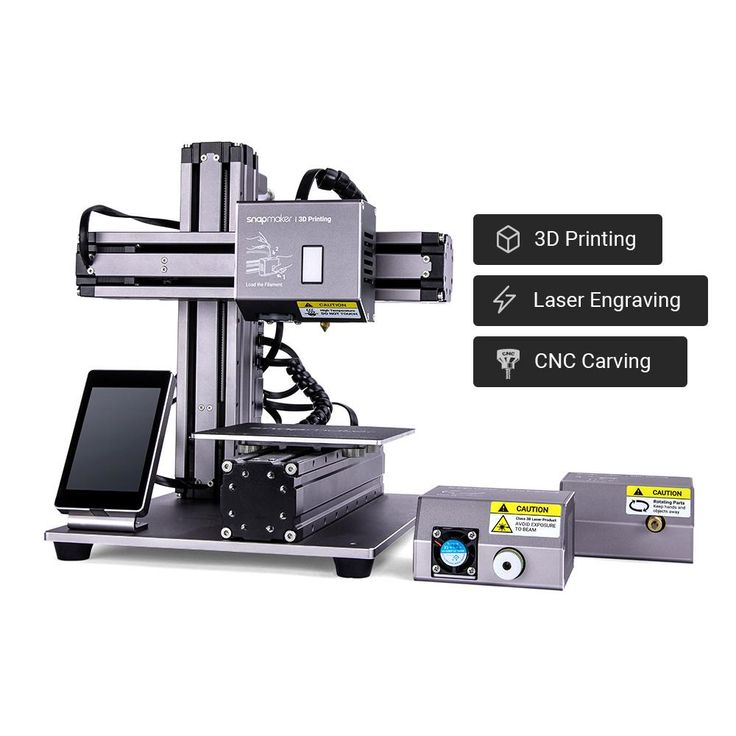 The hammer prints upright, with the head on the baseplate and the handle at a 90degree angle to the bed. The print took about 17 hours and 54 minutes.
The Snapmaker 2.0 had no problem with PETG, as you can see from this nearly flawless Flexi Factory Cute Dolphin. The translucent IC3D R-PETG Blue Razz doesn’t do it justice as the infill peeks through in a weird way. This is printed in “Normal” settings, with a .16 layer height. This took 7 hours and 3 minutes.
Flexi Factory’s Cute Dolphin (Image credit: Tom's Hardware)Since the Snapmaker 2.0 was parked in an enclosure, I tested a roll of Inland ABS on the Flexi Factory Cute Dolphin. This printed without any lifting, which is surprising since the bed only gets to 80 degrees, the lowest temperature Inland ABS can handle. Taller models – I originally tried the Thwack hammer in ABS – were unable to stick and fell over halfway through.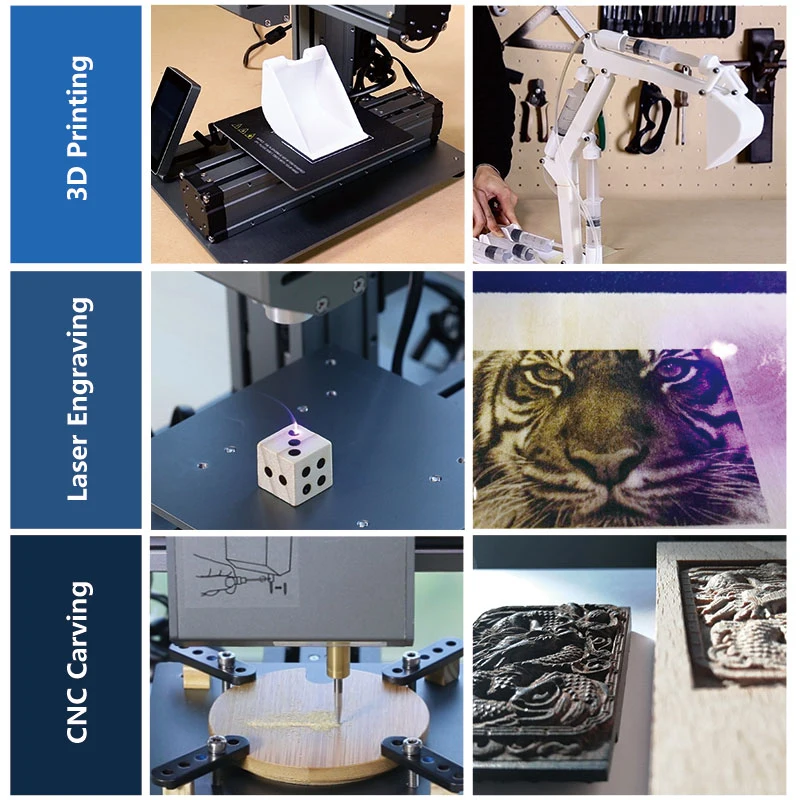 I switched to “Normal” default settings, which uses a .16 layer height and slightly slower speeds. This took 7 hours and 3 minutes.
Laser Engraving and Cutting on the Snapmaker 2.0 A350T
(Image credit: Tom's Hardware)To use the Laser tool head, you’ll need to install the provided aluminum grid build surface, which comes with silicone grippy tabs for holding down material. You can also use binder clips or tape. The Snapmaker 2.0 A350T laser is 1.6 watts, however a more powerful 10 watt laser can be purchased as an accessory for an additional $498.
The laser tool head has an opaque shield to minimize laser exposure, but you will still need to operate the laser while using laser safety glasses – one pair is provided – or while it’s inside the optional enclosure.
The tool head also comes with a camera to assist in focusing and placing your engraving/cutting design where you want it on the material.
You’ll need to focus the laser each time you install the laser tool head. To do this, place a piece of scrap wood in the center of the work surface. Then move the laser until its black shade slightly touches the surface and set the origin point. The machine will burn several lines into the wood and ask you to pick the best line.
Next, you’ll calibrate the camera with a piece of blank paper that is at least 150 x 150 mm. The machine will lightly engrave a square onto the paper. It will take a photo of this square to help with placing materials for the laser.
The camera aided placement sounds easy, but the quick start directions skipped over how to properly set the origin point for the laser. It took a bit of trial and error to get the origin set correctly, but after that the laser performed quite well.
The Snapmaker 2.0 laser is only 1.6 watt, which is very low power compared to other diode lasers on the market. However, it was able to very slowly slice through 1.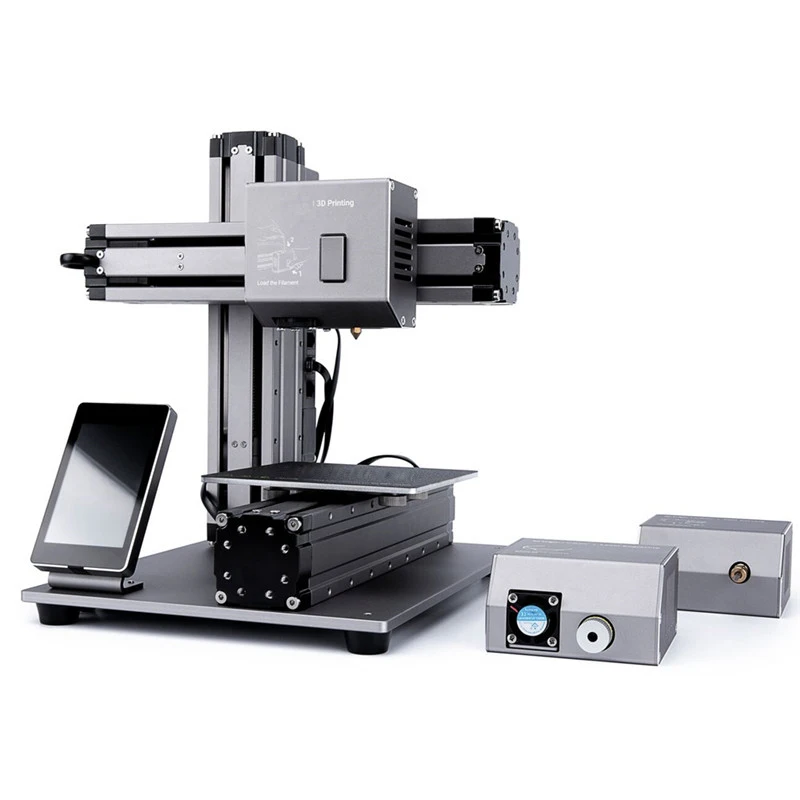 5mm light plywood and this thin balsa, which I tested with a part from an RC airplane kit. It took about an hour each to cut out these wings.
Photo engraving was excellent, especially when I used an old black and white photo – like the WWII pilots on the top. The family photo below was originally in color and could use a little tweaking. These were engraved into MDF. These 4.5 x 3.25 inch images each took about 4 hours to engrave.
(Image credit: Tom's Hardware)CNC on the Snapmaker 2.0 A350T
The CNC module was something I haven’t used before, so I stuck with a few simple tests. Unlike the Laser and 3d printing tool heads, there’s no need to recalibrate the machine once the parts have been swapped out. Snapmaker Luban has default settings for different kinds of bits you can use to help you get started.
This phone holder is a sample file included with Snapmaker Luban and designed to be cut from a sample of acrylic included with the machine. The CNC moves a bit faster than the laser when it comes to cutting, and this only took 57 minutes to carve out.
This simple test was made with Snapmaker Luban and carved into MDF. The words are about 75 mm wide and 2mm deep. It took 6 hours and 11 minutes to carve them out. The process is slow, but the results are clean.
(Image credit: Tom's Hardware)If you drop a photo into Snapmaker Luban while in the CNC mode, you’ll get the option to carve a relief. This St. Louis skyline took 30 hours and 26 minutes to carve.
(Image credit: Tom's Hardware)(Image credit: Tom's Hardware)The Snapmaker 2.0 A350T is for a crafty maker who wants to dabble in 3d printing, laser engraving and CNC – and doesn’t mind paying for a well-engineered piece of machinery. It certainly saves on space, but its laser and CNC are a bit under powered, so I can’t imagine it replacing three machines you already own.
The Snapmaker 2.0 is a quality machine that makes quality pieces, however for full disclosure, I feel I have to let you know about the Snapmaker Artisan – currently on presale. By the time we were offered the 2.0 for testing, Snapmaker was already teasing the Artisan. Before pulling the trigger on a Snapmaker 2.0 you might want to check out the Artisan, which is bigger, faster and has quick release work surfaces. It’s also about $800 more than a Snapmaker 2.0 with an enclosure, but I’d hate for anyone to get buyer's remorse. We have not been offered an Artisan for review at the time of this writing, so I can only say it looks well worth the wait on stats alone.
If you don’t need a three-in-one machine, we’ve reviewed several excellent printers that might better suit your needs, like the Ender 3 S1 Pro, our pick for best 3D printer. Overall. FYI, Creality makes an optional 1.6 watt laser module for the Ender 3 line that we are currently testing and costs less than $100. If you don’t need a CNC or an enclosure, this could save you a significant amount of money.
MORE: Best 3D Printers
MORE: Best Resin 3D Printers
MORE: Best Filaments for 3D Printing
Denise Bertacchi is a Contributing Writer for Tom’s Hardware US, covering 3D printing.
Snapmaker compact 3D MFP overview / Sudo Null IT News
- Manufacturer: Snapmaker
- Model: Snapmaker 3D MFP
- Spindle speed, rpm: 2000-7000 (Nominal - up to 19000)
- Operation speed, mm/s, up to: 100
- Actual print speed, mm/s: 40
- Print area, mm: 125x125x125
- Laser engraving area, mm, up to: 125x125 (actual may differ, more details in the review)
- Milling area: 90x90x50 mm (actual may differ, more details in the review)
- Print technology: FDM
- Platform heating temperature, °C, up to: 100
- Nozzle temperature, °C, up to: 250
- Layer thickness, microns: 50-300
- Laser engraving
- Milling cutter
- Price, rub: 63 566
Unpacking
Snapmaker came to our review with 2 reels of “native” PLA, yellow and red.
Beautiful box with a description of the contents.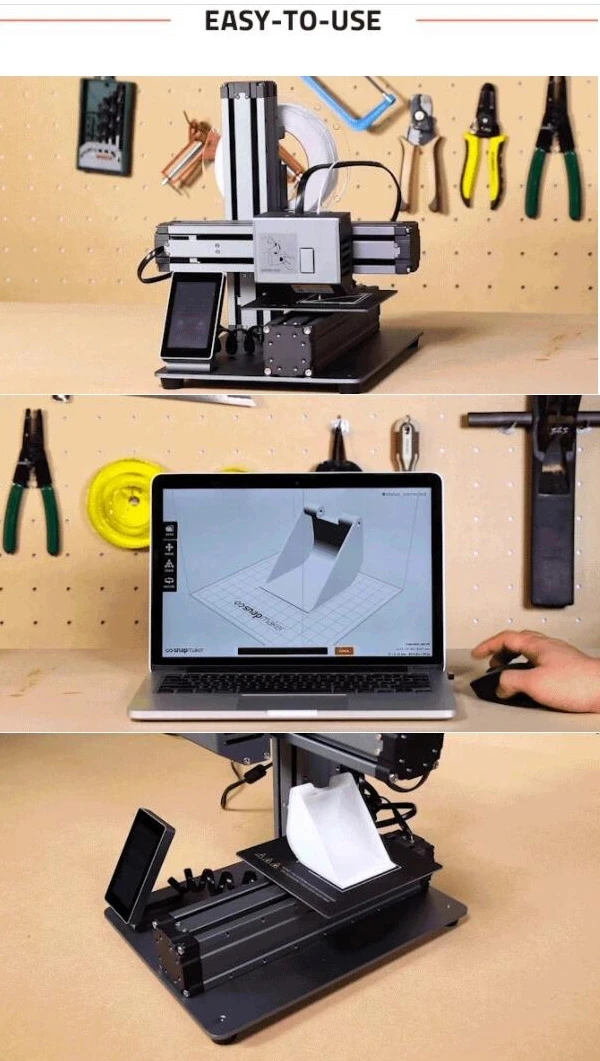
Inside - soft transport material, something like foam rubber, for safety.
Introductory manuals for the machine and its functions.
Memory card and USB adapter.
Test samples to verify functionality.
The modules themselves that make up the machine.
Content list.
Tools - wrenches and screwdrivers.
All instruments are packed in individual bags.
Two pairs of protective goggles - clear for milling, green for laser.
Connecting cables.
Power adapter.
Touch control panel.
Working modules - laser engraver, milling cutter, 3D printing unit.
Controller.
Plastic spool holder, removable.
Heated platform 125x125 mm, with interchangeable surface, laser and router platform and legs.
Assembly
The assembly instructions are very clear. Everything is simple. First we screw the legs.
Then we connect one of the transport modules to the platform.
Then two or three more linear modules in total give the platform mobility in three dimensions.
We make sure that everything is assembled evenly, using a level.
The table top of the workbench on which assembly is performed and on which operation will be carried out must also be strictly horizontal, otherwise incorrect calibration is possible.
We attach one of the working modules.
We connect the control panel.
Attach the controller and coil holder.
We connect everything with wires and turn it on.
The machine is ready to print.
Software
The software is divided into three separate parts:
Snapmaker3D for FDM printing.
Simple FDM slicer.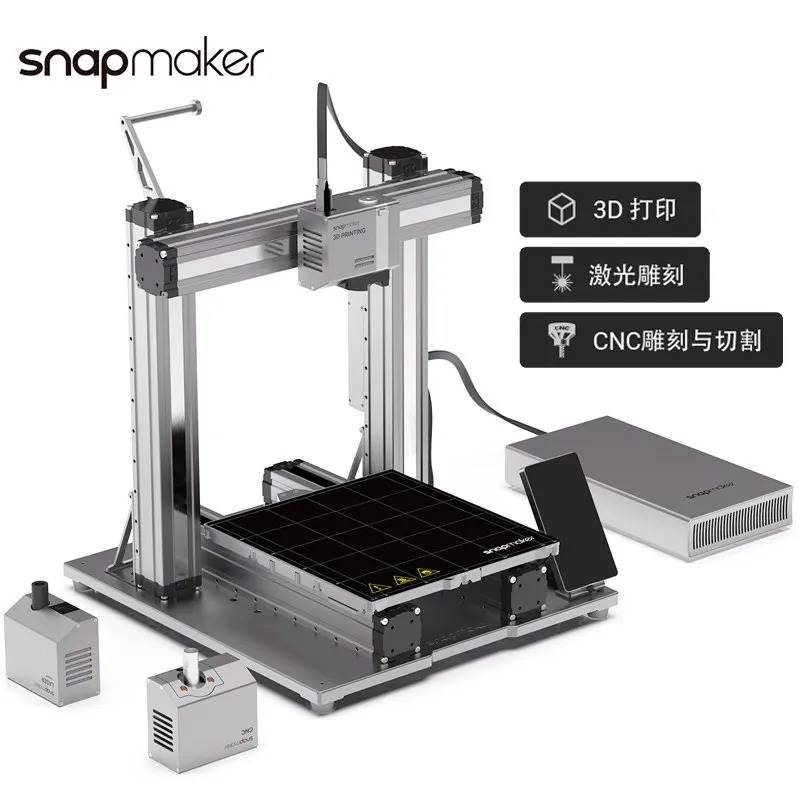
Snapmakerjs - for laser engraving.
Fusion 360 - for milling.
Operation of the device
Snapmaker is not a professional FDM printer, laser engraver or engraver, but it is perfect for home and educational use. “3in1” is not just a marketing ploy, this miniature machine will introduce you to three types of equipment and will be very useful in your home workshop.
There are no high speeds here: preset print speed is up to 40 mm per second, the speed of the laser and router depends on the model; but this is enough for high-quality execution of 3D models, accurate laser engraving and milling.
Open g-code allows you to use any model preparation programs that work with this code with Snapmaker, such as Simplify3D and Fusion 360.
3D printing FDM, PLA, Snapmaker
For 3D printing, we need to install the head under the FDM and the heating platform.
After installing the head and platform, we calibrate the table by 4 points in the control panel menu.
By setting the Z-offset at each of the 4 points, we prepared the Snapmaker for FDM printing. Next, we load the .stl file into the Snapmaker3D slicer and prepare the model for printing.
Snapmaker3D does not stand out among the variety of slicers. It's not Simplify3D, but it's also not Repetier-host, a medium functionality program.
In this slicer, you can move an object in the XY plane, scale and rotate it.
Standard printing process settings: choice of profiles, PLA and ABS, four presets, Brim, Raft, Skirt.
In the Custom preset, you can change the values.
Slicer cons:
1. Only one object can be loaded
2. You can not adjust the position of the object along the Z axis
Pros:
1. Simple and intuitive interface
2. Output file format is .gcode
3. Ability to work with Simplify3D
Print video:
Laser
After that we connect Snapmaker to PC, connect via com-port and focus the laser.
Engraving area is quite small - it is 80x80 mm. Nominally, it is 125x125, but when using standard clamps, it decreases at the edges. If you are willing to take the risk and engrave without fixing the workpiece, you can use the entire area of the platform.
Manual focusing. It is necessary to achieve the smallest possible point.
Head position and height can be controlled in Snapmakerjs, and the module itself has focus controls.
This program has three function windows:
1. Work area window
2. Drawing preparation window
3. Window with program settings.
In the workspace window, we can control the position of the laser and the focusing power, we can see the display of executed commands, set the speed of passage, set the relative zero.
In the window with the preparation of the picture, adjust the dimensions of the picture, contrast, brightness, image processing method, display quality. Here gcode for laser engraving is formed.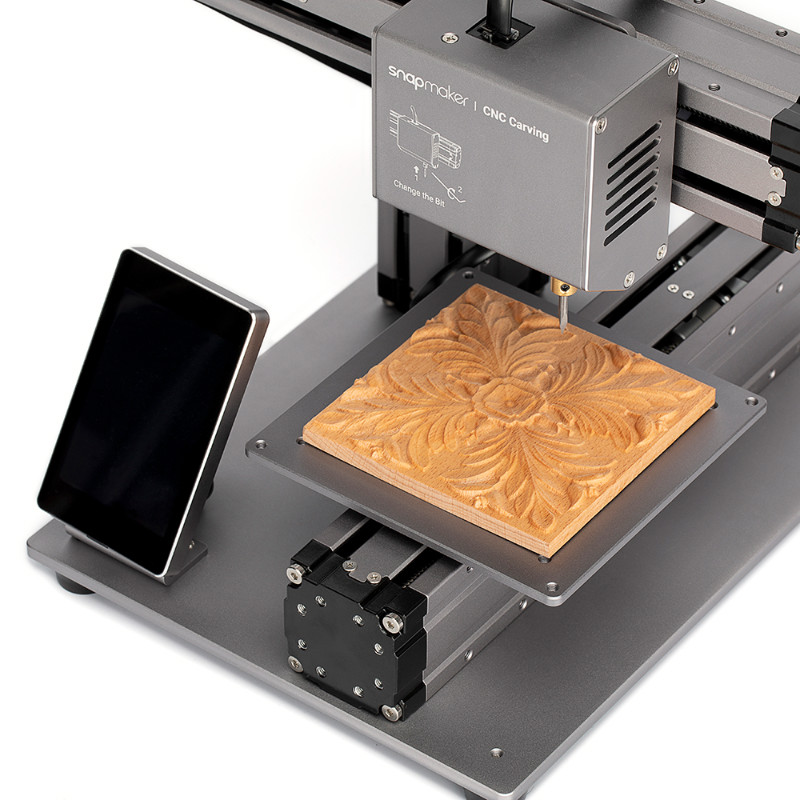
In this case, we are processing the image in grayscale mode. The image is raster, from individual points, not curves.
After setting the settings, you can see a preview and generate the final gcode. Processing a vector image here is similar to the work of CorelDraw.
Here we see a black rectangle. Upon closer examination, it becomes clear that this is a visualization of the path along which the laser will go and burn the image, point by point. The process is quite long, which cannot be said about the engraving of vector drawings.
Logos burn much faster in black and white engraving mode, through vector. But in raster format, a much more interesting result is obtained.
Milling
To prepare for milling, to create 3D models and generate standard gcode format NC programs, you will need the free Fusion 360 program, then Snapmakerjs to translate gcode to the machine itself.
For the first milling, you will not need any special knowledge, except for a minimum knowledge of English - the whole process is described in detail, step by step, in the instructions.
To begin with, we are offered a simple example - cut out the Latin letter S. To do this, we need to open Fusion 360, create an outline of the letter and extrude it.
Then, using the CAM tab, we create a cutter path.
After that, the gcode is saved and transferred to Snapmakerjs.
We start milling and observe the process.
Then you can experiment and do something more complicated.
A nuance about the milling area - nominally it is 90x90 mm and 50 mm deep, but when using clamps, the area is reduced to 80x80. That is, in fact, it turns out 80x80x50 mm.
Pros and cons
Pros:
- compact,
- mobility,
- easy handling,
- quality,
- appearance.
Cons:
- small working area,
- low spindle power,
- long overhang,
- insufficient rigidity for serious milling.

Because of all this, milling is extremely slow. This machine is still created for engraving, and not for serious milling.
In order to beat off the working zero, in any case, you will have to connect the device to a computer. Then you can run the control program from the USB flash drive.
No feed adjustment in progress, it can only be adjusted before starting the control program and only from the computer.
Good for engraving small printed circuit boards for DIY electronics.
Impression, comparison
You can compare with SkyOne.
How they differ:
1. SkyOne's Scara movement mechanic versus Snapmaker's Cartesian system. The uneven movement of Scara mechanics will affect the resolution of laser and milling engraving. The Cartesian system has no such problems.
3. Both printers are not rigid enough for 2.5D milling.
4. The construction area for Snapmaker is 125x125x125 mm, for SkyOne - 140x190x200 mm.
5. On the other hand, the layer thickness of Snapmaker is 50 microns, which is exactly two times thinner, this will give a smoother surface of the FDM print.
5. More convenient software from Snapmaker.
Answers to questions about past reviews
- I wonder what the moving parts are on?
If we partially dismantle one of the linear modules, we will find a fairly simple system on four rollers made of light plastic. We haven't done a chemical analysis, but it's most likely nylon or PTFE.
The solution is quite budgetary and simple. However, one cannot fail to note the high quality and precision of the milled body elements, as well as the assembly inside the modules. The rollers do not dangle and provide sufficient rigidity for the operation of all three types of nozzles.
- I didn't notice any table calibration options. I don't see the Z sensor either. They hope that such brutal beams will allow them to set zero once at the factory and that's it? Good luck, they'll need it.
Calibration is carried out at four points on the platform. In the program, it is necessary to adjust the pressure for each of the 4 points in series. Thus, by introducing software correction of the distance between the nozzle and the platform, Snapmaker completely eliminated the need for adjustment screws.
— How is the rigidity of the structure ensured?
For FDM and laser, with such small processing areas and print volumes, rigidity plays a small role. Milling on Snapmaker is relevant for educational and entertainment purposes, it is unlikely that anyone would think of creating a prototype of a serious industrial device on it.
The power is small, the rigidity is appropriate.
— What is responsible for positioning accuracy?
No ball screws here. Standard helical gear with tension spring. It is unlikely that this will confuse anyone in our time.
Summary
Snapmaker is not an industrial machine. This is not the kind of 3D printer, router or laser cutter that will produce tons of products 24/7.
If you need a machine or printer for commercial use, this is definitely not your choice.
This is a miniature desktop machine for learning, entertaining and creating unique DIY gifts. With it, you will teach your child the basic skills of working with modern technology, moreover, with three types of machines at the same time. Or you can please an adult with such an original and useful gift. Few people will be left indifferent.
Although Snapmaker does not have precision accuracy, rigidity, workspace volumes, it has a different purpose, and it fulfills it. He does a great job with his goals. And besides, it looks very good.
You can buy Snapmaker and get free training in Top 3D Shop. When buying it, you will also receive a discount on consumables - up to 20%, for the whole of 2018.
Want more exciting news from the world of 3D technology?
Follow us on social.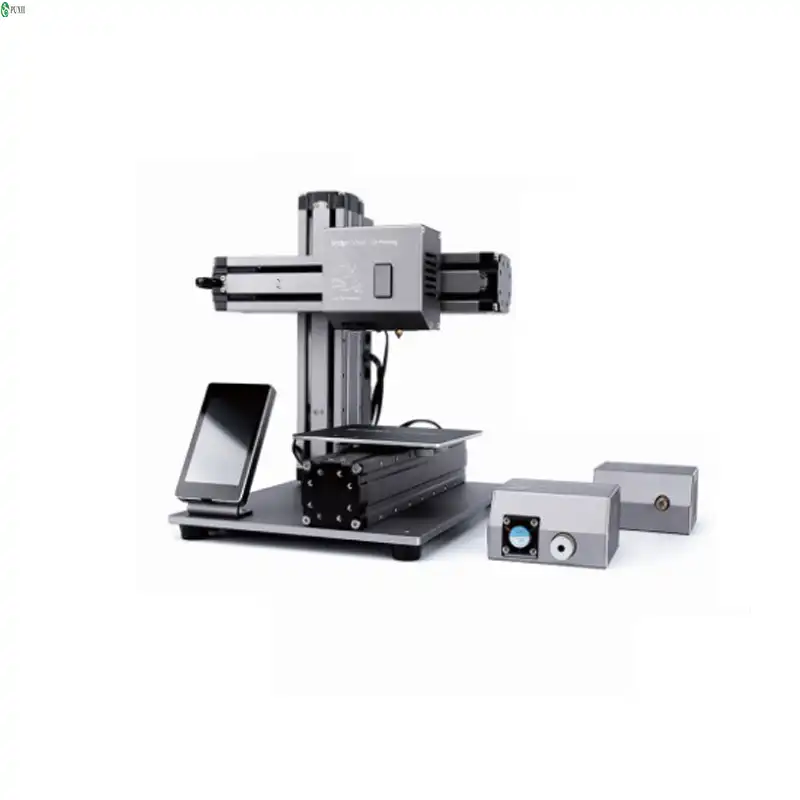 networks:
A brief overview of universal Snapmaker 3in1 MFPs for beginners. What can a 3D printer, milling machine and laser engraver do in one bottle?
Hello, friends! 3DTool is with you!
We never get tired of telling you about Snapmaker, not only because they are really cool guys, but also because we really like this brand ourselves. The vibrant start-up from China quickly gained popularity among makers and garage enthusiasts around the world, and this is not at all surprising, given the uniqueness of the offer and the quality of their products. In this material, we have collected videos and articles dedicated to this manufacturer, so that it would be more convenient for you to get to know the brand's products in one reading.
The Snapmaker Philosophy
The guys at Snapmaker believe that there is a creative and inventive spirit within each of us that just needs an outlet.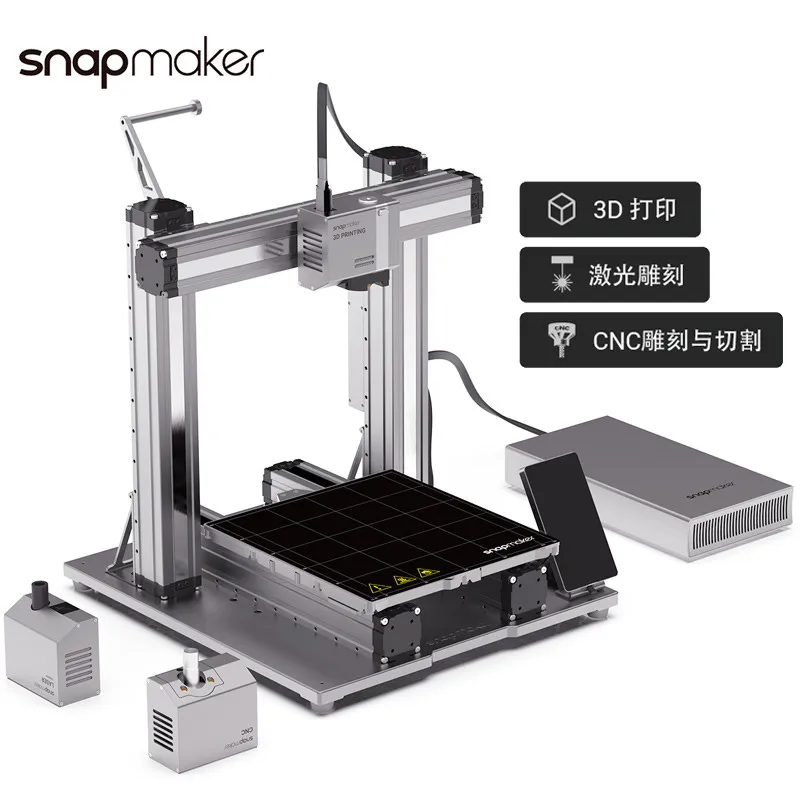 Thinking about their product, they expected to create a convenient universal tool that allows you to quickly achieve even the most ambitious goals and solve complex problems using a single device.
Looking ahead, we can say that they certainly achieved this goal!
Assemble yourself!
The Snapmaker 3in1 is a modular building kit that must be assembled by hand before use. Of course, the guys could supply already assembled Snapmaker , but what could be more exciting for a person charged with technical creativity than building a 3D printer or CNC machine for himself? However, the threshold of knowledge required to create from scratch is sometimes too high, and in order to learn something, you must first look at how serial products are arranged, right? 😉 Therefore, modular, partially reassembled Snapmaker fit in this case as well as possible.
Upgrade!
Rotator
Enclosed housing
Anyone who has ever upgraded his personal car, or did repairs in the apartment, or maybe is engaged in large-scale modeling, knows perfectly well, there is no limit to perfection! Even in a solid device, tool, design, there is always something to refine. Snapmaker gives its users the same opportunity. By purchasing a basic set, you can always expand its functionality in the future, for example, by adding a rotary axis for radial processing of workpieces, or a closed housing with a filtration and smoke exhaust system. At the same time, full compatibility of add-ons from the manufacturer will guarantee the absence of annoying inconsistencies and breakdowns when using analogues not intended for such an MFP.
Learn!
milling with a rotary axis
Module of milling
Laser engraving module
Any of SNAPMAKER 3IN1 is able to become a good practical example for the development of the CNC of the CNC of the Frys these areas. Thanks to quick-change working modules, it takes just a few minutes to reconfigure a 3D printer that has just printed from plastic filament into a laser engraver. However, in order to get the result that you originally intended, you need to learn how to choose the right settings. Agree, this is difficult to do if you have to work in several software packages, separately for milling, laser and printing. Snapmaker offers a unique P.O. – Luban . A unified environment for the preparation of control programs and tasks for 3D printing. This approach greatly simplifies learning to work with any of these tools and allows you to gain experience in each of them individually almost seamlessly. And after a few actually prepared projects, you will already be able to understand the process much faster. Don't be afraid to experiment!
Choose yours!
Overview A250
The Snapmaker MFP line currently consists of 3 models in various sizes.
The smallest A150 (aka Snapmaker Original)
The mid-sized and fastest A250T
And the big and powerful A350T capable of solving even more ambitious tasks!
Before choosing the model that is right for you, decide on the location and frequency of planned use of the device. The larger workpieces you plan to process, the more space you need and the larger the working area your Snapmaker . Based on our personal experience, the A250T model seems to be the most balanced at the moment, both in terms of the working field and dimensions, and considering the price of the device. It should also be noted that the frame rigidity of A250T is also at a better level than that of the starting model. For the rest of the functionality and options offered, the models do not differ. You can learn more about the line using the example of Snapmaker 3in1 A250T and A350T in our overview video above, or in THIS article.
Create amazing things!
Make something Wonderful! This is the main idea of our title promo video.
And we fully share this call. By creating something with your own hands, something that no one has done before you, or a thoughtful refinement of existing ideas, you fill the world with new meanings and bright colors, move forward and develop the space around you!
Do not limit your imagination, give free rein to skillful hands and a sharp mind and realize your idea “in kind”, and a reliable tool in the form of a small and hardworking MFP machine on the table will help you with this.


