Resin 3d print temperature
Can You 3D Print in a Cold or Hot Room? – Temperature Solutions – 3D Printerly
Getting the perfect 3D printing quality depends on many factors, the temperature is one of the main ones. Based on this, many people wonder whether you can 3D print in a cold or hot room. This article is going to answer exactly that so you have a better idea of your 3D printing capabilities.
You can 3D print in a cold or hot room as long as your 3D printer has the proper conditions, such as a constant printing temperature and the right kind of materials. If you try to 3D print ABS in a cold room, you are likely to run into massive warping problems, while PLA could be pulled off.
There are many more details that need to be discussed to get the real answer on 3D printing in a cold or hot room. Keep on reading to find out some key information on this topic.
If you are interested in seeing some of the best tools and accessories for your 3D printers, you can find them easily by clicking here (Amazon).
Can You 3D Print in a Cold Room or Cold Weather?
Monitoring temperature while printing is one important step you need to ensure. It can be hard to print in a cold environment hence you need to carefully monitor your environmental temperature while printing.
Different print materials require different optimum temperatures. When you print with ABS, you should keep the entire build area fairly hot to prevent warping. However, PLA is not as meticulous as ABS.
Which means that you can get some 3D prints in a relatively cold environment if you are printing with PLA. Users started to see printing issues with PLA at temperatures below 59°F (15°C).
The main thing you have to control is temperature fluctuations because large changes in temperature can definitely mess a print up. Warping occurs because print layers are cooling down too quickly, meaning they contract too much.
This is when you see corners of your print start to curl away from the print bed, which is bad for print quality and can even lead to prints getting knocked over because it decreases bed adhesion.
Once you control for temperature fluctuations, 3D printing in a cold room isn’t impossible, but it can definitely be difficult. I’m sure there are certain temperatures which are just too cold to operate successfully.
It will come down to how good your power supply is and your heated bed part’s ability to generate enough power to overcome the cooler environment.
Check out this video by Uncle Jessy who actually 3D printed outside in the snow to test out the theory!
Can You Resin 3D Print in a Cold Room?
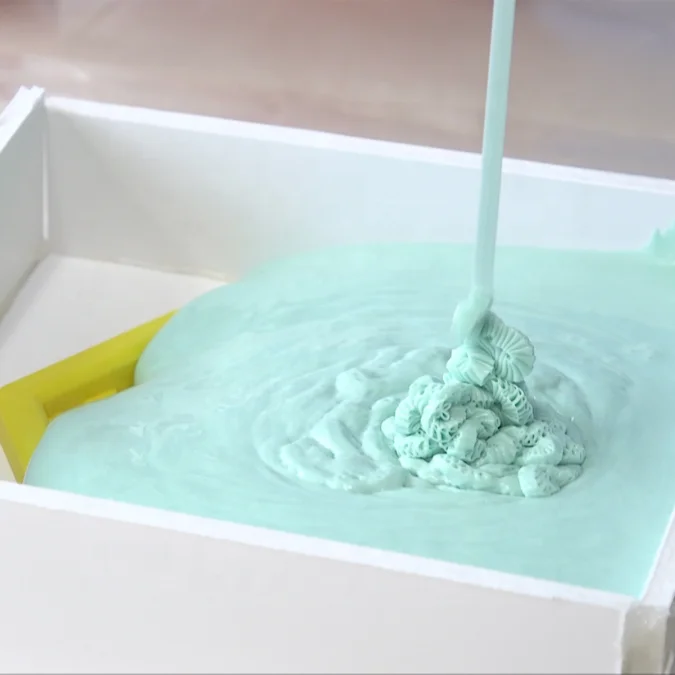
Yes, it is possible to resin 3D print in a cold room if you keep in mind a few pointers. The resin won’t completely harden if the temperature falls too low if you ensure your workplace temperature stays stable at 75°F (24°C) and doesn’t fall below around the 68°F (20°C) mark.
The operating temperature for a Formlabs resin 3D printer is 64-82°F (18-28°C).
You must ensure your resin is at room temperature if you want it to work fine. Try to keep your workplace temperature stable and make sure humidity level is not above 50 per cent.1
Hence, it is quite possible to get resin 3D print if you ensure a few important steps. By avoiding any temperature fluctuations and high humidity levels, it is possible to get resin 3D print in a cold room.
Cold is actually ideal for storing your resin because the lower temperatures reduce chemical reactions which mature the resin. Warming up your resin before use will get it going. Some resin shouldn’t be stored in environments which are too cool though.
You want to try avoiding storing your resin in temperatures below 50°F (10°C) or above 140°F (60°C).
Constant temperature is essential for successful prints. Temperature also has effects on how well your resin hardens from the light and cures with the help of UV. A high quality resin 3D printer will regulate the temperature inside the machine, as well as the curing chambers.
The Peopoly Maoi offers a heater for their printer which makes it much easier to resin 3D print in a cold environment.
Can You 3D Print in a Hot Room?
Most printing occurs efficiently under a hot environment however there is a certain limitation to the temperature.
To allow a better working environment for the printer if your surroundings are hot is to install efficient cooling fans and even a cooler. For even better temperature regulation you can also place an air conditioner.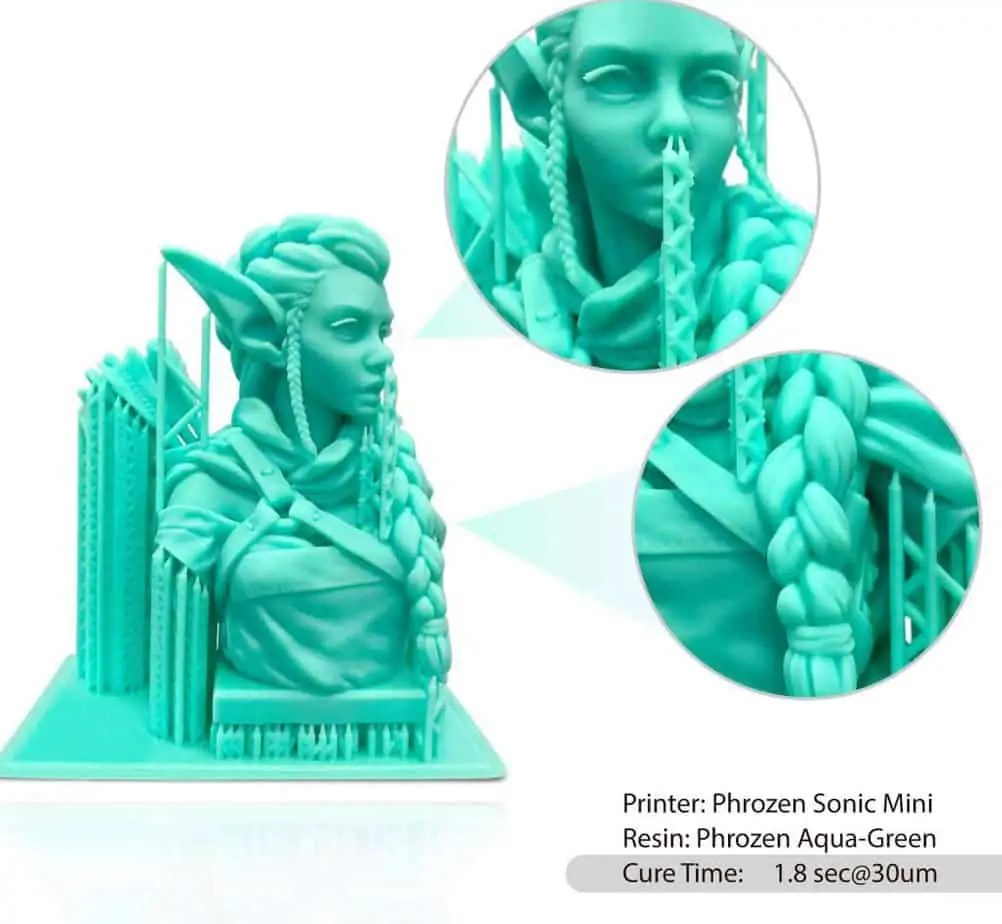
PLA is relatively easy to work with and is not that sensitive to temperature changes as compared to ABS.
You just want to make sure you don’t have an extremely hot operating temperature because that can mess up some prints, depending on the material.
Materials with a low glass transition temperature like PLA won’t do very well in a hot environment as it won’t harden in time. If you have strong cooling fans it may be able to print successfully, but it does make it harder.
However, regardless of the filament you use, you need to make sure at all times that the overall room temperature even in a hot room doesn’t exceed above 50 Celsius. Beyond this temperature, your prints can get messy and spoiled.
Moreover, your printer can overheat resulting in many other complications.
Can You Resin 3D Print in a Hot Room?
To allow resin 3D printing in a hot room you must observe consistent temperatures. Consistency in your workplace temperature is the key to perfect your resin printing in a relatively hot environment.
You can improve your resin printing by heating the resin in a water bath before starting the printing process. Most resins work best in the temperature range of 25-30°C.
By decreasing the heated bed temperature and using efficient fans for cooling, you can enable printing in a hot room. You should be able to regulate your temperature around 20°C.
3D Printing in a Hot Garage
Yes, it is possible for you to 3D print in a hot garage but for this, you need to have some accurate climate control facilities. By ensuring control over the operating temperature and its fluctuations you can successfully print in a hot room.
In hot garage temperatures, it shall be unlikely to print in PLA, as that specific temperature is way above its glass transition temperature. This therefore could never let it solidify.
But, for ABS it will be great and would also decrease warping. It will also improve surface finish.
Does Room Temperature Affect 3D Printing?
Regardless of the environment, you are working in, you should at all times, ensure stability in temperature. It is best advised to regulate the temperature around 68°F (20°C).
So, yes, room temperature surely has a huge effect on the printer’s performance, efficiency and longevity. No printer likes to work in an extreme climatic environment, whether it’s too cold or too hot.
Extreme high temperature can result in deformation of parts, whereas the cold temperature may result in warping between the print layers.
What is the Best Ambient Room Temperature for 3D Printing?
Technically speaking, there is no exact ambient room temperature for 3D printing. There isn’t actually an ideal ambient room temperature for the 3D printing. Rather a temperature range is to be kept in mind.
But the most foremost factor to practice is temperature stability. Hence, for good print output and overall performance, it’s best you maintain an optimum room temperature preferably around 62-68°F (17-20°C).
Should I Use a Heater for my Printer Enclosure?
If you are printing in a cold environment, it’s good to use a heater so that the overall workplace temperature is suitable for the printer to work in. Temperatures might fluctuate without a heater and hence spoil your printer’s performance.
So, you should place a heater to avoid the area from getting too cold. Extremely low temperatures can exist without there being no heater and this can result in your nozzle and filament getting spoiled.
How to Winterize your 3D Printer to Print in a Cold Room?
Printers might not be able to work in a very cold area, so you can install heating chambers for better results. It is also advised that you install wireless sensors which can monitor temperature and the humidity changes.
The main thing would be trying to increase your overall temperature in the cold room with a heater, or by using better insulation so the warm air doesn’t escape, and cold air doesn’t come in.
If you are having trouble with this, a heated chamber is going to be a lot more efficient compared to heating the whole room. It can be built out of many materials and there are guides on building DIY heated chambers that you can find on YouTube.
Furthermore, for a better printing experience you can also install carbon filters, and even an exhaust system which can filter out toxic fumes. Although you are working in a cold room, try to avoid your printer’s direct contact with sunlight.
This is suggested because, severe temperature fluctuations can prove to be really disadvantageous for the printer’s overall performance.
Apart from that, it is important that you store your materials and other supplies at room temperature and preferably in a vacuum free space.
Conclusion
Temperature regulation is a key step which can promise you a smooth printing experience. Other than that, the aforementioned guidelines will seem to be very effective if you practice them.:quality(80)/images.vogel.de/vogelonline/bdb/1696600/1696673/original.jpg)
If you love great quality 3D prints, you’ll love the AMX3d Pro Grade 3D Printer Tool Kit from Amazon. It is a staple set of 3D printing tools that gives you everything you need to remove, clean & finish your 3D prints.
It gives you the ability to:
- Easily clean your 3D prints – 25-piece kit with 13 knife blades and 3 handles, long tweezers, needle nose pliers, and glue stick.
- Simply remove 3D prints – stop damaging your 3D prints by using one of the 3 specialized removal tools.
- Perfectly finish your 3D prints – the 3-piece, 6-tool precision scraper/pick/knife blade combo can get into small crevices to get a great finish.
- Become a 3D printing pro!
Can Resin Prints Melt? Are They Heat Resistant? – 3D Printerly
While I was making some resin models, I wondered whether resin prints can melt or whether they are heat-resistant, so I decided to do some research into this.
Resin prints can’t melt since they are not thermoplastics. When they get heated to very high temperatures like 180°C, they will scorch and deteriorate. After resin prints have cured they cannot go back to their original liquid state. Resin prints start to soften or lose elasticity at temperatures between 40-70°C.
There are more details that you’ll want to know so keep reading this article to find out.
Can Resin Prints Melt? What Temperature Does 3D Resin Melt At?
One important factor that you should know about resin prints is that they are not thermoplastics which means that when they cure and get hardened, they cannot melt or turn back into a liquid.
Some users say resin prints often get softened as the temperature increases and for most resins, it starts at around 40°C. However, this may be subject to the type of resin used and the condition required to cure them.
Many users think their resin has melted when it has actually just leaked out and expanded due to its properties.
When uncured resin gets trapped in a resin print due to not draining properly, it still cures but very slowly over time. While the resin is curing, it produces heat and pressure which can start to crack or even blow up the resin print.
If you’ve seen resin leaking or dripping from a model, it means that the uncured resin finally built up the pressure to crack through the model and release it. In some situations, this reaction can be really bad so it’s important to properly hollow and drain your models.
Check out these articles I have done to learn how to go through the resin printing process and avoid this happening to you – How to Hollow Resin 3D Prints Properly – Save Your Resin & How to Dig Holes in Resin Prints Like a Pro.
A visual example of this happening can be seen in the video below by Advanced Greekery.
He shared a video on YouTube where some 14-month-old Rook prints were oozing out some really toxic uncured resin on his shelf. He posited four possible reasons why his prints started “melting”:
- Heat from an LED light nearby on the shelf
- Heat from the room
- Some kind of reaction with the shelf paint and the resin
- Uncured resin within the Rook causing cracks and resin to spill
He went through all these possibilities one by one to debunk them and find the real answer.
- The first was the LED light which produces little to no heat and the light source didn’t really reach where the Rook prints were.
- It was in the winter, so the room temperature couldn’t have had such an effect
- The uncured resin didn’t cause a reaction with the paint because there was no mixing of the paint in the resin
The last reason which quite a number of users attest to was that the trapped uncured resin in the print built up pressure and ended up splitting the model open, resulting in leaking resin.
Are Resin Prints Heat-Resistant?
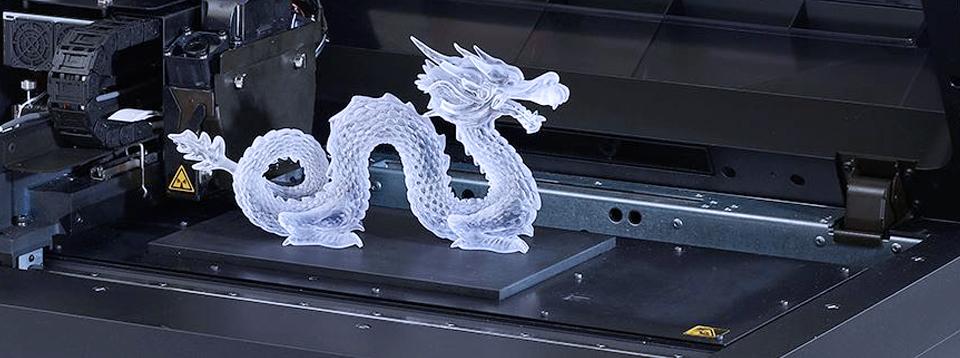
Resin 3D prints can be heat-resistant if you use a specialized heat-resistant resin like the Peopoly Moai Hi-Temp Nex Resin, having great thermal stability and heat deflection temperatures around 180°C. One user said Elegoo resin prints start to crack around 200°C and melt/crumble around 500°C, also giving off fumes.
Normal resins like Anycubic or Elegoo can resist heat fairly well but they do start to soften at lower temperatures like 40°C.
If you have a project where the object will be in high temperature environments, you want to get a heat-resistant resin. They do cost significantly more than your average bottles of resin so keep this in mind.
It may even be possible to mix together these high-temp resins with normal resins, similar to how you mix flexible or tough resin with normal resin to improve its durability and strength.
In some cases where you just need a little bit of extra heat-resistance, this could work really well.
One user who tried a few types of resin like water washable and ABS-Like resin found that they easily warped and cracked when subjected to heat. He also lived in quite a cold area, so the change in temperature from cold to hot could contribute to less heat-resistance.
You can also choose to cast models into silicone if you need very high temperature resistance.
Here’s a really creative way that a YouTuber by the name of Integza created a high-temperature ceramic part using porcelain resin. It can allow you to create a model that can withstand a temperature up to 1,000°C.
However, to achieve this, you may have to gradually and slowly raise the temperature by 5° every minute and a half until it reaches 1,300°C so as to burn out the resin and get a hundred percent ceramic part. You may cure the print with a kiln or a cheap furnace.
Unfortunately, the furnace actually blew up during this experiment since it was not meant to maintain such a high temperature for a long period of time.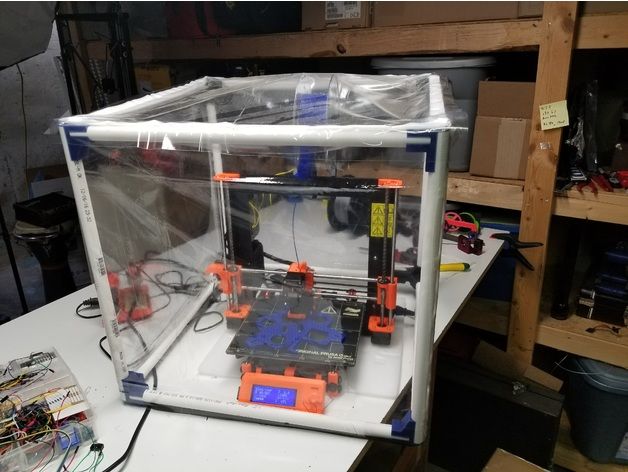
However, the ceramic models that were 3D printed were able to withstand the heat from a very hot flame that was used to test its heat resistance.
For the Makerjuice High Performance General Purpose Resin, it has a data sheet which states a glass transition temperature of 104°C, which is when the material gets to a soft, rubbery state.
When you have the right high temperature resin, you can put them in boiling water for hours and they shouldn’t become brittle, cracked or soft.
Check out the video below by ModBot who puts Siraya Tech Sculpt Ultra to the test which can withstand temperatures of up to 160°C.
You can get yourself a bottle of Siraya Tech Sculpt Ultra from Amazon for a great price.
Check out 3D Printing Nerd’s video below on applying actual fire to a print made from the Siraya Tech Sculpt Ultra. I forwarded the time on the video straight to the action.
Heat Resistance of Elegoo Resin
Elegoo ABS-like resin has a thermal deformation temperature of about 70℃. This means that the prints get softened or malleable at this temperature and may burn out at higher temperatures. A user with a heat gun and laser thermometer found that Elegoo Resin starts to crack around 200°C.
At temperatures of 500°C, the resin started showing several cracks and deteriorated, also giving off visible gas fumes.
Anycubic Resin Temperature Resistance
Anycubic Resin is known to have a glass transition temperature of around 85°C.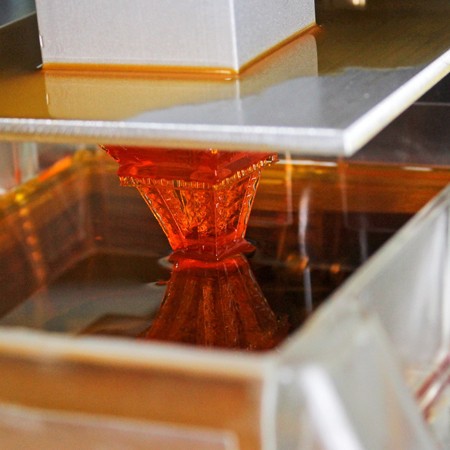 The thermal deformation temperature of Anycubic’s Plant-Based Resin is known to be lower than their standard resins.
In terms of printing the liquid resin at low temperatures, a user who purchased the Anycubic resin on Amazon left feedback that says that they printed in their garage during winter when temperature and humidity fluctuate with the weather.
The winter temperature in their garage hovers around 10-15°C (50°F-60°F) and the resin performed well despite the lower temperature.
Another user expressed their excitement about being able to 3D print with the Anycubic resin under a normal room temperature of 20°C which was below the recommended temperature for storing resin.
Best High-Temperature SLA Resin
There are actually quite a few types of high-temperature resins out there so I looked into it to find some of the best. Here is a quick list of four great high temperature resins that you can start using for your projects.
Phrozen Functional Resin
One of the best high-temperature resins you may want to consider is the Phrozen resin is specially made for LCD 3D printers with about 405 nm wavelength, which is most out there. This type of resin is able to withstand heat of about 120°C.
It has low viscosity and low odor, making it very easy to use and clean. Having resins that don’t have a strong odor is definitely appreciated. This resin also has low shrinkage so your models stay in shape as they were designed.
Not only do you have great temperature resistance, but your models should have good durability and toughness. They advertise it as being great for dental models and industrial parts.
You can get yourself a bottle of this Phrozen Functional Resin from Amazon for around $50 for 1KG.
Siraya Tech Sculpt 3D Printer Resin
As previously mentioned above, the Siraya Tech Sculpt Ultra Resin is a great choice for a high-temperature resin. It has a high-temperature resistance of about 160°C (320°F) and is priced competitively at around $40 for 1KG.
Even when the models reach high temperatures, since it has a great heat deflection temperature, they won’t soften very much. It’s perfect for the high temperature production and prototypes that need to maintain shape.
Another highlight of this resin is how it has amazing resolution and a smooth surface finish, especially with the Matte White color. It’s compatible with most resin 3D printers out there like Elegoo, Anycubic, Phrozen and more.
They do mention how you can mix this resin with lower temperature resins to improve the heat-resistance, like I talked about earlier in the article.
At the time of writing, they have a rating of 4.8/5.0, having 87% of ratings at 5 stars.
Get yourself a bottle of Siraya Tech Sculpt Ultra from Amazon.
Formlabs High Temp Resin 1L
Another one on the list is the Formlabs High Temp Resin, a more premium brand of resin.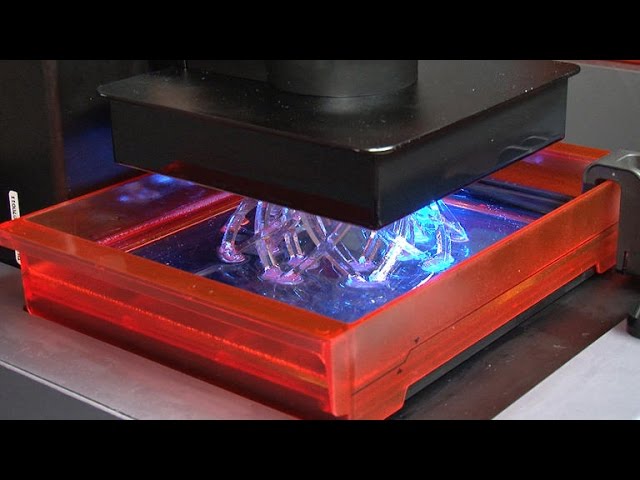 It was designed and manufactured to perform well under pressure, having a heat deflection temperature of 238°C. It’s the highest among the Formlabs resins out there, and very high compared to most others.
The compatibility does mention it usually goes with other Formlabs printers though, so I’m not sure how well it would work with other printers. Some users mentioned that Formlabs uses quite high power UV laser, so if you were to use it in your resin printer, increase the exposure times.
He did give an update to say he got some moderately successful prints from his Anycubic Photon, but it doesn’t have the greatest resolution, maybe because it needs a lot of UV power to cure it.
They have their Materials Data Sheet that you can check out for more details.
You can get a bottle of this Formlabs High Temp Resin for around $200.
Peopoly Moai Hi-Temp Nex Resin
Last but not least is the Peopoly Moai Hi-Temp Nex Resin, a great resin that has a heat resistance of up to 180°C (356°F).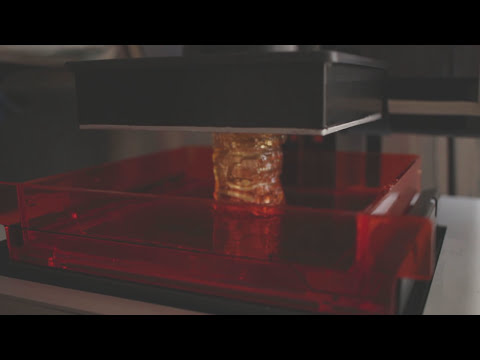
They have a number of great properties such as:
- Handles up to 180°C (356°F)
- Good hardness
- Easy on the PDMS layer
- High resolution
- Low shrinkage
- Provides a great surface finish
- Easy to sand and paint
The unique gray color is perfect for delivering high resolution and smooth finishes. Users who love 3D printing sculpts and high detail models will definitely enjoy this resin.
You can get the Peopoly Hi-Temp Nex Resin directly from the Phrozen Store for around $70, or sometimes on sale for $40 so definitely check that out.
Choosing a liquid photopolymer for a 3D printer. Classification of materials for SLA/DLP 3D printing.
Contents:
- Introduction
- SLA Overview
- SLA Standard Resins
- Standard photopolymer resin - Standard
- Clear Photopolymer Resin - Clear
- Engineering photopolymer resins
- Rigid photopolymer resin - Tough (like ABS)
- Durable photopolymer resin - Durable (PP-like)
- Heat resistant photopolymer resin - Heat resistant
- Rubber-like photopolymer resin - Rubber-like (Elastic)
- Ceramic photopolymer resin - Ceramic filled (Hard)
- How to choose the right resin for your application
- Dental and medical SLA resins
- Medical Device Photopolymer Resin - Custom Medical Appliances (Class I Biocompatibility)
- Dental Long Term Biocompatible Resin (Class IIa Biocompatible)
- Biocompatibility class I vs biocompatibility class IIa
- Cast SLA resins
- Cast resin for jewelry making
- Generalized rules
Hello everyone, Friends! With you 3DTool!
This article compares photopolymer resins using Formlabs SLA 3D printing products –
Catalog of photopolymer 3D printers
Photopolymers from FormLabs
Detailed review of the Formlabs Form 3 3D printer
Introduction
The stereolithography prints plastic parts with high resolution, good fine detail and smooth surface. Due to the variety of photopolymer resins available for SLA, this technology is used in many different industries:
-
"Standard" photopolymers are used for prototyping
-
Engineering photopolymers have certain mechanical and thermal properties
-
Dental and medical photopolymers have biocompatibility certificates.
-
Cast photopolymers have a zero ash content after burning.
SLA 3D Printing Resin Overview
SLA uses a laser to cure a liquid photopolymer resin. This process is called photopolymerization. Various combinations of polymers and other additives that are part of the resin allow you to get different material properties.
The main advantages and limitations that are common to all resins in SLA 3D printing are:
Benefits:
Weaknesses:
Base Resins for SLA
Post-Processing SLA/DLP 3D Printing Article
Standard photopolymer resin - Standard
Standard resins produce parts with high stiffness, detail and a smooth surface. The low cost of resins, from $250 per liter, makes them ideal for prototypes.
The color of the resin also affects its properties. For example, in FormLabs products, gray resin is suitable for models with fine details, and white resin for parts that require the smoothest possible surface.
Benefits of using Standard grade resins:
Cons Standard:
Also included in the class of "Standard" photopolymer resins from FormLabs is the Color KIT - a set of special dyes and "Color Base" photopolymer resin for mixing and obtaining a variety of color solutions. This eliminates the need for painting parts after 3D printing.
FormLabs Engineering Photopolymer Resins
Engineering resins have a range of properties for injection molded plastics.
All engineering resins require additional UV curing, such as using the Form Cure, to achieve their maximum properties.
Tough photopolymer resin - Tough (ABS equivalent)
Tough resin was developed for models that need to withstand high loads and be durable.
This material produces strong, shatter-resistant parts and functional prototypes such as snap-on housings.
Pros:
Cons:
Ideal for: functional prototypes, mechanical parts
Durable photopolymer resin - Durable
Durable resin is a wear-resistant and flexible material with mechanical properties similar to polypropylene.
Durable photopolymer produces models with a smooth glossy surface and high resistance to deformation.
Durable Resin is ideal for:
- Bushings and bearings;
- Various functional compounds
Pros:
Cons:
-
Not suitable for thin wall parts (recommended minimum wall thickness 1mm)
-
Low heat distortion temperature
-
Low flexural strength (lower than hard resin)
Ideal for: functional prototypes.
Refractory Photopolymer Resin - Formlabs High Temp Resin
The heat resistant resin is ideal for parts that require high temperature resistance and operate at high temperatures.
Formlabs High Temp Resin provides the highest melting point (HDT): 238°C at 0.45 MPa.
The resin should be used to print detailed, accurate prototypes with high heat resistance.
Pros:
Cons:
Flexible Resin
Rubber-like resin allows flexible parts to be made. This material has a low tensile strength and high elongation at break and is well suited for parts that will be bent or compressed.
It can also be used to add ergonomic features to multi-material assemblies such as: dies, wearable prototypes, handles, pads and grips.
Pros:
-
High flexibility (high elongation at break)
-
Low hardness (simulates 80A durometer rubber)
-
High impact resistance
Cons:
-
Doesn't have all the properties of real rubber
-
Requires extensive support structures
-
Material properties deteriorate over time as the part is exposed to ultraviolet radiation (sunlight)
-
Not suitable for thin wall parts (recommended minimum wall thickness 1mm)
Ideal for flexible prototyping.
Ceramic photopolymer resin - Rigid Resin
This resin is reinforced with glass, which provides very high rigidity and a polished surface. The polymer is very resistant to deformation and is excellent for 3D printing thin elements.
Ideal for: molds and tooling, jigs, manifolds, retainers, electrical and automotive fixture housings
Thermal management components printed with SLA ceramic (hard) resin. Image credit: Formlabs
How to choose the right resin for your application
The table below shows the main mechanical properties of photopolymers for SLA:
Source: Formlabs
Standard resin ( standart ) has high tensile strength but is very brittle (very low elongation at break) so it is not suitable for functional parts. The ability to create a good part surface makes it ideal for visual prototypes and art models.
Durable ( durable ) resin has the highest impact strength and elongation at break of any other SLA material. Best suited for prototyping parts with moving parts and latches. It lacks, however, the strength of thermoplastic 3D printing materials such as SLA nylon.
tough tough resin is a compromise between the material properties of tough and standard resin. It has a high tensile strength, so it is best suited for rigid parts that require high hardness.
heat resistant resin ( heat resistant ) can withstand temperatures above 200 o C, but has poor impact strength and is even more brittle than standard resin.
ceramic ( ceramic reinforce ) resin has the highest tensile strength and flexural modulus, but is brittle (poor elongation at break and toughness). This resin is preferred for thin wall parts that require increased rigidity.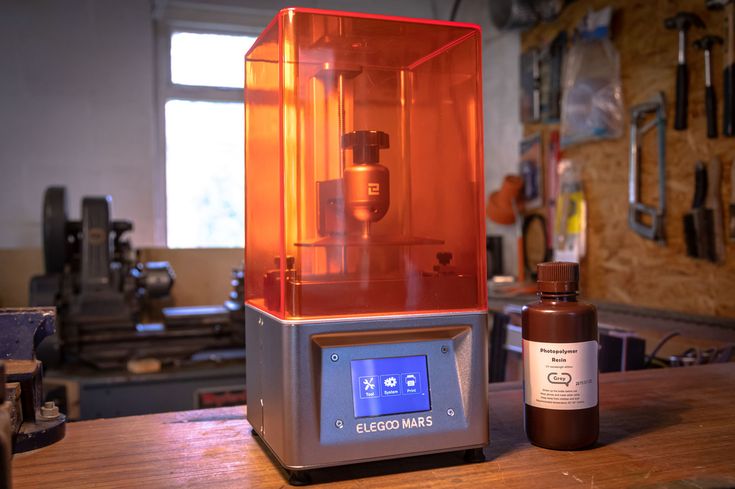
The graphs below compare the mechanical properties of the most common SLA materials visually:
Comparison chart for elongation at break and toughness for common SLA printing specifications and standard media. Image courtesy of Formlabs.
Stress-strain curves for conventional SLA technologies and standard materials. Image credit: Formlabs
Pros:
Cons:
- Moderate wear and tear resistance
Ideal for: Surgical aids and appliances
Dental Long Term Biocompatible Resin - Dental Long Term (Class 2A biocompatible)
0114
These resins are specially formulated for long term dental fixtures. Class 2A biocompatible resins can come into contact with the human body for up to a year.
High resistance to breakage and wear make this resin ideal for making rigid cotter pins or retainers.
Pros:
Cons:
-
High price
Ideal for: durable dental instruments, fracture and wear resistant medical parts, rigid cotter pins, retainers
What is the difference between class 1 and class 2a biocompatibility?
Class 1 biocompatibility rules apply to materials that are allowed to be used for:
-
non-invasive devices that come into contact with intact skin
-
devices for temporary use or short-term use in the mouth or ear canal or in the nasal cavity
-
reusable surgical instruments
Class 2a biocompatibility rules apply to materials that are allowed to be used for:
-
devices that come into contact with bodily fluids or open wounds
-
devices used to introduce substances into or remove substances from the human body
-
invasive short-term devices such as invasive surgical items
-
long-term implantable devices placed in the teeth
Photopolymer resins in SLA 3D printing for jewelers
Jewelry resins
This material allows you to print models with fine details and a smooth surface without leaving ash or residue after burning.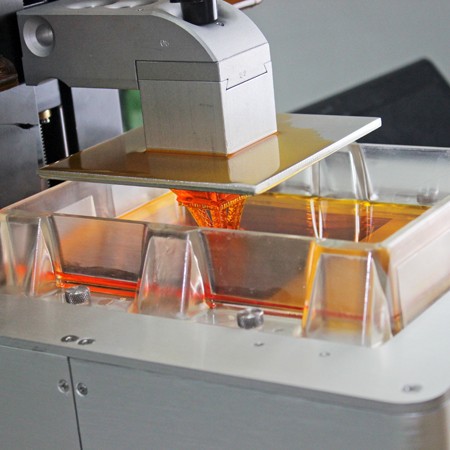
Cast resin allows you to get the finished product directly from design to precision casting with just one 3D printed part. It is suitable for making jewelry and other small and complex components.
Pros:
Cons:
Ideal for: investment casting, jewelry making
SLA/DLP 3D printer catalog
Photopolymers from FormLabs
Post-Processing SLA/DLP 3D Printing Article
Well, that's all we have! We hope this article was useful for you!
You can order Formlabs SLA 3D printers or ask your questions and find out the status of your order, you can
- Email: [email protected]
- By phone: 8(800)775-86-69
- Or on our website: http://3dtool.ru
-
Don't forget to subscribe to our YouTube channel:
Subscribe to our groups in social networks:
In contact with
Photopolymer 3D printer
3D printers can be sorted not only by the printing technologies used, but also by the consumables used. In this section, we will look at devices that use photopolymer resins to build models.
- 1 Consumables
- 2 Laser stereolithography (SLA)
- 3 Projector stereolithography (DLP)
- 4 Multi-jet (MJM and PolyJet)
- 5 3D pens
- 6 Additional illumination
Consumables
Photopolymer resins are liquid polymers that harden when exposed to light. As a rule, such materials are sensitive to the ultraviolet range, which determines the design of photopolymer printers. One of the common design elements is a transparent colored cap or housing made of a material that filters ultraviolet radiation. This is done both to protect the user's eyes and to protect the supplies inside the printer from exposure to sunlight and background lighting.
Photopolymer resin loaded into Form 1 3D printer
The physical properties of resins after polymerization vary widely. Both rigid and flexible options are available, transparent and matte. A wide selection of colors is also available. Resin consistency and exposure times also vary, so a range of compatible media should be considered when choosing a printer.
The last aspect to consider when choosing a material is its toxicity. There are both quite toxic options and biologically safe ones.
The cost of consumables can be considered the Achilles' heel of photopolymer printing. The plants themselves are already reaching quite acceptable price levels, but it is still quite difficult to find inexpensive photopolymer resins. It is hoped that the proliferation of inexpensive photopolymer printers will lead to an increase in the production of consumables and lower prices.
Laser Stereolithography (SLA)
SLA Model
The firstborn of photopolymer printing and modern 3D printing in general. The technology was developed in 1984 by Charles Hall, who later founded 3D Systems.
SLA printers use laser emitters to cure the photopolymer supply.
A typical SLA printer consists of a consumable tray sitting under a build platform driven vertically by a raise/lower mechanism.
Alternatively, the cuvette itself can be driven - what matters is the relative movement of the platform and the container. Above the cuvette is a laser emitter and a mirror system for deflecting the laser beam.
During the printing process, the platform is immersed in the consumable for the thickness of one layer of the digital model.
Since photopolymer resins can be quite thick, a leveling mechanism is often used to speed up the process.
SLA printer operation diagram
After leveling, the process of illumination of the material begins. Illumination is produced by laser irradiation. Most photopolymer resins are designed to cure (polymerize) when exposed to ultraviolet light, which determines the choice of laser frequency. The movement of the beam along the X and Y axes is determined by the operation of the deflecting mirrors.
After the drawing of the layer is completed, the platform is immersed in the material for the thickness of one more layer, and the process is repeated with the drawing of the next layer of the digital model.
Animation of the build process
SLA printing takes quite a long time, and printers using this method tend to have relatively small build areas.
This is mainly due to the high cost of laser emitters: printing large objects with a single laser will take too much time, and installing additional emitters and mirrors will complicate the design, increase the installation dimensions and raise the price to an unacceptable level for most users.
Despite the success of this technology, projected stereolithography is considered to be a more promising, albeit very similar, method.
Projector Stereolithography (DLP)
Formlabs Form 1 Desktop DLP Printer
A close relative of laser stereolithography, this method uses digital LED projectors instead of laser machines with mirror deflection systems. The method became popular due to the development of technology for the production of low-cost high-resolution digital projectors by Texas Instruments.
Layers are illuminated using a digital projector that highlights the patterns of the entire layer, which distinguishes this method from SLA, where the "picture" emerges progressively using an ultraviolet laser.
A similar approach has previously been used on SGC-type units, but this technology used physical photomasks, making the process costly, time consuming, slow and noisy.
FTI continues to exist, a development of SGC that is virtually indistinguishable from DLP printing, as it also uses digital LED projectors.
DLP printer design
Simultaneous illumination of an entire layer using projectors can significantly speed up the printing process even compared to SLA printers that have a high scanning speed (ie beam movement).
In addition, these printers are less sensitive to rough physical impact due to the lack of delicate mirror systems.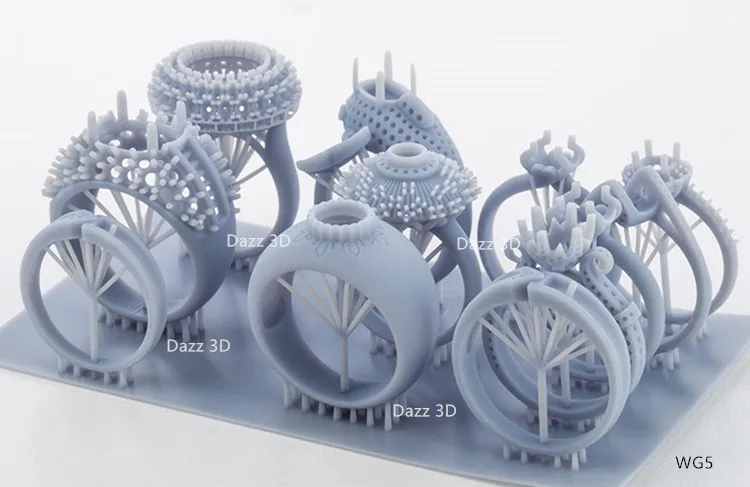
The absence of mechanical mirror systems improves accuracy. Finally, the cost of projectors sets them apart from laser systems.
Projection size can be quite significant, reaching the average of popular FDM printers.
An interesting feature of DLP printers is the ability to "reverse" or "reverse" printing.
In this case, the projector is installed under a transparent (material choice for transparency in relation to ultraviolet light) cuvette, and the platform does not sink into the material, but gradually rises, pulling out the layers of exposed polymer.
This approach eliminates the alignment mechanism and achieves even higher Z resolution than SLA printers.
In addition, the size of models in height is not limited by the depth of the cuvette, which favorably affects the dimensions of the printer and the possibility of increasing the build area.
Multi-jet printing (MJM and PolyJet)
MJM printer 3D Systems ProJet 3500HDMax
MJM and PolyJet technologies are practically indistinguishable from each other. The name difference comes from the respective patents: Multi Jet Modeling is owned by 3D Systems, while PolyJet is owned by rival Stratasys.
The very principle of multi-jet polymer printing was developed by the Israeli company Objet, which eventually became a division of Stratasys.
Multi-jet printing technology combines features of 3D inkjet printing (3DP) and projection stereolithography (DLP).
How the MJM PolyJet printer works
Models are built by spraying photopolymer using linear arrays consisting of multiple nozzles.
The applied layer is immediately exposed to ultraviolet lamps - as a rule, two processes occur simultaneously.
By the time the array reaches the end of the build chamber, the previously deposited material is hard enough to print a new layer.
Composite models created on the ProJet 3500 DP dental printer
This approach allows for very high printing speeds, but is characterized by high design complexity, which negatively affects the cost of such installations and limits their distribution to professional use.
One of the advantages of MJM and PolyJet technologies is the ability to create composite structures from photopolymer resins with different physical characteristics.
It is therefore possible to create models with easily removable supports, use multiple colors and use flexible and rigid materials in parallel within the same model.
3D Pens
CreoPop 3D Resin 3D Pen
Recently, there has been a craze for hand-held printing devices called 3D pens. At the moment, there are three main options for such devices: drip-jet pens (DOD), called BioPen and used in the development of new methods for treating damaged tissues, FDM 3D pens, which are manual extruders (essentially similar to the usual hot glue guns, but using thermoplastics) and developments in 3D-drawing with photopolymer resins.
CreoPop 3D pen was the first "handheld photopolymer printer". The design of this device is quite simple, because the most complex function, positioning, is performed by the user himself.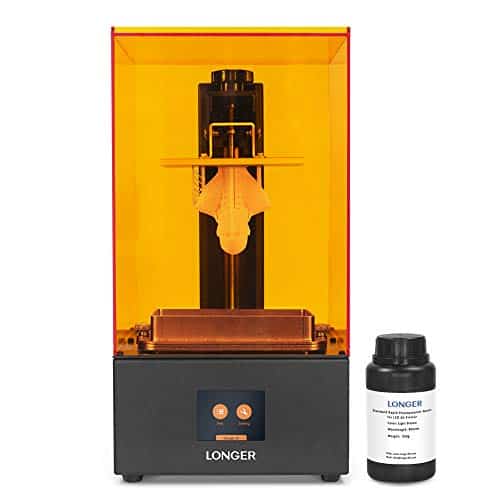 The pen only extrudes resin through the tip surrounded by LED emitters.
CreoPop 3D pen in action
This way the resin hardens immediately after application, allowing you to literally draw on air.
The advantage of such handles over FDM-analogues is the low operating temperature - there are no heating elements in the device. As a result, with such pens you can even draw on the skin.
In addition, a wide range of photopolymer resins with different physical properties can be used with such devices, which greatly expands the range of possible applications. At a minimum, this is a relatively inexpensive, but entertaining toy.
The only drawback is the relatively high cost of consumables, but such devices are unlikely to require large volumes of photopolymer resin for domestic use.
Additional Lighting
Final Lighting of Resin Models in a Homemade Camera
Full curing of models can take quite a long time, so models during SLA and DLP printing are only partially polymerized, sufficient to maintain the physical shape of the part.