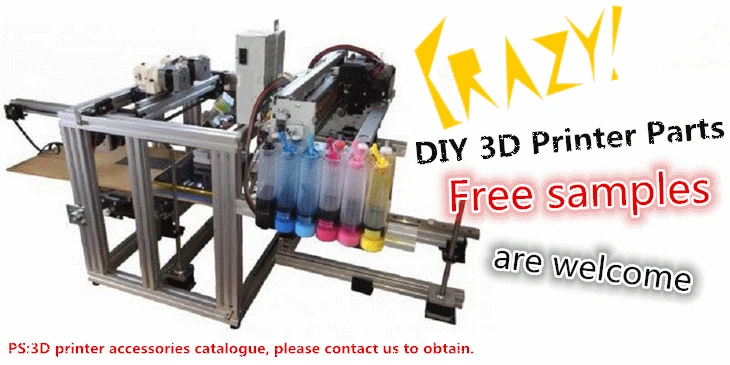
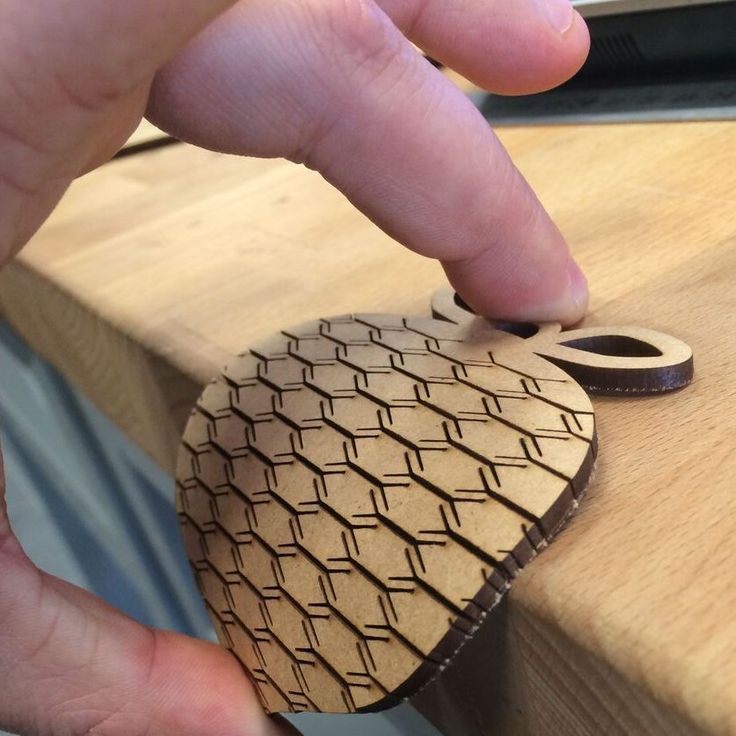
Plating 3d printed parts
5 Reasons to Metal Plate Your 3D Printed Parts
Toggle Nav
Menu
Account
Settings
Currency
USD - US Dollar
- CAD - Canadian Dollar
Posted in: Additive Manufacturing
by Kainon Irons
June 2, 2022
The practice of metal plating or metallization of plastic parts has been in use for a long time. Many people don't realize that thermoplastic 3D printed parts can also undergo this same process with amazing results. We have seen firsthand that this process works well with many HP Jet Fusion and Markforged thermoplastic materials.
Metallization allows for targeted metal properties on lightweight and in-expensive plastics that can be printed with complex geometries that are unattainable with traditional manufacturing. In today’s blog, we are going to remove the veil look at five reasons to metal plate your 3D printed parts.
Cosmetic Purposes and Reflective Properties
Many applications require the look of metal but not mechanical performance. This can often be seen with chrome-plated automotive components anywhere from grill guards, and instrument panels, to door handles and even headlight reflectors. In addition to automotive industries, plumbing hardware and electronics manufacturers also heavily used plated plastic for cosmetic purposes.
Plating 3D printed parts with a cosmetic coating is a cost-effective way to create great-looking metal-like parts. When shooting for highly reflective surfaces, printed parts must be very smooth before plating. There are three primary ways to smooth parts: first through sanding down layer lines (600 grit), second through vapor smoothing (chemical polishing), and finally through tumbling (mechanical polishing). Of the three techniques, vapor smoothing will be the most automated and quickest solution.
Structural Benefits
Metal plating of 3D printed parts can also improve the overall strength of the part. Along with an improvement in tensile strength, wear resistance, and improved surface hardness are also great benefits from electroplating.
To find out how much stronger parts can be, we reached out to Repliform who is very knowledgeable on plating printed parts. Here is the test data from Repliform showing strength improvement from different plating types when using HP Jet Fusion PA12 and PA12GB (glass bead) parts.
Improvement in Flexural Strength vs Thickness of Metal Plating
From the chart data, it is very clear that plating your printed parts can lead to some significant strength benefits. The thicker the plating, the stronger your part becomes. This process can be a viable alternative to metal 3D printing in certain applications.
Protect Parts from the Elements
Protecting plastic parts from the elements can be challenging. Metal plating is a great way to apply several key protections with one process:
- Heat Resistance
- UV Stability
- Chemical Resistance
- Corrosion Resistance
Electrical Conductivity
Plating your plastic parts with an electrically conductive material such as copper can help reduce costs and weight for any industry that deals with electronics and semiconductors.
EMI / RFI Shielding
In the electronics world, protecting internal circuitry is also an important topic to consider. Industries such as medical, aerospace, and automotive that have critical applications have a greater need for this type of protection. Plastics in general have very little resistance to electromagnetic interference (EMI) and radio frequency interference (RFI) unless they are coated through some form of metalization. The standard that governs the performance of these types of coatings is EMC (electromagnetic compatibility) ratings. Metal plating of your plastic parts can bring them up to EMC specifications.
Common Metal Plating Methods:
Electroplating
Process: A conductive part is placed in an electrically charged bath that contains a cathode of the plating material and the anode being the part to be plated. Then under an electrical current, the positively charged plating material is split up into ions that are attracted to the surface of your negatively charged part.![]() To electroplate a plastic part, a conductive outer layer must be applied either through electroless plating or conductive paints. Metal coatings can vary in thickness typically anywhere between 10-400 microns thick.
To electroplate a plastic part, a conductive outer layer must be applied either through electroless plating or conductive paints. Metal coatings can vary in thickness typically anywhere between 10-400 microns thick.
Benefits: Cosmetic Improvement, EMI/RFI shielding, improved strength, heat, and chemical resistance.
Drawbacks: Additional steps must be taken to add a conductive coating on your plastic part.
Typical Materials/Finish Options: Nickel, Copper, Silver, Gold, Chrome
Electroless Plating
Process: Process of metalizing parts without the use of an electrical current by a series of chemical baths to etch (increase surface area and anchor points), autocatalyze (substrate to encourage metal to bond to plastic), and finally a thin layer of metal is deposited on the plastic surface. Once this process is complete, the part can be further processed using standard electroplating as if it were a metal part. Other names for this process: auto-catalytic, or chemical plating. Most often, parts are further electroplated on top of this layer to add thickness and/or change the coating material.
Benefits: Very consistent way to make your plastic parts conductive.
Drawbacks: Process requires many steps and chemicals.
Typical Materials/Finish Options: Nickel, Copper
Conductive Paint
Process: Conductive paint is sprayed onto the surface of a part. Raw material usually is in the form of a metal powder that is then applied to the part as a spray. Additional electroplating can then be done after the conductive base layer if desired.
Benefits: More convenient process. Masking portions of the part that will not be plated is easier.
Drawbacks: Not as consistent could have poor adhesion to the part surface.
Typical Materials/Finish Options: Nickel, Copper
Vacuum Metalizing (Physical Vapor Deposition)
Process: A filled vacuum chamber vaporizes metal which then condenses on the outside surfaces of the part. A primer and basecoat are typically applied to the part before it is placed in a vacuum chamber.
Common Applications: Reflective lamp components (headlights, flashlights, etc), cosmetic pieces
Benefits: Very thin coat, high reflectivity, a safer process for operators.
Drawbacks: Susceptible to Scratching. Difficult to reach areas may not be plated.
Typical Materials/Finish Options: Chrome, Brushed Aluminum, Brass, Gold, Bronze
There you have it, we have looked at five reasons to metal plating your 3D printed parts. If you would like to know more about postprocessing your Markforged or HP 3D printed parts, feel free to contact us at Hawk Ridge Systems today!
June 2, 2022
Did you like this post?
Related posts
Related Products
Recent posts
Email address is required to login
Electroplating 3D Printed Parts Brings Plastic and Metal .
 ..
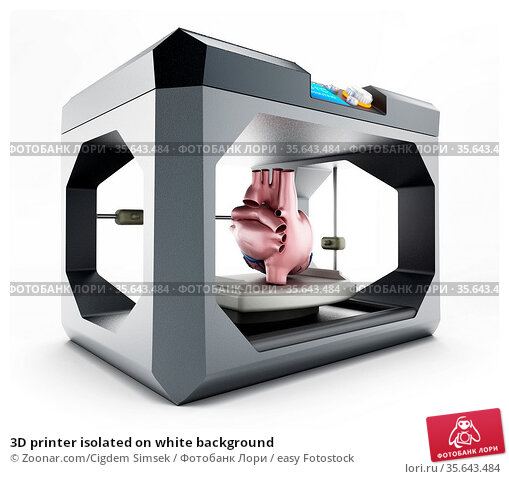
..3D printing can produce lightweight and intricate components. However, most 3D printers use thermoplastic materials. Metal 3D printing is possible, but it can be very expensive.
Fortunately, there’s a solution for manufacturers who want the benefits of both 3D printing and metal materials. That solution is called electroplating.
Electroplating coats plastic, 3D printed parts in a solid metal shell. It can greatly improve their strength, durability, and appearance in a wide variety of applications.
Read on to learn about electroplating, its benefits and applications, and how you can start coating your 3D printed components with metal.
What is Electroplating?
Electroplating refers to a chemical process that coats an object — like a 3D printed component — in a layer of metallic material. The process relies on a phenomenon known as electrolysis to attach metals to the targeted part.
During electroplating, engineers immerse a positively charged anode (a metal bar used in the plating) and a negatively charged cathode (the part that receives the plating) in a liquid chemical electrolyte. They will then direct an electric current through the parts and the liquid.
The current will cause positive metal ions to move from the anode to the cathode. Meanwhile, negative ions make the trip in the opposite direction. The metal particles take the negative ions’ place, slowly covering the cathode part until they form a thin, solid metal shell.
Electroplating is most commonly used with other metal parts, particularly in jewellery production. However, with proper preparation, it’s also perfectly possible to electroplate plastic 3D printed parts.
In addition to electroplating, you can coat parts through electroless plating. As the name implies, this process doesn’t use an electric current and instead relies on a chemical reaction to transfer the metal particles. The process creates a lot of heat that could warp 3D printed components, so it may not be suitable for all 3D printing materials.
How the Electroplating Process Works
Before you start electroplating 3D printed parts, you have to consider your 3D printing technology.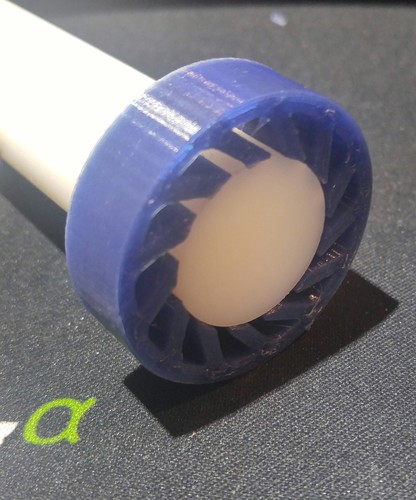 Not all 3D printers produce sufficient surface quality or use materials that are suitable for electroplating.
SLA 3D printers — like Formlabs Form 3+ — are ideal for electroplating, thanks to the high surface quality they produce. The smooth surface results in an equally smooth and watertight transition between plastic and metal.
The basic electroplating process for 3D printed parts includes:
- Printing — Naturally you have to start with 3D printing and cleaning your part. Make sure the material you use can withstand the chemical bath used in the process.
- Priming — You must prime your part to create a conductive surface the metal plating can attach to. Manufacturers commonly use a graphite spray to prime their 3D printed parts. You may also need to etch the part’s surface for better adhesion.
- Immersion — Next, you must prepare your chemical bath. Attach the anode and cathode parts to suitable fixtures and lower them into the chemical solution.
- Electroplating — Direct an electrical current through the parts and wait for the plating process to finish. If all goes well, you can then finish the process by cleaning the chemical solution off the newly-plated part.
The Benefits of Electroplating 3D Printed Parts
But why would you want to electroplate plastic 3D printed parts? After all, aren’t 3D printed components replacing metal parts in many applications?
Indeed, 3D printed parts can be superior to metal ones in certain use cases. However, there are some situations where a plastic component just can’t compete — unless you coat it with metal.
Electroplating offers manufacturers a slew of benefits, including:
Increase Strength and Durability
Most of the time, metal is simply sturdier than plastic. But giving your plastic parts a metal coating can greatly increase their strength.
Electroplating can significantly boost a 3D printed part’s tensile strength. This is partially due to the strength of the metal itself, but also the slightly higher wall thickness after plating.
As a result, the part will not break as easily under tension. This gives electroplated parts a longer lifespan in mechanical applications without making them significantly heavier.
Additionally, metal can often better resist environmental stress, such as chemical and heat exposure or abrasion. Consequently, 3D printed parts with plating can perform longer in more demanding environments.
Enhance Part Appearance
Modern 3D printers can produce stunningly accurate details and smooth surfaces. But despite that, the resulting parts are plain plastic, which isn’t always the prettiest choice.
Electroplating results in 3D printed parts with a smooth, shiny metal exterior that can give their appearance a big boost. Additionally, the metal coating gives them the same feel as full metal components, which can be a welcome introduction to prototyping.
Improve Electrical Conductivity
Plastic simply doesn’t conduct electricity well. In fact, it’s one of the most common electrical insulators in the world. This makes 3D printed plastic parts a terrible choice for applications where conductivity is essential.
Metals, on the other hand, excel as conductors. Electroplating opens a whole new world of applications for plastic 3D printers. With a coating of metal, they can now serve as components in electrical systems where plain plastic 3D printed parts could’ve never worked before.
Materials for Electroplating
Another great advantage of electroplating is its sheer versatility. Many metals are suitable for the electroplating process, giving you plenty of options to choose from. With different materials, you can easily maximise your parts’ strength, durability, conductivity, or aesthetic appearance.
Some of the most common metal materials used in electroplating include:
- Brass
- Cadmium
- Chrome
- Copper
- Gold
- Iron
- Nickel
- Silver
- Titanium
- Zinc
Considerations Before Electroplating
Although electroplating can provide significant benefits, it’s not the easiest manufacturing process. As such, there are some considerations you should be aware of.
First, electroplating requires you to use potentially hazardous chemicals that could lead to dangerous exposure. It’s vital that you have proper ventilation in the electroplating workspace and that you and your staff your all appropriate safety measures and protective equipment.
Second, successfully electroplating resin parts can be challenging. Although it’s certainly possible, you can just as easily end up with deformed resin, flaky metal coating, or uneven surfaces. You may want to consider hiring a professional coating service if you’re interested in exploring electroplating.
Applications of Electroplated 3D Printed Parts
Despite its challenging nature, electroplating has plenty to offer for any manufacturer. As we mentioned, the large library of available metals makes electroplating suitable for a great number of industries. These include:
Prototyping
When producing metal parts, it’s often not cost-effective to create prototypes with traditional manufacturing. 3D printing can produce highly-detailed prototypes, but plastic doesn’t give you the same look and feel as metal.
Electroplating resolves this issue, as it makes components that will eventually end up as metal look the part even during design verification.
Automotive
Electroplating is very common in automotive manufacture — after all, who doesn’t like shiny chrome on their vehicle. Since 3D printing is also becoming increasingly common in car manufacture, it’s natural that the two technologies would meet.
For example, Volkswagen has electroplated 3D printed hub caps for their Type 20 concept camper. Electroplating can also increase durability in 3D car parts in mechanical applications.
Aerospace
Aeroplane components often face intense pressure and temperature changes. Additionally, they’re subject to high mechanical and environmental stresses, from heat to abrasion.
A metal coating on 3D printed aeroplane parts gives what’s known as a “sacrificial coating.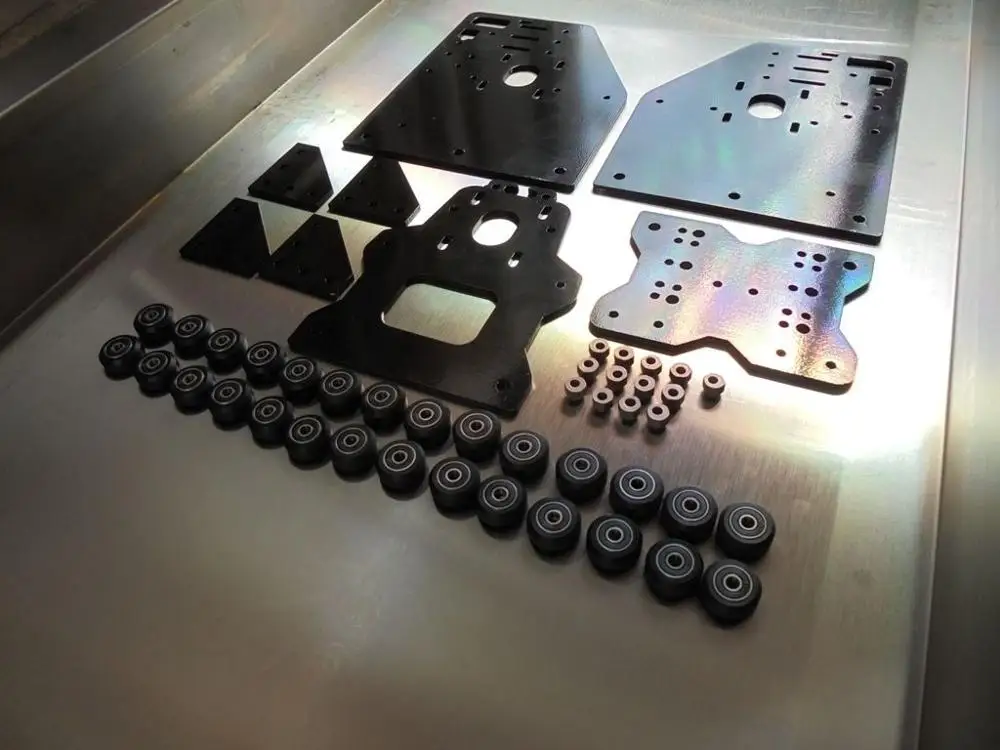 ” The environmental conditions can safely eat away at the electroplated metal without affecting the 3D printer part’s structural integrity.
Electronics
Electronics rely on efficient conductivity to function. High-conductivity electroplating allows electronics manufacturers to use 3D printed parts where doing so was previously impossible.
For example, the company Elliptika produce antennas for various industries. Thanks to electroplated 3D printed parts, they’ve been able to manufacture high-performance antennas while cutting lead times and costs by 90%.
Jewellery and Art
Jewellers and artists are perhaps the most well-known users of electroplating. Combining this process with 3D printing opens completely new creative avenues for them to pursue.
With 3D printers, you can produce intricately detailed pieces of jewellery and art at a low cost. Afterwards, it’s easy to electroplate them with precious metals to give them a smooth, lustrous coating.
Medical and Dental
3D printers are quickly making their way into both medical and dental applications. However, some 3D printing materials are porous, which makes them difficult to sterilize.
A solid and uniform metal coating enables doctors and dentists to easily sanitize 3D printed appliances. It can also make implants, like joint replacements, more durable and wear-resistant.
Start Electroplating 3D Printed Components
You now know how electroplating works and what benefits it can bring to your business. If you already use 3D printers, you can quickly start exploring the world of electroplated components.
However, if your operation doesn’t yet use 3D printers, now is a great time to start. For example, Formlabs Form 3+ is an affordable, professional-quality SLA printer. It produces durable parts with accurate details and smooth surfaces that are highly suitable for electroplating.
—
If you’d like to learn more about electroplating 3D printed parts, contact our 3D printing experts at Solid Print3D! Call us at 01926 333 777 or email us at info@solidprint3d. co.uk.
Galvanic coating of 3D printed models / Sudo Null IT News
Picture Jason Welsh youtube channel
With the spread of 3D printing, many fans have received unique opportunities, which, however, are limited by the properties of the material itself - the plastic base. In one of the previous articles, we talked about an interesting way to make metal castings from 3D printed models using metal melting in a conventional home microwave.
However, it is not always necessary to manufacture ultra-solid metal parts in complex ways, as there is a much simpler option ...
And this widely known method is electroplating! That is, a coating with metals dissolved in the form of salts in an electrolyte, when an electric current is passed through it.
The method is quite interesting, because with proper organization it allows you to deposit metals even on hard-to-reach parts of surfaces, and the do-it-yourselfer has at his disposal a relatively easy way to create any objects that look like metal.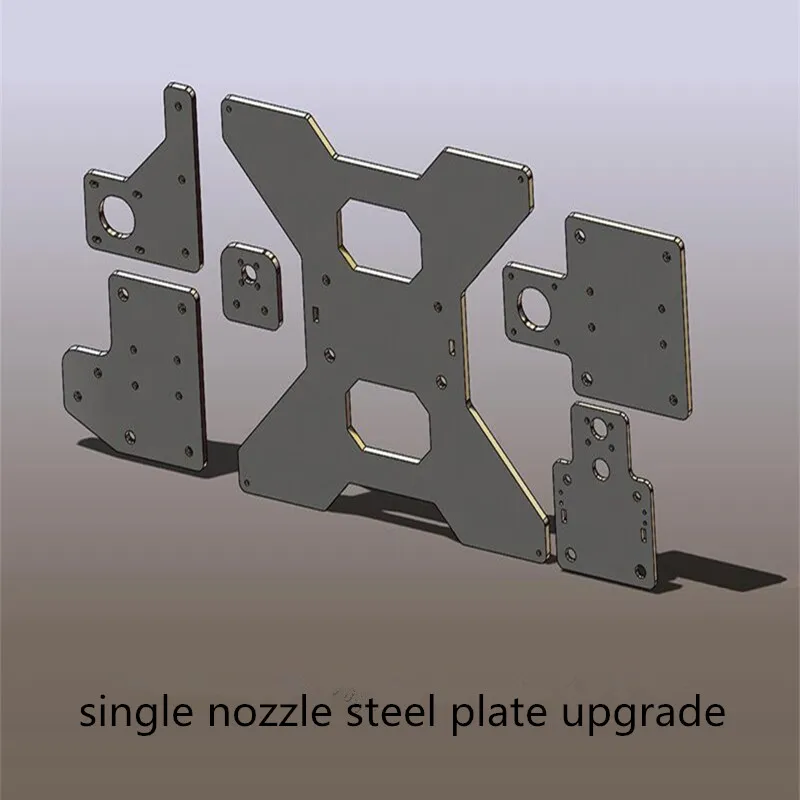
This is especially true with the advent and widespread use of inexpensive photopolymer 3D printers, the print resolution of which makes it possible to create quite interesting “metal” figurines that an unknowing person can hardly distinguish. Especially if the figurines have voids to fill them with some kind of weighting agent, for example, hunting lead shot mixed with epoxy or other binder. nine0005
Caution: electroforming involves working with electricity and chemicals, which can be quite dangerous. All subsequent information is given for general development. The author does not call for anything and is not responsible for the result of any experiments, if you want to conduct them.
▍ General description
The process of electroforming is the movement of metal salt ions, since when they are dissolved in an electrolyte, they undergo electrolytic dissociation, that is, they turn into a set of ions with positive and negative charges. nine0005
For this process, it is necessary to lower two contacts (negative and positive) into the bath with salts dissolved in the electrolyte and connect them to the corresponding terminals of the power source:
Odnoralov
When an electric current appears on the contacts, the ions in the electrolyte begin to move: with a positive charge they move to the negative contact, with a negative charge - to the positive one. Coating occurs when applying voltages in the range from 1 to 5-6 volts. nine0005
In this case, pure metal is deposited on the negative contact, and an acid residue is released on the positive contact. The amount of metal deposited on the negative electrode is directly proportional to the amount of current that was used to deposit it. That is, to put it simply, many amperes deposit more metal in less time, and fewer amperes deposit less metal in more time.
But this is to say in very general terms, since you also need to take into account the surface area of \u200b\u200bthe part on which you want to deposit metal, since a large current for a small surface will damage the coating. There is a good table for this, which allows you to calculate the amount of deposited metal:
Picture from the book "Entertaining electroplating", N.V. Odnoralov
To calculate the amount of metal that will precipitate in a certain time, you need to take the value from the last column of the table and multiply it by the current strength and the electrolysis time.
For example, in the literature cited at the end of the article there is the following calculation:
1.186 x 8 x 3 = 28.464 g.
the following calculation is required: the amount obtained is divided by the density of the metal ( 8.9g/cu. see for copper) electrolytically deposited, as well as on the surface area. For example, if the surface area is 100 sq. cm (1 sq. dm), the resulting thickness of the metal film will be 0.31 mm. This is information from the literature and this approach can even be improved nowadays if your slicer, CAD or other 3D editor can calculate the surface area of a 3D model.
▍ Electrolyte and bath
As an electrolytic bath, it is best to use plastic, glass or ceramic containers. nine0005
The model for coating (cathode) and the second electrode (anode) are suspended in baths on hooks made of conductive wire in such a way that this suspension does not get into the electrolyte and does not corrode it.
Use a plate of the same metal as the second electrode to cover the 3D model.
In the process of galvanization, it is necessary that the parts to be coated with metal be turned to the metal plate (anode) with the largest side. However, this is not always possible, therefore, various tricks are used: more than one plate is used, hanging them from both sides of the part (a - surrounding plates, b - coated part):
Picture from the book "300 Practical Tips", V. G. Bastanov
Or, in general, they use a round container with curved plates (with - bent anode plates):
Picture from the book "300 Practical Tips", V G. Bastanov
In order for all the elements of the product to be coated to be properly connected to the electric current, additional electrodes are brought into recesses and other deep places.
One of the simplest and most affordable metals for coatings is copper. Therefore, it is necessary to purchase copper sulphate (looks like plastic bags with bright blue crystals), which can be bought in almost any department of stores working in the "Garden and vegetable garden" theme:
Picture markik.ru
Electrolyte is produced by dissolving copper sulphate in water, and for this it is desirable to use hot or warm water.
Then the resulting solution must be cooled, after which sulfuric acid is slowly poured into it in a thin stream to increase the electrical conductivity. In this case, the solution will be very hot, so you need to do it very slowly so that splashing does not occur, which can cause severe burns. As sulfuric acid, it is quite possible to use a regular battery electrolyte from an auto shop. In the process of mixing water and sulfuric acid, personal protective equipment must be used. nine0005
The required amount of copper sulphate is calculated from the ratio of 200-250 g of copper sulphate per liter of water. As water, it is desirable to use distilled water for automotive electrolytes (also sold in bottles in car dealerships). When selecting the amount of sulfuric acid in the electrolyte, one should be guided by an approximate ratio of 30-35 g of acid per liter of water.
To improve the quality of the resulting copper film, you can add alcohol at the rate of 8-10 g per liter, which will lead to precipitation of copper in a finer crystalline form, as well as an increase in its hardness and elasticity. nine0005
In general, exceeding the indicated values both in terms of acid content and alcohol content will lead to a deterioration in the quality of copper and an increase in its friability.
Electrolysis is usually carried out at a temperature of about 18-20 degrees, which, however, may increase when heated during the passage of current.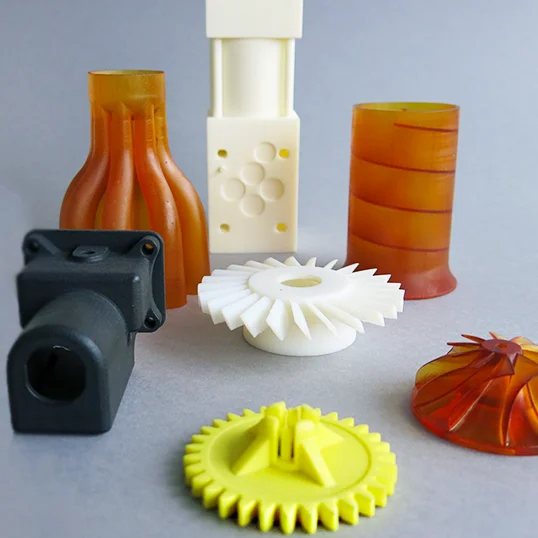
Over time, sludge will form at the bottom of the electrolytic bath, which must be periodically filtered, otherwise it will float in the electrolyte and be included in the metal structure, degrading its quality. nine0005
In the process of electrolysis, it is necessary to control the ongoing process, for which you can focus on the classic table of indicators: Odnoralov
And there is an interesting point here, which is that the result will be a copper matte finish.
Despite the above restrictions on the content of components, there is an interesting recipe on the net, practically tested by its author, where the content of components, in particular, sulfuric acid, is much higher than usual. However, the method allows obtaining copper glossy coatings. To do this, for each liter of water you should take: 200 g of copper sulfate, 180 g of sulfuric acid, 0.07 g of thiourea, 0.07 g of edible salt. nine0005
The process takes place at a current of 10-20 mA per sq.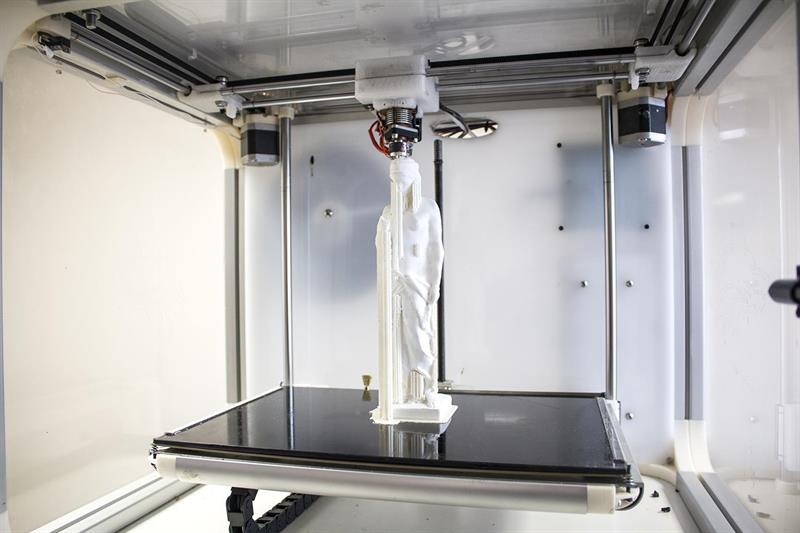 see
see
When studying the experiments of interested people, the author of the article paid special attention to the fact that do-it-yourselfers, as a rule, miss the use of chemical methods for creating gloss. Instead, at the final stage, they suffer, rubbing the resulting model with a velvet cloth with polishing paste (which, in principle, does not deny a similar approach here).
Often copper is used in electrolysis as a substrate for the deposition of subsequent, "more noble" metal coatings. This is necessary both for preliminary leveling of the surface so that the final coating looks more presentable, and because it is impossible to directly apply the final coating to the original surface due to the impossibility of strong adhesion to it. nine0005
There are many different recipes for creating metal coatings on the net, but half the success in this business is understanding the sequence of processes, as well as understanding the possibility and impossibility of applying certain metals to target surfaces. Therefore, the following formulations can be studied for yourself simply for informational purposes to understand which components are required to apply a particular coating and which you have the opportunity to get.
However, if you are interested in the appropriate coating, you need to study the accompanying technological process in more detail, since this is half the battle. In particular, as far as the author of this article is aware, chromic anhydride (used in chromium plating) is a strong carcinogen, so you should study the coating of interest to you very closely from different angles (in terms of technology) before taking it:
The numbers in the recipes shown above indicate the sequence of preparing the mixture, while mixing each component with 200-300 ml of water, after which the same amount of water and the next component in the list are added, etc., until the total amount of electrolyte reaches 1 l. nine0005
A detailed description of some of the plating technologies is given in the literature available at the end of the article.
▍ Surface degreasing
The classical technology of galvanic coating involves preliminary high-quality surface preparation, which consists in cleaning it from pollutants and degreasing. Usually the surface is cleaned of coarse contaminants using solvents and alcohols. Subsequently, the part is dipped in a hot solution of caustic soda dissolved in water (80-90 degrees), at the rate of 10-15 g per liter, after which the removed part is washed with running water. Such degreasing gives a good subsequent wetting of the parts with water, which is a marker of the absence of grease contamination.
By the way, as far as the author knows (at this point, a comment from chemists is required, not completely sure), ordinary household bathroom products, especially for cleaning heavy blockages, sold in black plastic bottles in the form of loose formulations, are predominantly caustic alkali (sodium or potassium). The chemical purity certainly leaves much to be desired, but at least they are quite affordable and are available in almost any store. nine0005
However, due to the low heat resistance of the photopolymer resin (of course, if you do not use a special, heat-resistant version of it that can withstand temperatures above 200 ⁰С), this method seems difficult to implement. Therefore, the following is most applicable: all operations with the finished printed part are carried out with gloves (removal of supports), after which the part is thoroughly washed in isopropyl alcohol.
Since the part is freshly printed, it must not contain any particular contaminants that may cause subsequent problems. nine0005
▍ Conductive coating
Since we are dealing with a 3D printed plastic part, it is natural that it does not conduct electricity. To give the surface of the part the properties of electrical conductivity, according to classical technology, it is rubbed using soft artistic brushes with finely ground lamellar graphite, which can even be used as a pencil lead.
But this is a classic method, and now there are simpler methods, one of which is the application of an aerosol coating using an airbrush (metal mixtures, in particular copper):
Or spray-on using Graphite 33 mix:
It is also possible to use pure graphite powder mixed with some binder, eg paint. The example below illustrates this well and also shows how presentable a simple copper plating can be:
some interesting thoughts about creating conductive surfaces. nine0005
Why did this idea come to mind: I remembered my childhood and the experience of smoking various surfaces with a candle or matches (not always socially approved :-)).
The author began to study this topic for realism in the field of "smoking 3D models", since, in theory, soot, which is carbon, should conduct electricity well!
As it turned out in the process of diving into the topic, alternative ways to create conductive surfaces are a kind of "Holy Grail" in the field of chemistry and there are quite active discussions on this issue in the relevant chemical forums. nine0005
If we try to summarize the results of these discussions, the most promising, from the point of view of chemists, are the following options:
 The result of this method gives almost graphite soot. Here it should be noted that the pyrolysis of acetone occurred during the tests of chemists without air access. No one has done smoking with acetone in the presence of air, so this method still requires its own experiment; nine0143
  nine0143
 Summarizing all the smoking methods, it should be said that according to the results of a number of tests, everyone noted the highest degree of soot adhesion to the surface, which is explained by high-temperature fusion. All these methods are quite curious and deserve their attention, as they lead, if successful, to obtaining a cheap, fast and high-quality conductive coating.
The high temperature that occurs during the smoking process is not an insurmountable barrier, since it can act for a very short time if the flame is pressed almost close to the model, which will cause the predominantly low-temperature zone of the flame to interact with the model (usually has a blue color and is located in the center of the tongue flame, at its base). A side benefit of this treatment will be some melting of the surface roughness and their smoothing, which will eliminate the need for manual action (for example, using iron wool). nine0005
▍ Prospects?
Oddly enough, there are very few homemade products of this kind in RuNet, since 3D printing enthusiasts usually limit themselves to just coloring a printed 3D model, losing sight of the interesting possibilities that electroplating provides.![]()
The use of electroforming also draws prospects never seen before: literally in May of this year, there was news that the developers from the Moscow Institute of Physics and Technology created an antenna for 5G and 6G using a new technology: the antenna was printed on a 3D printer, after which it was covered with metal using galvanization. This way of producing complex technical things seems quite interesting and allows any do-it-yourselfer to create quickly and easily even very complex designs, which, moreover, will be significantly cheaper than fully printed using 3D metal printers. nine0005
The topic of electroplating is quite large, and it is difficult to state all the subtleties within the framework of one article, so I recommend those who are interested to read the relevant chapters of the books below. They cover many issues in great detail, the approach to which has not lost its relevance, despite the years of publications.
Materials of books were used for writing the article:
1. "Entertaining electroplating", N.V. Odnoralov, Moscow, Enlightenment, 1965
2. "300 Practical Tips", V.G. Bastanov, - Moscow, Moscow Worker, 1986
Telegram channel with utilities and cozy chat
Lacification of 3D-printed models
Technica
Sign up for
Subscribe
7,000 7
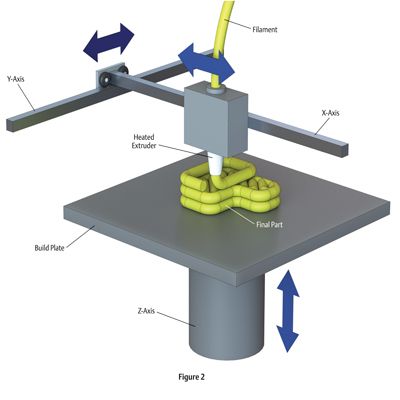
9000 Unfortunately, the print quality of FDM printers is not comparable in quality to die-cast or mechanical models - at least when it comes to the relatively inexpensive desktop setups used by enthusiasts. One of the most popular ways to smooth surfaces has become chemical treatment. The so-called "acetone baths", that is, the processing of finished models with acetone vapor, really give excellent results when working with ABS plastic, although they require accuracy. Unfortunately, this method is not suitable for use with all plastics - for example, with PLA, which is practically insoluble in acetone. But there are other solutions as well. nine0005
Instead of dissolving the outer layer of the model, you can apply a layer of material that hides product defects. As an example, consider the XTC-3D varnish from Reynolds Advanced Materials. In essence, XTC-3D is an epoxy resin that forms a durable protective coating when it cures. The strength of the material reaches 80 on the Shore D scale.
A distinctive feature of this processing method is the possibility of adding various dyes and powders to the mixture to simulate metals, stone and other materials. nine0005
The drying time of the varnish depends on the thickness of the applied layer, taking an average of 3-4 hours, although the process can be accelerated by heating. At a temperature of 60°C, the curing time is about 15 minutes. The applied layers self-level, provided that the constituent parts are mixed in the correct proportion. Technical alcohol can be used to lower the viscosity of the mixture.