Photoshop to 3d printer
Print 3D objects in Photoshop
User Guide Cancel
Search
Last updated on Nov 17, 2021 08:07:46 AM GMT
- Photoshop User Guide
- Introduction to Photoshop
- Dream it. Make it.
- What's new in Photoshop
- Edit your first photo
- Create documents
- Photoshop | Common Questions
- Photoshop system requirements
- Migrate presets, actions, and settings
- Get to know Photoshop
- Photoshop and other Adobe products and services
- Work with Illustrator artwork in Photoshop
- Work with Photoshop files in InDesign
- Substance 3D Materials for Photoshop
- Photoshop and Adobe Stock
- Use the Capture in-app extension in Photoshop
- Creative Cloud Libraries
- Creative Cloud Libraries in Photoshop
- Use the Touch Bar with Photoshop
- Grid and guides
- Creating actions
- Undo and history
- Photoshop on the iPad
- Photoshop on the iPad | Common questions
- Get to know the workspace
- System requirements | Photoshop on the iPad
- Create, open, and export documents
- Add photos
- Work with layers
- Draw and paint with brushes
- Make selections and add masks
- Retouch your composites
- Work with adjustment layers
- Adjust the tonality of your composite with Curves
- Apply transform operations
- Crop and rotate your composites
- Rotate, pan, zoom, and reset the canvas
- Work with Type layers
- Work with Photoshop and Lightroom
- Get missing fonts in Photoshop on the iPad
- Japanese Text in Photoshop on the iPad
- Manage app settings
- Touch shortcuts and gestures
- Keyboard shortcuts
- Edit your image size
- Livestream as you create in Photoshop on the iPad
- Correct imperfections with the Healing Brush
- Create brushes in Capture and use them in Photoshop
- Work with Camera Raw files
- Create and work with Smart Objects
- Adjust exposure in your images with Dodge and Burn
- Photoshop on the web beta
- Common questions | Photoshop on the web beta
- Introduction to the workspace
- System requirements | Photoshop on the web beta
- Keyboard shortcuts | Photoshop on the web beta
- Supported file types | Photoshop on the web beta
- Open and work with cloud documents
- Apply limited edits to your cloud documents
- Collaborate with stakeholders
- Cloud documents
- Photoshop cloud documents | Common questions
- Photoshop cloud documents | Workflow questions
- Manage and work with cloud documents in Photoshop
- Upgrade cloud storage for Photoshop
- Unable to create or save a cloud document
- Solve Photoshop cloud document errors
- Collect cloud document sync logs
- Share access and edit your cloud documents
- Share files and comment in-app
- Workspace
- Workspace basics
- Preferences
- Learn faster with the Photoshop Discover Panel
- Create documents
- Place files
- Default keyboard shortcuts
- Customize keyboard shortcuts
- Tool galleries
- Performance preferences
- Use tools
- Presets
- Grid and guides
- Touch gestures
- Use the Touch Bar with Photoshop
- Touch capabilities and customizable workspaces
- Technology previews
- Metadata and notes
- Touch capabilities and customizable workspaces
- Place Photoshop images in other applications
- Rulers
- Show or hide non-printing Extras
- Specify columns for an image
- Undo and history
- Panels and menus
- Position elements with snapping
- Position with the Ruler tool
- Web, screen, and app design
- Photoshop for design
- Artboards
- Device Preview
- Copy CSS from layers
- Slice web pages
- HTML options for slices
- Modify slice layout
- Work with web graphics
- Create web photo galleries
- Image and color basics
- How to resize images
- Work with raster and vector images
- Image size and resolution
- Acquire images from cameras and scanners
- Create, open, and import images
- View images
- Invalid JPEG Marker error | Opening images
- Viewing multiple images
- Customize color pickers and swatches
- High dynamic range images
- Match colors in your image
- Convert between color modes
- Color modes
- Erase parts of an image
- Blending modes
- Choose colors
- Customize indexed color tables
- Image information
- Distort filters are unavailable
- About color
- Color and monochrome adjustments using channels
- Choose colors in the Color and Swatches panels
- Sample
- Color mode or Image mode
- Color cast
- Add a conditional mode change to an action
- Add swatches from HTML CSS and SVG
- Bit depth and preferences
- Layers
- Layer basics
- Nondestructive editing
- Create and manage layers and groups
- Select, group, and link layers
- Place images into frames
- Layer opacity and blending
- Mask layers
- Apply Smart Filters
- Layer comps
- Move, stack, and lock layers
- Mask layers with vector masks
- Manage layers and groups
- Layer effects and styles
- Edit layer masks
- Extract assets
- Reveal layers with clipping masks
- Generate image assets from layers
- Work with Smart Objects
- Blending modes
- Combine multiple images into a group portrait
- Combine images with Auto-Blend Layers
- Align and distribute layers
- Copy CSS from layers
- Load selections from a layer or layer mask's boundaries
- Knockout to reveal content from other layers
- Selections
- Get started with selections
- Make selections in your composite
- Select and Mask workspace
- Select with the marquee tools
- Select with the lasso tools
- Adjust pixel selections
- Move, copy, and delete selected pixels
- Create a temporary quick mask
- Select a color range in an image
- Convert between paths and selection borders
- Channel basics
- Save selections and alpha channel masks
- Select the image areas in focus
- Duplicate, split, and merge channels
- Channel calculations
- Get started with selections
- Image adjustments
- Replace object colors
- Perspective warp
- Reduce camera shake blurring
- Healing brush examples
- Export color lookup tables
- Adjust image sharpness and blur
- Understand color adjustments
- Apply a Brightness/Contrast adjustment
- Adjust shadow and highlight detail
- Levels adjustment
- Adjust hue and saturation
- Adjust vibrance
- Adjust color saturation in image areas
- Make quick tonal adjustments
- Apply special color effects to images
- Enhance your image with color balance adjustments
- High dynamic range images
- View histograms and pixel values
- Match colors in your image
- Crop and straighten photos
- Convert a color image to black and white
- Adjustment and fill layers
- Curves adjustment
- Blending modes
- Target images for press
- Adjust color and tone with Levels and Curves eyedroppers
- Adjust HDR exposure and toning
- Dodge or burn image areas
- Make selective color adjustments
- Adobe Camera Raw
- Camera Raw system requirements
- What's new in Camera Raw
- Introduction to Camera Raw
- Create panoramas
- Supported lenses
- Vignette, grain, and dehaze effects in Camera Raw
- Default keyboard shortcuts
- Automatic perspective correction in Camera Raw
- How to make non-destructive edits in Camera Raw
- Radial Filter in Camera Raw
- Manage Camera Raw settings
- Open, process, and save images in Camera Raw
- Repair images with the Enhanced Spot Removal tool in Camera Raw
- Rotate, crop, and adjust images
- Adjust color rendering in Camera Raw
- Feature summary | Adobe Camera Raw | 2018 releases
- New features summary
- Process versions in Camera Raw
- Make local adjustments in Camera Raw
- Image repair and restoration
- Remove objects from your photos with Content-Aware Fill
- Content-Aware Patch and Move
- Retouch and repair photos
- Correct image distortion and noise
- Basic troubleshooting steps to fix most issues
- Image enhancement and transformation
- Replace sky in your images
- Transform objects
- Adjust crop, rotation, and canvas size
- How to crop and straighten photos
- Create and edit panoramic images
- Warp images, shapes, and paths
- Vanishing Point
- Content-aware scaling
- Transform images, shapes, and paths
- Drawing and painting
- Paint symmetrical patterns
- Draw rectangles and modify stroke options
- About drawing
- Draw and edit shapes
- Painting tools
- Create and modify brushes
- Blending modes
- Add color to paths
- Edit paths
- Paint with the Mixer Brush
- Brush presets
- Gradients
- Gradient interpolation
- Fill and stroke selections, layers, and paths
- Draw with the Pen tools
- Create patterns
- Generate a pattern using the Pattern Maker
- Manage paths
- Manage pattern libraries and presets
- Draw or paint with a graphics tablet
- Create textured brushes
- Add dynamic elements to brushes
- Gradient
- Paint stylized strokes with the Art History Brush
- Paint with a pattern
- Sync presets on multiple devices
- Text
- Add and edit the text
- Unified Text Engine
- Work with OpenType SVG fonts
- Format characters
- Format paragraphs
- How to create type effects
- Edit text
- Line and character spacing
- Arabic and Hebrew type
- Fonts
- Troubleshoot fonts
- Asian type
- Create type
- Text Engine error using Type tool in Photoshop | Windows 8
- Add and edit the text
- Filters and effects
- Use the Liquify filter
- Use the Blur Gallery
- Filter basics
- Filter effects reference
- Add Lighting Effects
- Use the Adaptive Wide Angle filter
- Use the Oil Paint filter
- Use the Liquify filter
- Layer effects and styles
- Apply specific filters
- Smudge image areas
- Use the Liquify filter
- Saving and exporting
- Save your files in Photoshop
- Export your files in Photoshop
- Supported file formats
- Save files in graphics formats
- Move designs between Photoshop and Illustrator
- Save and export video and animations
- Save PDF files
- Digimarc copyright protection
- Save your files in Photoshop
- Color Management
- Understanding color management
- Keeping colors consistent
- Color settings
- Duotones
- Work with color profiles
- Color-managing documents for online viewing
- Color-managing documents when printing
- Color-managing imported images
- Proofing colors
- Web, screen, and app design
- Photoshop for design
- Artboards
- Device Preview
- Copy CSS from layers
- Slice web pages
- HTML options for slices
- Modify slice layout
- Work with web graphics
- Create web photo galleries
- Video and animation
- Video editing in Photoshop
- Edit video and animation layers
- Video and animation overview
- Preview video and animations
- Paint frames in video layers
- Import video files and image sequences
- Create frame animations
- Creative Cloud 3D Animation (Preview)
- Create timeline animations
- Create images for video
- Printing
- Print 3D objects
- Print from Photoshop
- Print with color management
- Contact Sheets and PDF Presentations
- Print photos in a picture package layout
- Print spot colors
- Print images to a commercial printing press
- Improve color prints from Photoshop
- Troubleshoot printing problems | Photoshop
- Automation
- Creating actions
- Create data-driven graphics
- Scripting
- Process a batch of files
- Play and manage actions
- Add conditional actions
- About actions and the Actions panel
- Record tools in actions
- Add a conditional mode change to an action
- Photoshop UI toolkit for plug-ins and scripts
- Content authenticity
- Learn about content credentials
- Identity and provenance for NFTs
- Connect accounts for creative attribution
- 3D and technical imaging
- Photoshop 3D | Common questions around discontinued 3D features
- Creative Cloud 3D Animation (Preview)
- Print 3D objects
- 3D painting
- 3D panel enhancements | Photoshop
- Essential 3D concepts and tools
- 3D rendering and saving
- Create 3D objects and animations
- Image stacks
- 3D workflow
- Measurement
- DICOM files
- Photoshop and MATLAB
- Count objects in an image
- Combine and convert 3D objects
- 3D texture editing
- Adjust HDR exposure and toning
- 3D panel settings
With Photoshop, you can print any compatible 3D model without worrying about 3D printer limitations. In preparation for printing, Photoshop automatically makes 3D models watertight. Photoshop also generates the necessary support structures—scaffolding and rafts—to ensure that your 3D prints are successful.
Preparing to print 3D objects
- Select Window > Workspace > 3D to switch to the 3D workspace.
- Open the 3D model in Photoshop. If necessary, customize the size of the 3D model while opening it.
- Select 3D > 3D Print Settings.
- In the 3D Print Settings panel, choose whether you want to print to a printer connected to your computer through a USB port (local printer) or use an online 3D printing service, such as Shapeways.com or Sculpteo.
You can now print 3D models as 3D Manufacturing Format (3MF) files. While specifying the 3D Print Settings, select Print To: Local and Printer: 3MF File. When you print the 3D object, Photoshop generates the 3MF file. On computers running Windows, Photoshop also launches Microsoft 3D Builder for you to work further on the 3MF file.
To refresh the list of supported printers or online profiles, select Get Latest Printers from the Print To pop-up menu.
- Select a local printer or a Shapeways.com printer profile.
To view estimated prices for printing the 3D model using available Shapeways.com profiles, select Printer > Estimate Price.
- Select a unit for the printer volume—inch, centimeter, millimeter, or pixel. The unit is reflected in the Printer Volume dimensions as well as the print plate measurements.
A. 3D model B. Print plate C. Printer volume overlay
- Select a Detail Level—Low, Medium, or High—for the 3D print. The time required to print the 3D object depends on the detail level that you choose.
- If you don't want to see the 3D printer volume overlaid on the 3D model, deselect Show Printer Volume Overlay.
- Adjust the Scene Volume dimensions to specify the desired size of the printed 3D object. When you change a value (X, Y, or Z), the other two values are scaled proportionately. As you modify the Scene Volume dimensions, notice that the print plate under the 3D model scales in proportion.
You can scrub the value of a Scene Volume dimension by clicking the dimension label (X, Y, or Z) and then dragging the mouse left or right. Hold down the Shift key to make the value scrub faster.
- Choose Scale To Print Volume if you want Photoshop to auto-scale your 3D model, such that it fills up the available print volume of the selected printer.
- If the 3D model has normal maps, bump maps, or opacity maps; you can choose to ignore one of more types of these maps while printing the model. You'll notice that the 3D model updates in real time when you change these Surface Detail settings.
- You may choose to not print the support structures (scaffolds or rafts) required for the 3D object.
 Use this option with caution, since the printing of the 3D model may fail if you don't print a necessary support structure.
 - If your printer supports multiple materials, choose the material that you want to use for printing the 3D object.
(Experimental) Enable multitone printing for MakerBot Replicator 2x
You can enable an experimental feature that lets you print continuous tones using your MakerBot Replicator 2x 3D printer.
Prerequisite: Enable experimental features
As a prerequisite to multitone printing, you must enable experimental features in Photoshop:
- Select Preferences > Experimental Features.
- Select Enable Multitone Printing.
- Click OK.
- Restart Photoshop.
Experimental features are not yet production-ready. Use these features with discretion.
Select the multitone surface material
- Select the MakerBot Replicator 2x printer in the 3D Print Settings panel.

- Under Material, select Multitone Surface. If this option is not available for selection, ensure that the Multitone 3D Printing experimental feature is already enabled.
- Select other options relevant to the 3D object that you're printing.
- Select 3D > 3D Print to preview and print the 3D object.
Previewing and printing the 3D object
Once you're done specifying the 3D print settings, follow these steps:
- Click the Start Print icon () or select 3D > 3D Print. Photoshop unifies the 3D scene and prepares it for the printing process.
- If you chose to print using a Shapeways.com profile, Photoshop prompts you that the actual cost of printing may differ from the displayed estimates. Click OK.
- In the preview window that appears, use the 3D camera tools to rotate, zoom, or move the 3D object.
Rotate the 3D camera
Roll the 3D camera
Pan the 3D camera
Slide the 3D camera
Reset the 3D camera to its original location
- If necessary, select Show Repair.
 Photoshop displays the Original Mesh, Wall Thickness, and Closed Hole repairs using appropriate color coding:
- Optionally, enable Raytrace Preview. Raytrace previews represent the printed output more accurately.
- If you want to export the 3D print settings to an STL file, click Export and save the file to an appropriate location on your computer. You can upload the STL file to an online service or put it on an SD card for local printing.
- Review the 3D print summary and click Print.
You can cancel an in-progress 3D print by selecting 3D > Cancel 3D Print.
3D print utilities
Photoshop provides interactive wizard-based utilities that you can use for configuring, calibrating, and maintaining your 3D printer. You can use these utilities only when the 3D printer is powered on and connected to your computer.
- Select 3D > 3D Printer Utilities.
- Select the utility that you want to launch.
Calibrate Print Plate
Helps level the print plate. This utility performs the following broad steps:
- Prompts you to remove any leftover printing material from the 3D printer
- Initializes the print head
- Lets you adjust/finetune the gap between the print plate and the print head for nine nozzle positions
You can use this utility in the wizard mode or in the manual mode.
Load Filament
Helps load a filament into a fused deposition modeling (FDM) 3D printer. Photoshop initiates the head-heating process and the filament-loading mechanism for easy filament loading.
Remove Filament
Helps remove a filament from an FDM 3D printer. Photoshop initiates the head-heating process and the filament-loading mechanism for easy filament removal.
Change Filament
Helps replace the filament of an FDM 3D printer with a new filament. Photoshop initiates the head-heating process and the filament-loading mechanism for easy filament changing.
- Follow the onscreen instructions.
Pack objects on the ground plane
At times, you may want to print multiple instances of the same object on the same build plate. Follow these steps:
- Select the required objects in the 3D Panel.
- Select 3D > Pack Objects On Ground Plane.
- Proceed with printing the objects.
Photoshop currently supports the following local 3D printers:
- MakerBot Replicator 2
- MakerBot Replicator 2x
- ZCorp Full Color
- Mcor Iris
- MakerBot Replicator 5th Generation
Additionally, Photoshop supports several Shapeways.com and Sculpteo profiles.
Direct USB printing with the MakerBot Replicator 5th Generation printer profile is not supported yet.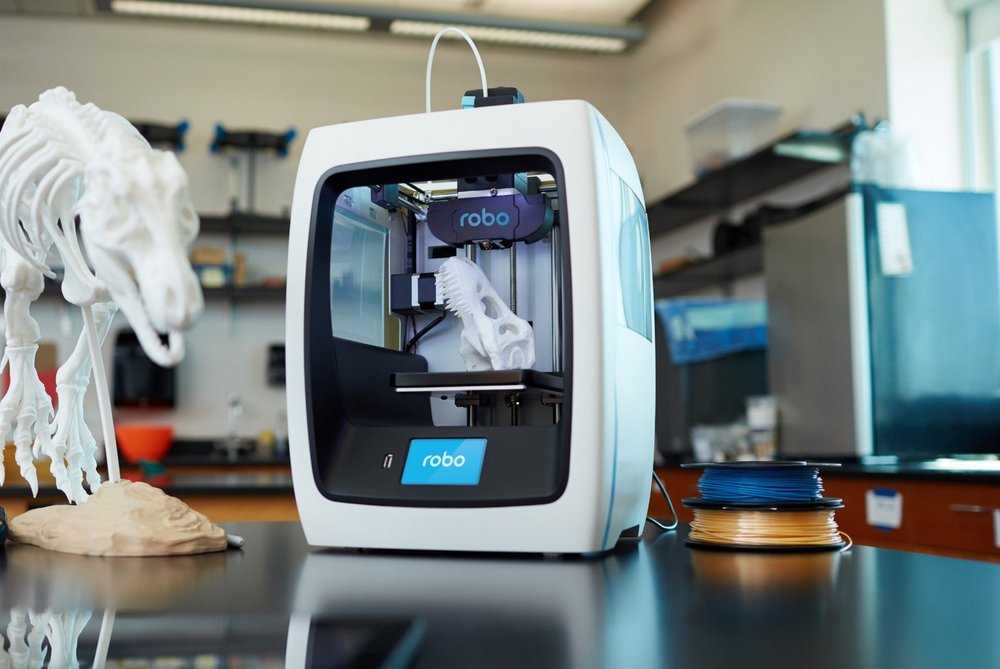 You can export the files you want to print to a USB stick and then print them locally.
Yes. You can define cross sections to slice away parts of a 3D model before printing. Follow these broad steps:
- Select Window > Workspace > 3D to switch to the 3D workspace.
- Open the 3D object you want to print.
- Select Scene in the 3D panel.
- In the Properties panel, select Cross Section.
- Specify settings for the cross section in the Properties panel.
- Select 3D > Apply Cross Section To Scene.
- Print the 3D scene.
Before printing, you must bake the cross section you've defined.
Yes. Follow these broad steps:
- Select a material in the Scene panel.
- In the Properties panel, click the folder icon () next to Bump/Opacity/Normal and load a texture. You can also define a new texture that you want to apply to the 3D model.

- If you're defining a new texture, save the texture. The texture is applied to the 3D model as a bump/opacity map.
- Print the 3D model.
If your 3D printer is equipped with two heads, you can print 3D models in two colors. The Print Properties panel displays pop-up options for the additional heads available. The 3D workspace and the 3D print preview display the model in two colors.
Printing a 3D model in two colorsFrom a printing standpoint, each layer in the 3D model is treated as a 3D object. If necessary, you can merge two or more layers (3D > Merge 3D Layers).
More like this
- How to print a 3D object in Photoshop
- 3D painting
- 3D panel enhancements | Photoshop
- Photoshop 3D documentation
Sign in to your account
Sign in
Manage account
3D Printing & 3D Modeling with Photoshop CC | 3D Printing Blog
by Fabian | September 1, 2016
Great news for Photoshop users: you can now use the powerful editing tools of Photoshop to bring 3D models and prints to life! Photoshop CC now fully supports 3D printing with i.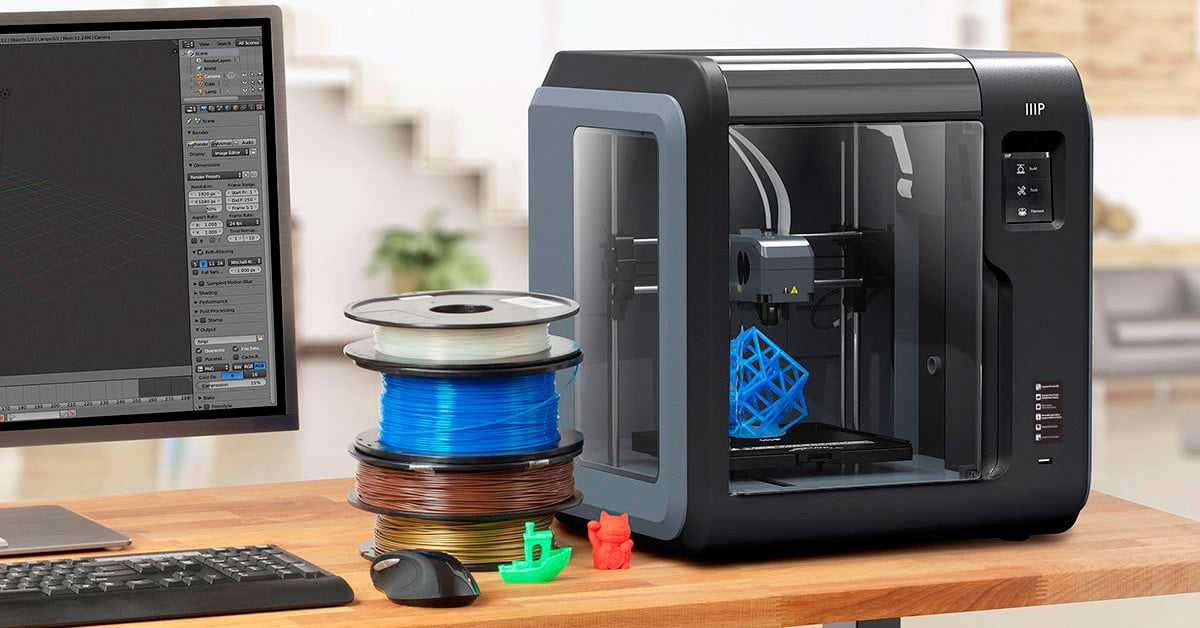 materialise in 100+ materials and finishes – all that’s left for you to do is to take a look at our new tutorial video on how to create 3D models in Photoshop.
We’ve created a hands-on tutorial and info website to take you step-by-step through the process of creating 3D models in Photoshop CC. This tutorial will teach you how to use different views, how to edit both in 3D space and on the UV skin, and how to 3D print your model. You’ll see how to suit up a little piguin (yes, that’s a penguin and a pig mixed together) in minutes for a black tie event. Check out our new Photoshop 3D printing tutorial and follow the tutorial text in this blog post.
Step 1: Learn to import a 3D file to Photoshop
Photoshop lets you import the most popular 3D file formats such as STL, IGS, PLY, or OBJ. In our tutorial video, we chose to import the STL file of a piguin. If you don’t have a 3D file yet, you can find objects to start from on these 10 popular 3D model databases.
Start by importing a 3D file (for example an STL file) to Photoshop
Step 2: Get familiar with the basic controlsThe next part of our video tutorial is all about familiarizing yourself with the 3D environment in Photoshop CC. Learn how to use basic controls to manipulate and rotate the view, zoom in and out, and to switch between several predefined views (i.e. how to switch between the main and secondary view).
Get familiar with the 3D environment in Photoshop
Step 3: Investigate the 3D model in PhotoshopNow it’s time to investigate the model in more detail. Photoshop lets you change the layer characteristics of your 3D object. With the segmented view, for instance, you can virtually cut open your model on the X, Y, and Z axis to take a look inside your model. You can also display the design as a point cloud wireframe structure and switch other effects such as shadows off or on.
Learn to investigate your 3D model in Photoshop
Step 4: Paint your model in a 3D spaceThe ability to paint your 3D model is one of the biggest benefits of Photoshop.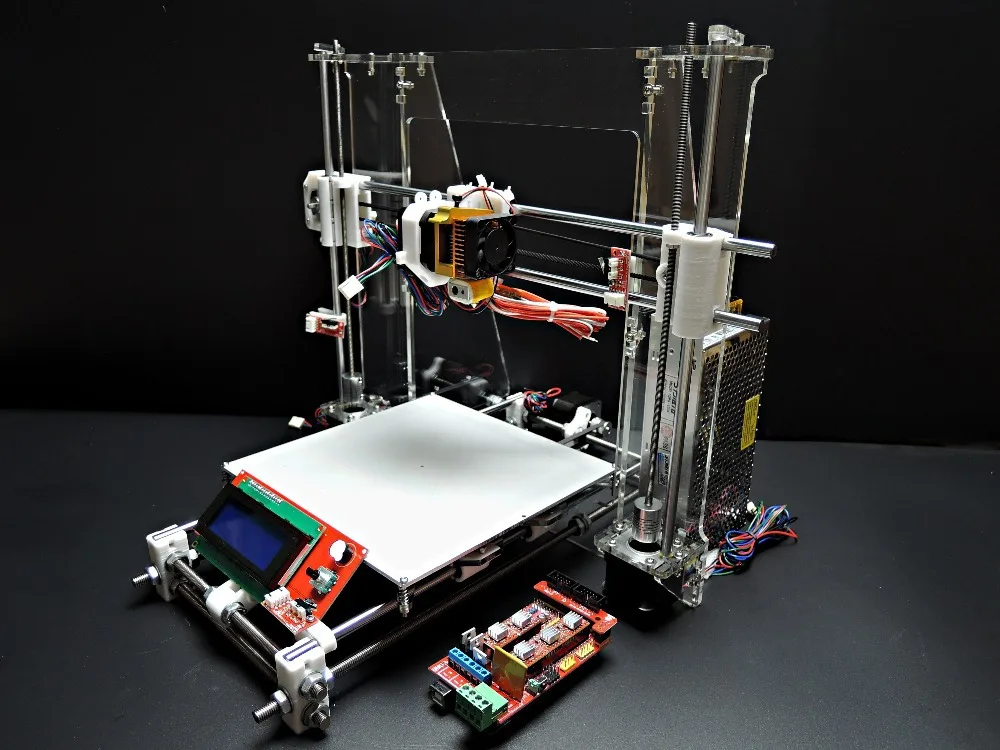 Which other 3D modeling or design software can offer editing tools as powerful as those that Photoshop has to offer? If you want to, you can directly start painting the design in a 3D space.
You can paint a model in a 3D space
Step 5: Switch from 3D to 2D and paint the 2D skinIf you prefer to paint and edit in 2D you can simply switch from the 3D view to a classic 2D view. This means that the UV skin of the model will be unwrapped and easy to edit. You can change the UV overlay capacity, select the brush size and hardness of your choice, and use any of the Photoshop editing tools you have in mind. For example, you can add effects and filters such as noise, distortion, pixelation and much more.
You can also edit the 2D skin of your model
Step 6: Import Photoshop files and images into your 3D modelOf course, you can also add images to your 3D model. It makes the most sense to start importing them in the 2D view and then navigating them to the right place.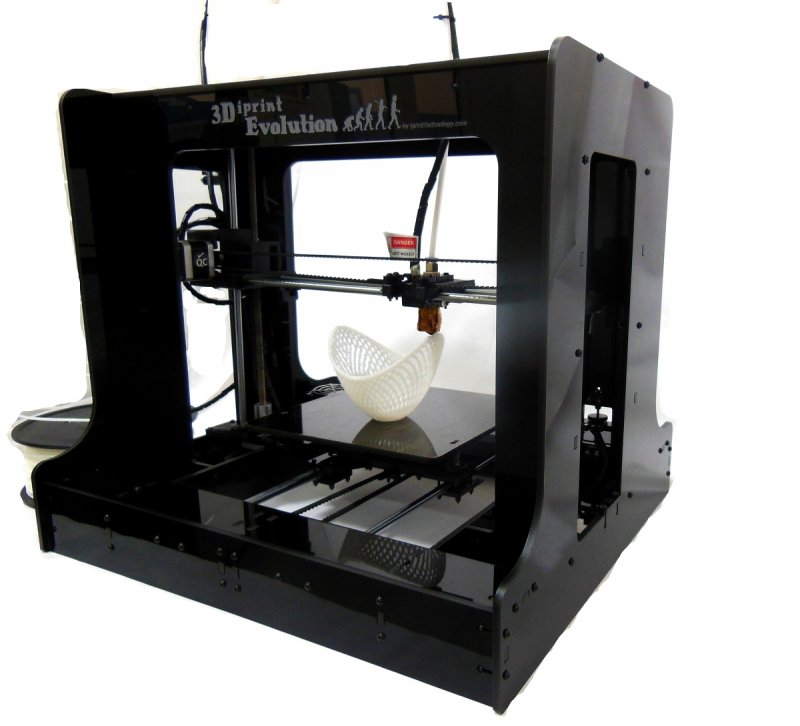 Of course, you can also work with several layers, use textures, and modify and manipulate the important images with the Photoshop editing operation of your choice.
You can also import images onto your design
Step 7: 3D print your designOnce your design is ready, it’s time to hit the ‘print’ button, select i.materialise, and choose the material and finish of your choice from the drop-down menu. You can also double-check if the dimensions of your 3D model are correct. Click ‘prepare to print’ and save your 3D file by selecting ‘export’.
Prepare your Photoshop file for 3D printing
You will then be directed to the i.materialise upload page. Upload the 3D file that you just saved on your computer and you will instantly see the price for your high-quality 3D print.
Upload your Photoshop 3D file and get your 3D print
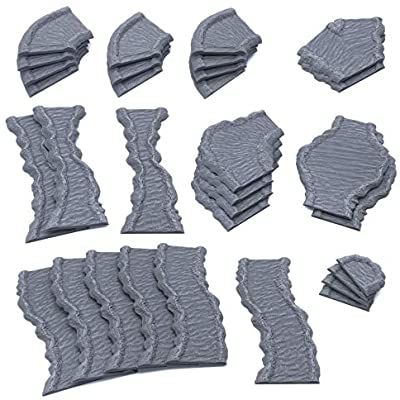
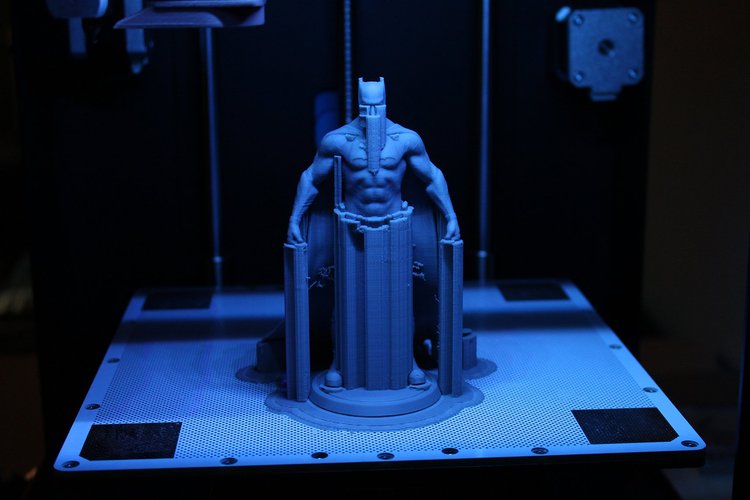
Piguins painted in Photoshop CC and 3D printed in Multicolor
And that’s it.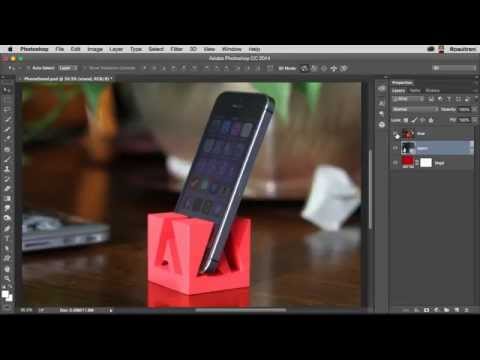 Editing your 3D files with Photoshop will make them look better than ever! This is especially useful if you were thinking about printing in our multicolor material. Visit our dedicated Photoshop CC site for some more info and images. To get a general overview of all 3D printing materials, check out our materials page.
Printing 3D Objects in Photoshop
User's Guide Cancel
Search
Last update Dec 13, 2021 08:23:10 PM GMT
- Photoshop User Guide
- Introduction to Photoshop
- Dream about it. Do it.
- What's New in Photoshop
- Editing the first photo
- Create documents
- Photoshop | FAQ
- Photoshop system requirements
- Transferring presets, operations and settings
- Introduction to Photoshop
- Photoshop and other Adobe products and services
- Working with Illustrator artwork in Photoshop
- Working with Photoshop files in InDesign
- Substance 3D Materials for Photoshop
- Photoshop and Adobe Stock
- Working with the built-in Capture extension in Photoshop nine0009 Creative Cloud Libraries
- Creative Cloud Libraries in Photoshop
- Working in Photoshop using the Touch Bar
- Net and guides
- Create transactions
- Cancellation and transaction history
- Photoshop on iPad | General questions
- Introduction to the working environment
- System requirements | Photoshop on iPad
- Create, open and export documents
- Adding photos
- Working with layers
- Drawing and painting with brushes
- Selecting areas and adding masks
- Retouch compositions
- Working with Adjustment Layers
- Adjusting the key of a composition using the Curves layer
- Applying transform operations
- Trim and rotate compositions
- Rotate, pan, zoom and restore canvas nine0009 Working with text layers
- Frequently Asked Questions | Photoshop Web App Beta
- Working environment overview
- System requirements | Photoshop 9 Web App Beta0010
- Keyboard shortcuts | Photoshop Web Application Beta
- Supported file formats | Photoshop Web Application Beta
- Opening and working with cloud documents
- Collaboration with stakeholders
- Limited editing options for cloud documents
- Photoshop Cloud Documents | Frequently Asked Questions
- Photoshop Cloud Documents | Workflow Questions
- Work with and manage cloud documents in Photoshop
- Cloud storage update for Photoshop
- Unable to create or save cloud document
- Troubleshooting Photoshop cloud documents
- Collection of cloud document synchronization logs
- Sharing and editing cloud documents
- File sharing and commenting in the application
- Working environment basics
- Learn faster with the What's New panel in Photoshop
- Create documents
- Working in Photoshop using the Touch Bar
- Tool gallery
- Performance settings
- Using tools
- Touch gestures
- Touch gestures and customizable workspaces
- Technology overview versions
- Metadata and comments
- Default key combinations
- Touch gestures and customizable workspaces
- Putting Photoshop images into other applications
- Installations
- Default key combinations
- Rulers
- Show or hide non-printing auxiliaries
- Specifying columns for the image
- Cancellation and transaction history
- Panels and menus
- File storage
- Positioning of elements with referencing
- Positioning with the ruler tool
- Setting sets
- Customizing keyboard shortcuts
- Net and guides
- Photoshop for design
- Artboards
- View on device
- Copy CSS from layers
- Splitting web pages into fragments
- HTML options for snippets
- Changing the arrangement of fragments
- Working with web graphics
- Create web photo galleries
- Resizing images
- Working with raster and vector images
- Image size and resolution
- Importing images from cameras and scanners
- Creating, opening and importing images
- Image viewer
- "Invalid JPEG marker" error | Opening images
- Viewing multiple images
- Customize color palettes and color swatches
- HDR images
- Image color matching
- Converting between color modes
- Color modes
- Erase sub-images
- Blend Modes
- Choice of colors
- Making changes to indexed color tables
- Image information
- Distortion filters not available
- Color details
- Color and monochrome corrections with channels
- Selecting colors in the Color and Swatches panels
- Sample
- Color mode (or picture mode)
- Shade
- Add color mode change to operation
- Add swatches from HTML CSS and SVG files
- Bit depth and settings
- Understanding Layers
- Reversible editing
- Create and manage layers and groups
- Selecting, grouping and linking layers
- Putting images into frames
- Opacity and layering
- Layer masks
- Application of smart filters
- Layer compositions
- Move, arrange and lock layers
- Layer masking with vector masks
- Manage layers and groups
- Effects and Layer Styles
- Editing layer masks
- Extract resources
- Display layers with clipping masks
- Generation of graphic resources from layers
- Working with Smart Objects
- Blend Modes
- Combining several fragments into one image
- Combining images with Auto Layer
- Alignment and distribution of layers
- Copy CSS from layers
- Load selections based on layer boundaries or layer masks
- See-through to show the contents of other layers
- Layer
- Mixing
- Composite images
- Background
- Select and Mask workspace
- Quick area selection
- Getting Started with Selections
- Selecting with the Marquee Toolbox
- Selection with the Lasso tools
- Selecting a color range in the image
- Pixel highlight setting
- Convert between contours and selection boundaries
- Channel Basics
- Moving, copying and deleting selected pixels
- Creating a temporary quick mask
- Save selections and alpha channel masks
- Selecting focus areas in an image
- Duplication, splitting and merging of channels
- Channel calculation
- Extraction
- Bounding box
- Perspective distortion
- Blur reduction due to camera movement
- Healing Brush Tool Examples
- Export color lookup tables
- Image sharpening and blurring
- Introduction to color grading
- Applying the Brightness/Contrast setting
- Shadow and Highlight Detail Correction
- "Levels" correction
- Hue and saturation correction
- Juiciness correction
- Adjusting the color saturation in image areas
- Quick tone correction
- Applying special color effects to images
- Image enhancement with color balance correction
- HDR images
- View histograms and pixel values
- Image color matching
- Crop and straighten photographs
- Converting a color image to black and white
- Adjustment and fill layers
- Curves correction
- Blend Modes
- Target Imaging for Press
- Color and tone correction with Levels and Curves eyedroppers
- HDR Exposure and Toning Compensation
- Filter
- Blur
- Lighten or darken image areas
- Selective color correction
- Changing object colors
- Camera Raw system requirements
- What's New in Camera Raw
- Introduction to Camera Raw
- Creating panoramas
- Supported lenses
- Camera Raw 9 Vignetting, Grain, and Haze Removal0010
- Default key combinations
- Automatic perspective correction in Camera Raw
- Reversible editing in Camera Raw
- Camera Raw Radial Filter Tool
- Manage Camera Raw Settings
- Processing, saving and opening images in Camera Raw
- Improving Images with Camera Raw's Improved Spot Remover
- Rotating, cropping and modifying images nine0009 Camera Raw color correction
- Removing objects from photos using Content-Aware Fill
- Content-aware patching and relocation
- Retouching and fixing photos
- Image Distortion and Noise Correction
- Basic troubleshooting steps to solve most problems
- Object transformation
- Crop, rotate and canvas adjustment
- Crop and straighten photographs
- Creating and editing panoramic images
- Deforming images, shapes and contours
- Perspective
- Using the Liquify filter
- Content-aware scale
- Transforming images, shapes and paths
- Deformation
- Transformation
- Panorama
- Drawing symmetrical ornaments
- Options for drawing a rectangle and changing the stroke
- Drawing details
- Drawing and editing shapes
- Paint tools
- Creating and modifying brushes
- Blend Modes
- Adding color to contours
- Edit contours
- Painting with mix brush
- Brush Presets
- Gradients
- Gradient interpolation
- Fill and stroke selections, layers, and paths
- Drawing with the pen tool group
- Making patterns
- Creating a pattern with the Pattern Builder filter
- Loop control
- Managing pattern libraries and presets
- Drawing with pen tablet
- Creating textured brushes
- Adding dynamic elements to brushes
- Gradient
- Draw stylized strokes with the Artistic Archive Brush
- Drawing with pattern
- Synchronizing presets across multiple devices
- Adding and editing text
- Universal text editor
- Working with OpenType SVG Fonts
- Character formatting
- Paragraph formatting
- Creating text effects
- Text editing
- Leading and letter spacing
- Font for Arabic and Hebrew
- Fonts
- Troubleshooting fonts
- Asian text
- Create text nine0009 Text Engine error when using Photoshop's Type tool | Windows 8
- Video editing in Photoshop
- Editing video and animation layers
- Introduction to video and animation
- Video and animation preview
- Drawing frames in video layers
- Import video files and image sequences
- Create frame animations
- Creative Cloud 3D Animation (Preview)
- Create timeline animations
- Creating images for videos
- Using the Liquify filter
- Using Blur Gallery group effects
- Filter basics
- Filter effects guide
- Adding lighting effects
- Using the Adaptive Wide Angle filter
- Oil Paint Filter
- Effects and Layer Styles
- Application of specific filters
- Image area feathering
- Saving files in Photoshop
- Export files to Photoshop
- Supported file formats
- Saving files in other graphic formats
- Moving projects between Photoshop and Illustrator
- Saving and exporting video and animation
- Saving PDF files nine0009 Digimarc copyright protection
- Printing 3D objects
- Printing with Photoshop
- Printing and color management
- Checklists and PDF presentations
- Print photos in a new image layout
- Spot color printing
- Duplexes
- Printing images on a printing press
- Photoshop Color Enhancement
- Printing troubleshooting | Photoshop
- Create activities
- Creation of data-driven images
- Scenarios
- File batch processing
- Operation playback and management
- Adding conditional operations
- About actions and the Actions panel
- Recording tools in operations
- Add color mode change to operation
- Photoshop UI Development Kit for Plugins and Scripts
- Understanding Color Management
- Accurate color assurance
- Color settings
- Working with color profiles
- Color management of documents for viewing on the web
- Color management for printing documents
- Color management of imported images
- Perform proofing
- Learn more about content credentials
- Identity and origin of NFT tokens
- Connecting accounts for creative attribution
- 3D in Photoshop | Common questions about deprecated 3D features
- Creative Cloud 3D Animation (Preview)
- Printing 3D objects
- 3D drawing
- 3D Panel Enhancement | Photoshop
- 3D Concepts and Tools
- Rendering and saving 3D objects
- Creating 3D objects and animations
- Image stacks
- 3D graphics workflow
- Measurements
- DICOM files
- Photoshop and MATLAB
- Image object count
- Combining and transforming 3D objects
- Editing 3D textures
- HDR Exposure and Toning Compensation
- 3D panel settings
Photoshop allows you to print any compatible 3D model without worrying about the limitations of a 3D printer. When preparing to print, Photoshop automatically renders 3D models impenetrable. Photoshop also generates the necessary support structures—platforms and bases—to help you achieve successful 3D printing results.
Preparing 3D objects for printing
- Select the menu item Window > Workspace > 3D to switch to 3D mode. nine0010
- Open the 3D model in Photoshop. If necessary, resize the 3D model while opening the file.
- Select menu item 3D > 3D Print Settings.
- In the 3D Printing Preferences panel, choose whether to use a printer connected to your computer via USB (local printer) or online 3D printing services such as Shapeways.com or Sculpteo.
You can now print 3D models as 3MF (3D Manufacturing Format) files. When specifying 3D printing options, select 9 for option0848 Print to is set to Local and Printer is set to 3MF File. When you send a 3D object to print, Photoshop creates a 3MF file. On Windows computers, Photoshop also launches the Microsoft 3D Builder application to further process the 3MF file.
To update the list of supported printers or online profiles, select Get Latest Printers from the Send to Print To pop-up menu.
- Select a local printer or Shapeways.com print profile. nine0010
View estimated prices for printing 3D models using available Shapeways.com profiles by selecting Printer > Estimated Price.
- Select the print volume units from inches, centimeters, millimeters, or pixels. This unit will serve to measure the dimensions of the volume of the printer as well as the dimensions of the printing plate.
A. 3D model B. Printing plate C. Printer volume overlay nine0003
- Select the 3D Printing Detail Level—Low, Medium, or Fine. The time it takes to print a 3D object depends on the level of detail selected.

- If you do not want to see the bounds of the 3D model's print volume, clear the Show Printer Volume Overlay check box.
- Set the Scene Size options to the appropriate size for the 3D printed object. When you change one value (X, Y, or Z), the other two values are scaled proportionally. When resizing the Stage Volume, notice that the print plate under the 3D model resizes accordingly. nine0010
You can scroll through the Scene Volume settings by clicking the size label (X, Y, or Z) and dragging the cursor left or right. By holding down the Shift key, you can scroll through the values faster.
- Select Scale by printer volume if you want to automatically resize the 3D model so that it takes up the entire available printer volume on the selected printer.
- If the 3D model includes normal maps, bump maps, or transparency maps, you can ignore these types of maps when printing the model. Notice how the 3D model changes in real time as you change the Surface Detail settings.
 nine0010
 - Optionally, you can exclude the support structures of the 3D object (platforms and bases) from printing. Use this option with caution as printing a 3D model without the necessary support structures may produce unsatisfactory results.
- If your printer supports multiple materials, select the material you want to use to print this 3D object.
(Experimental) Enable multitone printing for the MakerBot Replicator 2x 9 printer0036
You can enable an experimental feature that allows you to print continuous tones with your MakerBot Replicator 2x 3D printer.
Requirement: Enable experimental Photoshop features
Experimental features must be enabled in Photoshop before using multitone printing:
- Select Preferences > Experimental Features.
- Select the Enable multitone printing check box. nine0010
- Click OK.
- Restart Photoshop.
Experimental features not yet fully tested. They should be used with caution.
Choose a multi-tone surface material
- Select the MakerBot Replicator 2x printer in the 3D Printing Settings panel.
- In the Material field, select Multitone Surface. If you don't see this option, make sure the experimental Multitone 3D Printing feature is enabled. nine0010
- Set other parameters according to the generated 3D model.
- To view and print a 3D object, select 3D > 3D Print.
Preview and print 3D object
After setting the 3D printing options, follow these steps.
- Click the Start Print icon () or select the menu item 3D > 3D Print. Photoshop will combine the 3D elements of the scene and prepare it for the printing process. nine0036
- If you choose to print with a Shapeways.com profile, Photoshop will display a message that the actual print cost may differ from the estimated cost displayed. Click OK.
- In the preview window that opens, you can use the 3D camera tools to rotate, scale, or move the 3D object.
Rotate the 3D camera.
3D camera rotation.
Move the 3D camera.
3D camera slide. nine0003
Return to the home position of the 3D camera.
- If necessary, select the Show restoration check box. Photoshop displays various restoration colors such as Original mesh, Thickened walls, and Hole closed.
- You can also turn on Ray Tracing Preview. Viewing ray tracing allows you to more accurately reproduce the printed material. nine0010
- If you want to export the 3D printing settings to an STL file, click the Export button and save the file to the desired folder on your computer. This STL file can be sent to a network service server or moved to an SD card for printing with your own printer.

- View a summary of the 3D print object and click the Print button.
You can cancel the current 3D printing process using the menu item 3D > Cancel 3D printing. nine0036
3D printing utilities
Photoshop provides interactive step-by-step utilities that you can use to set up, calibrate, and maintain your 3D printer. These utilities can only be used when the 3D printer is turned on and connected to a computer.
- Select the menu item 3D > 3D Printer Utilities.
- Select the utilities you want to run.
Print plate calibration nine0003
Helps in leveling the printing plate. This utility includes the following general steps:
- Requires you to remove all residual print materials from the 3D printer.
- Initializes the print head.
- Allows you to adjust the amount of gap between the platen and the printhead at nine nozzle positions.

You can use this utility in wizard mode or manual mode.
Download Thread nine0003
Helps load filament into a Fused Deposition Modeling (FDM) 3D printer. To facilitate filament loading, Photoshop starts the head heating process and the filament loading mechanism.
Remove thread
Helps remove the filament from the FDM 3D printer. To facilitate the removal of the filament, Photoshop starts the head heating process and the filament loading mechanism.
Replace thread nine0003
Helps to replace the old filament in the FDM 3D printer with a new one. To make changing filament easier, Photoshop starts the head heating process and the filament loading mechanism.
- Follow the instructions on the screen.
Pack objects on the base plane
Sometimes you may want to print multiple instances of an object on the same panel. Do the following.
- Select the required objects in the 3D panel. nine0009 Select 3D > Pack Objects on Ground Plane.
- Start printing objects.
FAQ
Photoshop currently supports the following 3D printers:
- MakerBot Replicator 2
- MakerBot Replicator 2x
- ZCorp Full Color
- Mcor Iris
- MakerBot Replicator 5th Generation
Photoshop also supports several Shapeways.com and Sculpteo profiles. nine0003
The MakerBot Replicator 5th Generation Printer Profile does not yet support USB direct printing. You can export files to a USB drive and print them to a local printer.
Yes. Before printing, you can set a cross section to cut off part of the 3D model. Follow these general steps.
- Select the menu item Window > Workspace > 3D to switch to 3D mode.
- Open the 3D object you want to print. nine0010
- Select Scene in the 3D panel.
- On the Properties panel, select Cross Section.
- Specify the cross section parameters in the Properties panel.
- Select the menu item 3D > Apply Cross Section to Scene.
- Print the 3D scene.
The desired cross section must be dried before printing.
Yes. Follow these general steps. nine0003
- Select a material in the Stage panel.
- In the Properties panel, click the folder icon () next to Emboss/Transparency/Normals and load the texture. You can also specify a new texture to apply to the 3D model.
- When specifying a new texture, save this texture. The texture is applied to the 3D model as a bump map or transparency.
- Print a 3D model.
 Pop-up menus for additional heads available are displayed in the Print Properties panel. In the 3D workspace and in the 3D Print Preview window, the model appears in two colors. Printing a 3D model in two colors
 From a printing point of view, each layer of a 3D model is treated as a separate 3D object. You can optionally merge two or more layers (3D > Merge 3D Layers). nine0036
Related topics
- How to print a 3D object in Photoshop
- 3D painting
- 3D panel enhancements | Photoshop
- Photoshop 3D Documentation
Sign in
To come in
Account Management
Photoshop CS6 Modeling and 3D Printing Tutorial
Independent creation of a model does not necessarily imply the use of special 3D or CAD programs. To do this, you can use Photoshop CS6 Extended and two other free cross-platform tools: the Cura 3D printing utility and the MeshLab model validation and processing tool. nine0003
The 3D modeling options have been greatly improved in Photoshop CS6 and now include more intuitive on-screen controls that let even the least tech-savvy of designers create 3D models from flat images, photographs, or their own imagination.
Photoshop may have very limited modeling capabilities compared to professional CAD programs, but it's much easier to use than learning NURBS and SDS surfaces. Also, once you master Adobe's 3D tool, it will be much easier for you to switch to more professional 3D programs like Cinema 4D or Maya. nine0003
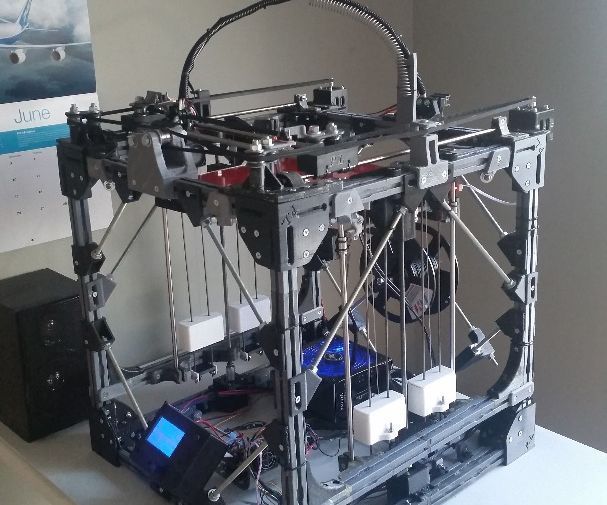
Here we'll show you how you can use Photoshop to create a model of a human figure and then print the physical version of it. You will learn about the creative and technical side of this process, as well as some of the limitations that you must consider when modeling for the subsequent 3D printing. This figurine was printed using an Ultimaker 2 3D printer. However, the preparation and printing process is almost identical to any desktop 3D printer.
How long will it take to complete this project:
2 hours for modeling and file preparation and up to 4 hours for printing.
Tools:
Photoshop CS6 Extended, Cura, MeshLab
Download
The files for this lesson can be downloaded here.
- 1 Step 1 - new document
- 2 Step 2 - creating a 3D object
- 3 Step 3 - object depth
- 4 Step 4 - Build Model
- 5 Step 5 - model volume
- 6 step 6 - stability
- 7 step 7 - sole
- 8 Step 8 - detailing
- 9 step 9 - layers
- 10 Step 10 - Location
- 11 Step 11 - forming stl
- 12 Step 12 - export to stl
- 13 Step 13 - Preparing to Print
- 14 Step 14 - print options
- 15 Step 15 - Printing
- 16 Step 16 - print
Step 1 - New Document
First, create a new document in Photoshop - a 2000px square will suffice - and draw your design on a new layer.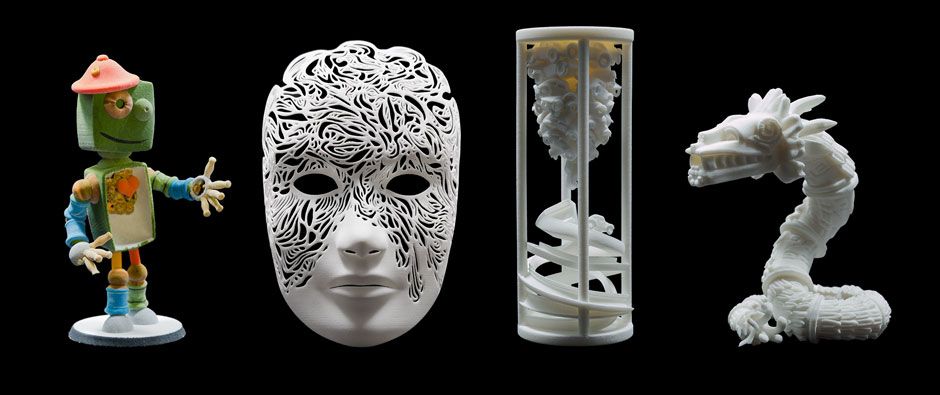
Since the model will be printed layer by layer from the bottom up, it is important that there are no places where the machine will print in the air: because of this limitation, we cannot create a figure of a man with his hands down.
Step 2 - forming the 3D object
From the menu 3D select New 3D Extrusion from Selected Layer . The form will instantly become three-dimensional due to the “push back”, this will be the beginning of the formation of a 3D object.
Step 3 - Object Depth
You can use the Move tool in Photoshop CS6 to view an object from different angles: simply move the tool outside the object you are creating to look at it from a different angle.
Make sure you don't move the object itself, as you want it to stay upright. nine0003
Select an object and you will see its depth in the Extrusion Depth indicator in the Properties panel .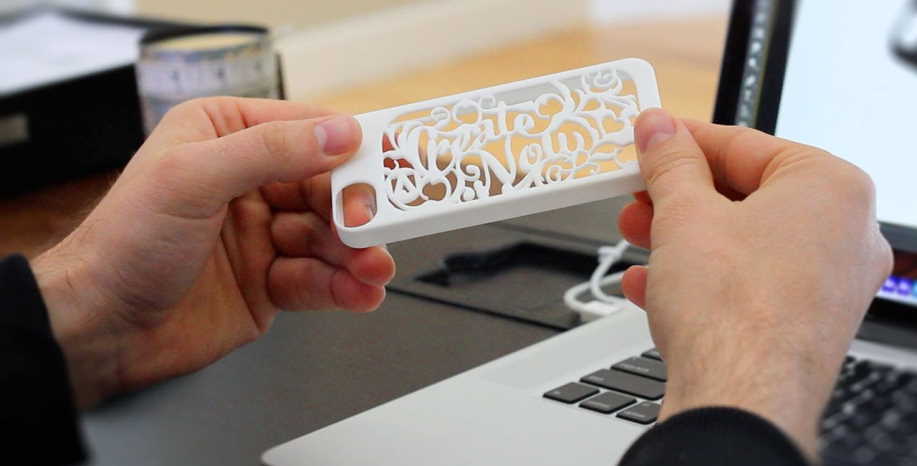 Drag the slider for this indicator to zero so that the object has no depth.
Step 4 - Modeling
In the Cap section of the Properties panel, set the value Inflate Angle to 90 degrees so that the model inflates at right angles on both sides.
Then with slider Strength set to a value that makes the object look round and three-dimensional.
You can also inflate an object by pressing the V key and dragging the controls on the object itself.
Step 5 - volume of the model
By default, only the front side of the object is inflated.
In the Properties panel find the pop-up menu Sides and change the value to Front and Back .
The magnification of the object will now be mirrored. nine0003
The thicker the original drawing, the more "inflated" the object will be, so the body and head are thicker than the arms and legs.
Step 6 - stability
Now you need to make some voluminous shoes for your figure.
And in order for the figurine to be stable, it is important to create a large enough area that will be attached to the print platform.
Just like with the little man, start by drawing the outline of the shoe on a new layer.
Step 7 - sole
Just as before, make the figure three-dimensional using menu 3D .
However, this time you don't need to nullify Extrusion Depth , by setting it to a small value, say 20, we will make a flat sole for this shoe.
Rotate the shoe 90 degrees in the X direction using the Co-ordinates tab in the Properties panel so that it lies flat on the base.
Step 8 - Detail
Use the controls Inflate to make the shoe look more real.
This time you want only the front side to increase.
Step 9 - Layers
Make a copy of the 3D shoe layer, then select all three layers and choose Merge 3D Layers from the menu 3D .
They will all be connected, and you may end up with the same bad orientation as in the picture below. This is a matter of chance. nine0003
Step 10 - Location
You can select each of the shoes on the panel 3D or by clicking on them.
Select the 3D menu option Snap Object to Ground Plane and move the shoe to the side so that it is exactly under one of the legs of the main figure.
Repeat for the other shoe.
Then select Export 3D Layer from the pop-up menu in the 3D panel and select the .obj file type. nine0003
Step 11 - generating stl
Then convert the .obj file to a .stl file so that the printer knows what to do with it.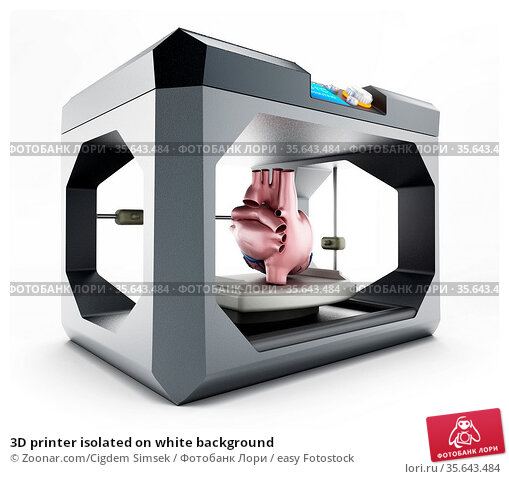
The free software MeshLab is great for this.
Open the 3D file you created and you will see a couple of warnings like the one shown in the picture.
Click the OK button because they are not important - for example, this is a warning that the program is looking for missing textures.
Step 12 - export to stl
You can rotate the model in MeshLab if you want.
But our main task here is to export the file: select Export Mesh and select STL as the file type.
Step 13 - Preparing to Print
Before sending the .stl file for printing, it must be cut. And for this we need the Cura program, although its installation will have to be tricky, especially for Mac owners.
But don't be alarmed, the instructions for the program are quite detailed, and the program's website provides user support. nine0003
Select Load Model to place the figurine on the platform.
It may seem too big: here we have scaled it to 0.05 of its original size in order to fit on the platform.
Step 14 - print settings
Next, you need to set the values for all the necessary parameters: layer height (height of each print cycle), wall thickness, print temperature and other parameters.
You will have to install a lot of this by trial and error, although you can find some pretty good advice on this in the user forums of your 3D printer model. nine0003
When all values are set, select command Slice to GCode .
Step 15 - Printing
GCode is a file that your printer understands.
When this file is ready, you can send it for printing directly from your computer, but we recommend that you copy this file to an SD card and insert it into your printer.
Step 16 - Printing
The object is printed from bottom to top, layer by layer.