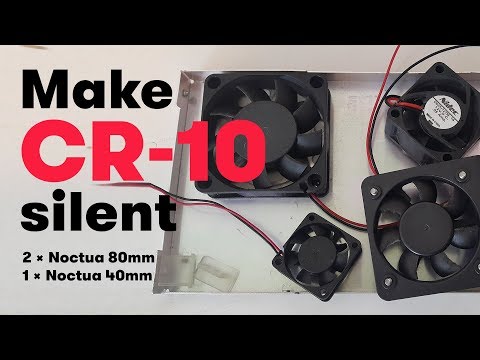
Make 3d printer quieter
How to Make Your 3D Printer Quiet – Clever Creations
3D printers are useful to have around, but unfortunately their noise can be a problem. They contain many components, like loud fans and stepper motors, that are far from quiet.
While the noise of a 3D printer might be tolerable for a couple of minutes, it quickly becomes a nuisance when you have to work in the same room as the printer for hours at a time. On top of that, the low frequency sounds that a 3D printer generates often travel through floors and walls, bothering co-workers, family members and neighbours in the process.
Luckily, there are multiple ways of silencing most noisy components.
Today, I will explain which components are most responsible for noise, give you a list of upgrades that you can do to make your printer quieter and share the most silent 3D printers available right now.
Let’s see what we can do to make your 3D printer practically noise-free!
Where Does 3D Printer Noise Come From?
3D printers are complex machines with a lot of parts. Not all of these parts make noise, however. Nearly all of the sound of your 3D printer is made by components that involve some kind of movement.
For example, bearings create noise as they move along linear guide rails and rods. Fans are responsible for sound as well, with fast blades rotating at many revolutions per second to displace air.
Recommended:
How to Improve the Performance of Cheap Linear Guides
Only the following 3D printer components involve some kind motion and thus noise:
- Linear bearings
- Linear rail carriages
- Fans
- Stepper motors
- Idler bearings
- Lead screws and nuts
- Belts, pulleys and gears
Under normal circumstances, it is only the fans, stepper motors, linear bearings and linear rail carriages (if your 3D printer has those) that make audible noise. Belts, pulleys, gears and idler bearings are practically silent, unless they are defective.
Important Factors
All 3D printers, especially those that use FDM technology (that put down layers of filament), have the same components, but not all of these printers are loud. How come?
There are several important factors that define how much noise a 3D printer makes.
Component Quality
Cheaper 3D printers, for example the Ender 3 V2, tend to come with lower quality components. These components come with looser tolerances, cause more vibrations and wear out quicker than their higher-end counterparts.
So while you don’t need to spend a lot to be able to 3D print, you can expect budget 3D printers to be louder than more expensive ones.
That does not necessarily mean that all expensive 3D printers are quiet, however. There are several machines in our 3D printers under $1000 lineup that come with above-average noise levels.
Still, especially on budget machines, switching low quality components out with better ones is one of the best things you can do to quieten your 3D printer.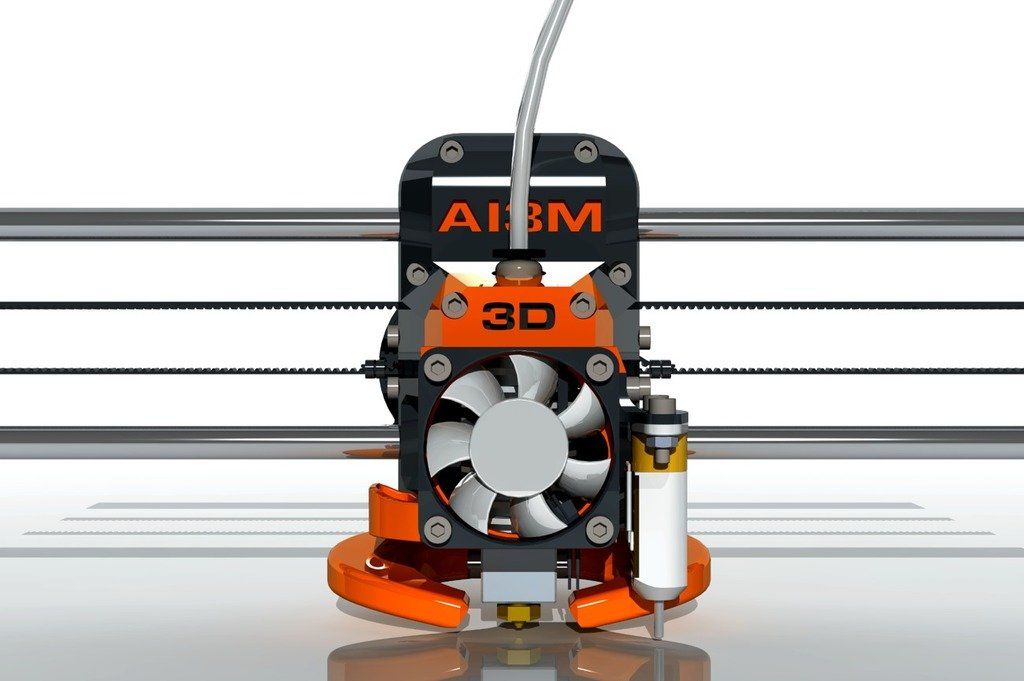
Recommended:
The Best Ender 3 (V2 / Pro) Upgrades
Part Types and Sizes
The types and sizes of parts matter too. For instance, small fans need to spin at a higher RPM than larger fans to move the same amount of air. As a result, small fans tend to be notably louder and are a big nuisance.
Another example is linear bearings. There are several different types available. If you want to quieten your 3D printer, sliding linear bearings can be a better solution than bearings with recirculating balls.
Maintenance
3D printer maintenance is equally important. To reduce noise, friction and wear, you must regularly lubricate moving components like bearings with the proper lubricant.
For all issues mentioned above you can find more detailed solutions further down the page.
3D Printer TypeA factor that can not be easily changed is the type of the printer that you use. FDM 3D printers (that use filament) are louder than stereolithography (SLA) resin 3D printers because they contain significantly more moving parts.
Whereas FDM printers use a plethora of stepper motors, bearings and noisy fans, resin 3D printers only have a single motor to move the build plate and one or more fans.
On top of that, SLA printers are also enclosed to contain 3D printer resin fumes. This is an additional noise reduction factor that many FDM 3D printers do not have by default.
If you are looking for a silent 3D printer, a SLA printer is a great option. However, because there are many differences between FDM and SLA 3D printers, it is important to make sure that a resin printer actually meets your needs.
Recommended:
Resin vs Filament 3D Printers: What’s the Difference?
Now that we have discussed what makes 3D printers loud, we can take a look at what you can do to make your 3D printer more silent. There are many different methods that you can use. Each adds an extra level of noise reduction. When you add all improvements together, you end up with a practically silent 3D printer.
How to Make Your 3D Printer More Silent
I have listed the following sections roughly in order of how much noise they are responsible for. So for the best results, I recommend working down this list from top to bottom.
Overall Construction
When silencing a 3D printer, the first step is to make sure that all fasteners (bolts, nuts, screws, clamps) are properly tightened. Even a single loose nut or bolt can make a 3D printer horrendously loud when it resonates at specific printing speeds.
To do this, simply go over all fasteners and make sure that they are not loose. If they are loose, tightening them is sufficient to keep them secure for a while.
To prevent these fasteners from loosening again, however, it is best to apply Loctite Threadlocker (Blue 242) to the fastener’s threads. This protects components from vibrating out, but still lets you loosen them with hand tools when necessary.
Loctite Threadlocker 242, 50mL Bottle, Blue
Check PriceIt is not necessary to apply Loctite on every single nut and bolt in your 3D printer. Only the ones at risk of coming loose need it. These are typically the ones closest to sources of movement or vibration.
The most common fasteners that come loose are the ones on X/Y/Z carriages/gantries, stepper motor mounts and pulley set screws.
There are many different 3D printers out there, however, and they do not all resonate the same way. To keep things simple, you can just apply Loctite on fasteners that have come loose in the past on your specific 3D printer.
Fans
Power supplies, control boards, hot end heatsinks, and the 3D prints themselves all need cooling. As a result, a typical 3D printer contains many fans responsible for a cacophony of noise.
Silent fans do exist, but we rarely find these in 3D printers. This is for a couple of reasons:
- Size. There is little space for cooling in 3D printers, especially on things like the extruder carriage. Because of this, printer fans are nearly always small (30*30mm to 60*60mm).
 These fans need to move at high RPMs (rotations per minute) to displace enough air, making them very loud.
 - Budget. While small silent fans do exist, they are more expensive. But because higher component costs means less profit for the manufacturer, you will usually find the cheapest fans that still do a good enough cooling job. Unfortunately, these cheap fans are the loudest.
- Lack of incentive. Low noise levels are often not that important in terms of things that people look for in a 3D printer. Price, print quality and print volume, for example, are all more relevant. As a result, 3D printer manufacturers do not have much reason to equip their products with higher quality, silent fans.
Luckily, we can simply swap out the loud fans in our 3D printer with better, silent ones. It is an easy to do modification that makes a big difference.
Let’s take a look at the various fans we can replace in more detail.
Hot End Cooling Fan
In order for a 3D printer hot end to function properly, its heatsink needs to be cooled properly. This is nearly always done with a 30*30mm or 40*40mm fan mounted near to the heatsink.
The stock fan that does this is typically very loud and is a big source of nuisance for many 3D printer users.
The best way to make it silent is to swap it out with a Noctua A4x10-FLX, currently one of the most quiet 40*40mm fans available.
Noctua NF-A4x10 FLX, Premium Quiet Fan, 3-Pin (40x10mm, Brown)
9,293 Reviews
Check PriceIf your 3D printer hot end already uses a 40×40 mm (width x height) fan for cooling, this is as simple as swapping out the fan and connecting the wires. But if the printer uses a 30×30 mm fan, you might first have to find and 3D print one of the many available 30mm->40mm fan adapters.
Part Cooling Fan
The part cooling fan of your 3D printer (sometimes also called a layer fan) is responsible for cooling filament as it comes out of the nozzle. It is essential in getting good printing results with filaments like PLA, PETG, PP and PVA.
Layer fans are typically of the radial/blower type (instead of regular axial type) because of their higher static pressure. This makes them good at pushing air through a fan duct.
Typical sizes you see for these fans are 40×10 mm (width * depth), 40×20 mm and 50×15 mm.
Unfortunately, there are no fan manufacturers that make silent blower fans (at the time of writing). Because of this, part-cooling fans are one of the most difficult parts to silence in a 3D printer.
Because there are no quiet blower fans, I believe the best option to get a silent layer fan is to run a larger, more powerful blower fan and reduce its PWM duty cycle. Setting a 50*15 mm fan to run at 75% (you can set this in your slicer program or in the 3D printer firmware) still pushes plenty of air, while being more silent.
Power Supply Fan
Not all 3D printer power supplies have active cooling. The ones that do, however, usually come with an annoyingly loud fan.
Replacing your 3D printer’s power supply fan is possible, but it is not as straightforward as replacing the other fans in your 3D printer. There are more steps involved, some of which are very important for safety.
For more information on how to do this, you can check out the dedicated article on how to replace a 3D printer power supply fan.
Stepper Motors
Stepper motors are responsible for moving the most important components of a 3D printer. While they are quite silent on their own, they are still a source of considerable noise in 3D printers.
Let me explain.
Most of the noise that stepper motors are responsible for comes from vibrations that are transferred to the 3D printer’s frame. As these vibrations travel through the frame, they make other components resonate, as well as any table or cabinet that the printer is placed on.
To solve this, we can reduce the vibrations that the stepper motors produce as well as isolate the stepper motors from the 3D printer frame.
Stepper DriversAs the name might already hint at, stepper motors divide each full rotation into multiple discrete steps. For example, a 1.8 degree stepper motor will make 200 (360°/1.8°) steps per revolution.
These discrete steps do not exactly create smooth motion. The frequent starting and stopping creates a lot of vibration and resonance in the motor’s components as well as in surrounding parts.
To solve this, the electronics that drive the stepper motors, the stepper motor drivers, use microstepping.
Microstepping control divides full steps into smaller microsteps. This smoothes out the motor’s movement and significantly reduces vibrations and resonance.
Most 3D printer stepper drivers use 1/16 step microstepping, but for extra smoothness and noise reduction you can go one step further. Or multiple microsteps further, actually.
One way of doing this is by swapping out the default A4988 or DRV8825-based stepper drivers with ones that are more silent. A popular choice for this are Trinamic TMC2209 stepper drivers.
BIGTREETECH Direct 6PCS TMC2209 V1. 2/V1.3 Stepper Motor Driver UART...
These stepper drivers use interpolation to convert standard 1/16 microsteps to 1/256 microsteps. This results in a 16x increase in smoothness and practically inaudible stepper motors.
An additional benefit of getting rid of older stepper drivers like the A4988 and DRV8825 is that it can often solves problems with motor coil whine
Control Board Upgrade
If your 3D printer control board does not come with swappable stepper drivers, the only option is to upgrade the control board itself.
For budget 3D printers like the Ender 3, the new Creality v4.2.7 Silent Motherboard is a great solution. It uses Trinamic’s TMC2225 stepper drivers to reduce stepper motor vibrations.
For higher-end 3D printers, I recommend a Duet3D control board. Aside from coming with Trinamic stepper drivers, these also come with every single other function you might want on a 3D printer controller board, both on the hardware and software side.
Recommended:
The 6 Best 3D Printer Controller Boards
0.9 Degree Steppers
Another way to increase the number of steps that your 3D printer’s stepper motors make per revolution, is to swap out the motors themselves.
Most stepper motors use 1.8 degree steps (200 steps/revolution), but you can change these to stepper motors that use 0.9 degree steps (400 steps/revolution).
In terms of sound levels, this upgrade does not make as big of a difference as swapping out the stepper drivers. However, people do notice a reduction in Z-banding when switching to 0.9 degree steppers, so that might be something to consider as well.
Stepper Motor Dampers
Aside from reducing the amount of vibrations that our stepper motors create, we can also limit the transfer of these vibrations to the frame and other components of a 3D printer.
The easiest way to do this is by installing rubber vibration dampers on your 3D printer’s stepper motors. By absorbing the vibrations that come from the steppers, these dampers reduce noise and improve print quality.
BIQU Nema17 Stepper Motor Steel and Rubber Vibration Dampers with M3...
Check PriceRods, Rails & Bearings
Regular lubrication of the moving parts in a 3D printer is something that is often overlooked. Not only does lubrication limit wear and tear on moving components, it also reduces noise.
Components that need regular lubrication are the ones that move gantries and carriages along the X-/Y- and Z-axis. Depending on the 3D printer, these are linear bearings + rods (X/Y/Z), linear guide rails + carriages (X/Y/Z), or lead screws + lead nuts (Z only).
The steps for lubrication are roughly as follows:
- Wipe any existing oil or grease from the linear rod, rail or screw. If it is difficult to remove, you can apply a degreaser first.
- Apply a small amount of new lubricant onto the ball bearings or lead nut.
- Move the carriage or gantry over the axis a couple of times. This gives the lubricant an opportunity to spread to all the right places.

One of the most important things here is to use the right lubricant. For linear bearings and guide rail carriages one of the best options is to use Super Lube, whereas for lead screws/nuts it is better to use white lithium grease.
Super Lube 51010 Oil Super Lube, 3 PACK
Check PriceLucas Oil 10533 White Lithium Grease - 8 oz. Squeeze Tube
4,119 Reviews
Check PriceSliding Bearings
Regular linear bearings contain recirculating ball bearings that continuously knock into each other as the bearings move around. Even when properly lubricated, they make some noise.
Instead of using bearings with recirculating balls it is also possible to use sliding linear bearings. These have no moving parts, are completely silent and tend to give smoother prints. They are also self-lubricating, so you don’t have to spend as much time performing maintenance on your 3D printer.
Good options are Igus Drylin bearings and Vescolite Superlube bushings
10 Pieces Igus Drylin RJ4JP-01-08 Prusa i3 Mk2s Prusa i3 Mk3 Anet A8. ..
..
235 Reviews
Check Price Linear RailsLinear guide rails (steel rails with a sliding carriage) are more silent than linear rods with typical recirculating ball bearings. Additionally, linear rails also provide several other benefits, such as tighter tolerances/less play and smoother motion.
Converting a 3D printer to use linear rails is a worthwhile investment that (among others) significantly reduces sound levels. If you have a popular 3D printer, like the Creality CR-10, you can find plenty of conversion kits and instructions online.
While linear rails are more expensive than linear rods, you can find them for relatively low prices from China. Their quality is obviously not as good as the more expensive name-brand models, but there are plenty of methods you can use to improve their performance.
Software Improvements
Aside from making hardware changes, you can also make several adjustments in software to make your 3D printer quieter.
Adjusting Printing Speeds
Some of the loudest noises in a 3D printer come from components that resonate, rattle or vibrate in unwanted ways. Simply put, a part starts resonating when the vibration frequencies it is exposed to matches the natural vibration frequency of that part.
One of the easiest ways to prevent this from happening is by adjusting the printing speeds of your 3D printer. Switching from 100 mm/s to 90 mm/s, for example, can make certain resonating parts behave much more quietly.
Acceleration and jerk settings can be adjusted as well, but in my experience these tend to have less of an effect on resonating parts.
Changing Infill Patterns
When 3D printing, there are many different infill patterns you can choose from. Popular slicer programs will offer you between five and fifteen options. Grid, lines and triangles are some examples.
Certain infill patterns, like the honeycomb pattern, require a 3D printer to move back and forth repeatedly.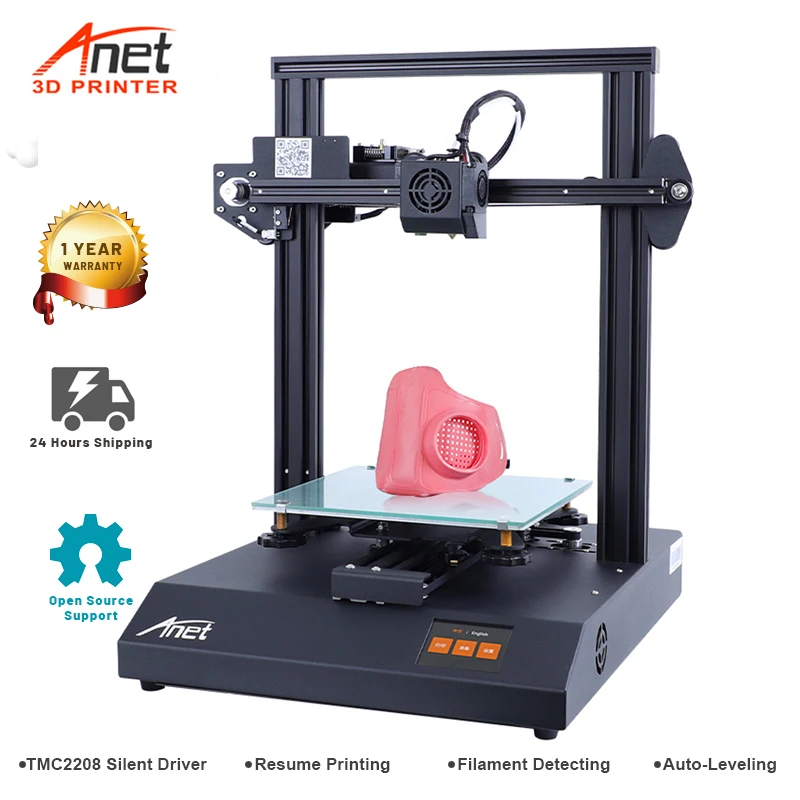 Combine this with a high printing speed and there will be a lot of vibration going on.
If you don’t have any specific needs, for example, using the strongest infill pattern, and you want to reduce noise levels, it is a good idea to choose an infill pattern that does not require rapid back-and-forth movement of the 3D printer nozzle. For example, grid or line infill.
Vibrations That Travel Through Floors and Walls
Even after you have taken all steps above to make your 3D printer less loud, there will still be some noise and vibrations left. The printer has various parts moving around, after all.
While these vibrations might be relatively minor, they can get amplified by the table or cabinet that your 3D printer is placed on. This amplification happens especially when the table or cabinet has a flimsy build without much mass. A solid 3D printer table solves a lot of those issues.
Recommended:
The 10 Best 3D Printer Tables and Workbenches
It is usually the lower frequencies that get amplified this way. This can create more noise than the 3D printer itself actually makes and can result in the 3D printer being audible much further away. Low frequency vibrations have no trouble traveling through floors, walls, and so on.
So while we can not modify a 3D printer even further to reduce a 100% of the vibrations, we can do things to make sure that these vibrations do not get transferred from the printer to the table, cabinet or floor.
There are two main ways in which this is done.
Decoupling
To prevent low-frequency vibrations from making their way beyond our 3D printer, we can add a form of isolation that creates a vibration-absorbing barrier between the printer and the surface it rests on.
One of the best ways of doing this is by placing Sorbothane feet on the underside of the 3D printer. Sorbothane is a specifically designed vibration absorbing material that is widely used in audio applications. On 3D printers it works just as well.
.5" Dia Sorbothane Hemisphere Rubber Bumper Non-Skid Feet with. ..
..
Other options are to use a set of squash balls (cut in half) as feet, or placing a thick rubber anti-vibration mat under the printer. Sorbothane feet give the best results, however, because of the superior vibration absorbing properties of the material itself.
Adding Mass
Many of the vibrations and ringing in 3D printers is caused by the weight of the printer being too low to dampen the forces of the extruder carriage and bed being flung around.
Adding extra mass to the 3D printer is the easiest and cheapest way to fix this. A popular solution is to place a concrete paver directly under the printer.
The added mass of the paver does not only reduce vibrations in the 3D printer when the extruder carriage and/or bed move around, but also reduces the natural frequency of the 3D printer to something lower than the frequencies that are generated in the printer itself. This results in less resonance.
Instead of a concrete paver, you can also use a ceramic tile or a leftover piece of granite from a countertop. What matters is that it is heavy and flat. The flatness of the surface helps prevent the 3D printer frame warping from being on an uneven surface.
It is important that the 3D printer and the paver are connected as much as possible. So if you want to combine this with isolating sorbothane feet or a different damper, you want the printer to be placed directly on the paver and the damper underneath the paver.
Enclosure
To reduce the remaining sounds that travel through the air, the best solution is to add an enclosure to your 3D printer. Assuming that you don’t already have a enclosed 3D printer, of course.
Aside from reducing sound, enclosures also contain potentially toxic 3D printing fumes that are emitted from certain filaments, create a heated chamber, reduce dust, and prevent curious fingers and paws from accessing the 3D printer.
You can build a DIY 3D printer enclosure your self, but the easiest solution is to get an off-the-shelf enclosure kit for your specific 3D printer.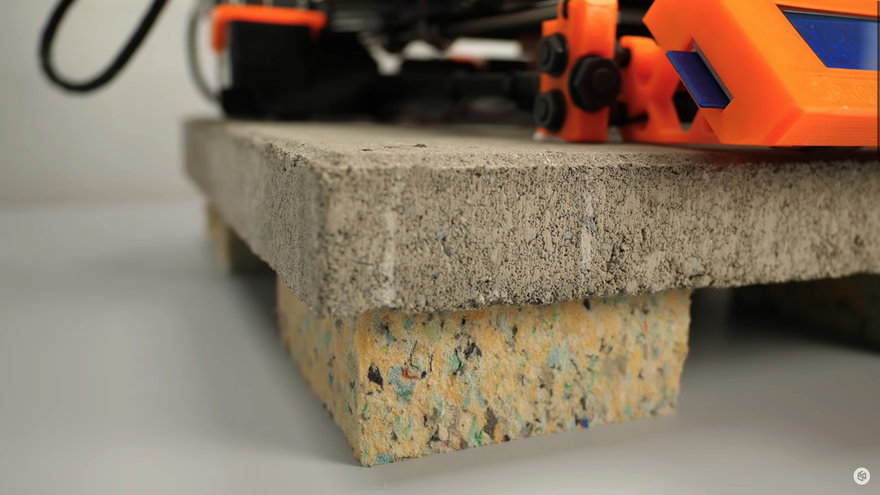
FAQ
How loud is a 3D printer?
Because the loudness of a 3D printer depends on a number of factors, there is not a single number that describes the noise levels of all 3D printers. However, you can expect popular FDM/FFF-technology printers without noise reducing modifications to generate about 50-60 dB (conversation in a restaurant).
Resin 3D printers are significantly more silent because of their lack of moving parts. They typically only have a single motor to move the print bed up and down. On top of that, they are fully enclosed to hold in resin fumes.
Which is the most silent 3D printer?
Obviously, some 3D printers are quieter than others. If you are in the market for a silent 3D printer, there are several models that are best suited.
The latest Ender 3 (V2) comes with silent TMC2208 stepper drivers and produces less noise than similar 3D printers at that price point.
An other option is the Prusa MK3S+. It comes with an inaudible Noctua cooling fan, smooth Trinamic stepper drivers as well as a dedicated silent printing mode.
Conclusion
3D printers can be loud. Depending on the model, you are looking at (or listening to) about 50-55 dB.
Most noise comes from cooling fans, whether it be the hotend fan, print cooling fans or fans that keep the temperature of the electronics down. On top of that, you can expect noise from moving carriages, gantries and stepper motors. This noise does not only move through the air, but also travels through the printer frame and the table/cabinet/floor under the printer.
To make your 3D printer quieter, some of the best things you can do are replacing the fans with more silent fans (where possible), using stepper motor dampers and quiet stepper drivers. Regular maintenance and making sure all components are properly tightened are critical as well.
If you are looking to buy a silent 3D printer, two great options are the Ender 3 V2 and the Prusa MK3S+. Both are excellent choices at their respective price points and come with several features that make them quieter than their competition.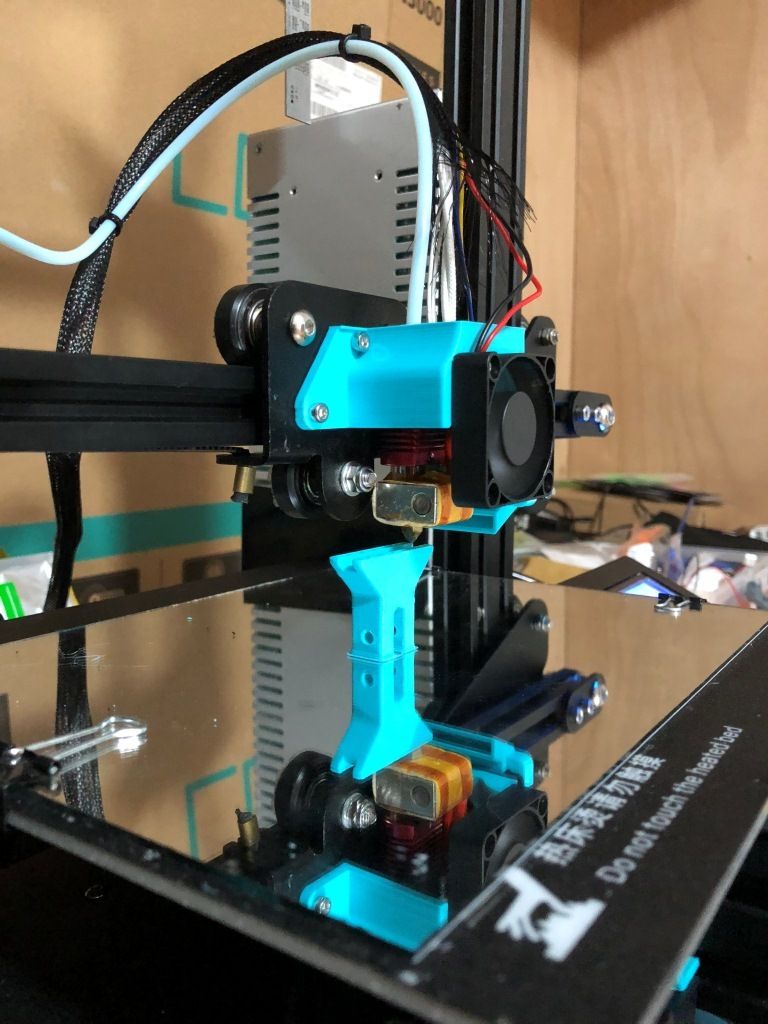
Some Cool Tips To Reduce Noise – 3D Printerly
3D printers are very useful machines, but they can be a bit of a noise disturbance depending on what 3D printer you have. You’ve probably been thinking about getting a 3D printer and wonder, just how loud are 3D printers?
The average 3D printer is around 50 decibels, which is as loud as a normal conversation. Cheaper 3D printers tend to be the loudest, as well as FDM printers because of all the moving parts. Thankfully, there are many ways to reduce how loud your 3D printer is.
Considering 3D printers usually run for hours on end and maybe even days, it’s important for it to not be too loud. I’ve looked into how loud 3D printers can be, and also found some cool tips to reduce noise so keep reading to found out.
How Loud is the Average 3D Printer?
So as previously mentioned, the average 3D printer is roughly 50db, but this is without using techniques and tips to reduce noise. Some 3D printers are actually known to be relatively quiet.
One of these printers is the Monoprice Maker Select v2. It’s something that will be very hard to hear in the next room over. They can be too loud to have in quiet rooms such as an office or library, but if had this 3D printer in your dining room while you watch TV, it won’t be too noticeable.
It’s important to note that noise sensitivity affects people in different ways, so you should try to be as accommodating as possible.
Creality Ender 3’s are pretty loud on the surface, at roughly 58db (conversation at a restaurant), but when you convert the right parts such as stepper motor dampers and premium fans, it can be a lot quieter.
The Prusa MK3 actually has a silent mode which makes a big difference on how loud it is. On it’s a normal mode, the loudest parts seem to be the fans, which is as loud as a laptop fan at maximum capacity.
The Ultimaker 2 works pretty quietly, with just minimal noise coming from the stepper drivers and fans.
The Flashforge Creator Pro, is the opposite, where it can be heard from the next room, even with the door closed.
The Anycubic i3 Mega has an average of 55db being roughly 3 feet away.
What Makes A 3D Printer Loud?
How loud your 3D printer will depend on a few different things, but it’s mainly based on vibrations.
The main things that make a 3D printer loud are: Motors, fans, bearings and stepper drivers. Cheaper printers do tend to be a lot noisier due to the cheaper mechanical parts and result in more vibrations. A lot of the time, this can be alleviated by changing to better parts.
Most 3D printers are relatively quiet, but are still too noisy to be in the same room with for many hours. The average decibel range of 3D printers is around 40db-55db, but it can get a lot quieter with some basic techniques.
Fans also make a portion of the noise of 3D printers, similar to a laptop fan on high blast. Radial fans seem to be the loudest of fans out there.
FDM printers which are the most popular have several stepper motors in them, as well as many moving parts. On the other hand, SLA resin printers only have a moving build plate and maybe a few smaller bits, but these a lot more expensive.
How Can I Reduce How Noisy My 3D Printer Is?
Many people wonder, “how do I make my 3D printer quieter” because they can be quite distracting, especially if it is operating near you.
If your 3D printer is loud, your best bet is first identifying what is making the most noise. If it is a vibrating noise, find out where it’s coming from then you can narrow down solutions to your issue.
Reducing Noise From A Stepper Motor
A lot of the time, simply replacing a few parts on your 3D printer will quieten it down to acceptable levels. Replacing the stepper driver is one of the main culprits of noisy printers.
Slowing your printer speed should also reduce how loud your 3D printer gets, so you can do this overnight when noise isn’t ideal in most cases. You do have to know what level you can reduce your printer speed down to, as it can affect how your printer runs. This information should be accessible online on forums or on your 3D printer brand’s website.
The 3D printing community is very helpful, and have even solved this problem for other 3D print artists out there. Here is a link for a vibration dampener for the Prusa i3 Mk2, which attaches to your printer. The comments from people who have used this design give it very positive reviews so I’d give it a go!
Dampers for stepper motors have seen huge improvements in sound reduction for many people, especially with any high-pitched harmonic sounds. A customized design for the Creality Ender 3 has great reviews and looks like it does the job, so you may not have to buy one just yet.
Is Your Cooling Fan Too Loud?
While your 3D printer is working, you can bet your fan will be working too. With cheaper 3D printers, you can expect manufacturers to use cheap parts. A cheaper cooling fan is likely to lead to problems of being loud.
Quieter fans can be purchased and installed to reduce how loud your 3D printer is and they aren’t too expensive either. If you identified your fan as being loud, this is definitely a great solution to this problem.
Reducing Noise From X, Y & Z Axis Movement
I’ve seen someone recommend using thin machine lubricant on your X and Y axis linear bearings. It has to be a thinner grease because a heavier grease will cause your internal bearings to slide instead of roll which can cause unnecessary wear and dirt build-up.
If you do want to use WD-40, make sure it is the White Lithium Grease formula and not the standard formula. The standard formula is too thin and does not act as a brush on type of lubricant. You want to use machine oil on your linear rods and bearings.
Decoupling Your 3D Printer From The Floor
With the vibrations from your 3D printer, it definitely contributes to how noisy it gets. This isn’t an ideal situation if you have neighbors below you because it can really disturb them. This is where decoupling comes in, which simply means to separate it from direct contact.
A quick DIY fix for this is to put a thick yoga mat under your printers to dampen the sound, or even carpet. This does the trick because it absorbs the vibrations below the printer. Some people have put sponges and even foam underneath to get the same result.
You want to make sure whatever you put underneath your 3D printer to dampen vibrations is straight and level. You don’t want your prints being negatively affected by having a slanted print bed.
Using a Sturdy Enclosure For Your 3D Printer
This is hands down, the easiest method to get the best results. Simply having a good quality enclosure for your 3D printer can make it so it is relatively quiet and won’t disturb yourself or people around you.
If you have a printer that’s enclosed, it will absorb some of that noise compared to an open style printer. Some printers come already enclosed, which is great but if not, you’ll benefit from getting yourself one.
If you have an open style printer, the sound can be reduced by getting foam core boards and making a box around the printer.
A basic enclosure you can get is the Creality Fireproof & Dustproof Enclosure from Amazon. One user who got this mentioned that the sound went down about half as loud as it was before, but definitely not soundproof.
You could probably even add some padding to the enclosure to improve its sound dampening effect.
More Useful Tips To Reduce Noise
You can get sorbothane feet, which are small anti-vibration rubber stands to absorb vibrations from your 3D printer. People have reported this working very well to substantially reduce sound.
Another solution is changing your board to a Duet3D board or Soundboard Heat box. These do a fantastic job with dampening loud sounds from your 3D printer.
Regular maintenance of your printer will do wonders to reduce noise, as get the most life out of it. Making sure loose screws are tightened and screws that are too tight, loosened will have a beneficial impact.
I’d recommend getting some sound dampening objects around the room such as heavy curtains, foam pads on the walls, hanging up objects so the noise vibrations don’t reflect too much.
The video below explains how to make high performance sound absorption panels for cheap.
Examples of People Making Their 3D Printer Quieter
Reading around on this issue, there are a few basic examples of people using tips to make their 3D printer quieter. One example is from someone reporting a 50% decrease in decibels after using a good quality enclosure.
Enclosures don’t only block out sounds, but they have multiple benefits such as helping with temperature stability, reducing the risk of physical injury and reducing the spread of air pollutants.
If you have the DIY skills, you can essentially make your 3D printer almost noise-free.
One individual went through many steps with their Ender 3 3D Printer:
- Replaced the frame nuts with square nuts then added on lock washers to prevent rattling.
- Replaced it’s metal bearings with higher quality Dry-Lin Polymer Bearings
- Added EVA anti-vibration pads which are designed to eliminate vibrations coming from motor-driven equipment due to its special composite foam with vibration dampening technology
- Installed cork gaskets on the motors to reduce vibration.
Are Resin 3D Printers Quiet?
Resin 3D printers are usually quiet compared to filament 3D printers, but they do still emit a decent amount of noise from the stepper motors (50 dB). You want to find a resin 3D printer that has quiet stepper motors like the Elegoo Mars 2 Pro, rather than one like the Anycubic Photon which can get loud.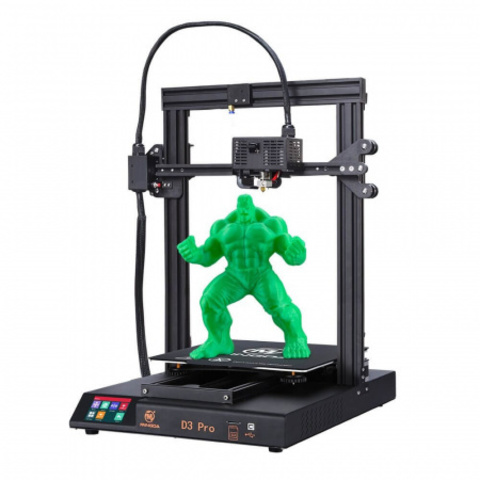
Soundproof 3D Printer Enclosure
If you want to create a soundproof 3D printer enclosure, you can create an IKEA Lack Enclosure or your own DIY enclosure.
Here is a video of the IKEA Lack enclosure.
Here is a video of a DIY 3D printer enclosure.
Summary
With this information, hopefully you’ve learned that you shouldn’t worry too much about your 3D printer being loud. The advised method to reduce noise from your 3D printer is to use a combination of these methods to get the best results.
Get yourself a 3D printer enclosure, get a good quality stepper motor, cooling fan, with a thick yoga mat and make sure your printer maintenance is top-notch!
Making the 3d printer quieter without firmware and drivers
Technician
Hi all. My plywood printer was loud. Quite loud. Due to the fact that I am switching to printing with Eco-materials, it is possible to be in the printing area of the printer without toxic effects on the body. Only the noise from the printer drove me crazy even when idle (the fans were terribly noisy). Plan:
- reduce the noise of the fans
- put dampers under the printer
Fans
All my fans were terribly buzzing. Strongest on the extruder. My technique was as follows:
- We take an old fan
- We test it with a laboratory power supply for the lowest speed
- If there is extraneous chirring other than air flow - to release.
 If weak/medium - then marked on it 'noisy' and the urn did without a fan (for future homemade products without criticality to the sound). nine0016
Let's analyze everything using the example of a printer power supply fan.
I measured the noise with a good voice recorder. A phone will do. We must understand 'what happened'?
After inspection, I decided to put the fan (conditionally new 70mm) exactly in the center to blow air. The transformer will divide into 2 streams, which will fly out into the holes at the terminal.
On a laboratory PSU, a voltage was selected at which the air flow is not lower than it was with a stock fan, but the sound is not too much. To adjust the voltage, I bought step-down DC-DC converters (10pcs / $ 6.5)
After we make holes for blowing with scissors for metal.
I attached the fan with 2 Noctua dampers and double-sided foam tape. Next, of course, we remove the noise after the alterations.
Visual noise before and after:
Who wants to listen - the difference is impressive. Then we mount everything back, start printing. We are testing so that everything works, and the radiators (in my case, these are the side walls of the PSU) were lower than the temperature at which it hurts to hold the hand (this is 60 degrees). nine0003
I switched the extruder to a 40mm fan and cut the voltage a little. For the control board (Arduino + drivers), similar to the power supply - about 70mm fan at low speeds.
Dampers
When I messed around with casting polyurethane, I made a lot of different things for future dampers / wheels.
I added printed tops for attaching to plywood to them and we get:
Installation:
After the tests, I noticed that the dampers almost do not deform when printed, respectively, they do not extinguish anything. Then some scissors and we get:
I tested with and without dampers. When printing, the difference is about zero in my case, because. mechanical sounds override any vibration.
Total
Graphically, the difference during printer operation (before / after) is not very visible
But if you listen, it was the annoying noise from the fan that almost completely disappeared.
The next step, as I understand it, is to interfere with the firmware / drivers / work with the mechanics. I don’t want to do any of this, the goal of a more comfortable stay with an assistant has been achieved. nine0003
Subscribe to the author
Subscribe
Don't want
17
Making the 3D printer quieter - automatic control of coolers
Technar
Loading
07/19/2019
3003
Personal diaries
TEVO Tarantula
It is possible to make the 3D printer quieter thanks to automatic cooler control. It is possible to do this using the Marlin firmware and slightly changing the circuit in the electrics of the 3D printer. Implemented this on my 3D printer, using the control board 9 as an example0109 MKS Gen L v0.1 .
This improvement will also extend the life of the 3D printer coolers and allow you to save a little, just a little bit, save electricity. Also, this functionality is very relevant if you often leave printing on a 3D printer overnight. Let's look at the motherboard circuit, call the pins we need and configure the directives we need in the Marlin firmware ....
0002 4
Article comments
More interesting articles
rannek
Loading
12/16/2022
651
3
Subscribe to the author
Subscribe
I don't want
I already wrote here in questions that my screen firmware was not successful and there was a bug with highlighting the item .