Original prusa sl1 3d printer review
Prusa SL1S Speed Resin 3D Printer Review: Speedy, Smart, and Sophisticated
Tom's Hardware Verdict
The Prusa SL1S Speed creates high-quality resin 3D prints at lightning-fast speeds, but the high cost may turn away some users.
Pros
- +
+ Native integration with PrusaSlicer app
- +
+ Unique tilting mechanism enables rapid printing
- +
+ Easy build platform leveling
- +
+ Color touchscreen LCD offers guided setup
The $1,999 Prusa SL1S resin MSLA 3D printer is one of the priciest resin 3D printers in the consumer/prosumer market, and after spending some time printing with it, I understand exactly where all of that money goes. The SL1S uses a tilting resin vat and a monochrome LCD to achieve print speeds of under 2 seconds per layer while not sacrificing quality on printed parts. Prusa has developed an entire ecosystem for this machine, including the PrusaSlicer software for preparing models and Prusament Resin for achieving best results when printing. One of the best 3D printers, this machine impressed and surprised throughout the testing process.
The SL1S has a clear target market of prosumers and businesses that are interested in being able to rapidly create models without troubleshooting, fiddling with software, or going back and forth with a support team. The $1,999 price tag puts this machine out of reach for many home users, but there are plenty of other machines like the Elegoo Mars 3 that exist at a lower price point.
Prusa SL1S Specifications
| Machine Footprint | 8.8" x 9.3" x 15.7" (22.5cm x 23.7cm x 40.0cm) |
| Build Volume | 5" x 3.15" x 5.91" (127mm x 80mm x 150mm) |
| Resin | DLP Photopolymer Resin |
| Exposure Time | 1.3 - 2.4 seconds per layer |
| UV Light | Custom Designed 405nm UV LED Panel |
| Supported Layer Heights | 0.025mm - 0.1mm |
| Masking LCD Resolution | 2560 x 1620 |
| Masking LCD Size | 5. 96-inch 96-inch |
| Interface | 4-inch LCD Touchscreen |
| XY Axis Resolution | .049mm |
Included in the Box of Prusa SL1S
Image 1 of 2
(Image credit: Tom's Hardware)(Image credit: Tom's Hardware)The Prusa SL1S ships with everything you need to start printing, including a 500 gram bottle of Prusa’s Orange Tough resin. Included in the accessories kit is a set of gloves, a funnel with a filter, a cover for the resin vat, a small syringe, some extra FEP film, a pair of scrapers, a bag of Haribo Goldbears (a staple for all Prusa printers), and a validation print to confirm the functionality of the printer. This print is a grid of tiny replicas of Josef Prusa himself, with a total of 120 tiny models that were all printed simultaneously.
(Image credit: Tom's Hardware)As you would expect from a machine from Prusa, the included documentation is best-in-class and contains detailed diagrams and instructions for getting the printer up and running. Everything from how to unbox the printer to troubleshooting problems is covered in the 68 page user manual, and it should be required reading for any manufacturer currently making 3D printers.
Image 1 of 2
(Image credit: Tom's Hardware)(Image credit: Tom's Hardware)The Prusa SL1S is a familiar sight for most users of resin 3D printers; an orange UV lid perched atop a black metal base. Upon closer inspection, some of the unique design elements of the SL1S become more apparent. For one, the lid of the SL1S doesn’t lift off like the lid of the Elegoo Saturn or the Anycubic Photon Mono; the hinges on the top of the printer allow it to lift up and back without needing to be removed from the machine. This small touch means the printer can be opened without needing to remove the lid and finding a place to set it down; something anyone with a busy work area will no doubt appreciate.
Image 1 of 2
(Image credit: Tom's Hardware)(Image credit: Tom's Hardware)The 4-inch color touchscreen LCD interface offers a guided setup for the machine, including detailed instructions on how to calibrate the build platform. At each step of the setup, the user can swipe the screen to the right, which reveals full-color pictures detailing the process. This is an invaluable step for new users, and the additional value of this detailed user guide will result in a printer that has far fewer issues due to an improper or incomplete setup process. In fact, shortly after turning the machine on and connecting to Wi-Fi, I was prompted to update the firmware, which the printer was able to automatically download and install.
Unlike most other resin MSLA 3D printers, the SL1S uses a unique mechanism for delaminating the part from the FEP film during printing. Most resin printers like the Elegoo Mars 3 lift the part directly up from the FEP film, delaminating it in a single movement. The SLS1 uses a tilt mechanism instead, tilting the resin vat down towards the front of the printer, which causes the printed part to peel incrementally from the film. This peeling motion allows for a rapid transition between layers, due to the lack of a need to raise and lower the Z axis after each individual layer.
Image 1 of 2
(Image credit: Tom's Hardware)(Image credit: Tom's Hardware)The build platform is designed with a tapered top, so resin can drip off during printing instead of pooling on the top. The platform has a slight, uniform texture that feels like bead-blasted aluminum, and the one-piece nature of the platform means cleaning after printing is a very easy process. Unlike the build platform on printers like the Anycubic Mono X, there are no nooks or crevices where uncured resin can get trapped and be difficult to clear out.
(Image credit: Tom's Hardware)The overall build volume of the SL1S is on the small side for an MSLA resin 3D printer, measuring 5" x 3.15" x 5.91" (127mm x 80mm x 150mm). It’s clear from the name of the printer (Prusa SL1S Speed) that this machine has been designed for fast printing and not necessarily large format prints.
In addition to the FEP film already attached to the resin vat, Prusa has included three additional extra FEP film sheets to use as a replacement when the original becomes deformed or perforated. The resin vat itself has markings denoting 35%, 70%, and 100% volume. Because of the tilting mechanism of the vat, the 100% volume mark is relatively low on the vat and only allows for 200ml of resin to be filled at a time.
This was the only recurring issue I had with the machine; I consistently had overfill errors when starting a print, even when it looked like the resin was under the 100% line. Even at the 100% line, I would get a message stating the vat had 220ml or 240ml of resin in it, and I then had to extract some of the resin from the vat.
The SL1S has a fill sensor to detect when the resin vat is running low, which I used to refill the vat after the resin ran too low. I also had a minor issue with the vat itself; it feels like a glass or fiber-filled polymer material, as opposed to the machined metal vat included with Elegoo Mars 2 Pro, which feels much more substantial. This may be due to the reduced weight being easier on the tilt motor, but it does result in a vat that feels a bit more delicate.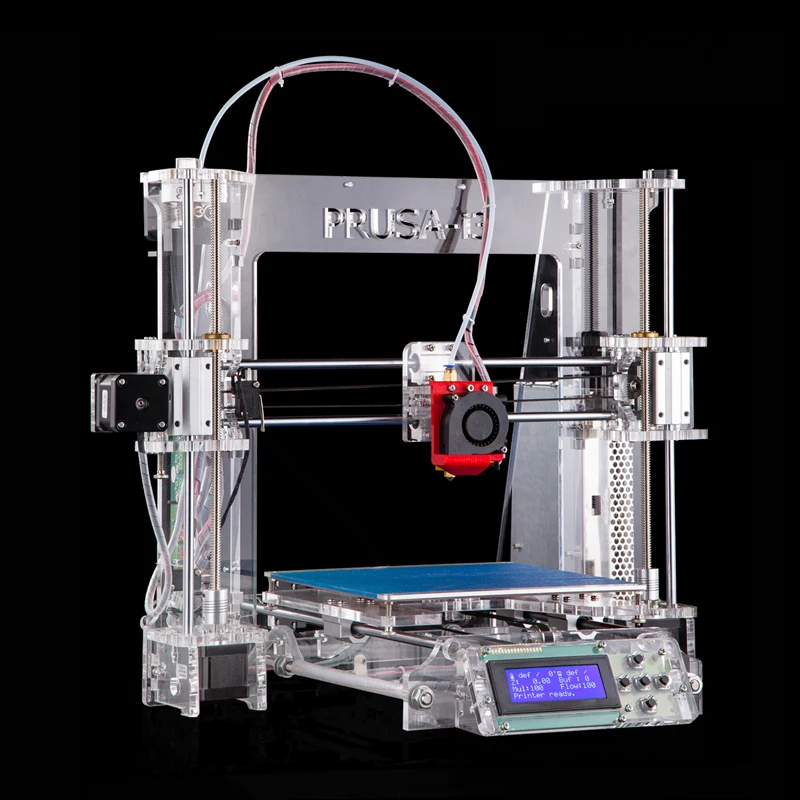
Prusa refers to the Z-axis assembly as the ‘Tower’, and it uses a ball screw linear actuator for Z-axis movement. The build platform is suspended from this axis on a solid aluminum cantilever bracket, which feels solid and doesn’t have any noticeable play or wiggle during printing.
(Image credit: Tom's Hardware)One of the first things I noticed about the SL1S was the number of 3D printed parts on the printer. Everything from the brackets on the hinge to the knob that locks in the build platform have been 3D printed with an FDM machine, and more parts on the inside of the machine appear to have been printed as well. The CW1S Cure/Wash station also has a 3D printed knob and other 3D printed parts across the machine.
(Image credit: Tom's Hardware)These parts indicate that Prusa has embraced some of the core strengths of additive manufacturing, including printing high-complexity, low-volume parts for production. The printed knob on the build platform works just as well as an injection molded or machined knob would function, and there was no tooling or setup required for manufacturing, just directly printing the part on an FDM 3D printer.
Leveling the Build Platform on Prusa SL1S
(Image credit: Tom's Hardware)Considering the high level of automation on the Prusa SL1S, it should come as no surprise that the build platform leveling process is nearly completely automated, only requiring a single bolt be loosened and then tightened. The SL1S uses an automated wizard that guides the user through the calibration process, and it only takes a few minutes to complete. After loosening the bolt that holds the build platform tight against the gantry, the SL1S drops the platform onto the FEP film of the vat, holding it flat while the user re-tightens the bolt.
Compared to the four bolt process used by printers like the Anycubic Photon Mono, this is fast, reliable, easy, and doesn’t require the same “feel” for pulling a piece of paper between the platform and the LCD. This is a very subjective process that can be difficult for new users, and the SL1S instead opts for a calibration workflow that has a higher level of automation with a lower chance of failure. The obvious trade-off is cost; the Photon Mono costs $199 and contains only a single sensor (Z-axis endstop), while the Prusa SL1S is 10x the price and contains a multiple sensors for everything from the UV lid to the weight sensor used to detect the amount of resin left.
Printing Safety with Prusa SL1S
(Image credit: Tom's Hardware)The Prusa SL1S uses 405nm UV resin, a material that you need to handle safely when in an uncured state to avoid injury. The resin can be harmful when making contact with skin, so make sure to wear gloves when pouring, cleaning up, or handling uncured resin. I also make sure I’m wearing gloves when removing the build platform after a print, as the resin tends to pool on top of the platform and can drip off while the platform is being removed.
Make sure you use the SL1S in a well-ventilated room to minimize the danger from inhaling fumes. Any spills or uncured resin stuck to a surface should be cleaned using 99% isopropyl alcohol and the container for the resin should be kept closed and secured when not actively pouring material.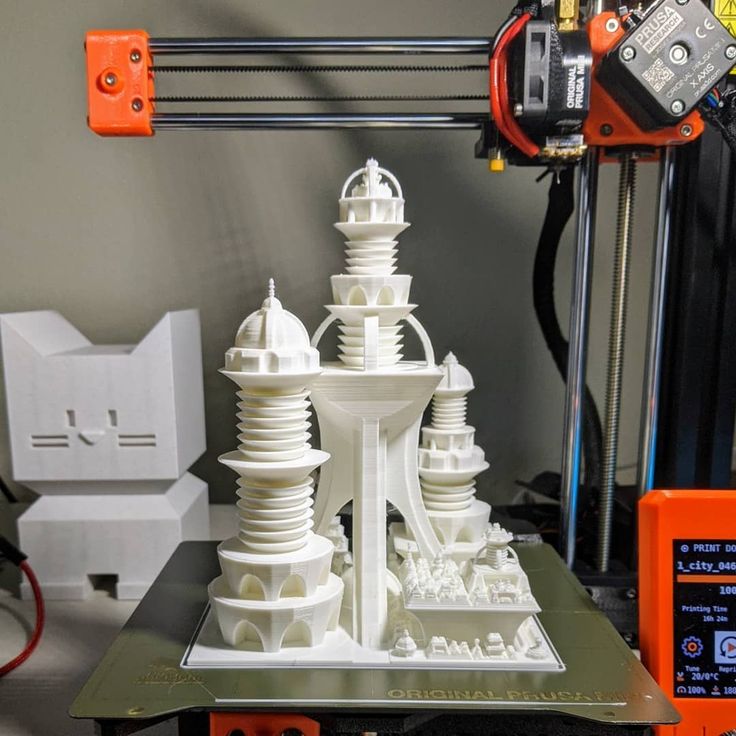
Printing the Included Test Prints on Prusa SL1S
Test prints are frequently bundled with 3D printers as a fast and easy way to validate the functionality of the machine while also giving users a chance to experience normal operation. Some manufacturers treat this as an afterthought, such as the 19-hour test print included with the Creality LD-002R, a nerve-wracking marathon for anyone who wants to see the printing process in its entirety.
(Image credit: Tom's Hardware)The Prusa SL1S includes a test print of Josef Prusa (of course) and a hexagon that contains a multitude of features that can be used for showcasing the strengths of the printer. While the Josef model is printed solid, the hexagon features a honeycomb pattern as well as posts and holes that measure all the way down to 20 microns. These fine features demonstrate the strengths of a resin printer like the SL1S, while also having a reasonable 1 hour print time.
(Image credit: Tom's Hardware)Washing and Curing Models with Prusa CW1S
(Image credit: Tom's Hardware)Most of the mess typically associated with resin printing occurs in the post-processing stage, where the printed model needs to be removed from the printer, rinsed of excess resin, washed in a solvent bath to remove uncured resin, and fully polymerized in a curing chamber. This process involves multiple steps and typically requires several other machines to accomplish.
To make this an easier process for the user, Prusa has designed the Prusa CW1S, an optional accessory for the machine that combines these steps (and more) into a single unit capable of reducing the amount of time spent post-processing resin parts. Retailing for $749, this is not a cheap accessory; it costs a lot more than some other resin printers such as the Elegoo Mars 2 Pro. If you are interested in a fast workflow with a reliable machine, it’s worth investigating the CW1S to understand the benefits it can bring to your workflow.
(Image credit: Tom's Hardware)To understand how the CW1S works, I’ll walk you through a typical workflow process for finishing a resin print. The build platform on the SL1S is easy to remove from the machine, and the tapered edges allow resin to flow off making the clean-up easy, so carefully removing the platform from the bracket can be done without spilling a single drop of resin. I usually let it sit for a while after printing to allow the model to drip-dry.
After removing the build platform, the next step is removing the part. This is typically done with the sharp metal scraper included with the printer, and can be accomplished by finding a corner, or edge, and lightly separating the model from the platform. It’s possible some resin that is stuck to the model might drip off, so you’ll want to lay down a silicone mat or other easy-to-clean surface under the platform.
Image 1 of 2
(Image credit: Tom's Hardware)(Image credit: Tom's Hardware)The CW1S includes a metal vat with a wire mesh basket that is used to rinse the excess resin from the part. Underneath the vat is a spinning magnetic platform that propels a plastic agitator at the bottom of the vat. This agitator creates a vortex of solvent which actively rinses excess resin from the model. For models like this tower, there are lots of small windows that can have resin stuck to them due to the surface tension of the material. By vigorously rinsing the model, this excess resin is cleared from all areas of the model.
The screen on the front of the CW1S includes an interface that automatically walks the user through the steps of post-processing. Once the washing phase is finished, I remove the part from the tub and allow it to air dry before putting it back in the CW1S. One of the unique features of the CW1S is the ‘Drying’ phase, which blows hot air over the model to speed up the evaporation of any trapped or stuck solvent.
(Image credit: Tom's Hardware)The interface will prompt you to start the drying phase, and automatically begins the curing phase once it’s finished. The UV-resistant lid of the CW1S means the only light leakage is on the sides of the machine, through which a slightly purple glow can be seen. Once the UV curing phase is complete the model is fully polymerized and the post-processing phase is complete.
(Image credit: Tom's Hardware)Once the processing is finished, we can take a look at the model to get a better idea of what we have accomplished through these steps. The fine lattice structure of this model is readily visible with no filled cells or holes, and there is no excess resin on the edges of the model. The beams on this model measure 0.4mm, and there is no warping, deformation, or incomplete areas on the model. Printing a model with this much detail is an accomplishment on its own, but the extra detail that is brought out in the post-processing phase helps highlight the value of a post-processing machine like the CW1S.
Preparing Files for Printing with PrusaSlicer
(Image credit: Prusa)PrusaSlicer is a feature-rich slicer app for FDM 3D printers, developed by Prusa and compatible with a large number of filament 3D printers including the company’s own Prusa MK3S+. In addition to this functionality, PrusaSlicer is also compatible with the MSLA resin Prusa SL1S and contains just as many features as you would expect from the Prusa team. Using the PrusaSlicer software, you are able to load and fix 3D models, hollow them, add drain holes, split the model into parts, and even manually add a support structure.
These settings are laid out in a way that is approachable without being overwhelming, with a ‘Simple’ view providing the basic information needed to prepare a file, while the ‘Expert’ mode unlocks full control in the slicer. I went through the typical workflow process (hollow, drain, support) and prepared the MadCat Mk2 Mech model by Matt Mason for the SL1S. This process was straight-forwad and laid out in a linear fashion in the software, so it only took a few minutes to complete.
(Image credit: Prusa)The typical approach to preparing a part for MSLA resin printing is angling the model to reduce cross-sectional width. This creates smaller layers that are easier to delaminate from the delicate FEP film and don’t have the suction associated with a large flat block being pulled straight-up. Interestingly enough, the tilt function on the SL1S means it’s completely possible to print large blocky objects that have dense layers due to the gradual peeling of the FEP from the part, instead of the other way around.
Image 1 of 2
(Image credit: Tom's Hardware)(Image credit: Tom's Hardware)Using the support structure automatically generated by PrusaSlicer, the model printed in 1 hour and 53 minutes without any issues. When printing models that have lots of small details, it’s always possible that a small piece of cured resin will detach from the model and float away in the tank, potentially causing issues in later prints. The slicer app Chitubox has the ability to detect and remove these floating islands, but I couldn’t find a comparable feature in PrusaSlicer. This is the only improvement I could see Prusa adding to this software; the experience was otherwise straight-forward and didn’t present any surprises.
(Image credit: Tom's Hardware)Comparison of the Prusa SL1S vs. Elegoo Mars 3
(Image credit: Tom's Hardware)For anyone considering purchasing a resin printer, it may be difficult to understand why the price of the Prusa SL1S is so much higher than some of the other resin printers on the market. To benchmark this machine, I printed a model on both the SL1S as well as the Elegoo Mars 3, one of the best 3D printers you can buy in 2021 which happens to cost $300 or less. To understand this benchmark test, it’s worth taking a look at the specs of both machines to better understand their performance.
| Prusa SL1S | Elegoo Mars 3 | |
| Masking LCD Resolution | 2560 x 1620 | 4098 x 2560 |
| XY Resolution | .049mm | .035mm |
| Build Dimensions | 5 x 3.15 x 5.91 inches | 5.64 x 3.52 x 6.89 inches |
| Build Volume | 93.08 cubic inches | 136.79 cubic inches |
| Printer Dimensions | 8.8 x 9.3 x 15.7 inches | 8.93 x 8.93 x 17.28 inches |
| Printer Volume | 1284 cubic inches | 1378 cubic inches |
| Build / Footprint Ratio (higher is better) | 7.2% | 9.9% |
| Cost | $1,999 | $300 |
| Benchmark Part Time | 2 Hours 59 Minutes | 5 Hours 19 Minutes |
Image 1 of 2
(Image credit: Prusa / Chitubox)(Image credit: Prusa / Chitubox)To minimize variables between the two prints, I used a pre-supported model from Loot Studios that prints hollow with an internal support structure. I used default settings on both PrusaSlicer as well as Chitubox, and used Prusament Tough Anthracite Grey resin on both the SL1S and the Mars 3. Both models were printed at a default layer height of 0.05mm (50 microns), and the exposure time for PrusaSlicer defaulted to 2.4 seconds / layer while Chitubox defaulted to 2.5 seconds / layer.
Image 1 of 2
(Image credit: Tom's Hardware)(Image credit: Tom's Hardware)The model printed on the Mars 3 took 5 hours and 19 minutes, a large difference from the estimated 4 hour and 4 minute print time provided by Chitubox. By contrast, the model printed on the SL1 took 2 hours and 59 minutes, precisely down to the minute of the estimate provided by PrusaSlicer.
Image 1 of 3
(Image credit: Tom's Hardware)(Image credit: Tom's Hardware)(Image credit: Tom's Hardware)The print from the Mars 3 featured a high level of detail, and the texture on both the skin of the model was clean and well-defined, and the smooth plates on the armor had almost no visible stepping. The Mars 3 is a 4K Mono LCD with an XY resolution of .035mm, so this level of detail is about what you would expect.
Image 1 of 3
(Image credit: Tom's Hardware)(Image credit: Tom's Hardware)(Image credit: Tom's Hardware)The print from the SL1S looked equally detailed, and despite a technically lower XY resolution of .049mm, the model was nearly indistinguishable from the one made with the Mars 3, and completed in less than 60% of the time needed by the Mars 3. A side-by-side comparison reveals two models that are very similar in appearance. The model on the left below was printed on the Mars 3, and the model on the right was printed on the SL1S.
Image 1 of 3
(Image credit: Tom's Hardware)(Image credit: Tom's Hardware)(Image credit: Tom's Hardware)Printing a Model from prusaprinters.org
(Image credit: prusaprinter.org)Prusa has created an online file repository called ‘PrusaPrinters’ that encourages users to upload both 3D models as well as prepared 3D files that are ready for printing. As an example of this is the ‘Wardragon’ model, which is available as a ‘.sl1s’ file format that is readily printable by the Prusa SL1S without any additional software. This type of file sharing allows users to download models that they can print without having to worry about going through the slicing process.
Image 1 of 2
(Image credit: Tom's Hardware)(Image credit: Tom's Hardware)I downloaded the wardragon.sl1s file and printed it using Prusa Tough Orange material without making any modifications to either the settings or the printer.
(Image credit: Tom's Hardware)The Wardragon model printed without any issues, and it really was as simple as downloading the .sl1s file, putting it on a thumb drive, plugging it into the printer, and hitting ‘start’. The model printed in 3 hours and 1 minute, an improvement over the estimated time on the site of 3 hours and 29 minutes. I’m used to slicer apps providing ‘optimistic’ print times which are usually 20-50% short of the actual print time, so having a printer finish before the estimated time was a pleasant surprise.
Image 1 of 2
(Image credit: Tom's Hardware)(Image credit: Tom's Hardware)After removing the part from the build platform of the machine, I post-processed the model using the Prusa CW1S to clean up the excess resin and fully cure the part. The detail on the model is striking, with individual rings visible on the reins of the dragon and the textured skin of the model looking sharp and lifelike. I was most impressed with the chainmail rings hanging underneath the armor; they appear to almost float in air and the level of detail is far past what I would have expected from a 2K masking LCD screen.
Printing Multiple Models on Prusa SL1S
(Image credit: Prusa)Resin MSLA 3D printers, like the Prusa SL1S, have a unique advantage over FDM 3D printers when it comes to print speed by virtue of the curing process. Each layer on a MSLA resin 3D printer has the potential to be cured across the area of the platform, so adding multiple parts doesn’t add any additional print time. As an example of this technique, I’ve loaded three copies of the same Sci-Fi Door model from Loot Studios into PrusaSlicer side-by-side on the build platform.
Image 1 of 2
(Image credit: Tom's Hardware)(Image credit: Tom's Hardware)Printing three of these models simultaneously took 1 hour and 59 minutes, the exact same amount of time it would have taken to print a single one. Typically, keeping a relatively thin cross-sectional width is important to avoid causing undue stress on the FEP film, but the unique tilt-and-peel nature of the SL1S means that printing large parts in multiplies is a viable strategy.
(Image credit: Tom's Hardware)The detail on each model is identical, and it’s impossible to tell the three apart from each other. By printing these three models simultaneously, I effectively reduced the cycle time (or time per part) to one third the amount required to print a single part. This is done with no penalty to print quality, and the models look the same as if they had been printed individually. For anyone interested in printing large quantities of small parts reliability, the SL1S has shown it is more than up for the challenge.
The $1,999 price of the Prusa SL1S ($2,599 with the CW1S Cure/Wash station) is certainly high enough to raise the eyebrows of most hobbyists. This machine is not designed to compete in the race-to-the-bottom pricing of other inexpensive machines, and instead focuses very intensely at providing reliable results using sturdy, high-quality components. After spending time with this machine and testing it for a variety of applications, I can whole-heartedly recommend it for anyone interested in a reliable resin MSLA 3D printer and believe that it has earned a place among the best 3D printers.
Prusa is involved with every aspect of the ecosystem of this machine, from the hardware, to the software, even down to the consumables like the Prusament resin. This translates to a smooth, predictable printing experience that involves little to no trouble-shooting or guessing on the part of the user, so they can spend more time printing and less time tweaking.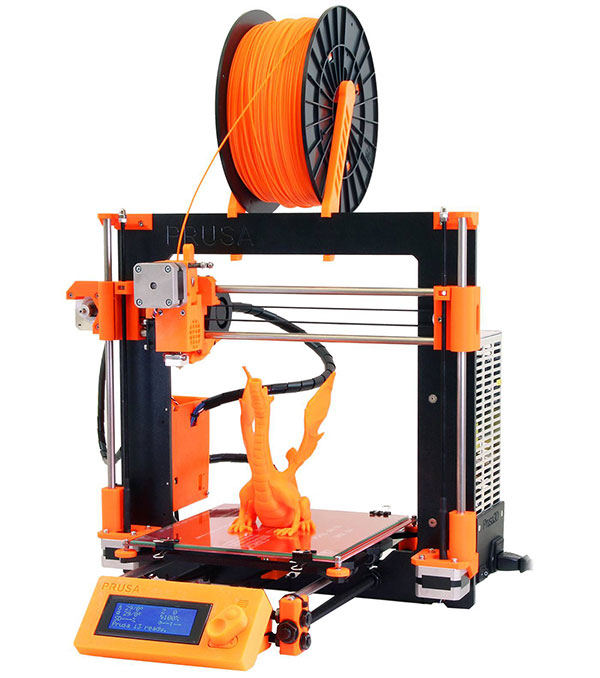
The tilting vat, ballscrew Z axis, resin vat sensor, lightning-fast print speed and other high-end touches go a long way to justifying the cost of the machine, but at the end of the day, this machine isn’t going to be a great fit for everyone. If you’re not interested in the speed of the printer and more concerned about large build volume, it might make sense to investigate a less-expensive option such as the Elegoo Saturn as an alternative.
Andrew Sink first used a 3D printer in 2012, and has been enthusiastically involved in the 3D printing industry ever since. Having printed everything from a scan of his own brain to a peanut butter and jelly sandwich, he continues to dive ever more deeply into the endless applications of additive technology. He is always working on new experiments, designs, and reviews and sharing his results on Tom's Hardware, YouTube, and more.
Original PRUSA SL1 review | TechRadar
Skip to main contentTechRadar is supported by its audience. When you purchase through links on our site, we may earn an affiliate commission. Here’s why you can trust us.
(Image: © Ali Jennings)
TechRadar Verdict
The Original PRUSA SL1 is easy to setup and the device's print quality far surpasses FFF 3D printers, even the Original PRUSA i3 MK3s.
TODAY'S BEST DEALS
Pros
- +
Incredibly cheap for an SLA printer
- +
Outstanding print quality
- +
Open source resin compatibility
Cons
- -
Resin is always messy
- -
Steep learning Curve
- -
Can't see print until it raises from the tank
3D printing technology has come along way in a short time, and while FFF (Fused Filament fabrication) is still the most popular format, there are other technologies.
SLA or Stereolithography, for its full name, is a form of 3D printing that uses a liquid resin rather than a solid filament. A UV light from the print head is projected into the resin and cures it layer-by-layer, once finished the excess resin is washed off and the print left to cure.
As you can imagine, there's plenty of scope for mess, but the resulting prints are generally nothing less than incredible.
The SL1 is an MSLA 3D printer a variant on the SLA technology.
Rather than a print head that moves from one location to the next, it uses a high-resolution LCD that displays a mask; then a UV LED panel projects light through the mask to expose and cure the resin.
As each layer is exposed all at once, the print process is far faster than the same resolution printed on an FFF or standard SLA printer. This makes it more akin to a DLP printer technique.
So why choose the SL1 MSLA printer over the MK3s FFF printer?
- You can buy the Original PRUSA SL1 here
The Original PRUSA i3 MK3s is a workhorse and forgiving, excellent for functional parts, models, prototyping, and getting into 3D print technology.
The Original PRUSA SL1 is more refined, less forgiving, but the quality is as close as your going to get to injection moulding, and therefore favoured by jewellers, modellers and dentists because of the high-quality detailed durable finish.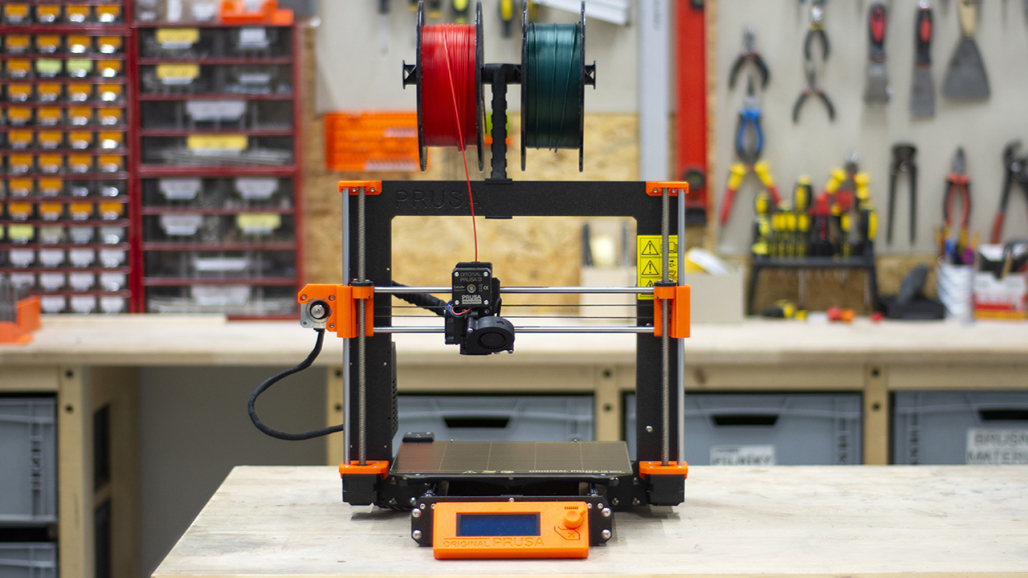
FFF printing is an easy and reliable 3D print solution, there's little mess and you can print at scale, it's also very forgiving.
SLA, on the other hand, is generally restricted by small print areas and needs more time in the preparation and finish, however, you do get a better visual quality print.
As you can imagine with lights and lasers, SLA technology is more advanced than FFF, less accessible and usually far more expensive.
This is where Prusa Research is focused, doing the same for SLA 3D printing that they have done for FFF, and all under the Open-Source banner.
The Original PRUSA SL1 is Open-Source, and you have the choice to build your own from scratch, assemble the kit or buy one expertly pre-built by Prusa Research.
(Image credit: Ali Jennings)The Original Prusa SL1 is one of those devices that has an instant magnetic appeal. As soon as someone walks into the workshop, they're checking out the slender black and orange box.
Aesthetically it looks the business, large transparent orange door that flips open to reveal the build plate and resin tank.
On the base is a large LCD touch screen that enables you to navigate settings quickly. There's nothing here that looks openly Open-Source, this feels like a proper commercial product.
That quality and precision sum up the design and build of the SL1, it's solid and needs to be to produce SLA prints, as unlike FFF printing there's very little margin for error.
From the UV protective orange door to the industrial lead screw, solid metal tank and build plate, the SL1 instantly feels one up on many other SLA printers that I've looked at.
(Image credit: Ali Jennings)Take a closer look, and you can see those small hints that this printer has it's feet firmly based in the world of Open-Source. The fixing knob on the build plate is 3D printed.
There are a few other 3D printed parts on the machine such as the covercheck cover, blower fan duct and touchscreen frame, a little nod to the Open-Source community, and just letting you know you could build it if you wanted.
Interestingly the 3D printed part is printed with an FFF printer rather than SLA. The only reasons I can think of for this is that it's cheaper to produce and if printed by the SL1 you may not realise that the part was 3D printed.
One aspect of the SL1 that instantly stands out is size and weight. This is by no means a large machine, and the small footprint is ideal for location in a workshop.
Although the printer is compact, it has a good weight to it, and a stable surface or table is the best option. Although in operation, the printer is quiet and doesn't vibrate or wobble in the same was as an FFF printer.
Unlike FFF printers, no material option enables you to use this printer in a small confined space without the fumes getting to you. By the very nature of SLA printing, it is more industrial, and a decent workshop is the best option or at the very least a very well vented room. Thanks to the filter assembly you are able to attach a hose and direct all the fumes to outer space.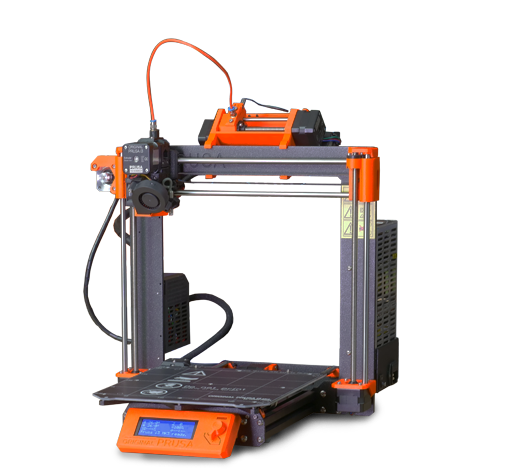
Connectivity can be a real 3D printing headache, but here Prusa Research has opted for every type of connection going, Wi-Fi, Network and USB.
(Image credit: Ali Jennings)Ease of use has been carefully considered and opening the door; you can see that the build plate is easily removable once the print has finished.
This feature is vital due to the finishing process that's required with SLA prints.
Then there's the bolt in tank, the tank itself is solid and made to last, but the perishable film base that will inevitably degrade over time is replaceable.
There's a lot to be said for the design ethics of Prusa Research making sure that these parts are serviceable.
Features
When it comes to features, you can see the difference between SLA and FFF 3D printers. SLA will inevitably have a far smaller print platform and build area than FFF, but the print resolution will be far higher.
Let's take a look at the main features:
The exposure method or MSLA system uses an LCD screen to display a mask and a UV LED to cure the resin.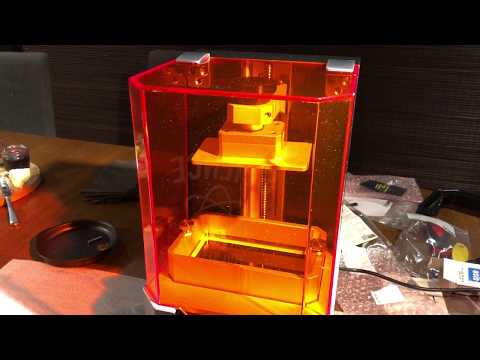 The LCD is a 5.5-inch with a resolution of 2560x1440p, Quad HD or Wide QHD, and has a fixed XY resolution of 0.047mm (47um).
Each layer takes around 6 seconds to expose whatever the size of the print, as it exposes the entire layer in one go. The UV wavelength is 405nm, and light intensity is cca 990mW/m2.
The ball screw Z-axis, which looks incredibly robust is powered by the Trinamic stepper drivers enabling a minimum layer height of 0.01mm, the motors are also incredibly quiet. Although Prusa Research states the normal workable range for a standard user is between 0.025 and 0.1mm per layer.
(Image credit: Ali Jennings)The print area of an SLA printer is generally far smaller than that of an FFF printer, and here the SL1 has an area of 120x68x150mm. This might not sound large, but in the SLA world, that's OK, but is still on the small side.
Resin can suffer from all sorts of issues; testing any SLA printer will highlight almost everyone in a very short time. Prints sticking to the exposure surface rather than the build platform, cured bits of resin floating around and so the list goes on.
Various manufacturers have come up with different solutions, and here Prusa has gone for a unique tilting tank.
It's a decent approach and keeps the resin moving through the print process; it's also far faster than wiper arms and some other methods employed by other manufacturers.
(Image credit: Ali Jennings)When it comes to resin levels you add resin by hand before the print, there are no pipes or reservoirs to fill. The level of the resin is measured by a sensor hidden away in the printing platform.
This measures the volume of resin in the tank and ensures that there's enough resin to complete the job. If the resin is below the required amount, then a warning will appear on the front LCD screen.
Another stand out feature of the tank is the FEP transparent film on the base. This can be replaced when the film starts to discolour or becomes damaged.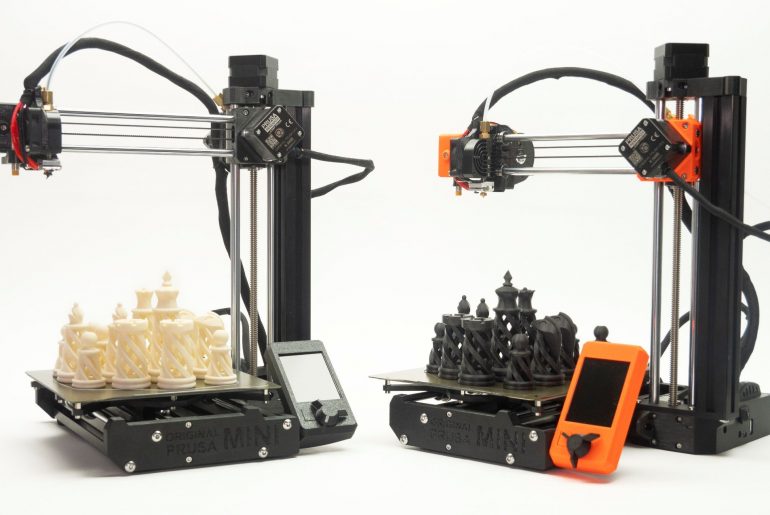
To do this the bolts holding it in place can be removed and a new FEP film can be placed in. The process is easy and takes about 10 minutes to complete.
The SL1 is also not tied to proprietary resins and is compatible with any UV sensitive liquid resin.
The build platform, as with much of the construction, is solid metal and has a couple of features that aid with easy calibration and print removal.
A ball joint connects the main arm to the build platform, and this is released for free movement during the step-by-step calibration process. There's also a release knob on top that enables the build platform to be slipped out once a print is complete.
For me, one of the most significant issues with SLA printing, aside from dealing with the resin, is the smell. The entire process gives off fumes, but it is possible to attach a hose to the filter assembly and route that in to an extractor..
However, there are a few design elements that help with the fume issue. A lid covers the main print area containing some of the fumes and there's a fan and filter at the back of the machine. It would have been good if the rear extraction fan had the ability to link into an extractor easily.
Sizewise the printer is actually quite small and comfortably fits on most surfaces, even a shelf, and measures in at 400x237x225mm.
A big part of the Original PRUSA SL1 is the software. PrusaSlicer has grown and developed and is now a formidable force.
The SL1 can communicate with the software in a range of ways, from direct connection to Network, Wi-Fi or USB.
On the front of the machine is the control panel, and of all 3D printers that I've seen this is one of the clearest and easiest to use.
Initial instruction for set-up then calibration are clear and concise, with images to help guide you when needed.
(Image credit: Ali Jennings)During printing, it shows you the progress and enables you to check settings and make adjustments to options such as exposure easily.
The design of the printer and software is all very clever and slick.
Set-up overview
Spec Sheet
These are the full specs for the Original PRUSA SL1:
Build Volume: 120 x 68 x 150mm
Connectivity: Wi-Fi, Network, USB
Size of pixel: 47um in XY axes
Layer Height: 0.025-0.1
Bed: 120 x 68mm
Print Surface: 120 × 68 × 150 mm
Software: PrusaSlicer
Materials: Resin
Included Material: 500ml Resin
Power: Global
When you buy a pre-built Prusa, you essentially know what you're going to get. Everything has been carefully assembled and tested, there may be an identical kit version that you can build yourself, but the pre-built is assembled with care and diligence.
The Original PRUSA SL1 arrives almost ready to go, you need to remove the packaging, there's a guide as soon as you open the box, and this 100% guided approach continues once the power is switched on.
Prusa is leaving nothing to chance by incorrect user set-up. It's almost impossible not to follow the directions, and within five minutes the SL1 is unpacked, and the few parts that need to be attached are bolted in place.
Once powered up, the machine is ready for calibration, and as with every part of the process, Prusa has created a guide to handhold you through.
Once complete you can then connect the printer to the PrusaSlicer software through your chosen method.
In this test, I used the Wi-Fi connection, setting this up involved going through the menu on the printer, select the Wi-Fi network, add the password, and that was it.
Then in PrusaSlicer pop along to the Printer Settings, and the SL1 can be found by clicking browse and then entering the API Key / Password.
The final part of the printer set-up is to add the Resin which is poured directly into the tank once the tank is bolted into place.
TODAY'S BEST DEALS
- 1
Current page: Introduction, design and features
Next Page Performance and verdict
Imaging Lab Manager
Ali Jennings is the imaging lab manager for Future Publishing's Photography portfolio. Using Imatest Master and DxO Analyser he produces the image quality tests for all new cameras and lenses review in TechRadar's cameras channel. Ali has been shooting digital since the early nineties and joined Future's Photography portfolio back in 2003.
TechRadar is part of Future US Inc, an international media group and leading digital publisher. Visit our corporate site .
© Future US, Inc. Full 7th Floor, 130 West 42nd Street, New York, NY 10036.
Original PRUSA SL1 Review - Wildly Helpful Electronics Selection Tips
3D printing technology has arrived in a short amount of time, and while FFF (fusible filament fabrication) is still the most popular format, there are other technologies..
SLA or stereolithography, for its full name, is a form of 3D printing that uses liquid resin rather than a solid filament. UV light from the print head is projected into the resin and cures it layer by layer, after completion, the excess resin is washed off and the print is left to cure. .
.
As you can imagine, there is a lot of room for confusion, but the resulting prints are usually nothing short of incredible.
SL1 is MSLA 3D printer, SLA variant.
Instead of a printhead that moves from one place to another, it uses a high resolution LCD that displays a mask; then the UV LED panel projects light through the mask to expose and cure the resin.
Because each layer is exposed at the same time, the printing process is much faster than the same resolution printed on an FFF or standard SLA printer. This makes it more similar to the DLP printer technique.
So why choose the SL1 MSLA printer over the MK3s FFF printer?
- You can buy Original PRUSA SL1 here
The original PRUSA i3 MK3s is a workhorse and forgiving, great for functional parts, models, prototyping and 3D printing..
The original PRUSA SL1 is more refined, less forgiving, but the quality is as close as you're going to get diecast and is therefore preferred by jewellers, modellers and dentists for its high quality and durable finish.
FFF printing is simple and reliable 3D printing solution, it has little clutter and you can print to scale, it's also very forgiving.
On the other hand, SLA is generally limited to small print areas and requires more preparation and finishing time, but you get better visual print quality.
As you can imagine, using light sources and lasers, SLA technology is more advanced than FFF, less available and generally much more expensive. The SLA is the same as for FFF, all under the open source banner. ..
(Image credit: Ali Jennings)
design
The Original Prusa SL1 is one of those devices that has instant magnetic appeal. As soon as someone enters the workshop, they check the thin black and orange box.
Business aesthetic, large transparent orange door that opens to reveal build plate and resin tank.
(Image credit: Ali Jennings)
Based on a large LCD touch screen that allows you to quickly navigate through settings. There is nothing here that looks like open source, it looks like a proper commercial product.
This quality and precision sums up the design and construction of the SL1, it is robust and should be required for SLA production as there is very little room for error unlike FFF printing.
From the protective orange UV door to the industrial lead screw, all-metal tank and mounting plate, the SL1 has an instant feel in many other SLA printers I've looked at.
(Image credit: Ali Jennings)
Look closer and you'll see those little hints that this printer is based in the Open-Source world. The locking knob on the mounting plate is 3D printed.
There are a few more 3D printed parts on the machine, such as the control cover cover, fan duct and touch screen frame, a little indication to the open source software community and just a notice that you can build it, if you want to.
Interestingly, the 3D printed part is printed on the FFF printer and not on the SLA. The only reasons I can think of for this is that it's cheaper to manufacture and if you print on the SL1 you may not realize the part was 3D printed.
One aspect of the SL1 that instantly stands out is its size and weight. It's by no means a big machine, and the small footprint is perfect for a workshop.
Although the printer is compact, it has a good weight and a stable surface or table is the best option. Although the printer is quiet, it does not vibrate or vibrate like an FFF printer..
Unlike FFF printers, no material option allows you to use this printer in a small confined space without smoke ingress. By the very nature of SLA printing, it's more industrial, and a decent workshop is the best option, or at least a well ventilated area. Thanks to the filter assembly, you can attach a hose and send all the vapors into space.
(Image credit: Ali Jennings)
Connectivity can be a real headache when 3D printing, but here Prusa Research has opted for Wi-Fi, network, and USB for each connection type.
(Image credit: Ali Jennings)
Ease of use has been carefully designed and opened; You can see that the build plate can be easily removed after printing is completed.
This feature is vital due to the finishing process required for SLA printing.
Then there is a bolt in the tank, the tank itself is solid and made to last, but the perishable film base, which will inevitably deteriorate over time, is replaceable.
There is a lot to be said for Prusa Research's design ethic to make sure these details are right.
Features
When it comes to features, you can see the difference between SLA and FFF 3D printers. SLA will inevitably have a much smaller print platform and build area than FFF, but the print resolution will be much higher.
Let's look at the main functions:
The exposure method or MSLA system uses an LCD screen to display the mask and a UV LED to cure the resin. The LCD is 5.5-inch with a resolution of 2560x1440p, Quad HD or Wide QHD, and has a fixed XY resolution of 0.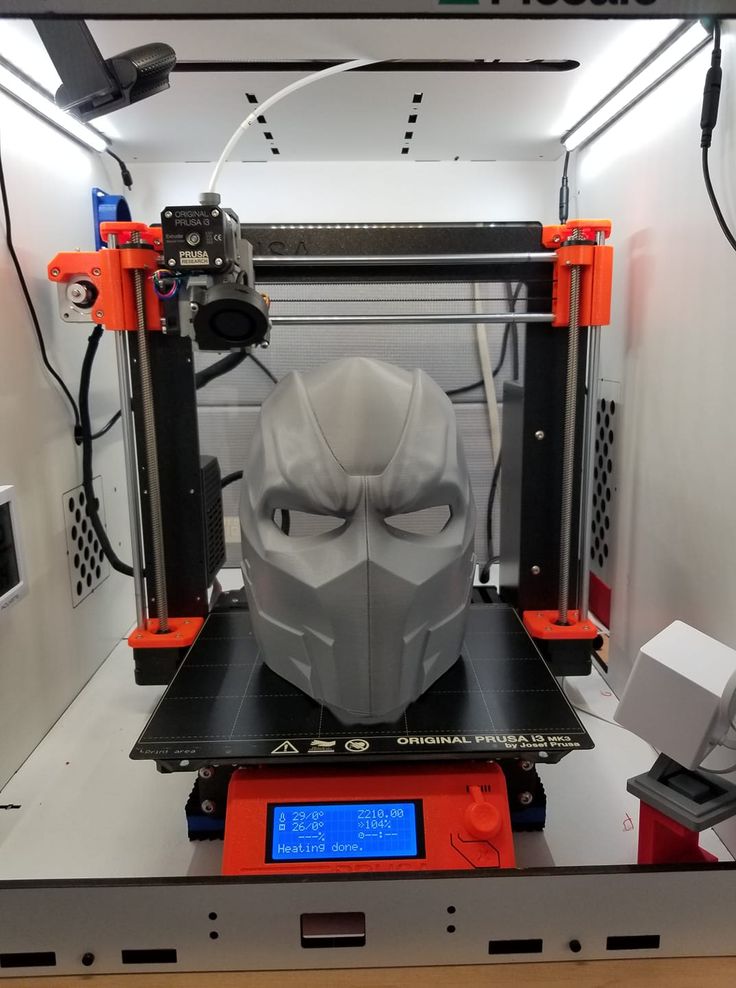 047mm (47um).
Each layer takes about 6 seconds to show any print size as it shows the entire layer in one go. The UV wavelength is 405nm and the light intensity is about 990mW/m2. incredibly quiet motors. Although Prusa Research states that the normal operating range for the average user is 0.025 to 0.1mm per layer.
(Image credit: Ali Jennings)
The print area on an SLA printer is usually much smaller than on an FFF printer, and here the SL1 has an area of 120x68x150mm. This may not sound like much, but in the SLA world it's okay, but still on the small side.
Resin can suffer from all sorts of problems; Testing any SLA printer will highlight just about everyone in a very short time. Prints stick to the exposure surface rather than the build platform, cured resin pieces float around, and the list goes on.
Different manufacturers have come up with different solutions, and here Prusa has opted for a unique sloping tank.
This is a decent approach that allows the resin to move during the printing process; it is also much faster than wiper arms and some other methods used by other manufacturers.
(Image credit: Ali Jennings)
When it comes to resin level, you add resin by hand before printing, there are no pipes or reservoirs to fill. The resin level is measured by a sensor hidden in the print platform.
This measures the amount of resin in the tank and provides enough resin to complete the job. If the amount of resin is lower than required, a warning will appear on the LCD.
Another feature of the tank is the transparent FEP film on the base. This can be replaced when the film starts to discolor or becomes damaged.
(Image credit: Ali Jennings)
To do this, you can remove the bolts holding it in place and install a new FEP film. The process is simple and takes about 10 minutes..
SL1 is also not bound to proprietary resins and is compatible with any UV sensitive liquid resin.
A ball joint connects the main arm to the build platform, and it is released to move freely during step-by-step calibration. There is also a handle on the top that allows the build platform to slide out after printing is complete. .
.
For me, one of the biggest issues with SLA printing, besides the resin, is the smell. The whole process releases fumes, but it is possible to attach a hose to the filter assembly and route it to the extractor...
However, there are a few design elements that help with the smoke problem. The cover covers the main print area containing some fumes, and the fan and filter are on the back of the machine. It would be nice if the rear exhaust fan could easily connect to the extractor.
Also the printer is actually quite small and fits comfortably on most surfaces, even on a shelf, and measures 400x237x225mm.
Most of the original PRUSA SL1 is software. PrusaSlicer has grown and evolved and is now a huge force. The
SL1 can communicate with software in a variety of ways, from a direct network connection, Wi-Fi or USB.
There is a control panel on the front of the machine and of all the 3D printers I have seen, this is one of the simplest and easiest to use.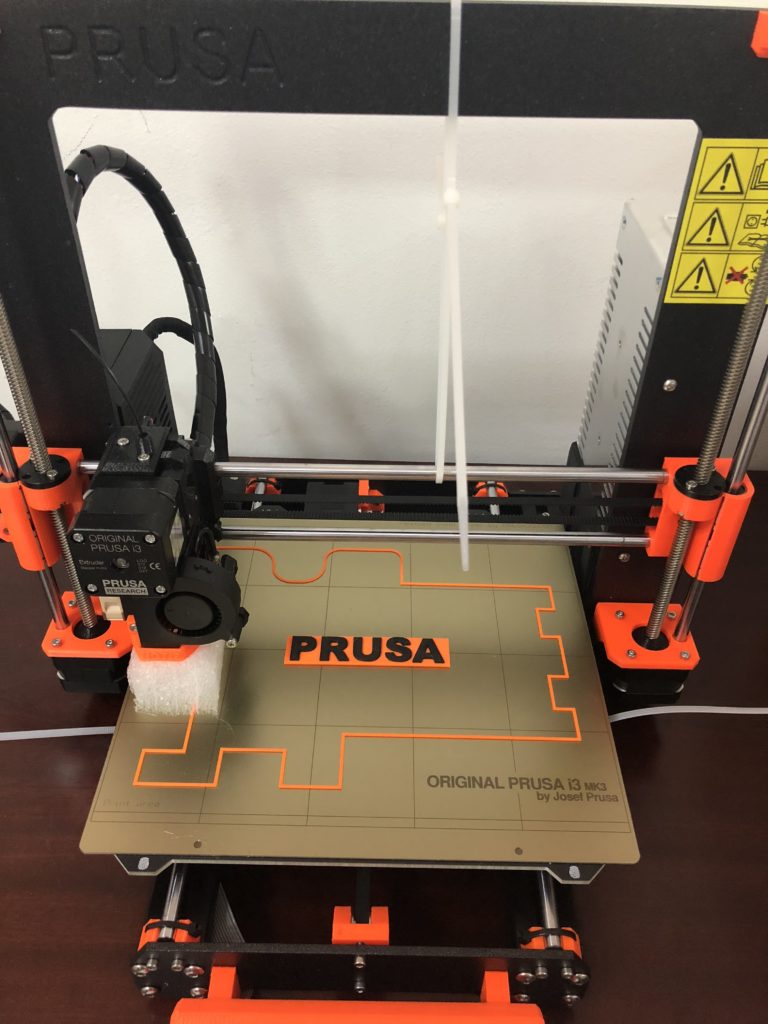
Initial setup and calibration instructions are clear and concise, with images to help you when needed.
(Image credit: Ali Jennings)
As you print, it shows you progress and lets you check settings and easily adjust things like exposure.
The design of the printer and software is very smart and convenient.
Settings overview
Spec Sheet
Here are the full specifications of the original PRUSA SL1:
Assembly volume: 120 x 68 x 150 mm
Connection Opportunities: Wi-Fi, Network, USB
Pixel size: 47UM for axes XY
Layers: 0.025-0.1
Bed: 120 x 68 mm
Printing surface: 120 × 68 × 150 mm
Program: PrusASLICER
Smol
9000 0003Power: Global
When you buy a pre-built Prusa, you basically know what you're going to get. Everything has been carefully assembled and tested, there may be an identical version of the kit that you can build yourself, but pre-assembled with care and diligence.
The original PRUSA SL1 arrives almost ready to go, you need to remove the packaging, there is a manual as soon as you open the box and this 100% approach continues after the power is turned on.
Prusa leaves nothing to chance due to user misconfiguration. It's almost impossible not to follow the directions, and within five minutes the SL1 is unpacked and the few parts that need to be attached are bolted on.
Once turned on, the machine is ready for calibration and as with any part of the process, Prusa has developed a manual to help you.
Once completed, you can connect the printer to the PrusaSlicer software using the selected method.
In this test, I used a Wi-Fi connection, set it up by enabling the menu view on the printer, selecting the Wi-Fi network, adding a password, and that's it. by clicking 'Browse' and then entering the API Key/Password.
The last part of the printer setup is the addition of resin, which is poured directly into the tank after the tank is screwed into place.
Continue reading on next page
Prusa Research releases monochrome version of SL1 3D printer
News
photopolymer 3D printer. The novelty with a monochrome LCD mask, increased performance and an increased working area is called the Original Prusa SL1 Speed.
Switching to a monochrome matrix with a resolution of 2560x1620 has significantly improved performance: now it takes from 1.4 seconds to expose a layer, although it all depends on the material used. What we love about Josef is that he gives more or less illustrative examples instead of vague marketing. So, the team tested different photopolymers and achieved the highest results with a throughput of 80 mm/h when printing with transparent modeling resins with a layer thickness of 100 microns.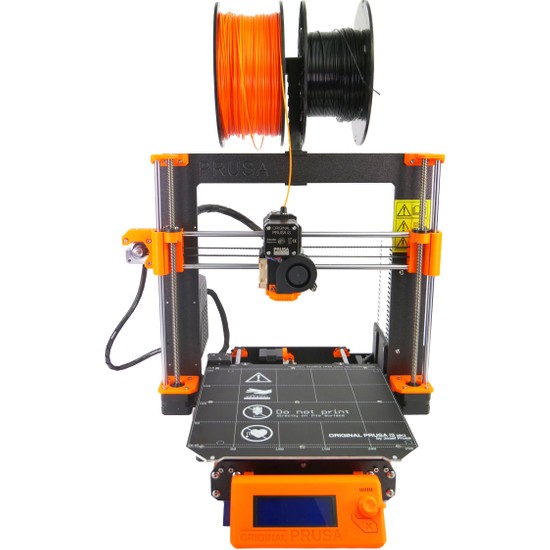 Standard strong resins require 1.6-2.5 seconds per coat, while advanced options that normally take over twenty seconds now cure in 3-4 seconds.
Cuvette, lifting mechanism and LED module have been redesigned to get the most out of the new system in terms of performance. Cuvette tilting and platform lifting are now about three times faster, LED power has been increased, and firmware changes have been made. As a result, a 150mm high model can now be 3D printed in just under two hours under optimal conditions.
The lighting module has been completely redesigned: instead of the socket in the original version, the new version uses a rectifying LED array, the so-called "paraled", and the power has been increased four times.
Along with performance and sharpness improvements, the new 5.96-inch sensor has a couple of nice bonuses. The first is to increase the lifespan of the mask itself to about two thousand hours. The second is an increase in the working area from 120x68 mm to 127x80 mm.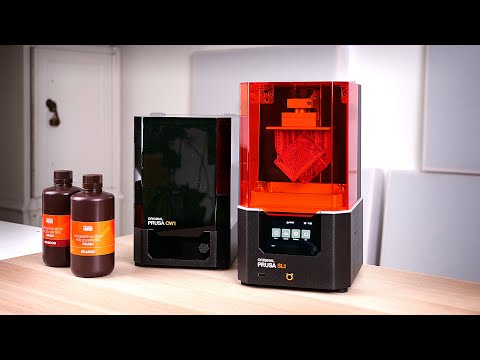 At the same time, the maximum height remained the same, at the level of 150 mm.
Additional upgrades include the addition of sloping lift platform tops and switching from expensive aluminum cuvettes to cheaper graphite-filled polyamide-6 composites.
Cost matters, because at the same time the designers added convenient lids to the cuvettes. Resin baths can be capped and stacked without the hassle of pouring leftovers back into bottles. Additional cuvettes are available for approximately $23.
Curva
Calm, no one swears. The working name CurWa was given to a proprietary washing and re-lighting system ( Cur ing and Wa shing Machine), released in parallel with the original SL1 3D printer. True, then for some reason the colorful name was replaced with a boring CW1. For the launch of the upgraded version of the 3D printer, the company has also prepared an updated version of the auxiliary equipment under the designation CW1S.
Improvements include a more efficient resin warm-up system and a new removable turntable now covered with replaceable FEP film to reduce the time spent cleaning equipment. The latter option will also be available to owners of already released systems: in the near future, the company will publish the STL file of the new platform for independent 3D printing, and the films can be bought in the official store.
The fly in the ointment is that the cost of a new 3D printer has increased slightly. According to Josef, this is due to the use of more expensive components, the lack of certain parts and increased transport costs. In addition, the company decided to curtail sales of self-assembly kits, as they were not particularly popular. On the other hand, the design remains open source.
The Original Prusa SL1 Speed (SL1S) 3D printers are priced at $1,999, and the team is asking for an additional $749 for the CW1S washer and UV backlight. You can save $2,599 on buying the kit.