Xyz 3d printer software download
XYZprinting da Vinci 1.0
This page will help you set up your new XYZprinting da Vinci 3D printer for use with the All-In-One 3D Printing software by Simplify3D. The da Vinci line of 3D printers come at an affordable cost and include features such as a filament cartridge system, integrated LCD panel, and an enclosed printing chamber. If you are setting up a brand new da Vinci 3D printer, make sure to read the User Manual that comes with the printer. This describes the unboxing process, which includes removing plastic harnesses, filament loading, and bed preparation. You can also download an electronic copy of the User Manual directly from XYZprinting’s Support Page. The remainder of this page is written specifically for the da Vinci 1.0, but the same process can be applied to the da Vinci 2.0 and 2.1 plus.
Final Hardware Checks
Before we dive into the software, there are a few final hardware checks you should perform before using your da Vinci 1.0. If you’re confident your printer is ready to go, you can jump directly to the software setup. The da Vinci 1.0 comes with several additional pieces you will need to remove before performing your first print. These are also described in XYZprinting’s documentation as mentioned above. You will want to remove the plastic clips near the extruder or print head that hold onto the rods and secure the printer when being shipped. You will also want to remove the orange clip securing the build plate, this can be done by removing the thumb screw holding down the orange clip.
Once you have removed the necessary clips securing the printer, you will want to load filament before starting a print. Power on the da Vinci 1.0 by plugging in the included power cord and flipping the switch on the left side of the unit. You can load filament by following the on-screen instructions. Once this setup process is complete, you’re ready to start printing!
Printing with Simplify3D
Simplify3D Software comes with all of the necessary tools required to start printing on your da Vinci 3D printer. It is an integrated package so it’s the only piece of software you’ll need. The software communicates with your da Vinci 3D printer via the supplied USB Cable. If you’re running Linux or OS X, you can move on to the next step. Windows users may need to install the Arduino and RAMBo inf driver files (found here and here). However, if you have installed or used XYZware previously, you should already have the necessary drivers installed and can move on to the next step.
The first time you open Simplify3D Software, the Configuration Assistant will help you choose your printer. Select either the XYZprinting da Vinci 1.0 or 2.0. If this is not your first time opening Simplify3D Software, you can bring up the Configuration Assistant by going to Help > Configuration Assistant.
After completing the Configuration Assistant, import the 3D model you’d like to print. After importing the model, please click “Edit Process Settings”. This will open the FFF Settings window where you can configure a wide variety of slicing options.
In this window, you will find options to select the material for the print, the preferred quality, infill percentage, and whether to use a raft or generate support material. If you’d like to customize your prints further, please click the Show Advanced button. For more information on the options available in the Advanced Settings, please visit our Tutorial Library.
Once you’ve sliced a model with your selected settings, click “Begin Printing Over USB” to start the print job. When the da Vinci 3D printer receives the print job, it will automatically go through its start routine and begin heating up.
You can gather further information about the status of your machine by going to Tools > Machine Control Panel. On this window you can view a plot of the current temperatures, see the communication back and forth with the machine, and issue manual commands such as jogging or preheating. Please note that it may take several minutes for your machine to reach the appropriate temperature before printing can begin.
Troubleshooting
Is my da Vinci 3D Printer supported?
All da Vinci 3D Printers, 1.0, 1.0A, 2.0 Duo, 2.1 Plus, 1.0 AiO are supported by Simplify3D Software. Enjoy fast slicing, highly customizable print settings, and upload files directly to the printer over USB.
Recommended Firmware?
Every firmware version can take full advantage of Simplify3D’s highly customizable slicer and directly upload print jobs over USB. For other features like manual jogging or bed leveling, we recommend the following firmware.
da Vinci 1.0 – Firmware version 1.1J
da Vinci 2.0 – Firmware version 2.0J
My Printer Reboots During Upload
If you experience this, please turn off the da Vinci printer and close the Simplify3D Software. Re-open the software, turn the printer back on, and retry the file transmission. Newer firmware releases by XYZprinting have greatly reduced the likelihood of this problem, so you may also wish to update to the latest version.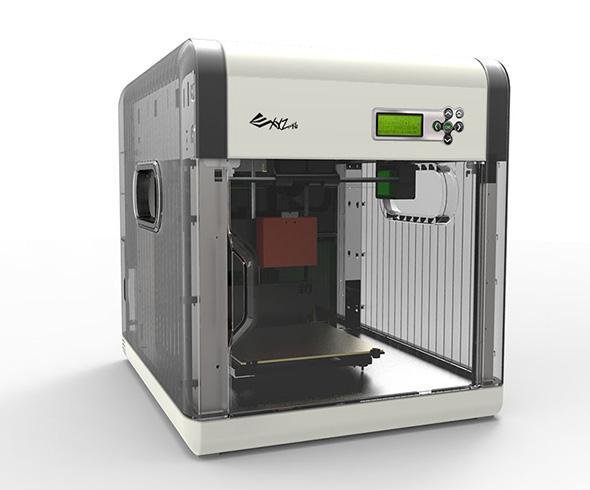
XYZgallery 2.0 on the App Store
Description
Description:
XYZgallery 2.0 lets you share, manage, download and print 3D models using supported XYZprinting printers, all in one easy-to-access app.
Easily manage your own 3D models or quickly search and preview in 3D. Thousands of different models uploaded by our active community of designers and makers. 3D printing by using the app to select your model and send it to any XYZprinting printer which connected to your wireless network.
To get the best print-quality possible, files have been pre-sliced to work on XYZprinting printers - no more struggling with difficult print settings - just select, download and print. You can also use the app to monitor your print’s progress and change filament when needed, letting you be the “idle” one for once, while your printer churns through that long list of print jobs.
Language Support:
- English, Spanish, Germany, French, Italian, Traditional Chinese, Simplified Chinese, Japanese and Korean
Supported printers:
-da Vinci nano (with Wi-Fi box)/nano w
-da Vinci Jr. 1.0w/Jr. 1.0 3in1/Jr. 1.0A (with Wi-Fi box)
-da Vinci Jr. 2.0 Mix
-da Vinci 1.0 Pro/Pro 3-in-1
-da Vinci mini w/mini w+
-da Vinci Color (print only)
-PartPro200 xTCS(print only)
Version 1.5.4
-Optimized slicing speed
-Fixed issues in usability and stability
-Quick file access & print from iCloud Drive and My Download
-Optimized advanced slicing parameters (da Vinci 1.0 Pro/Pro 3-in-1, da Vinci Jr. WiFi Pro)
Ratings and Reviews
20 Ratings
Connect?
How do I connect the app to a printer, I have a da Vinci mini w but I can’t find out how to connect it.
I haven’t had any problems
Lots of low rating reviews so I thought I’d give my two cents. I have da Vinci mini wireless (the orange one) and this app works great as a printer monitor. Doesn’t crash at all compared to the pc software that crashes every time I try to use it.
The files that you can browse online for free are really cool too.
I would pay for this app (even though it’s free) therefore I think it’s a good app
Decent App- But Not Without Problems!
The app works great for looking at models and saving them, but when using this as a printer monitor, the app keeps crashing. I keep connecting my Color Mini and it will work for about 1 second and then the app keeps crashing. I will update my review once this issue is fixed.
The developer, XYZprinting, has not provided details about its privacy practices and handling of data to Apple. For more information, see the developer’s privacy policy.
No Details Provided
The developer will be required to provide privacy details when they submit their next app update.
Information
- Seller
- XYZprinting, Inc.
- Size
- 37.1 MB
- Category
- Utilities
- Age Rating
- 4+
- Copyright
- Copyright © 2015 XYZprinting, Inc. All Rights Reserved.
- Price
- Free
- App Support
- Privacy Policy
More By This Developer
You Might Also Like
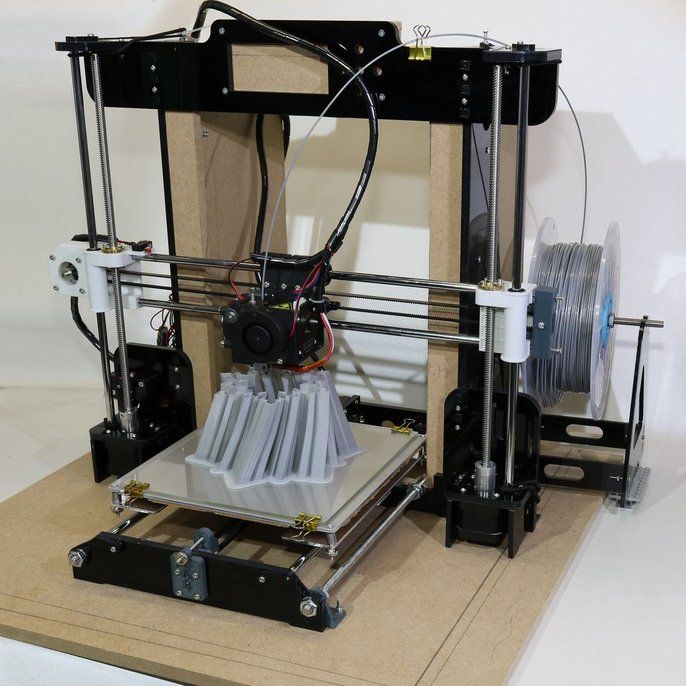
Top 20 Free 3D Printing & 3D Printing Software
Looking for 3D printing software? We've rounded up the top 20 software tools for beginners and professionals alike. Most slicers are free.
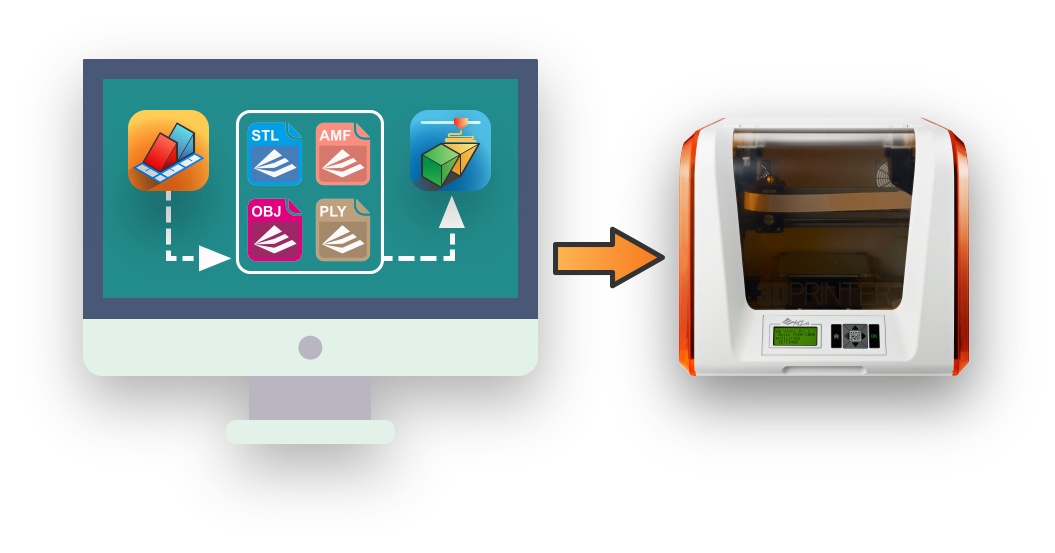
What is a slicer? This is a program for preparing a digital model for printing. Models for 3D printing are usually distributed in STL files. To turn an STL file into G-code (a language that a 3D printer understands), a slicer program is required. It is called a slicer because it cuts (to slice - English) a 3D model into many flat two-dimensional layers, from which a 3D printer will add a physical object.
Which slicer should I choose? In this article, we will tell you which slicer is best for 3D printing for each stage of your work. Which one is better for preparing a 3D model for printing? But what if you need to create a 3D model from scratch? And if you are only taking the first steps in 3D?
Don't be afraid: we've answered all of these questions, including the required skill level for each program and where you can download it. The great thing is that most of these programs are completely free and open source.
- Cura
- CraftWare
- 123D Catch
- 3D Slash
- TinkerCAD
- 3DTin
- Sculptris
- ViewSTL
- Netfabb Basic
- Repetier
- FreeCAD
- SketchUp
- 3D Tool
- Meshfix
- Simplify3D
- Slic3r
- Blender
- MeshLab
- Meshmixer
- OctoPrint
#1: Cura
For beginners who need a slicer to prepare STL files for 3D printing
Cura is the default slicer software for all Ultimaker 3D printers, but can be used with most others , including RepRap, Makerbot, Printrbot, Lulzbot and Witbox. The program is completely open source, its capabilities can be extended using plugins.
This program is very easy to use and allows you to manage the most important 3D printing settings through a clear interface. Start in Basic mode to quickly get up to speed and change print quality settings. If finer control is required, switch to Expert mode.
Cura can also be used to directly control the printer, but then the printer and computer must be connected to each other.
Download: Cura
Price: Free
Systems: PC, Mac, Linux
#2: CraftWare
3D printers by the Hungarian startup CraftUnique to support their CraftBot crowdfunding machine. However, the program works with other printers.
Like Cura, CraftWare allows you to switch from "Easy" to "Expert" mode, depending on how confident you feel. It's a colorful app that features a visual G-code visualization with each function represented by a different color. But the most outstanding feature is the individual support service. As far as we know, only the paid program Simplify3D has this.
Please note, however, that this program is still in beta, so bugs may occur.
Download: CraftWare
Price: Free
Systems: PC, Mac
#3: 123D Catch
-systems, smartphones and tablets, which allows you to convert images of objects into a 3D model. Pictures can be taken with a smartphone/tablet or digital camera.
You need many photos of an object from different angles - the more the better - after which they will be compiled into a 3D model.
123D Catch is more of a fun app than a professional 3D printing tool, but after some tambourine dancing, you can get good results, especially when paired with an STL editor like MeshLab or Meshmixer.
Price: Free
Systems: PC, Android, iOS, Windows Phone
#4: 3D Slash
and surprisingly simple, and refreshingly new. With 3D Slash, you can design 3D models using your dice skills.
You can start with a large block and, like a virtual sculptor, remove small cups from it with tools such as a hammer or drill, or start from empty space and build a model from cubes and other shapes. You can paint with flowers or use template pictures.
Other features worth mentioning are tools for creating logos and 3D text. The Logo Wizard imports an image and creates a 3D model, while the Text Wizard allows you to enter and format text, and then turn it into 3D.
Recommended!
Download: 3dslash.net
Price: Free
Systems: PC, Mac, Linux, Browser
#5: TinkerCAD
- A computer-aided design (CAD) system for 3D printing, which is a good starting point for beginners. Since its capabilities are limited compared to Blender, FreeCAD and SketchUp, many users switch to more powerful tools after some time.
As in 3D Slash, here you can build models from basic shapes. At the same time, unlike 3D Slash, TinkerCAD allows you to create vector shapes in 2D and convert them into three-dimensional models.
Come in: Autodesk TinkerCAD
Price: Free
Systems: Browser
#6: 3DTin
For beginners who want to create 3D printable models
another easy and intuitive online tool choice for beginners in 3D modeling. All you need is a Chrome or Firefox browser with WebGL enabled.
Choose from a huge library of 3D shapes and add them to your sketch. All sketches are stored in the cloud, access to them is free if you honor the Creative Commons license. Everything can be exported to STL or OBJ formats.
Enter: 3DTin
Price: Free
Systems: Browser
#7: Sculptris
For beginners who want to create 3D printable models
clay. This is a fantastic 3D modeling program if figurines are your main task. For example, you can make a bust of your favorite video game or comic book character. Sculptris is completely free and bills itself as a stepping stone to the more complex (and expensive) ZBrush tool.
Download: Pixologic Sculptris
Price: Free
Systems: PC, Mac
#8: ViewSTL
For beginners who want to view STL files
ViewSTL is the easiest way to view STL files . Simply open a web page and drag the STL onto the dotted box.
The STL online viewer allows you to display the model in one of three views: flat shading (for a quick view), smooth shading (for a high-quality image), and wireframe.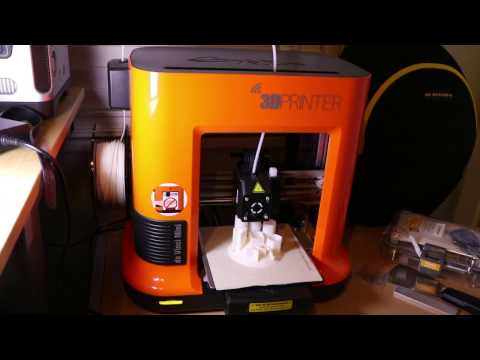
Enter: ViewSTL
Price: Free
Systems: Browser
#9: Netfabb Basic
some nice features that allow you to analyze, "repair" and edit STL files before moving on to the model cutting stage.
A good choice if you need more than just a slicer and want to be able to quickly fix STL files without having to learn programs like MeshLab or Meshmixer.
Don't let the 'Basic' in the title fool you, Netfabb Basic is actually a very powerful 3D printing tool. It's "basic" only in the sense that it doesn't cost €1,500 like Netfabb Professional!
Download: netfabb.de
Price: Free
Systems: PC, Mac, Linux
No. 10: Repetier
For advanced to prepare STL files for 3D printing
9002 the next level of 3D printer slicer software, but if you want to stay open source, you should look into Repetier. It is the great grandfather of 3D printing software and a favorite of the RepRap community. To date, the program is moving by leaps and bounds from the level for beginners to advanced users.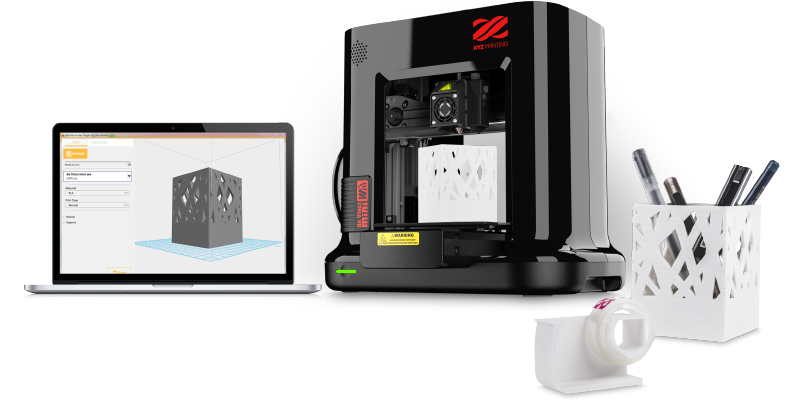 Packaged in an all-in-one configuration, it supports up to 16 extruders, multi-slicing via plug-ins, and virtually every fusing 3D printer on the market. Get ready to tinker!
What's more, Repetier Host works remotely via Repetier Server, so that the 3D printer can be controlled via a browser, tablet or smartphone.
Download: Repetier
Price: Free
Systems: PC, Mac, Linux
#11: FreeCAD
The program is a great option for developing your design skills. More technically, this parametric 3D modeling program allows you to easily change the project by rolling back through the history of the model and editing the parameters.
Download: freecadweb.org
Price: Free
Systems: PC, Mac, Linux
#12: SketchUp
For beginners who want to create 3D printable models
SketchUp is the perfect combination of simplicity and the perfect combination functionality, with a user-friendly interface and a relatively flat learning curve (i. e., as experience grows with the time spent), the ideal program for developing three-dimensional models.
The Make SketchUp version is free and will include everything you need for 3D modeling if you also download and install the free STL exporter. There is also a professional edition for architects, interior designers and engineers.
Download: sketchup.com
Price: Free (SketchUp Make), $695 (SketchUp Pro)
Systems: PC, Mac, Linux
#13: 3D-Tool Free Viewer
view and validate STL files
3D-Tool Free Viewer is a sophisticated tool that, among other things, allows you to check the structural integrity and printability of your file. With the Cross-Section function, for example, you can look at the model from the inside and check the wall thickness. Very useful if you want to check your STL file for killer errors before printing.
Download: 3D-Tool
Price: Free
Systems: PC
#14: Meshfix
your model for errors.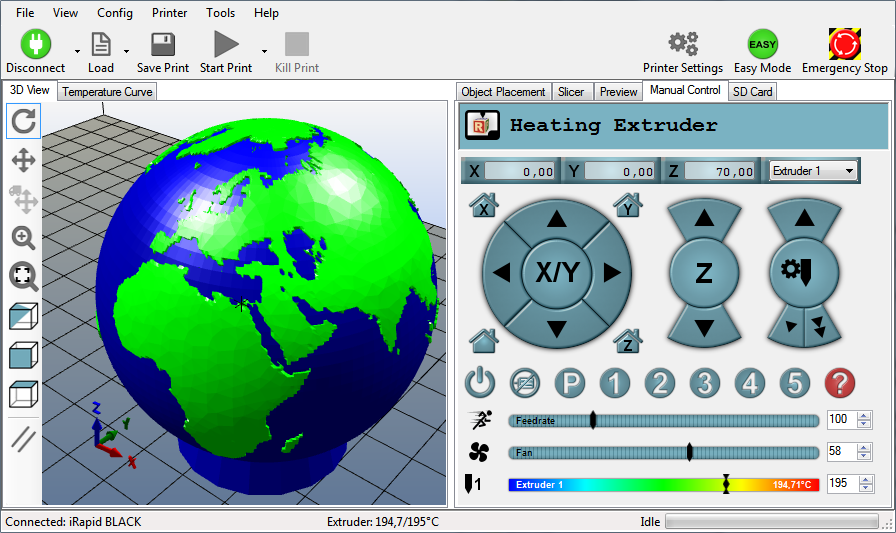
Price: Free
Systems: Browser
#15: Simplify3D
For professionals to prepare STL files for 3D printing print. A flexible algorithm checks the model for problems, fixes them, shows a preview of the printing process (ideal for identifying potential problems), and then slices it.
This slicer offers the best infill pattern options in the competition. For models that require supports, Simplify3D will create the appropriate structures on its own and give you full control over their placement. For printers with a dual extruder, when printing with different materials, the Dual Extrusion wizard will help, as a result of which, for example, it will be easier to remove the dissolving filament.
Simplify3D supports 90% of today's commercially available desktop 3D printers and is compatible with Marlin, Sprinter, Repetier, XYZprinting, FlashForge, Sailfish and MakerBot firmware. Simplify3D can also be used to directly control the printer, but then the printer and computer must be connected to each other.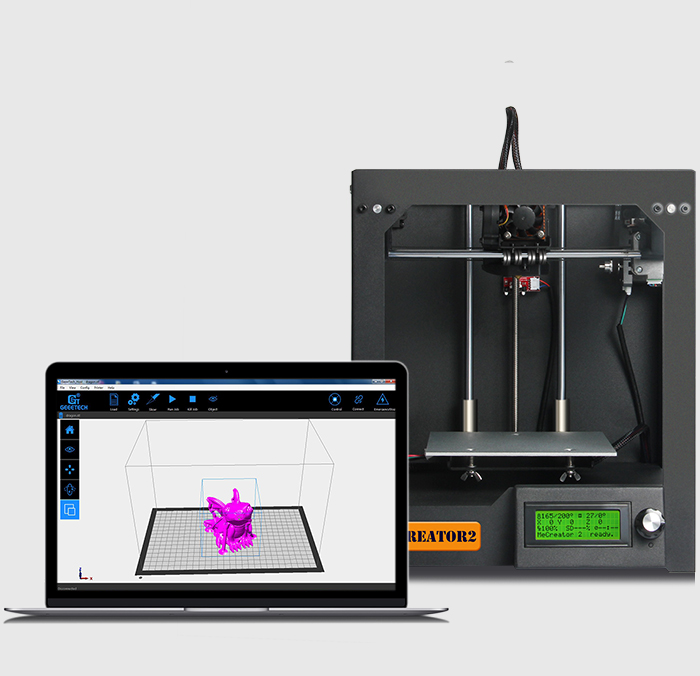
Download: simplify3d.com
Price: $149
Systems: PC, Mac, Linux
#16: Slic3r
source code, which has a reputation as a carrier of super new functionality, which you will not find anywhere else. The current version of the program is able to show the model from multiple angles, so that the user gets a better preview experience.
There's also an incredible 3D honeycomb infill, the first of its kind that can extend over multiple layers rather than repeating itself like a stamp. This significantly increases the strength of the internal filling of the model and the final printout.
Another option is direct integration with Octoprint. Once the files on the user's desktop are sliced, they can be directly uploaded to Octoprint with one click.
Download: Slic3r
Price: Free
Systems: PC, Mac, Linux
#17: Blender
For professionals who want to create 3D printable models
Blender is a popular computer-aided design (CAD) system with a steep learning curve.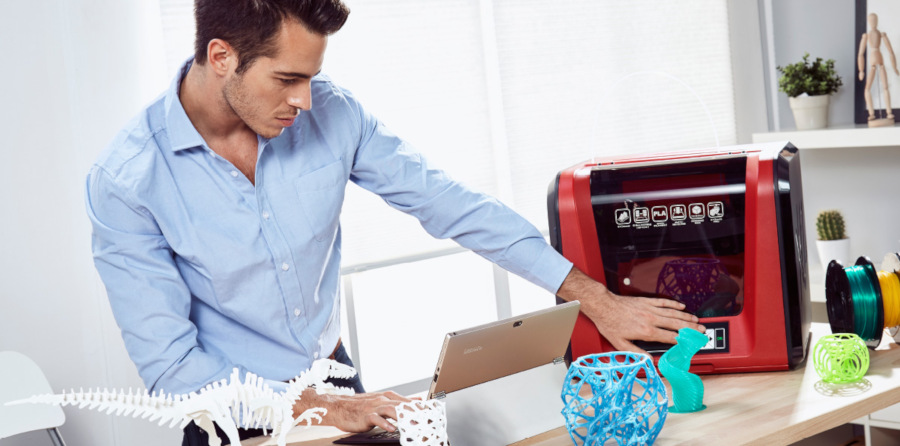 Not at all the best choice for beginners, but what you need if you are quite experienced and need something more complex for modeling and printing.
In short, Blender is one of the most powerful tools out there. Its community is always ready to help, there are a lot of educational materials. It's also open source, so enthusiasts often write extensions to make it even better and more powerful.
Download: blender.org
Price: Free
Systems: PC, Mac, Linux
#18: MeshLab
For professionals to prepare STL files for 3D printing
MeshLab - advanced editor. It allows you to remove parts of a 3D model, merge two models into one, patch holes. If you need a program to modify models for 3D printing or some kind of "repair" work, MeshLab is the right choice.
Price: Free
Systems: PC, Mac, Linux
#19: Meshmixer
For professionals to prepare STL files for 3D printing files. It's especially good for identifying potential problems and fixing them automatically.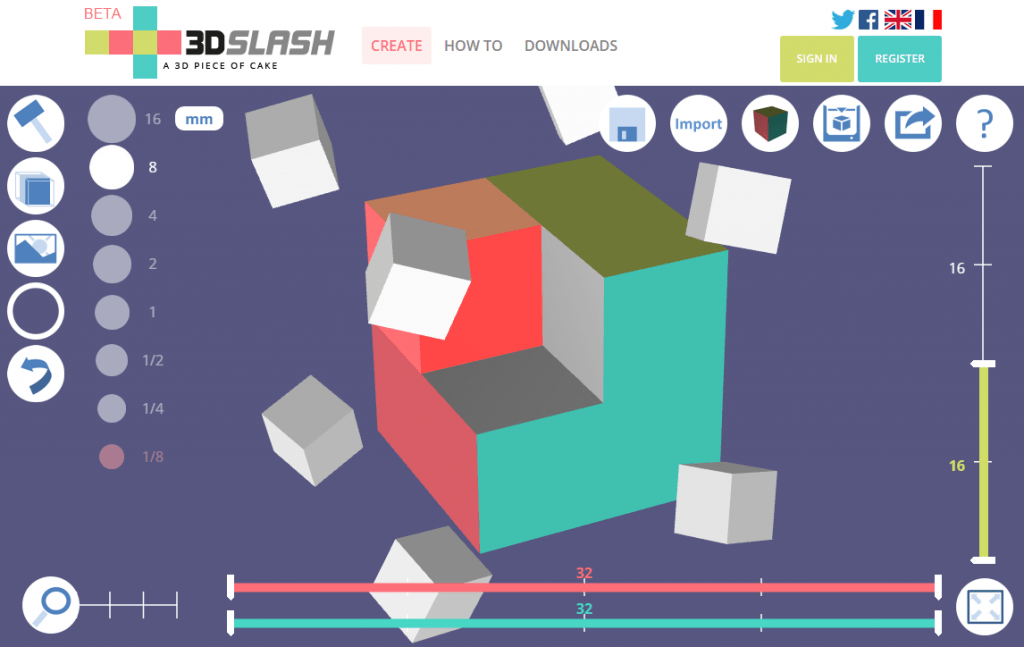 For example, it will show paper-thin walls that can lead to problems with 3D printing. Meshmixer is part of the Autodesk family of 3D printer software, so it should work well with tools like TinkerCAD.
Price: Free
Systems: PC, Mac
#20: OctoPrint
start, pause or interrupt 3D print jobs. Combined with Wi-Fi capable devices, it makes for a great monitor for remotely monitoring the 3D printing process.
Octoprint understands the G-codes of almost all 3D printers and slicers and includes a gCodeVisualizer to visualize this code before or during printing.
If you want to work away from your 3D printer and control it remotely, Octoprint is the best you can find.
Download: octoprint.org
Price: Free
Systems: PC, Mac, Linux
Source
New features of PICASO 3D Desinger X series 3D printers. NETWORK management.
Contents:
- 1. Update list
- 2. Support for network mode.
- 2.1. Network interface in program
- 2.2. Setting up a network interface in a 3D printer
- 3. File system
- 3.1 Print sheets
- 3.2 Updated Print menu
- 4. Minor updates and old bug fixes
- 4.1 Polygon X
- 4.2 Printer interface.
- 5. Announcement of future updates.
Links to previous articles in this series:
PICASO Polygon X - Slicer overview.
Hello everyone, friends! 3Dtool is with you!
In this article, we would like to tell you in detail about the updates to the Polygon X software package and the new firmware version for 3D printers PICASO 3D Designer X, Designer X PRO, Designer XL. We'll go into detail about what's new, how these features work, and how you can use them in your daily work with the device!
To begin with, we will give the official list of updates in new versions of the firmware and the slicer program and try to reveal it in more detail.
As you can easily see, the main innovation of this update package was the long-awaited network mode . Or rather, its full support from the hardware and software side. "In hardware", this feature has been present since the launch of the platform Designer X series .
However, now both the printer firmware and the Polygon X itself finally have the ability to send print files over the network Ethernet , as well as synchronize work with several devices at once within one 3D printing farm.
This means that your 3D printer PICASO Designer X will be able to work over the network after the update! Unfortunately, 3D printers not related to X-series are not affected.
In connection with the addition of the ability to send files over a local network, the file system itself was also rethought and the concept of a “printlist” was introduced, but we will not get ahead of ourselves and will tell about everything in order.
So.
Networking was announced as one of the main "chips" of the PICASO X- series device line when the flagship PICASO Designer X PRO was announced. However, due to a number of reasons, the release of this update was delayed several times.
Opening Polygon X after the update, you can see why.
A whole new section has been added to the program with its own logic of work and special functions. And such work requires sufficient time for testing and development.
Let's consider the innovation in more detail.
2.1 Network interface in the Polygon X software
To activate the network mode in Polygon X software, you need to select the menu " setup Polygon X " in the drop-down list of the item " configuration " on the top panel of the interface. A new window will open with a list of printers found and connected over the network, not to be confused with " printer selection » on the main screen. The new function is related to devices available for connection, and " printer selection " is responsible for the slicer settings template and provides access to rendering tasks for a specific model, for example PICASO Designer XL . In other words, in order to prepare a network job for the PICASO Designer XL , this printer will first need to be activated in the standard way.
So. Let's take a closer look at the above screenshot from Polygon X .
On the left side is a list of currently available and currently found 3D printers , please note that you can set the names yourself for each printer in the list. This is done in the next window, if you select a specific 3D printer , you can change its name, you will see the serial number, firmware version, IP address and connection type . At the moment, only connection via Ethernet is available ( i.e. using a network cable ), but we are sure that WI-FI will also become available in new versions of PICASO3D 3D printers.
The last window displays the model of the 3D printer and the size of the currently installed nozzles, as well as the "availability" of the device.
The number of printers is not limited, you can connect at least 10, at least 20, at least 50 printers PICASO Designer X series . The main thing is that they be combined into one local area network. The program for managing printers Polygon X is installed on any computer within this network.
After connecting to the network, on the 3D printers themselves, it becomes possible to set the “availability” of a specific device to start 3D printing over the network. If "available for printing" is enabled through the printer interface, the operator can start a print job on this printer via the network ethernet . Please note that in this case, a USB flash drive (included in the kit) must be inserted into the printer. If this mode is not activated, you will be able to see the printer in the list of found devices, but you will not be able to press the "play" button to start 3D printing .
It should be noted that the meaning of the “accessibility” and “device unavailability” functions is to protect against incorrect actions of operators, especially when you have a large farm of PICASO 9 3D printers0417 and is served by 2 operators. Those. after completing 3D printing , you need to go to the printer and perform all the procedures for preparing 3D printer for a new task ( remove the printed model, remove plastic residue, etc. ) and in the main menu, after doing this, set the value " available for printing”, it is after this that the operator Polygon X will be able to start a new print on this printer. Thus, the system will not allow the printer to be broken by starting printing on a printer whose previous model has not been removed from the table.
When starting a print job locally from a 3D printer (without remote control), printer availability does not need to be specified.
2.
 2 Setting up the network interface in the 3D printer.
In addition to Polygon X , work with a network connection in the printer itself has also changed a bit, firstly, in the interface of devices of the X line, the "Network Settings" menu has been added, in the "Settings" section of the main menu, and secondly, as we already noted earlier, it became possible to mark a device as "available" or "not available" for remote control, depending on its state.
In "Network Settings", it is possible to enable automatic mode for obtaining a network address from a DHCP server. Or assign IP address and network settings manually. In this case, a single click on any of the items will allow you to set the corresponding numbers using the joystick, scrolling it to the right or left.
Also, the network name of the device and its current network parameters will be displayed here.
Let's move on to the innovations of the file system.
The second major innovation of this update is a new file system for the 3D printer and for the Polygon X .
Moreover, both on the printer itself and in the program interface, changes are available to the naked eye.
The first thing that catches your eye is the presence of a third, additional stage in the “line” of task preparation stages on the main screen (see below).
The “Network” circle appeared on it, which contains:
-
list of files prepared for sending (on the right side of the screen)
-
setting the display of file data (on the left side)
-
and the printer management tab.
In order to use this menu, first you need to add and calculate 3D model , after which a new button “add to database” will appear on the “task” tab
This database of tasks is a list of files registered in the program, which can either be sent for printing via the network interface, or organized from them into a “print list”, about them below.
By the way, it is not necessary to wait for a 100% download of a job when sending it to print remotely. You can start this process almost immediately, the file will be loaded in real time.
3.1 Print sheets
What is a Print List? The easiest way is to compare it with the playlist of any music player. You have a list of files that are played in a specific order and matched with a specific meaning.
For example, you have a product consisting of a large number of parts. Each detail has its own task. Suppose one of these tasks according to the assembly scheme must be repeated several times.
It is this task that the new function is designed to facilitate. The print list allows you to track the progress of the entire “product” and count how many times a particular file has been launched. Moreover, if the set number of files of a particular print list is completed, the smart program will prohibit the creation of extra copies.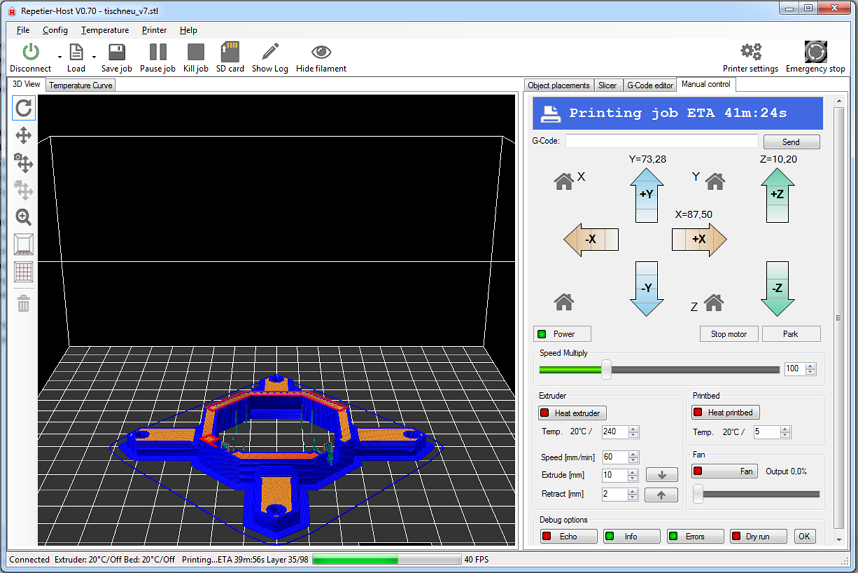
The lists themselves can be saved for a specific 3D printer , or in the program interface Polygon X as a whole.
3.2 Updated Print menu
If before that we were talking only about Polygon X , then you might get the impression that almost nothing has changed on the interface of 3D printer , this is not so. To match the new file system and support Printlists , the Print menu has been redesigned.
Now you can select specific files for printing, or use the Print List . In this case, all the functionality of the latter will also be displayed on the display.
Also, an indicator of the printer's readiness for printing has been added to this menu, we talked about this earlier.
Among other things, the 3D printing elapsed time counting system has been redesigned. Now it is considered correctly and written off accordingly in the same way. The starting point is the moment of switching on 3D printer when the global timer starts.
Let's briefly go over the "small" fixes in general. Which typed, judging by the announcement - a lot. In fact, even more, but some very subtle things simply did not fall under the description.
4.1 Innovations Polygon X
As many of you probably noticed even from the screenshots, the interface of Polygon X has changed a bit. The Mission Calculation button has moved to its rightful historical place in the lower right corner of the screen. This is done as part of the interface philosophy - more space for the active viewing area and we have insider information that this is just the first small touch in a series of many changes that will transform Polygon X externally in the future.
In addition, the old task preparation modes were renamed, because users often confused them with the names of the print speed mode on the 3D printer . Now they do not duplicate each other and from the description it is more clear how exactly one mode differs from another (see below)
Yes, by the way, tooltips have also been redesigned. Added new and corrected old descriptions. Some were written from scratch. Job preparation just got easier!
Also in the interface of the slicer Polygon X , the names of the type of global settings in which the program works have changed - now it is a basic and professional view. With the latter, as you might guess, an extended list of settings is available to you (see above).
From this version Polygon X the old file format .plg is no longer supported. This is due to a number of critical vulnerabilities due to the difference in formats.
4.2 3D printer interface.
The interface of the 3D printer has also received some important changes. To begin with, in the “Sleep” mode, only the illumination of the working area goes out. The display changes its brightness to dim, but is still visible. Practice has shown that this approach is more convenient to simply turn off any backlight.
Also, the system for registering and displaying errors has been redesigned. Now the printer writes not only the error code, but also how many times during the printing process it occurred, as well as its brief description.
Again, many old bugs related to menu scrolling and other nuances have been globally fixed. Their list is quite large, but they arose very rarely and do not require a detailed description.
5. Announcement of future updates.
In conclusion, I would like to say that this update is the first in a series of Important updates for Polygon X in the future. Looking ahead, you can dream up and imagine that in the future Polygon X will acquire a new, more powerful mathematical engine, new settings functions will appear in it, and in general, the program will become more flexible and convenient.
By the way, the .plgx format will become dominant and support for g-code will most likely (But this is not accurate! Note ed.) be excluded in the future. This is due to the file display format in the program and in the 3D printers themselves. Part of the functionality is already present in this version, for example, screenshots of the calculated task in the network mode.
One thing we know for sure - in the next version there will be even more new, useful and interesting, we are looking forward to announcements from PICASO3D !
I would also like to note that PICASO3D is the only manufacturer of 3D printers in Russia with its own slicer Polygon X . Which is constantly updated and available for download from the official website PICASO3D - for free.
Well, that's all we have! We hope this article was useful for you!
Order 3D printers PICASO Designer X Series you can in our company we since 2016 are the official distributors of the plant:
• By e-mail: Sales@3dtool.![]()