Monoprice 3d printer filament stuck
How to Fix 3D Printer Filament Sticking to Nozzle – PLA, ABS, PETG – 3D Printerly
Getting melted filament stuck to your 3D printer nozzle can get quite annoying, especially since it can be hard to actually clean.
Many of us have been through this annoyance, so I decided to write an article about how to fix your 3D printer filament sticking to your nozzle, whether it’s PLA, ABS, or PETG.
You should increase your nozzle temperature to fix 3D printer filament sticking to the nozzle, since it provides consistent extrusion. In some instances, your nozzle or extrusion path may be clogged, so unclog it as best as you can. Increase your bed temperature and ensure your nozzle isn’t too high from the bed.
The rest of this article will go through the steps to get this done, as well as detail preventative measures, so it doesn’t happen again.
What Causes 3D Printer Filament to Stick to the Nozzle?
We all have faced the issue, especially after some series of printing.
To explain what causes 3D printer filament to stick to the nozzle, I will go through some of the main causes behind it which many 3D printer users have experienced.
- Nozzle too high from the bed (most common)
- Filament not heated properly
- Clogging in the nozzle
- Bad adhesion on the surface
- Inconsistent extrusion
- Bed temperature isn’t high enough
- Cooling on first layers
How to Fix Filament Sticking to Your Nozzle
After knowing the main causes of this issue, it allows us to come up with solutions which work well, leading us to getting those high quality 3D prints.
Many users have experienced their 3D printer nozzle covered in plastic or PLA clumping at the extruder, so let’s get into the solutions, along with action points that help you solve the issue step by step.
Fix the Nozzle Height
Having your nozzle too high from the print bed is one of the main problems that causes filament to stick to the nozzle.
Your nozzle requires a good amount of pressure onto the print bed to properly extrude, but if it’s too high, you start to see filament curling around the nozzle and sticking.
In order to fix this, you should:
- Check the height of your nozzle from the bed.
- If it is high, start adjusting the height and make it come closer to the build surface.
- Make sure your bed is levelled properly, either manually or with an automated leveling system.
Heat the Filament Properly
Now, if your nozzle height is calibrated and at the right point, the next thing that comes to mind is the filament temperature. Many users who have implemented this solution to their 3D printers have seen quick results.
If the filament is heated properly, it can easily come out to the nozzle and get deposited on the surface without inconsistencies.
- Increase your printing temperature so filament can flow through easier
- Check the temperature range for your filament and try to use the upper range
- With some temperature testing, you should be able to get some good extrusion.
Unclog the Nozzle
It is one of the main steps which you should follow if nothing else is working. You can go for it right before even starting the print. I am going to list the steps through which you can clean the nozzle.
- Cleaning with a needle: Use a needle and make it go inside the nozzle; this will break the particles if there is any present in it.
 Repeat this process again and again.
 - Use a hot or cold pull to clean out your nozzle thoroughly
- Get Capricorn PTFE Tubing for a smoother extrusion path
- Also check whether your nozzle is damaged or there aren’t any bends at the nozzle tip.
When it reaches an adequate temperature, pull it fairly firm. Repeat the process until you start to see a clean filament coming out.
- Wire Brush: The wire brush helps in removing all those particles which are attached to the print surface. But make sure you are not damaging the nozzle with it.
The cleaning will help you to avoid filament getting stuck to the nozzle.
Add Adhesion to the Surface
Now, if you are still facing the issue of filament making the loop or curling around the nozzle instead of sticking to the bed, you need to check the adhesion properties.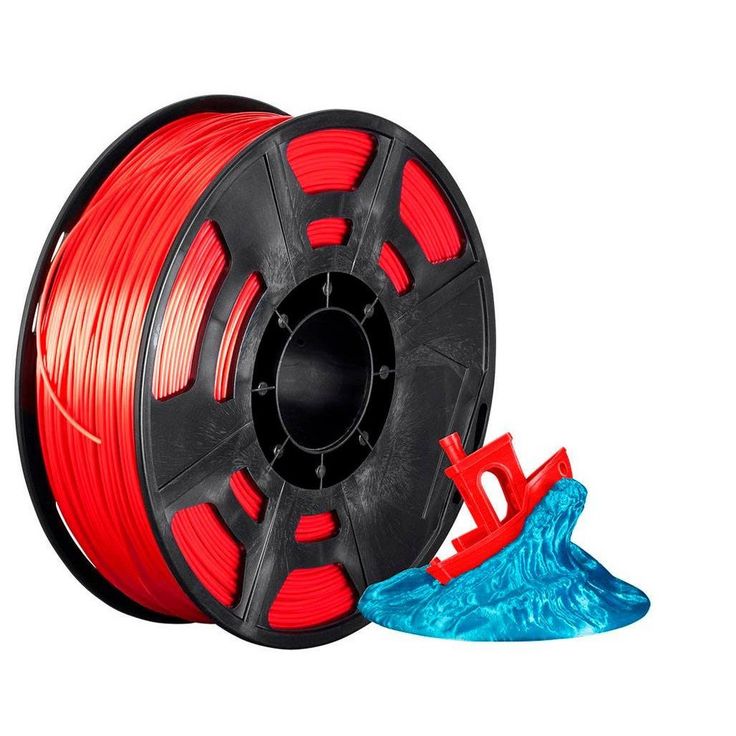
This part is simple: your surface has less adhesion, which is not allowing the filament to stick to the surface, and it is rolling around.
What you have to do to make sure filament sticks to the bed is:
- Add adhesive material to the surface, such as hair spray, tape, glue, etc.
- Make sure the adhesive material and the build surface are of different materials than the filament.
Note: Be careful with the choice of adhesive material because it can cause trouble for you in the post-printing process.
Increase Bed Temperature
Filament has a better time sticking to the print bed when there is heat involved. For materials like PLA, it is known that a heated bed isn’t necessarily needed to stick to the build surface, but it definitely helps out.
- Increase your bed temperature for better adhesion of your 3D prints
Don’t Use Cooling for the First Layer
When your filament gets cooled, you usually experience a small amount of shrinkage which doesn’t give the best results for the first layer especially.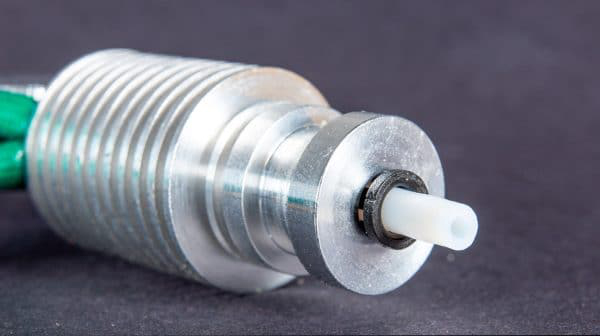
Your slicer usually has default settings which stops the fans for the first few layers, so double check this setting and make sure fans aren’t enabled straight away.
Make Your Flow Rates More Consistent
If you have an inconsistent feed rate, there is a chance you will be having an issue of filament not coming out properly.
Remember, everything in 3D printing is related to one another when it comes to print a model. It would be best if you make sure everything is stable and properly maintained.
The filament sticking to the nozzle can happen when the feed rate is too slow.
If you recently changed filament, this can definitely be your cause, so I would:
- Adjust your flow rate, usually an increase is what will help out an inconsistent flow of filament.
How to Prevent PLA, ABS & PETG Sticking to the Nozzle?
I am going to give you a brief detail on all these three filaments by which you can avoid them curling around, clumping, sticking, or bunching up on the nozzle.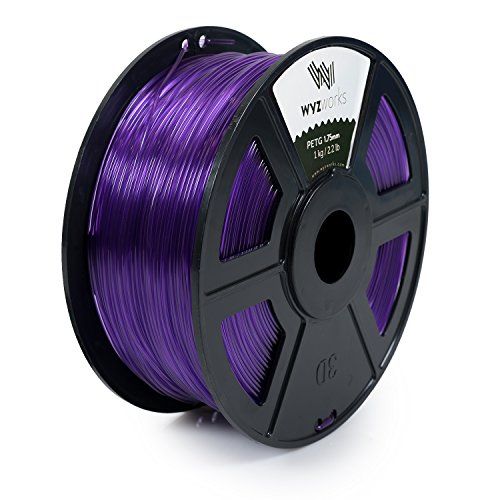 So keep on reading.
Preventing PLA Sticking to the Nozzle
With PLA, you might be facing the problem that the filament is curling around to clumping to the nozzle. I am listing a few ways to avoid this while keeping the printing process smooth.
- Get a good quality hot-end nozzle because a poor quality nozzle might pull the filament up.
- Make sure the distance between the nozzle and bed is adjusted for proper printing.
- Check the filament/nozzle temperature to meet the requirements which are need for PLA.
- Every filament has a different standard temperature, so follow it carefully.
Preventing ABS Sticking to the Nozzle
- The right temperature and the feed rate are the keys to avoid any curling up of filament here.
- Make sure the build surface is close to the bed.
- Try to control your operational temperature, so you don’t have fluctuations
- Clean the extruder and nozzle before you start printing with ABS – set nozzle to high temperature then extrude
Preventing PETG Sticking to the Nozzle
Before starting anything, remember every filament is different in its properties, so it requires a different temperature, different bed settings, different cooling temperatures, etc.
- Make sure you maintain the PETG filament temperature based on what the packaging says
- Inspect and clean your nozzle before you start printing
- Maintain the bed height but remember it is different from PLA, so set the height accordingly.
- PETG shouldn’t be squished onto the build plate like PLA
- It absorbs more moisture, so keep it in a dry environment.
- Keep cooling it during the printing process.
Hopefully after going through the solutions above, you should finally have your problem of filament sticking to the nozzle all sorted out.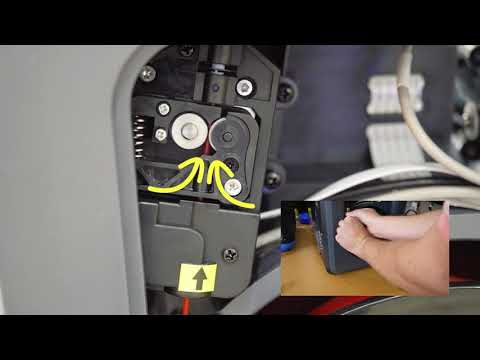 It’s always a good feeling when 3D printer issues finally get fixed!
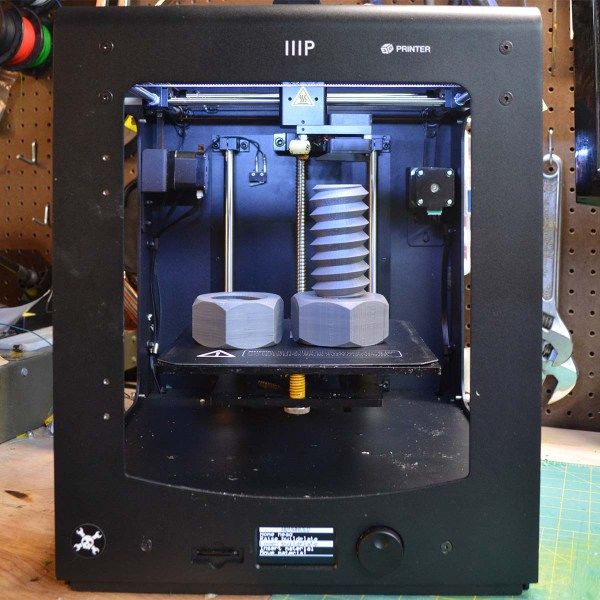
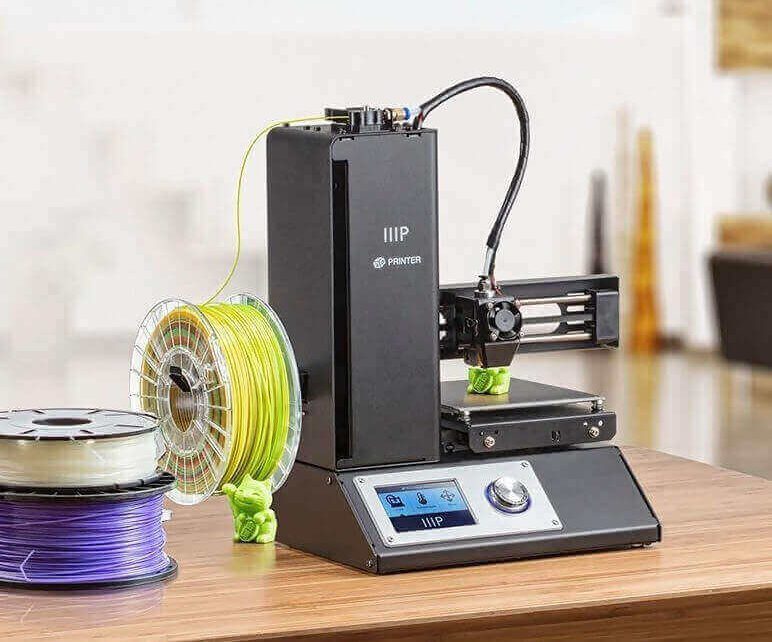
Monoprice Maker Select Mini – Fargo 3D Printing
We’ve noticed some common questions asked about the Monoprice Maker Select Mini that revolve around the same issues. This page goes through the most common solutions to these problems.
Let’s get started.
Under Extrusion/No ExtrusionWhen there’s no filament coming out of the nozzle or filament is “curling” out of the nozzle. Your printer isn’t supplying the amount of plastic asked for.
Troubleshoot It
Issues with Heating and Temperature RegulationYour printer is receiving “Heating Failure” codes or it doesn’t seem to be retaining heat.
Troubleshoot It
Stepper Motor Not WorkingYou’re noticing your stepper motors aren’t running, or running but not operating.
Troubleshoot It
Bed Stopped HeatingThe bed plate on your printer isn’t heating like it should.
Troubleshoot It
The LCD Screen or the SD Card is not WorkingYou’re having any amount of issues with your LCD screen or SD card.
Troubleshoot It
The Axis Does Not MoveIf the axis on your printer isn’t moving, there are a few solutions to this problem.
Troubleshoot It
Stuttering/Step SkippingYour printer is stuttering at the same location of each layer, or your printer is shifting layers.
Troubleshoot It
Axis CrashesIf your axis is crashing, there are a few solutions and steps to take.
Troubleshoot It
Extruder Stops Mid-PrintYou notice that your prints are failing part-way or about a half-hour into the printing process.
Troubleshoot It
Under Extrusion/No ExtrusionCheck the Front Extruder Fan
The front fan may not be spinning, may be missing blades, spinning slowly, or mounted incorrectly. Visibly check for any of these issues. Also check to ensure that the fan is getting 12 volts of power at max fan speed. If it is not, it is spinning slowly. The fan will need to be replaced or remounted.
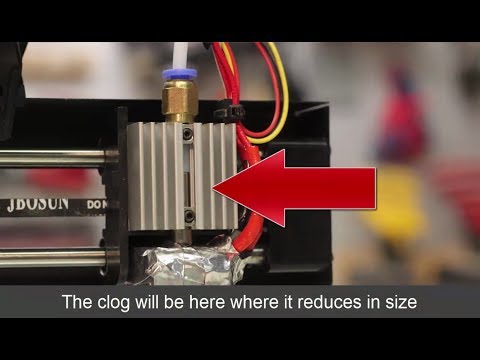
Hobbed Gear is Clogged
A piece of filament may be stuck in the teeth of the hobbed gear. If this is the case, use a wire brush or toothpick to clean out the teeth. This gear may also be worn down and may need to be replaced.
Filament Path is Blocked
There are several places that the filament path could clog. The thermal barrier tubing or the nozzle could be clogged. If you cannot easily unclog the hot end, you may need to replace part or all of your hot end.
Poor Quality or Bad Filament
You may be using filament that is of low quality or has irregularities in its shape. This can slow the flow of filament or can stop it altogether. Try using a different spool of filament and see if the problem is still present. You can also measure the amount of filament that is extruded with calipers to ensure that the stepper motor is extruding the correct amount. Fargo 3D Printing sells 3D-Fuel brand filament, whose quality we vouch for.
Print Temp is Too Low
Your printer may be printing at a temperature that is too low for your filament. Try increasing the printing temp to the maximum temperature or above the recommended temperature range.
Bowden Tubing is Pinched or Clogged
The Bowden tube directs the filament from the stepper motor to the hot end. If the turns sharply or is clogged, this restricts the flow of filament. Visibly check to see if the tubing is making sharp turns or has filament stuck inside of it.
Issues with Heating and Temperature RegulationFaulty Thermistor
Run a pre-heat. If your printer is not displaying that it is heating up, but you observe that the heater block is heating up, then the thermistor is most likely faulty. Check to make sure that the thermistor wire is not cut or damaged, then replace the thermistor.
Faulty Heater Cartridge
Run a pre-heat. If the heater block does not heat up, then the heater cartridge is most likely faulty. Check to make sure the wire to the heater cartridge is not cut or damaged, then replace the cartridge.
PID Settings Incorrect
PID settings control how much power is sent to the heater cartridge. Over time, these settings can change and may need to be reset.
Missing or Damaged Ceramic Tape
Check the ceramic tape. If it is torn or missing it may be causing irregular heating or heat creep. If this is the case, replace the ceramic tape.
Stepper Motor Not WorkingCheck Stepper Motor Connections
Check all connections from the motherboard to the stepper motor to ensure they are not loose, cut, or damaged.
Faulty Stepper Motor
Your stepper motor may be damaged or defunct. To check, unplug the stepper motor and plug it into an axis that you are sure works. If the motor still does not work, then it needs to be replaced.
Faulty Motor Cable
First, check to ensure that the stepper motor works (previous step). If the motor works, then either the cable or the stepper driver is faulty. To check the cable, test the resistance on the wire leading to the motherboard. If the wire is damaged or cut, this cable will need to be replaced.
Faulty Stepper Drivers
First, check to ensure that the stepper motor works and that the motor cable is not faulty (previous two steps). If the motor works and the cable is functioning, then the stepper motor driver is faulty, and your motherboard will need to be replaced.
Bed Stopped HeatingCheck Connectors
The connectors from the print bed to the motherboard may have melted or may be charred. If this is the case, your printer may have smoked or started to smell before your print bed stopped heating. To check the connectors, open the electronics case and see if the connectors for the heated bed are melted or charred black. If so, your motherboard will need to be replaced.
Check Wiring
To check the wiring, open the electronics case and make sure the wires for the print bed are plugged in and undamaged. If they are, check the resistance on these wires. If the wires are damaged or cut, they will need to be replaced.
Check Voltage
To check the voltage to the print bed, open the electronics case and pre-heat the print bed. Use a volt meter to ensure that the bed is getting 12V. If it is, then either the wiring or the bed itself is faulty and will need to be replace. If the bed is not getting 12V, then the motherboard is faulty and will need to be replaced.
The LCD Screen or the SD Card is not WorkingThe LCD screen has dead pixels
Replace the LCD screen.
The LCD screen does not light up
Replace the LCD screen.
The SD card does not read
Replace the motherboard.
The Selector wheel does not work
Replace the selector wheel board.
The Axis Does Not MoveFaulty Pulley
The pulley may be worn. Check the pulley to see if it spins smoothly and check to ensure no teeth are missing. If the pulley is damaged or worn, replace the pulley.
Loose Belt
Check the tightness of the belt. If it is too loose, the pulley may not turn the belt. In this case, tighten the belt.
Loose Set Screw
Check the set screw on the pulley. If this is loose, the motor will spin without spinning the pulley. To fix, tighten the set screw.
Faulty Stepper Motor or Stepper Driver
Check Troubleshooting Chart for Stepper Motor Not Working.
Rough Axis Movement
Turn the axis by hand and observe if there are any rough spots. If so, find out why.
Stuttering/Step SkippingCheck Stepper Motor Connections
Check all connections from the motherboard to the stepper motor to ensure they are not loose, cut, or damaged.
Check the Axis Rotation
Turn the axis by hand and observe if there are any rough spots. If so, find out why.
Faulty Stepper Motor, Cable, or Drivers
Check the Troubleshooting Chart for Stepper Motor Not Working.
Out of Place End Stop
The end stop may be out of place or mounted incorrectly. Check the mount bracket to see if it is bent or missing screws. You may need to replace the bracket or remount it.
Faulty End Stop
The end stop may be damaged. If so, replace.
Check Wiring
Check the wires to the end stop to see if they are cut or damaged. Also check the resistance of the wires. If they are damaged or broken, replace the wires.
Extruder Stops Mid-PrintCheck Front Fan
The front fan may not be spinning, may be missing blades, spinning slowly, or mounted incorrectly. Visibly check for any of these issues. Also check to ensure that the fan is getting 12 volts of power at max fan speed. If it is not, it is spinning slowly. The fan will need to be replaced or remounted.
Check Fan Shroud
Your fan shroud may be missing. If so, replace it.
Check PTFE Liner
The PTFE liner may be black or burnt. If this is the case, it needs to be replaced.
Poor Quality or Bad Filament
You may be using filament that is of low quality or has irregularities in its shape. This can slow the flow of filament or can stop it altogether. Try using a different spool of filament and see if the problem is still present. You can also measure the amount of filament that is extruded with calipers to ensure that the stepper motor is extruding the correct amount.
Hobbed Gear is Clogged
A piece of filament may be stuck in the teeth of the hobbed gear. If this is the case, use a wire brush or toothpick to clean out the teeth. This gear may also be worn down and may need to be replaced.
Dropped Temperature
The hot end may suddenly drop in temperature. Watch your temperature to see if the temperature drops rapidly by twenty or more degrees or if it drops gradually. If the drop is quick, there may be faulty wiring, a faulty heater cartridge, or a faulty thermistor. To troubleshoot these problems, check the Troubleshooting Chart for Issues with Heating and Temperature Regulation. If the drop is gradual, then your parts fan may be spinning too fast or your ceramic insulation may be damaged or missing.
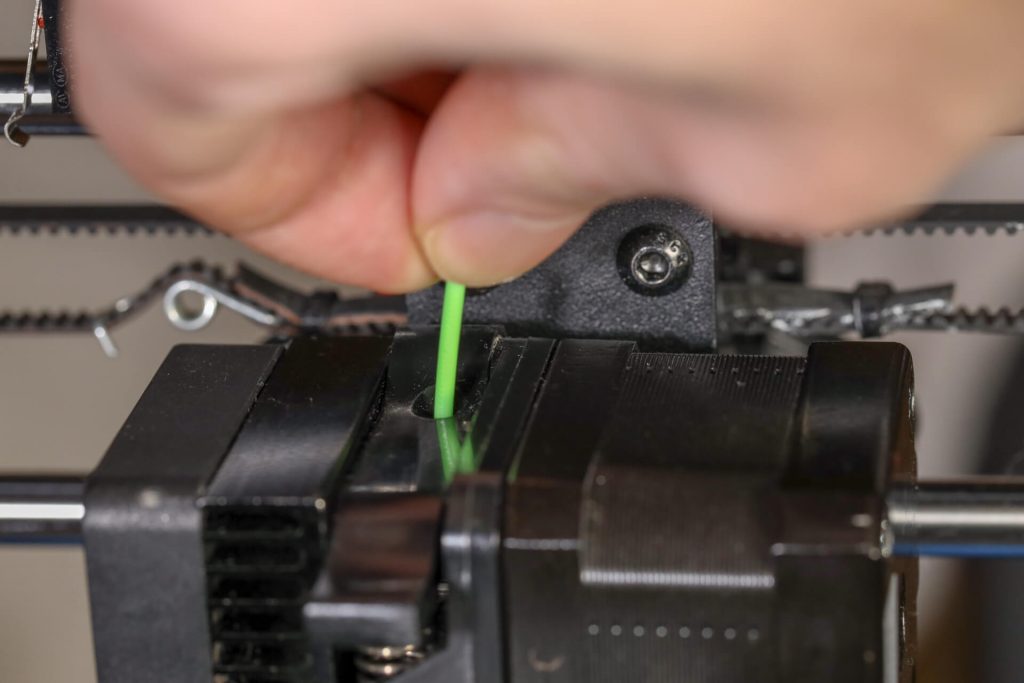
(There is a solution) Why is my filament no longer going through the extruder?
extruder monoprice-maker-select change-filament
Printer: Monoprice Select V2.
I've already done a few prints and changed filaments many times, but in my last exchange I can't feed my PLA anymore.
First I heat up the extruder for PLA temps (185°C). Then I press down on the plastic contraption so that I can push as much thread as possible into the hole. Then I change the position of the extruder to try to retract it. Usually after a few mm I start to see the filament coming out of the extruder and I can also feel the tension on the filament from above. But now nothing is happening. nine0003
However, if I adjust the position of the extruder in the opposite direction, it ends up pushing the filament back up and out, so I assume the "stepper motor" (is that what it's called?) is working (at least in one direction) .
I'm getting ready to open the extruder module to see what's going on, but wanted to see if anyone had any simple ideas for me to try before I screw anything.
@kane, 👍2
Talk
3 answers
Best answer:
▲ 6
I figured out this problem. I think I put it in the wrong hole.
I disassembled my extruder component. There is a good video on the subject here. But basically, you just need to loosen the bottom two screws on the side fan, like this:
First I checked everything. I cleaned the extruder head with the included pin. I also ran a filament through the heated area and the filament came out fine. nine0003
But then I discovered that the filament can sometimes go through the extruder in the wrong direction.
This is the correct way to pass the filament. He has to crawl out of this plastic hole.
But from time to time I accidentally pushed the thread in this way.
If the filament was bent and I pressed too hard on the lever, it often ended up in the wrong path. So I played around with how hard I should hold the lever and how hard I should push the filament. nine0003
I don't know if other 3D printer extruders are designed this way, but they seem to be bug-prone. Or maybe it's just me.
, @ kane
▲ 0
Maybe some PLA stuck in the nozzle. Can you run very small wires through it, or can you see light through the path of the filament?
185 slightly on the cold side. I would suggest trying to eat at 195 before taking any more drastic measures. nine0003
, @ silver
▲ 0
Try increasing the temperature to 260°C and pushing through.
Also cut off a few inches for me to be the end of the PLA, in case the drive wheel can't grab it due to a greasy bit of thread.
If you succeed, run a cleaning thread through it and cold pull it. This removed the annoying but hardness from my Monoprise.
, @ BanksySan
Questions answered by wanhao
3D printer manufacturer from China since 2011.
From WANHAO 3D printer page:
Thanks to the great efforts of all the members of the WANHAO 3D printer team, WANHAO started shipping overseas 3D printers from August 8, 2012. With 6 months experience in China local retail market, WANHAO has accumulated good experience in 3D printing robot production and after-sales service. Based on this valuable experience and the hard work of our team, we believe that WANHAO can provide more professional service and a more modern affordable 3D printer to amazing people around the world. nine0003
WANHAO has been manufacturing 3D printers since the beginning of 2011.
Several roommates spent all their pocket money and bought one thing - O-Matic from Makerbot. This precious awesome machine brought a lot of enthusiasm for these college students to create 3D projects and helped these buddies make their dream come true. On October 1, WANHAO reproduced Thing-O-Matic and named it DUBLICator NUMBER ONE. This 1st generation 3D printer made in China combined most of the benefits of RepRap and Makerbot and upgraded the extruder to a non-block type. nine0003
In June 2012, WANHAO invented his LCD 3D printer, now called the REPLIATOR TWO. This is a great move that will free up your computer that you don't have to type while your computer is running. Just a simple SD card will do the rest of the work.
- Print is not laminated correctly at a certain height I have a Wanhao i3 duplicator. I've made many great prints with this printer and have found from my own experience that it can produce nearly flawless prints. But.....
 In…
In… - OctoPrint won't heat hotend/extruder My OctPrint and Monoprice Maker Select IIIP (Wanhao i3 duplicator Plus clone) worked fine, but all of a sudden today the hotend doesn't heat up anymore. I tried to disable the OctoPrint USB port and reset...
- Wanhao i3 duplicator ceramic ribbon replacement I need a new ceramic ribbon for my 3D printer. Does it matter what I get? Can I just buy the cheapest one? Is there a difference in quality? nine0096
- How do I calibrate the temperature of my hot end? I'm using Monoprice Maker Select v2 (Monoprice branded Wanhao i3 duplicator) and would like to calibrate temperature readings for my hotend. I used a thermal probe on my...
- Wanhao i3 Mini Temperature Offset I am trying to print with PLA on the new Wanhao Duplicator i3 Mini. Under normal temperature conditions (200-210°C), the printer is underextruded and the extruder motor skips, which…
- Update hotend to reach higher temperatures (e.
 g. for PETG) I'm struggling to get my printer up to temperature for modified PETG (I have Fillamentum CPE filament and recommend 255-275°C), currently time I can reach…
 - Monoprice Maker (Wanhao Duplicator Clone) Intermittent Underextrusion I have had Monoprice Maker (Wanhao Duplicator Clone) for about a year and a half now. I type in a closed chamber and have had a lot of issues with this in the past (all sorts of random issues) that I…
- Consistent smearing and gaps in print towards the right side Question: I have a problem with some clumps and spaces consistently in the same areas. The left edge is always good, the right edge is very bad (especially around the corner), and the front and back...
- Is there a way to remap the pins so that the Z axis is output through the extruder driver? I have a Wanhao i3 duplicator from which I blew a Z-axis stepper motor. I would like to be able to have all three axes of motion for another project.
 I am trying to see if there is an easy way,…
 - Wanhao Duplicator i3 Mini - Doesn't reach temperature -> screen freezes I'm having some problems with my Cocoon Create Model Maker/Wanhao Duplicator i3 Mini. The temperature does not rise in the hotend. I'll go to any of the heating functions (start printing,…
- Recommendations for a 3d printer that can print fidget? I'm looking for a cheap 3d printer that can print this: https://www.thingiverse.com/ thing:1307100 and hopefully under US$200 such as Creality Ender 3, Monoprice Select Mini Pro and V2,…
- Assembly plate (PEI on glass) not flat after several months of use? I have a lot of Duplicator 6 branded printers as my ultimate Monoprice about a year and a half ago, 6 months after I got it I decided I hated the buildplate (I had to…
- Z axis adjustment (Monoprice Maker Select) I have a Monoprice Maker Select v2 and recently upgraded to Anycubic Ultrabase glass plate In Cura the model I am printing is in the middle as shown here: but the printer places.
 ..
.. - Monoprice Maker Ultimate extrudes too much filament at start Bought a Monoprice Maker Ultimate 3D printer today. This is a rebranded Wanhao Duplicator 6 for reference. I am using the default settings for Wanhao Duplicator 6 in Simplify3D. Here…
- Compensating Device for Smaller Extruder Suppose someone has a Monoprice Maker Select and switched from the original brass extruder to a D4 Plus which is slightly smaller (10.6 vs 10.9mm outside diameter). This…
- "Missing" lines on 64x128 LCD after flashing Marlin 1.1.9 on Monoprice Maker Select v2 I successfully flashed Marlin 1.1.9 on a Melzi v3.5 board (stock board for Monoprice Maker Select v2 (v2. 1?, Duplicator Wanhao i3 with white label). Initially after the flash succeeded…
- Resin burns to transparent sheet I recently bought a Kelant s400 LCD DLP 3D printer. I'm using Wanhao resin (green) to print using Wanhao's recommended settings.
 I printed a hollowed out cube as a test and it printed...
 - Wanhao i3 stops printing after about 40 minutes I have a Monoprice Maker Select V2.1 (with new Wanhao Di3 load) with a metal hot end and machined arm and extruder plate. It printed very consistently for several...
- Ultimaker Cura infill problems (weird vertical pillars due to insufficient exhaust) I've spent years debugging this problem, but I can't figure out what I'm doing wrong. I have a Wanhao i3 duplicator (a clone of Prusa i3) and until recently I used an adapted…0096
- Is the Prometheus system compatible with the Wanhao i3 Plus duplicator? I'm trying to figure out if the Wanhao i3 Plus duplicator can be easily expanded to print with two separate filaments using the Prometheus system with DisTech Automation using one hot end...
- Wanhao i3 duplicator plus the temperature is out of control the new Wanhao i3 plus duplicator, which has been printing successfully for several weeks now.
 This morning a new error appeared in it. When you press the pre...
 - Can't print with Wanhao Duplicator i3 Mini After unpacking and setting up my brand new Wanhao i3 Mini duplicator, I can't seem to print. When choosing a printable model, the extruder does not heat up and the entire printer does nothing,…
- How do I keep the moving parts from sticking together? I'm new to the world of 3D printing and I would appreciate if someone could give me advice on how to 3D print moving parts without gluing them together. I recently 3D printed predator pliers…
- Wanhao Duplicator i3 Settings for ABS I am looking for others who have successfully printed in ABS using the Wanhao i3 duplicator. I tried and get a lot of warps and delaminations. I tried to put a big box over the printer, which is a bit...
- Print quality deteriorates after 1.5 hours Testing my new Wanhao i3+. PLA plastic (Wanhao), basic normal quality settings in Cura (I think layer 0.
 1mm, speed 40mm/s, bed temp 60c, extruder temp 200c). Through…
 - Duplicator Wanhao i3 Plus Stuck Extruder I'm new to 3D printing, just got it for Christmas. The filament is stuck somewhere in the extruder of my Wanhao i3 Plus duplicator. I tried to remove it with the supplied hook but without success...
- Extrusion stops during printing I changed the filament (PLA) in my Wanhao I3+ duplicator. I finished my first print attempt when I saw that the "lines" were too thin. I re-sliced with a higher temperature (195°C instead of...
- Regular over-extrusion Can anyone explain to me why I am getting regular over-extrusion patterns on this extrusion calibration cube? Just upgraded extruder from stock to Flexion HT on my Balco…
- Wanhao i3 PLUS restarts on USB plug I just received my Wanhao i3 PLUS duplicator. Everything prints and works fine via the SD card and display, but when connected to my Mac, the printer seems to restart.

Learn more